power steering TOYOTA RAV4 PRIME 2021 Owners Manual (in English)
[x] Cancel search | Manufacturer: TOYOTA, Model Year: 2021, Model line: RAV4 PRIME, Model: TOYOTA RAV4 PRIME 2021Pages: 616, PDF Size: 34.66 MB
Page 3 of 616
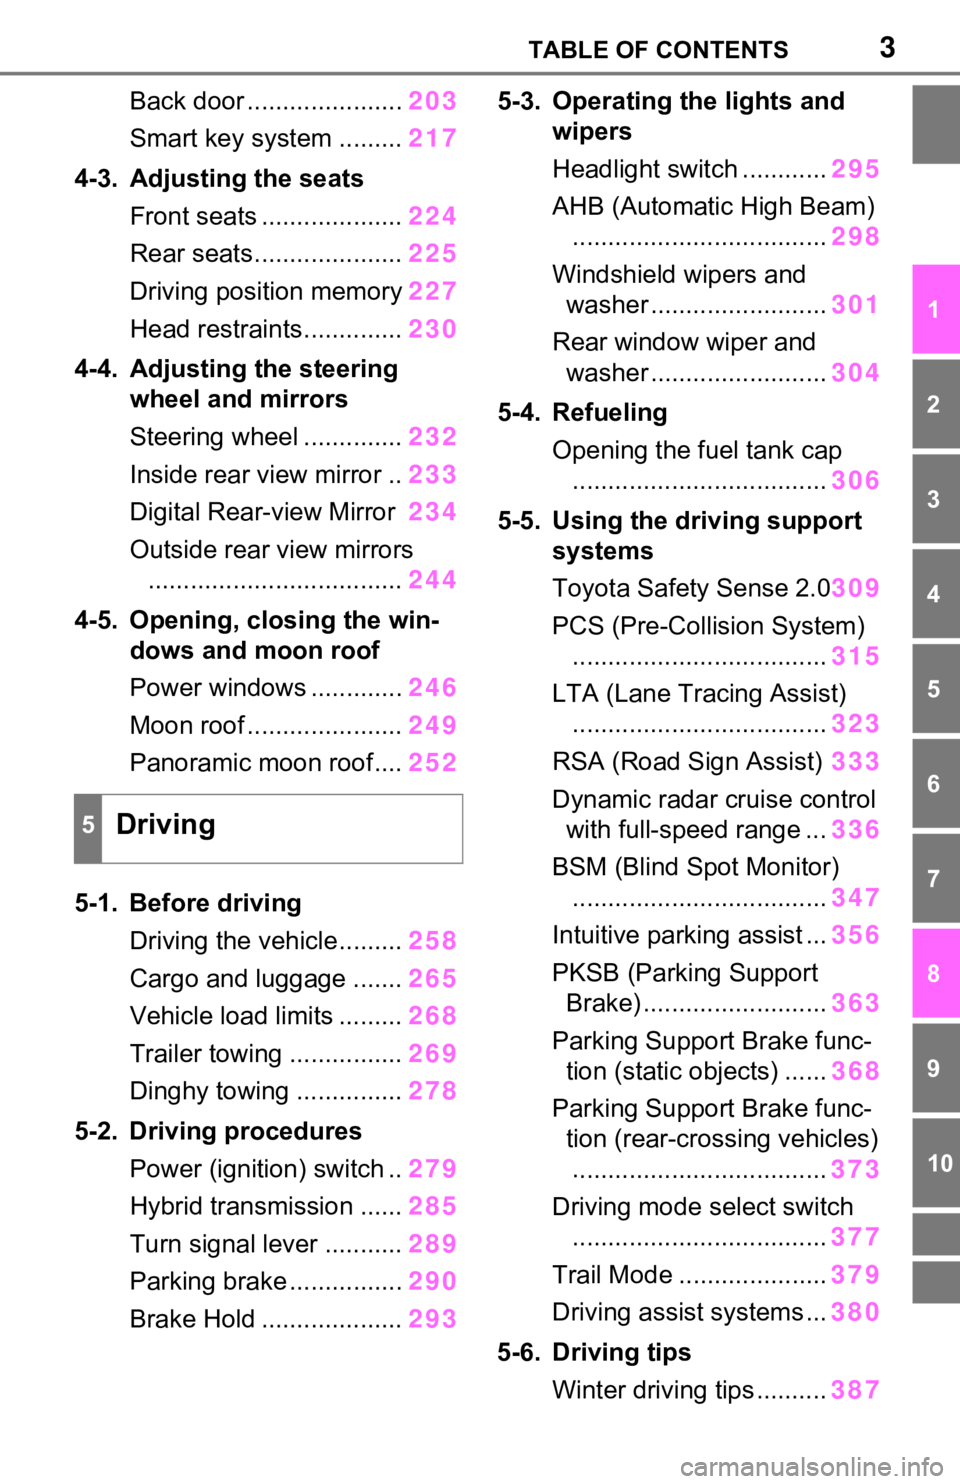
3TABLE OF CONTENTS
1
2
3
4
5
6
7
8
9
10
Back door ......................203
Smart key system ......... 217
4-3. Adjusting the seats Front seats .................... 224
Rear seats..................... 225
Driving position memory 227
Head restraints.............. 230
4-4. Adjusting the steering wheel and mirrors
Steering wheel .............. 232
Inside rear view mirror .. 233
Digital Rear-view Mirror 234
Outside rear view mirrors .................................... 244
4-5. Opening, closing the win- dows and moon roof
Power windows ............. 246
Moon roof ...................... 249
Panoramic moon roof.... 252
5-1. Before driving Driving the vehicle......... 258
Cargo and luggage ....... 265
Vehicle load limits ......... 268
Trailer towing ................ 269
Dinghy towing ............... 278
5-2. Driving procedures Power (ignition) switch .. 279
Hybrid transmission ...... 285
Turn signal lever ........... 289
Parking brake ................ 290
Brake Hold .................... 2935-3. Operating the lights and
wipers
Headlight switch ............ 295
AHB (Automatic High Beam) .................................... 298
Windshield wipers and washer ......................... 301
Rear window wiper and washer ......................... 304
5-4. Refueling Opening the fuel tank cap.................................... 306
5-5. Using the driving support systems
Toyota Safety Sense 2.0 309
PCS (Pre-Collision System) .................................... 315
LTA (Lane Tracing Assist) .................................... 323
RSA (Road Sign Assist) 333
Dynamic radar cruise control with full-speed range ... 336
BSM (Blind Spot Monitor) .................................... 347
Intuitive parking assist ... 356
PKSB (Parking Support Brake) .......................... 363
Parking Support Brake func- tion (static objects) ...... 368
Parking Support Brake func- tion (rear-crossing vehicles). ... ...
............................. 373
Driving mode s elect switch
.................................... 377
Trail Mode ..................... 379
Driving assist systems ... 380
5-6. Driving tips Winter driving tips .......... 387
5Driving
Page 19 of 616
19Pictorial index
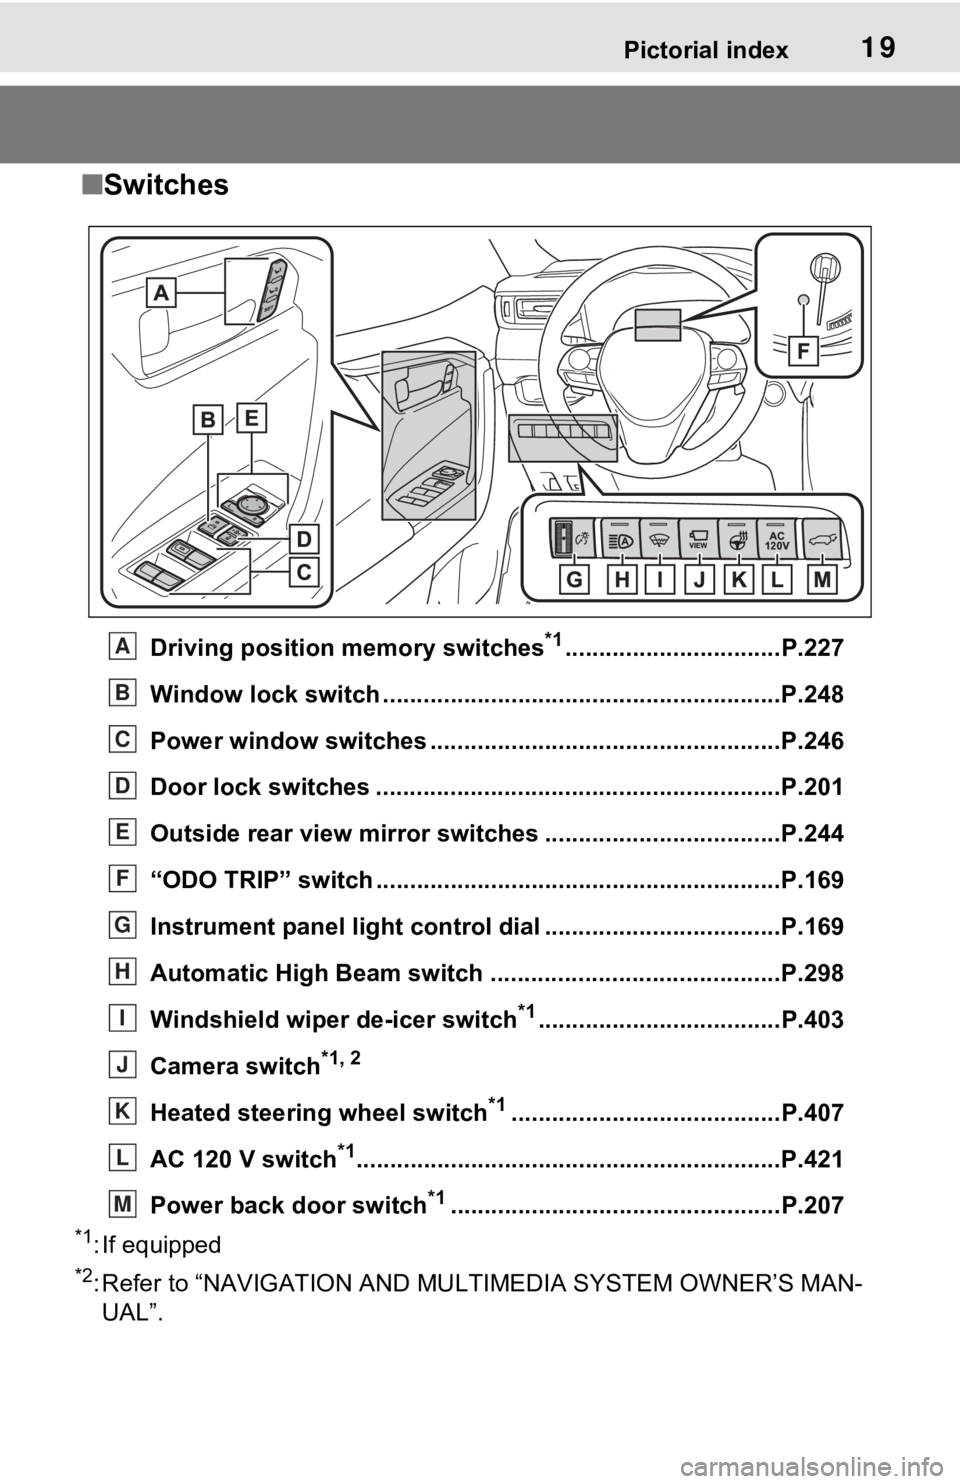
■Switches
Driving position memory switches*1................................P.227
Window lock switch ............................................. ..............P.248
Power window switches ....... .............................................P.246
Door lock switches ............................................................P.201
Outside rear view mirror swi tches ...................................P.244
“ODO TRIP” switch ............................................................P.169
Instrument panel light cont rol dial ...................................P.169
Automatic High Beam switch ..................................... ......P.298
Windshield wiper de-icer switch
*1....................................P.403
Camera switch
*1, 2
Heated steering wheel switch*1........................................P.407
AC 120 V switch
*1............................................................... P.421
Power back door switch
*1.................................................P.207
*1: If equipped
*2: Refer to “NAVIGATI ON AND MULTIMEDIA SYSTEM OWNER’S MAN-
UAL”.
A
B
C
D
E
F
G
H
I
J
K
L
M
Page 94 of 616
942-1. Plug-in hybrid system
HV mode while on the free-
way and change to EV mode
or AUTO EV/HV mode after
leaving the freeway. (P.78)
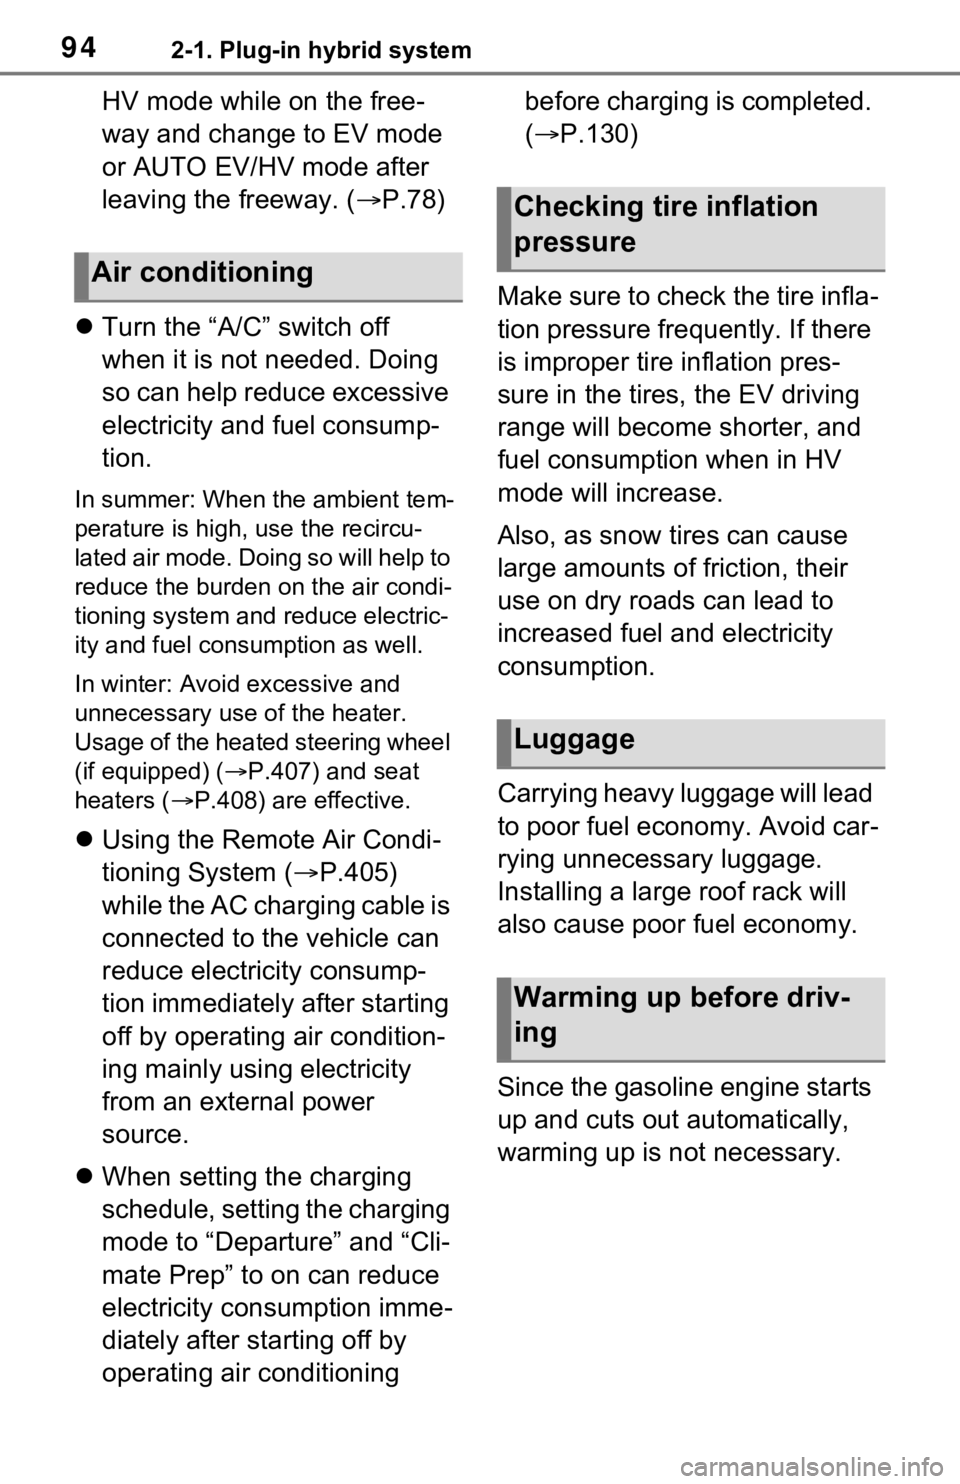
Turn the “A/C” switch off
when it is not needed. Doing
so can help reduce excessive
electricity and fuel consump-
tion.
In summer: When the ambient tem-
perature is high, use the recircu-
lated air mode. Doing so will help to
reduce the burden on the air condi-
tioning system and reduce electric-
ity and fuel consumption as well.
In winter: Avoid excessive and
unnecessary use o f the heater.
Usage of the heated steering wheel
(if equipped) ( P.407) and seat
heaters ( P.408) are effective.
Using the Remote Air Condi-
tioning System ( P.405)
while the AC charging cable is
connected to the vehicle can
reduce electricity consump-
tion immediately after starting
off by operating air condition-
ing mainly using electricity
from an external power
source.
When setting the charging
schedule, setting the charging
mode to “Departure” and “Cli-
mate Prep” to on can reduce
electricity consumption imme-
diately after starting off by
operating air conditioning before charging is completed.
(
P.130)
Make sure to check the tire infla-
tion pressure frequently. If there
is improper tire inflation pres-
sure in the tires, the EV driving
range will become shorter, and
fuel consumption when in HV
mode will increase.
Also, as snow tires can cause
large amounts of friction, their
use on dry roads can lead to
increased fuel and electricity
consumption.
Carrying heavy luggage will lead
to poor fuel economy. Avoid car-
rying unnecessary luggage.
Installing a large roof rack will
also cause poor fuel economy.
Since the gasoline engine starts
up and cuts out automatically,
warming up is not necessary.
Air conditioning
Checking tire inflation
pressure
Luggage
Warming up before driv-
ing
Page 97 of 616
972-1. Plug-in hybrid system
2
Plug-in hybrid system
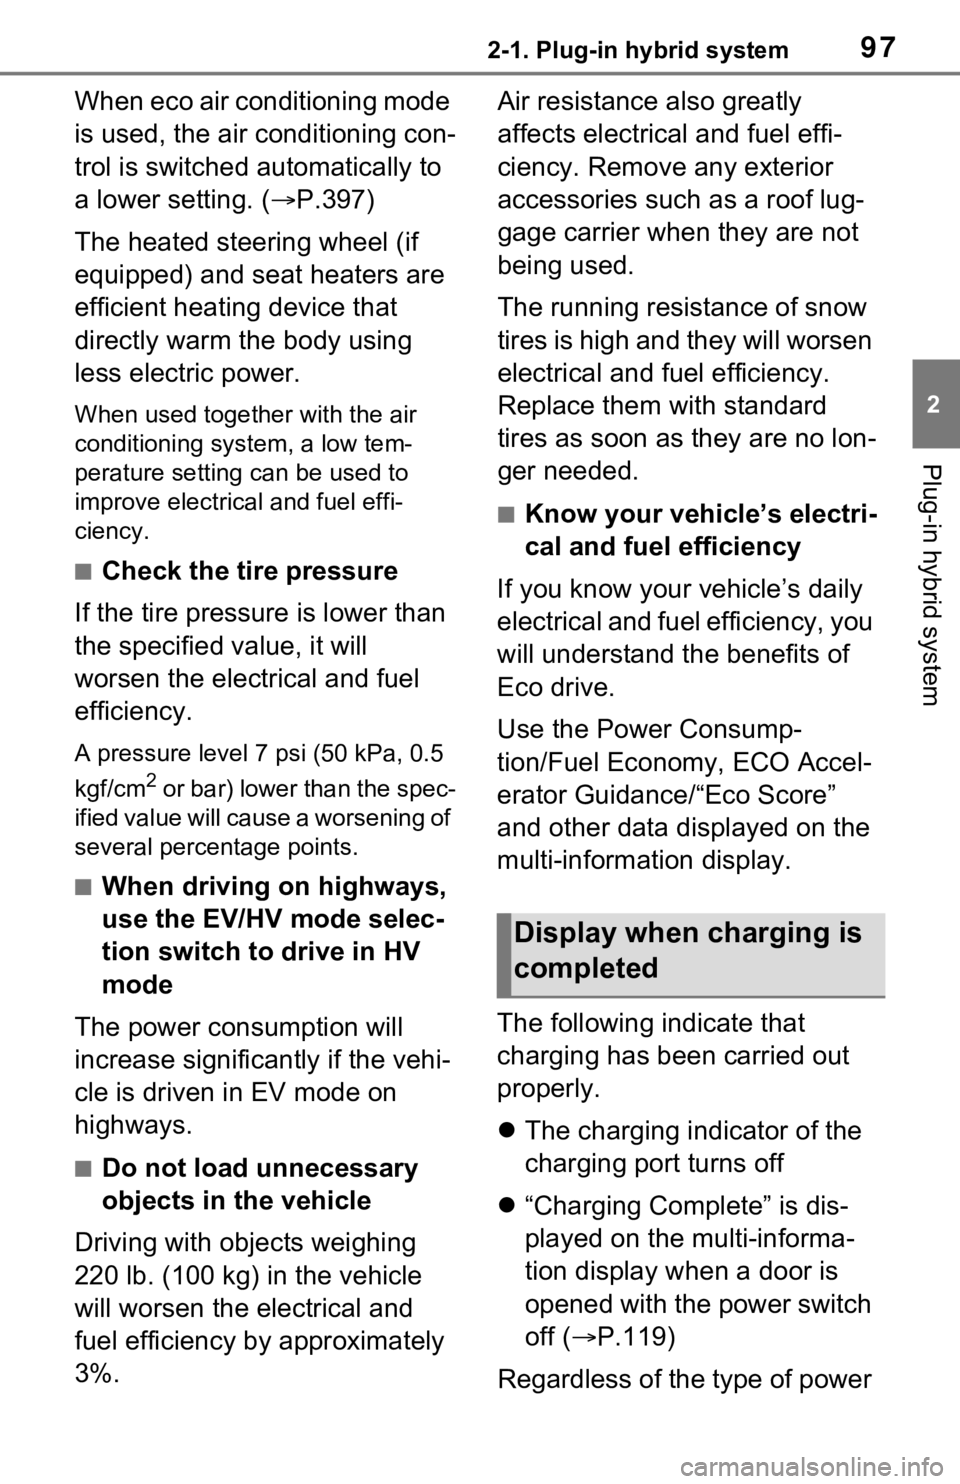
When eco air conditioning mode
is used, the air conditioning con-
trol is switched automatically to
a lower setting. (P.397)
The heated steering wheel (if
equipped) and seat heaters are
efficient heating device that
directly warm the body using
less electric power.
When used togethe r with the air
conditioning system, a low tem-
perature setting can be used to
improve electrical and fuel effi-
ciency.
■Check the tire pressure
If the tire pressure is lower than
the specified value, it will
worsen the electrical and fuel
efficiency.
A pressure level 7 psi (50 kPa, 0.5
kgf/cm
2 or bar) lower than the spec-
ified value will cause a worsening of
several percentage points.
■When driving on highways,
use the EV/HV mode selec-
tion switch to drive in HV
mode
The power consumption will
increase significantly if the vehi-
cle is driven in EV mode on
highways.
■Do not load unnecessary
objects in the vehicle
Driving with objects weighing
220 lb. (100 kg) in the vehicle
will worsen the electrical and
fuel efficiency by approximately
3%. Air resistance also greatly
affects electrical and fuel effi-
ciency. Remove any exterior
accessories such as a roof lug-
gage carrier when they are not
being used.
The running resistance of snow
tires is high and they will worsen
electrical and fuel efficiency.
Replace them with standard
tires as soon as they are no lon-
ger needed.
■Know your vehicle’s electri-
cal and fuel efficiency
If you know your vehicle’s daily
electrical and fuel efficiency, you
will understand the benefits of
Eco drive.
Use the Power Consump-
tion/Fuel Economy, ECO Accel-
erator Guidance/“Eco Score”
and other data displayed on the
multi-information display.
The following indicate that
charging has been carried out
properly.
The charging indicator of the
charging port turns off
“Charging Complete” is dis-
played on the multi-informa-
tion display when a door is
opened with the power switch
off ( P.119)
Regardless of the type of power
Display when c harging is
completed
Page 145 of 616
1452-2. Charging
2
Plug-in hybrid system
To stop “My Room Mode”, turn
the power switch off.
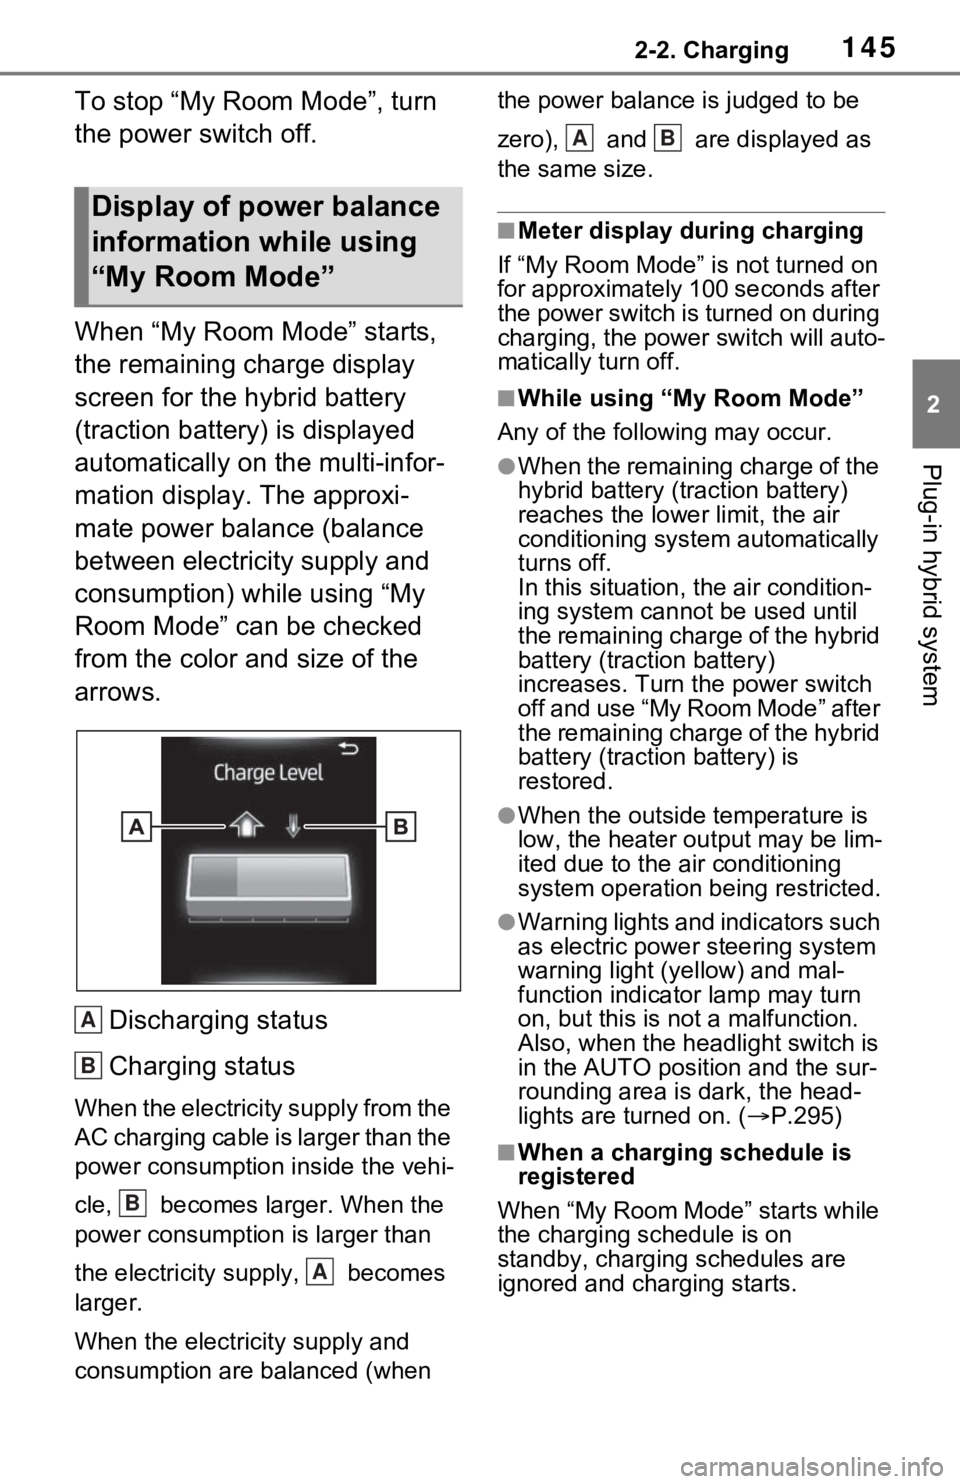
When “My Room Mode” starts,
the remaining charge display
screen for the hybrid battery
(traction battery) is displayed
automatically on the multi-infor-
mation display. The approxi-
mate power balance (balance
between electricity supply and
consumption) while using “My
Room Mode” can be checked
from the color and size of the
arrows.Discharging status
Charging status
When the electricity supply from the
AC charging cable is larger than the
power consumption inside the vehi-
cle, becomes larger. When the
power consumption is larger than
the electricity su pply, becomes
larger.
When the electricity supply and
consumption are balanced (when the power balance is judged to be
zero), and are displayed as
the same size.
■Meter display during charging
If “My Room Mode” is not turned on
for approximately 100 seconds after
the power switch is turned on during
charging, the power switch will auto-
matically turn off.
■While using “My Room Mode”
Any of the following may occur.
●When the remaining charge of the
hybrid battery (traction battery)
reaches the lowe r limit, the air
conditioning system automatically
turns off.
In this situation, the air condition-
ing system cannot be used until
the remaining charge of the hybrid
battery (traction battery)
increases. Turn the power switch
off and use “My Room Mode” after
the remaining charge of the hybrid
battery (traction battery) is
restored.
●When the outside temperature is
low, the heater ou tput may be lim-
ited due to the air conditioning
system operation being restricted.
●Warning lights and indicators such
as electric power steering system
warning light (yellow) and mal-
function indicator lamp may turn
on, but this is no t a malfunction.
Also, when the headlight switch is
in the AUTO position and the sur-
rounding area is dark, the head-
lights are turned on. ( P.295)
■When a charging schedule is
registered
When “My Room Mode” starts while
the charging schedule is on
standby, charging schedules are
ignored and charging starts.
Display of power balance
information while using
“My Room Mode”
A
B
B
A
AB
Page 171 of 616
1713-1. Instrument cluster
3
Vehicle status information and indicators
Information display area
A variety of information can be dis-
played by selecting a menu icon.
Additionally, warning or sugges-
tion/advice pop-up displays will be
displayed in some situations.
Menu icons ( P.171)
■The multi-information display is
displayed when
The power swit ch is in ON.
■When changing driving mode
Background color of the multi-infor-
mation display is changed following
the selected drivi ng mode or when
Trail Mode is turned on. ( P.377,
379)
■Liquid crystal display
Small spots or light spots may
appear on the display. This phe-
nomenon is character istic of liquid
crystal displays, and there is no
problem continuing to use the dis-
play.
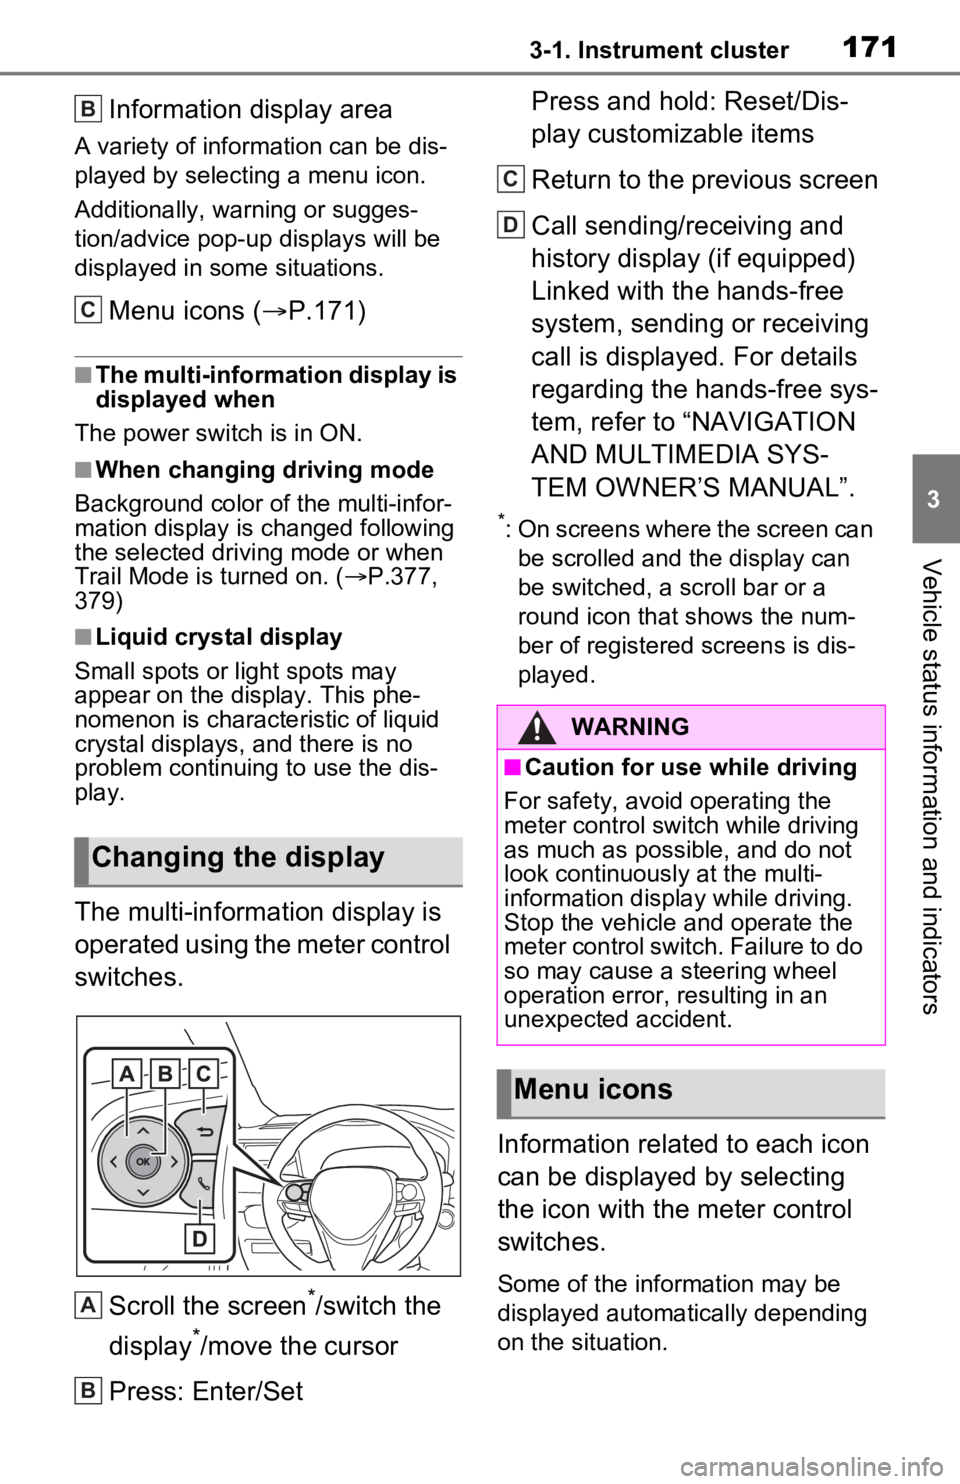
The multi-information display is
operated using the meter control
switches.
Scroll the screen
*/switch the
display
*/move the cursor
Press: Enter/Set Press and hold: Reset/Dis-
play customizable items
Return to the previous screen
Call sending/receiving and
history display (if equipped)
Linked with the hands-free
system, sending or receiving
call is displayed. For details
regarding the hands-free sys-
tem, refer to “NAVIGATION
AND MULTIMEDIA SYS-
TEM OWNER’S MANUAL”.
*: On screens where the screen can
be scrolled and the display can
be switched, a scroll bar or a
round icon that shows the num-
ber of registered screens is dis-
played.
Information related to each icon
can be displayed by selecting
the icon with the meter control
switches.
Some of the information may be
displayed automatically depending
on the situation.
Changing the display
B
C
A
B
�:�$�5�1�,�1�*
■Caution for use while driving
For safety, avoid operating the
meter control switch while driving
as much as possible, and do not
look continuously at the multi-
information display while driving.
Stop the vehicle and operate the
meter control switch. Failure to do
so may cause a steering wheel
operation error, resulting in an
unexpected accident.
Menu icons
C
D
Page 186 of 616
1863-1. Instrument cluster
that displayed on the multi-informa-
tion display. For details, refer to the
explanations of each system.
■Audio system operation
status (if equipped)
Displayed when an audio
remote control switch on the
steering wheel is operated.
■Hands-free system status
(if equipped)
Displayed when the hands-free
system is operated.
■Outside temperature dis-
play
Displayed when the power
switch is turned to ON or when
the low outside temperature
indicator is flashing.
■When a pop-up display is dis-
played
When a pop-up display is displayed,
a current display may no longer be
displayed. In this case, the display
will return after the pop-up display
disappears.
■Outside temperature display
●When the ambient temperature is
approximately 3°C (37°F) or
lower, will flash for approxi-
mately 10 seconds and the out-
side temperature display will turn
off.
●In the following si tuations, the cor-
rect outside tempe rature may not
be displayed, or the display may
take longer than normal to
change:
• When stopped (including when
using “My Room Mode”), or driv-
ing at low speeds (less than 20
km/h [12 mph])
• When the outside temperature has changed suddenly (at the
entrance/exit of a
garage, tunnel,
etc.)
●When “--” or “E” i s displayed, the
system may be malfunctioning.
Take your vehicle to your Toyota
dealer.
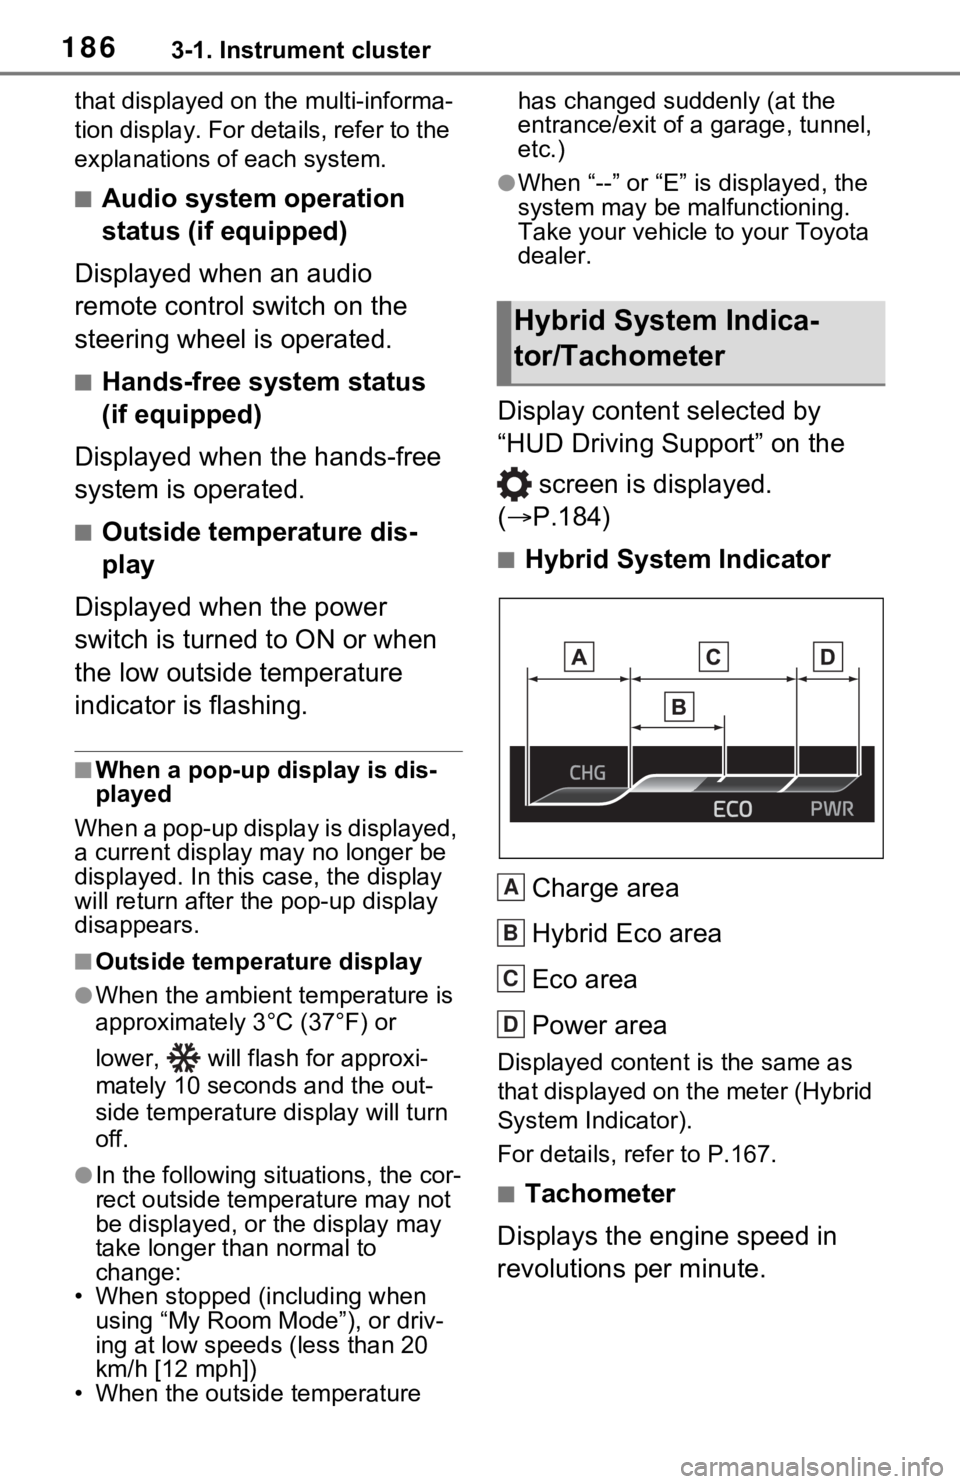
Display content selected by
“HUD Driving Support” on the
screen is displayed.
( P.184)
■Hybrid System Indicator
Charge area
Hybrid Eco area
Eco area
Power area
Displayed content is the same as
that displayed on the meter (Hybrid
System Indicator).
For details, refer to P.167.
■Tachometer
Displays the engine speed in
revolutions per minute.
Hybrid System Indica-
tor/Tachometer
A
B
C
D
Page 193 of 616
193
4
4
Before driving
Before driving
4-1. Key informationKeys ............................ 194
4-2. Opening, closing and locking the doors
Side doors ................... 198
Back door .................... 203
Smart key system ....... 217
4-3. Adjusting the seats Front seats .................. 224
Rear seats................... 225
Driving position memory .................................. 227
Head restraints............ 230
4-4. Adjusting the steering wheel and mirrors
Steering wheel ............ 232
Inside rear view mirror 233
Digital Rear-view Mirror 234
Outside rear view mirrors .................................. 244
4-5. Opening, closing the win- dows and moon roof
Power windows ........... 246
Moon roof .................... 249
Panoramic moon roof.. 252
Page 228 of 616
2284-3. Adjusting the seats
ten.
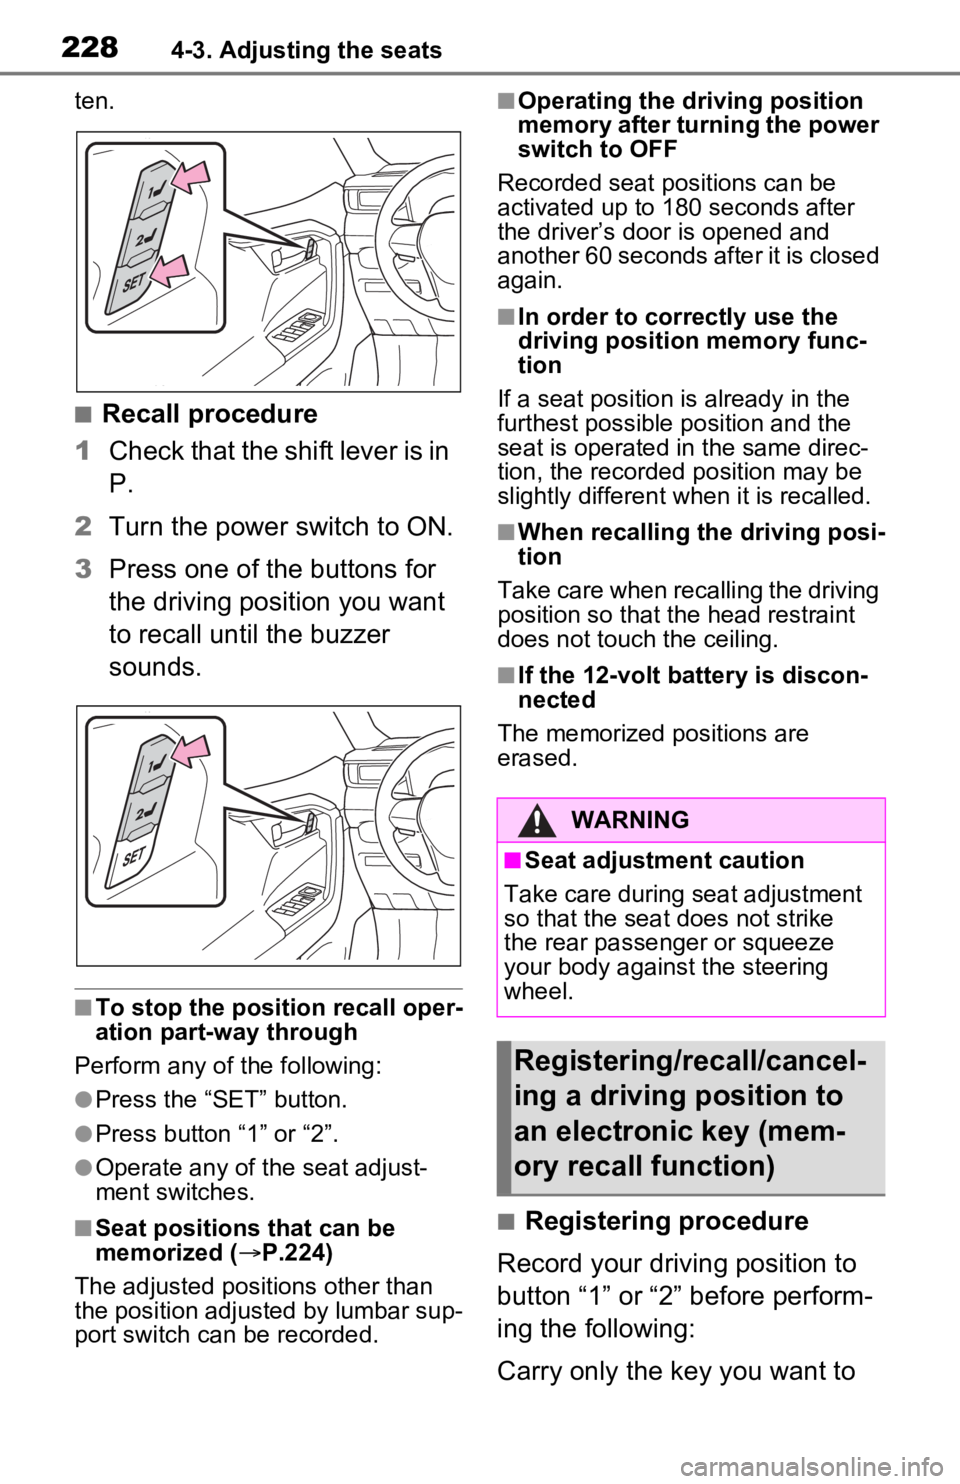
■Recall procedure
1 Check that the shift lever is in
P.
2 Turn the power switch to ON.
3 Press one of the buttons for
the driving position you want
to recall until the buzzer
sounds.
■To stop the position recall oper-
ation part-way through
Perform any of the following:
●Press the “SET” button.
●Press button “1” or “2”.
●Operate any of the seat adjust-
ment switches.
■Seat positions that can be
memorized ( P.224)
The adjusted positions other than
the position adjusted by lumbar sup-
port switch can be recorded.
■Operating the driving position
memory after turning the power
switch to OFF
Recorded seat positions can be
activated up to 180 seconds after
the driver’s door is opened and
another 60 seconds after it is closed
again.
■In order to correctly use the
driving position memory func-
tion
If a seat position is already in the
furthest possible position and the
seat is operated in the same direc-
tion, the recorded position may be
slightly different w hen it is recalled.
■When recalling the driving posi-
tion
Take care when recalling the driving
position so that the head restraint
does not touch the ceiling.
■If the 12-volt b attery is discon-
nected
The memorized positions are
erased.
■Registering procedure
Record your driving position to
button “1” or “2” before perform-
ing the following:
Carry only the key you want to
WARNING
■Seat adjustment caution
Take care during seat adjustment
so that the seat does not strike
the rear passenger or squeeze
your body against the steering
wheel.
Registering/recall/cancel-
ing a driving position to
an electronic key (mem-
ory recall function)
Page 233 of 616
2334-4. Adjusting the steering wheel and mirrors
4
Before driving
*: If equipped
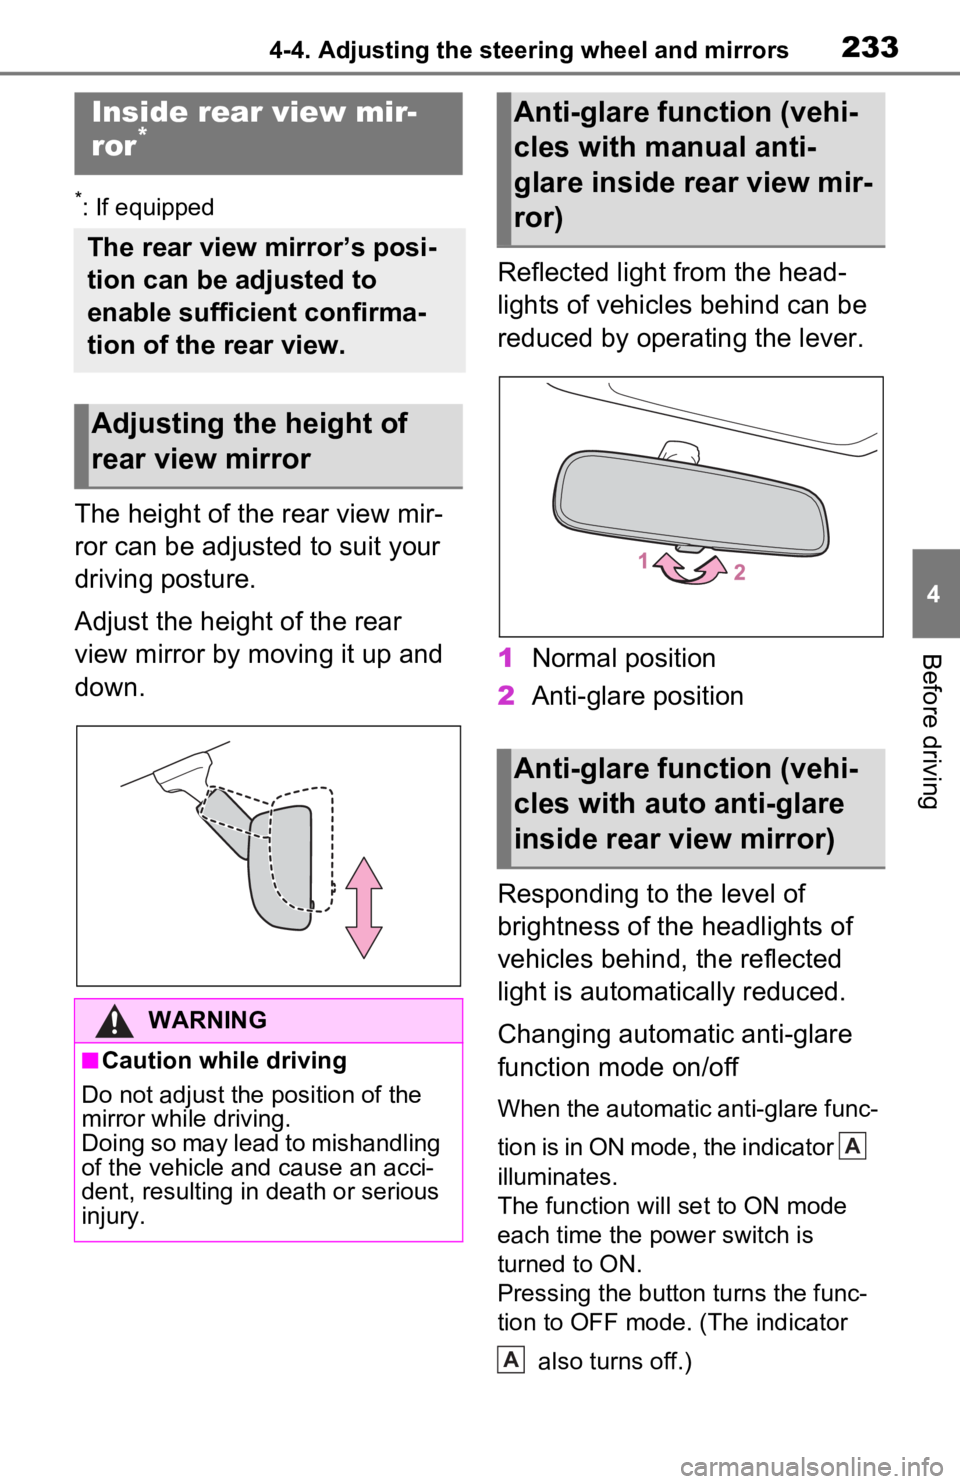
The height of the rear view mir-
ror can be adjusted to suit your
driving posture.
Adjust the height of the rear
view mirror by moving it up and
down.Reflected light from the head-
lights of vehicles behind can be
reduced by operating the lever.
1
Normal position
2 Anti-glare position
Responding to the level of
brightness of the headlights of
vehicles behind, the reflected
light is automatically reduced.
Changing automatic anti-glare
function mode on/off
When the automatic anti-glare func-
tion is in ON mode, the indicator
illuminates.
The function will set to ON mode
each time the power switch is
turned to ON.
Pressing the button turns the func-
tion to OFF mode. (The indicator also turns off.)
Inside rear view mir-
ror*
The rear view mirror’s posi-
tion can be adjusted to
enable sufficient confirma-
tion of the rear view.
Adjusting the height of
rear view mirror
WARNING
■Caution while driving
Do not adjust the position of the
mirror while driving.
Doing so may lead to mishandling
of the vehicle and cause an acci-
dent, resulting in death or serious
injury.
Anti-glare function (vehi-
cles with manual anti-
glare inside rear view mir-
ror)
Anti-glare function (vehi-
cles with auto anti-glare
inside rear view mirror)
A
A