stop start TOYOTA RAV4 PRIME 2021 Workshop Manual
[x] Cancel search | Manufacturer: TOYOTA, Model Year: 2021, Model line: RAV4 PRIME, Model: TOYOTA RAV4 PRIME 2021Pages: 618, PDF Size: 24.18 MB
Page 399 of 618
3996-1. Using the air conditioning system and defogger
6
Interior features
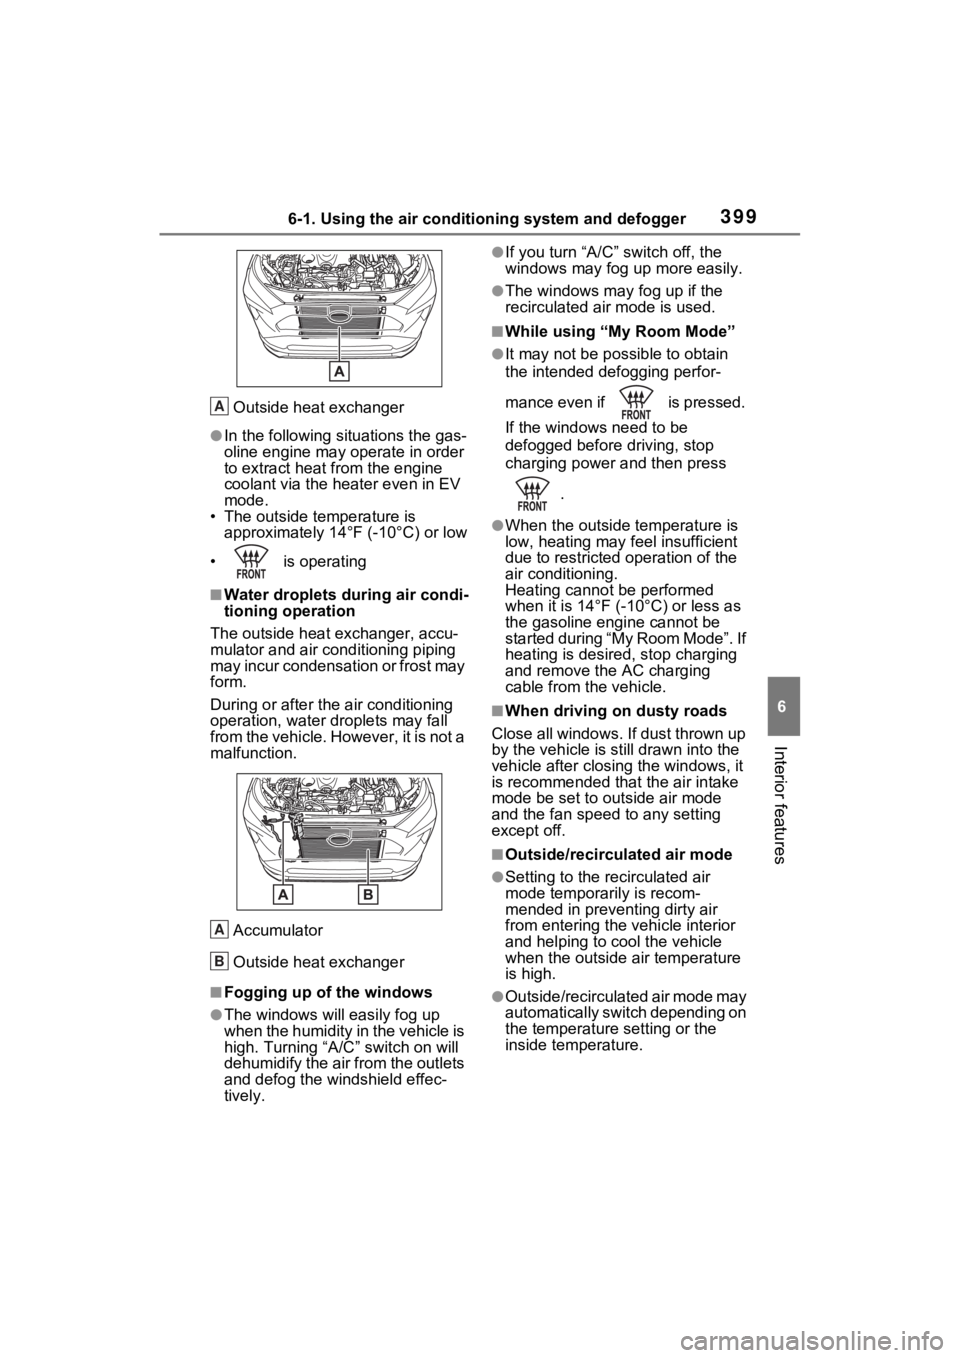
Outside heat exchanger
●In the following situations the gas-
oline engine may operate in order
to extract heat from the engine
coolant via the heater even in EV
mode.
• The outside temperature is approximately 14° F (-10°C) or low
• is operating
■Water droplets during air condi-
tioning operation
The outside heat exchanger, accu-
mulator and air conditioning piping
may incur condensation or frost may
form.
During or after the air conditioning
operation, water droplets may fall
from the vehicle. However, it is not a
malfunction.
Accumulator
Outside heat exchanger
■Fogging up of the windows
●The windows will easily fog up
when the humidity in the vehicle is
high. Turning “A/C ” switch on will
dehumidify the air from the outlets
and defog the windshield effec-
tively.
●If you turn “A/C” switch off, the
windows may fog up more easily.
●The windows may fog up if the
recirculated air mode is used.
■While using “My Room Mode”
●It may not be possible to obtain
the intended defogging perfor-
mance even if is pressed.
If the windows need to be
defogged before driving, stop
charging power and then press
.
●When the outside temperature is
low, heating may feel insufficient
due to restricted operation of the
air conditioning.
Heating cannot be performed
when it is 14°F (- 10°C) or less as
the gasoline engine cannot be
started during “My Room Mode”. If
heating is desired, stop charging
and remove the AC charging
cable from the vehicle.
■When driving on dusty roads
Close all windows. If dust thrown up
by the vehicle is still drawn into the
vehicle after closing the windows, it
is recommended that the air intake
mode be set to outside air mode
and the fan speed to any setting
except off.
■Outside/recirculated air mode
●Setting to the recirculated air
mode temporarily is recom-
mended in preventing dirty air
from entering the vehicle interior
and helping to c ool the vehicle
when the outside air temperature
is high.
●Outside/recirculated air mode may
automatically switch depending on
the temperature setting or the
inside temperature.
A
A
B
Page 402 of 618
4026-1. Using the air conditioning system and defogger
■Using automatic mode
Fan speed is adjusted automati-
cally according to the temperature
setting and the ambient conditions.
Therefore, the fan may stop for a
while until warm or cool air is ready
to flow immediately after the auto-
matic mode switch is pressed.
■Windshield fog d etection func-
tion
When automatic mode is set, the
humidity sensor detects fog on the
windshield and controls the air con-
ditioning system to prevent fog.
This function automatically con-
trols the air conditioning airflow
so that priority is given to the
front seats. When the front pas-
senger seat is not occupied, air-
flow may switch to only the
driver’s seat. Unnecessary air
conditioning is suppressed, con-
tributing to increased fuel effi-
ciency.
Front seat concentrated airflow
mode operates in the following
situations.
No passengers are detected
in the rear seats
The windshield defogger is
not operating
While operating, illumi-
nates.
■Manually turning front seat
concentrated airflow mode
on/off
In front seat concentrated air-
flow mode, directing airflow to
the front seats only and to all
seats can be switched via switch
operation. When the mode has
been switched manually, auto-
matic airflow control stops oper-
ating.
Press on the air condition-
ing operation panel and switch
the airflow.
Indicator illuminated: Airflow
to the front seats only
Indicator off: Airflow to all the
seats
■Operation of automatic airflow
control
●In order to maintain a comfortable
interior, airflow may be directed to
seats without passengers immedi-
ately after the hybrid system is
started and at other times depend-
ing on the outside temperature.
●After the hybrid system is started,
if passengers move around inside
or enter/exit the vehicle, the sys-
tem cannot accura tely detect the
presence of passengers and auto-
matic airflow co ntrol will not oper-
ate.
■Operation of manual airflow
control
Even if the funct ion is manually
switched to directing airflow to only
the front seats, w hen a rear seat is
occupied, it may automatically direct
airflow to all seats.
Front seat concentrated
airflow mode (S-FLOW)
Page 405 of 618
4056-1. Using the air conditioning system and defogger
6
Interior features
If the Remote Air Conditioning
System is used while the AC
charging cable is connected to
the vehicle, electricity from an
external power source can be
used minimizing the drop in
charge of the hybrid battery
(traction battery).
Charging will be conducted auto-
matically after the Remote Air Con-
ditioning System is stopped.
Check the temperature setting
of the air conditioning system.
( P.396)
The Remote Air C onditioning Sys-
tem will operate in accordance with
the temperature settings of the air
conditioning system.
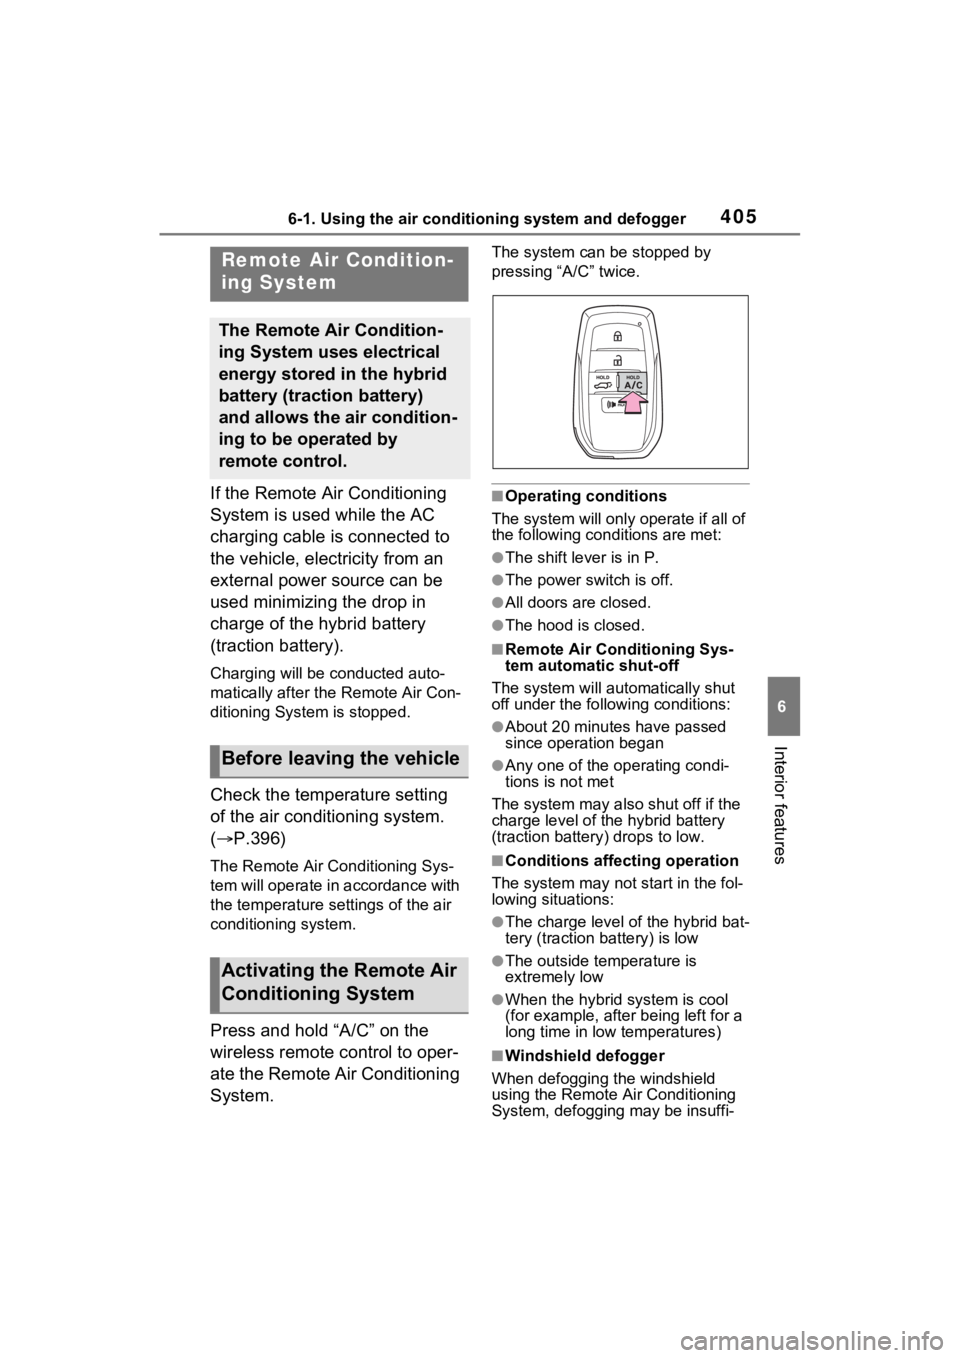
Press and hold “A/C” on the
wireless remote control to oper-
ate the Remote Air Conditioning
System.
The system can be stopped by
pressing “A/C” twice.
■Operating conditions
The system will only o perate if all of
the following conditions are met:
●The shift lever is in P.
●The power switch is off.
●All doors are closed.
●The hood is closed.
■Remote Air Conditioning Sys-
tem automatic shut-off
The system will automatically shut
off under the follo wing conditions:
●About 20 minutes have passed
since operation began
●Any one of the operating condi-
tions is not met
The system may also shut off if the
charge level of the hybrid battery
(traction battery) drops to low.
■Conditions affecting operation
The system may not start in the fol-
lowing situations:
●The charge level of the hybrid bat-
tery (traction battery) is low
●The outside temperature is
extremely low
●When the hybrid system is cool
(for example , after being left for a
long time in low temperatures)
■Windshield defogger
When defogging the windshield
using the Remote Air Conditioning
System, defogging may be insuffi-
Remote Air Condition-
ing System
The Remote Air Condition-
ing System uses electrical
energy stored in the hybrid
battery (traction battery)
and allows the air condition-
ing to be operated by
remote control.
Before leaving the vehicle
Activating the Remote Air
Conditioning System
Page 424 of 618
4246-4. Using the other interior features
WARNING
• Devices which may fall under the pedals and prevent the
brake pedal from being
depressed, such as a hair dryer,
AC adaptor, mouse, etc.
●Do not use devices which pro-
duce steam while the windows
are closed. Doing so may cause
the windows to fog up, reducing
visibility and making it difficult to
drive safely. Also, the steam
may damage or negatively
affect other devices. If the
device must be used, stop the
vehicle and open the windows
before use.
●Do not connect a malfunctioning
device to a power outlet, as
doing so may ca use the power
outlet to become inoperable.
●Do not disconnect the plug of a
device while your hands are wet
or insert a pin o r other object
into the pow er outlet. Also, if a
liquid or snow is on the power
outlet, dry the outlet before
using it.
●Be careful not to get pinched by
the power outlet lid.
●Do not attempt to modify, disas-
semble or repair a power outlet.
Also, do not replace the 120
VAC inverter with a commer-
cially available one. For infor-
mation on repairs, contact your
Toyota dealer.
●Do not let children touch the
power outlet.
●Keep the power outlet free of
foreign matter.
●Keep the power outlet free of
dust and foreign matter. Also,
make sure to clean the power
outlet periodically.
●If the plug of a device fits
loosely in a power outlet, even
though it is fully inserted,
replace the power outlet. For
information on replacement,
contact your Toyota dealer.
■Using the power outlet while
parked or stopped
Observe the following precau-
tions.
Failure to do so may lead to an
accident, possibly resulting in
death or serious injury.
●Make sure to securely engage
the parking brake and shift the
shift lever to P.
●Do not leave the vehicle unat-
tended while the READY indica-
tor is illuminated and a device is
connected to a power outlet.
●Make sure that the hood is
closed. As the engine will start
automatically depending on the
condition of the vehicle, make
sure that nothing is left near or
contacting the exhaust pipes.
Also, do not put your head or
hands anywhere inside the
engine compartment, as the
cooling fans may operate sud-
denly. Keep hands and clothing
(especially a tie, scarf, etc.)
away from the fans as they may
get caught in a fan.
●Do not stop the vehicle near
objects which burn easily. If the
exhaust system is extremely
hot, it may cause a fire.
Page 428 of 618
4286-4. Using the other interior features
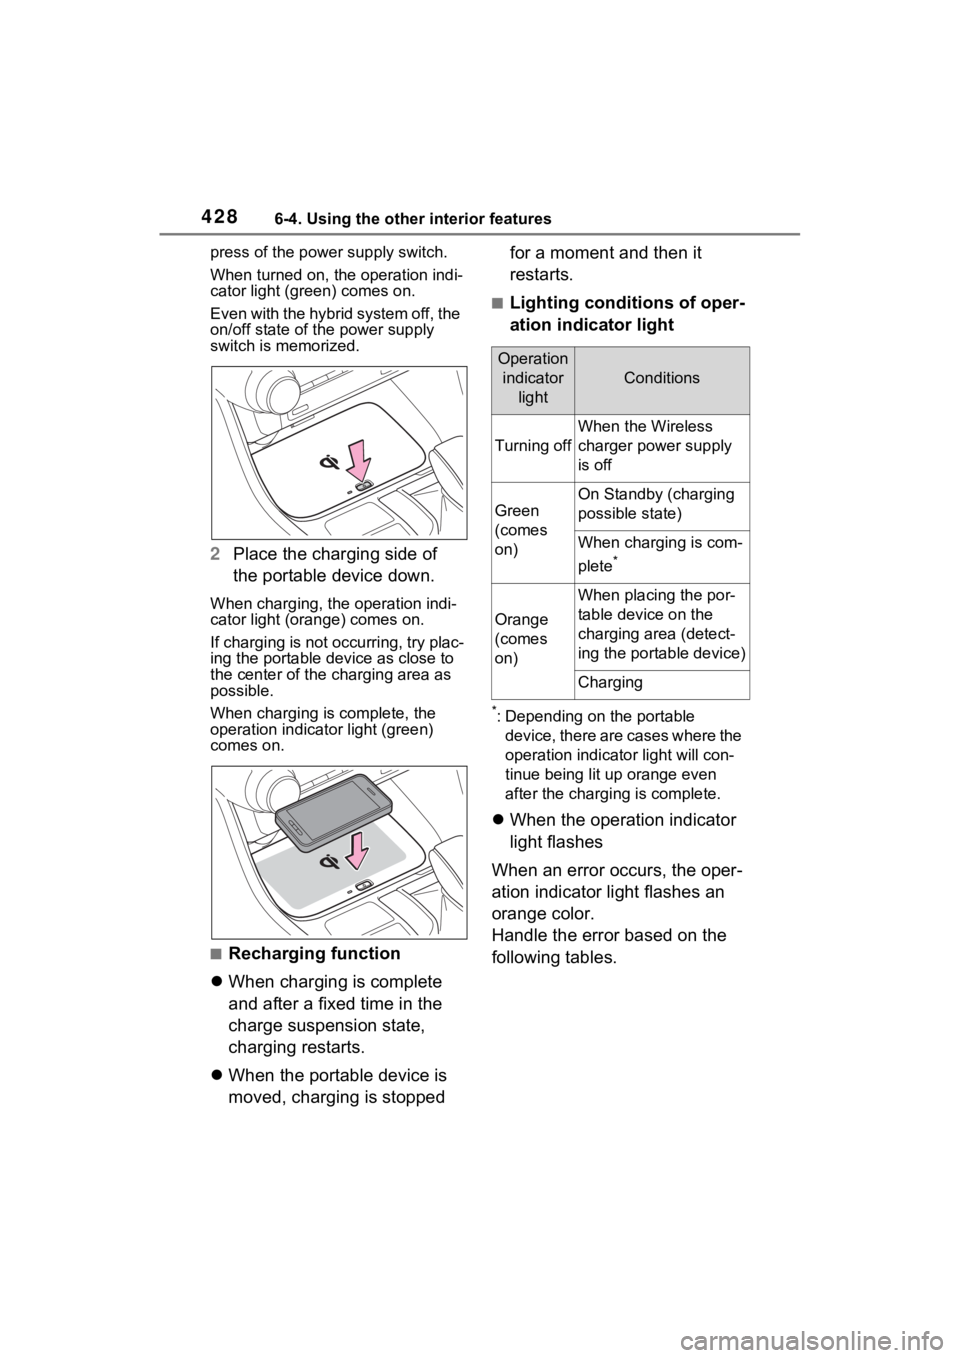
press of the power supply switch.
When turned on, the operation indi-
cator light (green) comes on.
Even with the hybrid system off, the
on/off state of the power supply
switch is memorized.
2 Place the charging side of
the portable device down.
When charging, the operation indi-
cator light (orange) comes on.
If charging is not occurring, try plac-
ing the portable device as close to
the center of the charging area as
possible.
When charging is complete, the
operation indicator light (green)
comes on.
■Recharging function
When charging is complete
and after a fixed time in the
charge suspension state,
charging restarts.
When the portable device is
moved, charging is stopped for a moment and then it
restarts.
■Lighting conditions of oper-
ation indicator light
*: Depending on the portable
device, there are cases where the
operation indicato r light will con-
tinue being lit u p orange even
after the charging is complete.
When the operation indicator
light flashes
When an error occurs, the oper-
ation indicator light flashes an
orange color.
Handle the error based on the
following tables.
Operation indicator light
Conditions
Turning off
When the Wireless
charger power supply
is off
Green
(comes
on)
On Standby (charging
possible state)
When charging is com-
plete
*
Orange
(comes
on)
When placing the por-
table device on the
charging area (detect-
ing the portable device)
Charging
Page 429 of 618
4296-4. Using the other interior features
6
Interior features
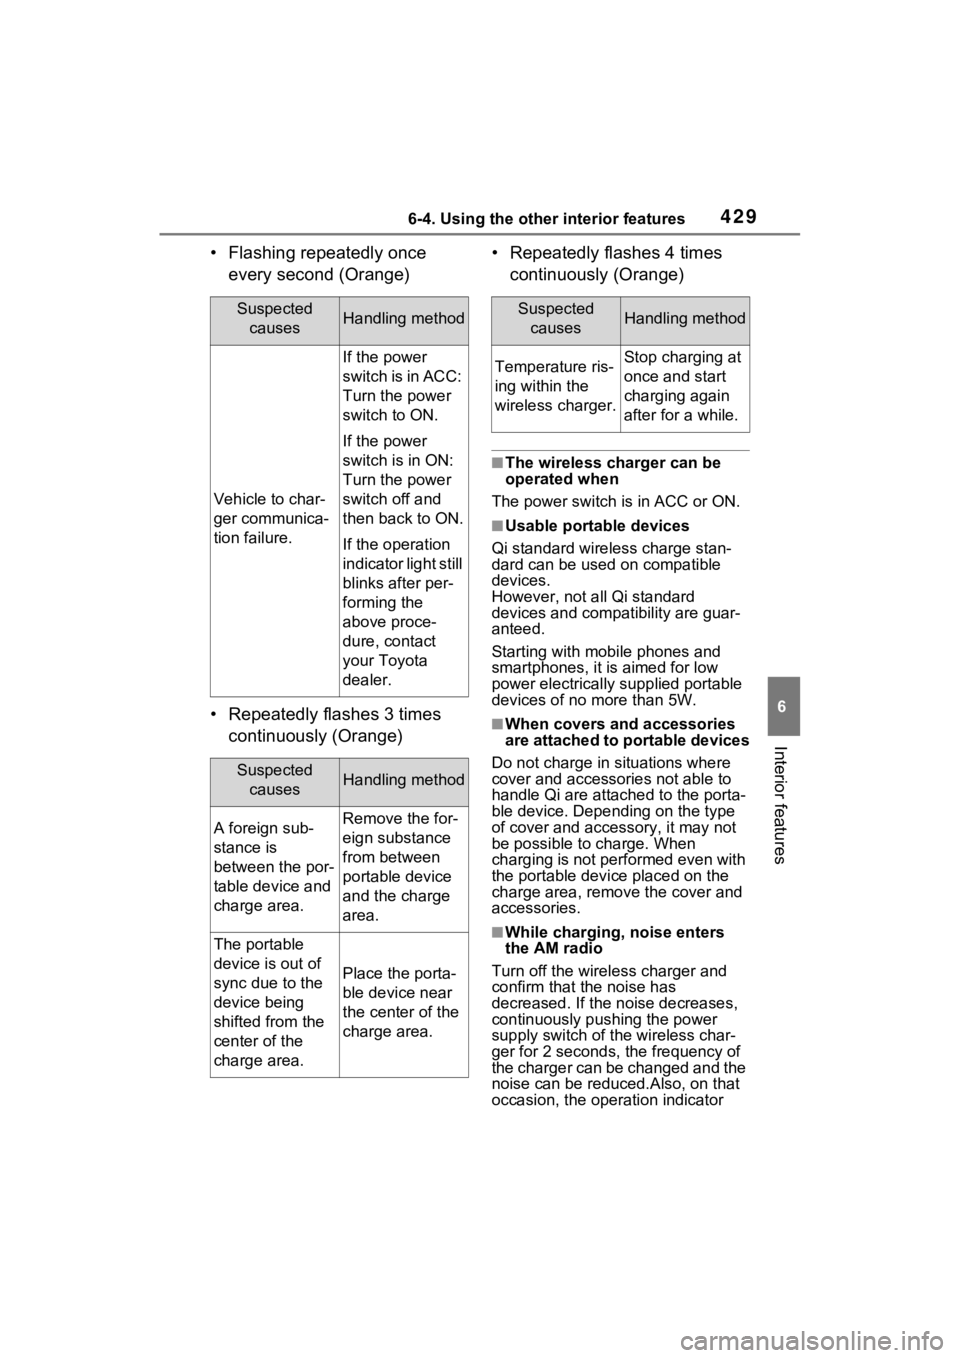
• Flashing repeatedly once every second (Orange)
• Repeatedly flashes 3 times continuously (Orange) • Repeatedly flashes 4 times
continuously (Orange)
■The wireless charger can be
operated when
The power switch is in ACC or ON.
■Usable portable devices
Qi standard wireless charge stan-
dard can be used on compatible
devices.
However, not all Qi standard
devices and compat ibility are guar-
anteed.
Starting with mobile phones and
smartphones, it is aimed for low
power electrically supplied portable
devices of no more than 5W.
■When covers and accessories
are attached to portable devices
Do not charge in situations where
cover and accessories not able to
handle Qi are attached to the porta-
ble device. Depending on the type
of cover and acce ssory, it may not
be possible to charge. When
charging is not performed even with
the portable devic e placed on the
charge area, remove the cover and
accessories.
■While charging, noise enters
the AM radio
Turn off the wireless charger and
confirm that the noise has
decreased. If the noise decreases,
continuously pushing the power
supply switch of the wireless char-
ger for 2 seconds, the frequency of
the charger can be changed and the
noise can be reduced.Also, on that
occasion, the operation indicator
Suspected causesHandling method
Vehicle to char-
ger communica-
tion failure.
If the power
switch is in ACC:
Turn the power
switch to ON.
If the power
switch is in ON:
Turn the power
switch off and
then back to ON.
If the operation
indicator light still
blinks after per-
forming the
above proce-
dure, contact
your Toyota
dealer.
Suspected causesHandling method
A foreign sub-
stance is
between the por-
table device and
charge area.Remove the for-
eign substance
from between
portable device
and the charge
area.
The portable
device is out of
sync due to the
device being
shifted from the
center of the
charge area.
Place the porta-
ble device near
the center of the
charge area.
Suspected causesHandling method
Temperature ris-
ing within the
wireless charger.Stop charging at
once and start
charging again
after for a while.
Page 474 of 618
4747-3. Do-it-yourself maintenance
be initialized. (P.476)
■When replacing the tires and
wheels
If the ID code of the tire pressure
warning valve and transmitter is not
registered, the tire pressure warning
system will not work properly. After
driving for about 20 minutes, the tire
pressure warning light blinks for 1
minute and stays on to indicate a
system malfunction.
■The tire pressure warning
system must be initialized
in the following circum-
stances:
When rotating the tires.
When changing the tire.
After registering the ID codes.
( P.476)
When changing between two
registered wheel sets.
When the tire pressure warning
system is initialized, the current
tire inflation pressure is set as
the benchmark pressure.
■How to initialize the tire
pressure warning system
1 Park the vehicle in a safe
place and stop the hybrid
system for 20 minutes or
more.
Initialization cannot be performed
while the vehicle is moving.
2Adjust the tire inflation pres-
sure to the specified cold tire
inflation pressure level.
( P.555)
Make sure to adjust the tire pres-
sure to the specifie d cold tire infla-
tion pressure level. The tire
pressure warning system will oper-
ate based on this pressure level.
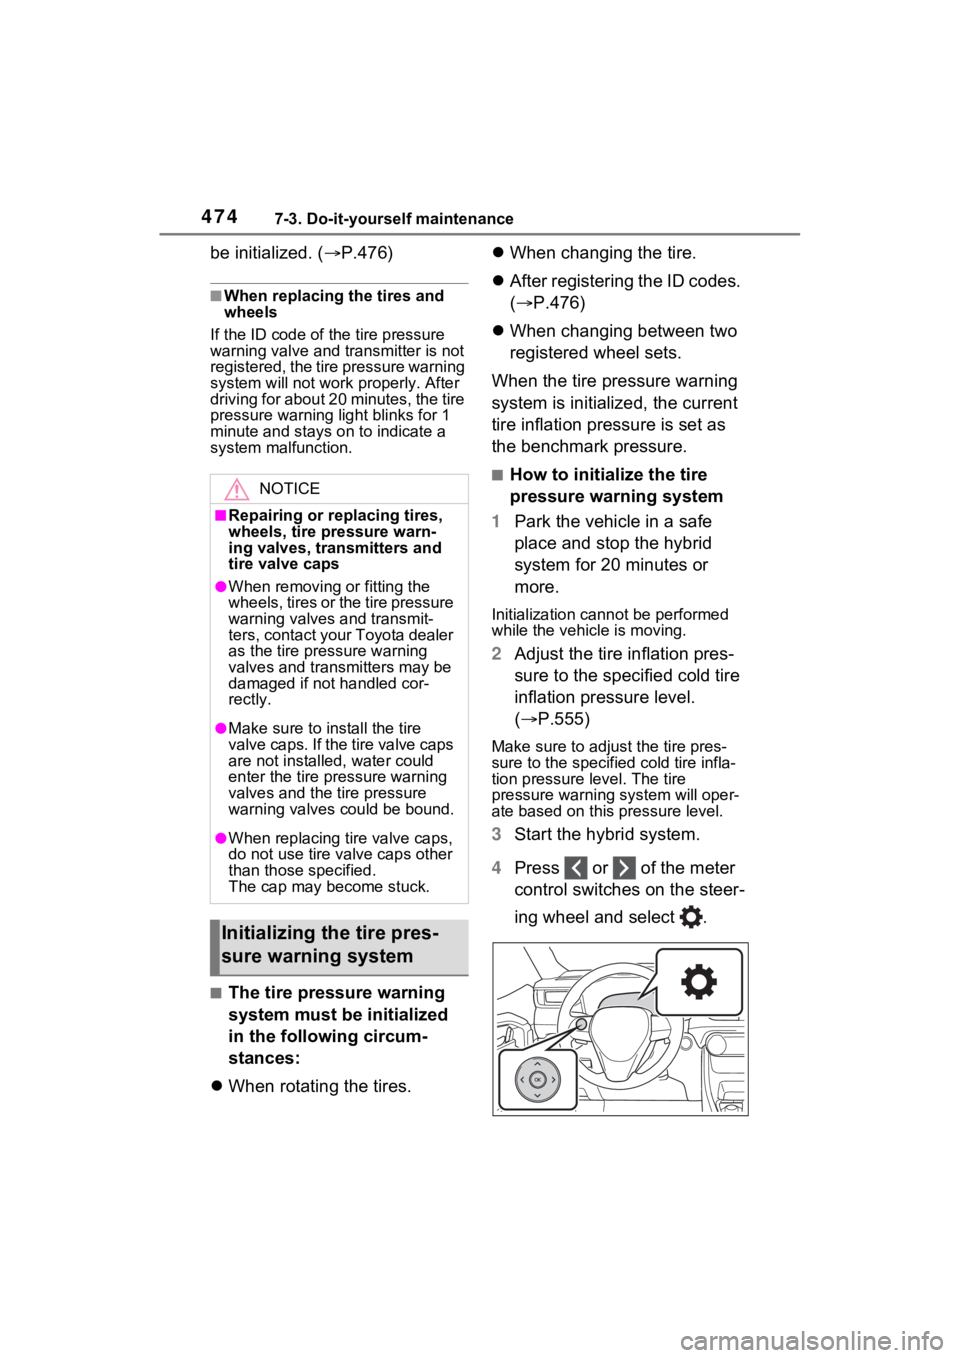
3Start the hybrid system.
4 Press or of the meter
control switches on the steer-
ing wheel and select .
NOTICE
■Repairing or replacing tires,
wheels, tire pressure warn-
ing valves, transmitters and
tire valve caps
●When removing or fitting the
w he e ls, tir es or th e t ir e pr es sur e
warning valves and transmit-
ters, contact your Toyota dealer
as the tire pr essure warning
valves and transmitters may be
damaged if not handled cor-
rectly.
●Make sure to install the tire
valve caps. If the tire valve caps
are not installed, water could
enter the tire pressure warning
valves and the tire pressure
warning valves could be bound.
●When replacing ti re valve caps,
do not use tire valve caps other
than those specified.
The cap may become stuck.
Initializing the tire pres-
sure warning system
Page 488 of 618
4887-3. Do-it-yourself maintenance
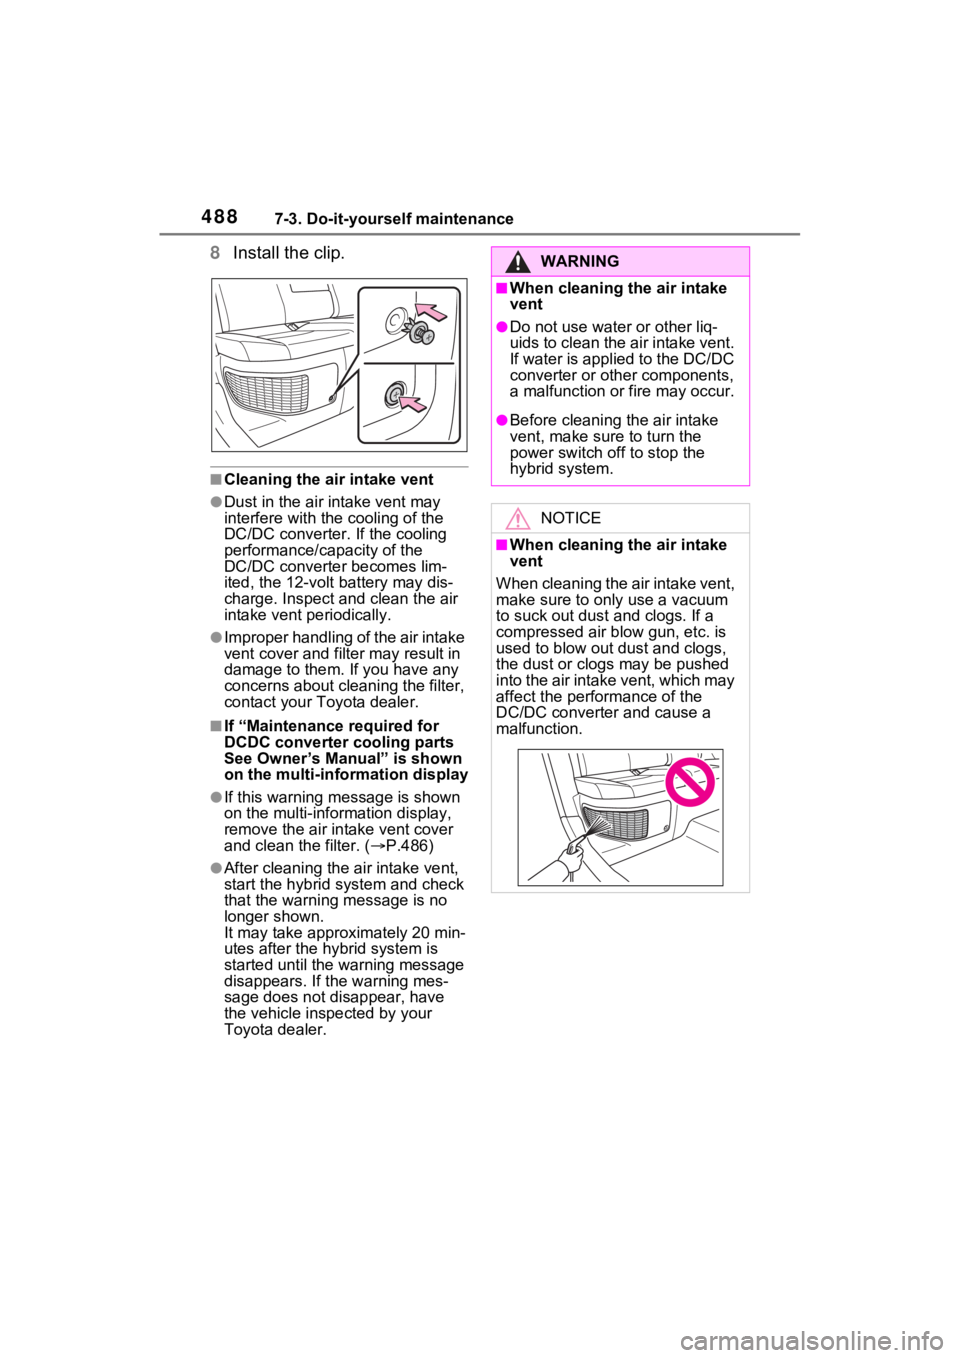
8Install the clip.
■Cleaning the ai r intake vent
●Dust in the air intake vent may
interfere with the cooling of the
DC/DC converter. If the cooling
performance/capacity of the
DC/DC converte r becomes lim-
ited, the 12-volt battery may dis-
charge. Inspect and clean the air
intake vent periodically.
●Improper handling of the air intake
vent cover and filt er may result in
damage to them. If you have any
concerns about cleaning the filter,
contact your Toyota dealer.
■If “Maintenance required for
DCDC converter cooling parts
See Owner’s Manual” is shown
on the multi-information display
●If this warning m essage is shown
on the multi-information display,
remove the air in take vent cover
and clean the filter. ( P.486)
●After cleaning the air intake vent,
start the hybrid system and check
that the warning message is no
longer shown.
It may take approximately 20 min-
utes after the hybrid system is
started until the warning message
disappears. If the warning mes-
sage does not disappear, have
the vehicle inspected by your
Toyota dealer.
WARNING
■When cleaning the air intake
vent
●Do not use water or other liq-
uids to clean the air intake vent.
If water is applied to the DC/DC
converter or other components,
a malfunction or fire may occur.
●Before cleaning the air intake
vent, make sure to turn the
power switch off to stop the
hybrid system.
NOTICE
■When cleaning the air intake
vent
When cleaning the air intake vent,
make sure to onl y use a vacuum
to suck out dust and clogs. If a
compressed air blow gun, etc. is
used to blow out dust and clogs,
the dust or clog s may be pushed
into the air intake vent, which may
affect the perfor mance of the
DC/DC converter and cause a
malfunction.
Page 491 of 618
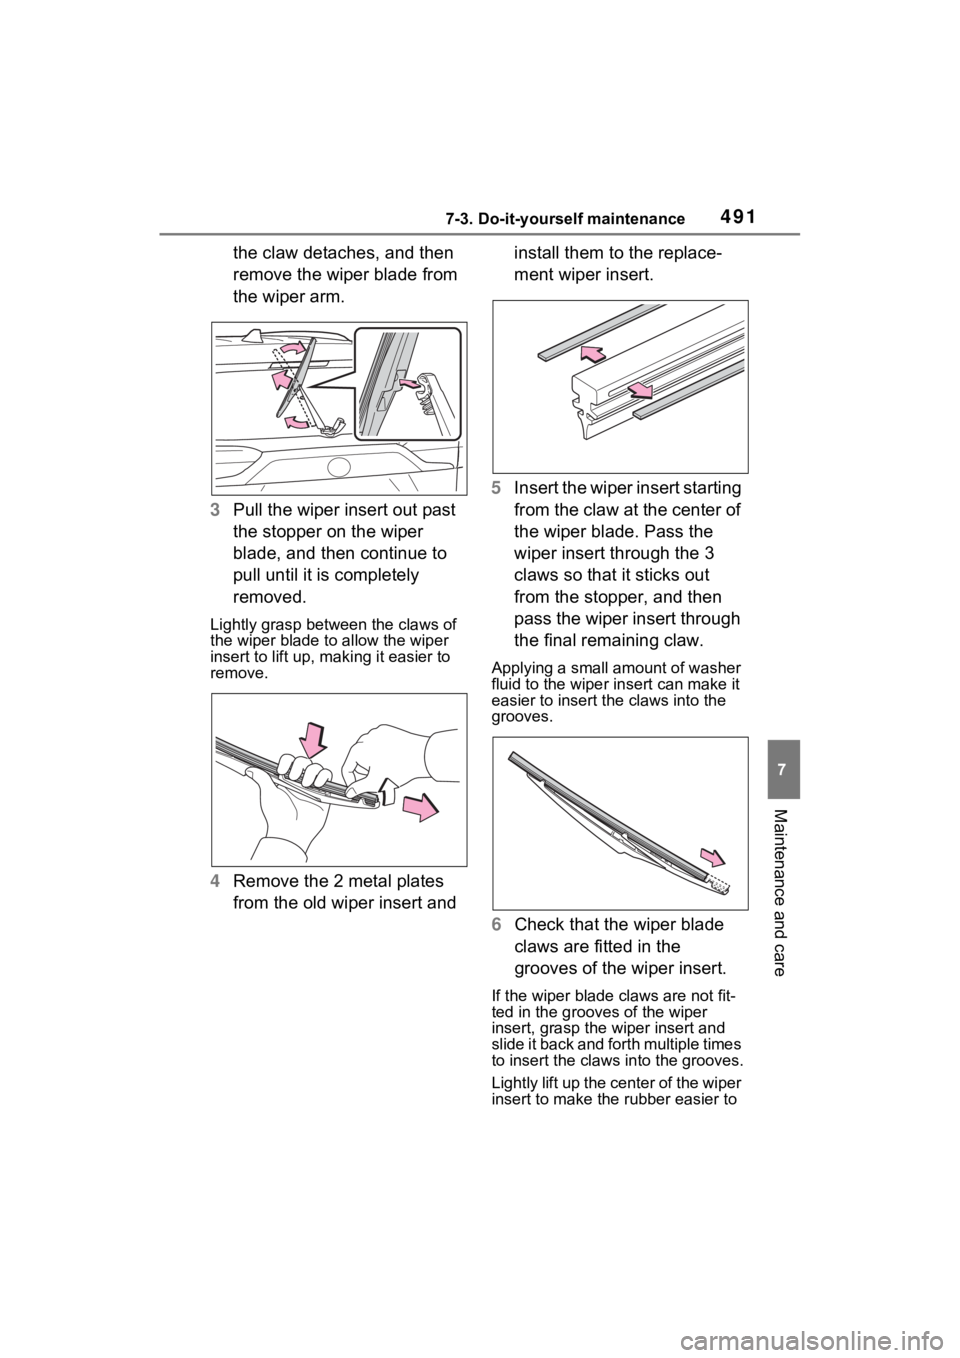
4917-3. Do-it-yourself maintenance
7
Maintenance and care
the claw detaches, and then
remove the wiper blade from
the wiper arm.
3 Pull the wiper insert out past
the stopper on the wiper
blade, and then continue to
pull until it is completely
removed.
Lightly grasp betw een the claws of
the wiper blade to allow the wiper
insert to lift up, mak ing it easier to
remove.
4 Remove the 2 metal plates
from the old wiper insert and install them to the replace-
ment wiper insert.
5 Insert the wiper insert starting
from the claw at the center of
the wiper blade. Pass the
wiper insert through the 3
claws so that it sticks out
from the stopper, and then
pass the wiper insert through
the final remaining claw.
Applying a small amount of washer
fluid to the wiper i nsert can make it
easier to insert the claws into the
grooves.
6 Check that the wiper blade
claws are fitted in the
grooves of the wiper insert.
If the wiper blade claws are not fit-
ted in the grooves of the wiper
insert, grasp the wiper insert and
slide it back and forth multiple times
to insert the claws into the grooves.
Lightly lift up the center of the wiper
insert to make the rubber easier to
Page 503 of 618

503
8
8
When trouble arises
When trouble arises
8-1. Essential informationEmergency flashers .... 504
If your vehicle has to be stopped in an emergency.................................. 505
If the vehicle is trapped in rising water ................ 506
8-2. Steps to take in an emer- gency
If your vehicle needs to be towed......................... 507
If you think something is wrong ........................ 509
If a warning light turns on or a warning buzzer sounds.................................. 511
If a warning message is dis- played........................ 523
If you have a flat tire.... 527
If the hybrid system will not start ........................... 534
If you lose your keys ... 536
If the fuel filler door cannot be opened ................. 536
If the electronic key does not operate properly .. 537
If the 12-volt battery is dis- charged ..................... 539
If your vehicle overheats .................................. 544
If the vehicle becomes stuck .................................. 548