headlights TOYOTA RAV4 PRIME 2021 Owners Manual
[x] Cancel search | Manufacturer: TOYOTA, Model Year: 2021, Model line: RAV4 PRIME, Model: TOYOTA RAV4 PRIME 2021Pages: 618, PDF Size: 24.18 MB
Page 15 of 618
15Pictorial index
Precautions against winter season ......................................P.387
To prevent freezing (windshield wiper de-icer)
*...................P.403
Precautions against car wash
(Rain-sensing windshield wipers)
*.......................................P.445
Replacing the wiper insert .................................... ...............P.489
Fuel filler door ............................................... .....................P.306
Refueling method ............................................... ..................P.306
Fuel type/fuel tan k capacity .................................................P.551
Charging port .................................................. .....................P.99
Charging method ................................................ .................P.114
Tires ....................................................................................P.468
Tire size/inflation pressure ................................... ................P.555
Winter tires/tire chain ........................................ ...................P.387
Checking/rotation/tire pressur e warning system ..................P.468
Coping with flat tires......................................... ....................P.527
Hood ....................................................................................P.457
Opening ........................................................ .......................P.457
Engine oil ..................................................... ........................P.552
Coping with overheat ........................................... ................P.544
Warning messages ..............................................................P.523
Headlights/side marker lights .................................. .........P.295
Turn signal lights ...............................................................P.289
Parking lights/dayt ime running lights .......................... ....P.295
LED accessory lights
*........................................................P.295
Tail lights/side marker lights ............................................P.295
Tail lights .................................................... ........................P.295
Back-up lights
Light bulbs of the exterior lights for driving
(Replacing method: P .497, Watts: P.556)
E
F
G
H
I
J
K
L
M
N
Page 18 of 618

18Pictorial index
Energy monitor.....................................................................P.187
When the warning messages are displayed ........................ P.523
Turn signal lever ................................................................P.289
Headlight switch ................................................................P.295
Headlights/parking lights/tail lig hts/license plate lights/daytime run-
ning lights/LED accessory lights
*1........................................P.295
Windshield wiper and washer switch ..............................P.301
Rear window wiper and washer switch ...........................P.304
Usage.......................................................... .................P.301, 304
Adding washer fluid ..............................................................P.465
Warning messages ..............................................................P.523
Emergency flasher switch ....................................... ..........P.504
Hood lock release lever ........................................ .............P.457
Tilt and telescopic steering lock release lever ................P.232
Adjustment ..................................................... ......................P.232
Air conditioning system ............................. .......................P.396
Usage.......................................................... .........................P.396
Rear window defogger ........................................... ..............P.398
Audio
*1, 2
Audio Plus*1, 2
Premium Audio*1, 2
Fuel filler door opener swi tch ...........................................P.307
*1: If equipped
*2: Refer to “NAVIGATION AND MULTIMEDIA SYSTEM OWNER’S MAN-
UAL”.
E
F
G
H
I
J
K
L
Page 115 of 618
1152-2. Charging
2
Plug-in hybrid system
( P.144), the time required for
charging to complete may be
longer or the charging may not
be completed.
*4: If equipped
■Charging time may increase
In the following si tuations, charging
time may become longer than nor-
mal:
●In very hot or very cold tempera-
tures.
●When the hybrid battery (traction
battery) becomes hot, such as
immediately after high-load driv-
ing.
●The vehicle is consuming a lot of
electricity, for example, when the
headlights are on etc.
●When using “My Room Mode”.
( P.144)
●There is a power outage during
charging.
●There is an interruption in the
electrical supply.
●There is a drop in the voltage of
external power source.
●The charge in the 12-volt battery
is low, for examp le due to the
vehicle being left unused for a
long period of time.
●The maximum charging current is
set to 8A or 16A* through “Vehicle
Settings”. ( P.112)
●When the “Battery Heater” oper-
ates. ( P.115)
●When the “Battery Cooler” is oper-
ated before charging. ( P.116)
●When the plug generates heat
due to a loose outlet connection
etc.
*: Vehicles with 6.6 kW onboard
traction battery charger only
■Using a DC Charger
DC Chargers cannot be used with this vehicle.
■Charging electricity
This vehicle can be charged up to
approximately 3. 3 kW or 6.6 kW
*.
However, depending on the used
charger or AC charging cable,
charging electrici ty may be limited.
*: Vehicles with 6.6 kW onboard
traction battery charger only
This vehicle is equipped with
several functions that are linked
with charging.
■“My Room Mode” ( P.144)
When the AC charging cable is
connected to the vehicle, electri-
cal components such as the air
conditioning system or audio
system can be used using the
external power source
*.
*: The power of the hybrid battery
(traction battery) may be used
depending on the situation.
■“Battery Heater”
When the outside temperature
is low and the AC charging
cable is connected to the vehi-
cle, this function automatically
warms the hybrid battery (trac-
tion battery) until it reaches or
exceeds a certain temperature.
“Battery Heater” will operate
when the “Battery Heater” of the
“Charging Settings” on the multi-
information display is on.
( P.178)
Charging-linked functions
Page 157 of 618
1572-2. Charging
2
Plug-in hybrid system
■If “Charging Stopped High Energy Use See Owner’s Manual”
is shown
■If “Charging System Malfunction See Owner’s Manual” is
shown
■If “The Traction Battery Temp is low System put priority on
charging to preserve battery condition” is shown (Alaska and
Canada only)
Likely causeCorrection procedure
Power is being consumed by electri-
cal components of vehicle
Check the following items, and then
carry out charging again.
If the headlights and audio are
turned on, t urn them off.
Turn the power switch off.
If charging cannot be carried out,
even after performing the above, the
auxiliary battery may not be suffi-
ciently charged. Op erate the hybrid
system for approximately 15 minutes
or more to charge the auxiliary bat-
tery.
Likely causeCorrection procedure
Malfunction occurred in charging
systemHave the vehicle inspected by your
Toyota dealer.
Likely causeCorrection procedure
The Hybrid battery ( traction battery)
warming control was operated
( P.116)
When the hybrid battery (traction
battery) warming control operates,
the charging schedule is not used
and charging is performed.
This is a control to protect the hybrid
battery (traction battery), and not a
malfunction.
Page 181 of 618
1813-1. Instrument cluster
3
Vehicle status information and indicators
Select to display warning mes-
sages and measures to be
taken if a malfunction is
detected. (P.523)
Displays suggestions to the
driver in the following situations.
To select a response to a dis-
played suggestion, use the
meter control switches.
■Suggestion to enable the
power back door (if
equipped)
If the power back door system is
disabled on the screen and
the power back door switch on
the instrument panel is oper- ated, a suggestion message will
be displayed asking if you wish
to enable the power back door
system. To enable the power
back door system, select “Yes”.
After enabling the power back door
system, press the power back door
switch again to op
en or close the
power back door.
■Suggestion to turn on the
headlights
If the headlight switch is in other
than or , and the vehicle
speed is 3 mph (5 km/h) or
higher for a certain amount of
time when the surroundings are
dark, a suggestion message will
be displayed.
■Suggestion to turn off the
headlights
If the headlights are left on for a
certain amount of time after the
power switch has been turned
off, a suggestion message will
be displayed.
When the headlight switch is in
the AUTO position: The mes-
sage asking if you wish to turn
the headlights off is displayed.
To turn the headlights off, select
“Yes”.
If the driver’s door is opened after
the power switch is turned off, this
suggestion message will not be dis-
played.
■Customization
The suggestion fu nction can be
turned on/off. (Customizable fea-
WARNING
■Cautions during setting up
the display
As the hybrid system needs to be
operating during setting up the
display, ensure that the vehicle is
parked in a place with adequate
ventilation. In a closed area such
as a garage, exhaust gases
including harmful carbon monox-
ide (CO) may collect and enter
the vehicle. This may lead to
death or a serious health hazard.
NOTICE
■During setting up the display
To prevent 12-volt battery dis-
charge, ensure t hat the hybrid
system is operating while setting
up the display features.
Warning message display
Suggestion function
Page 233 of 618

2334-4. Adjusting the steering wheel and mirrors
4
Before driving
*: If equipped
The height of the rear view mir-
ror can be adjusted to suit your
driving posture.
Adjust the height of the rear
view mirror by moving it up and
down.Reflected light from the head-
lights of vehicles behind can be
reduced by operating the lever.
1
Normal position
2 Anti-glare position
Responding to the level of
brightness of the headlights of
vehicles behind, the reflected
light is automatically reduced.
Changing automatic anti-glare
function mode on/off
When the automatic anti-glare func-
tion is in ON mode, the indicator
illuminates.
The function will set to ON mode
each time the power switch is
turned to ON.
Pressing the button turns the func-
tion to OFF mode. (The indicator also turns off.)
Inside rear view mir-
ror*
The rear view mirror’s posi-
tion can be adjusted to
enable sufficient confirma-
tion of the rear view.
Adjusting the height of
rear view mirror
WARNING
■Caution while driving
Do not adjust the position of the
mirror while driving.
Doing so may lead to mishandling
of the vehicle and cause an acci-
dent, resulting in death or serious
injury.
Anti-glare function (vehi-
cles with manual anti-
glare inside rear view mir-
ror)
Anti-glare function (vehi-
cles with auto anti-glare
inside rear view mirror)
A
A
Page 237 of 618
2374-4. Adjusting the steering wheel and mirrors
4
Before driving
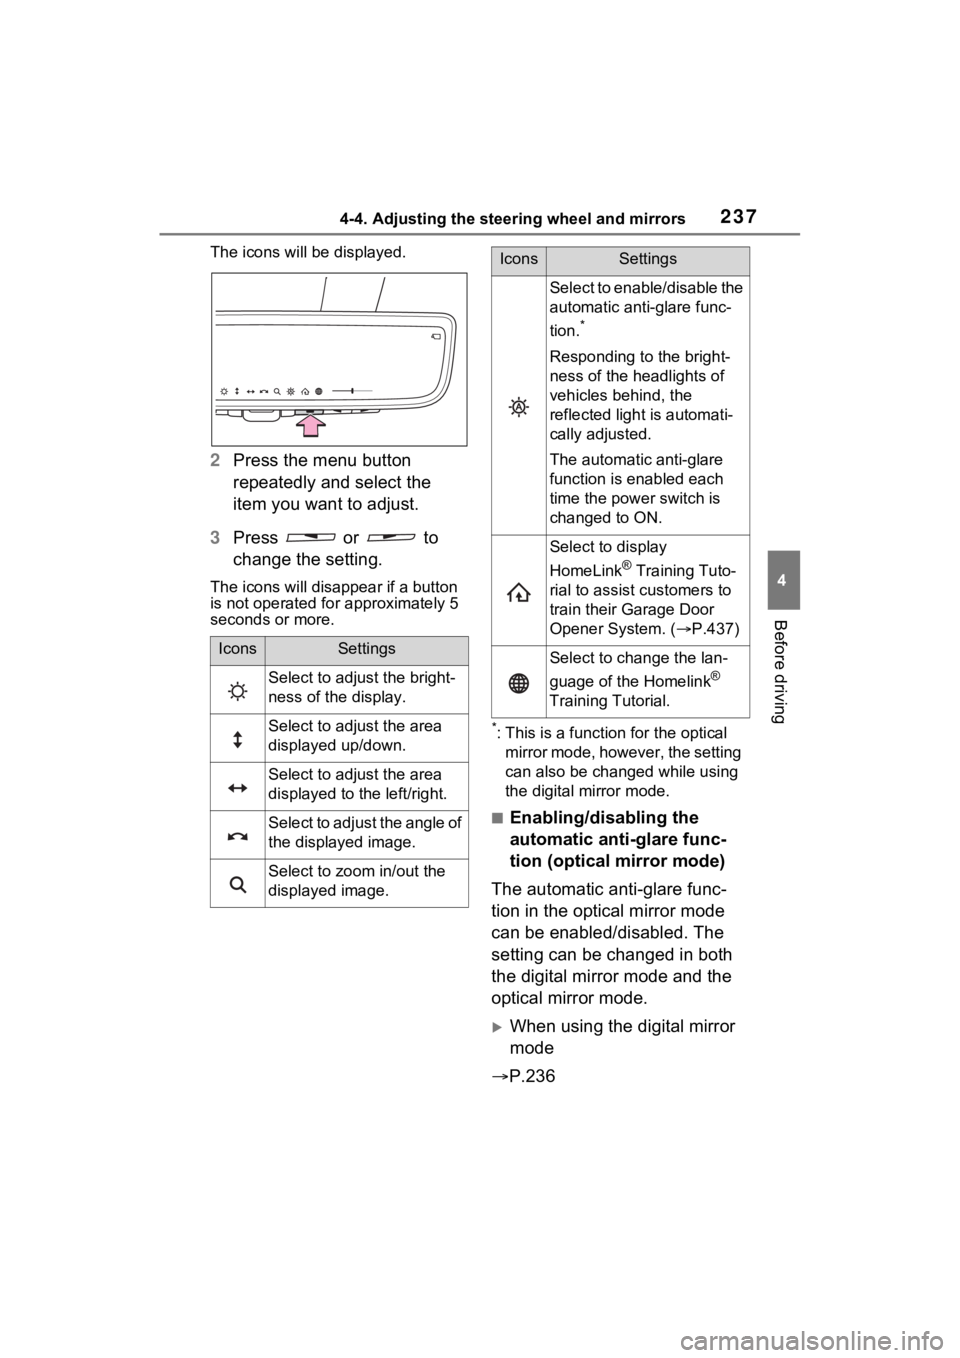
The icons will be displayed.
2Press the menu button
repeatedly and select the
item you want to adjust.
3 Press or to
change the setting.
The icons will disapp ear if a button
is not operated fo r approximately 5
seconds or more.
*: This is a functi on for the optical
mirror mode, however, the setting
can also be changed while using
the digital mirror mode.
■Enabling/disabling the
automatic anti-glare func-
tion (optical mirror mode)
The automatic anti-glare func-
tion in the optical mirror mode
can be enabled/disabled. The
setting can be changed in both
the digital mirror mode and the
optical mirror mode.
When using the digital mirror
mode
P.236
IconsSettings
Select to adjust the bright-
ness of the display.
Select to adjust the area
displayed up/down.
Select to adjust the area
displayed to the left/right.
Select to adjust the angle of
the displayed image.
Select to zoom in/out the
displayed image.
Select to enable/disable the
automatic anti-glare func-
tion.
*
Responding to the bright-
ness of the headlights of
vehicles behind, the
reflected light is automati-
cally adjusted.
The automatic anti-glare
function is enabled each
time the power switch is
changed to ON.
Select to display
HomeLink
® Training Tuto-
rial to assist customers to
train their Garage Door
Opener System. ( P.437)
Select to change the lan-
guage of the Homelink
®
Training Tutorial.
IconsSettings
Page 241 of 618
2414-4. Adjusting the steering wheel and mirrors
4
Before driving
SymptomLikely causeSolution
The image is
difficult to see.
The mirror surface is dirty.
Clean the mirror surface
gently, using a soft dry
cloth.
Sunlight or headlights are shin-
ing directly into the Digital Rear-
view Mirror.
Change to optical mirror
mode.
(If the light is coming
through the moon roof [if
equipped] or panoramic
moon roof [if equipped],
close the sunshade or
electronic sunshade.)
• The vehicle is in a dark area.
• The vehicle is near a TV tower, broadcasting station,
electric power plant, or other
location where strong radio
waves or electrical noise may
be present.
• The temperature around the camera is extremely high/low.
• The ambient te mperature is
extremely low.
• It is raining or humid.
• Sunlight or headlights are shining directly into the cam-
era lens.
• The vehicle is under fluores- cent lights, sodium lights,
mercury lights, etc.
• Exhaust gas is obstructing the camera.
Change to optical mirror
mode.
(Change back to digital
mirror mode when the
conditions have
improved.)
Foreign matters such as water
droplets or dust is on the cam-
era lens.Wipe the camera lens
with a damp soft cloth.
Page 295 of 618
2955-3. Operating the lights and wipers
5
Driving
5-3.Operating the lights and wipers
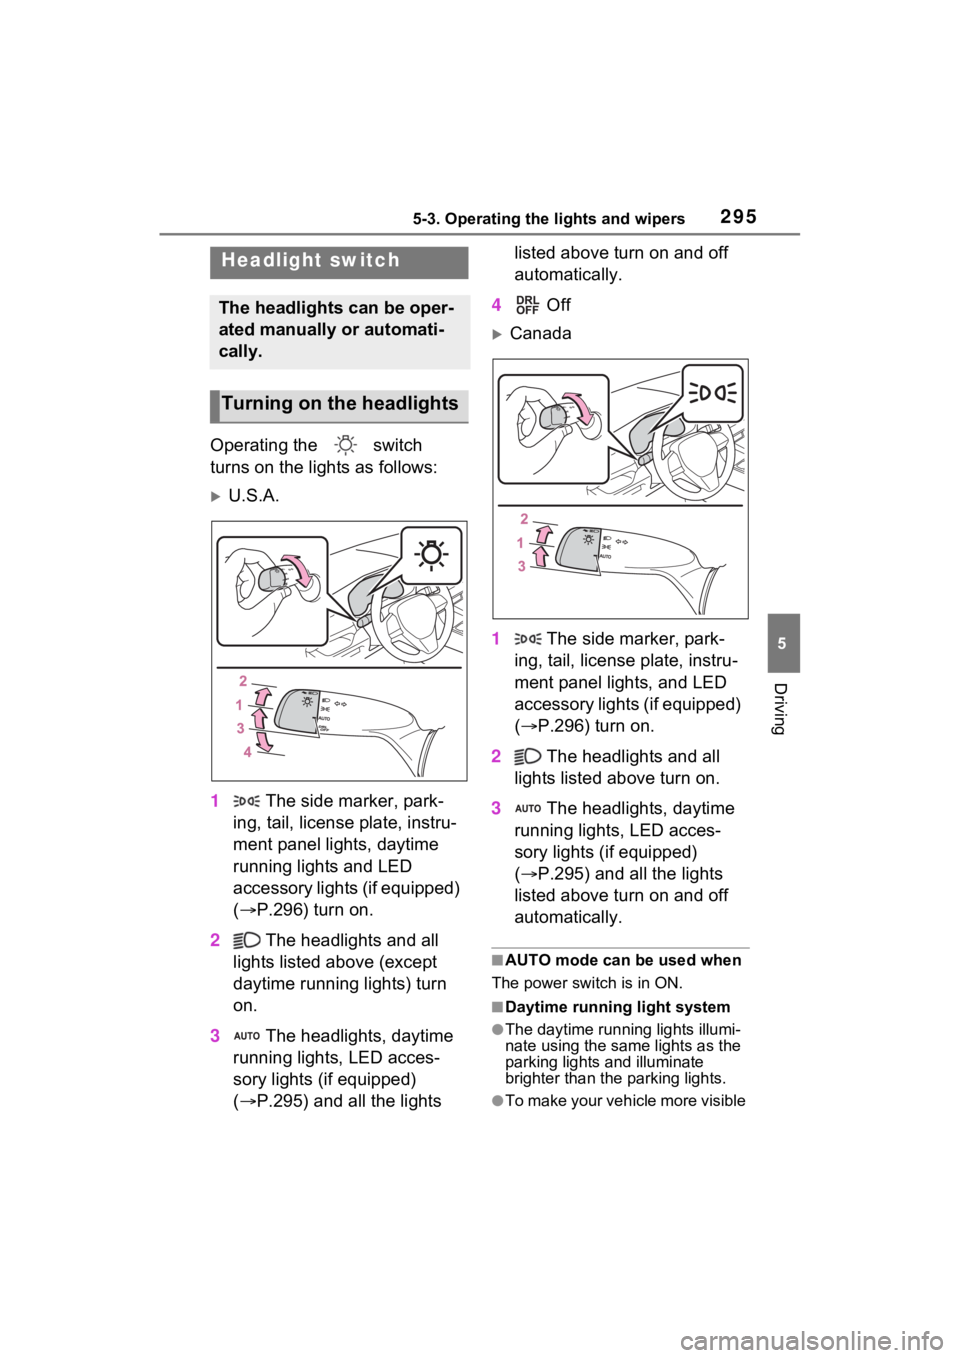
Operating the switch
turns on the lights as follows:
U.S.A.
1 The side marker, park-
ing, tail, license plate, instru-
ment panel lights, daytime
running lights and LED
accessory lights (if equipped)
( P.296) turn on.
2 The headlights and all
lights listed above (except
daytime running lights) turn
on.
3 The headlights, daytime
running lights, LED acces-
sory lights (if equipped)
( P.295) and all the lights listed above turn on and off
automatically.
4 Off
Canada
1 The side marker, park-
ing, tail, license plate, instru-
ment panel lights, and LED
accessory lights (if equipped)
( P.296) turn on.
2 The headlights and all
lights listed above turn on.
3 The headlights, daytime
running lights, LED acces-
sory lights (if equipped)
( P.295) and all the lights
listed above turn on and off
automatically.
■AUTO mode can be used when
The power switch is in ON.
■Daytime running light system
●The daytime runn ing lights illumi-
nate using the same lights as the
parking lights and illuminate
brighter than the parking lights.
●To make your vehicle more visible
Headlight switch
The headlights can be oper-
ated manually or automati-
cally.
Turning on the headlights
Page 296 of 618
2965-3. Operating the lights and wipers
to other drivers during daytime
driving, the daytime running lights
turn on automatically when all of
the following conditions are met.
(The daytime running lights are
not designed for use at night.)
• The hybrid system is operating
• The parking brake is released
• For the U.S.A.: The headlight
switch is in the or position
• For Canada: The headlight switch
is in the position
• The surroundings are bright
The daytime running lights remain
on after they illumi nate, even if the
parking brake is set again.
●For the U.S.A.: Daytime running
lights can be turned off by operat-
ing the switch.
●Compared to turning on the head-
lights, the daytime running light
system offers gre ater durability
and consumes less electricity, so
it can help improve fuel economy.
■LED accessory lights (if
equipped)
To make your vehicle more visible
to other drivers during daytime driv-
ing, the LED accessory lights turn
on automatically when the parking
brake is released while the hybrid
system is operating.
When the parking lights are turned
on, the LED accessory lights dim.
■Headlight control sensor (if
equipped)
The sensor may not function prop-
erly if an object is placed on the sen-
sor, or anything that blocks the
sensor is affixed to the windshield.
Doing so interfere s with the sensor
detecting the level of ambient light
and may cause the automatic head-
light system to malfunction.
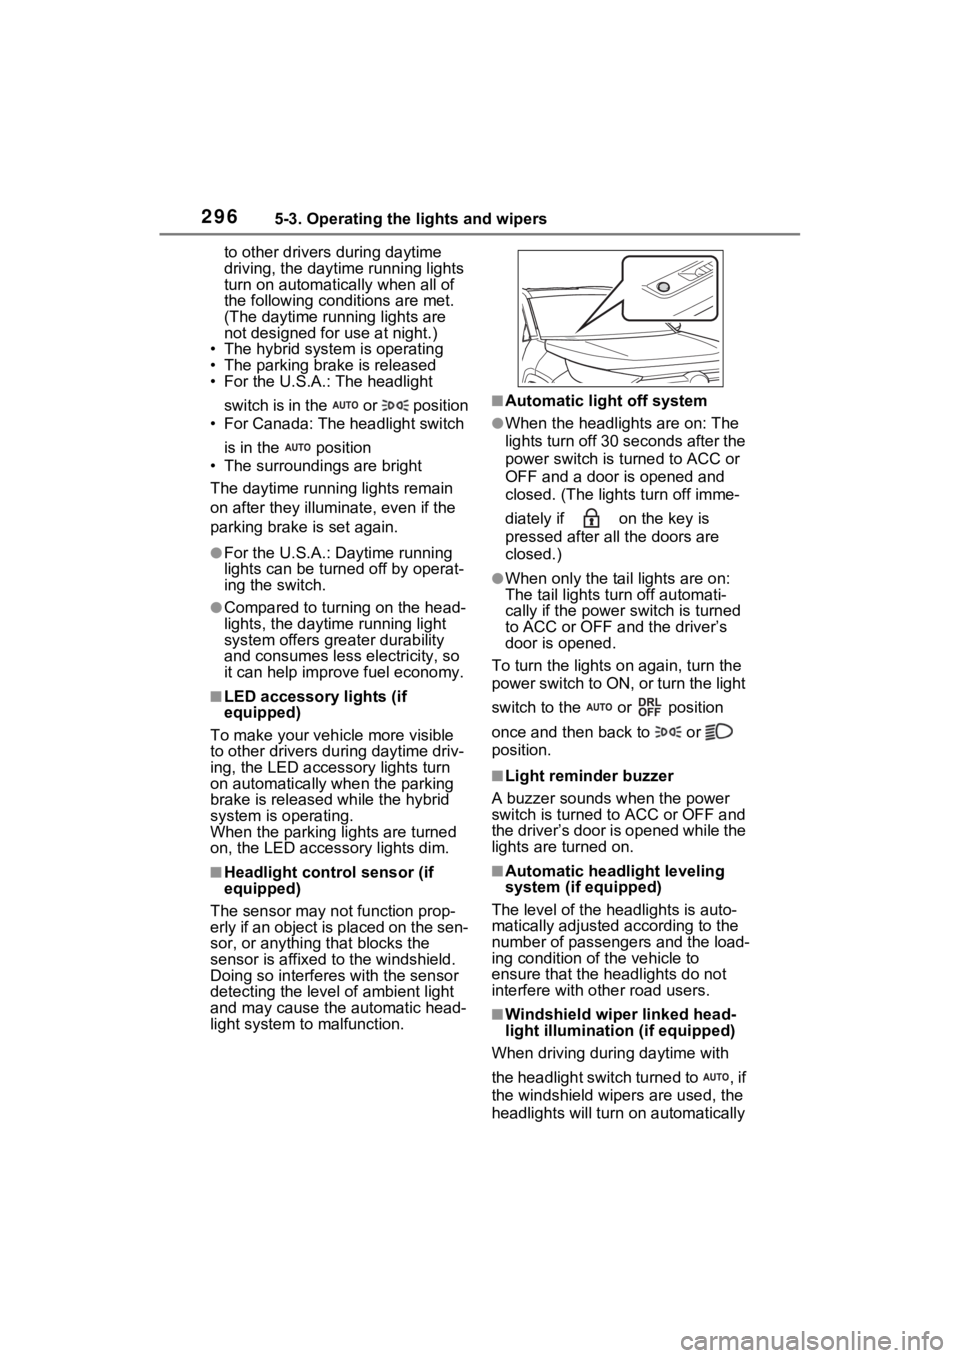
■Automatic light off system
●When the headlights are on: The
lights turn off 30 s econds after the
power switch is turned to ACC or
OFF and a door is opened and
closed. (The lights turn off imme-
diately if on the key is
pressed after all the doors are
closed.)
●When only the tail lights are on:
The tail lights turn off automati-
cally if the power switch is turned
to ACC or OFF and the driver’s
door is opened.
To turn the lights on again, turn the
power switch to ON, or turn the light
switch to the or position
once and then back to or
position.
■Light reminder buzzer
A buzzer sounds when the power
switch is turned to ACC or OFF and
the driver’s door is opened while the
lights are turned on.
■Automatic headlight leveling
system (if equipped)
The level of the headlights is auto-
matically adjusted according to the
number of passengers and the load-
ing condition of the vehicle to
ensure that the headlights do not
interfere with o ther road users.
■Windshield wiper linked head-
light illumination (if equipped)
When driving during daytime with
the headlight switch turned to , if
the windshield wipers are used, the
headlights will turn o n automatically