TOYOTA RAV4 PRIME 2022 Owners Manual
Manufacturer: TOYOTA, Model Year: 2022, Model line: RAV4 PRIME, Model: TOYOTA RAV4 PRIME 2022Pages: 624, PDF Size: 24.01 MB
Page 131 of 624
1312-2. Charging
2
Plug-in hybrid system
■Air conditioning-linked set-
ting (“Climate Prep”)
When the charging mode is set
to “Departure”, the vehicle air
conditioning system ( P.390)
can be set to automatically oper-
ate
* according to the set time.
By adjusting the cabin temperature
in advance, passengers can enjoy
a pleasant interior immediately after
entering the vehicle.
*: Operation starts approximately 20 minutes before the set depar-
ture time.
■Turning “Charge Now” on
and off
If even one charging schedule is
registered, charging does not
start until the set time, even if
the AC charging cable is con-
nected to the vehicle. To start
charging without changing the
charging schedule setting, turn
“Charge Now” on to temporarily
cancel the charging schedule
and enable charging after con-
necting the AC charging cable.
*
*: If the charging connector is removed during charging while
the charging schedule is regis-
tered and “Charge Now” is on,
“Charge Now” turns off.
■Changing “Next Event”*1
It is possible to temporarily set
the time of the next charging
schedule without changing the
registered repeated setting.
*2
*1: The “Next Event” refers to the closest charging schedule from
the current time among the regis-
tered charging schedules.
Charging schedule is performed
based on the “Next Event”.
*2: When “Next Event” is changed,
the current charging schedule
will be temporarily ignored and
charging will not be carried out
until the time specified by “Next
Event”. (For example, when
“Next Event” is set for 2 days
later, even if items are registered
on the charging schedule,
charging will not be carried out
until the time specified by “Next
Event”.)
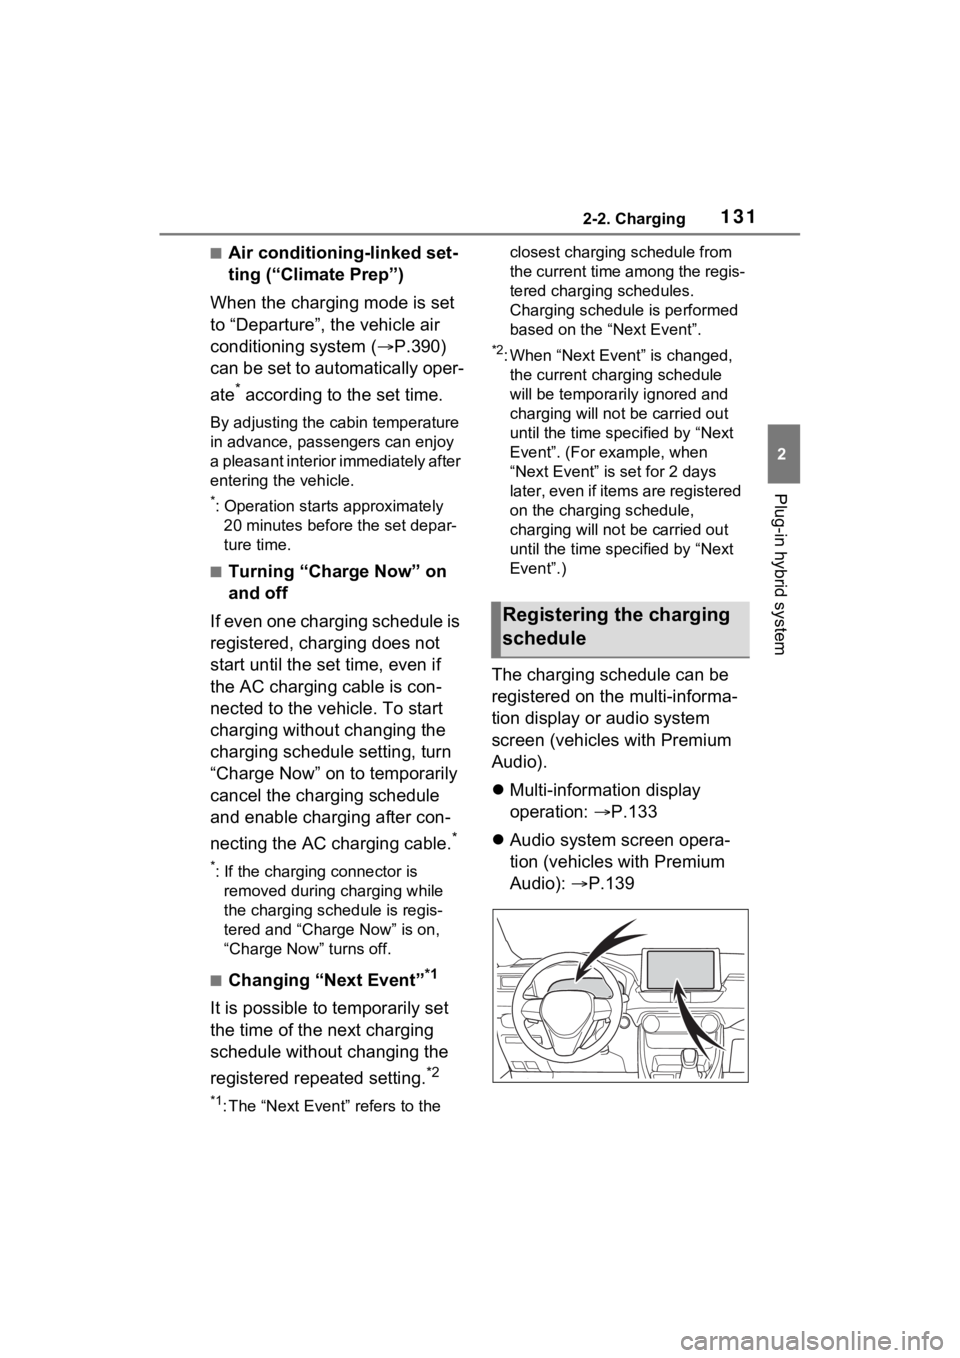
The charging schedule can be
registered on the multi-informa-
tion display or audio system
screen (vehicles with Premium
Audio).
Multi-information display
operation: P.133
Audio system screen opera-
tion (vehicles with Premium
Audio): P.139
Registering the charging
schedule
Page 132 of 624
1322-2. Charging
■Charging schedule
●The charging schedule cannot be
set while driving.
●A maximum of 15 charging sched-
ules can be registered.
■To make sure that the charging
schedule function operates cor-
rectly
Check the following items.
●A d j u s t t h e c l o c k t o t h e c o r r e c t t i m e
( P.169)
●The calendar is set to the correct
date ( P.177)
●Check that the power switch is
turned off
●After registering the charging
schedule, connect the AC
charging cable
The charging sta rt time is deter-
mined based on the charging
schedule at the time that the AC
charging cable was connected.
●After connecting the AC charging
cable, check that the charging
indicator of the charging port
flashes ( P.100)
●Do not use an ou tlet that has a
power cut off function (including a
timer function)
Use an outlet that constantly sup-
plies electricity. For outlets where
the power is cut off due to a timer
function, etc., charging may not be
carried out according to plan if the
power is cut off during the set
time.
■When the AC charging cable
remains connected to the vehi-
cle
Even if multiple consecutive
charging schedules are registered,
the next charge will not be carried
out according to the charging
schedule until the AC charging
cable is removed and reconnected
after charging completes. Also,
when the hybrid battery (traction
battery) is fully charged, charging according to the charging schedule
will not be carried out.
■“Climate Prep”
●When the air conditioning-linked
setting is turned on, the air condi-
tioning operates
until the set
departure time. Therefore, the air
conditioning will co nsume electric-
ity and charging may not complete
by the set departure time.
●If the hybrid batte ry (traction bat-
tery) is fully charged, charging will
not be carried o ut, even if the
charging schedule is set. How-
ever, if “Climate Prep” is turned
on, the air conditioning will oper-
ate only once when it nears the
time set in “Departure”. If this
occurs, the air conditioning will
consume electricity and the
remaining charge of the hybrid
battery (traction battery) when
departing may be decreased.
●When the doors are unlocked, the
air conditioning system does not
operate.
■Smartphone-linked operation
(vehicles with Premium Audio)
After applying to Toyota Apps, it is
possible to use the smartphone
application to change charging
schedule settings.
For details about Toyota Apps, refer
to
http://www.toyota.com/connectedse
rvices in the United States and
http://www.toyota.ca/connected
in
Canada.
■When charging schedules are
ignored
When the following operations are
performed while the charging
schedule is on standby, charging
schedule is temporarily canceled
and charging is started.
●When the Remote Air Condition-
ing System ( P.399) is operated
●When turning “My Room Mode”
on ( P.144)
Page 133 of 624
1332-2. Charging
2
Plug-in hybrid system
●When turning “Charge Now” on
( P.137, 142)
●When an operation that temporar-
ily cancels charg ing using the
charging schedule is performed
( P.125)
■Effects of outside temperature
When the charging mode is set to
“Departure”, charging schedule may
be ignored due to the outside tem-
perature and charging may start.
■“Battery Heater” ( P.115) /
“Battery Cooler” ( P.116)
When charging is c arried out using
the charging schedule, the hybrid
battery (traction battery) heating or
cooling function may operate
according to the te mperature of the
hybrid battery (traction battery).
●When the charging mode is set to
“Start”, the function starts at the
set charging start time.
●“Battery Heater”: When the
charging mode is set to “Depar-
ture”, the function starts automati-
cally to complete heating by the
desired departure time.
●“Battery Cooler”: When the
charging mode is set to “Depar-
ture”, cooling starts approximately
30 minutes before the charging
start time. However, if there is no
time to finish charging by the
charging schedule, the hybrid bat-
tery (traction battery) cooling time
may be shortened and “Battery
Cooler” may not operate.
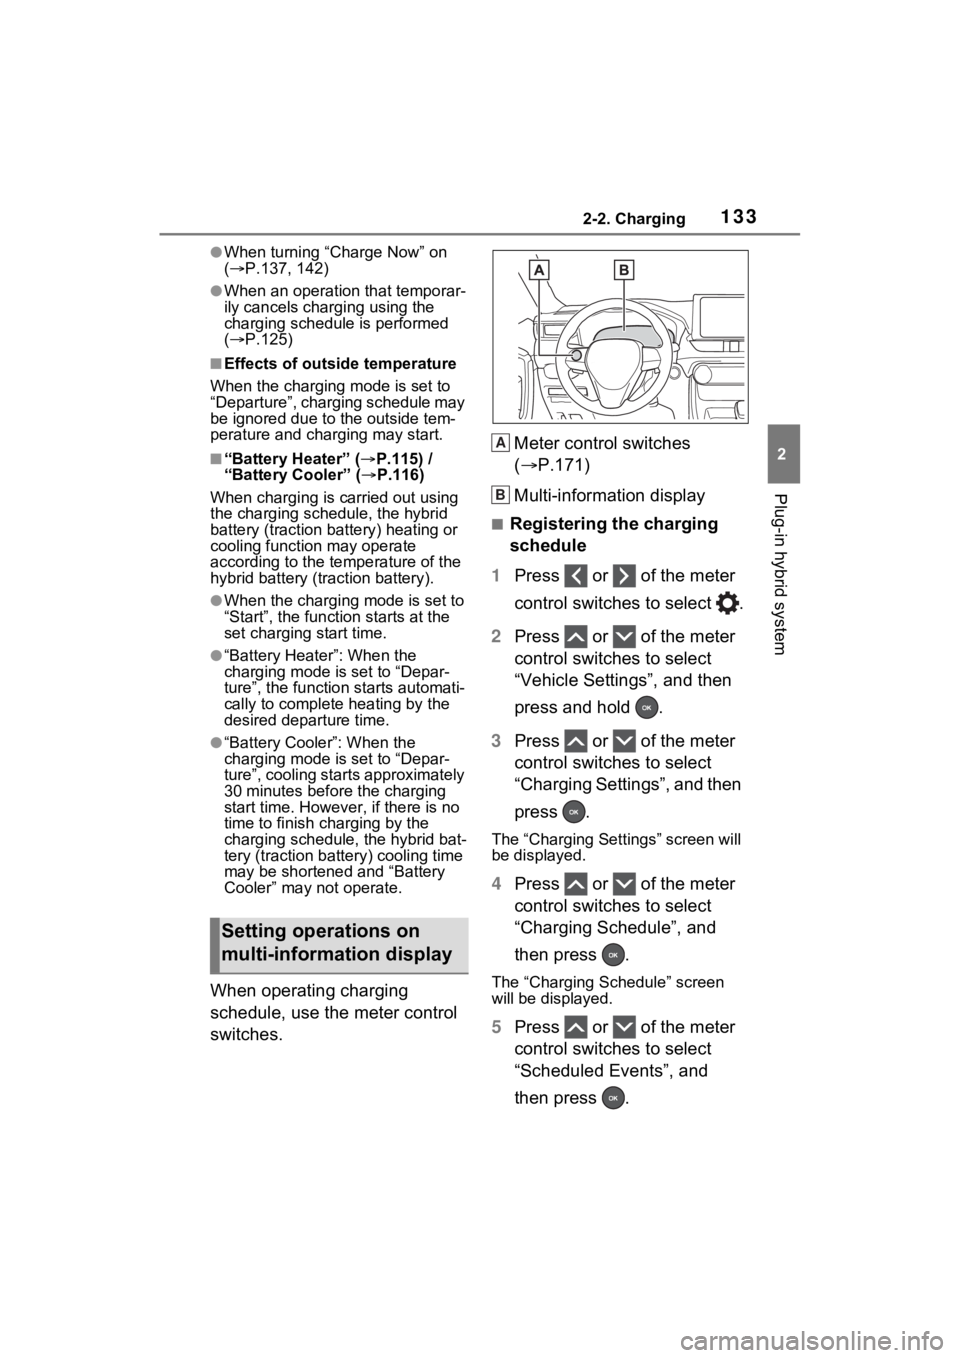
When operating charging
schedule, use the meter control
switches. Meter control switches
(
P.171)
Multi-information display
■Registering the charging
schedule
1 Press or of the meter
control switches to select .
2 Press or of the meter
control switches to select
“Vehicle Settings”, and then
press and hold .
3 Press or of the meter
control switches to select
“Charging Settings”, and then
press .
The “Charging Settings” screen will
be displayed.
4Press or of the meter
control switches to select
“Charging Schedule”, and
then press .
The “Charging Schedule” screen
will be displayed.
5Press or of the meter
control switches to select
“Scheduled Events”, and
then press .
Setting operations on
multi-information display
A
B
Page 134 of 624
1342-2. Charging
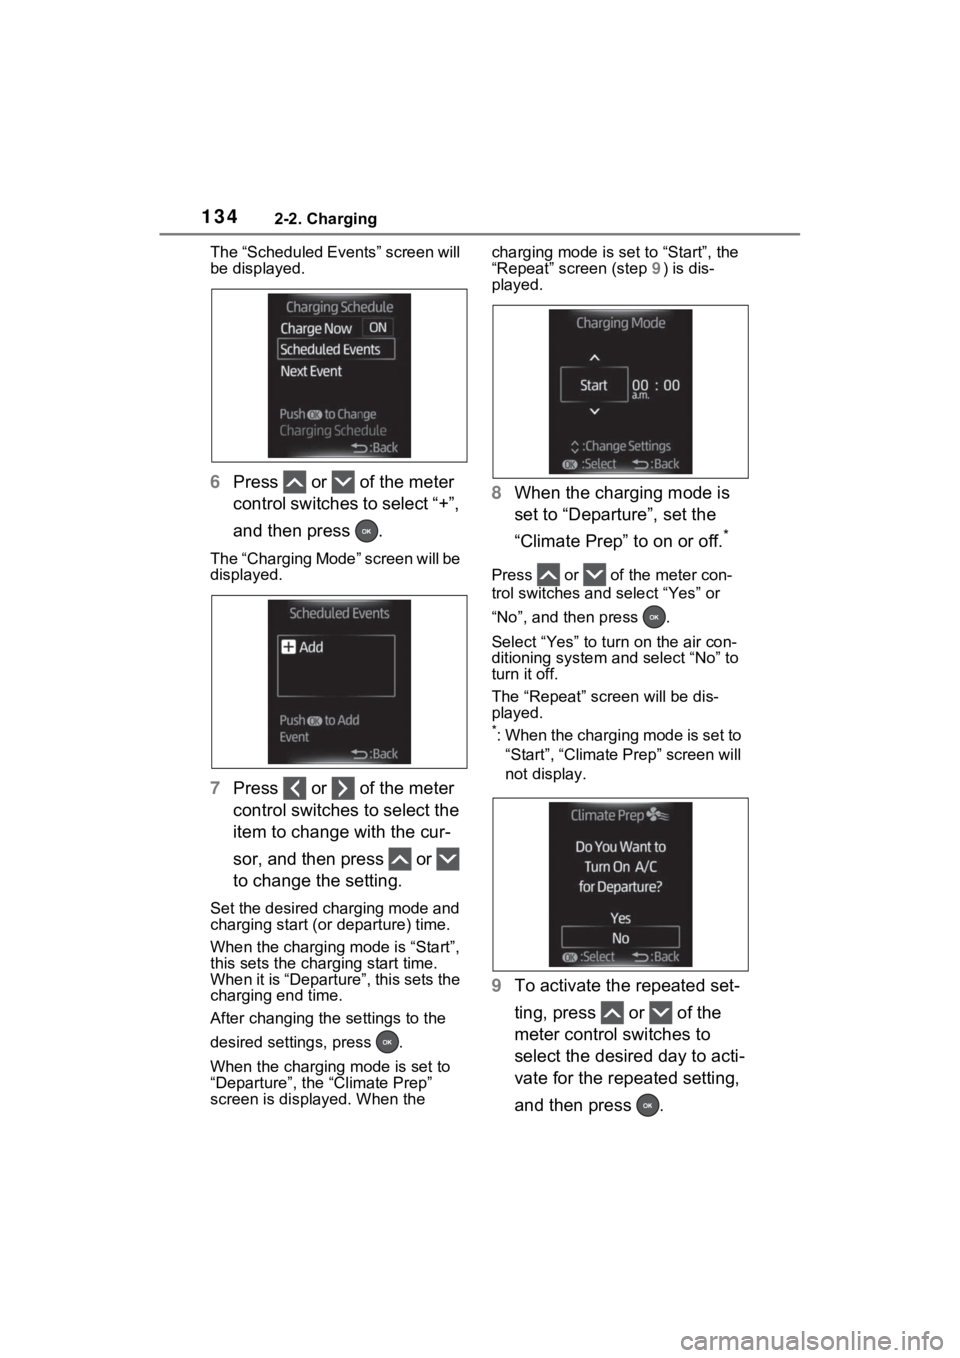
The “Scheduled Events” screen will
be displayed.
6Press or of the meter
control switches to select “+”,
and then press .
The “Charging Mode” screen will be
displayed.
7Press or of the meter
control switches to select the
item to change with the cur-
sor, and then press or
to change the setting.
Set the desired charging mode and
charging start (or departure) time.
When the charging mode is “Start”,
this sets the charging start time.
When it is “Departure”, this sets the
charging end time.
After changing the settings to the
desired settings, press .
When the charging mode is set to
“Departure”, the “Climate Prep”
screen is displayed. When the charging mode is set to “Start”, the
“Repeat” screen (step
9) is dis-
played.
8 When the charging mode is
set to “Departure”, set the
“Climate Prep” to on or off.
*
Press or of the meter con-
trol switches and select “Yes” or
“No”, and then press .
Select “Yes” to tu rn on the air con-
ditioning system and select “No” to
turn it off.
The “Repeat” scr een will be dis-
played.
*: When the charging mode is set to
“Start”, “Climate Prep” screen will
not display.
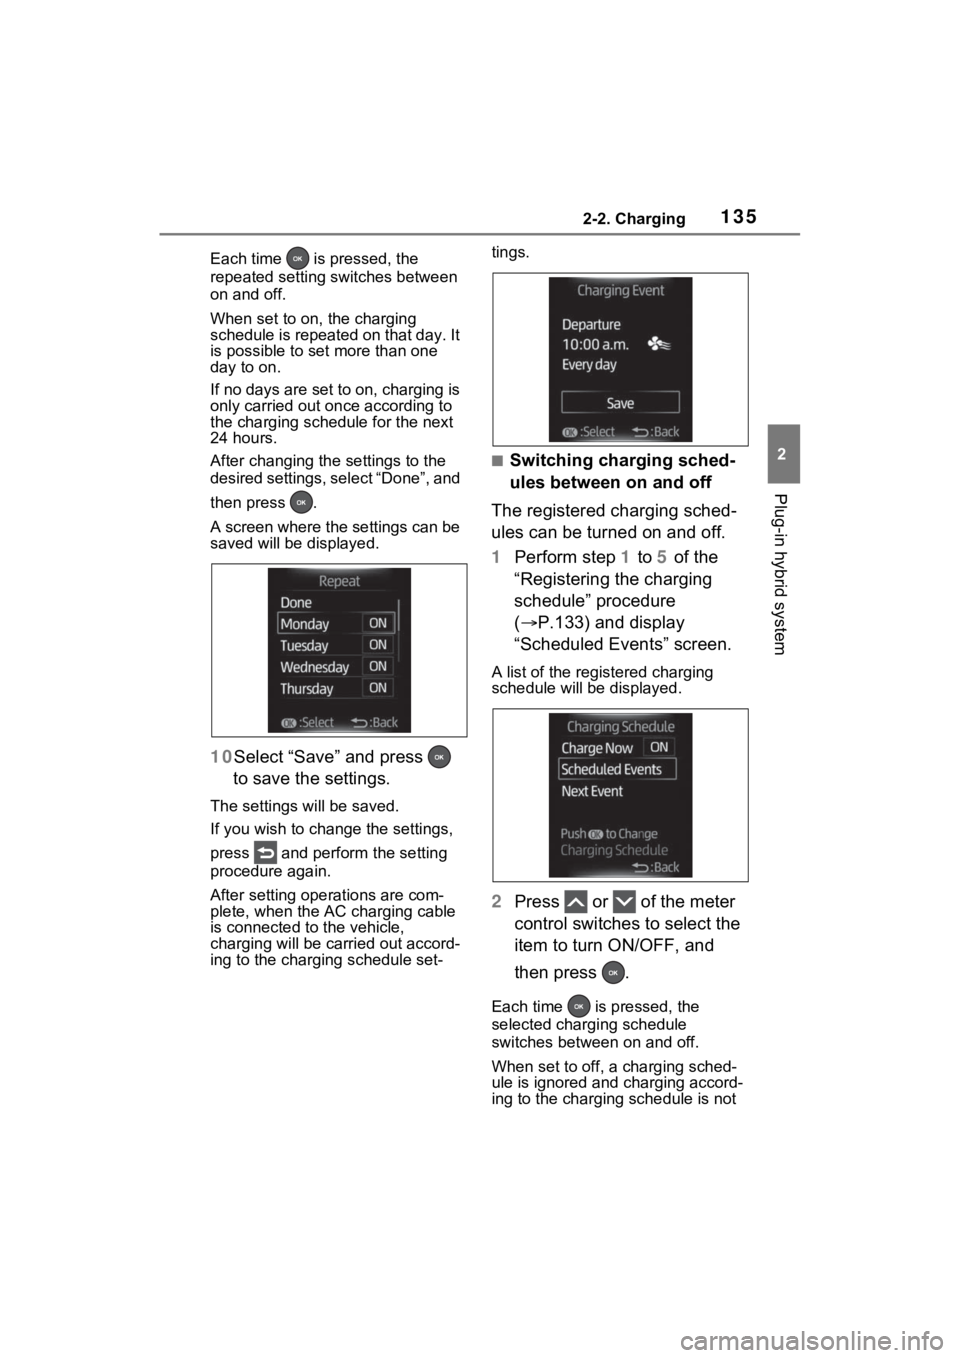
9 To activate the repeated set-
ting, press or of the
meter control switches to
select the desired day to acti-
vate for the repeated setting,
and then press .
Page 135 of 624
1352-2. Charging
2
Plug-in hybrid system
Each time is pressed, the
repeated setting switches between
on and off.
When set to on, the charging
schedule is repeated on that day. It
is possible to set more than one
day to on.
If no days are set to on, charging is
only carried out once according to
the charging sche dule for the next
24 hours.
After changing the settings to the
desired settings, select “Done”, and
then press .
A screen where the settings can be
saved will be displayed.
10 Select “Save” and press
to save the settings.
The settings will be saved.
If you wish to change the settings,
press and perform the setting
procedure again.
After setting operations are com-
plete, when the AC charging cable
is connected to the vehicle,
charging will be car ried out accord-
ing to the charging schedule set- tings.
■Switching charging sched-
ules between on and off
The registered charging sched-
ules can be turned on and off.
1 Perform step 1 to 5 of the
“Registering the charging
schedule” procedure
( P.133) and display
“Scheduled Events” screen.
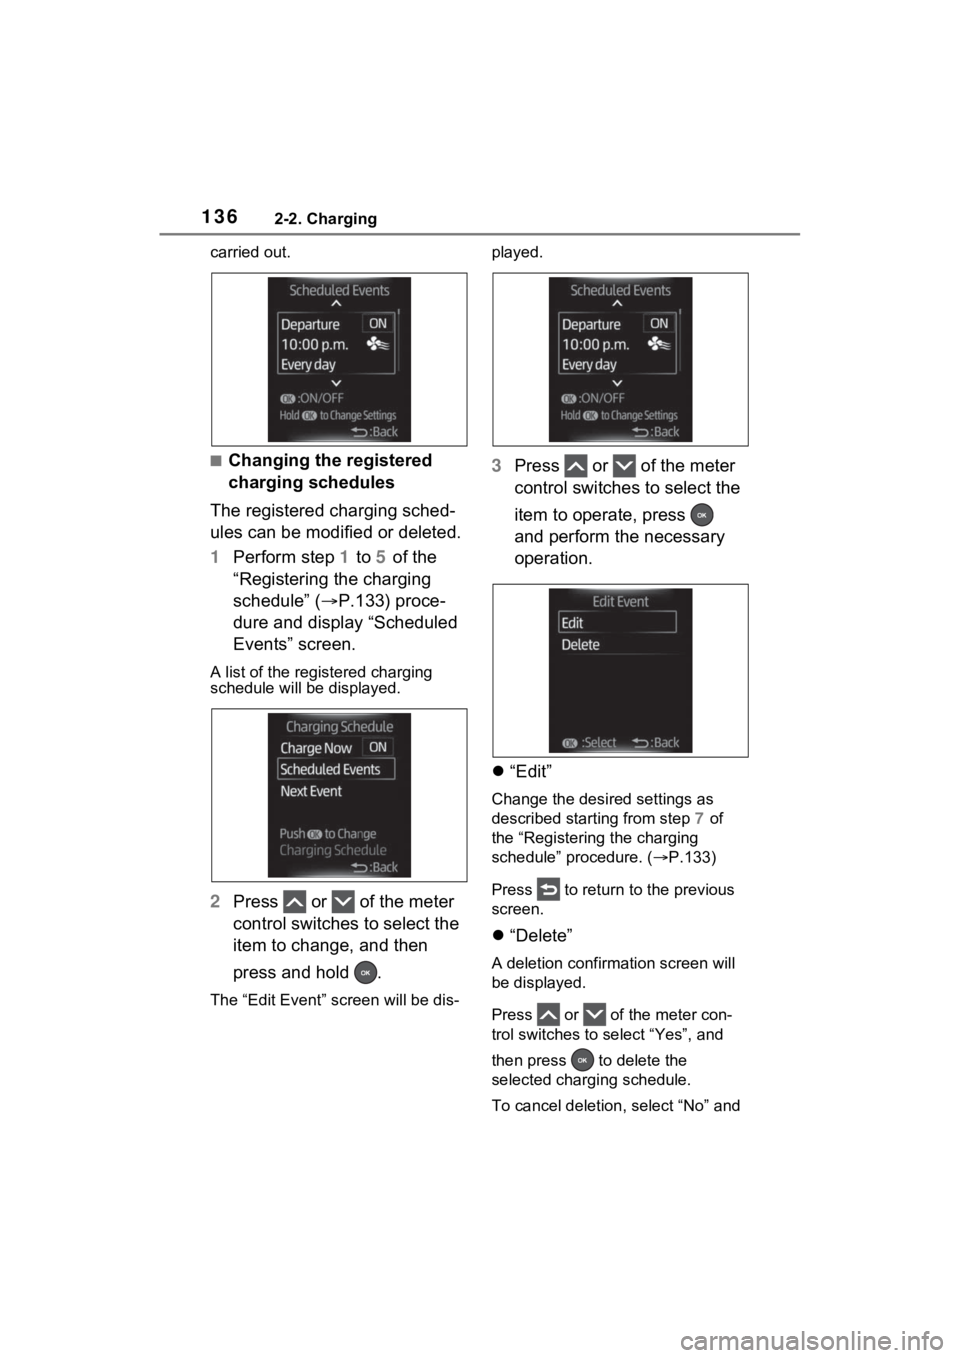
A list of the registered charging
schedule will be displayed.
2 Press or of the meter
control switches to select the
item to turn ON/OFF, and
then press .
Each time is pressed, the
selected charging schedule
switches between on and off.
When set to off, a charging sched-
ule is ignored and charging accord-
ing to the charging schedule is not
Page 136 of 624
1362-2. Charging
carried out.
■Changing the registered
charging schedules
The registered charging sched-
ules can be modified or deleted.
1 Perform step 1 to 5 of the
“Registering the charging
schedule” ( P.133) proce-
dure and display “Scheduled
Events” screen.
A list of the regi stered charging
schedule will be displayed.
2Press or of the meter
control switches to select the
item to change, and then
press and hold .
The “Edit Event” s creen will be dis- played.
3
Press or of the meter
control switches to select the
item to operate, press
and perform the necessary
operation.
“Edit”
Change the desired settings as
described starting from step 7 of
the “Registering the charging
schedule” procedure. ( P.133)
Press to return to the previous
screen.
“Delete”
A deletion confir mation screen will
be displayed.
Press or of the meter con-
trol switches to select “Yes”, and
then press to delete the
selected charging schedule.
To cancel deletion , select “No” and
Page 137 of 624
1372-2. Charging
2
Plug-in hybrid system
then press .
Press to return to the previous
screen.
■Setting “Charge Now” to on
The “Charge Now” setting can
be changed by performing one
of the two following procedures.
Operation on “Charging
Schedule” screen
1 Perform step 1 to 4 of the
“Registering the charging
schedule” procedure
( P.133) and display
“Charging Schedule” screen.
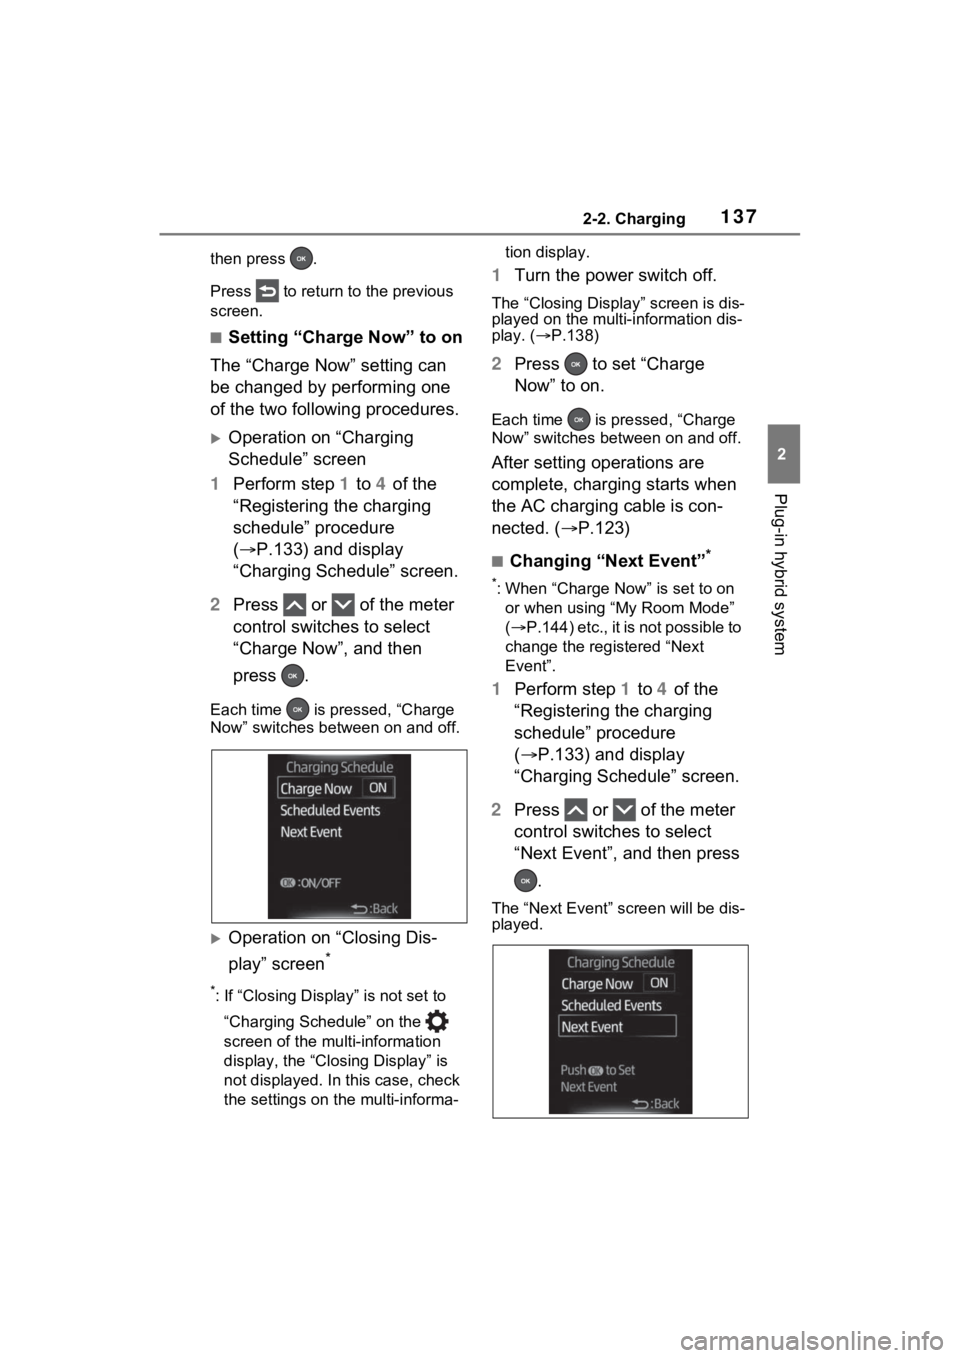
2 Press or of the meter
control switches to select
“Charge Now”, and then
press .
Each time is pressed, “Charge
Now” switches bet ween on and off.
Operation on “Closing Dis-
play” screen
*
*: If “Closing Display” is not set to
“Charging Schedule” on the
screen of the mu lti-information
display, the “Closing Display” is
not displayed. In this case, check
the settings on the multi-informa- tion display.
1
Turn the power switch off.
The “Closing Display” screen is dis-
played on the multi-information dis-
play. ( P.138)
2 Press to set “Charge
Now” to on.
Each time is pre ssed, “Charge
Now” switches betw een on and off.
After setting operations are
complete, charging starts when
the AC charging cable is con-
nected. (P.123)
■Changing “Next Event”*
*: When “Charge Now” is set to on
or when using “My Room Mode”
( P .1 44 ) e tc. , it is n ot p os sib le to
change the registered “Next
Event”.
1 Perform step 1 to 4 of the
“Registering the charging
schedule” procedure
( P.133) and display
“Charging Schedule” screen.
2 Press or of the meter
control switches to select
“Next Event”, and then press
.
The “Next Event” screen will be dis-
played.
Page 138 of 624
1382-2. Charging
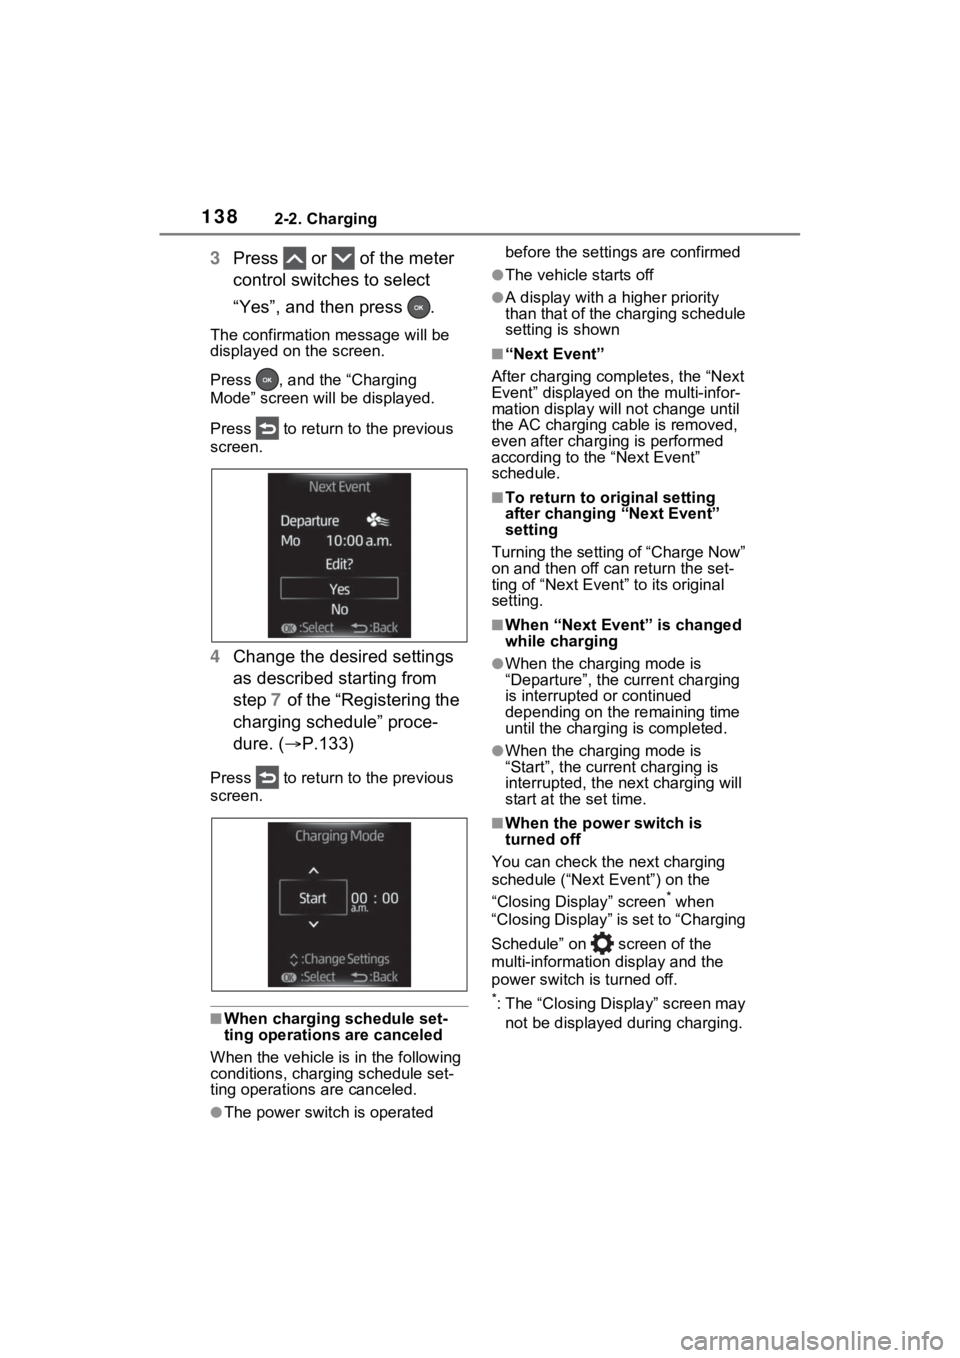
3Press or of the meter
control switches to select
“Yes”, and then press .
The confirmation message will be
displayed on the screen.
Press , and the “Charging
Mode” screen will be displayed.
Press to return to the previous
screen.
4 Change the desired settings
as described starting from
step 7 of the “Registering the
charging schedule” proce-
dure. ( P.133)
Press to return to the previous
screen.
■When charging schedule set-
ting operations are canceled
When the vehicle is in the following
conditions, charging schedule set-
ting operations are canceled.
●The power switch is operated before the settings are confirmed
●The vehicle starts off
●A display with a higher priority
than that of the charging schedule
setting is shown
■“Next Event”
After charging completes, the “Next
Event” displayed on the multi-infor-
mation display will not change until
the AC charging cable is removed,
even after charging is performed
according to the “Next Event”
schedule.
■To return to original setting
after changing “Next Event”
setting
Turning the setting of “Charge Now”
on and then off can return the set-
ting of “Next Event” to its original
setting.
■When “Next Event” is changed
while charging
●When the charging mode is
“Departure”, the current charging
is interrupted or continued
depending on the remaining time
until the charging is completed.
●When the charging mode is
“Start”, the current charging is
interrupted, the next charging will
start at the set time.
■When the power switch is
turned off
You can check the next charging
schedule (“Next Event”) on the
“Closing Display” screen
* when
“Closing Display” is set to “Charging
Schedule” on screen of the
multi-information display and the
power switch is turned off.
*: The “Closing Display” screen may
not be displayed during charging.
Page 139 of 624
1392-2. Charging
2
Plug-in hybrid system
For details on how to operate the
audio system screen, refer to
“NAVIGATION AND MULTIMEDIA
SYSTEM OWNER’S MANUAL”.
Setting operations related to the
charging schedule are per-
formed on the “Charging Sched-
ule” screen.
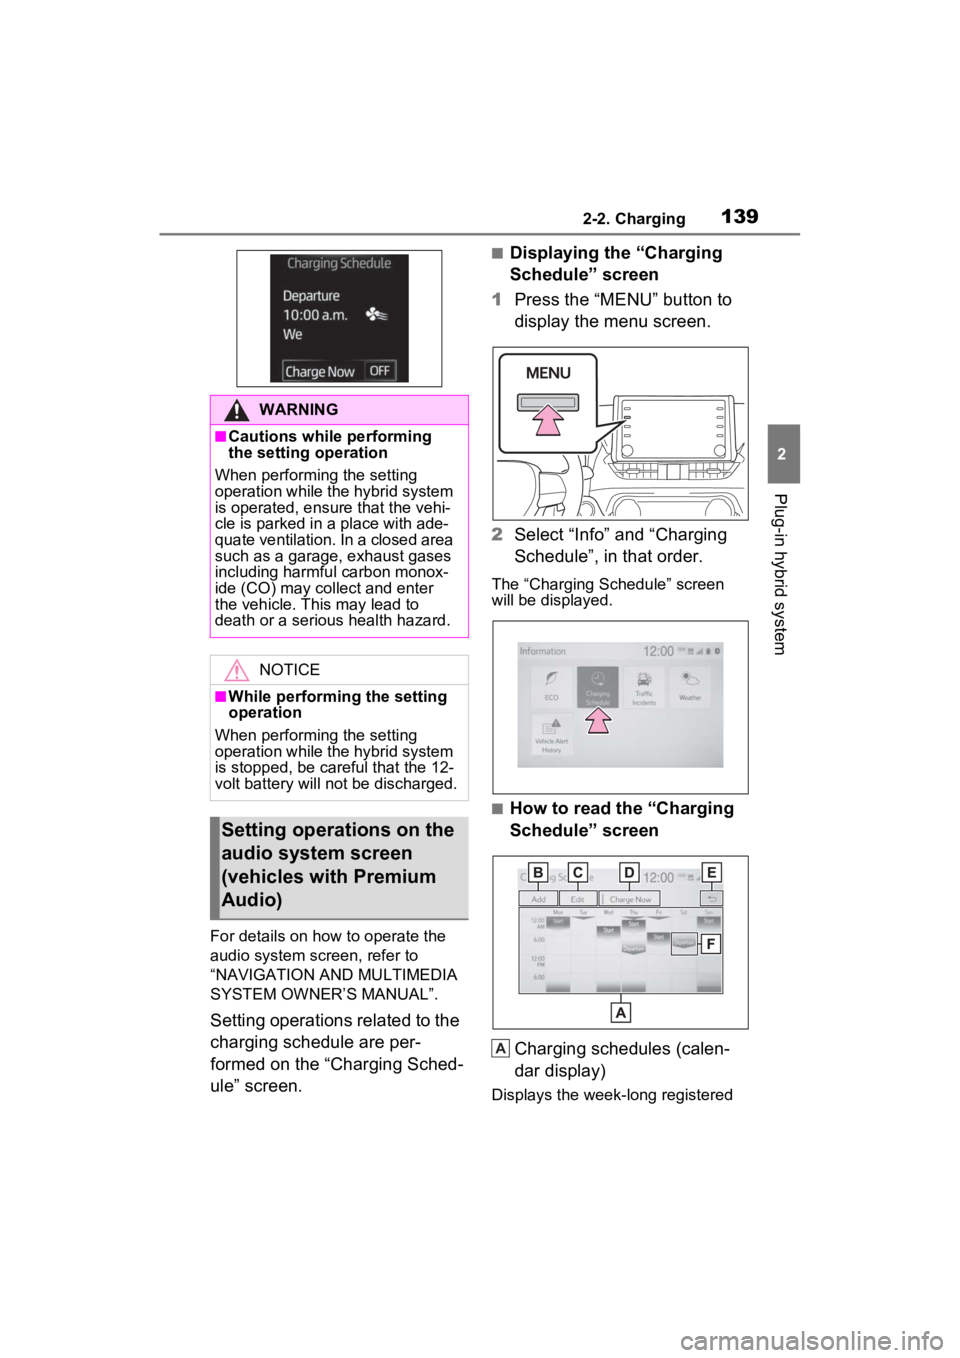
■Displaying the “Charging
Schedule” screen
1 Press the “MENU” button to
display the menu screen.
2 Select “Info” and “Charging
Schedule”, in that order.
The “Charging Schedule” screen
will be displayed.
■How to read the “Charging
Schedule” screen
Charging schedules (calen-
dar display)
Displays the week-long registered
WARNING
■Cautions while performing
the setting operation
When performing the setting
operation while the hybrid system
is operated, ensur e that the vehi-
cle is parked in a place with ade-
quate ventilation. In a closed area
such as a garage, exhaust gases
including harmful carbon monox-
ide (CO) may collect and enter
the vehicle. This may lead to
death or a seri ous health hazard.
NOTICE
■While performing the setting
operation
When performing the setting
operation while the hybrid system
is stopped, be careful that the 12-
volt battery will not be discharged.
Setting operations on the
audio system screen
(vehicles with Premium
Audio)
A
Page 140 of 624
1402-2. Charging
charging schedule in a list using
icons.
“Add” button
Press to add a new item to the
charging schedule. (P.140)
“Edit” button
Press to change or delete regis-
tered items on the charging sched-
ule. ( P.141)
“Charge Now” button
Press to set “Charge Now” to on.
( P.142)
Return button
Press to close the “Charging
Schedule” screen.
Charging schedules (icon
display)
When an item is registered on the
charging schedule, an icon is dis-
played on the calendar.
Main content displayed on the
calendar:
*1: A row with a red line indicates
the current time.
*2: When “Charge Now” ( P.142) is
set to on, the orange icon moves to the position of the red line and
changes to display “Charge
Now”.
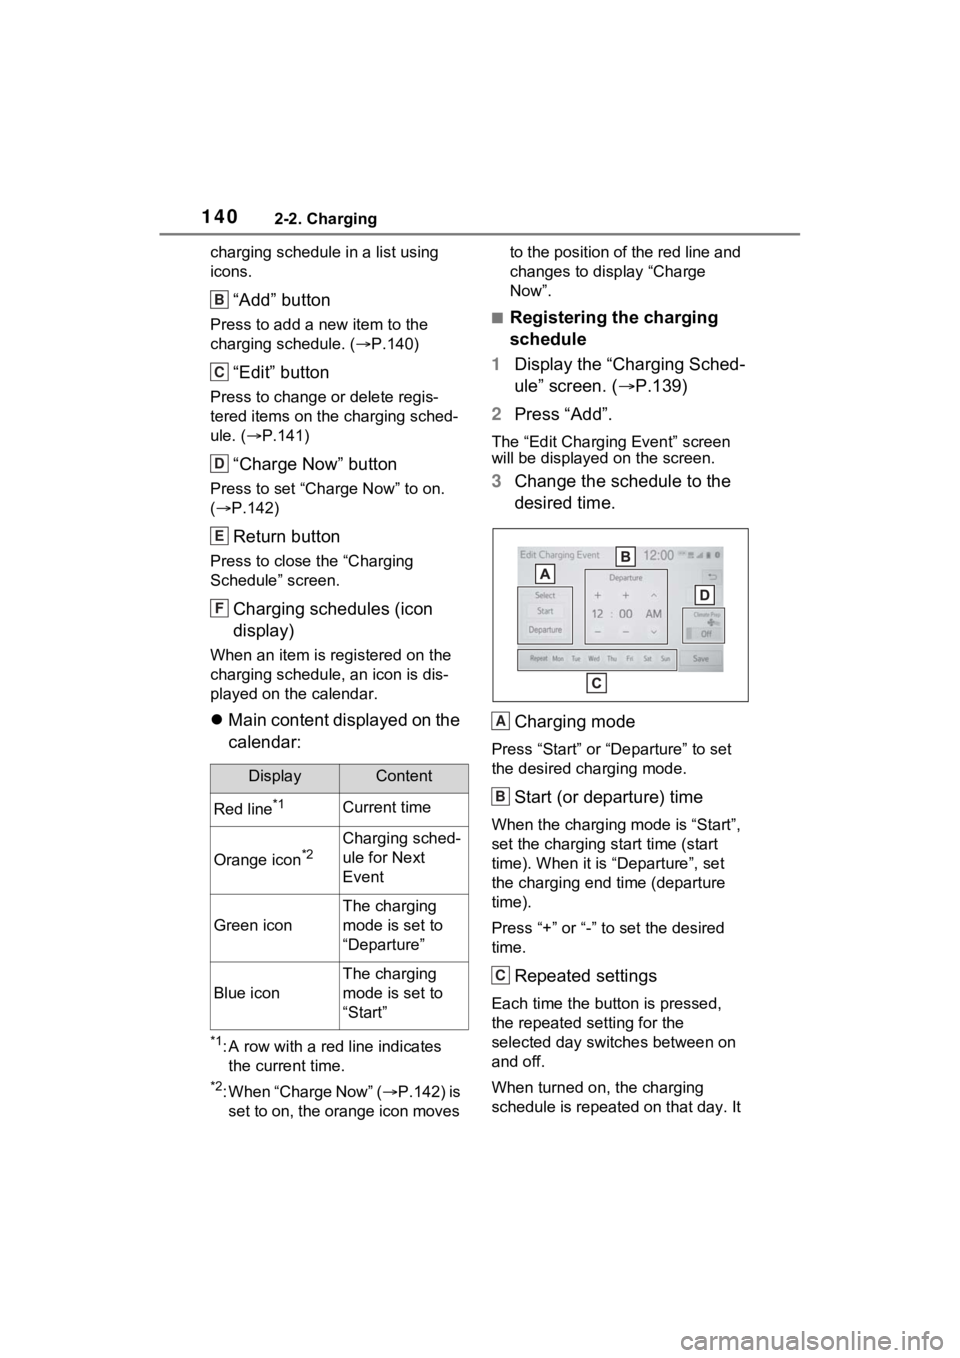
■Registering the charging
schedule
1 Display the “Charging Sched-
ule” screen. ( P.139)
2 Press “Add”.
The “Edit Charging Event” screen
will be displayed on the screen.
3Change the schedule to the
desired time.
Charging mode
Press “Start” or “Departure” to set
the desired charging mode.
Start (or departure) time
When the charging mode is “Start”,
set the charging start time (start
time). When it is “Departure”, set
the charging end time (departure
time).
Press “+” or “-” to set the desired
time.
Repeated settings
Each time the butt on is pressed,
the repeated se tting for the
selected day switches between on
and off.
When turned on, the charging
schedule is repeated on that day. It
DisplayContent
Red line*1Current time
Orange icon*2Charging sched-
ule for Next
Event
Green icon
The charging
mode is set to
“Departure”
Blue icon
The charging
mode is set to
“Start”
B
C
D
E
F
A
B
C