clock setting TOYOTA RAV4 PRIME 2023 Owners Manual
[x] Cancel search | Manufacturer: TOYOTA, Model Year: 2023, Model line: RAV4 PRIME, Model: TOYOTA RAV4 PRIME 2023Pages: 662, PDF Size: 25.4 MB
Page 128 of 662
1282-2. Charging
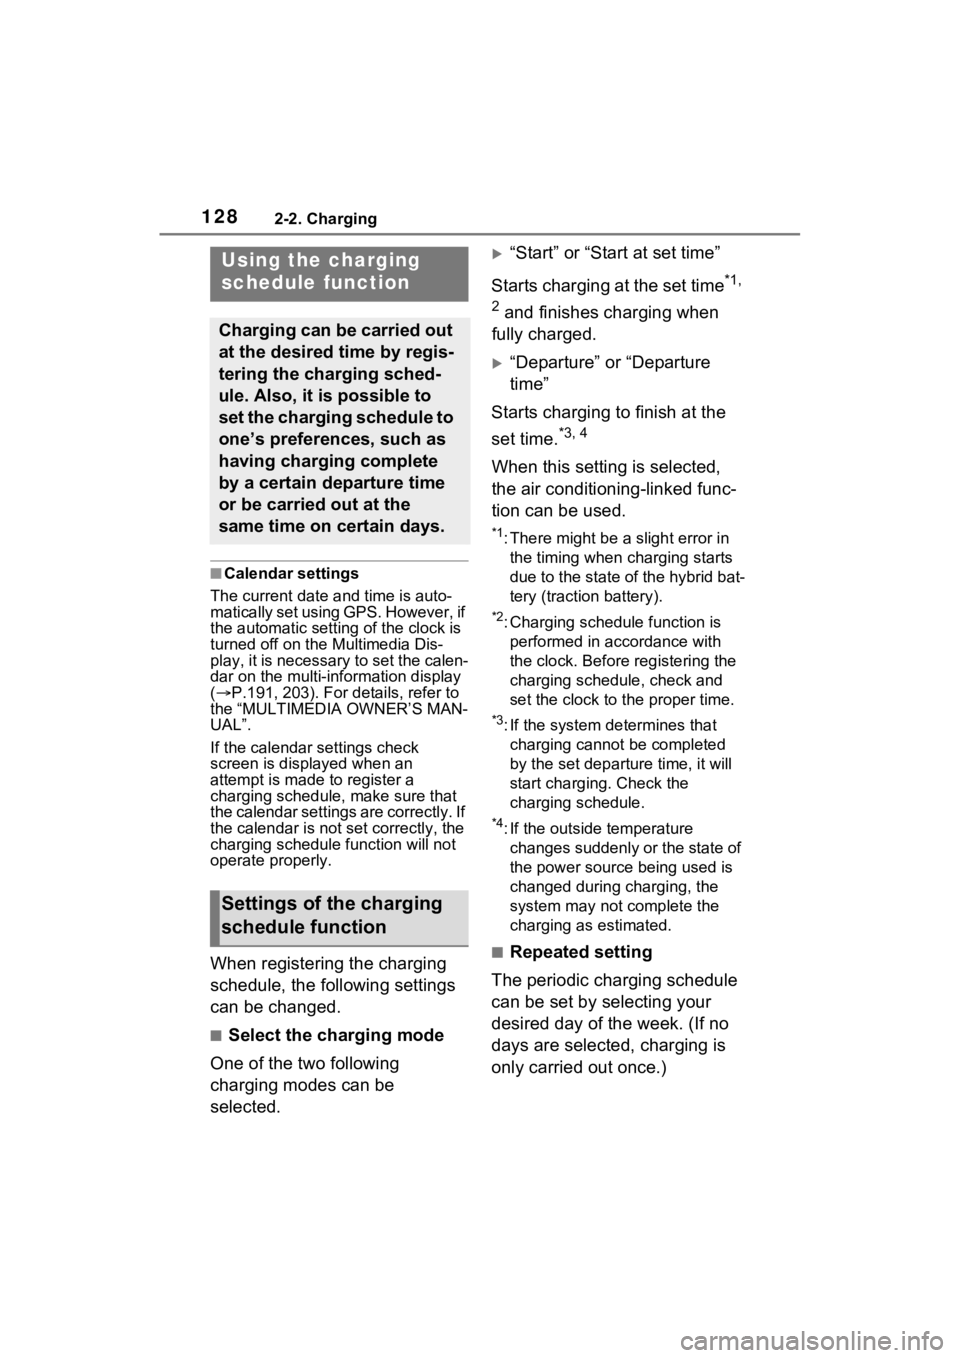
■Calendar settings
The current date an d time is auto-
matically set using GPS. However, if
the automatic setti ng of the clock is
turned off on the Multimedia Dis-
play, it is necessary to set the calen-
dar on the multi-information display
( P.191, 203). For details, refer to
the “MULTIMEDIA OWNER’S MAN-
UAL”.
If the calendar settings check
screen is displayed when an
attempt is made to register a
charging schedule, make sure that
the calendar settings are correctly. If
the calendar is not set correctly, the
charging schedule function will not
operate properly.
When registering the charging
schedule, the following settings
can be changed.
■Select the charging mode
One of the two following
charging modes can be
selected.
“Start” or “Start at set time”
Starts charging at the set time
*1,
2
and finishes charging when
fully charged.
“Departure” or “Departure
time”
Starts charging to finish at the
set time.
*3, 4
When this setting is selected,
the air conditioning-linked func-
tion can be used.
*1: There might be a slight error in the timing when charging starts
due to the state of the hybrid bat-
tery (traction battery).
*2: Charging schedule function is performed in accordance with
the clock. Before registering the
charging schedule, check and
set the clock to t he proper time.
*3: If the system de termines that
charging cannot be completed
by the set depart ure time, it will
start charging. Check the
charging schedule.
*4: If the outside temperature changes suddenly o r the state of
the power source being used is
changed during charging, the
system may not complete the
charging as estimated.
■Repeated setting
The periodic charging schedule
can be set by selecting your
desired day of the week. (If no
days are selected, charging is
only carried out once.)
Using the charging
schedule function
Charging can be carried out
at the desired time by regis-
tering the charging sched-
ule. Also, it is possible to
set the charging schedule to
one’s preferences, such as
having charging complete
by a certain departure time
or be carried out at the
same time on certain days.
Settings of the charging
schedule function
Page 130 of 662
1302-2. Charging
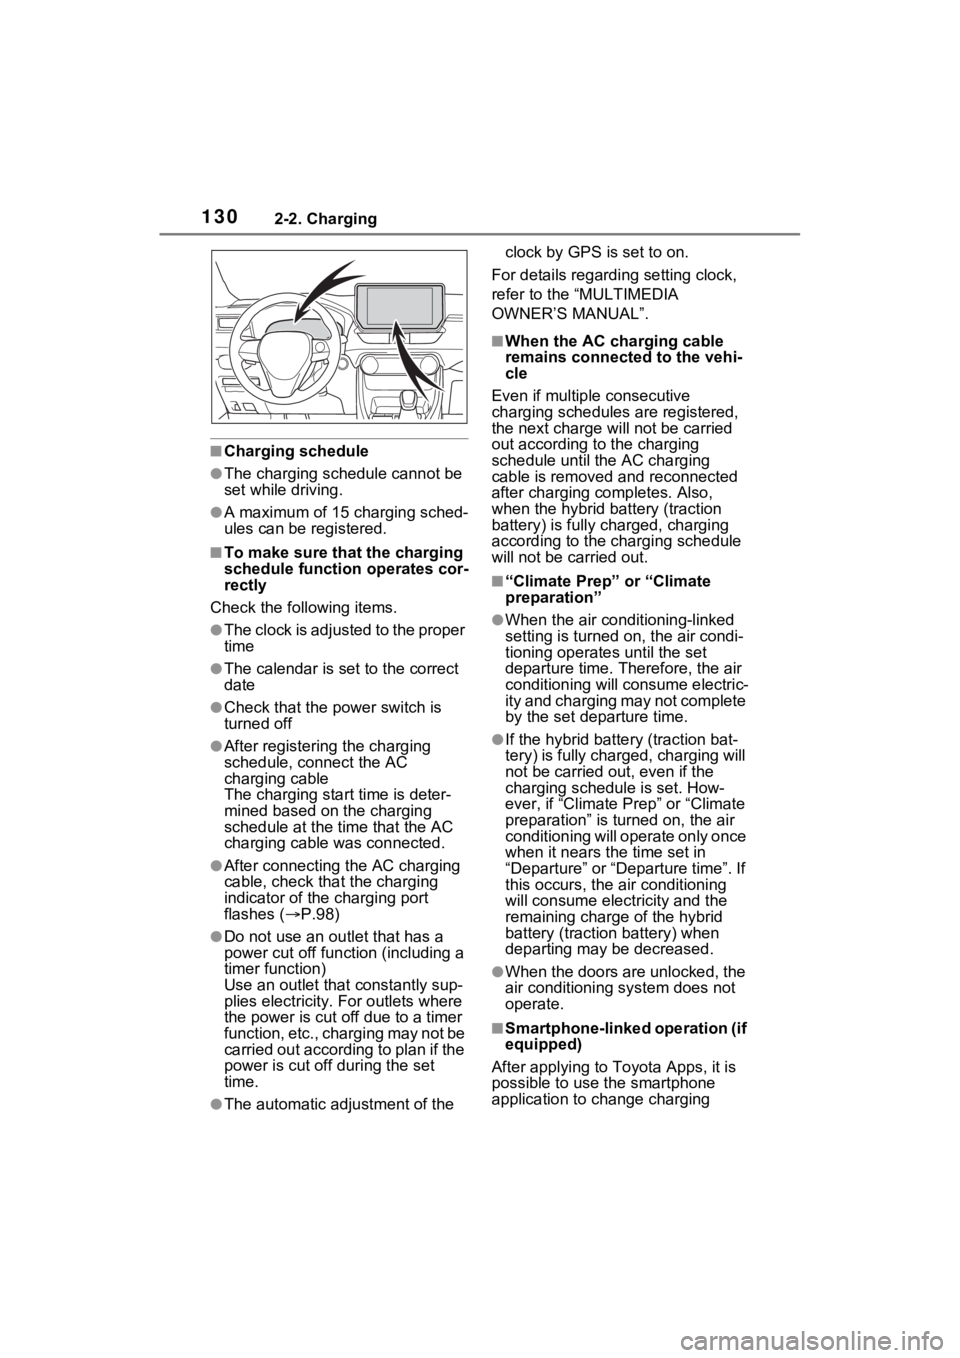
■Charging schedule
●The charging schedule cannot be
set while driving.
●A maximum of 15 charging sched-
ules can be registered.
■To make sure that the charging
schedule function operates cor-
rectly
Check the following items.
●The clock is adjusted to the proper
time
●The calendar is set to the correct
date
●Check that the power switch is
turned off
●After registering the charging
schedule, connect the AC
charging cable
The charging sta rt time is deter-
mined based on the charging
schedule at the time that the AC
charging cable was connected.
●After connecting the AC charging
cable, check that the charging
indicator of the charging port
flashes ( P.98)
●Do not use an ou tlet that has a
power cut off function (including a
timer function)
Use an outlet that constantly sup-
plies electricity. For outlets where
the power is cut off due to a timer
function, etc., charging may not be
carried out according to plan if the
power is cut off during the set
time.
●The automatic ad justment of the clock by GPS is set to on.
For details regarding setting clock,
refer to the “MULTIMEDIA
OWNER’S MANUAL”.
■When the AC charging cable
remains connected to the vehi-
cle
Even if multiple consecutive
charging schedules are registered,
the next charge will not be carried
out according to the charging
schedule until the AC charging
cable is removed and reconnected
after charging co mpletes. Also,
when the hybrid battery (traction
battery) is fully charged, charging
according to the charging schedule
will not be carried out.
■“Climate Prep” or “Climate
preparation”
●When the air conditioning-linked
setting is turned on, the air condi-
tioning operates until the set
departure time. Therefore, the air
conditioning will co nsume electric-
ity and charging may not complete
by the set departure time.
●If the hybrid batte ry (traction bat-
tery) is fully charged, charging will
not be carried o ut, even if the
charging schedule is set. How-
ever, if “Climate Prep” or “Climate
preparation” is turned on, the air
conditioning will operate only once
when it nears the time set in
“Departure” or “Departure time”. If
this occurs, the air conditioning
will consume electricity and the
remaining charge of the hybrid
battery (traction battery) when
departing may be decreased.
●When the doors are unlocked, the
air conditioning system does not
operate.
■Smartphone-linked operation (if
equipped)
After applying to Toyota Apps, it is
possible to use the smartphone
application to change charging
Page 154 of 662
1542-2. Charging
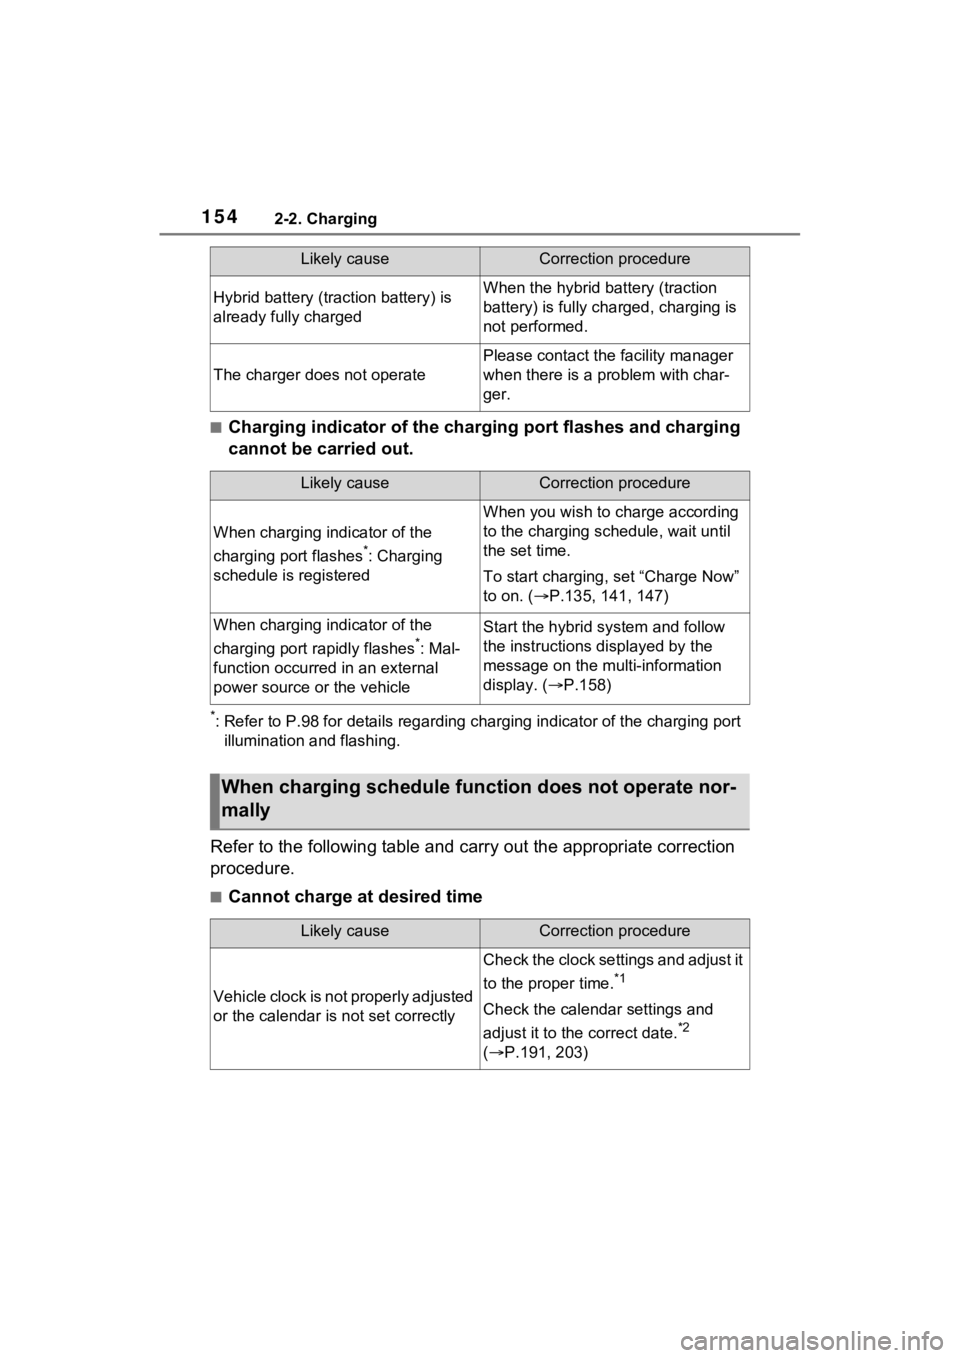
■Charging indicator of the charging port flashes and charging
cannot be carried out.
*: Refer to P.98 for details regarding charging indicator of the charging port
illumination and flashing.
Refer to the following table and carry out the appropriate correction
procedure.
■Cannot charge at desired time
Hybrid battery (traction battery) is
already fully chargedWhen the hybrid battery (traction
battery) is fully char ged, charging is
not performed.
The charger does not operate
Please contact the facility manager
when there is a problem with char-
ger.
Likely causeCorrection procedure
When charging indicator of the
charging port flashes
*: Charging
schedule is registered
When you wish to charge according
to the charging schedule, wait until
the set time.
To start charging, set “Charge Now”
to on. ( P.135, 141, 147)
When charging indicator of the
charging port rapidly flashes
*: Mal-
function occurred in an external
power source or the vehicle
Start the hybrid system and follow
the instructions displayed by the
message on the m ulti-information
display. ( P.158)
When charging schedule func tion does not operate nor-
mally
Likely causeCorrection procedure
Vehicle clock is not properly adjusted
or the calendar is not set correctly
Check the clock settings and adjust it
to the proper time.
*1
Check the calendar settings and
adjust it to the correct date.
*2
( P.191, 203)
Likely causeCorrection procedure
Page 155 of 662
1552-2. Charging
2
Plug-in hybrid system
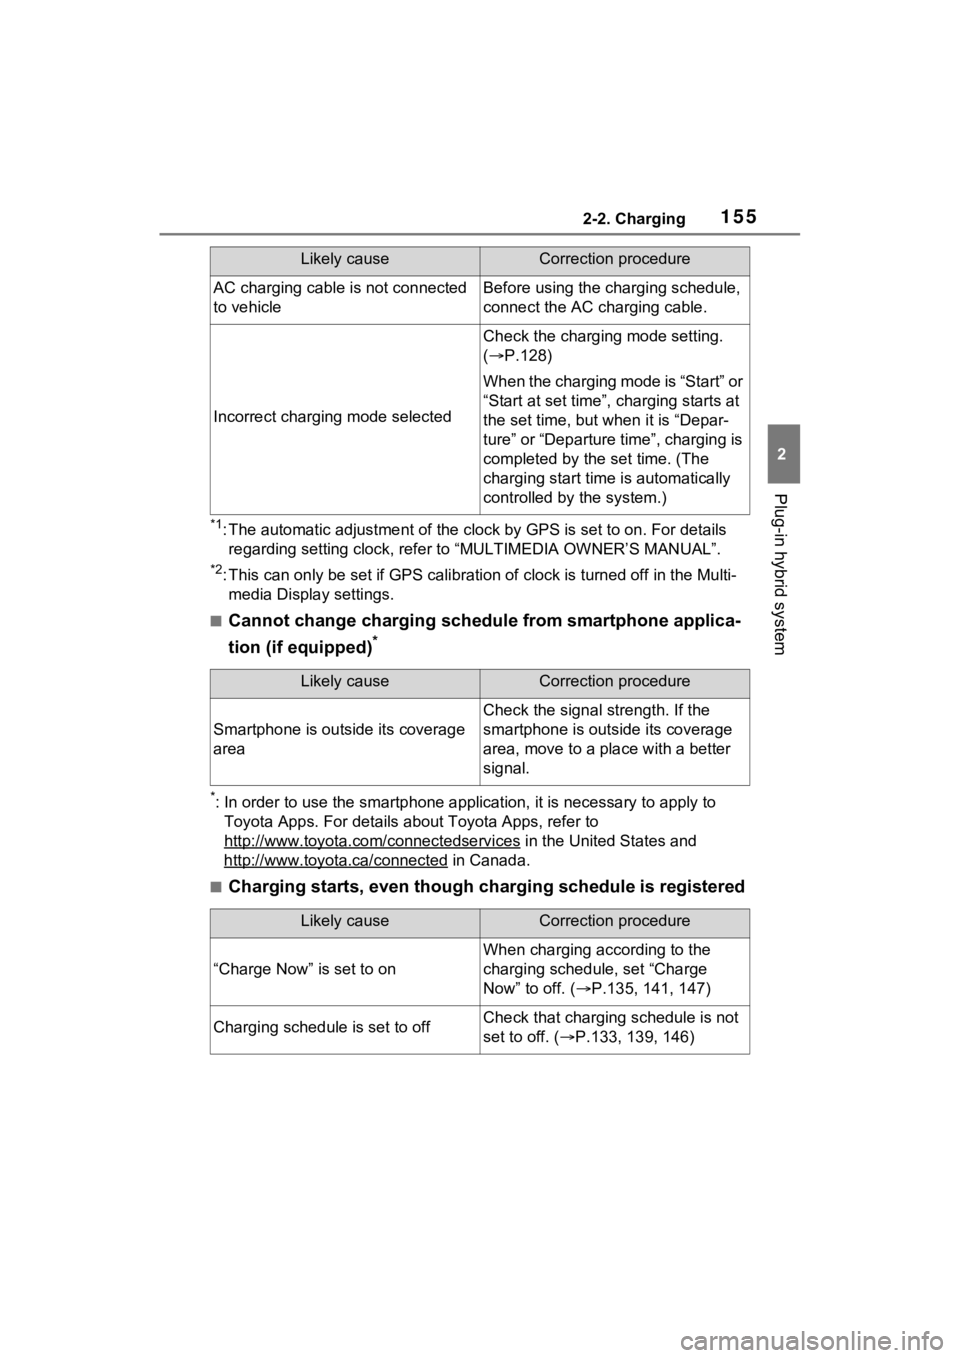
*1: The automatic adjustment of the clock by GPS is set to on. For details
regarding setting clock, refer t o “MULTIMEDIA OWNER’S MANUAL”.
*2: This can only be set if GPS ca libration of clock is turned off in the Multi-
media Display settings.
■Cannot change charging schedule from smartphone applica-
tion (if equipped)
*
*: In order to use the smartphon e application, it is necessary to apply to
Toyota Apps. For details about Toyota Apps, refer to
http://www.toyota.com/connectedservices
in the United States and
http://www.toyota.ca/connected
in Canada.
■Charging starts, even though charging schedule is registered
AC charging cable i s not connected
to vehicleBefore using the charging schedule,
connect the AC charging cable.
Incorrect charging mode selected
Check the charging mode setting.
( P.128)
When the charging mode is “Start” or
“Start at set time”, c harging starts at
the set time, but w hen it is “Depar-
ture” or “Departure time”, charging is
completed by the set time. (The
charging start time is automatically
controlled by the system.)
Likely causeCorrection procedure
Smartphone is outsi de its coverage
area
Check the signal strength. If the
smartphone is outside its coverage
area, move to a pl ace with a better
signal.
Likely causeCorrection procedure
“Charge Now” is set to on
When charging according to the
charging schedule, set “Charge
Now” to off. ( P.135, 141, 147)
Charging schedule is set to offCheck that charging schedule is not
set to off. ( P.133, 139, 146)
Likely causeCorrection procedure
Page 196 of 662
1963-1. Instrument cluster
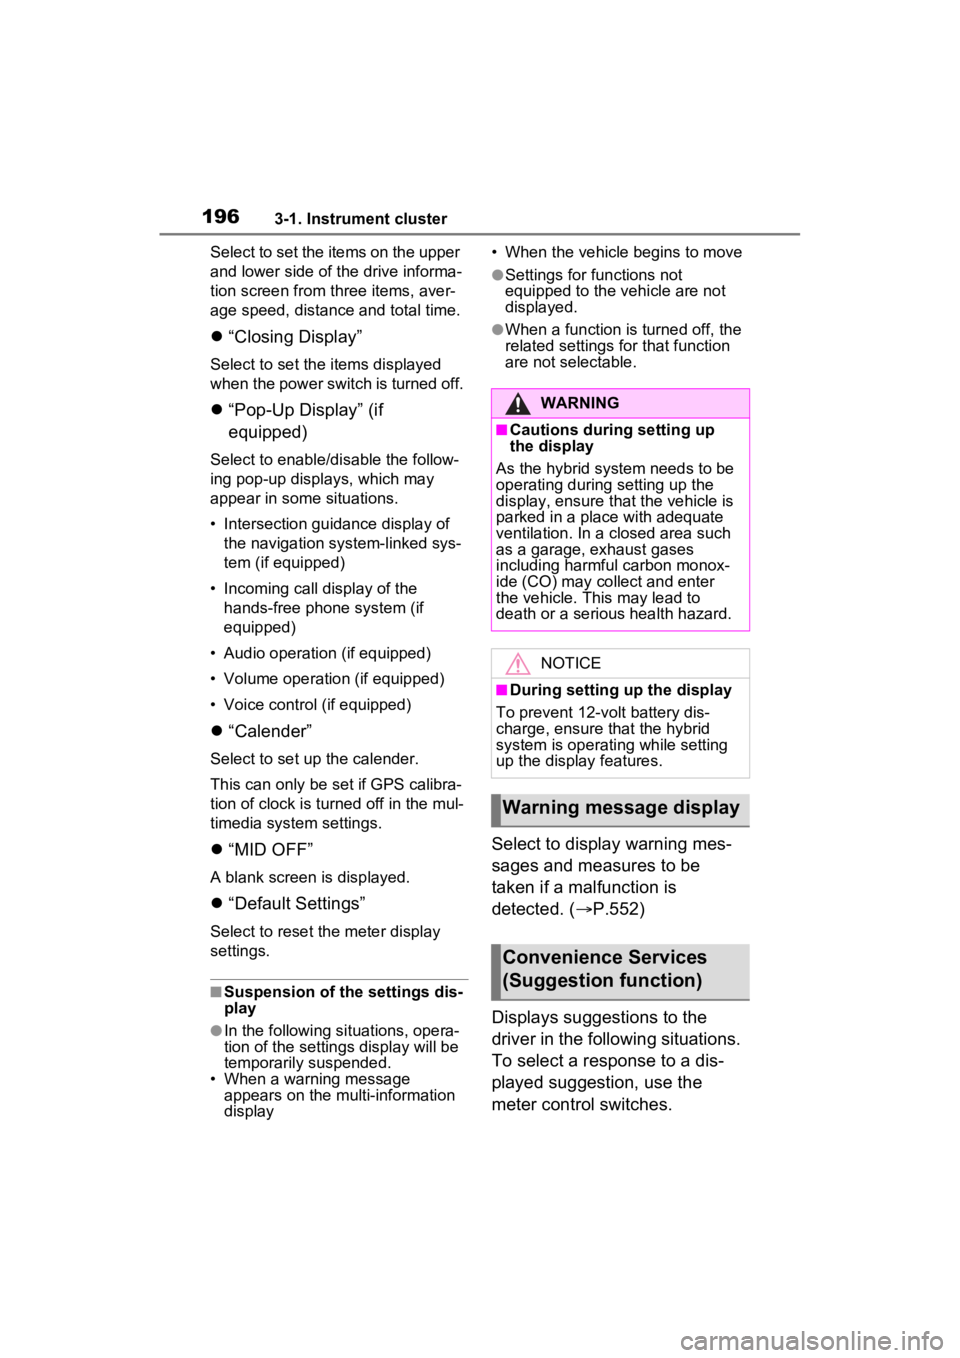
Select to set the items on the upper
and lower side of the drive informa-
tion screen from three items, aver-
age speed, distance and total time.
“Closing Display”
Select to set the i tems displayed
when the power switch is turned off.
“Pop-Up Display” (if
equipped)
Select to enable/d isable the follow-
ing pop-up displays, which may
appear in some situations.
• Intersection guidance display of the navigation system-linked sys-
tem (if equipped)
• Incoming call display of the hands-free phone system (if
equipped)
• Audio operation (if equipped)
• Volume operation (if equipped)
• Voice control (if equipped)
“Calender”
Select to set up the calender.
This can only be set if GPS calibra-
tion of clock is tur ned off in the mul-
timedia system settings.
“MID OFF”
A blank screen is displayed.
“Default Settings”
Select to reset the meter display
settings.
■Suspension of the settings dis-
play
●In the following si tuations, opera-
tion of the setting s display will be
temporarily suspended.
• When a warning message appears on the multi-information
display • When the vehicle begins to move
●Settings for functions not
equipped to the vehicle are not
displayed.
●When a function is turned off, the
related settings for that function
are not selectable.
Select to display warning mes-
sages and measures to be
taken if a malfunction is
detected. (
P.552)
Displays suggestions to the
driver in the following situations.
To select a response to a dis-
played suggestion, use the
meter control switches.
WARNING
■Cautions during setting up
the display
As the hybrid system needs to be
operating during setting up the
display, ensure that the vehicle is
parked in a place with adequate
ventilation. In a closed area such
as a garage, exhaust gases
including harmful carbon monox-
ide (CO) may collect and enter
the vehicle. This may lead to
death or a serious health hazard.
NOTICE
■During setting up the display
To prevent 12-vo lt battery dis-
charge, ensure that the hybrid
system is operating while setting
up the display features.
Warning message display
Convenience Services
(Suggestion function)
Page 207 of 662
2073-1. Instrument cluster
3
Vehicle status information and indicators
Meter Type
Select to change the meter
type setting.
Meter Style
Select to change the meter
style.
Dial Type
Select to change dial type.
( P.178)
Depending on the selected dial
type, this item will not be displayed.
EV indicator
Select to enable/disable the
EV indicator.
Fuel Economy
Select to change the display
on Fuel Economy. ( P.199)
“Hybrid System”
Select to enable/disable refer-
ence operation range.
“Power Consumption”
Select to change the display on
Power Consumption. ( P.199)
Drive Info
Select to change displayed
items on drive information dis-
play. ( P.202)
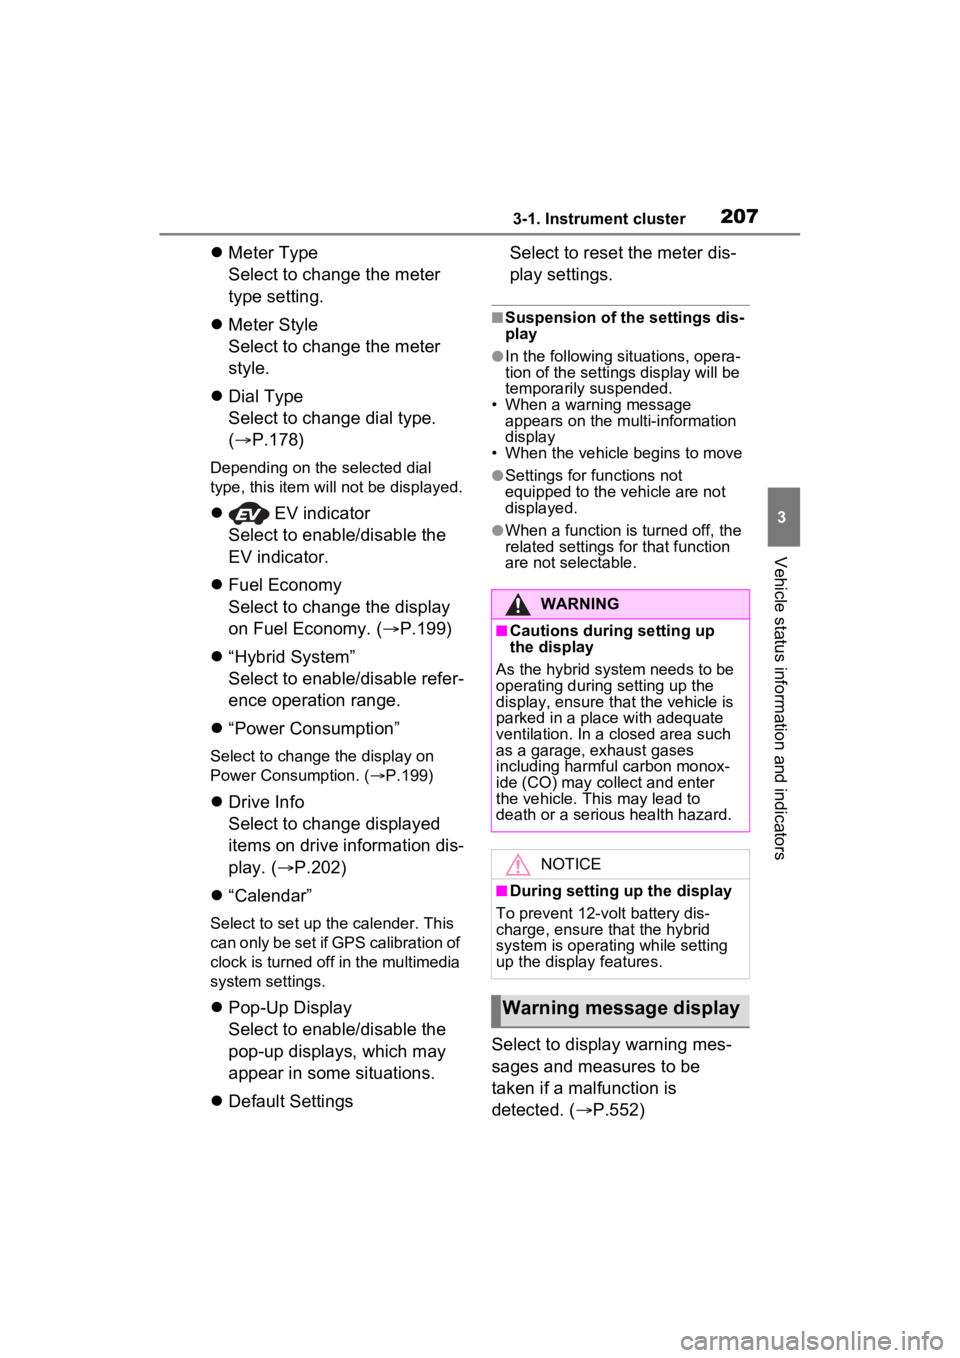
“Calendar”
Select to set up the calender. This
can only be set if GPS calibration of
clock is turned off in the multimedia
system settings.
Pop-Up Display
Select to enable/disable the
pop-up displays, which may
appear in some situations.
Default Settings Select to reset the meter dis-
play settings.
■Suspension of the settings dis-
play
●In the following situations, opera-
tion of the settings display will be
temporarily suspended.
• When a warning message appears on the multi-information
display
• When the vehicle begins to move
●Settings for functions not
equipped to the vehicle are not
displayed.
●When a function is turned off, the
related settings for that function
are not selectable.
Select to display warning mes-
sages and measures to be
taken if a malfunction is
detected. ( P.552)
WARNING
■Cautions during setting up
the display
As the hybrid system needs to be
operating during setting up the
display, ensure that the vehicle is
parked in a place with adequate
ventilation. In a closed area such
as a garage, exhaust gases
including harmful carbon monox-
ide (CO) may collect and enter
the vehicle. This may lead to
death or a serious health hazard.
NOTICE
■During setting up the display
To prevent 12-vo lt battery dis-
charge, ensure that the hybrid
system is operating while setting
up the display features.
Warning message display
Page 420 of 662
4226-1. Using the air conditioning system and defogger
6-1.Using the air conditioning system and defogger
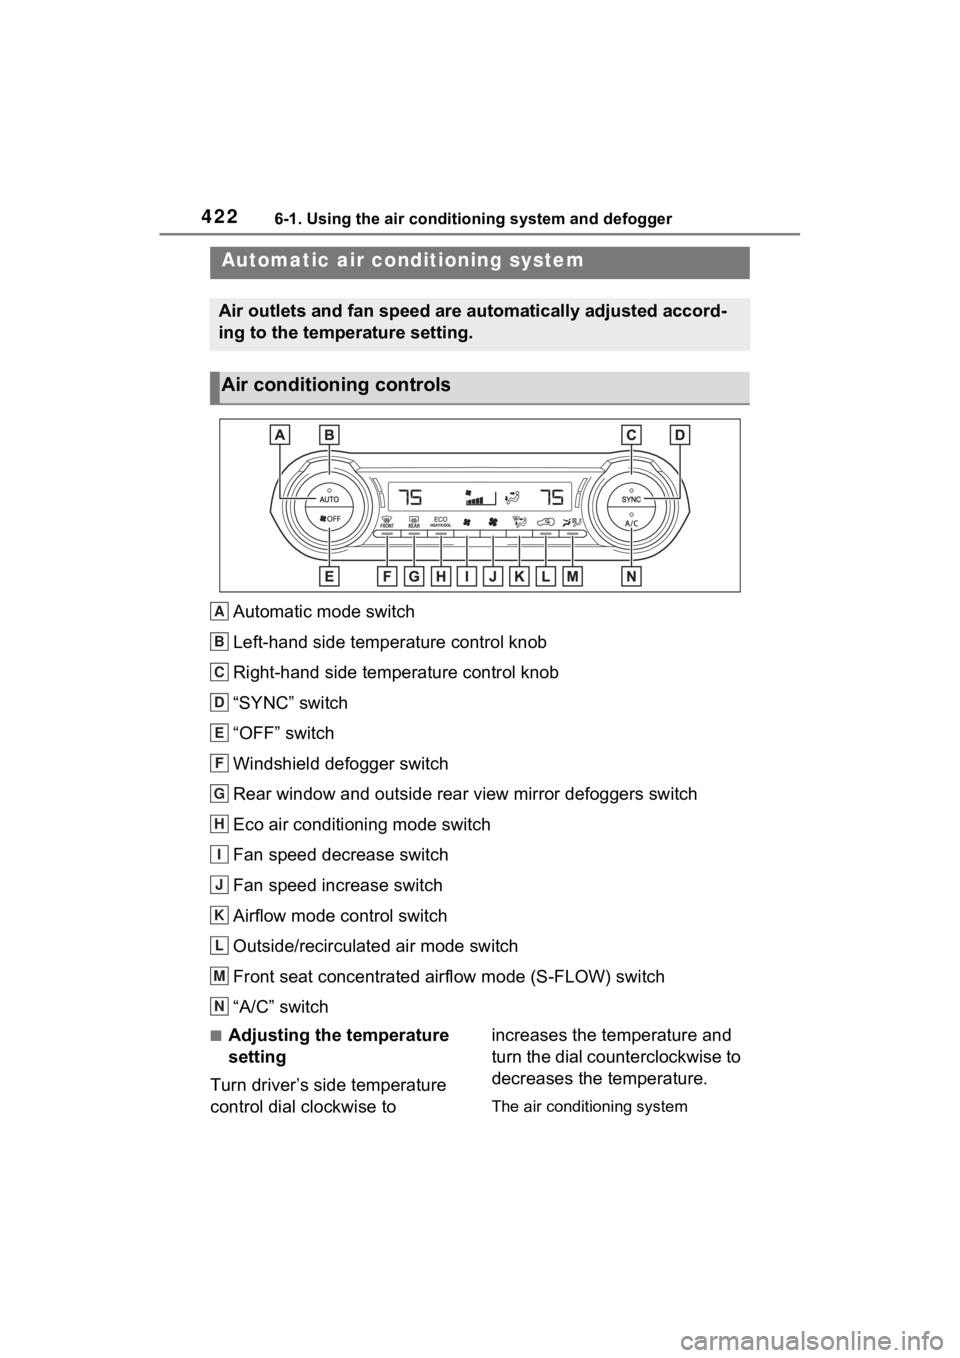
Automatic mode switch
Left-hand side temperature control knob
Right-hand side temperature control knob
“SYNC” switch
“OFF” switch
Windshield defogger switch
Rear window and outside rear view mirror defoggers switch
Eco air conditioning mode switch
Fan speed decrease switch
Fan speed increase switch
Airflow mode control switch
Outside/recirculated air mode switch
Front seat concentrated airflow mode (S-FLOW) switch
“A/C” switch
■Adjusting the temperature
setting
Turn driver’s side temperature
control dial clockwise to increases the temperature and
turn the dial counterclockwise to
decreases the temperature.
The air conditioning system
Automatic air co
nditioning system
Air outlets and fan speed are automatically adjusted accord-
ing to the temperature setting.
Air conditioning controls
A
B
C
D
E
F
G
H
I
J
K
L
M
N
Page 600 of 662
6029-2. Customization
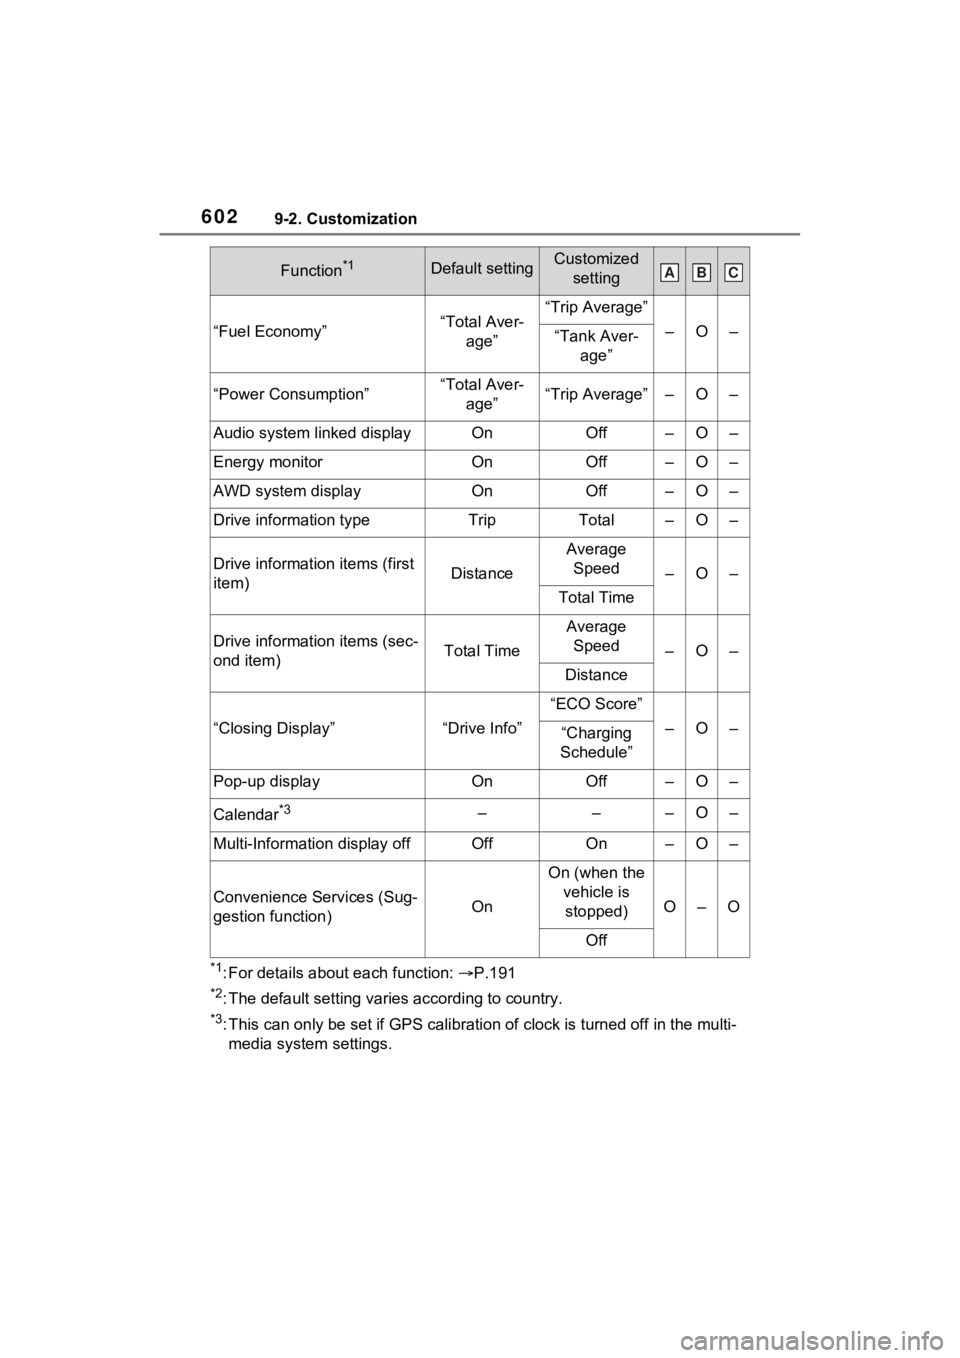
*1: For details about each function: P.191
*2: The default setting varies according to country.
*3: This can only be set if GPS ca libration of clock is turned off in the multi-
media system settings.
“Fuel Economy”“Total Aver- age”“Trip Average”
–O–“Tank Aver- age”
“Power Consumption”“Total Aver-age”“Trip Average”–O–
Audio system linked displayOnOff–O–
Energy monitorOnOff–O–
AWD system displayOnOff–O–
Drive information typeTripTotal–O–
Drive informatio n items (first
item)Distance
Average Speed
–O–
Total Time
Drive information items (sec-
ond item)Total Time
Average Speed
–O–
Distance
“Closing Display”“Drive Info”
“ECO Score”
–O–“Charging
Schedule”
Pop-up displayOnOff–O–
Calendar*3–––O–
Multi-Information display offOffOn–O–
Convenience Services (Sug-
gestion function)On
On (when the vehicle is stopped)
O–O
Off
Function*1Default settingCustomized settingABC
Page 602 of 662
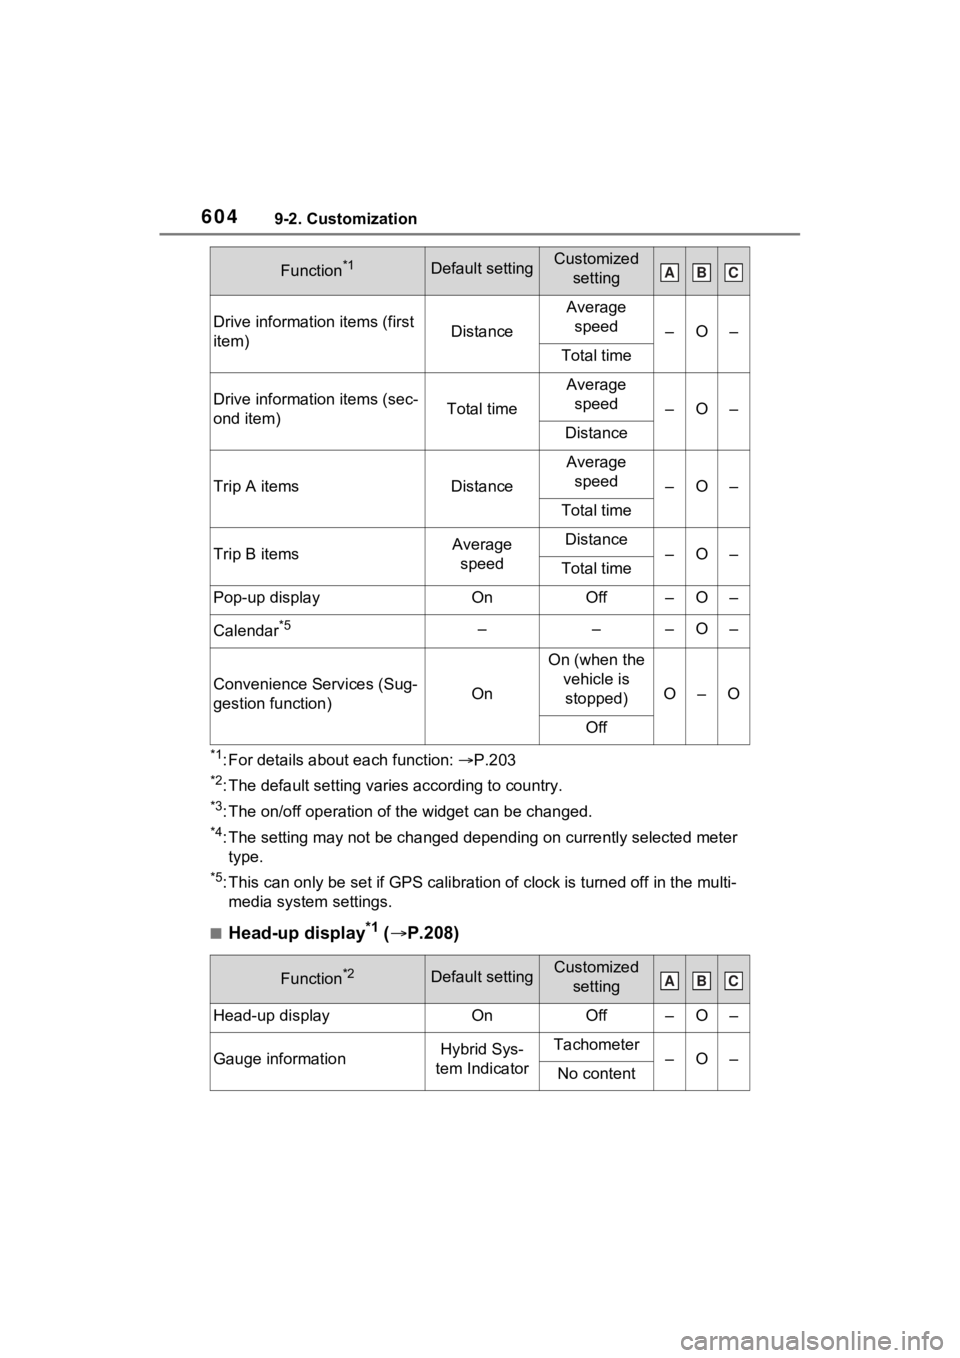
6049-2. Customization
*1: For details about each function: P.203
*2: The default setting varies according to country.
*3: The on/off operation of the widget can be changed.
*4: The setting may not be changed depending on currently selected meter
type.
*5: This can only be set if GPS ca libration of clock is turned off in the multi-
media system settings.
■Head-up display*1 ( P.208)
Drive informatio n items (first
item)Distance
Average speed
–O–
Total time
Drive information items (sec-
ond item)Total time
Average speed
–O–
Distance
Trip A itemsDistance
Average speed
–O–
Total time
Trip B itemsAverage speedDistance–O–Total time
Pop-up displayOnOff–O–
Calendar*5–––O–
Convenience Services (Sug-
gestion function)On
On (when the vehicle is stopped)
O–O
Off
Function*2Default settingCustomized setting
Head-up displayOnOff–O–
Gauge informationHybrid Sys-
tem IndicatorTachometer–O–No content
Function*1Default settingCustomized settingABC
ABC