parking brake TOYOTA SEQUOIA 2008 2.G User Guide
[x] Cancel search | Manufacturer: TOYOTA, Model Year: 2008, Model line: SEQUOIA, Model: TOYOTA SEQUOIA 2008 2.GPages: 596, PDF Size: 12.93 MB
Page 148 of 596

148
2-1. Driving procedures
Automatic transmission (6-speed models)
Select a shift position appropriate for the driving conditions.
■Shifting the shift lever
While the engine switch is on, depress the brake pedal and
move the shift lever.
■ Shift position uses
*1: To improve fuel consumption and reduce noises, set the shift lever in
D for normal driving.
*2: Selecting shift ranges S mode restricts the upper limit of the possiblegear ranges, control engine braking forces, and prevents unneces-
sary upshifting.
Shift positionFunction
PParking the vehicle or starting the engine
RReversing
NNeutral
DNormal driving*1
SS mode driving*2 (P. 149)
Page 152 of 596

152
2-1. Driving procedures
Automatic transmission (5-speed models)
Select a shift position appropriate for the driving conditions.
■Shifting the shift lever
While the engine switch is on, depress the brake pedal and
move the shift lever.
■ Shift position uses
*1: To improve fuel consumption and reduce noises, set the shift lever in
D for normal driving.
*2: Selecting shift ranges S mode restricts the upper limit of the possiblegear ranges, control engine braking forces, and prevents unneces-
sary upshifting.
Shift positionFunction
PParking the vehicle or starting the engine
RReversing
NNeutral
DNormal driving*1
SS mode driving*2 (P. 153)
Page 156 of 596

156
2-1. Driving procedures
Parking brake
■Parking brake engaged warning buzzer
The buzzer sounds to indicate that parking brake is still engaged (with the
vehicle having reach a speed of 3 mph [5 km/h]).
NOTICE
■Before driving
Fully release the parking brake.
Driving the vehicle with the parking brake set will lead to brake components
overheating, which may affect braking performance and increase brake
wear.
Sets the parking brake*.
(Depressing the pedal again
releases the parking brake.)
At this time, the indicator will
come on.
*: Fully depress the parking
brake pedal with your left
foot while depressing the
brake pedal with your right
foot.
Canada U.S.A.
Page 176 of 596
176 2-3. Operating the lights and wipers
■Daytime running light system (if equipped)
To make your vehicle more visible to other drivers, the front turn signal lights
turn on automatically whenever the engine is started and the parking brake
is released. Daytime running lights are not designed for use at night.
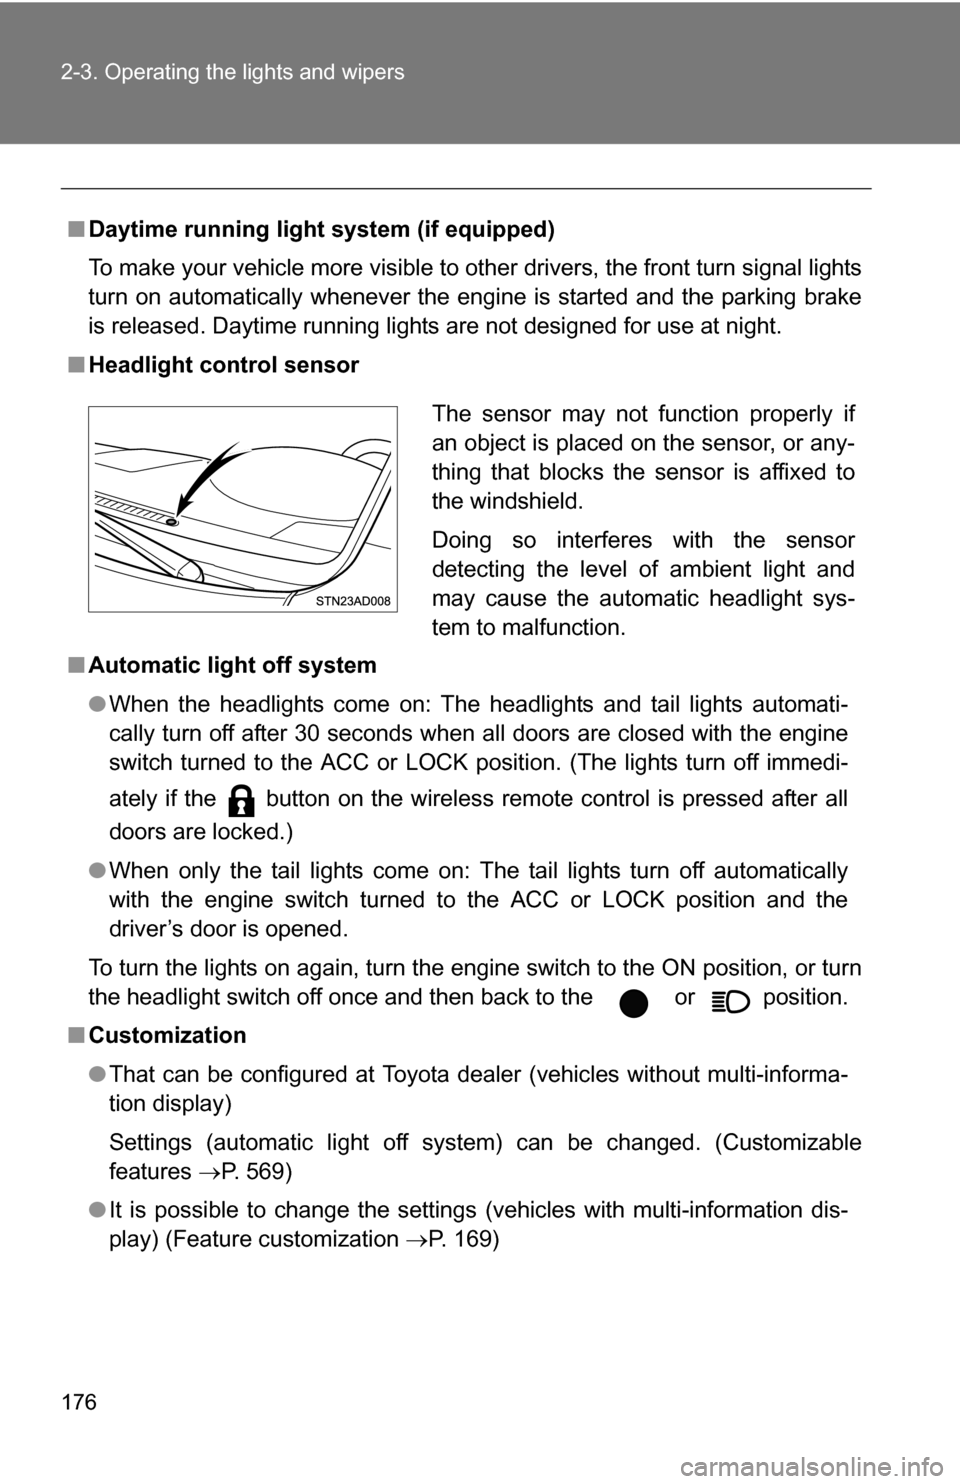
■ Headlight control sensor
■ Automatic light off system
●When the headlights come on: The headlights and tail lights automati-
cally turn off after 30 seconds when all doors are closed with the engine
switch turned to the ACC or LOCK position. (The lights turn off immedi-
ately if the button on the wireless remote control is pressed after all
doors are locked.)
● When only the tail lights come on: The tail lights turn off automatically
with the engine switch turned to the ACC or LOCK position and the
driver’s door is opened.
To turn the lights on again, turn the engine switch to the ON position, or turn
the headlight switch off once and then back to the or position.
■ Customization
●That can be configured at Toyota dealer (vehicles without multi-informa-
tion display)
Settings (automatic light off system) can be changed. (Customizable
features P. 569)
● It is possible to change the settings (vehicles with multi-information dis-
play) (Feature customization P. 169)
The sensor may not function properly if
an object is placed on the sensor, or any-
thing that blocks the sensor is affixed to
the windshield.
Doing so interferes with the sensor
detecting the level of ambient light and
may cause the automatic headlight sys-
tem to malfunction.
Page 200 of 596
200 2-4. Using other driving systems
■Sensor detection information
●Certain vehicle conditions and the surrounding environment may affect
the ability of a sensor to correctly detect an obstacle. Particular instances
where this may occur are listed below.
• There is dirt, snow or ice on a sensor.
• A sensor is frozen.
• A sensor is covered in any way.
• The vehicle is leaning considerably to one side.
• On an extremely bumpy road, on an incline, on gravel, or on grass.
• The vicinity of the vehicle is noisy due to vehicle horns, motorcycle
engines, air brakes of large vehicles, or other loud noises producing
ultrasonic waves.
• There is another vehicle equipped with parking assist sensors in the vicinity.
• A sensor is coated with a sheet of spray or heavy rain.
• The vehicle is equipped with a fender pole or radio antenna.
• A bumper or sensor receives a strong impact.
• The vehicle is approaching a tall or right-angled curb.
• In harsh sunlight or intense cold weather.
• The area directly under the bumpers is not detected. Objects lower than the sensors or thin stakes etc. may be detected ini-
tially, but as they draw closer, they may cease to be detected.
• A towing hitch is mounted to the vehicle.
• A non-genuine Toyota suspension (lowered suspension etc.) is installed.
• When attaching a two-way radio antenna.
• When a towing eyelet is mounted on your vehicle.
• When the bumper is damaged.
In addition to the examples above, there are instances in which, because of
their shapes, signs and other objects may be judged by a sensor to be closer
than they are.
● The shape of the obstacle may prevent a sensor from detecting it. Pay
particular attention to the following obstacles:
• Wires, fences, ropes, etc.
• Cotton, snow and other materials that absorb radio waves
• Sharply-angled objects
Page 230 of 596

230 2-5. Driving information
Selecting tire chainsUse the correct tire chain size when mounting the snow chains.
Chain size is regulated for each tire size.
Side chain
0.2 in. (5 mm) in diameter
Cross chain
0.25 in. (6.3 mm) in diameter
Regulations on the use of snow chains
● Regulations regarding the use of tire chains vary according to loca-
tion and type of road. Always check local regu lations before install-
ing chains.
● Install the chains on the rear tires.
● Retighten the chains after drivi ng 1/4 - 1/2 mile (0.5 - 1.0 km).
■When driving the vehicle
Accelerate the vehicle slowly and drive at a reduced speed suit-
able to road conditions.
■ When parking the vehicle
Park the vehicle and move the shift lever to P without setting the
parking brake. The parking brak e may freeze up, preventing it
from being released.
Page 242 of 596
242 2-5. Driving information
●Always place wheel blocks under both the vehicle and the trailer
wheels when parking. Apply the parking brake firmly, and put the
transmission in P. Avoid parking on a slope, but if unavoidable, do
so only after performing the following:
Apply the brakes and keep them applied.
Have someone place wheel bloc ks under both the vehicle and
trailer wheels.
When the wheel blocks are in place, release the brakes slowly
until the blocks absorb the load.
Apply the parking brake firmly.
Shift into P and turn off the engine.
● When restarting after parking on a slope:
With the transmission in P, start the engine. Be sure to keep
the brake pedal pressed.
Shift into D or R (if reversing).
Release the parking brake and brake pedal, and slowly pull or
back away from the wheel blocks. Stop and apply the brakes.
Have someone retrieve the blocks.
Page 430 of 596
430 4-2. Maintenance
Vehicle interior
ItemsCheck points
Accelerator pedal • Moves smoothly (without uneven
pedal effort or catching)?
Automatic transmission “Park”
mechanism • Can the vehicle be held securely
on an incline with the shift lever in
P?
Brake pedal • Moves smoothly?
• Does it have appropriate clear-
ance and correct amount of free
play?
Brakes • Not pull to one side when
applied?
• Loss of brake effectiveness?
• Spongy feeling brake pedal?
• Pedal almost touches floor?
Head restraints • Move smoothly and lock
securely?
Indicators/buzzers • Function properly?
Lights • Do all the lights come on?
• Headlights aimed correctly?
Parking brake • Moves smoothly?
• Can hold the vehicle securely on
an incline?
Seat belts • Does the seat belt system oper-
ate smoothly?
• Are the belts undamaged?
Seats • Do the seat controls operate
properly?
Steering wheel • Moves smoothly?
• Has correct free play?
• No strange noises?
Page 480 of 596
480 4-3. Do-it-yourself maintenance
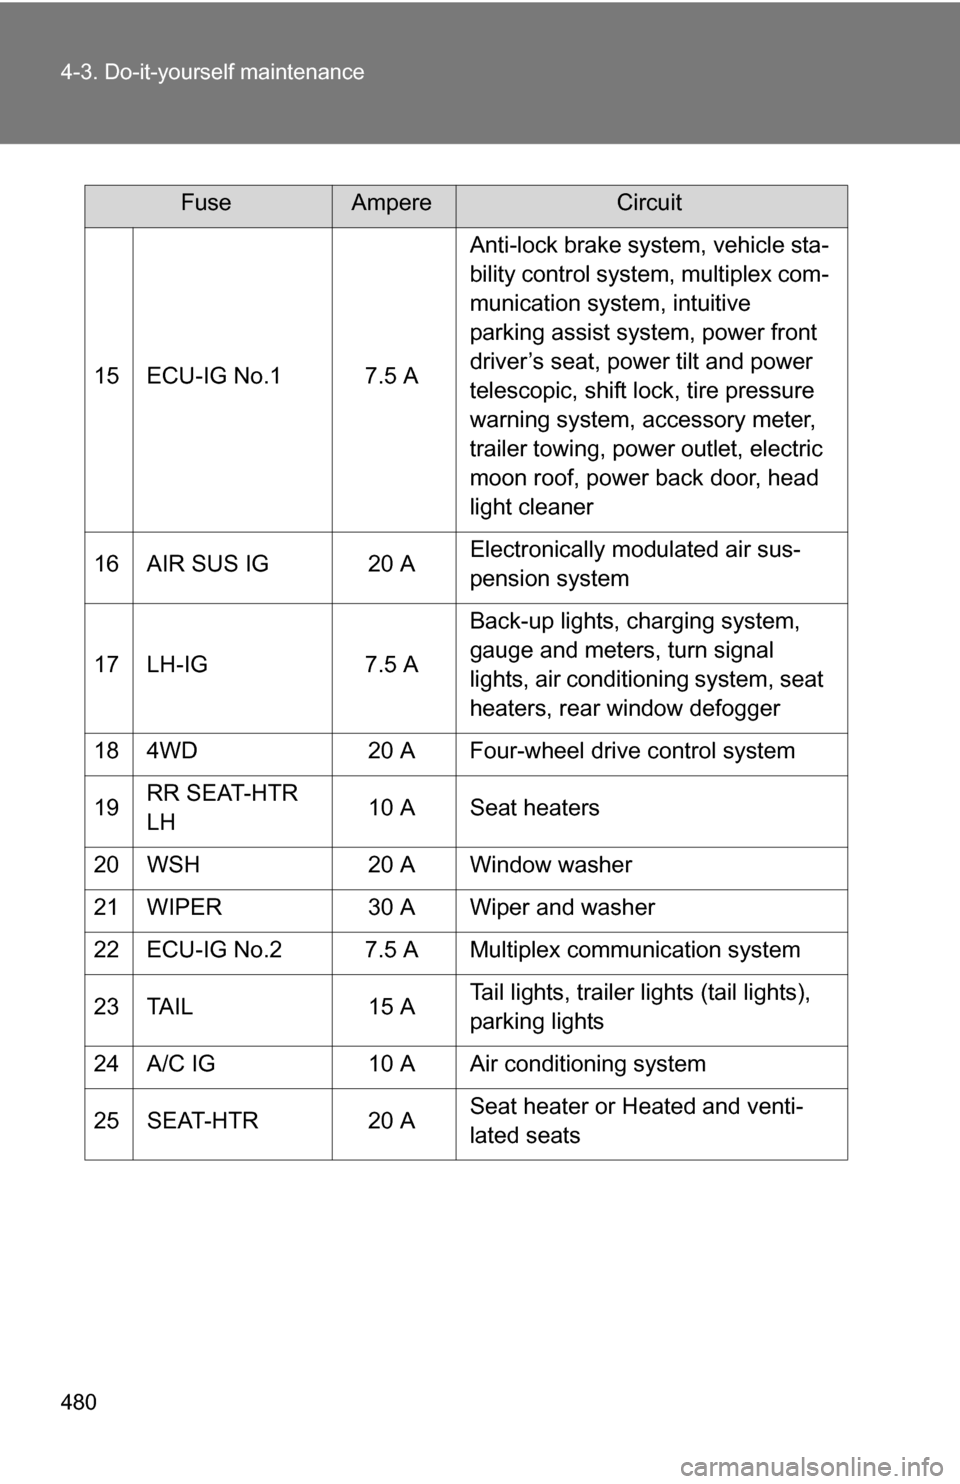
15 ECU-IG No.1 7.5 AAnti-lock brake system, vehicle sta-
bility control system, multiplex com-
munication system, intuitive
parking assist system, power front
driver’s seat, power tilt and power
telescopic, shift lock, tire pressure
warning system, accessory meter,
trailer towing, power outlet, electric
moon roof, power back door, head
light cleaner
16 AIR SUS IG 20 A Electronically modulated air sus-
pension system
17 LH-IG 7.5 A Back-up lights, charging system,
gauge and meters, turn signal
lights, air conditioning system, seat
heaters, rear window defogger
18 4WD 20 A Four-wheel drive control system
19 RR SEAT-HTR
LH 10 A Seat heaters
20 WSH 20 A Window washer
21 WIPER 30 A Wiper and washer
22 ECU-IG No.2 7.5 A Multiplex communication system
23 TAIL 15 A Tail lights, trailer lights (tail lights),
parking lights
24 A/C IG 10 A Air conditioning system
25 SEAT-HTR 20 A Seat heater or Heated and venti-
lated seats
FuseAmpereCircuit
Page 497 of 596
5
When trouble arises
497
5-1. Essential information
■
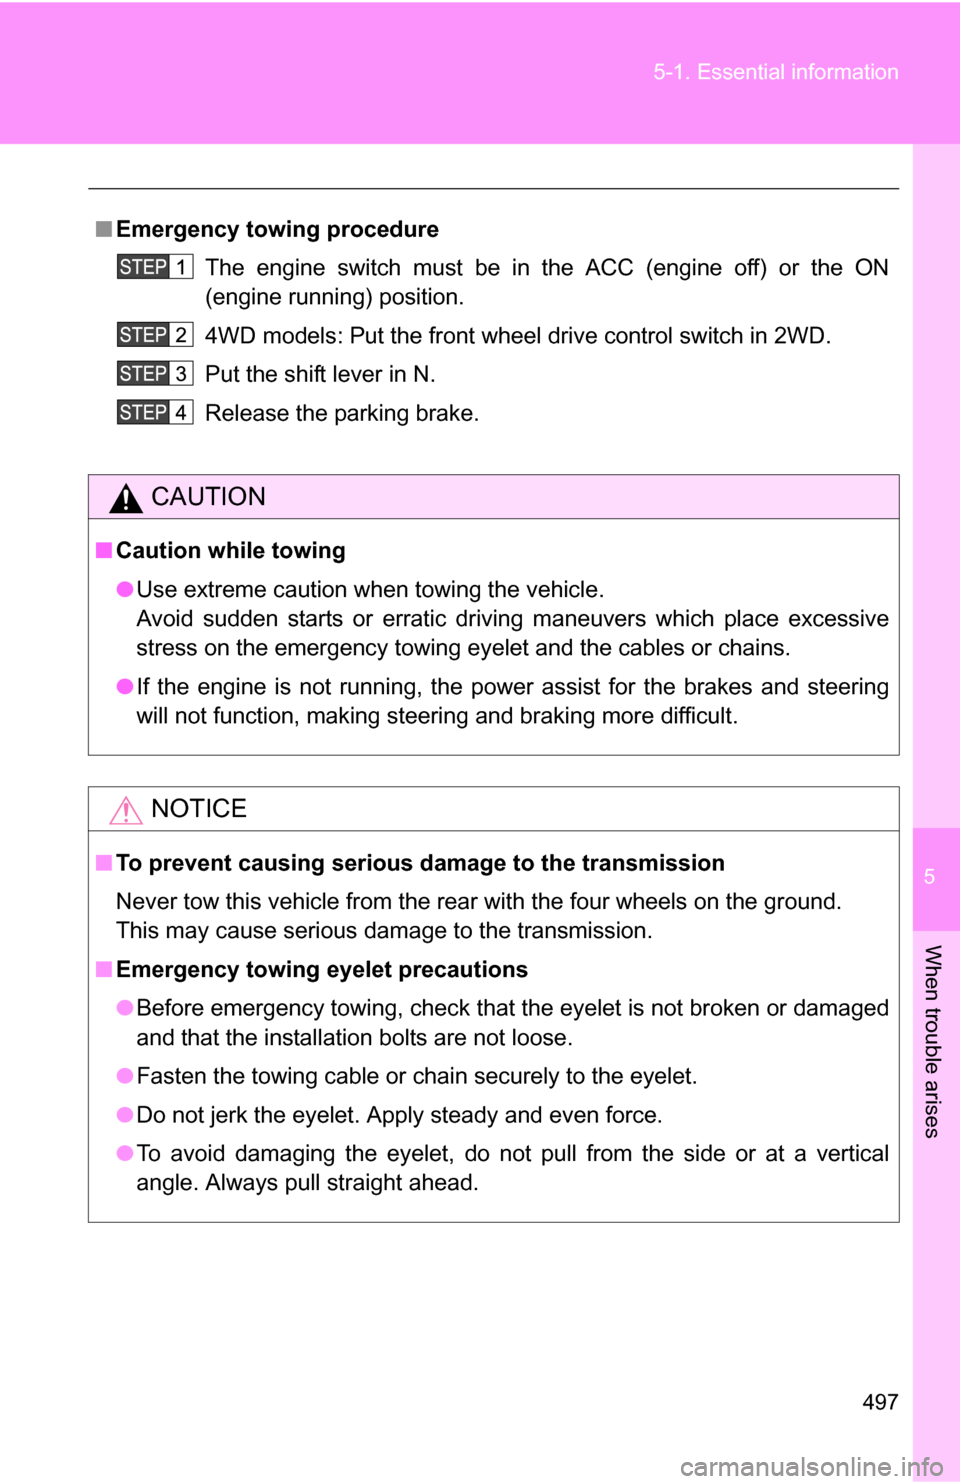
Emergency towin g procedure
The engine switch must be in the ACC (engine off) or the ON
(engine running) position.
4WD models: Put the front wheel drive control switch in 2WD.
Put the shift lever in N.
Release the parking brake.
CAUTION
■ Caution while towing
●Use extreme caution when towing the vehicle.
Avoid sudden starts or erratic driving maneuvers which place excessive
stress on the emergency towing eyelet and the cables or chains.
● If the engine is not running, the power assist for the brakes and steering
will not function, making steering and braking more difficult.
NOTICE
■To prevent causing serious da mage to the transmission
Never tow this vehicle from the rear with the four wheels on the ground.
This may cause serious damage to the transmission.
■ Emergency towing eyelet precautions
● Before emergency towing, check that the eyelet is not broken or damaged
and that the installation bolts are not loose.
● Fasten the towing cable or chain securely to the eyelet.
● Do not jerk the eyelet. Apply steady and even force.
● To avoid damaging the eyelet, do not pull from the side or at a vertical
angle. Always pull straight ahead.