light TOYOTA SEQUOIA 2014 2.G Owners Manual
[x] Cancel search | Manufacturer: TOYOTA, Model Year: 2014, Model line: SEQUOIA, Model: TOYOTA SEQUOIA 2014 2.GPages: 668, PDF Size: 13.86 MB
Page 412 of 668
412 3-4. Using the storage features
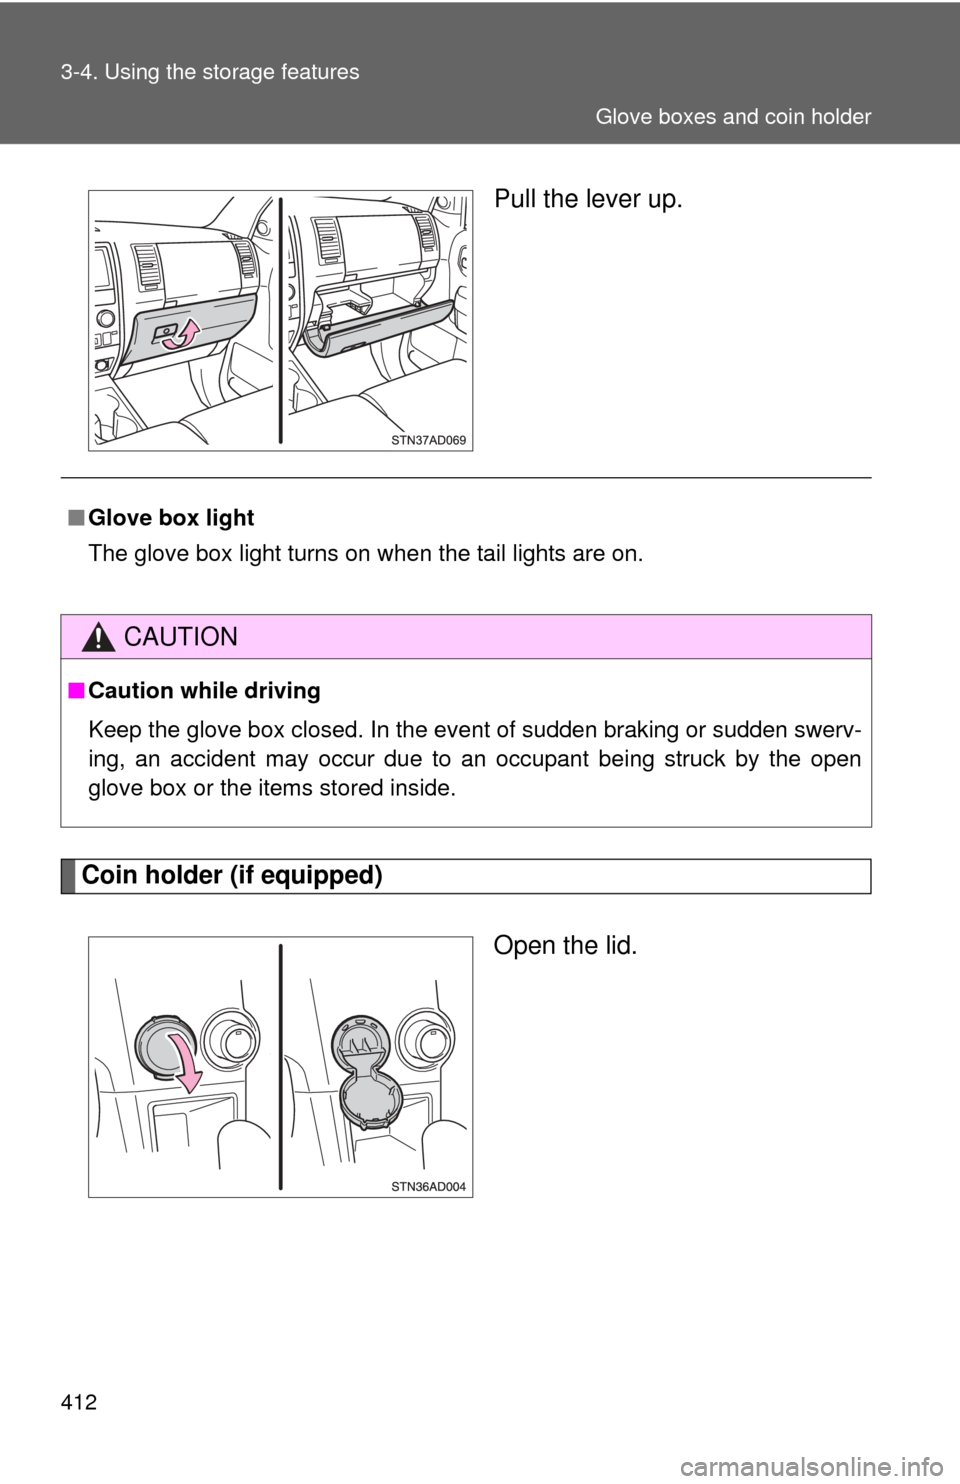
Pull the lever up.
Coin holder (if equipped)Open the lid.
■Glove box light
The glove box light turns on when the tail lights are on.
CAUTION
■Caution while driving
Keep the glove box closed. In the event of sudden braking or sudden swerv-
ing, an accident may occur due to an occupant being struck by the open
glove box or the items stored inside.
Glove boxes and coin holder
Page 434 of 668
434
3-5. Other interior features
Vanity mirrors
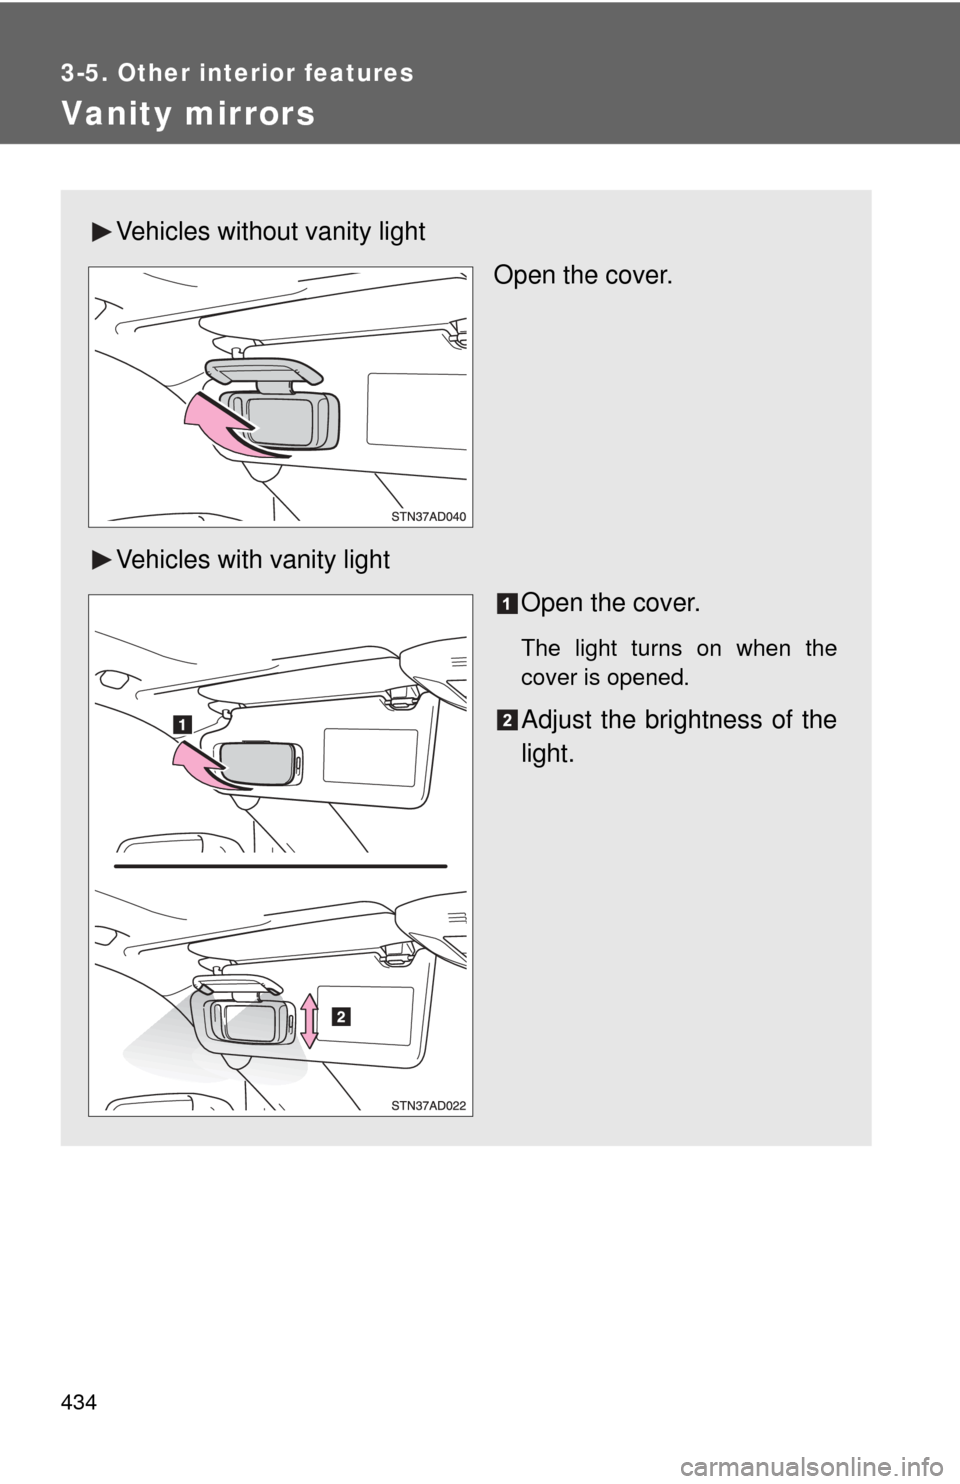
Vehicles without vanity lightOpen the cover.
Vehicles with vanity light Open the cover.
The light turns on when the
cover is opened.
Adjust the brightness of the
light.
Page 439 of 668
439
3-5. Other interior features
3
Interior features
Cigarette lighter
■The cigarette lighter can be used when
The engine switch is in the ACC or ON position.
CAUTION
■To avoid burns or fires
●Do not touch the metal parts of the cigarette lighter.
● Do not hold the cigarette lighter down. It could overheat and cause a fire.
● Do not insert anything other than the cigarette lighter into the outlet.\
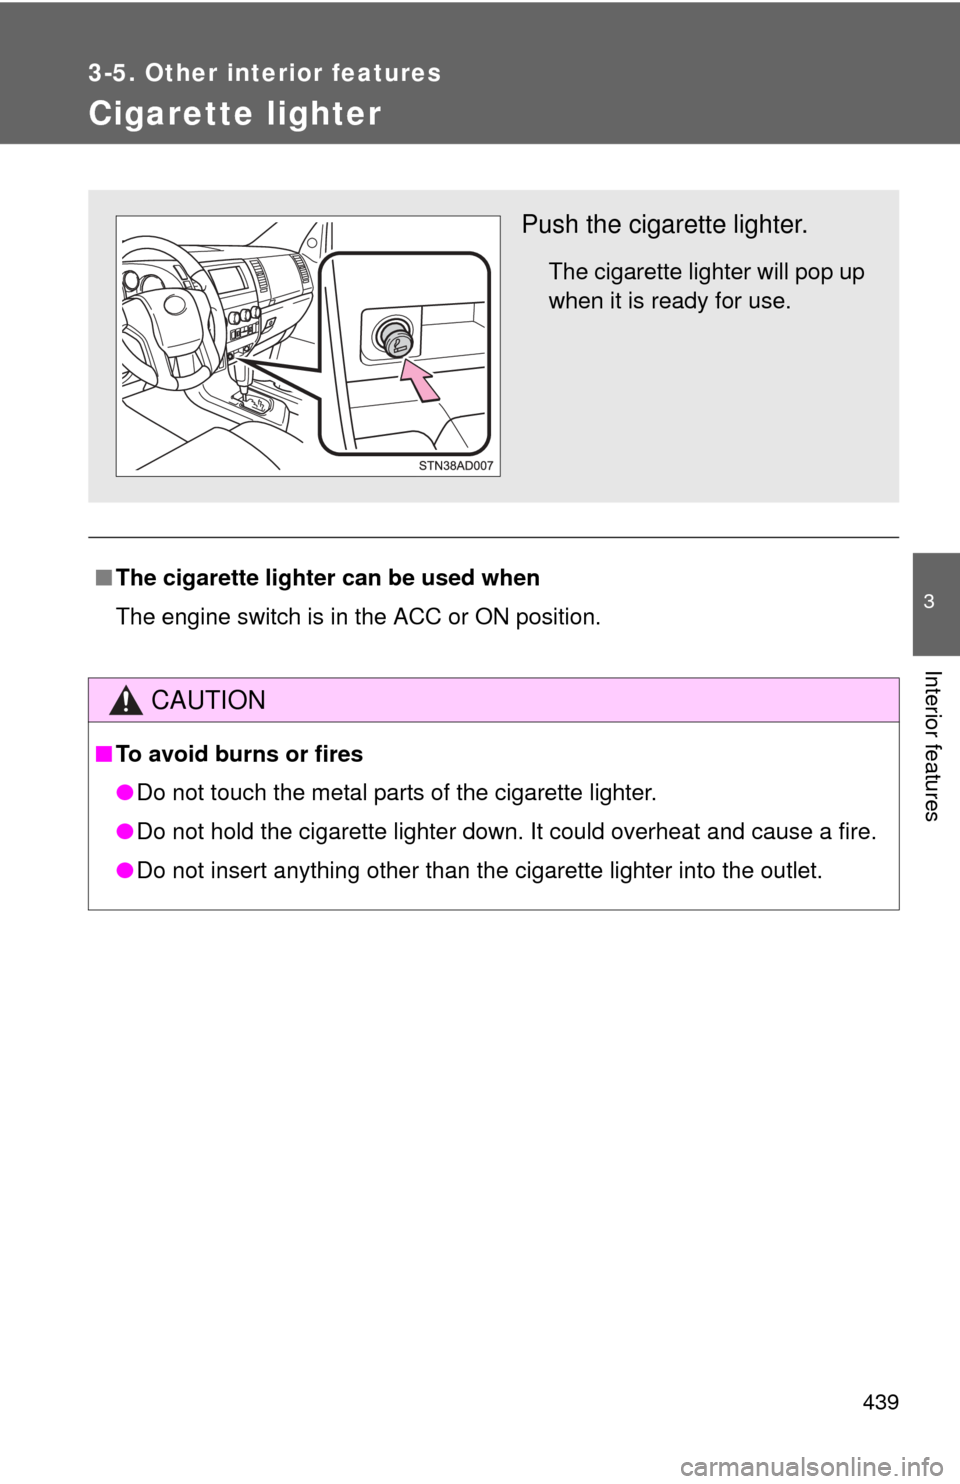
Push the cigarette lighter.
The cigarette lighter will pop up
when it is ready for use.
Page 445 of 668
445
3-5. Other interior features
3
Interior features
NOTICE
■
To avoid damaging the power outlet and the plug
●Close the power outlet lid when not in use.
● Foreign objects or liquids that enter the power outlet may cause a short
circuit.
● Do not use plug adaptors to connect too many plugs to the power outlet.
● After inserting a plug, gently close the power outlet lid.
■ To prevent the fuse from being blown
12 V
Do not use an accessory that uses more than 12 V 10 A.
120 V AC
Do not use a 120 V AC appliance that requires more than 100 W.
If a 120 V AC appliance that consumes more than 100 W is used, the pro-
tection circuit will cut the power supply.
■ Appliances that may not ope rate properly (120 V AC)
The following 120 V AC appliances may not operate even if their power con-
sumption is under 100 W.
● Appliances with high initial peak wattage
● Measuring devices that process precise data
● Other appliances that require an extremely stable power supply
■ To prevent the battery from being discharged
Turn off all the vehicle’s electronic equipment and accessories, such as the
headlights and air conditioning, when electrical appliances that consume in
excess of 100 W are used continuously for long periods of time.
■ To prevent any damage caused by heat
●Do not use any electrical appliances that give off intense heat such as
toasters, in any locations including the internal or external trim, seats and
deck.
● Do not use any electrical appliances, which are easily affected by vibration
or heat, inside the vehicle.
Vibration while driving, or the heat of the sun while parking, may result in
damage to those electrical appliances.
Page 448 of 668
448 3-5. Other interior features
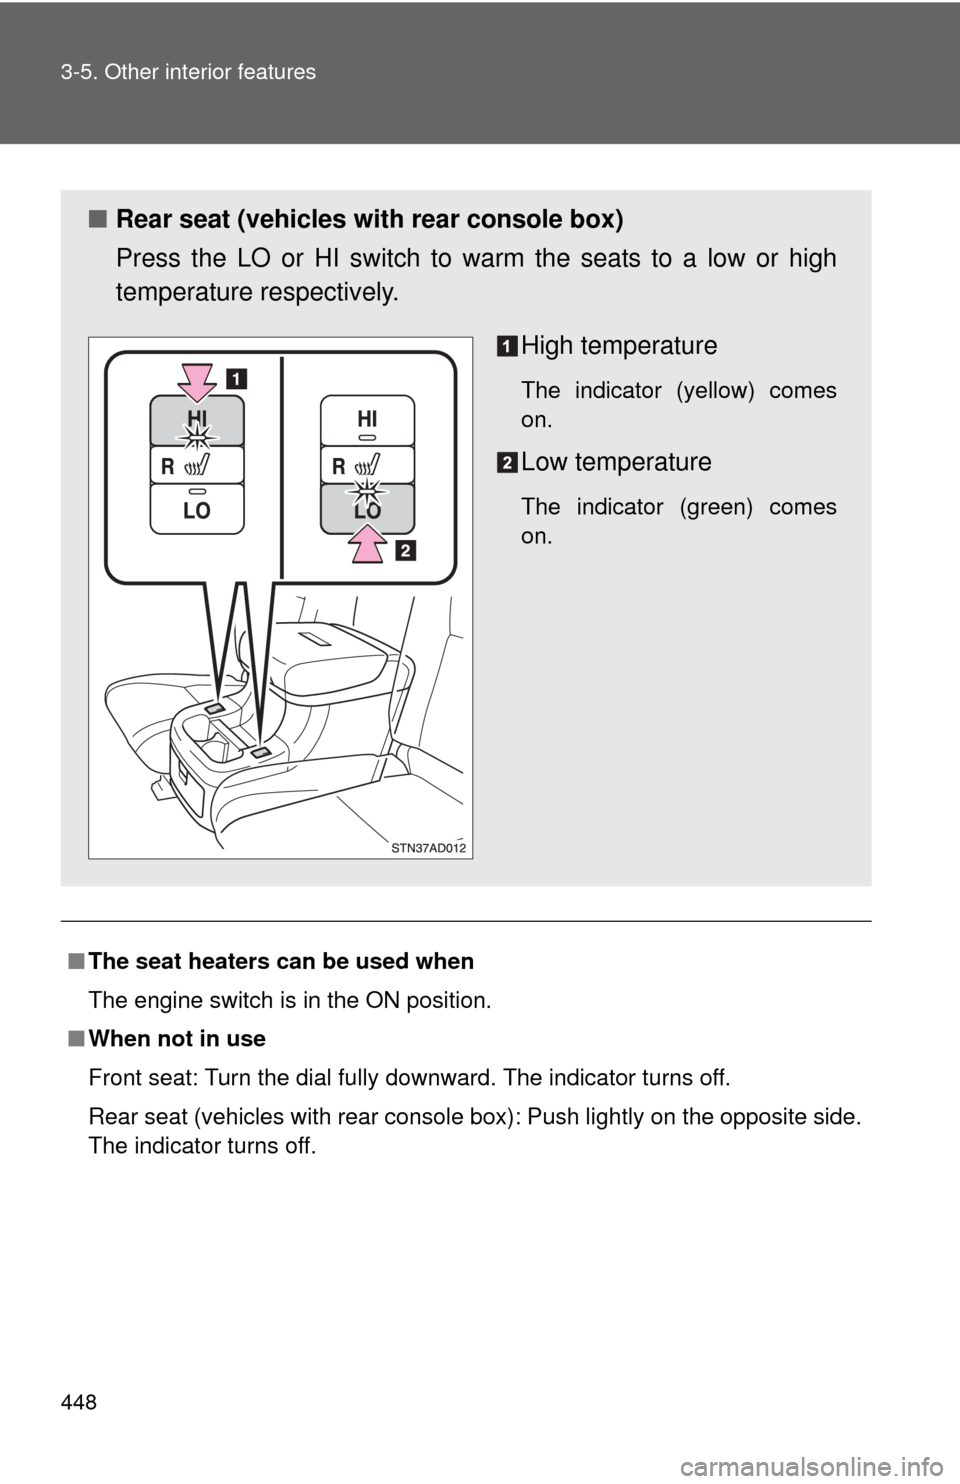
■The seat heaters can be used when
The engine switch is in the ON position.
■ When not in use
Front seat: Turn the dial fully downward. The indicator turns off.
Rear seat (vehicles with rear console box): Push lightly on the opposite side.
The indicator turns off.
■ Rear seat (vehicles with rear console box)
Press the LO or HI switch to warm the seats to a low or high
temperature respectively.
High temperature
The indicator (yellow) comes
on.
Low temperature
The indicator (green) comes
on.
Page 453 of 668
453
3-5. Other interior features
3
Interior features
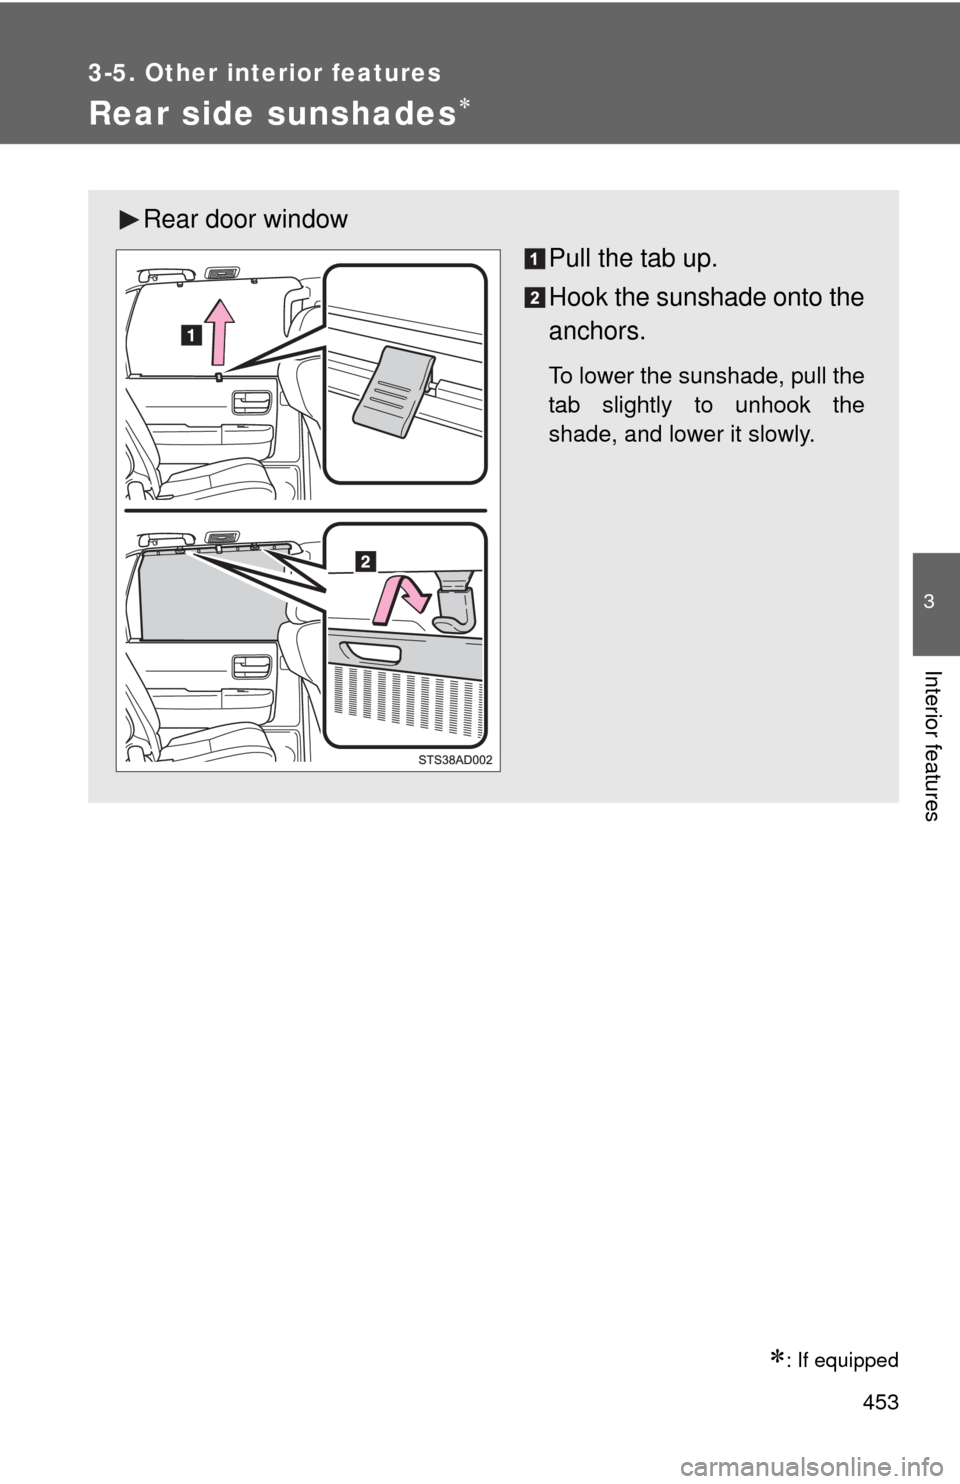
Rear side sunshades
: If equipped
Rear door windowPull the tab up.
Hook the sunshade onto the
anchors.
To lower the sunshade, pull the
tab slightly to unhook the
shade, and lower it slowly.
Page 454 of 668
454 3-5. Other interior features
NOTICE
■To ensure normal operation of the sunshade
Observe the following precautions.
●Do not place anything where it may hinder the opening/closing of the sun-
shade.
● Do not place anything on the sunshade.
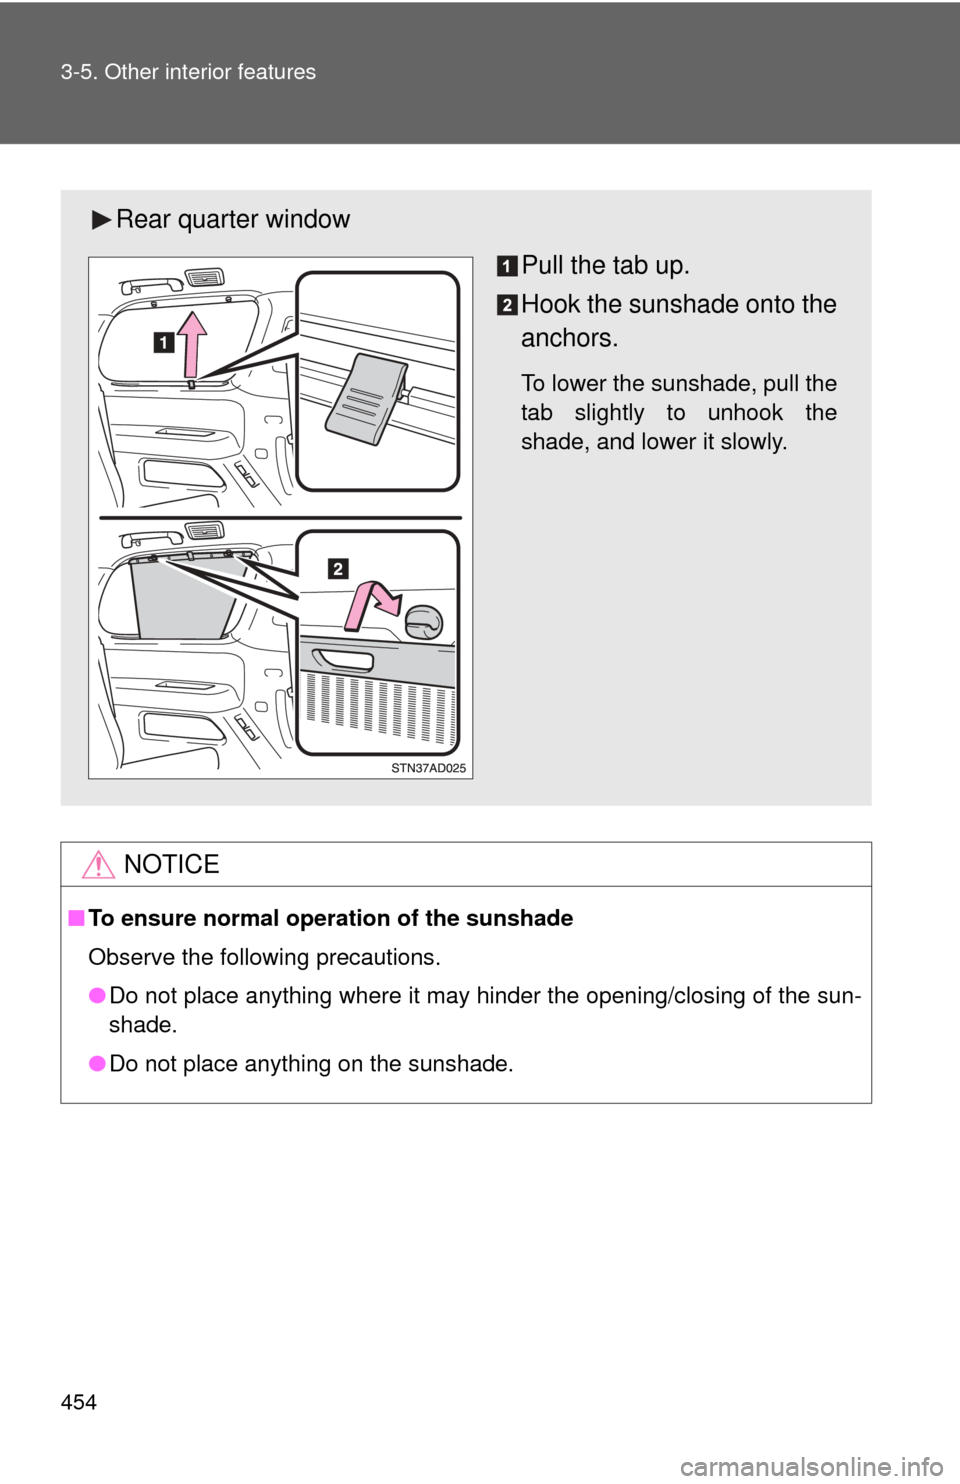
Rear quarter window
Pull the tab up.
Hook the sunshade onto the
anchors.
To lower the sunshade, pull the
tab slightly to unhook the
shade, and lower it slowly.
Page 464 of 668
464
3-5. Other interior features
Garage door opener
The garage door opener (HomeLink® Universal Transceiver) is manufac-
tured under license from HomeLink®.
Programming the HomeLink® (for U.S.A. owners)
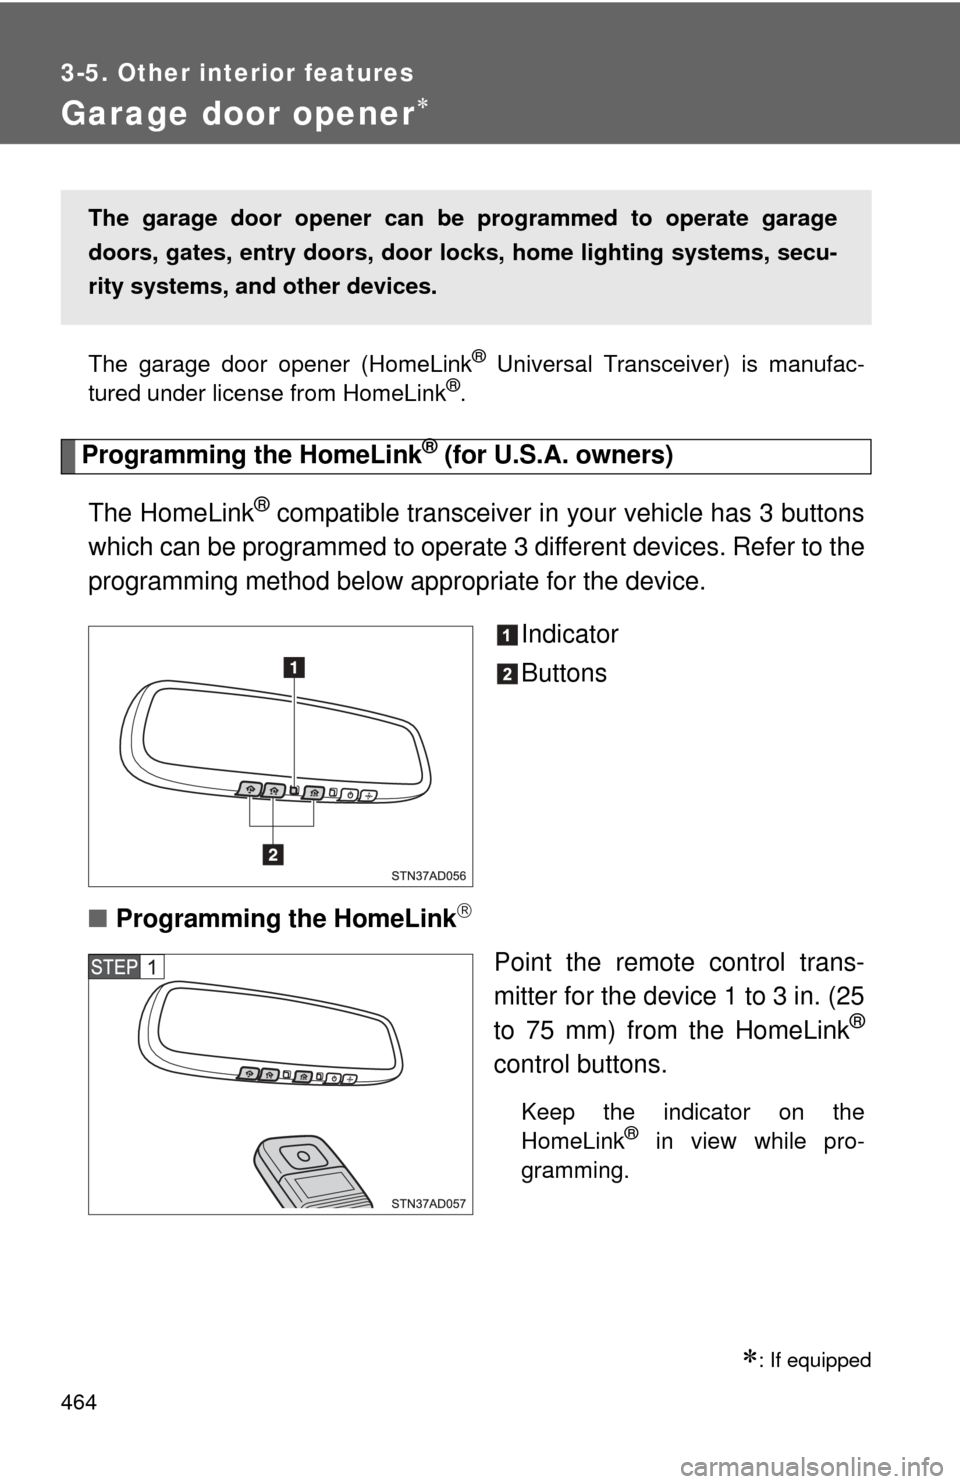
The HomeLink
® compatible transceiver in your vehicle has 3 buttons
which can be programmed to operate 3 different devices. Refer to the
programming method below appropriate for the device.
Indicator
Buttons
■ Programming the HomeLink
Point the remote control trans-
mitter for the device 1 to 3 in. (25
to 75 mm) from the HomeLink
®
control buttons.
Keep the indicator on the
HomeLink® in view while pro-
gramming.
: If equipped
The garage door opener can be programmed to operate garage
doors, gates, entry doors, door locks, hom e lighting systems, secu-
rity systems, and other devices.
Page 467 of 668
467
3-5. Other interior features
3
Interior features
Test the operation of the HomeLink® by pressing the newly
programmed button. Check to see if the gate/device operates
correctly.
Repeat the steps above to program another device for each of
the remaining HomeLink
® buttons.
■ Programming other devices
To program other devices such as home security systems, home
door locks or lighting, contact your authorized Toyota dealer for
assistance.
■ Reprogramming a button
The individual HomeLink
® buttons cannot be erased but can be
reprogrammed. To reprogram a button, follow the programming
instructions.
Operating the HomeLink®
Press the appropriate HomeLink® button. The HomeLink® indicator
on the HomeLink® transceiver should turn on.
The HomeLink® continues to send a signal for a maximum of 20 seconds
as long as the button is pressed.
Reprogramming a HomeLink® button
Press and hold the desired HomeLink
® button. After 20 seconds, the
HomeLink® indicator light will start flashing slowly. Keep pressing the
HomeLink® button and then follow the “Programming the HomeLink®
(for U.S.A. owners)” instructions. ( P. 464)
Page 475 of 668
Maintenance and care4
475
4-1. Maintenance and careCleaning and protecting the vehicle exterior ......... 476
Cleaning and protecting the vehicle interior .......... 478
4-2. Maintenance Maintenance requirements .................. 481
General maintenance....... 484
Emission inspection and maintenance (I/M)
programs........................ 487
4-3. Do-it-yourself maintenance Do-it-yourself service precautions .................... 488
Hood ................................ 492
Engine compartment ........ 493
Tires ................................. 508
Tire inflation pressure ...... 515
Wheels ............................. 519
Air conditioning filter......... 522
Wireless remote control battery ............................ 525
Checking and replacing fuses .............................. 527
Light bulbs........................ 539