light TOYOTA SEQUOIA 2014 2.G Manual Online
[x] Cancel search | Manufacturer: TOYOTA, Model Year: 2014, Model line: SEQUOIA, Model: TOYOTA SEQUOIA 2014 2.GPages: 668, PDF Size: 13.86 MB
Page 288 of 668

288 2-5. Driving information
HitchTrailer hitch assemblies have different weight capacities. Toyota rec-
ommends the use of Toyota hitch/brac ket for your vehicle. For details,
contact your Toyota dealer.
● If you wish to install a trailer hitch, contact your Toyota dealer.
● Use only a hitch that c onforms to the gross trailer weight require-
ment of your vehicle.
● Follow the directions supplied by the hitch manufacturer.
● Lubricate the hitch ball with a light coating of grease.
● Remove the trailer hitch whenever you are not towing a trailer.
After removing the hitch, seal any mounting hole in the vehicle
body to prevent entry of any substances into the vehicle.
Page 290 of 668
290 2-5. Driving information
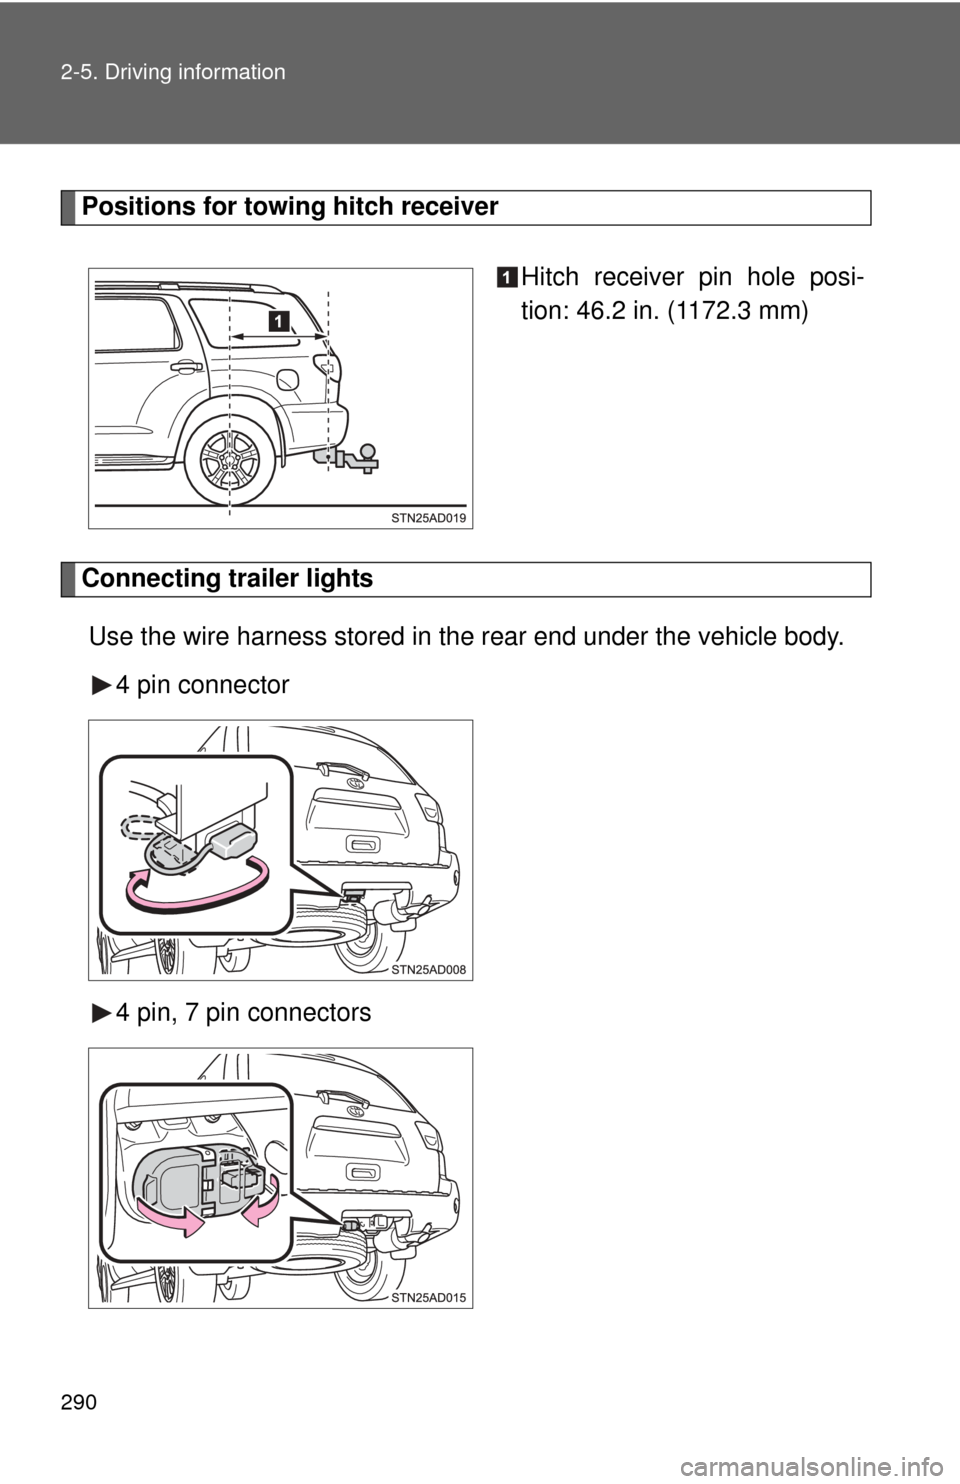
Positions for towing hitch receiverHitch receiver pin hole posi-
tion: 46.2 in. (1172.3 mm)
Connecting trailer lightsUse the wire harness stored in the rear end under the vehicle body. 4 pin connector
4 pin, 7 pin connectors
Page 293 of 668

293
2-5. Driving information
2
When driving
Trailer towing tips
Your vehicle will handle differently when towing a trailer. Help to avoid
an accident, death or serious injury, keep the following in mind when
towing:
● Speed limits for towing a trailer vary by state or province. Do not
exceed the posted towing speed limit.
● Toyota recommends that the vehicle-trailer speed limit is 65 mph
(104 km/h) on a flat, straight, dry road. Do not exceed this limit, the
posted towing speed limit or the speed limit for your trailer as set
forth in your trailer owner’s man ual, whichever is lowest. Instability
of the towing vehicle-trailer combin ation (trailer sway) increases as
speed increases. Exceeding speed limits may cause loss of con-
trol.
● Before starting out, check the trailer lights, tires and the vehicle-
trailer connections. Recheck after driving a short distance.
● Practice turning, stopping and reve rsing with the trailer attached in
an area away from traffic until you become accustomed to the feel
of the vehicle-trailer combination.
● Reversing with a trailer attached is difficult and requires practice.
Grip the bottom of the steering wheel and move your hand to the
left to move the trailer to the left. Move your hand to the right to
move the trailer to the right. (Thi s is generally opposite to reversing
without a trailer attached.) Avoid sharp or prolonged turning. Have
someone guide you when reversing to reduce the risk of an acci-
dent.
● As stopping distance is increased when towing a trailer, vehicle-to-
vehicle distance should be increased. For each 10 mph (16 km/h)
of speed, allow at least o ne vehicle and trailer length.
● Avoid sudden braking as you may skid, resulting in the trailer jack-
knifing and loss of vehicle control. This is especially true on wet or
slippery surfaces.
Page 296 of 668
296 2-5. Driving information
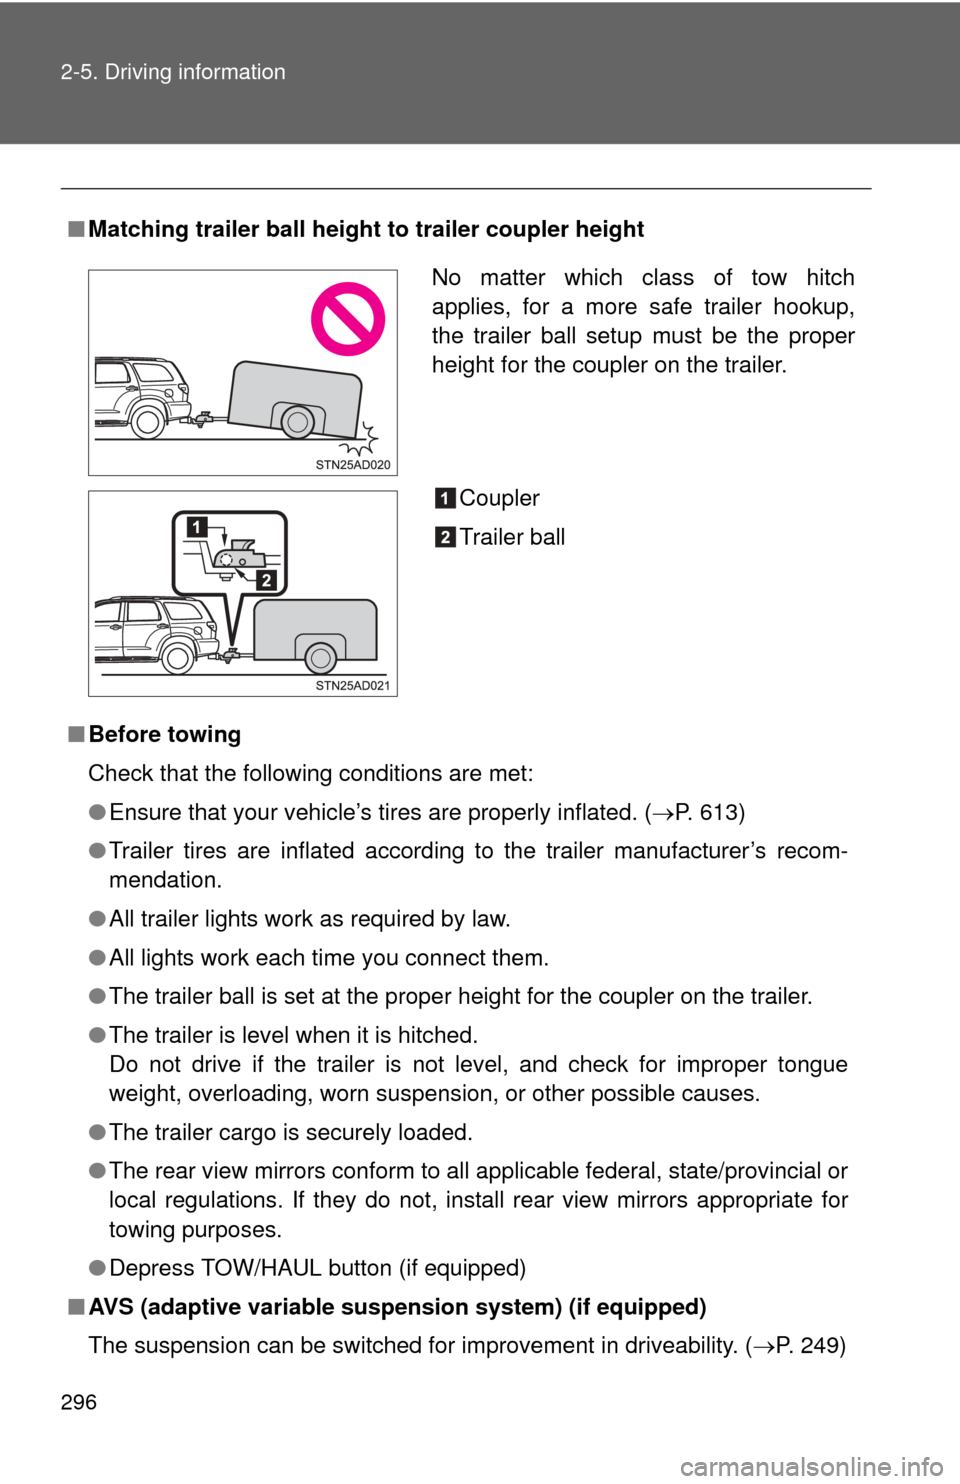
■Matching trailer ball height to trailer coupler height
■ Before towing
Check that the following conditions are met:
●Ensure that your vehicle’s tires are properly inflated. ( P. 613)
● Trailer tires are inflated according to the trailer manufacturer’s recom-
mendation.
● All trailer lights work as required by law.
● All lights work each time you connect them.
● The trailer ball is set at the proper height for the coupler on the trai\
ler.
● The trailer is level when it is hitched.
Do not drive if the trailer is not level, and check for improper tongue
weight, overloading, worn suspension, or other possible causes.
● The trailer cargo is securely loaded.
● The rear view mirrors conform to all applicable federal, state/provincial or
local regulations. If they do not, install rear view mirrors appropriate for
towing purposes.
● Depress TOW/HAUL button (if equipped)
■ AVS (adaptive variable suspension system) (if equipped)
The suspension can be switched for improvement in driveability. ( P. 249)
No matter which class of tow hitch
applies, for a more safe trailer hookup,
the trailer ball setup must be the proper
height for the coupler on the trailer.
Coupler
Trailer ball
Page 300 of 668
300 2-5. Driving information
CAUTION
■When towing a trailer
●Never tow a trailer without using a safety chain securely attached to both
the trailer and the vehicle. If damage occurs to the coupling unit or hitch
ball, there is danger of the trailer wandering into another lane.
NOTICE
■When installing a trailer hitch
Use only the position recommended by your Toyota dealer. Do not install the
trailer hitch on the bumper; this may cause body damage.
■ Do not directly splice trailer lights
Do not directly splice trailer lights. Directly splicing trailer lights may damage
your vehicle’s electrical system and cause a malfunction.
Page 303 of 668
Interior features3
303
3-3. Using the interior lightsInterior lights list ............... 406
• Personal/interior light main switch .................... 407
• Personal/interior lights ... 408
• Interior light .................... 409
3-4. Using the storage features List of storage features .... 410
• Glove boxes ................... 411
• Coin holder .................... 412
• Front console box .......... 413
• Card holder .................... 416
• Map holder ..................... 417
• Pen holder ..................... 419
• Tissue pocket................. 420
• Rear console box ........... 421
• Overhead console.......... 424
• Cup holders ................... 426
• Bottle holders ................. 430
• Auxiliary boxes............... 431 3-5. Other interior features
Sun visors ........................ 433
Vanity mirrors ................... 434
Clock ................................ 435
Outside temperature display............................ 436
Portable ashtray ............... 438
Cigarette lighter................ 439
Conversation mirror ......... 440
Power outlets ................... 441
Seat heaters..................... 447
Seat heaters and ventilators ...................... 450
Armrests........................... 452
Rear side sunshades ....... 453
Seatback table ................. 455
Assist grips....................... 456
Floor mat .......................... 457
Luggage compartment features .......................... 459
Garage door opener......... 464
Compass .......................... 470
Page 317 of 668
317
3-1. Using the air conditioning system and defogger
3
Interior features
Rear window and outside rear view mirror defoggers
: If equipped
■The rear window and outside rear vi ew mirror defoggers can be oper-
ated when
● The engine switch is in the ON position.
● The back window is completely closed.
■ Outside rear view mirror defoggers (vehicles with outside rear view
mirror defoggers)
Turning the rear window defogger on will turn the outside rear view mirror
defoggers on.
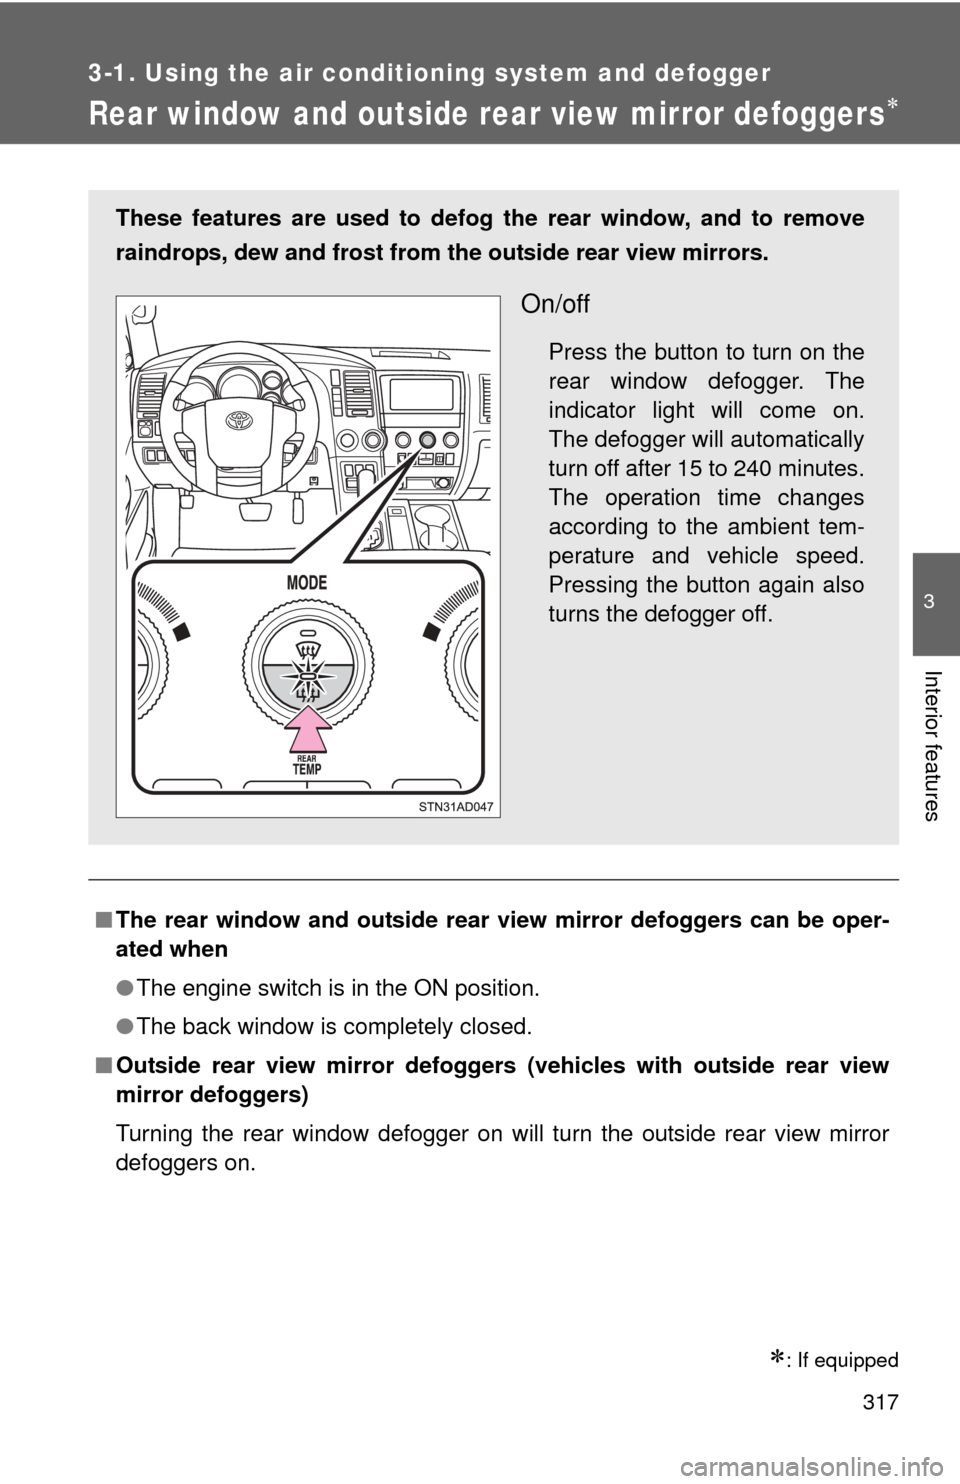
These features are used to defog the rear window, and to remove
raindrops, dew and frost from the outside rear view mirrors.
On/off
Press the button to turn on the
rear window defogger. The
indicator light will come on.
The defogger will automatically
turn off after 15 to 240 minutes.
The operation time changes
according to the ambient tem-
perature and vehicle speed.
Pressing the button again also
turns the defogger off.
Page 319 of 668
319
3-1. Using the air conditioning system and defogger
3
Interior features
Windshield wiper de-icer
: If equipped
■The de-icer can be operated when
●The engine switch is in the ON position.
● The back window is completely closed.
CAUTION
■When the windshield wiper de-icer is on
Do not touch the glass at the lower part of the windshield or to the side of the
front pillars as the surfaces can become very hot and burn you.
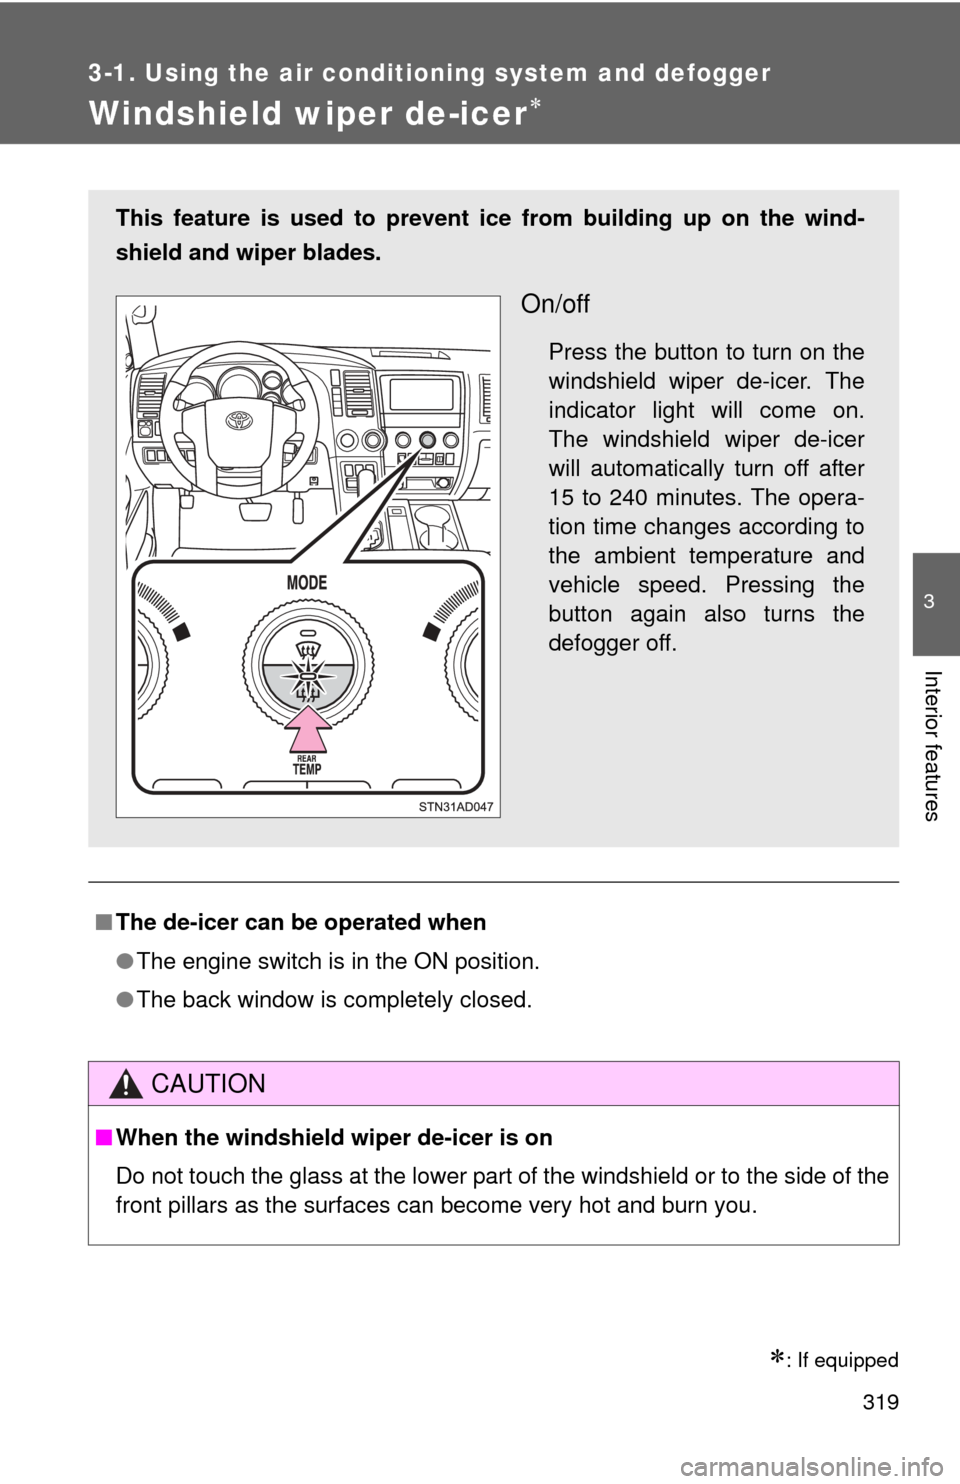
This feature is used to prevent ice from building up on the wind-
shield and wiper blades.
On/off
Press the button to turn on the
windshield wiper de-icer. The
indicator light will come on.
The windshield wiper de-icer
will automatically turn off after
15 to 240 minutes. The opera-
tion time changes according to
the ambient temperature and
vehicle speed. Pressing the
button again also turns the
defogger off.
Page 323 of 668
323
3-2. Using the multimedia system
3
Interior features
Operating the touch screen
By touching the screen with your finger, you can control the Audio,
hands-free system, etc.
■ Drag
*
Touch the screen with your finger and move the screen to the
desired position.
●Scrolling the lists
● Using scroll bar in lists
■ Flick
*
Touch the screen with your finger and then quickly move the
screen.
●Scrolling the main screen page
● Returning to the menu scr een from the sub-menu screen
(screen one level below)
*: The above operations may not be performed on all screens.
■ When using the touch screen
●If the screen is cold, the display may be dark, or the system may seem to
be operating slightly slower than normal.
● The screen may seem dark and hard to see when viewed through sun-
glasses. Change your angle of viewing, adjust the display on the “Dis\
play
Settings” screen ( P. 330) or remove your sunglasses.
■ Using cellular phones
Interference may be heard through the multimedia system’s speakers if a
cellular phone is being used inside or close to the vehicle while the multime-
dia system is operating.
Page 325 of 668
325
3-2. Using the multimedia system
3
Interior features
NOTICE
■
To avoid damaging the touch screen
●To prevent damaging the screen, lightly touch the screen buttons with your
finger.
● Do not use objects other than your finger to touch the screen.
● Wipe off fingerprints using a glass cleaning cloth. Do not use chemical
cleaners to clean the screen, as they may damage the touch screen.
■ To prevent battery discharge
Do not leave the multimedia system on longer than necessary when the
engine is off.
■ To avoid damaging the multimedia system
Take care not to spill drinks or ot her fluids on the multimedia system.