remote control TOYOTA SEQUOIA 2014 2.G User Guide
[x] Cancel search | Manufacturer: TOYOTA, Model Year: 2014, Model line: SEQUOIA, Model: TOYOTA SEQUOIA 2014 2.GPages: 668, PDF Size: 13.86 MB
Page 64 of 668
64 1-3. Adjustable components (seats, mirrors, steering wheel)
Linking driving position memory with door unlock operation
Memorized driving positions can be recalled when you unlock the
driver’s door using the wireless remote control and open the driver’s
door.
■ Setting the linked door unlock operation
Set the driving positions into the memory system using the “1”
or “2” buttons. ( P. 6 3 )
Turn the engine switch off then, close the driver’s door.
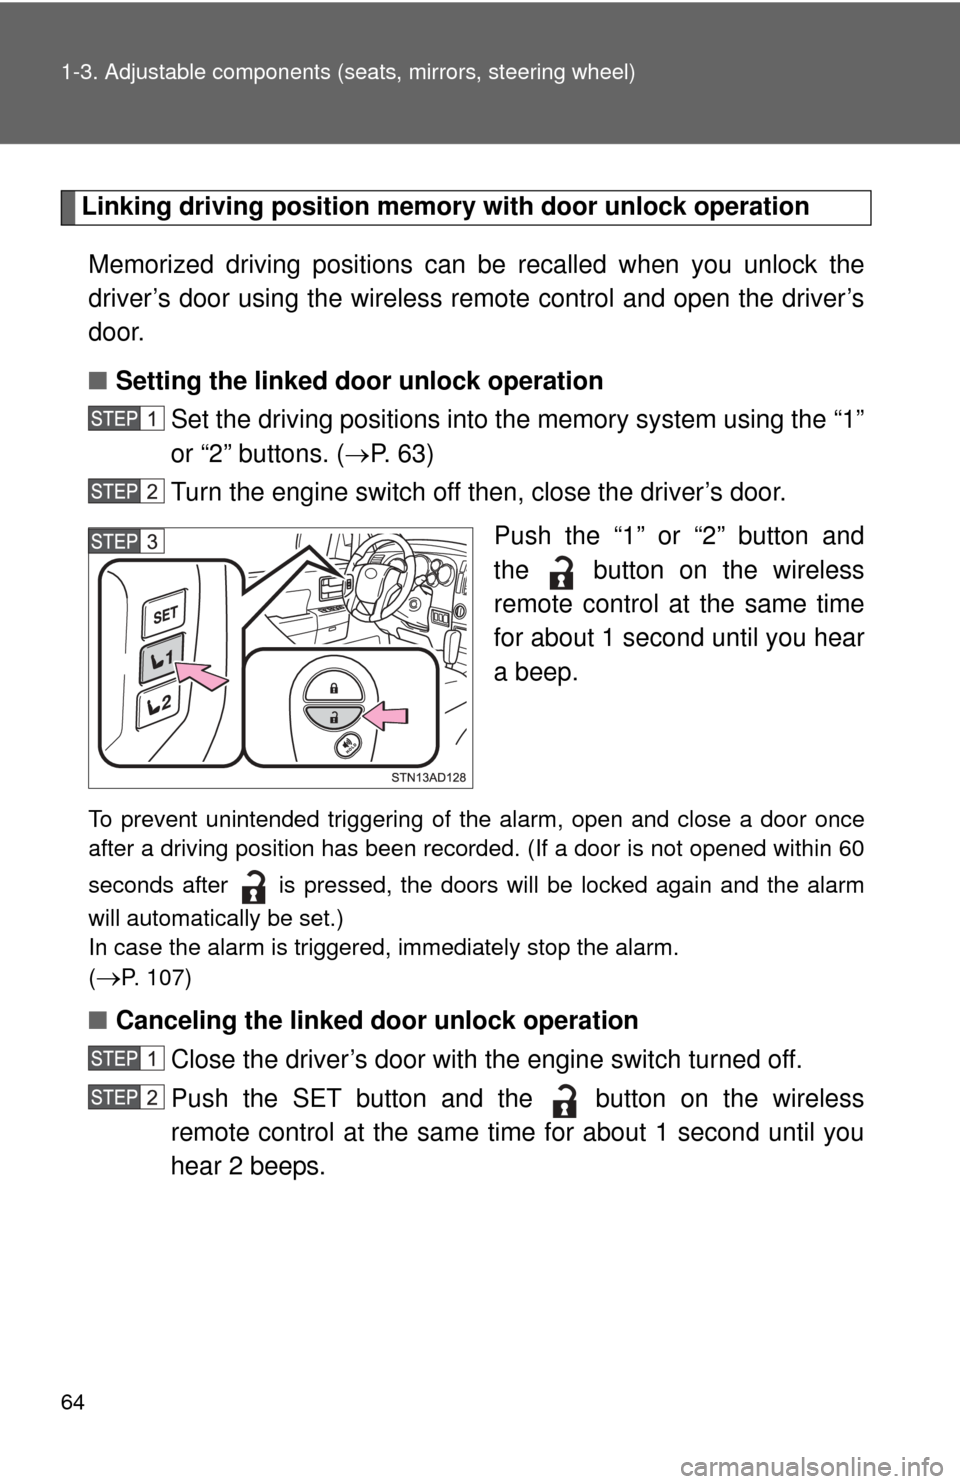
Push the “1” or “2” button and
the button on the wireless
remote control at the same time
for about 1 second until you hear
a beep.
To prevent unintended triggering of the alarm, open and close a door once
after a driving position has been recorded. (If a door is not opened within 60
seconds after is pressed, the doors will be locked again and the alarm
will automatically be set.)
In case the alarm is triggered, immediately stop the alarm.
(
P. 107)
■Canceling the linked door unlock operation
Close the driver’s door with the engine switch turned off.
Push the SET button and the button on the wireless
remote control at the same time for about 1 second until you
hear 2 beeps.
Page 107 of 668
107
1
1-6. Theft deterrent system
Before driving
Alarm
The system sounds the alarm and flashes lights when forcible entry
is detected.
■ Triggering of the alarm
The alarm is triggered in the fo llowing situations when the alarm
is set.
● A locked door is unlocked or opened in any way other than
using the wireless remote control door lock function or key.
The doors will lock again automatically.
● The hood is opened.
● Vehicles with the glass breakage sensor (if equipped): The
side windows are tapped or broken.
● The battery is reconnected.
■ Setting the alarm system
Close the doors and hood,
and lock all the doors. The
system will be set automati-
cally after 30 seconds.
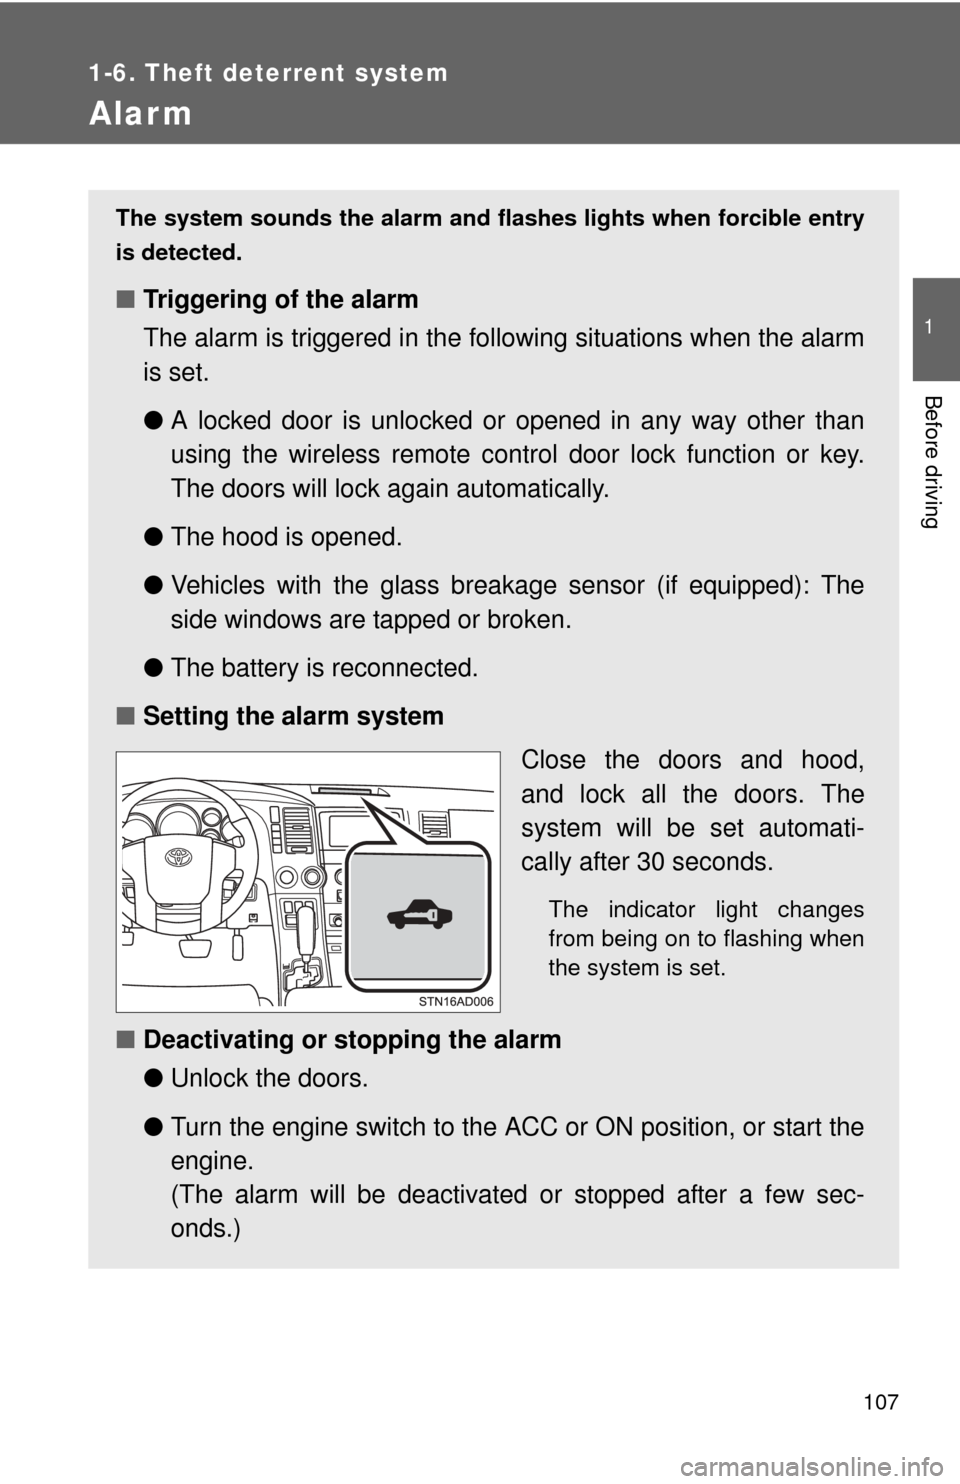
The indicator light changes
from being on to flashing when
the system is set.
■Deactivating or stopping the alarm
●Unlock the doors.
● Turn the engine switch to the ACC or ON position, or start the
engine.
(The alarm will be deactivated or stopped after a few sec-
onds.)
Page 192 of 668
192 2-3. Operating the lights and wipers
■Automatic light off system
●When the headlights come on: The headlights and tail lights automati-
cally turn off after 30 seconds when all doors are closed with the engine
switch turned to the ACC or LOCK position. (The lights turn off immedi-
ately if the button on the wireless remote control is pressed after all
doors are locked.)
● When only the tail lights come on: The tail lights turn off automatically
with the engine switch turned to the ACC or LOCK position and the
driver’s door is opened.
To turn the lights on again, turn the engine switch to the ON position, or turn
the headlight switch off once and then back to the or position.
■ Customization
●That can be configured at Toyota dealer. (vehicles without multi-informa-
tion display)
Settings (automatic light off system) can be changed. (Customizable
features P. 631)
● It is possible to change the settings. (vehicles with multi-information dis-
play) (Feature customization P. 181)
NOTICE
■To prevent battery discharge
Do not leave the lights on longer than necessary when the engine is not run-
ning.
Page 374 of 668

374 3-2. Using the multimedia system
■About the contact in this system
The following data is stored for every registered cellular phone. When
another phone is connecting, you cannot read the registered data.
●Contact data
● Call history
● Favorite
● Message
When removing a Bluetooth
® phone from the system, the above-mentioned
data is also deleted.
■ Compatible models
The Bluetooth
® audio system supports portable audio players with the fol-
lowing specifications
● Bluetooth
® specifications:
Ver. 2.0, or higher (Recommended: Ver. 3.0+EDR or higher)
● Profiles:
• A2DP (Advanced Audio Distribution Profile) Ver. 1.0, or higher
(Recommended: Ver. 1.2 or higher)
This is a profile to transmit stereo audio or high quality sound to the
multimedia system.
• AVRCP (Audio/Video Remote Control Profile) Ver. 1.0 or higher (Recommended: Ver. 1.4 or higher)
This is a profile to allow remote control the A/V equipment.
However, please note that some functions may be limited depending on the
type of portable audio player connected.
The hands-free system supports cellular phones with the following specifica-
tions.
• Bluetooth
® specification:
Ver. 2.0 or higher (Recommended: Ver. 3.0+EDR or higher)
Page 464 of 668
464
3-5. Other interior features
Garage door opener
The garage door opener (HomeLink® Universal Transceiver) is manufac-
tured under license from HomeLink®.
Programming the HomeLink® (for U.S.A. owners)
The HomeLink
® compatible transceiver in your vehicle has 3 buttons
which can be programmed to operate 3 different devices. Refer to the
programming method below appropriate for the device.
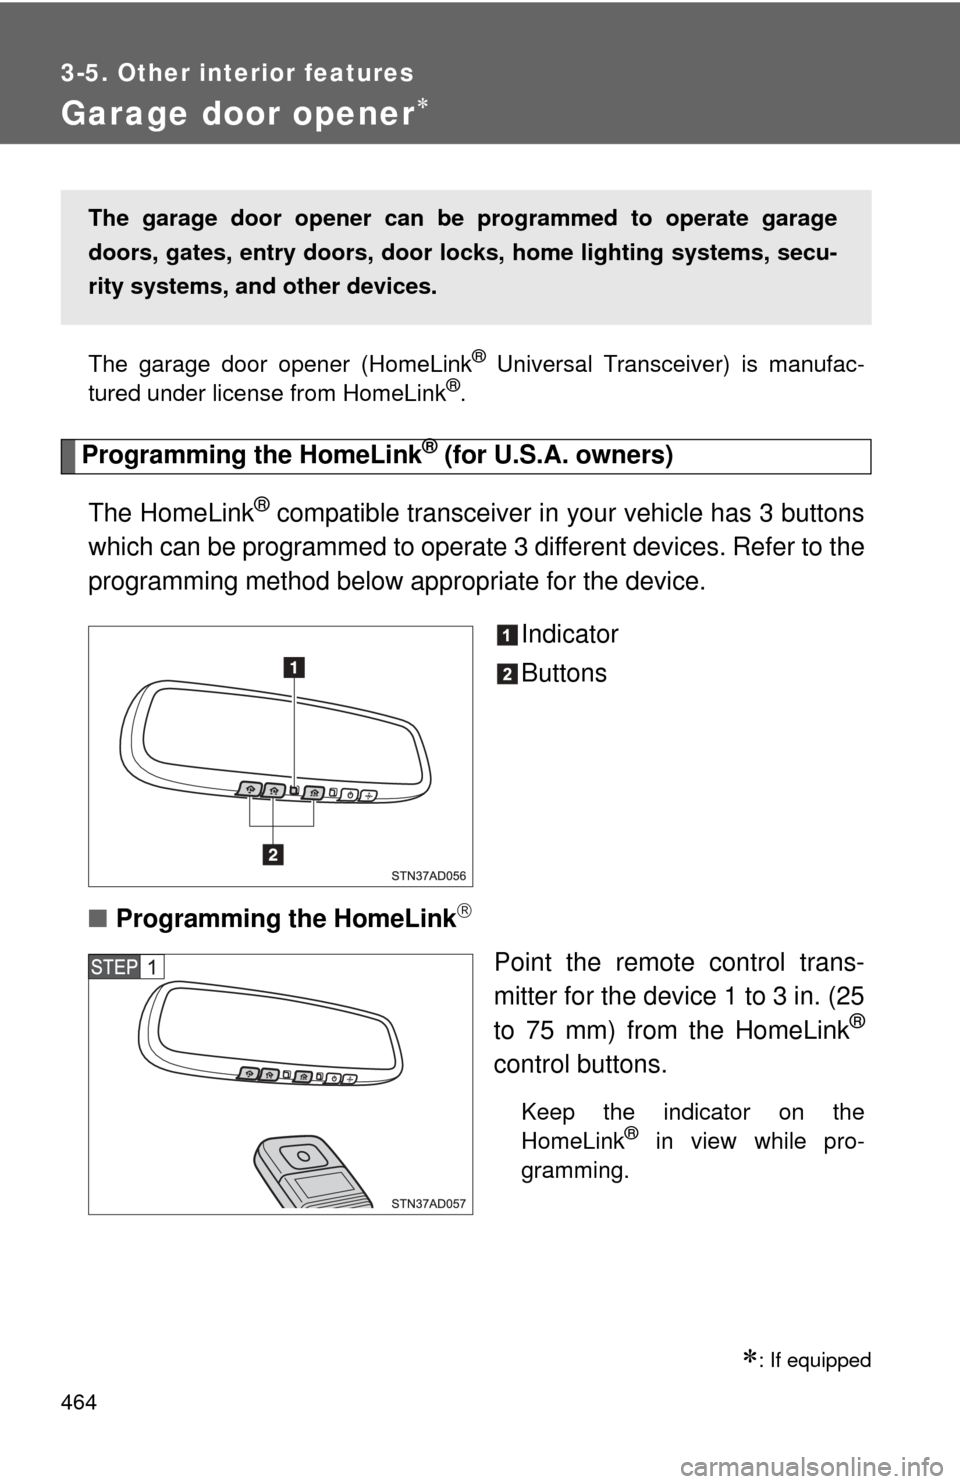
Indicator
Buttons
■ Programming the HomeLink
Point the remote control trans-
mitter for the device 1 to 3 in. (25
to 75 mm) from the HomeLink
®
control buttons.
Keep the indicator on the
HomeLink® in view while pro-
gramming.
: If equipped
The garage door opener can be programmed to operate garage
doors, gates, entry doors, door locks, hom e lighting systems, secu-
rity systems, and other devices.
Page 466 of 668

466 3-5. Other interior features
■Programming a Rolling Code sys tem (for U.S.A. owners)
If your device is Rolling Code equipped, follow the steps under the
heading “Programming the HomeLink
®” before proceeding with the
steps listed below.
Locate the training button on the ceiling mounted garage door
opener motor. The exact location and color of the button may
vary by brand of garage door opener.
Refer to the operation manual supplied with the garage door opener
for the location of the training button.
Press the training button.
Following this step, you have 30 seconds in which to initiate step 3
below.
Press and hold the vehicle’s programmed HomeLink® button
for 2 seconds and release it. Repeat this step once again. The
garage door may open.
If the garage door opens, the programming process is complete. If
the door does not open, press and release the button a third time.
This third press and release will complete the programming process
by opening the garage door.
The ceiling mounted garage door opener motor should now recog-
nize the HomeLink
® transceiver and operate the garage door.
Repeat the steps above to prog ram another rolling code sys-
tem for any of the remaining HomeLink® buttons.
■ Programming an entry gate (f or U.S.A. owners)/Programming
all devices in the Canadian market
Place your transmitter 1 to 3 in. (25 to 75 mm) away from the
surface of the HomeLink
®.
Keep the indicator on the HomeLink® in view while programming.
Press and hold the selected HomeLink® button.
Repeatedly press and release (cycle) the device’s remote
control button for two seconds each until step 4 is completed.
When the indicator on the HomeLink
® compatible transceiver
start to flashing rapidly, release the buttons.
Page 468 of 668
468 3-5. Other interior features
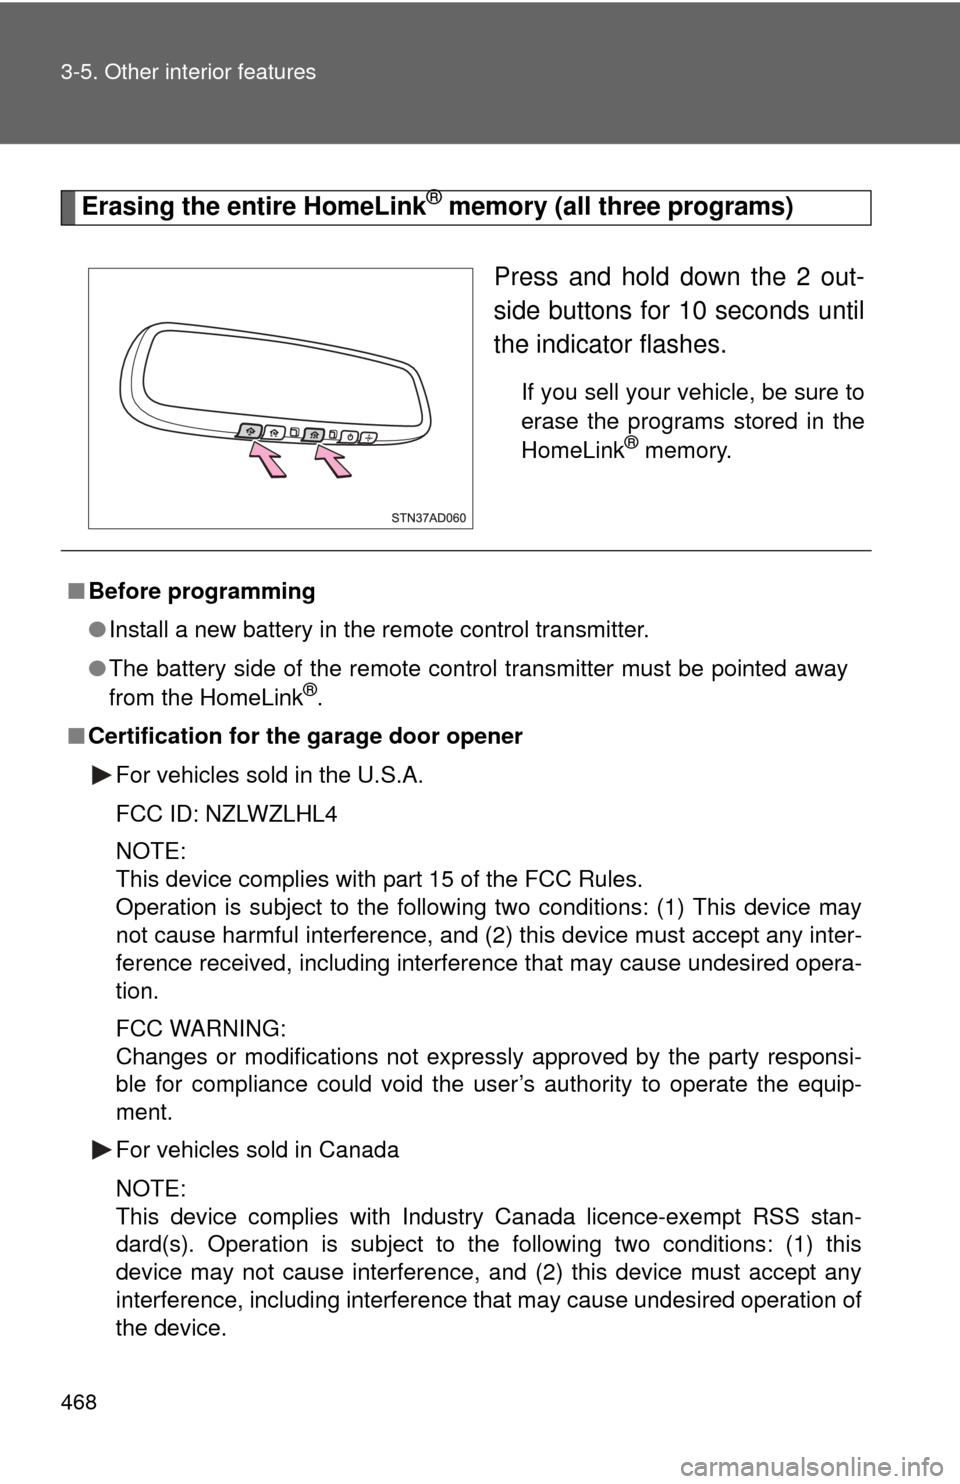
Erasing the entire HomeLink® memory (all three programs)Press and hold down the 2 out-
side buttons for 10 seconds until
the indicator flashes.
If you sell your vehicle, be sure to
erase the programs stored in the
HomeLink
® memory.
■Before programming
●Install a new battery in the remote control transmitter.
● The battery side of the remote control transmitter must be pointed away
from the HomeLink
®.
■ Certification for the garage door opener
For vehicles sold in the U.S.A.
FCC ID: NZLWZLHL4
NOTE:
This device complies with part 15 of the FCC Rules.
Operation is subject to the following two conditions: (1) This device may
not cause harmful interference, and (2) this device must accept any inter-
ference received, including interference that may cause undesired opera-
tion.
FCC WARNING:
Changes or modifications not expressly approved by the party responsi-
ble for compliance could void the user’s authority to operate the equip-
ment.
For vehicles sold in Canada
NOTE:
This device complies with Industry Canada licence-exempt RSS stan-
dard(s). Operation is subject to the following two conditions: (1) this
device may not cause interference, and (2) this device must accept any
interference, including interference that may cause undesired operation of
the device.
Page 469 of 668

469
3-5. Other interior features
3
Interior features
■
When support is necessary
Visit on the web at www.homelink.com
or call 1-800-355-3515.
CAUTION
■When programming a garage door or other remote control device
The garage door may operate, so ensure that people and objects are out of
danger to prevent potential harm.
■ Conforming to federal safety standards
Do not use the HomeLink
® Compatible Transceiver with any garage door
opener or device that lacks safety stop and reverse features as required by
federal safety standards.
This includes any garage door that cannot detect an obstruction object. A
door or device without these features increases the risk of death or serious
injury.
Page 475 of 668
Maintenance and care4
475
4-1. Maintenance and careCleaning and protecting the vehicle exterior ......... 476
Cleaning and protecting the vehicle interior .......... 478
4-2. Maintenance Maintenance requirements .................. 481
General maintenance....... 484
Emission inspection and maintenance (I/M)
programs........................ 487
4-3. Do-it-yourself maintenance Do-it-yourself service precautions .................... 488
Hood ................................ 492
Engine compartment ........ 493
Tires ................................. 508
Tire inflation pressure ...... 515
Wheels ............................. 519
Air conditioning filter......... 522
Wireless remote control battery ............................ 525
Checking and replacing fuses .............................. 527
Light bulbs........................ 539
Page 525 of 668
525
4-3. Do-it-yourself maintenance
4
Maintenance and care
Wireless remote control batter y
Replace the battery with a new one if it is discharged.
■You will need the following items:
Lithium battery CR2032
■ Replacing the battery
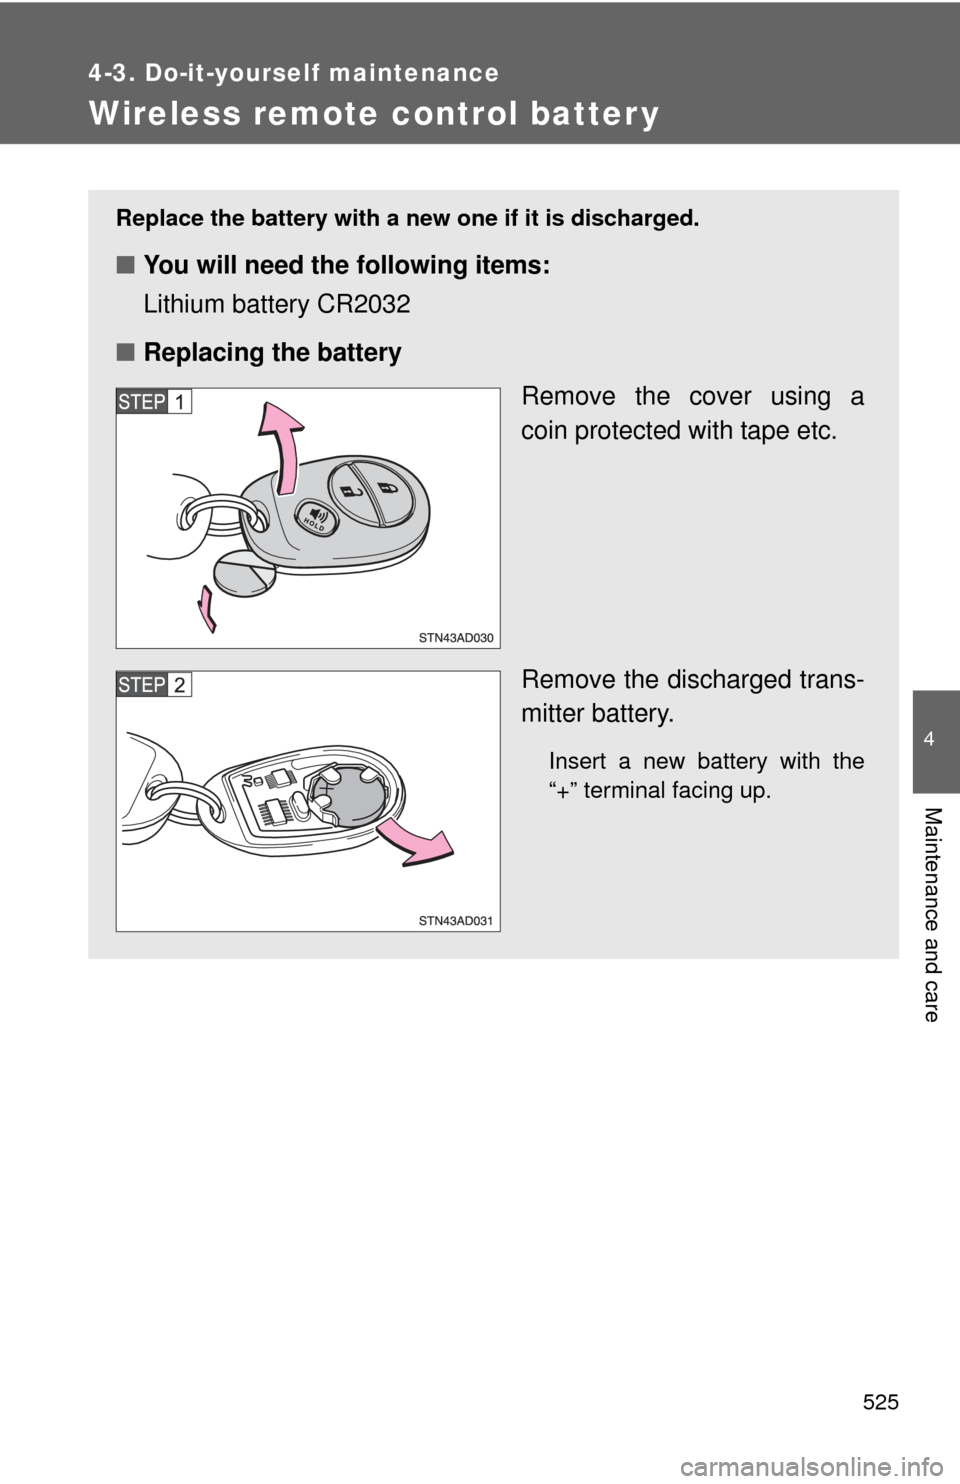
Remove the cover using a
coin protected with tape etc.
Remove the discharged trans-
mitter battery.
Insert a new battery with the
“+” terminal facing up.