clock setting TOYOTA SEQUOIA 2019 Accessories, Audio & Navigation (in English)
[x] Cancel search | Manufacturer: TOYOTA, Model Year: 2019, Model line: SEQUOIA, Model: TOYOTA SEQUOIA 2019Pages: 324, PDF Size: 6.76 MB
Page 54 of 324

54
3. OTHER SETTINGS
1. GENERAL SETTINGS
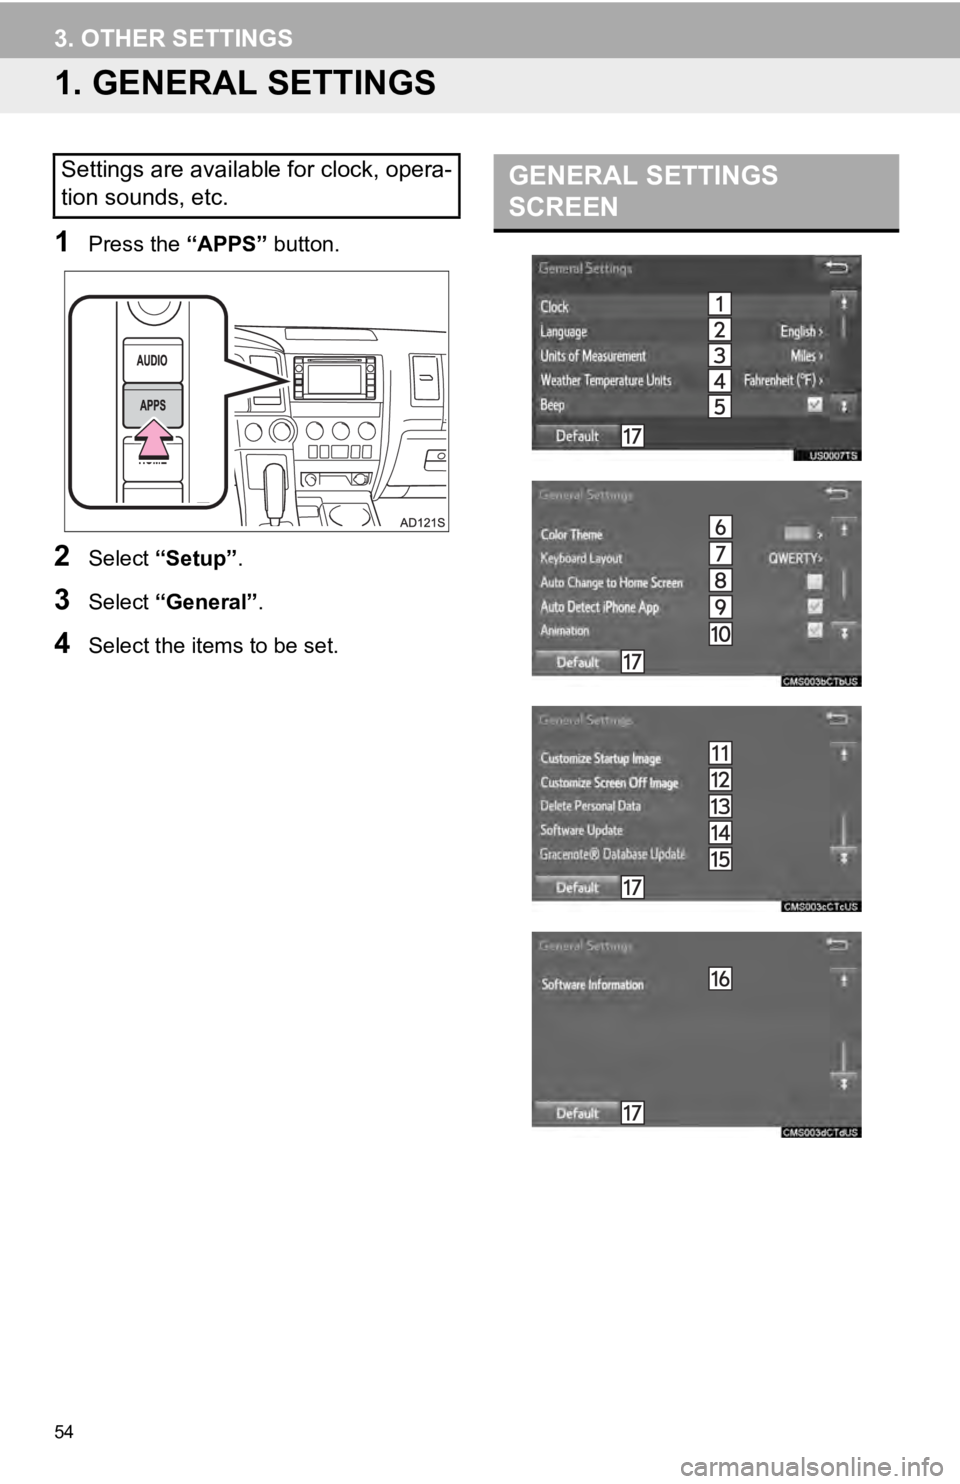
1Press the “APPS” button.
2Select “Setup” .
3Select “General” .
4Select the items to be set.
Settings are available for clock, opera-
tion sounds, etc.GENERAL SETTINGS
SCREEN
Page 55 of 324

55
3. OTHER SETTINGS
BASIC FUNCTION
2
*: Entune Premium Audio only
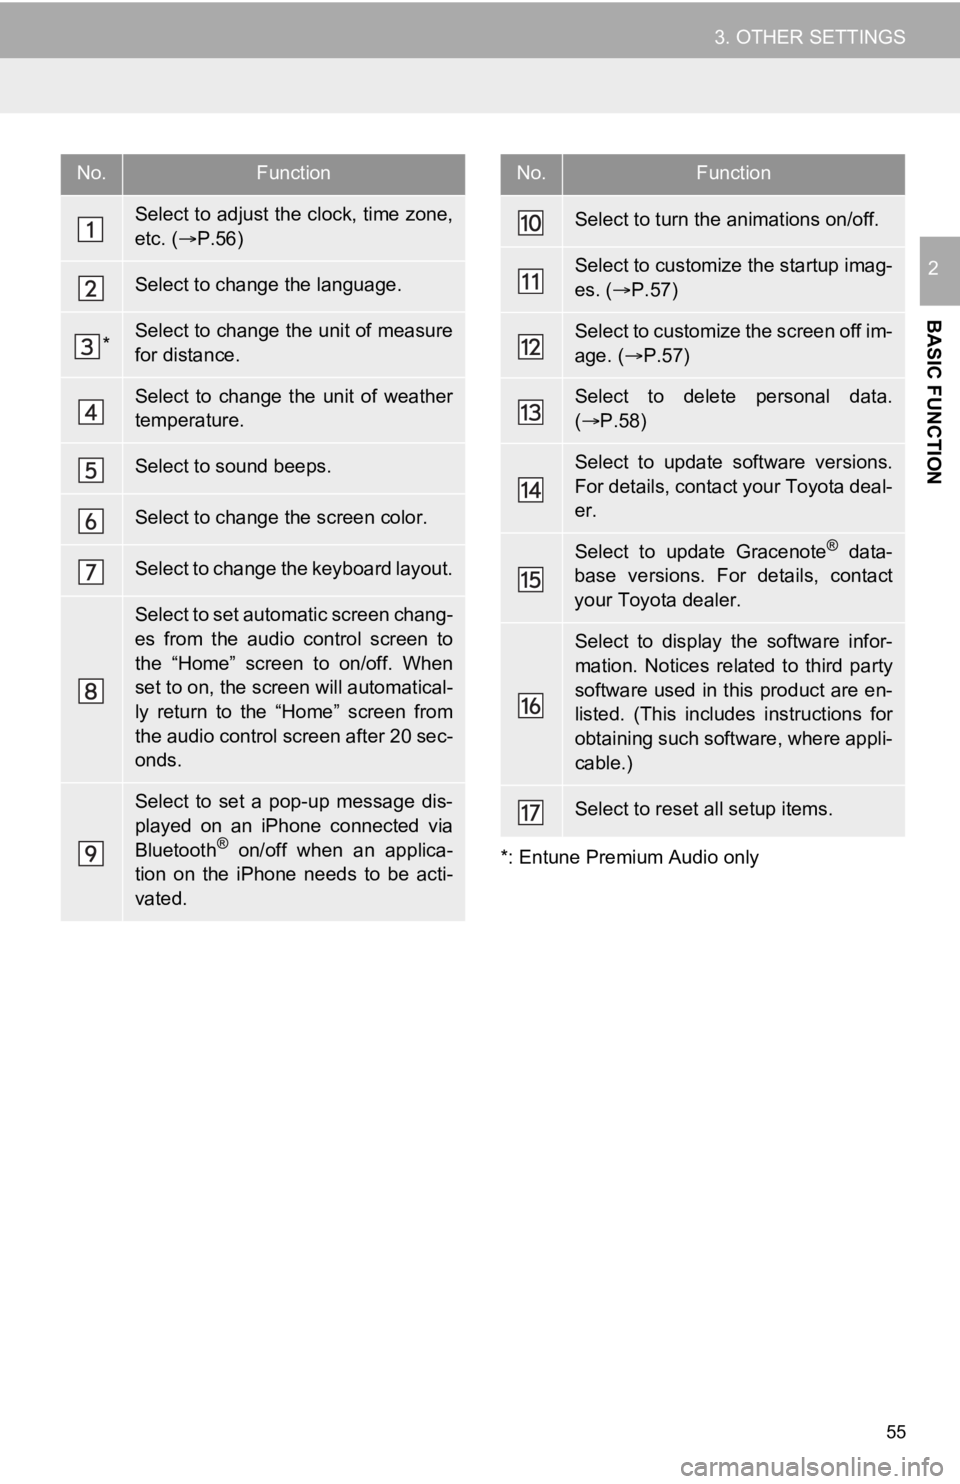
No.Function
Select to adjust the clock, time zone,
etc. ( P.56)
Select to change the language.
*Select to change the unit of measure
for distance.
Select to change the unit of weather
temperature.
Select to sound beeps.
Select to change the screen color.
Select to change the keyboard layout.
Select to set automatic screen chang-
es from the audio control screen to
the “Home” screen to on/off. When
set to on, the screen will automatical-
ly return to the “Home” screen from
the audio control screen after 20 sec-
onds.
Select to set a pop-up message dis-
played on an iPhone connected via
Bluetooth
® on/off when an applica-
tion on the iPhone needs to be acti-
vated.
Select to turn the animations on/off.
Select to customize the startup imag-
es. ( P.57)
Select to customize the screen off im-
age. ( P.57)
Select to delete personal data.
( P.58)
Select to update software versions.
For details, contact your Toyota deal-
er.
Select to update Gracenote® data-
base versions. For details, contact
your Toyota dealer.
Select to display the software infor-
mation. Notices related to third party
software used in this product are en-
listed. (This includes instructions for
obtaining such software, where appli-
cable.)
Select to reset all setup items.
No.Function
Page 56 of 324

56
3. OTHER SETTINGS
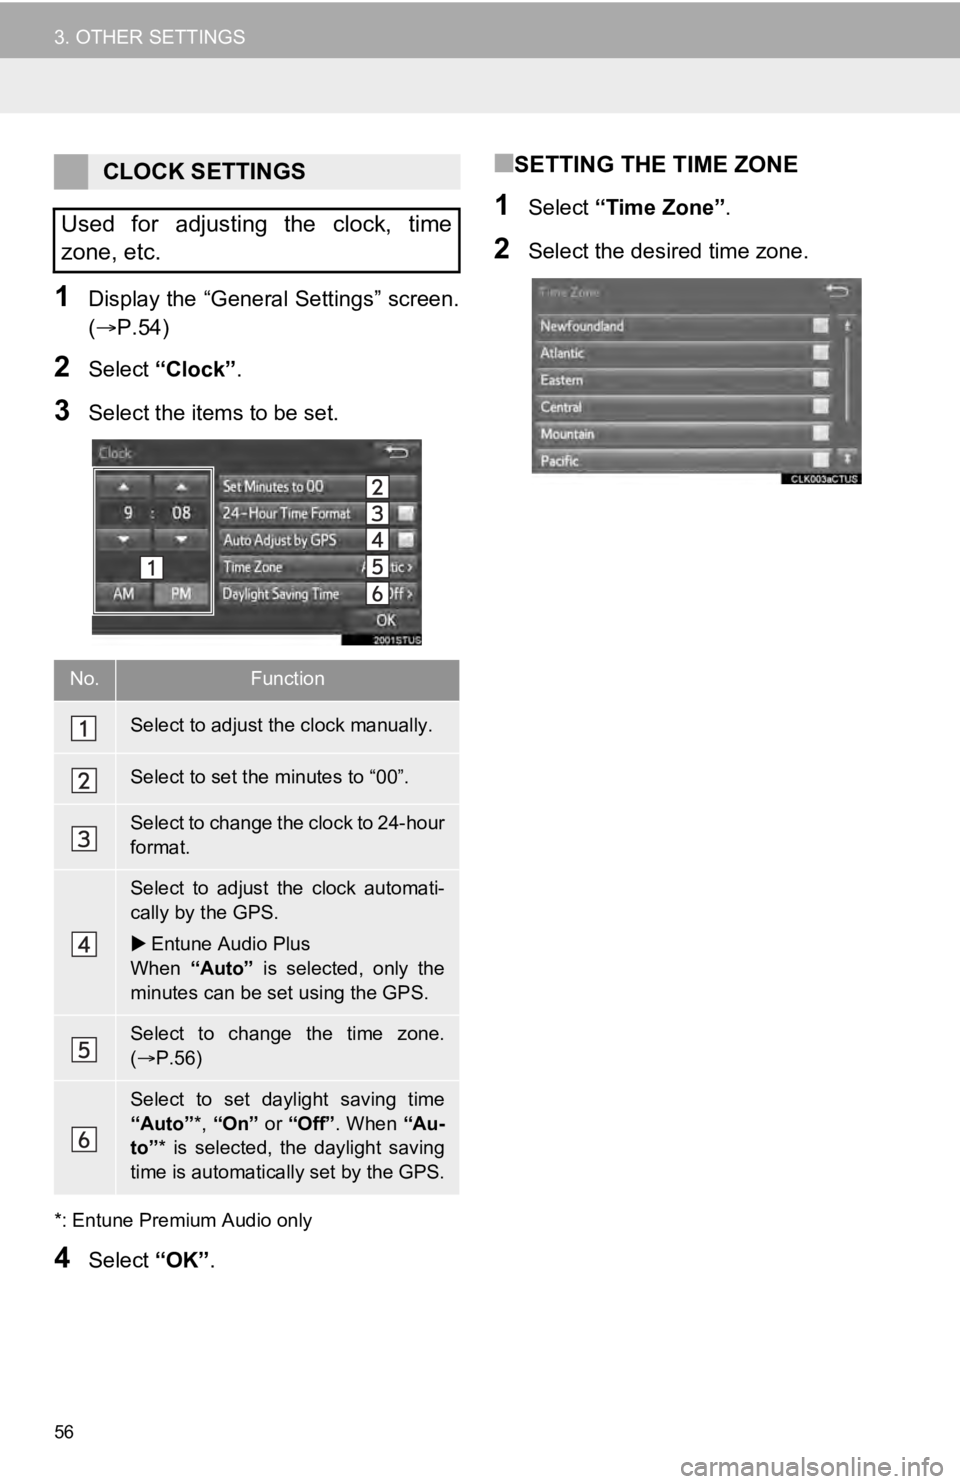
1Display the “General Settings” screen.
(P.54)
2Select “Clock”.
3Select the items to be set.
*: Entune Premium Audio only
4Select “OK”.
■SETTING THE TIME ZONE
1Select “Time Zone” .
2Select the desired time zone.
CLOCK SETTINGS
Used for adjusting the clock, time
zone, etc.
No.Function
Select to adjust the clock manually.
Select to set the minutes to “00”.
Select to change the clock to 24-hour
format.
Select to adjust the clock automati-
cally by the GPS.
Entune Audio Plus
When “Auto” is selected, only the
minutes can be set using the GPS.
Select to change the time zone.
( P.56)
Select to set daylight saving time
“Auto” *, “On” or “Off” . When “Au-
to” * is selected, the daylight saving
time is automatically set by the GPS.
Page 310 of 324

310
ALPHABETICAL INDEX
A
AAC.......................................................... 94
AM............................................................ 77
APPS button ............................................ 12
“Apps” screen........................................... 14
AUDIO button........................................... 12
Audio settings ........................................ 112
AUX........................................................ 109
B
Bluetooth®................................................ 42
Profiles ................................................. 44
Registering a Bluetooth
® audio
player ................................................ 43
Registering a Bluetooth
® phone ........... 42
Bluetooth® audio .................................... 105
Connecting a Bluetooth® device ........ 108
Listening to Bluetooth® audio ............. 108
Bluetooth® phone................................... 186
Bluetooth® phone message function ..... 202
C
Calling on the Bluetooth® phone ............ 191
Casual speech recognization ................. 165
CD ............................................................ 94
Playing an audio CD ............................. 96
Playing an MP3/WMA/AAC disc ........... 96
Clock settings ........................................... 56
Command list ......................................... 166
Contacts ................................................. 193
Controls overview..................................... 12
D
Data services settings ............................ 174
Destination search screen...................... 244
Driver settings .......................................... 62