clock TOYOTA SEQUOIA 2019 Owners Manual (in English)
[x] Cancel search | Manufacturer: TOYOTA, Model Year: 2019, Model line: SEQUOIA, Model: TOYOTA SEQUOIA 2019Pages: 560, PDF Size: 10.83 MB
Page 171 of 560
1714-1. Before driving
4
Driving
SEQUOIA_OM_USA_OM0C013U_19MY
Cargo and luggage
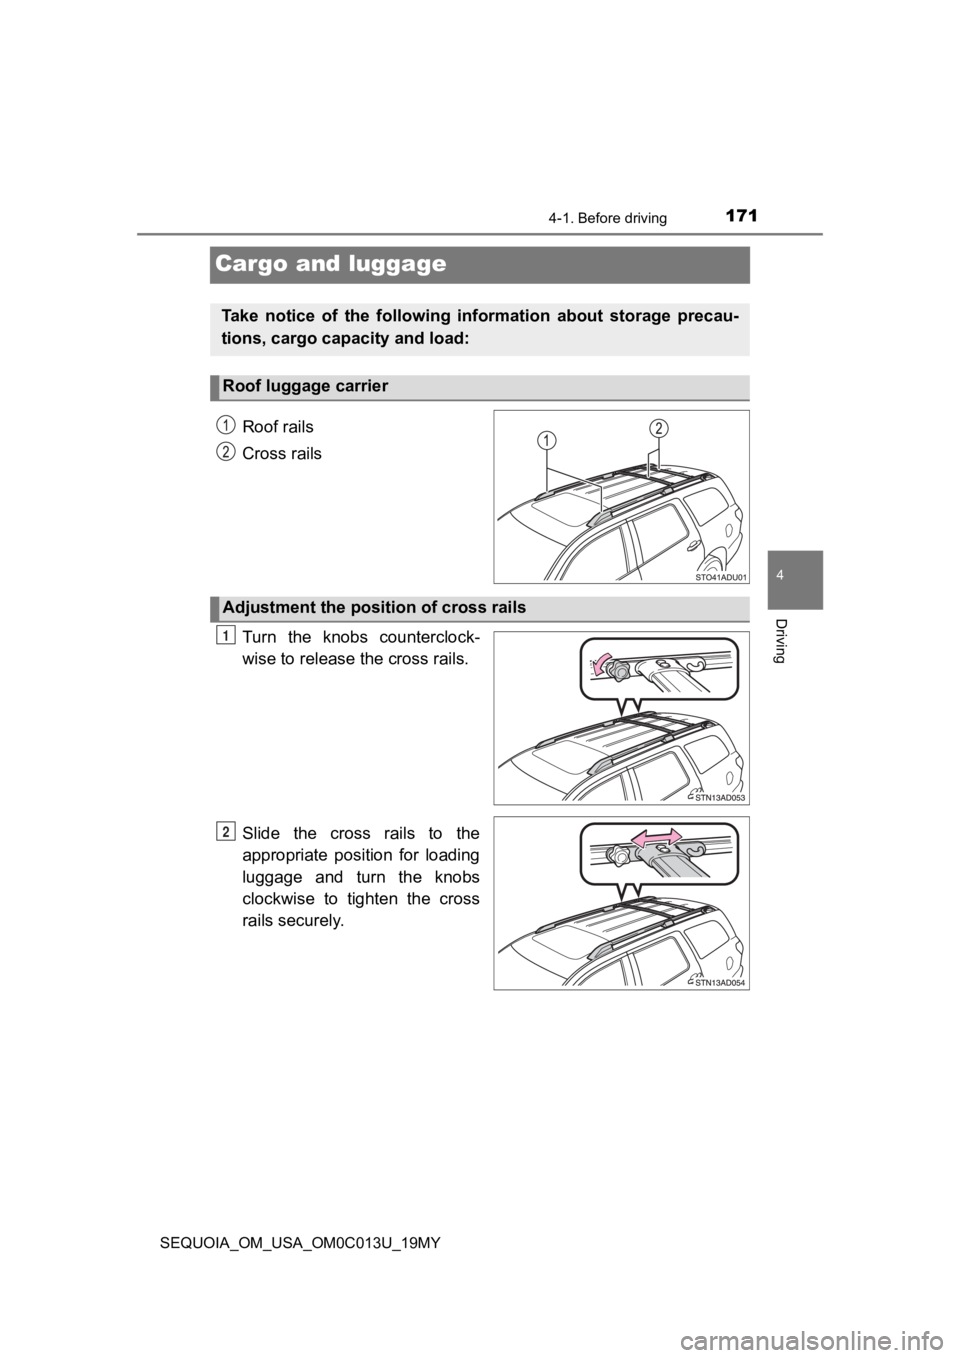
Roof rails
Cross rails
Turn the knobs counterclock-
wise to release the cross rails.
Slide the cross rails to the
appropriate position for loading
luggage and turn the knobs
clockwise to tighten the cross
rails securely.
Take notice of the following information about storage precau-
tions, cargo capacity and load:
Roof luggage carrier
Adjustment the position of cross rails
1
2
Page 396 of 560
3966-3. Do-it-yourself maintenance
SEQUOIA_OM_USA_OM0C013U_19MY■
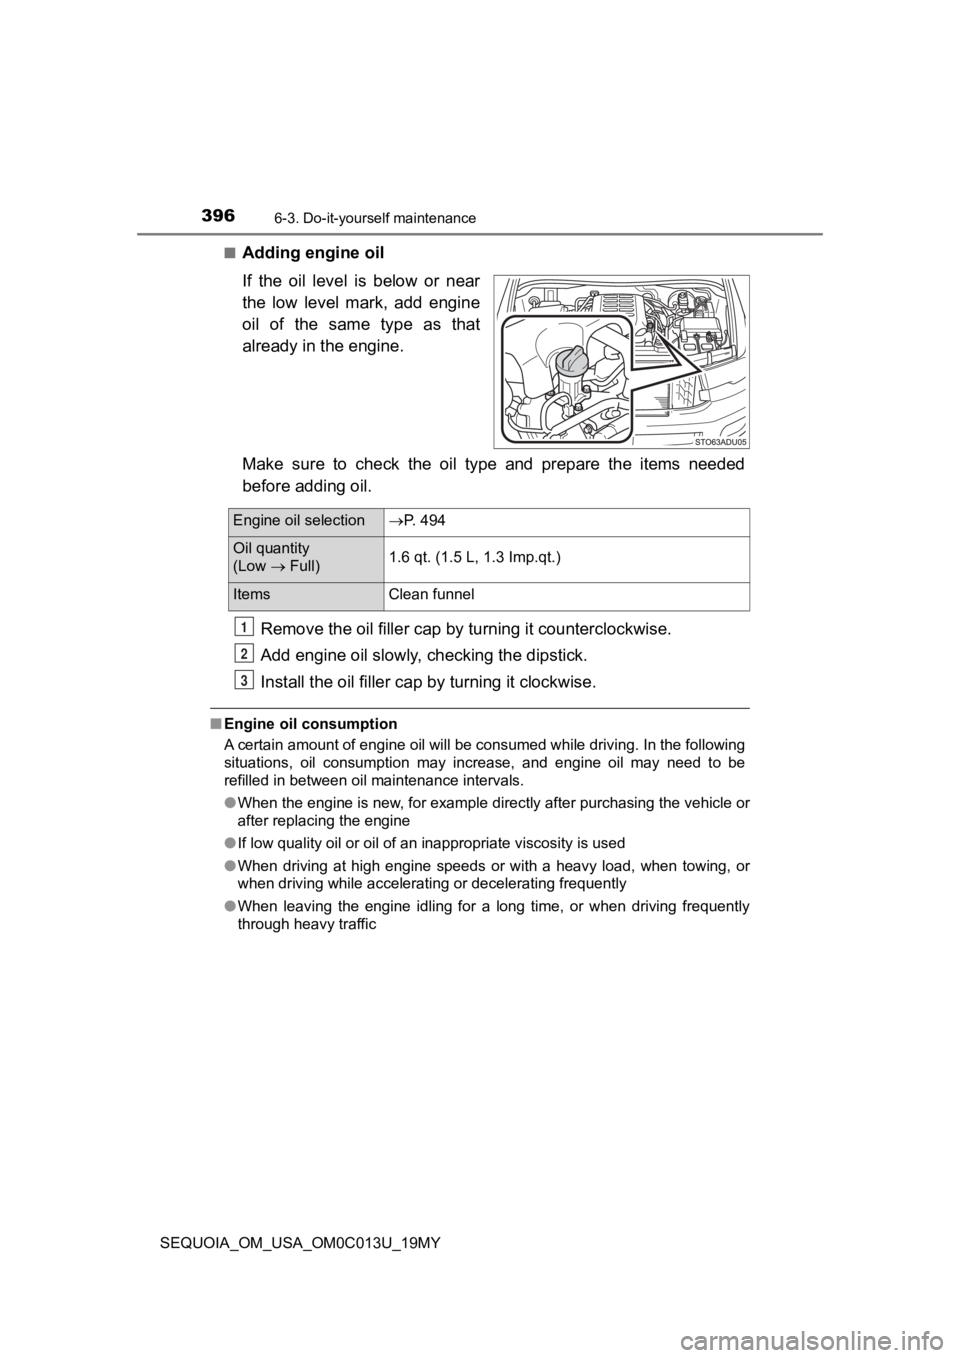
Adding engine oil
If the oil level is below or near
the low level mark, add engine
oil of the same type as that
already in the engine.
Make sure to check the oil type and prepare the items needed
before adding oil.
Remove the oil fille r cap by turning it counterclockwise.
Add engine oil slowly, checking the dipstick.
Install the oil filler cap by turning it clockwise.
■Engine oil consumption
A certain amount of engine oil will be consumed while driving. In the following
situations, oil consumption may increase, and engine oil may ne ed to be
refilled in between oil maintenance intervals.
● When the engine is new, for example directly after purchasing t he vehicle or
after replacing the engine
● If low quality oil or oil of an inappropriate viscosity is used
● When driving at high engine speeds or with a heavy load, when t owing, or
when driving while accelerating or decelerating frequently
● When leaving the engine idling for a long time, or when driving frequently
through heavy traffic
Engine oil selection P. 494
Oil quantity
(Low Full) 1.6 qt. (1.5 L, 1.3 Imp.qt.)
Items
Clean funnel
1
2
3
Page 401 of 560
4016-3. Do-it-yourself maintenance
6
Maintenance and care
SEQUOIA_OM_USA_OM0C013U_19MY■
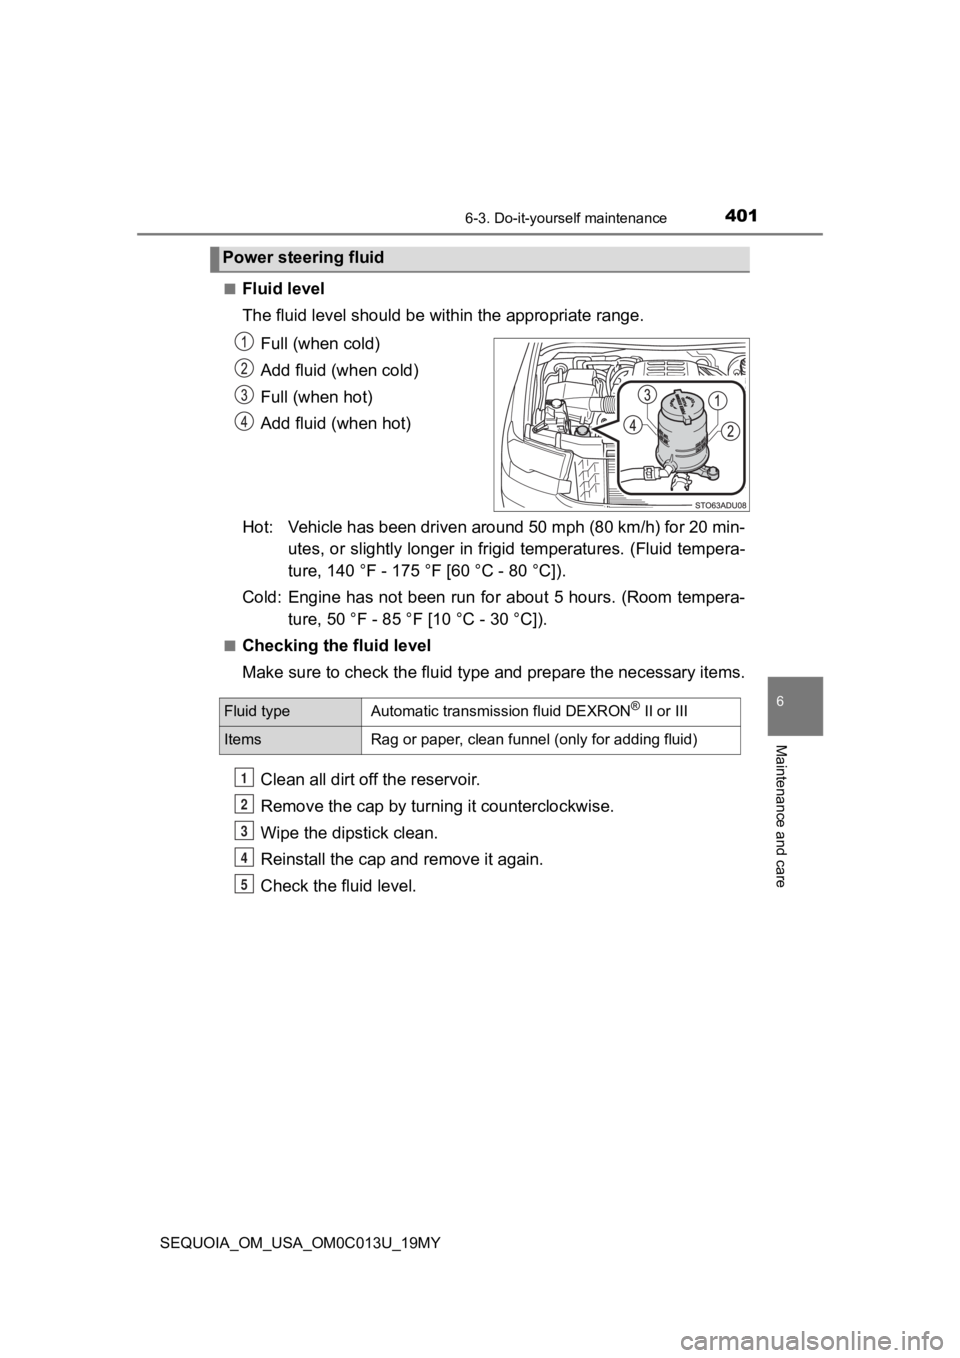
Fluid level
The fluid level should be within the appropriate range.
Full (when cold)
Add fluid (when cold)
Full (when hot)
Add fluid (when hot)
Hot: Vehicle has been driven around 50 mph (80 km/h) for 20 min- utes, or slightly longer in frigid temperatures. (Fluid tempera-
ture, 140 °F - 175 °F [60 °C - 80 °C]).
Cold: Engine has not been run for about 5 hours. (Room tempera- ture, 50 °F - 85 °F [10 °C - 30 °C]).
■Checking the fluid level
Make sure to check the fluid type and prepare the necessary items.
Clean all dirt off the reservoir.
Remove the cap by turni ng it counterclockwise.
Wipe the dipstick clean.
Reinstall the cap and remove it again.
Check the fluid level.
Power steering fluid
Fluid typeAutomatic transmission fluid DEXRON® II or III
ItemsRag or paper, clean funnel (only for adding fluid)
1
2
3
4
5
Page 431 of 560
4316-3. Do-it-yourself maintenance
6
Maintenance and care
SEQUOIA_OM_USA_OM0C013U_19MY
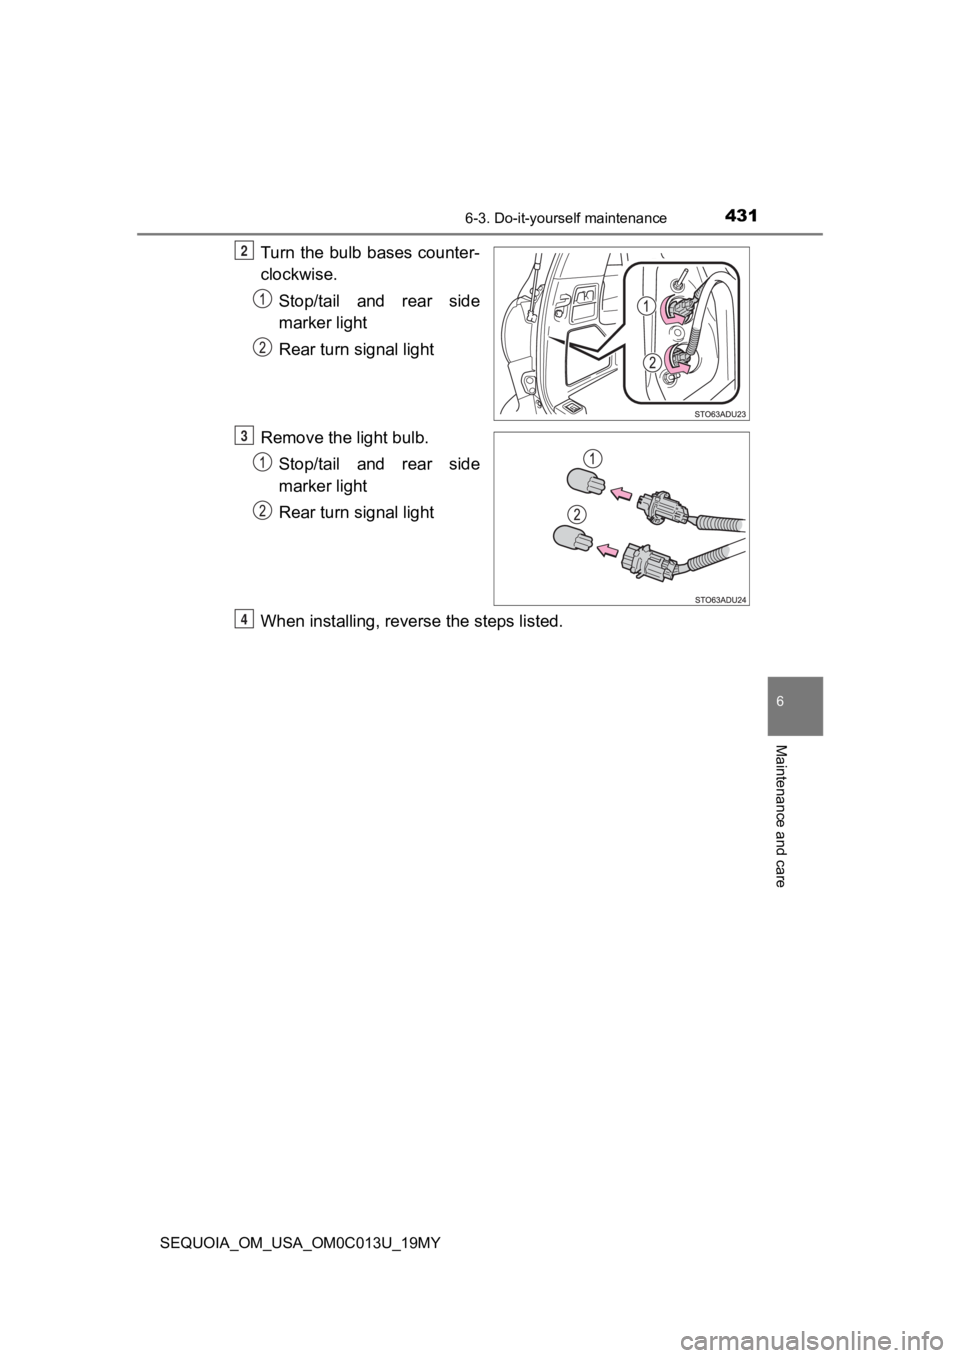
Turn the bulb bases counter-
clockwise.Stop/tail and rear side
marker light
Rear turn signal light
Remove the light bulb. Stop/tail and rear side
marker light
Rear turn signal light
When installing, reverse the steps listed.2
3
4
Page 433 of 560
4336-3. Do-it-yourself maintenance
6
Maintenance and care
SEQUOIA_OM_USA_OM0C013U_19MY
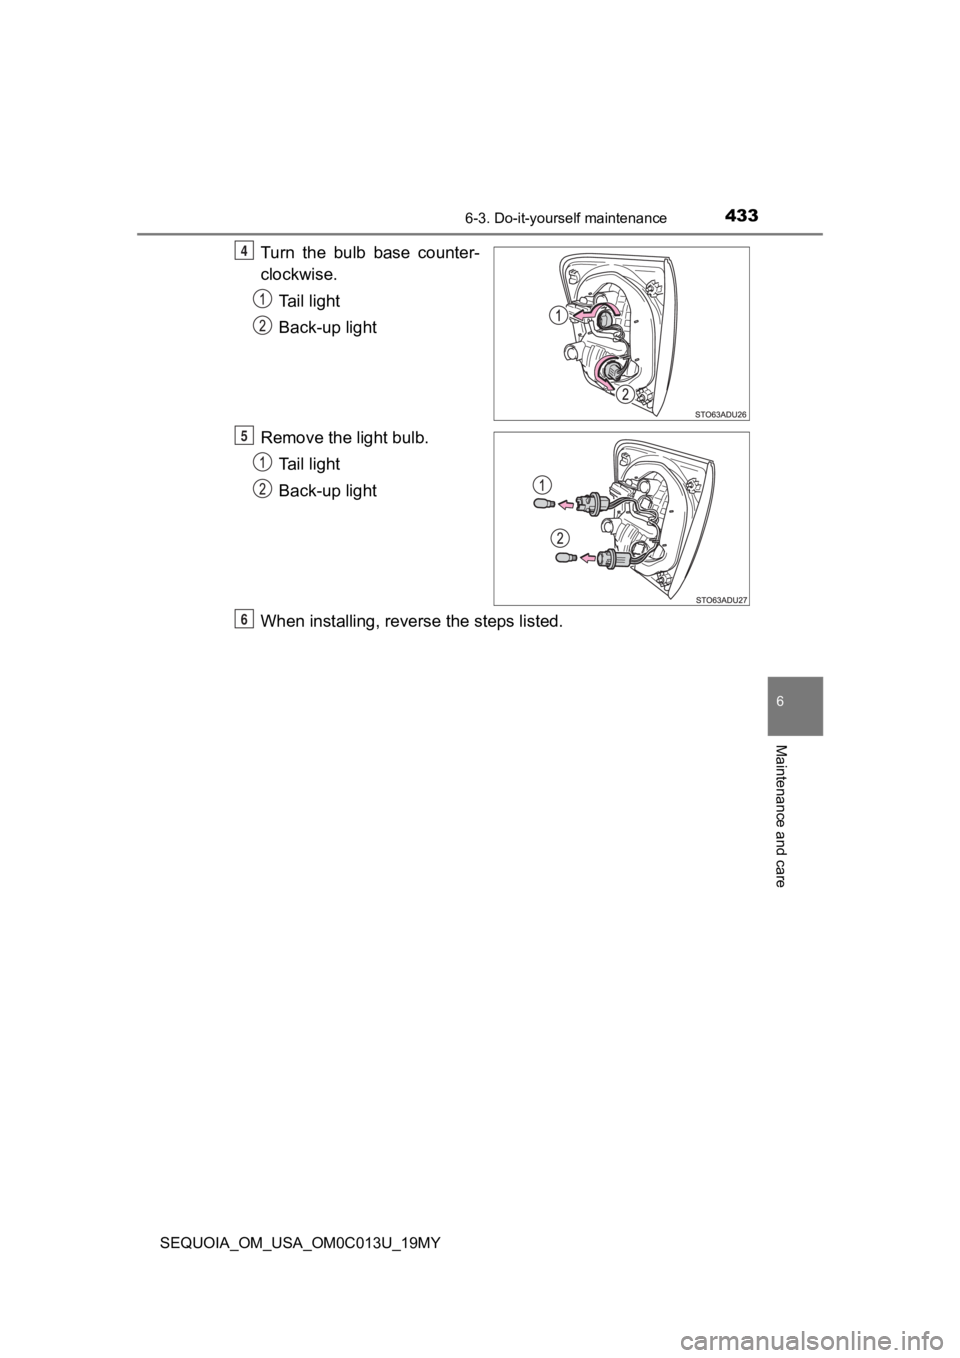
Turn the bulb base counter-
clockwise.Tail light
Back-up light
Remove the light bulb. Tail light
Back-up light
When installing, reverse the steps listed.4
5
6
Page 469 of 560
4697-2. Steps to take in an emergency
7
When trouble arises
SEQUOIA_OM_USA_OM0C013U_19MY
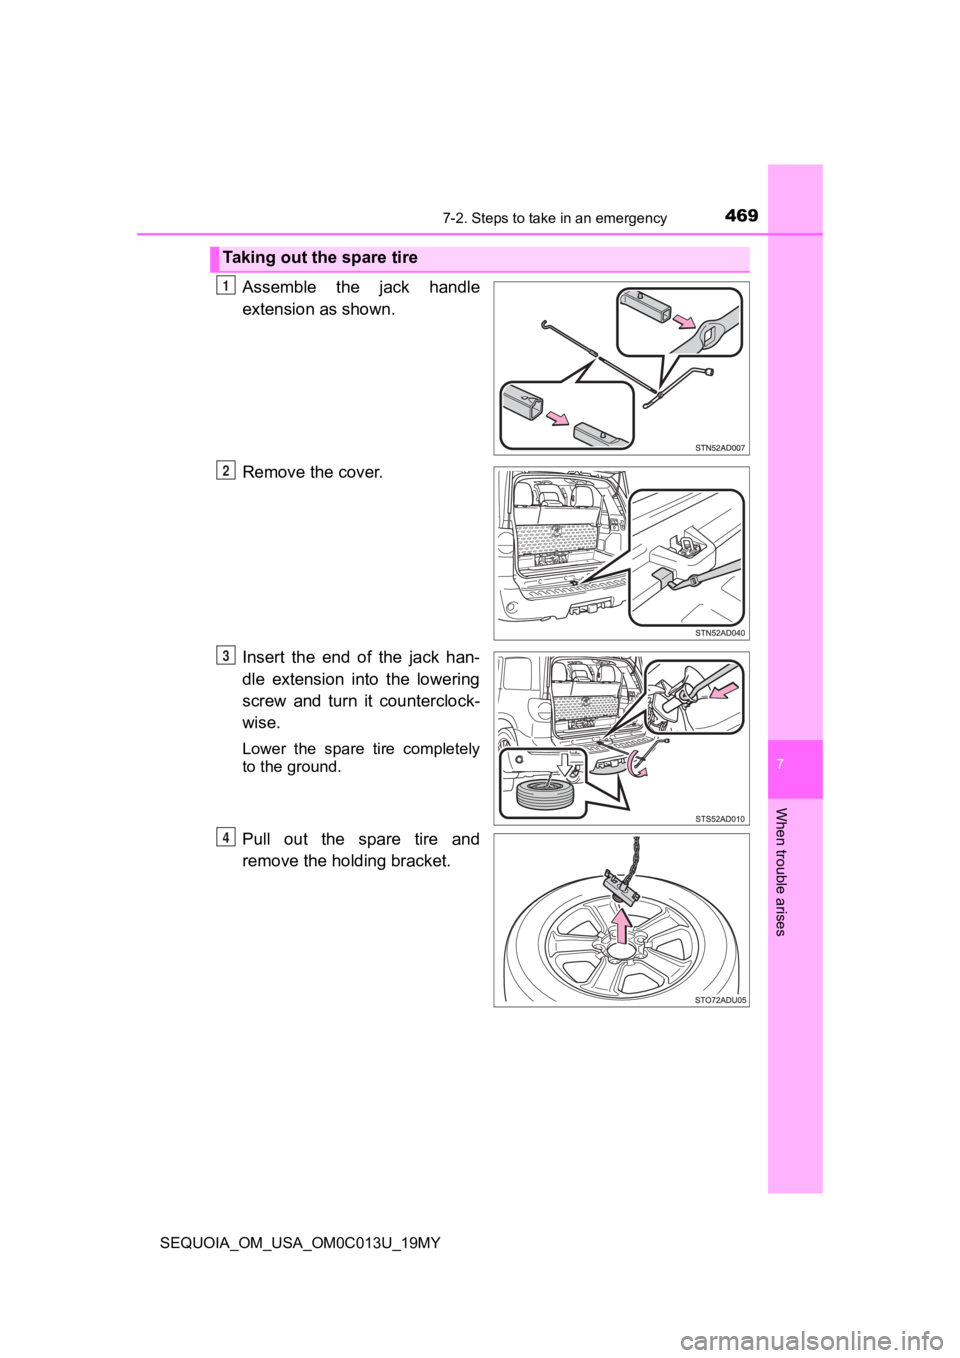
Assemble the jack handle
extension as shown.
Remove the cover.
Insert the end of the jack han-
dle extension into the lowering
screw and turn it counterclock-
wise.
Lower the spare tire completely
to the ground.
Pull out the spare tire and
remove the holding bracket.
Taking out the spare tire
1
2
3
4
Page 475 of 560
4757-2. Steps to take in an emergency
7
When trouble arises
SEQUOIA_OM_USA_OM0C013U_19MY
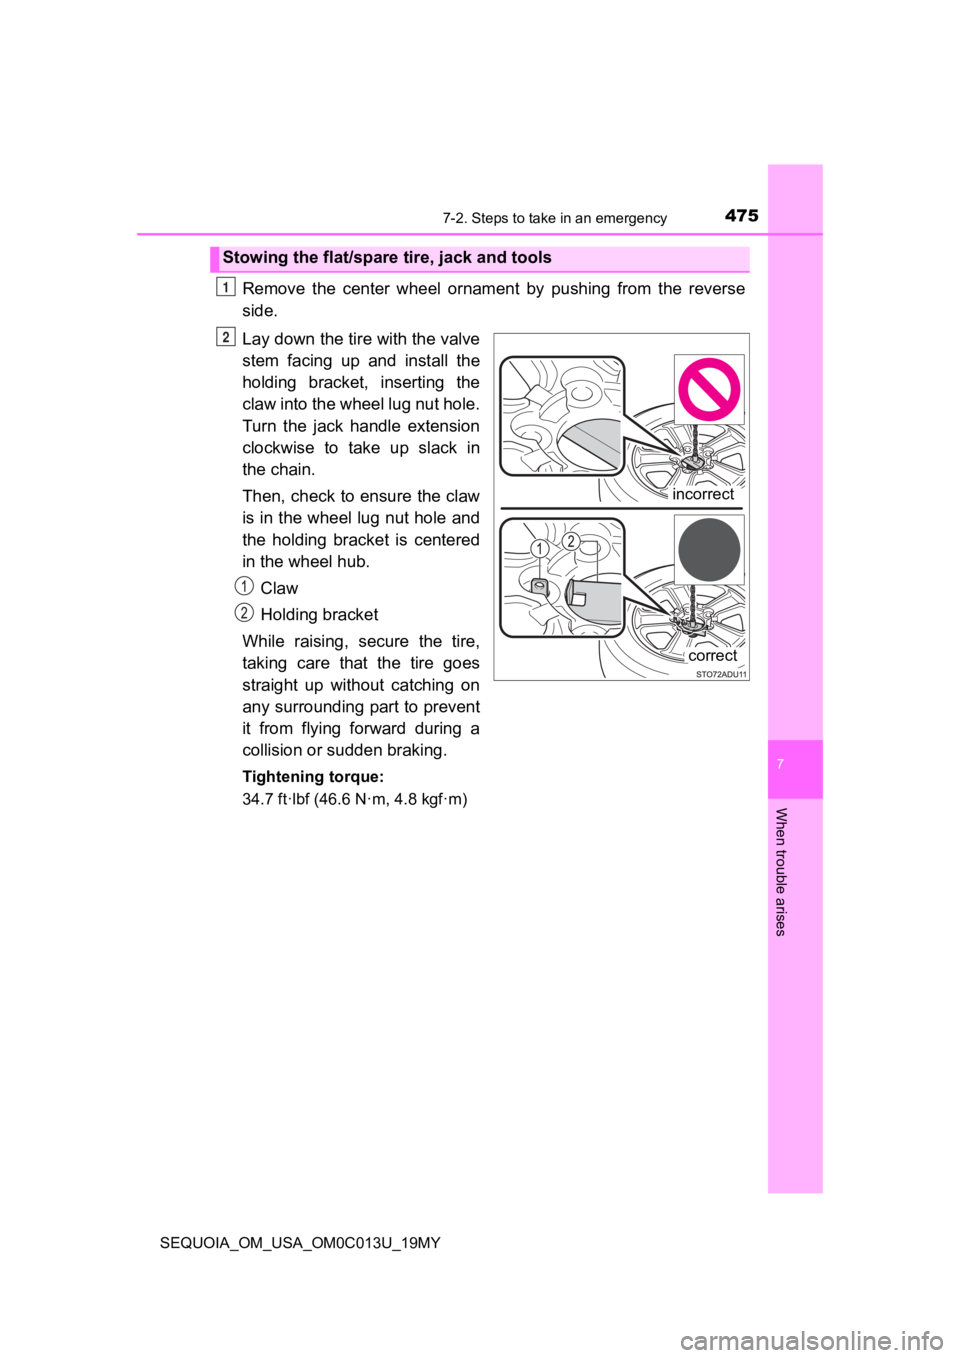
Remove the center wheel ornament by pushing from the reverse
side.
Lay down the tire with the valve
stem facing up and install the
holding bracket, inserting the
claw into the wheel lug nut hole.
Turn the jack handle extension
clockwise to take up slack in
the chain.
Then, check to ensure the claw
is in the wheel lug nut hole and
the holding brack et is centered
in the wheel hub.
Claw
Holding bracket
While raising, secure the tire,
taking care that the tire goes
straight up without catching on
any surrounding part to prevent
it from flying forward during a
collision or sudden braking.
Tightening torque:
34.7 ft·lbf (46.6 N·m, 4.8 kgf·m)
Stowing the flat/spare tire, jack and tools
1
incorrect
correct
O