engine TOYOTA SEQUOIA 2020 Owners Manual (in English)
[x] Cancel search | Manufacturer: TOYOTA, Model Year: 2020, Model line: SEQUOIA, Model: TOYOTA SEQUOIA 2020Pages: 588, PDF Size: 12.33 MB
Page 419 of 588
4196-3. Do-it-yourself maintenance
6
Maintenance and care
SEQUOIA_OM_USA_OM0C021U_20MY
Check the radiator and condenser and clear away any foreign objects.
If either of the above parts is extremely dirty or you are not sure of
their condition, have your vehic le inspected by your Toyota dea ler.
WARNING
■When the engine is hot
Do not remove the engine coolant reservoir cap or the radiator cap.
(P. 512)
The cooling system may be under pressure and may spray hot coolant if the
cap is removed, causing serious injuries, such as burns.
NOTICE
■ When adding coolant
Coolant is neither plain water nor straight antifreeze. The cor rect mixture of
water and antifreeze must be used to provide proper lubrication , corrosion
protection and cooling. Be sure to read the antifreeze or coolant label.
■ If you spill coolant
Be sure to wash it off with water to prevent it from damaging p arts or paint.
Radiator and condenser
WARNING
■When the engine is hot
Do not touch the radiator or condenser as they may be hot and c ause seri-
ous injuries, such as burns.
Page 421 of 588
4216-3. Do-it-yourself maintenance
6
Maintenance and care
SEQUOIA_OM_USA_OM0C021U_20MY■
Fluid level
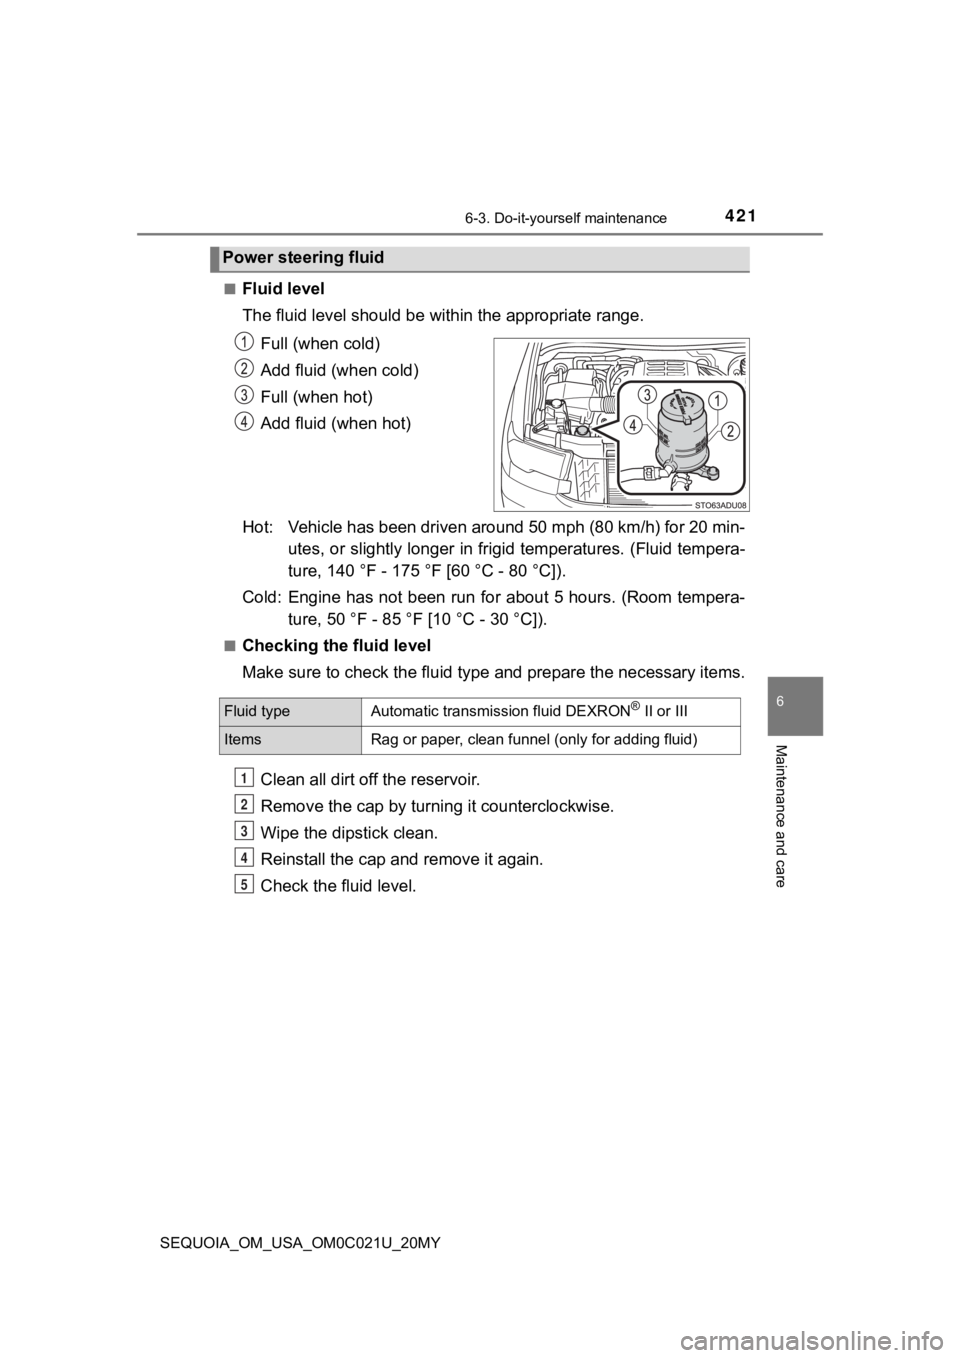
The fluid level should be within the appropriate range.
Full (when cold)
Add fluid (when cold)
Full (when hot)
Add fluid (when hot)
Hot: Vehicle has been driven around 50 mph (80 km/h) for 20 min- utes, or slightly longer in frigid temperatures. (Fluid tempera-
ture, 140 °F - 175 °F [60 °C - 80 °C]).
Cold: Engine has not been run for about 5 hours. (Room tempera- ture, 50 °F - 85 °F [10 °C - 30 °C]).
■Checking the fluid level
Make sure to check the fluid type and prepare the necessary items.
Clean all dirt off the reservoir.
Remove the cap by turni ng it counterclockwise.
Wipe the dipstick clean.
Reinstall the cap and remove it again.
Check the fluid level.
Power steering fluid
Fluid typeAutomatic transmission fluid DEXRON® II or III
ItemsRag or paper, clean funnel (only for adding fluid)
1
2
3
4
5
Page 424 of 588
4246-3. Do-it-yourself maintenance
SEQUOIA_OM_USA_OM0C021U_20MY
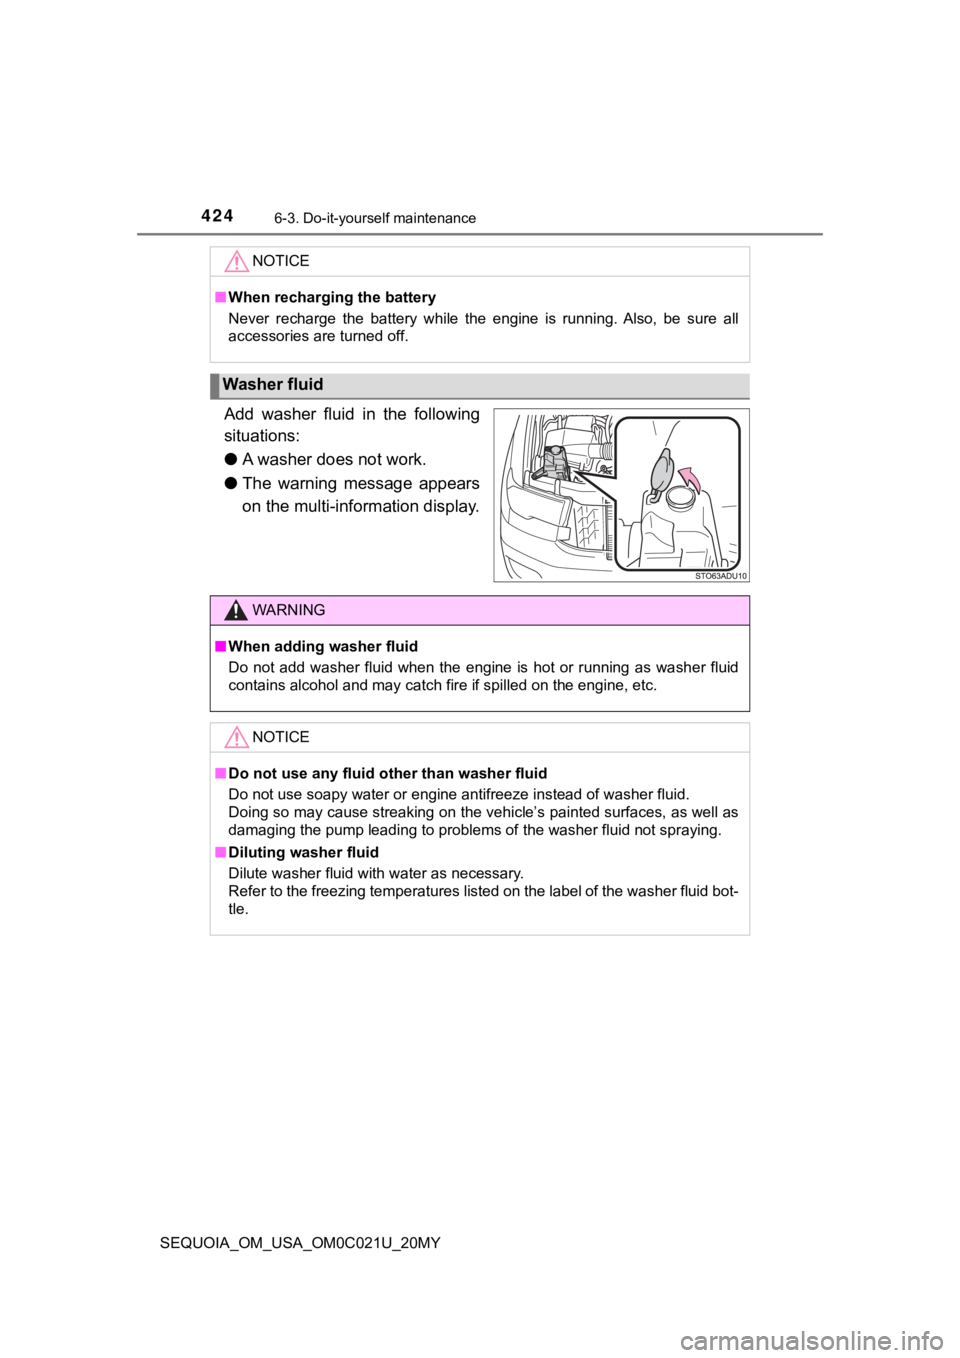
Add washer fluid in the following
situations:
●A washer does not work.
● The warning message appears
on the multi-information display.
NOTICE
■When recharging the battery
Never recharge the battery while the engine is running. Also, b e sure all
accessories are turned off.
Washer fluid
WARNING
■ When adding washer fluid
Do not add washer fluid when the engine is hot or running as wa sher fluid
contains alcohol and may catch fire if spilled on the engine, e tc.
NOTICE
■Do not use any fluid ot her than washer fluid
Do not use soapy water or engine antifreeze instead of washer f luid.
Doing so may cause streaking on the vehicle’s painted surfaces, as well as
damaging the pump leading to problems of the washer fluid not s praying.
■ Diluting washer fluid
Dilute washer fluid with water as necessary.
Refer to the freezing temperatures listed on the label of the washer fluid bot-
tle.
Page 427 of 588
4276-3. Do-it-yourself maintenance
6
Maintenance and care
SEQUOIA_OM_USA_OM0C021U_20MY
◆Initializing the tire pressure warning system
■The tire pressure warning system must be initialized in the fol-
lowing circumstances:
● When rotating the tires.
● When the tire inflation pressure is changed such as when chang-
ing tire size. (When there are multiple specified pressures)
● After registeri ng the ID codes. ( P. 428)
When the tire pressure warning sy stem is initialized, the current tire
inflation pressure is set as the benchmark pressure.
■How to initialize the tire pressure warning system
Park the vehicle in s afe place and turn the engine switch off.
Initialization cannot be perfo rmed while the vehicle is moving.
Adjust the tire inflation pressure to the specified cold tire i nflation
pressure level. ( P. 527)
Make sure to adjust the tire pre ssure to the specified cold tire infla-
tion pressure level. The tire pressure warning system will oper ate
based on this pr essure level.
Turn the engine switch to ON.
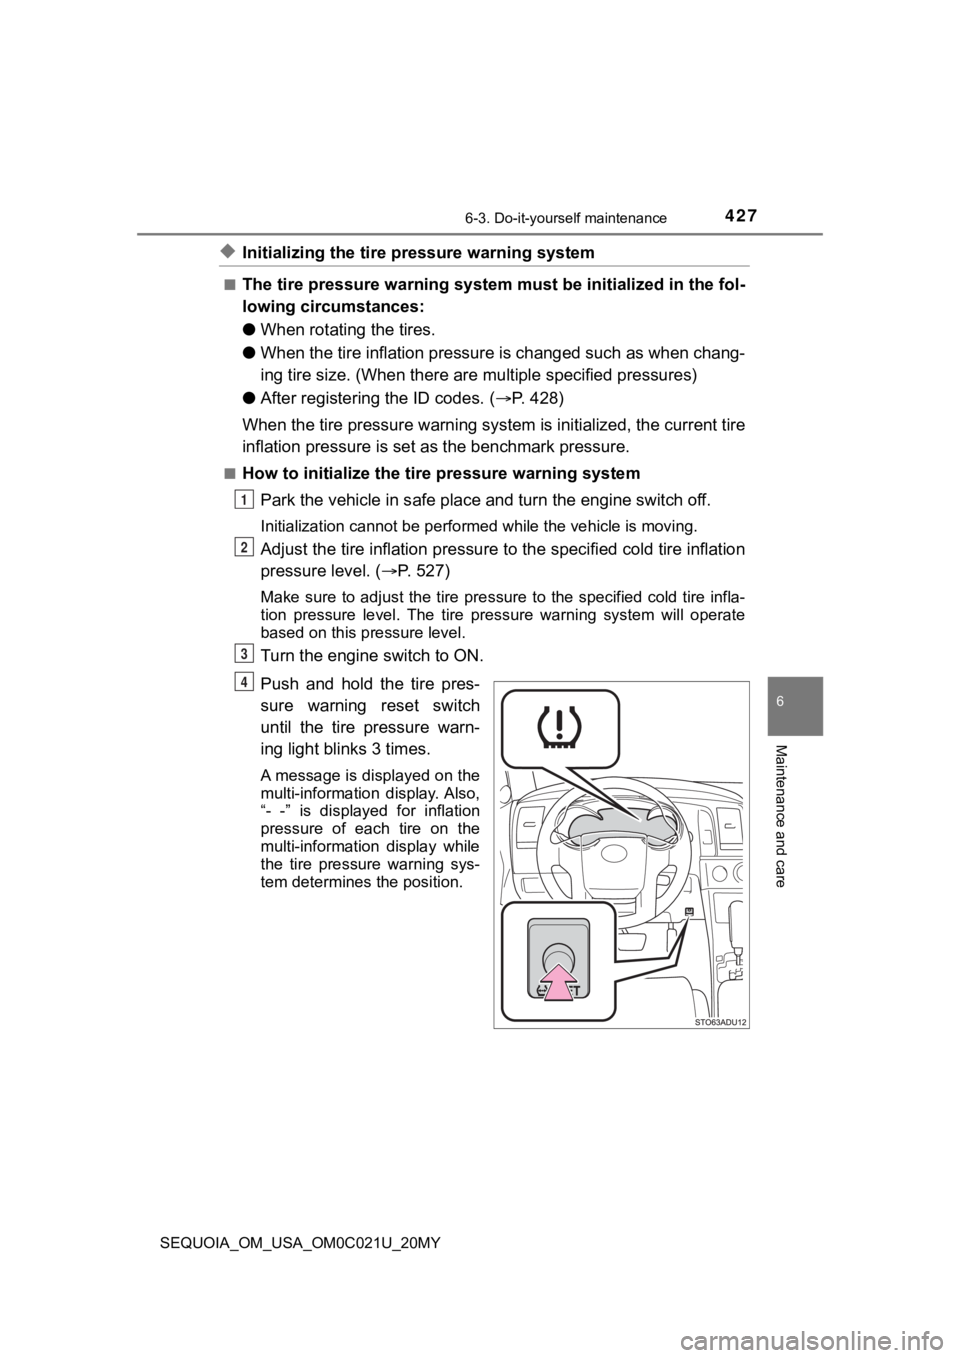
Push and hold the tire pres-
sure warning reset switch
until the tire pressure warn-
ing light blinks 3 times.
A message is displayed on the
multi-information display. Also,
“- -” is displayed for inflation
pressure of each tire on the
multi-information display while
the tire pressure warning sys-
tem determines the position.
1
2
3
4
Page 432 of 588

4326-3. Do-it-yourself maintenance
SEQUOIA_OM_USA_OM0C021U_20MY■
The initialization operation
●Make sure to carry out initializ
ation after adjusting the tire inflation pres-
sure.
Also, make sure the tires are co ld before carrying out initialization or tire
inflation pressure adjustment.
●If you have accidentally turned the engine switch to OFF during initial-
ization, it is not necessary to press the reset switch again as initialization
will restart automatically when the engine switch has been turned to ON
for the next time.
●If you accidentally press the reset switch when initialization is not neces-
sary, adjust the tire inflation pressure to the specified level when the
tires are cold, and cond uct initialization again.
●While the position of each tire is being determined and the inf lation pres-
sures are not being displayed on the multi-information display, if the
inflation pressure of a tire drops, the tire pressure warning l ight will come
on.
■Warning performance of the tire pressure warning system
The warning of the tire pressu re warning system will change in accor-
dance with the conditions under which it was initialized. For t his reason,
the system may give a warning even if the tire pressure does no t reach a
low enough level, or if the pressure is higher than the pressur e that was
adjusted to when the sys tem was initialized.
■When initialization of the tire pressure warning system has fai led
Initialization may take longer to complete if the vehicle is driven on an
unpaved road. When performing ini tialization, drive on a paved road if
possible. Depending on the driving environment and condition of the tires,
initialization will be completed i n approximately 10 to 30 minutes. If initial-
ization is not complete after dr iving approximately 10 to 30 mi nutes, con-
tinue driving for a while.
If the inflation pressure of each tire is not displayed after d riving for
approximately 1 hour, perf orm the following procedure.
●Park the vehicle in a safe place for approximately 20 minutes. Then
drive straight (with occasional left and right turns) at approx imately
25 mph (40 km/h) or more for approximately 10 to 30 minutes.
However, in the following situatio ns, the tire inflation pressure will not be
recorded and the system will not operate properly. Perform initialization
again.
●When operating the tire pressure warning reset switch, the tire pressure
warning light does not blink 3 times.
●After performing initialization, t he tire pressure warning light blinks for
1 minute then stays on while driving about 20 minutes.
If the inflation pressure of eac h tire is still not displayed, have the vehicle
inspected by you r Toyota dealer.
Page 442 of 588
4426-3. Do-it-yourself maintenance
SEQUOIA_OM_USA_OM0C021U_20MY
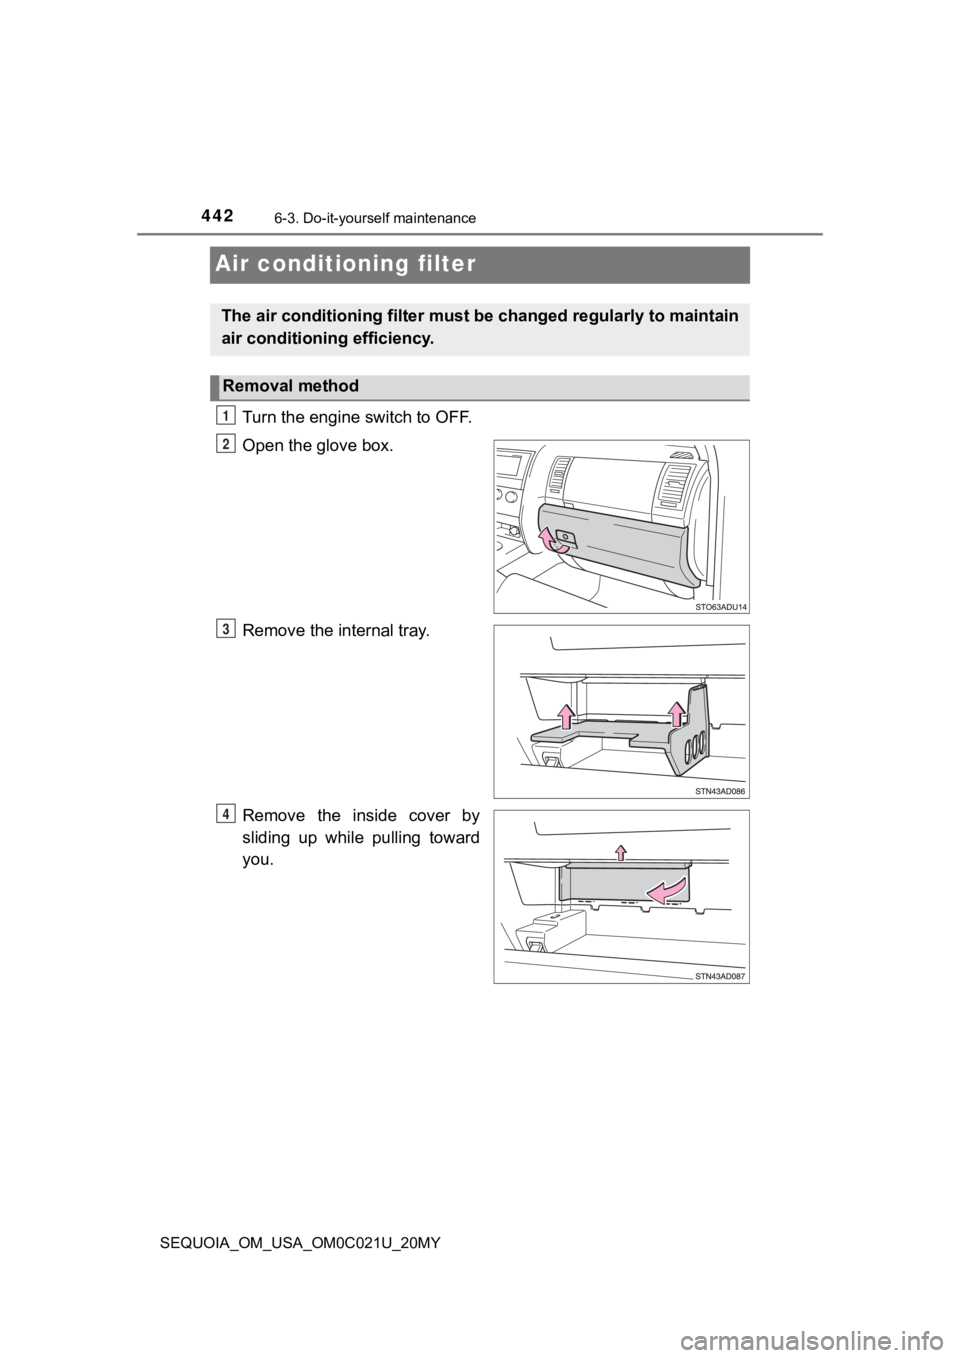
Air conditioning filter
Turn the engine switch to OFF.
Open the glove box.
Remove the internal tray.
Remove the inside cover by
sliding up while pulling toward
you.
The air conditioning filter must be changed regularly to maintain
air conditioning efficiency.
Removal method
1
2
3
4
Page 446 of 588
4466-3. Do-it-yourself maintenance
SEQUOIA_OM_USA_OM0C021U_20MY
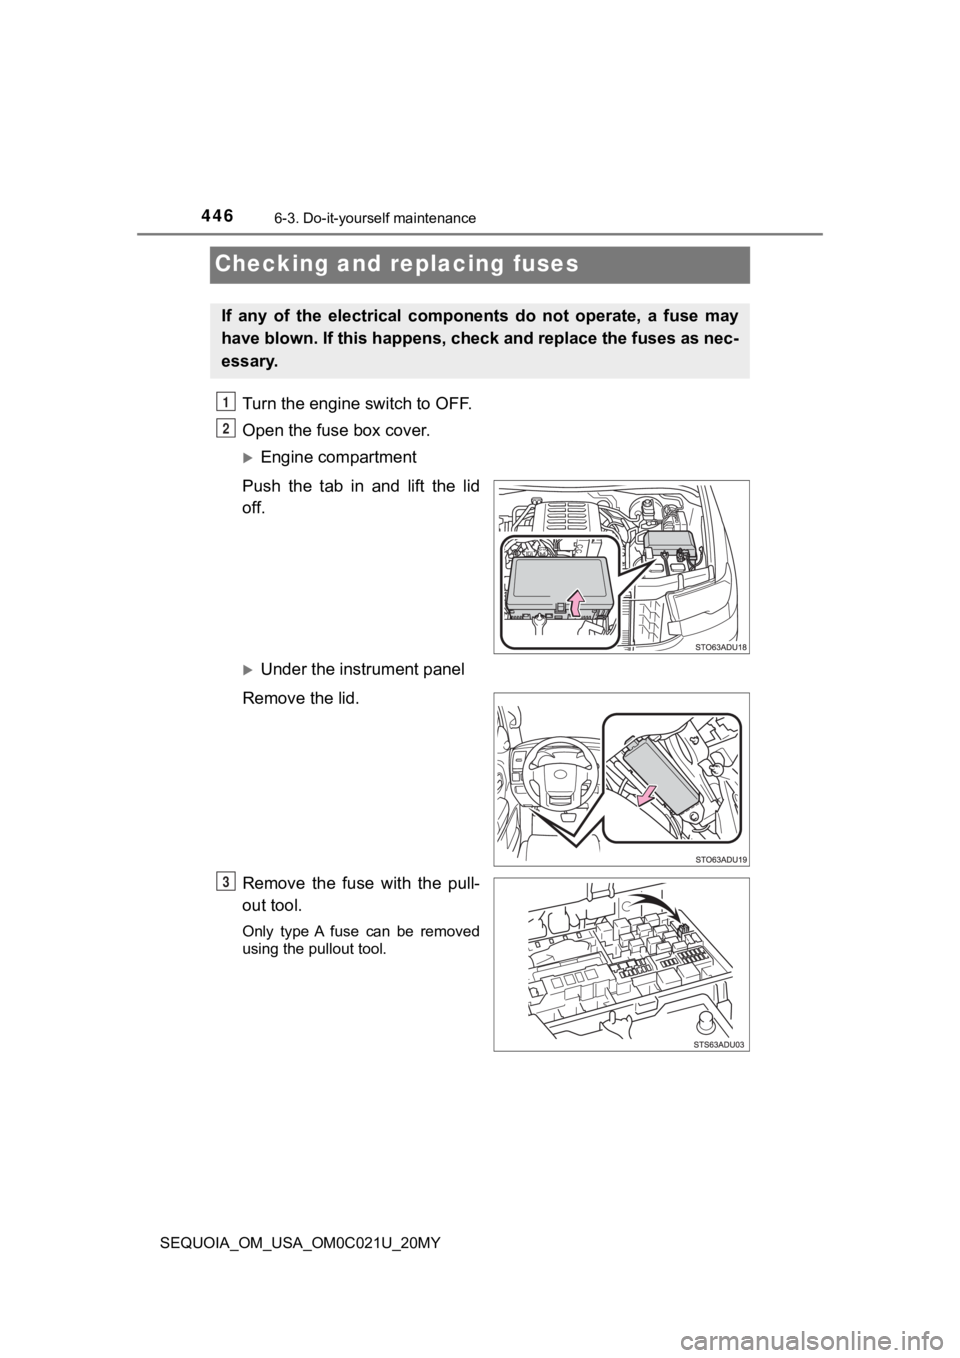
Checking and replacing fuses
Turn the engine switch to OFF.
Open the fuse box cover.
Engine compartment
Push the tab in and lift the lid
off.
Under the instrument panel
Remove the lid.
Remove the fuse with the pull-
out tool.
Only type A fuse can be removed
using the pullout tool.
If any of the electrical components do not operate, a fuse may
have blown. If this happens, che ck and replace the fuses as nec-
essary.
1
2
3
Page 457 of 588

457
When trouble arises7
SEQUOIA_OM_USA_OM0C021U_20MY7-1. Essential information
Emergency flashers .......... 458
If your vehicle has to be stopped in an
emergency ...................... 459
If the vehicle is trapped in rising water.................. 461
7-2. Steps to take in an emergency
If your vehicle needs to be towed ......................... 462
If you think something is wrong .............................. 467
Fuel pump shut off system ............................ 468
If a warning light turns on or a warning buzzer
sounds ............................ 469
If a warning message is displayed......................... 477
If you have a flat tire.......... 489
If the engine will not start ................................. 503
If the electronic key does not operate properly ........ 505
If the vehicle battery is discharged ...................... 507
If your vehicle overheats ... 511
If the vehicle becomes stuck ............................... 514
Page 458 of 588
4587-1. Essential information
SEQUOIA_OM_USA_OM0C021U_20MY
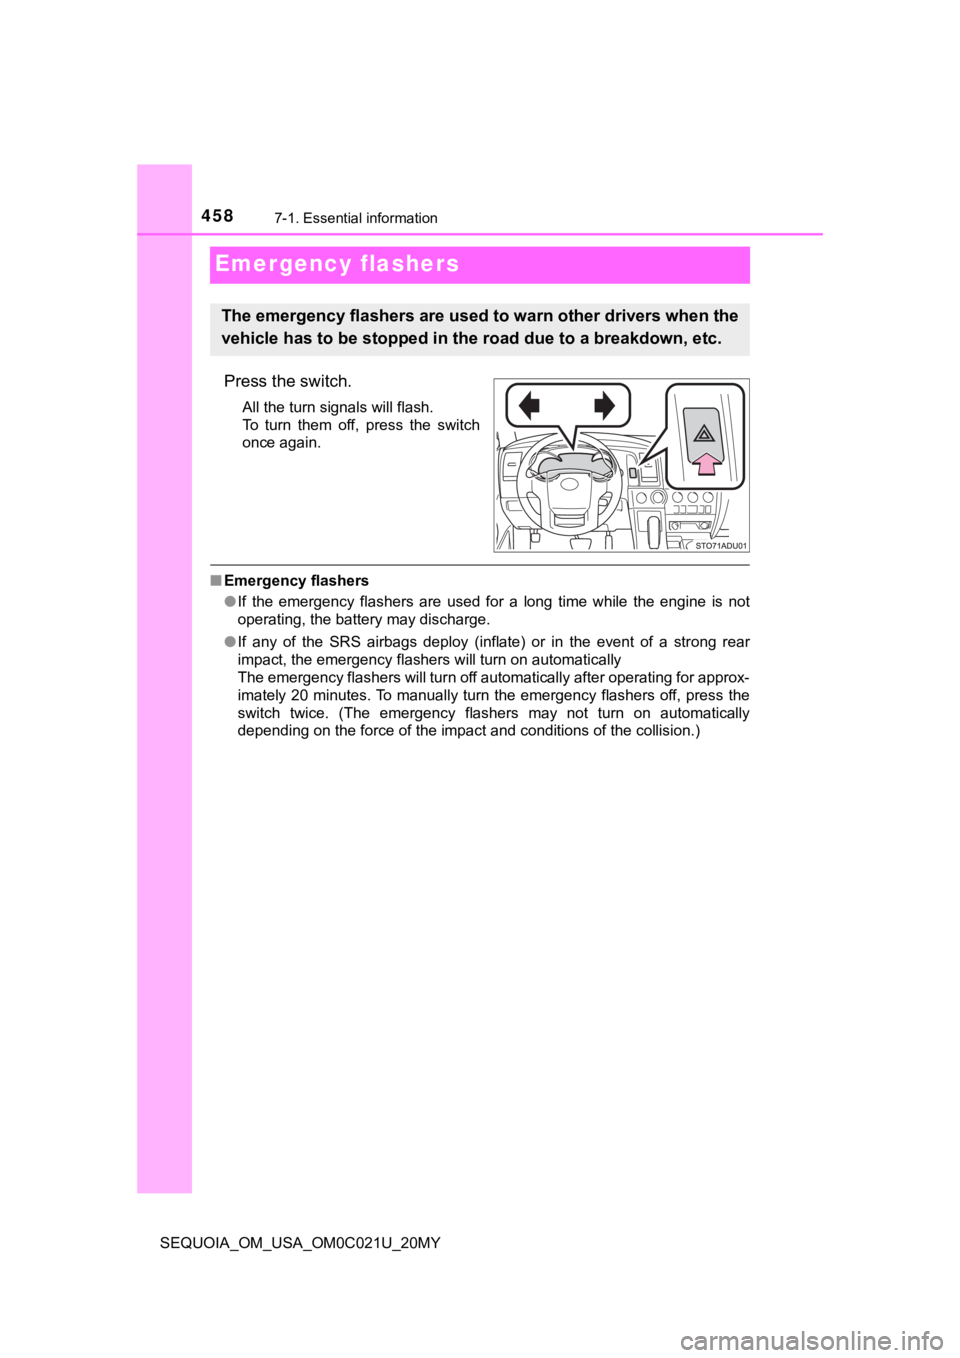
Emergency flashers
Press the switch.
All the turn signals will flash.
To turn them off, press the switch
once again.
■Emergency flashers
●If the emergency flashers are used for a long time while the engine is not
operating, the battery may discharge.
● If any of the SRS airbags deploy (inflate) or in the event of a strong rear
impact, the emergency flashers will turn on automatically
The emergency flashers will turn off automatically after operating for approx-
imately 20 minutes. To manually turn the emergency flashers off, press the
switch twice. (The emergency flashers may not turn on automatic ally
depending on the force of the impact and conditions of the coll ision.)
The emergency flashers are used to warn other drivers when the
vehicle has to be stopped in the road due to a breakdown, etc.
Page 459 of 588
4597-1. Essential information
SEQUOIA_OM_USA_OM0C021U_20MY
7
When trouble arises
If your vehicle has to be stopped in an
emergency
Steadily step on the brake pedal with both feet and firmly depress it.
Do not pump the brake pedal repeatedly as this will increase th e effort
required to slow the vehicle.
Shift the shift lever to N.
If the shift lever is shifted to N
After slowing down, stop the vehi cle in a safe place by the road.
Stop the engine.
If the shift lever cann ot be shifted to N
Keep depressing the brake pedal with both feet to reduce vehicl e
speed as much as possible.
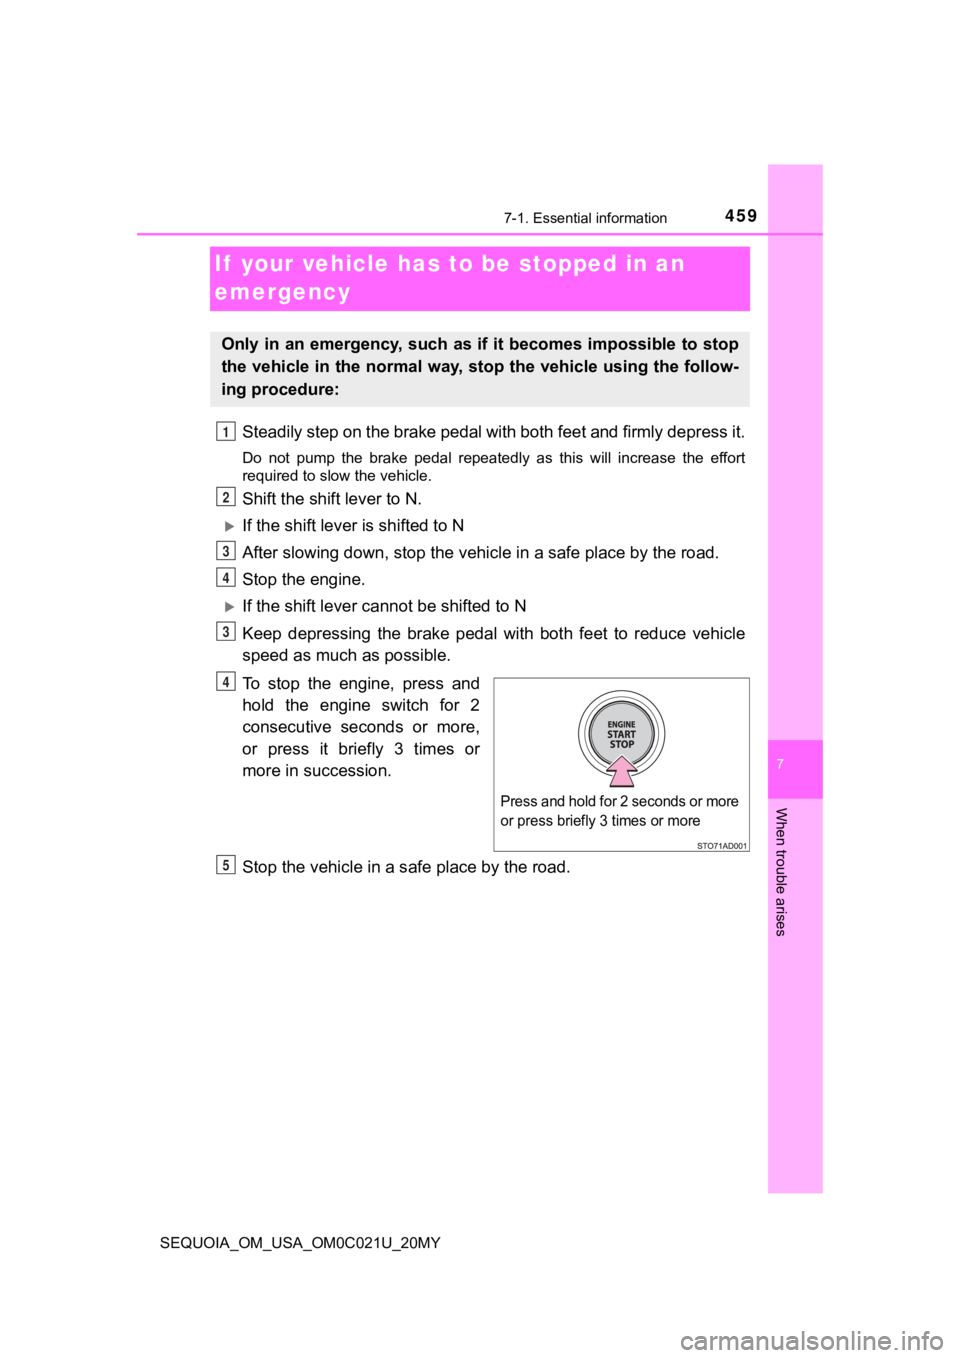
To stop the engine, press and
hold the engine switch for 2
consecutive seconds or more,
or press it briefly 3 times or
more in succession.
Stop the vehicle in a s afe place by the road.
Only in an emergency, such as if it becomes impossible to stop
the vehicle in the normal way, st op the vehicle using the follow-
ing procedure:
1
2
3
4
3
Press and hold for 2 seconds or more
or press briefly 3 times or more
Q
R