headlights TOYOTA SEQUOIA HYBRID 2023 Owners Manual
[x] Cancel search | Manufacturer: TOYOTA, Model Year: 2023, Model line: SEQUOIA HYBRID, Model: TOYOTA SEQUOIA HYBRID 2023Pages: 628, PDF Size: 14.27 MB
Page 15 of 628
15Pictorial index
Owners Manual_USA_M0C043_en
Defogging the mirrors .......................................... ................ P.408
Windshield wipers.............................................. ................ P.235
Rear window wiper .............................................. .............. P.239
Precautions for winter seas on.............................................. P.401
To prevent freezing (windshield wiper de-icer)
*.................... P.411
Precautions for car wash (vehicles with rain-sensing windshield wip-
ers)
*...................................................................................... P.451
Fuel filler door ............................................... ..................... P.241
Refueling method ............................................... .................. P.241
Fuel type/fuel tan k capacity ................................... .............. P.550
Tires.......................................................... ........................... P.474
Tire size/inflation pressure ................................... ................ P.555
Winter tires/tire chains ....................................... .................. P.401
Checking/rotation/tire pressur e warning system ..................P.474
Coping with flat tires......................................... .................... P.523
Hood ........................................................... ......................... P.464
Opening ............................................................................... P.464
Engine oil ..................................................... ........................ P.551
Coping with overheating ...................................................... P.543
Headlights..................................................... ...................... P.228
Parking lights ................................................. .................... P.228
Turn signal lights ............................................. .................. P.221
Daytime running lights .. .................................................... P.228
Head lights/daytime running lights ............................. ..... P.228
Turn signal lights ............................................. .................. P.221
Parking lights ................................................. .................... P.228
Side marker lights
*............................................................. P. 228
Light bulbs of the exterior lights for driving
(Replacing method: P.498, Watts: P.557)
Page 17 of 628
17Pictorial index
Owners Manual_USA_M0C043_en
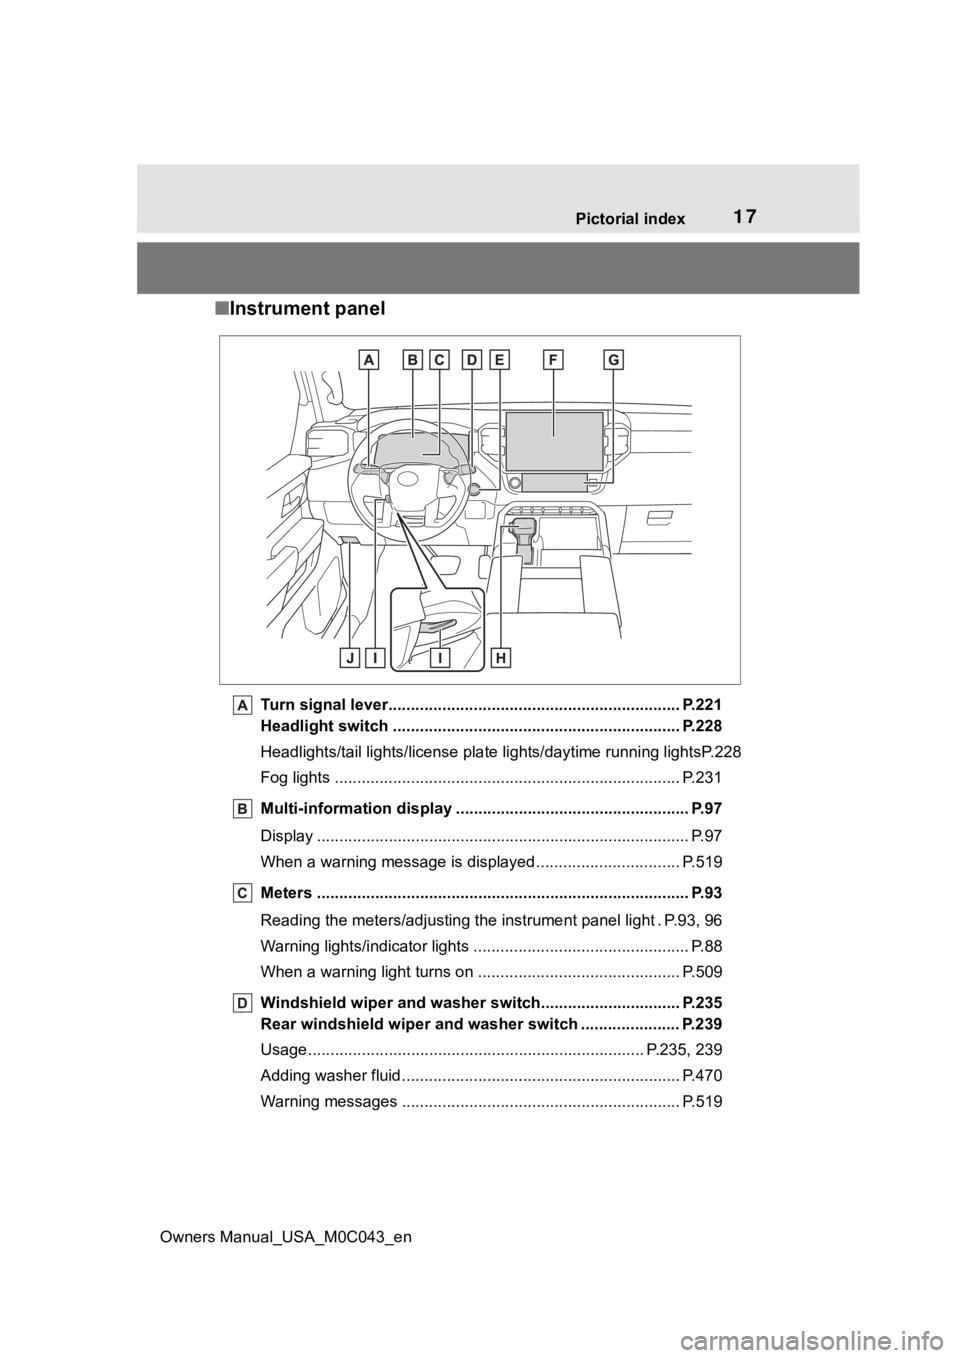
■ Instrument panel
Turn signal lever.............................................. ................... P.221
Headlight switch ............................................... ................. P.228
Headlights/tail lights/license pla te lights/daytime running lightsP.228
Fog lights ..................................................... ........................ P.231
Multi-information display . ................................................... P.97
Display ........................................................ ........................... P.97
When a warning message is displayed ............................ .... P.519
Meters ......................................................... .......................... P.93
Reading the meters/adjusting the instrument panel light . P.93, 9 6
Warning lights/indicator lights ................................ ................ P.88
When a warning light turns on .................................. ........... P.509
Windshield wiper and washer switch............................... P.235
Rear windshield wiper and washer switch ...................... P. 239
Usage.......................................................... ................. P.235, 239
Adding washer fluid .............................................................. P.470
Warning messages ............................................... ............... P.519
Page 160 of 628
1603-4. Adjusting the steering wheel and mirrors
Owners Manual_USA_M0C043_en
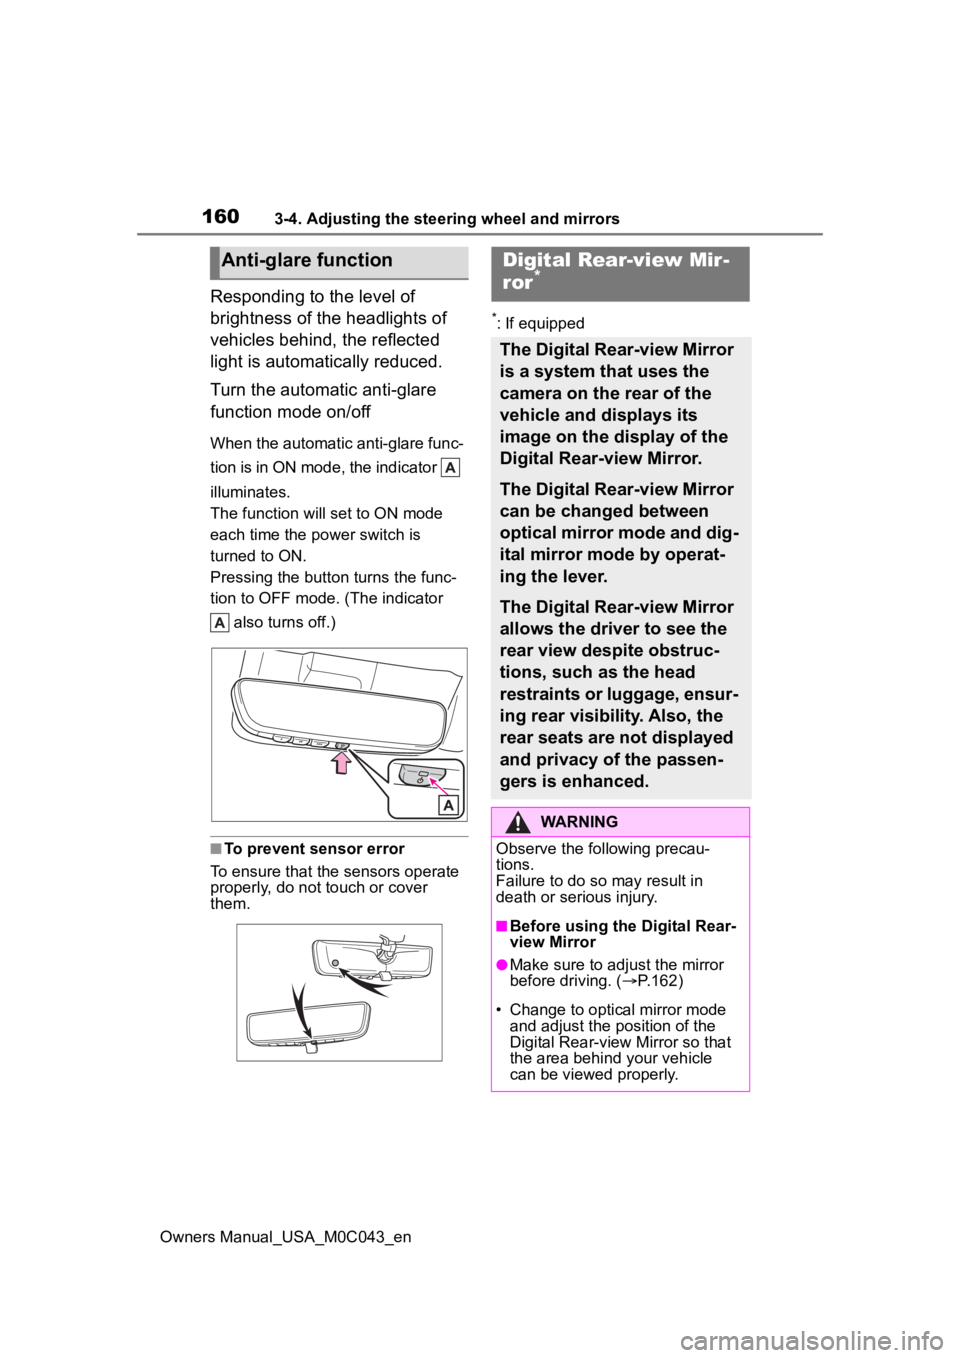
Responding to the level of
brightness of the headlights of
vehicles behind, the reflected
light is automatically reduced.
Turn the automatic anti-glare
function mode on/off
When the automatic anti-glare func-
tion is in ON mode, the indicator
illuminates.
The function will set to ON mode
each time the power switch is
turned to ON.
Pressing the button turns the func-
tion to OFF mode. (The indicator also turns off.)
■To prevent sensor error
To ensure that the sensors operate
properly, do not touch or cover
them.
*: If equipped
Anti-glare functionDigital Rear-view Mir-
ror*
The Digital Rear-view Mirror
is a system that uses the
camera on the rear of the
vehicle and displays its
image on the display of the
Digital Rear-view Mirror.
The Digital Rear-view Mirror
can be changed between
optical mirror mode and dig-
ital mirror mode by operat-
ing the lever.
The Digital Rear-view Mirror
allows the driver to see the
rear view despite obstruc-
tions, such as the head
restraints or luggage, ensur-
ing rear visibility. Also, the
rear seats are not displayed
and privacy of the passen-
gers is enhanced.
WARNING
Observe the following precau-
tions.
Failure to do so may result in
death or serious injury.
■Before using the Digital Rear-
view Mirror
●Make sure to adjust the mirror
before driving. ( P.162)
• Change to optical mirror mode and adjust the position of the
Digital Rear-view Mirror so that
the area behind your vehicle
can be viewed properly.
Page 163 of 628
1633-4. Adjusting the steering wheel and mirrors
Owners Manual_USA_M0C043_en
3
Before driving
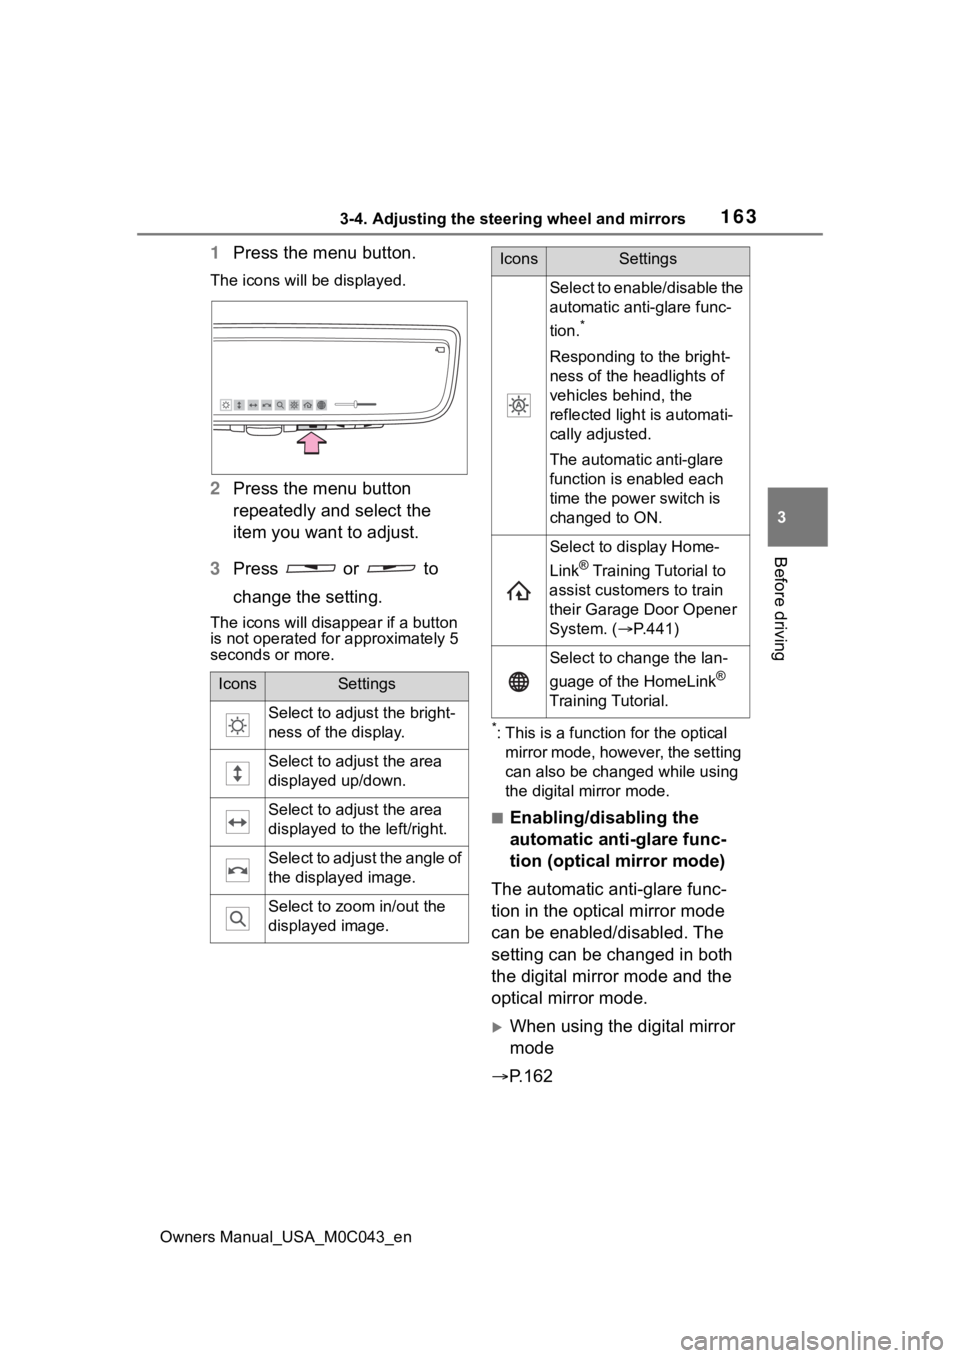
1 Press the menu button.
The icons will be displayed.
2Press the menu button
repeatedly and select the
item you want to adjust.
3 Press or to
change the setting.
The icons will disapp ear if a button
is not operated fo r approximately 5
seconds or more.
*: This is a functi on for the optical
mirror mode, however, the setting
can also be changed while using
the digital mirror mode.
■Enabling/disabling the
automatic anti-glare func-
tion (optical mirror mode)
The automatic anti-glare func-
tion in the optical mirror mode
can be enabled/disabled. The
setting can be changed in both
the digital mirror mode and the
optical mirror mode.
When using the digital mirror
mode
P.162
IconsSettings
Select to adjust the bright-
ness of the display.
Select to adjust the area
displayed up/down.
Select to adjust the area
displayed to the left/right.
Select to adjust the angle of
the displayed image.
Select to zoom in/out the
displayed image.
Select to enable/disable the
automatic anti-glare func-
tion.
*
Responding to the bright-
ness of the headlights of
vehicles behind, the
reflected light is automati-
cally adjusted.
The automatic anti-glare
function is enabled each
time the power switch is
changed to ON.
Select to display Home-
Link
® Training Tutorial to
assist customers to train
their Garage Door Opener
System. ( P.441)
Select to change the lan-
guage of the HomeLink
®
Training Tutorial.
IconsSettings
Page 167 of 628
1673-4. Adjusting the steering wheel and mirrors
Owners Manual_USA_M0C043_en
3
Before driving
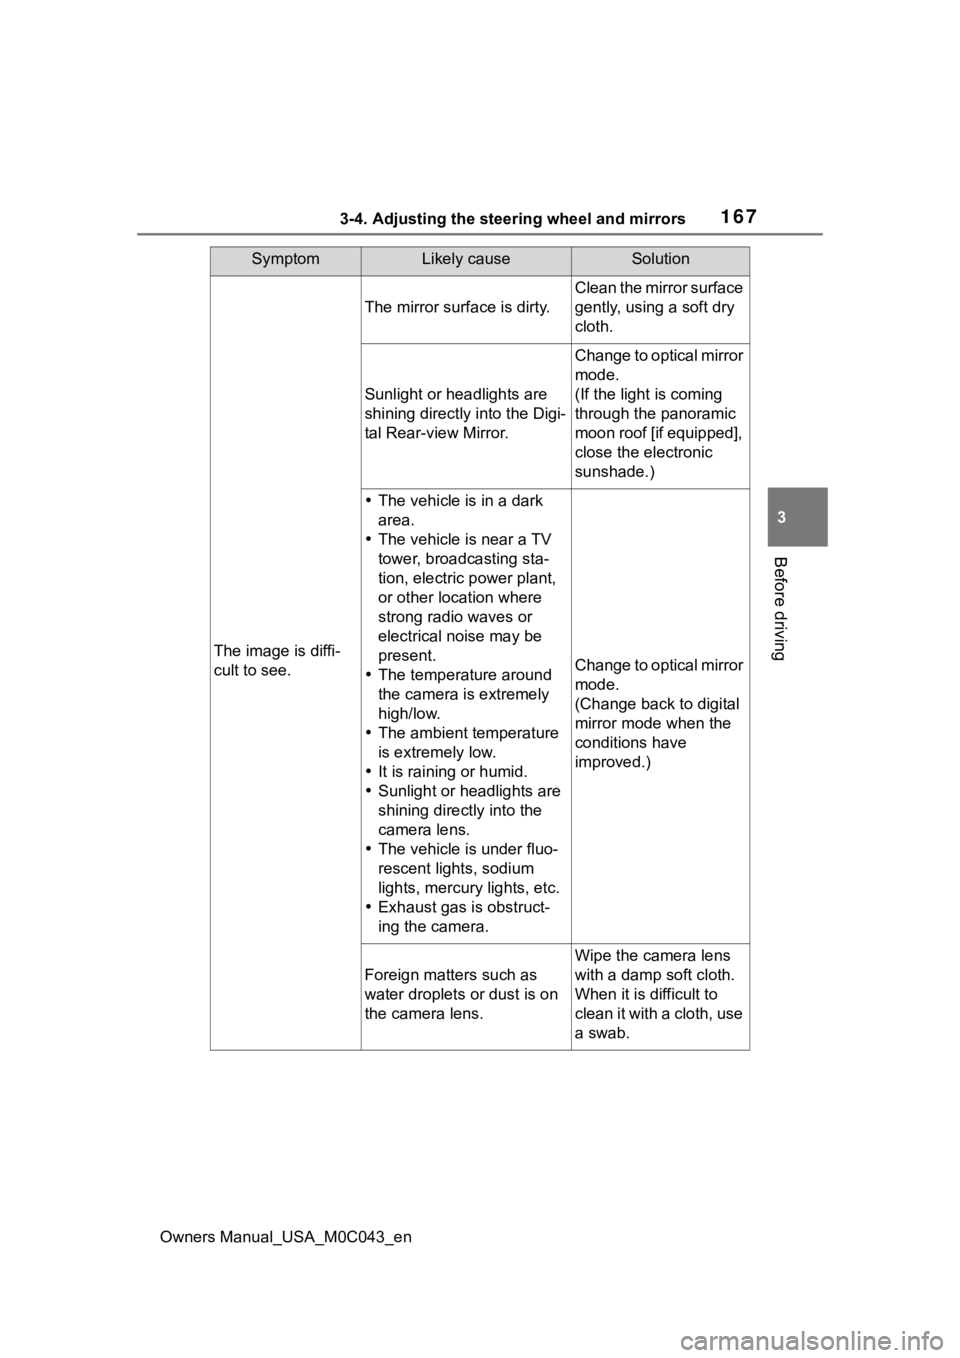
SymptomLikely causeSolution
The image is diffi-
cult to see.
The mirror surface is dirty.
Clean the mirror surface
gently, using a soft dry
cloth.
Sunlight or headlights are
shining directly into the Digi-
tal Rear-view Mirror.
Change to optical mirror
mode.
(If the light is coming
through the panoramic
moon roof [if equipped],
close the electronic
sunshade.)
The vehicle is in a dark
area.
The vehicle is near a TV
tower, broadcasting sta-
tion, electric power plant,
or other location where
strong radio waves or
electrical noise may be
present.
The temperature around
the camera is extremely
high/low.
The ambient temperature
is extremely low.
It is raining or humid.
Sunlight or headlights are
shining directly into the
camera lens.
The vehicle is under fluo-
rescent lights, sodium
lights, mercury lights, etc.
Exhaust gas is obstruct-
ing the camera.
Change to optical mirror
mode.
(Change back to digital
mirror mode when the
conditions have
improved.)
Foreign matters such as
water droplets or dust is on
the camera lens.
Wipe the camera lens
with a damp soft cloth.
When it is difficult to
clean it with a cloth, use
a swab.
Page 228 of 628
2284-3. Operating the lights and wipers
Owners Manual_USA_M0C043_en
4-3.Operating the lights and wipers
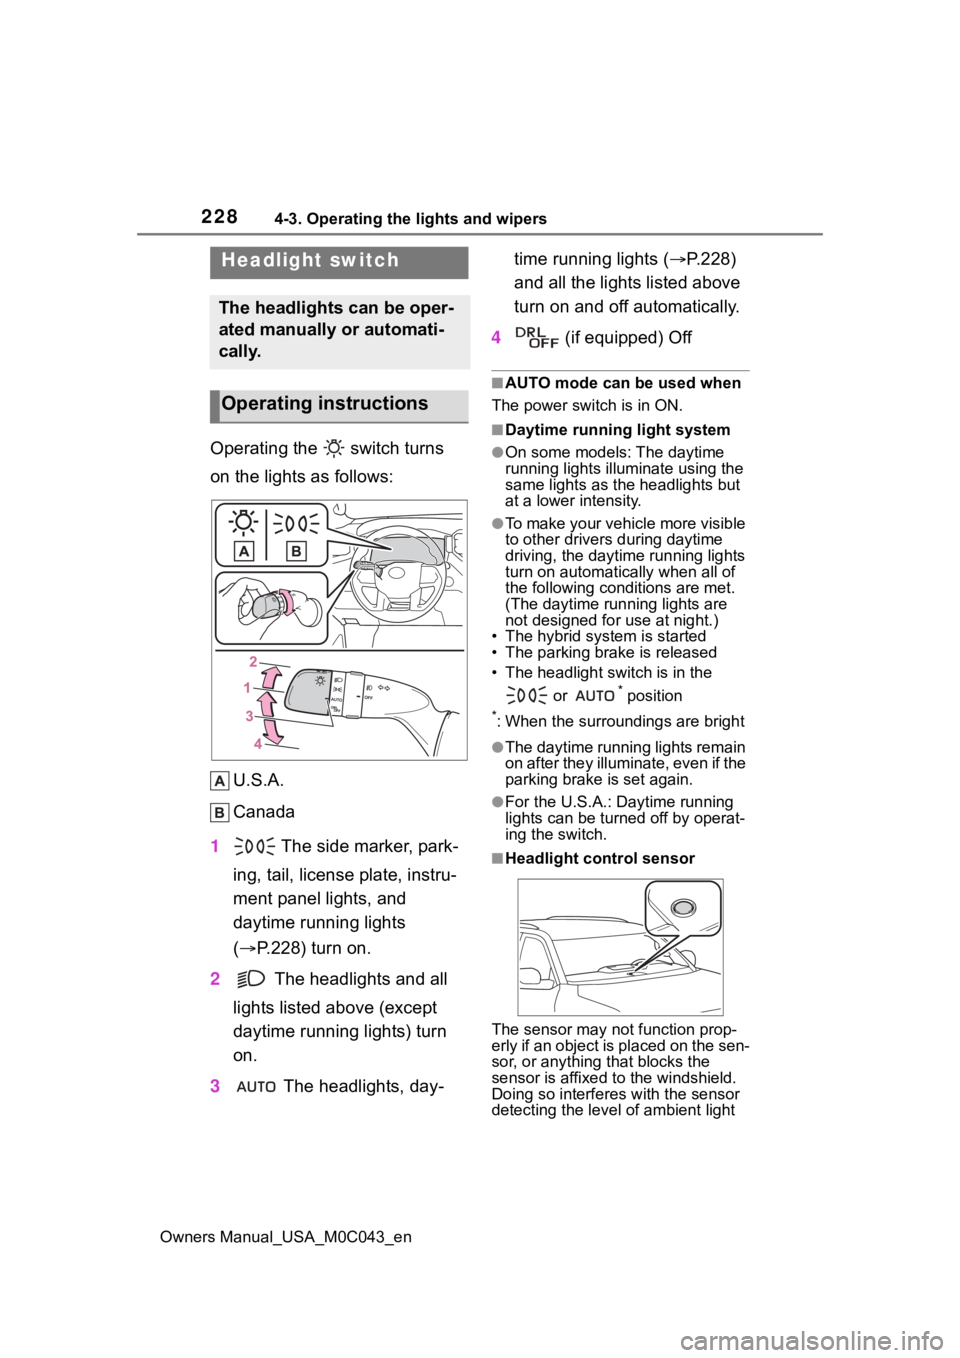
Operating the switch turns
on the lights as follows:U.S.A.
Canada
1 The side marker, park-
ing, tail, license plate, instru-
ment panel lights, and
daytime running lights
( P.228) turn on.
2 The headlights and all
lights listed above (except
daytime running lights) turn
on.
3 The headlights, day- time running lights (
P.228)
and all the lights listed above
turn on and off automatically.
4 (if equipped) Off
■AUTO mode can be used when
The power switch is in ON.
■Daytime running light system
●On some models: The daytime
running lights illu minate using the
same lights as the headlights but
at a lower intensity.
●To make your vehicle more visible
to other drivers during daytime
driving, the daytime running lights
turn on automatically when all of
the following conditions are met.
(The daytime running lights are
not designed for use at night.)
• The hybrid system is started
• The parking brake is released
• The headlight switch is in the
or
* position
*: When the surroundings are bright
●The daytime running lights remain
on after they illuminate, even if the
parking brake is set again.
●For the U.S.A.: Daytime running
lights can be turned off by operat-
ing the switch.
■Headlight control sensor
The sensor may not function prop-
erly if an object is placed on the sen-
sor, or anything that blocks the
sensor is affixed to the windshield.
Doing so interferes with the sensor
detecting the level of ambient light
Headlight switch
The headlights can be oper-
ated manually or automati-
cally.
Operating instructions
Page 229 of 628

2294-3. Operating the lights and wipers
Owners Manual_USA_M0C043_en
4
Driving
and may cause the automatic head-
light system to malfunction.
■Automatic light off system
●When the headlights are on: The
headlights and tail lights turn off
30 seconds after the driver’s door
is opened and clos ed if the power
switch is turned to ACC or off.
(The lights turn off immediately if
on the key is pressed after all
the doors are closed.)
●When only the tail lights are on:
The tail lights tu rn off automati-
cally if the power switch is turned
to ACC or OFF and the driver’s
door is opened.
To turn the lights on again, turn the
power switch to ON, or turn the light
switch off once and then back to or .
■Light reminder buzzer
A buzzer sounds when the power
switch is turned to ACC or OFF and
the driver’s door is opened while the
lights are turned on.
■When unlock the doors (wel-
come lamp) (If equipped)
When the doors are unlocked using
the entry function or wireless remote
control, the front parking lights and
tail lights turn o n automatically.
When the light switch is in the AUTO
position and the surrounding area is
dark, this function will operate.
■Automatic headlight leveling
system (if equipped)
The level of the headlights is auto-
matically adjusted according to the
number of passengers and the load-
ing condition of the vehicle to
ensure that the headlights do not
interfere with other road users.
■Windshield wiper linked head-
light illumination
When driving during daytime with
the headlight swit ch turned to , if the windshield wipers are
used, the headlights will turn on
automatically after several seconds
to help enhance the visibility of your
vehicle.
■12-volt battery-saving function
In order to prevent the 12-volt bat-
tery of the vehicle from discharging,
if the headlights and/or tail lights are
on when the power switch is turned
to OFF the 12-volt battery-saving
function will operate and automati-
cally turn off all the lights after
approximately 20 minutes. When
the power switch is turned to ON,
the 12-volt battery-saving function
will be disabled.
When any of the following are per-
formed, the 12-volt battery-saving
function is canceled once and then
reactivated. All the lights will turn off
automatically 20 minutes after the
12-volt battery-saving function has
been reactivated:
●When the headlight switch is oper-
ated
●When a door is opened or closed
■Customization
Some functions can be customized.
( P.570)
NOTICE
■To prevent 12-volt battery dis-
charge
Do not leave the lights on longer
than necessary when the hybrid
system is not operating.
Page 230 of 628
2304-3. Operating the lights and wipers
Owners Manual_USA_M0C043_en
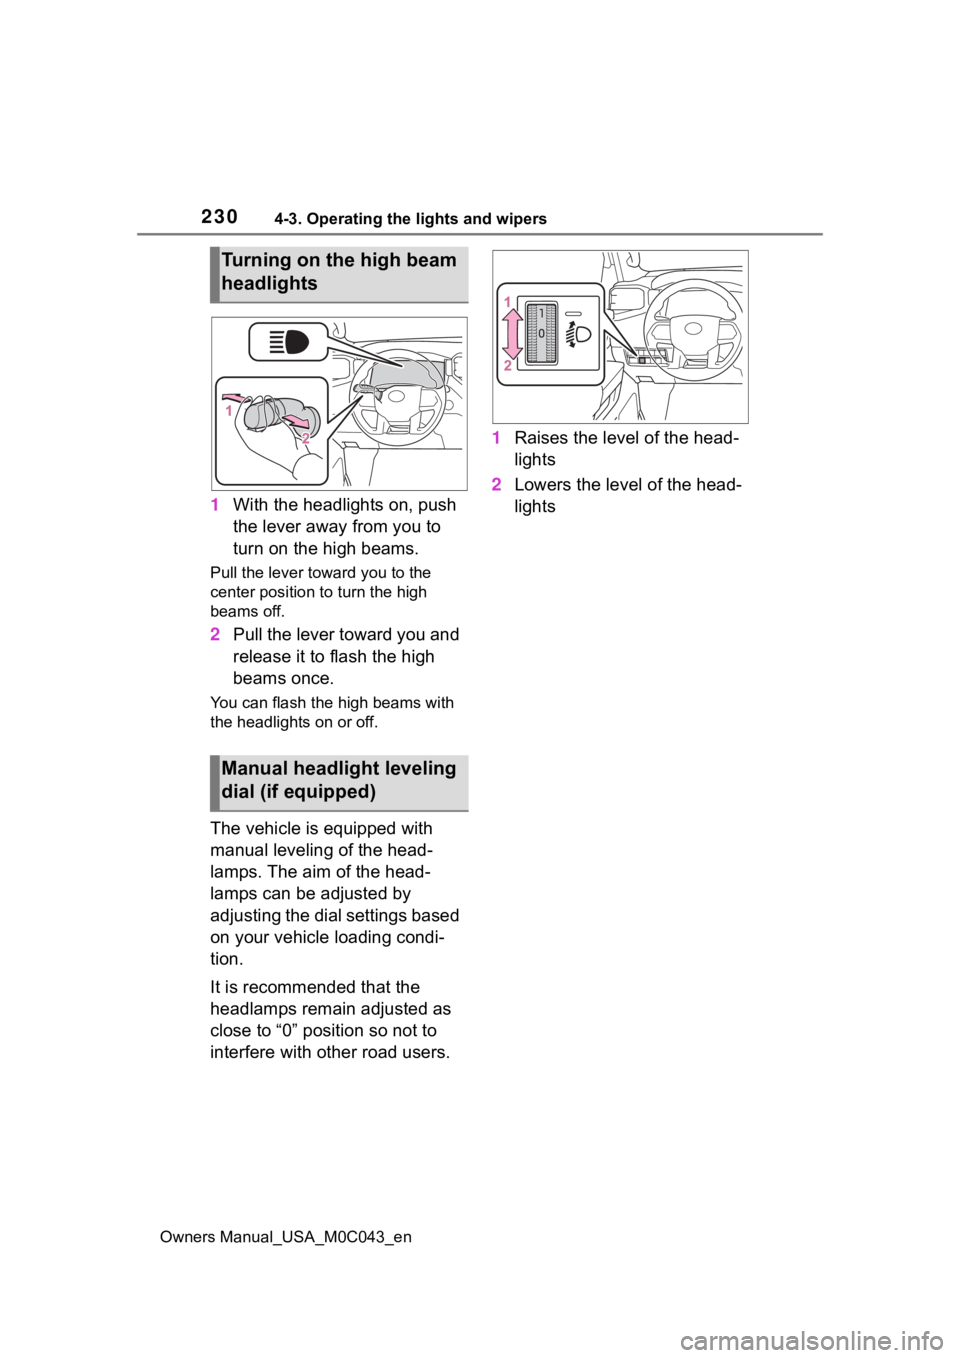
1With the headlights on, push
the lever away from you to
turn on the high beams.
Pull the lever to ward you to the
center position to turn the high
beams off.
2 Pull the lever toward you and
release it to flash the high
beams once.
You can flash the high beams with
the headlights on or off.
The vehicle is equipped with
manual leveling of the head-
lamps. The aim of the head-
lamps can be adjusted by
adjusting the dial settings based
on your vehicle loading condi-
tion.
It is recommended that the
headlamps remain adjusted as
close to “0” position so not to
interfere with other road users. 1
Raises the level of the head-
lights
2 Lowers the level of the head-
lights
Turning on the high beam
headlights
Manual headlight leveling
dial (if equipped)
Page 231 of 628

2314-3. Operating the lights and wipers
Owners Manual_USA_M0C043_en
4
Driving
1*1 or *2 Turns the
front fog lights off
2 Turns the front fog lights
on
*1: U.S.A.
*2: Canada
■Fog lights can be used when
The parking lights are on or the
headlights are on in low beam.
1 Press the Automatic High
Beam switch.
Fog light switch
The fog lights secure excel-
lent visibility in difficult driv-
ing conditions, such as in
rain and fog.
Operating instructions
AHB (Automatic High
Beam)
The Automatic High Beam
uses an in-vehicle front
camera to assess the bright-
ness of streetlights, the
lights of vehicles ahead etc.,
and automatically turns the
high beam on or off as nec-
essary.
WARNING
■Limitations of the Automatic
High Beam
Do not overly rely on the Auto-
matic High Beam. Always drive
safely, taking care to observe your
surroundings and turning the high
beams on or off manually if nec-
essary.
■To prevent inc orrect opera-
tion of the Automatic High
Beam system
Do not overload the vehicle.
Activating the Automatic
High Beam
Page 232 of 628
2324-3. Operating the lights and wipers
Owners Manual_USA_M0C043_en
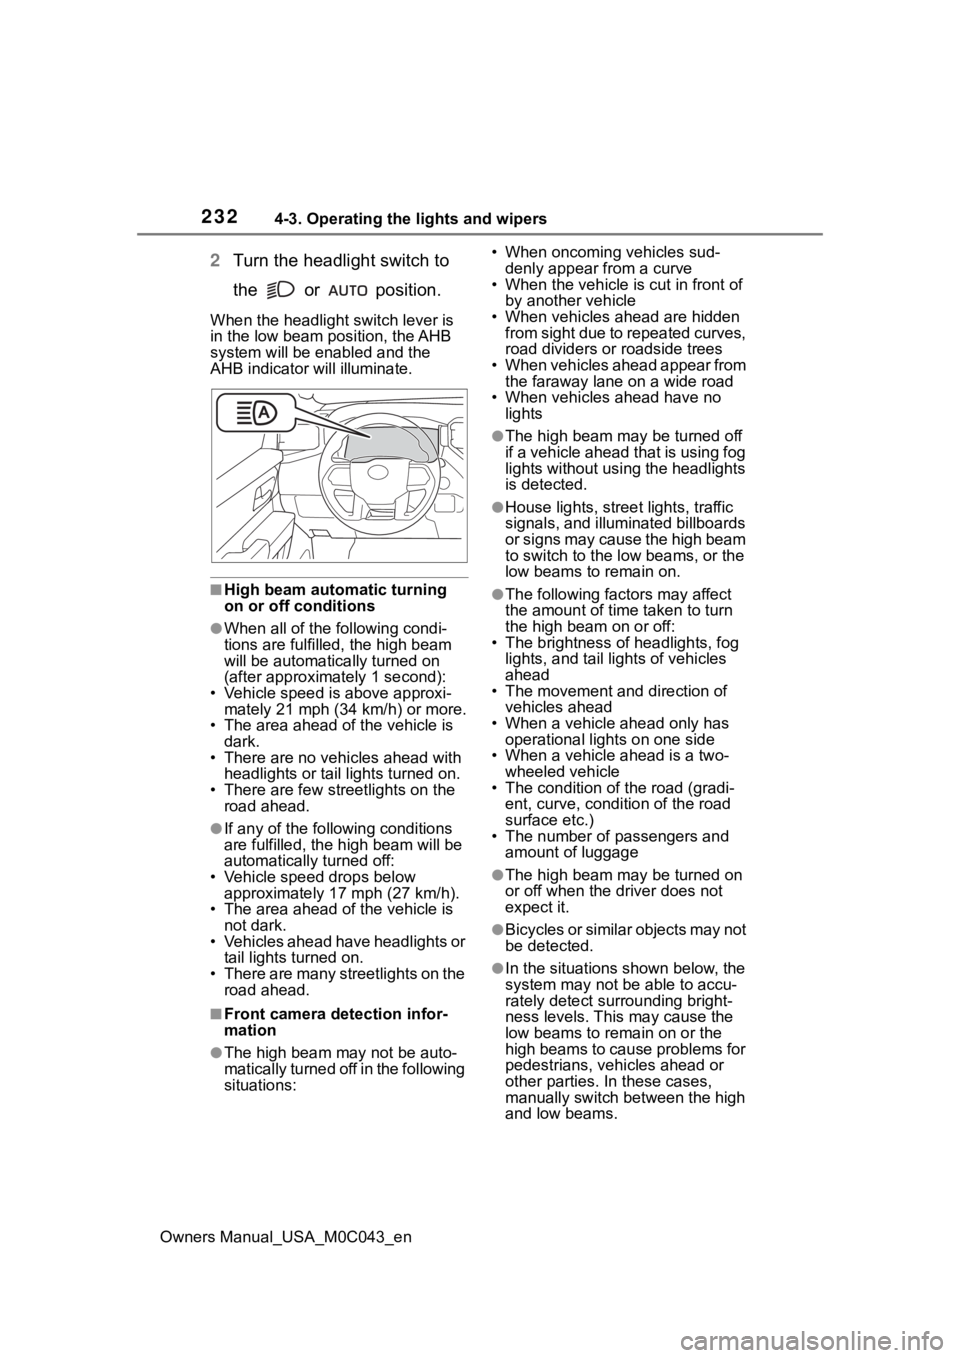
2Turn the headlight switch to
the or position.
When the headlight switch lever is
in the low beam position, the AHB
system will be enabled and the
AHB indicator will illuminate.
■High beam automatic turning
on or off conditions
●When all of the following condi-
tions are fulfille d, the high beam
will be automatica lly turned on
(after approximately 1 second):
• Vehicle speed is above approxi- mately 21 mph (34 km/h) or more.
• The area ahead of the vehicle is
dark.
• There are no vehicles ahead with headlights or tail lights turned on.
• There are few streetlights on the road ahead.
●If any of the following conditions
are fulfilled, the h igh beam will be
automatically turned off:
• Vehicle speed drops below approximately 17 mph (27 km/h).
• The area ahead of the vehicle is
not dark.
• Vehicles ahead have headlights or tail lights turned on.
• There are many streetlights on the road ahead.
■Front camera detection infor-
mation
●The high beam may not be auto-
matically turned off in the following
situations: • When oncoming vehicles sud-
denly appear from a curve
• When the vehicle is cut in front of
by another vehicle
• When vehicles ahead are hidden from sight due to repeated curves,
road dividers or roadside trees
• When vehicles ahead appear from the faraway lane on a wide road
• When vehicles ahead have no lights
●The high beam ma y be turned off
if a vehicle ahead that is using fog
lights without using the headlights
is detected.
●House lights, street lights, traffic
signals, and illuminated billboards
or signs may cause the high beam
to switch to the low beams, or the
low beams to remain on.
●The following fact ors may affect
the amount of time taken to turn
the high beam on or off:
• The brightness of headlights, fog
lights, and tail lig hts of vehicles
ahead
• The movement and direction of
vehicles ahead
• When a vehicle ahead only has
operational lights on one side
• When a vehicle ahead is a two- wheeled vehicle
• The condition of the road (gradi-
ent, curve, condition of the road
surface etc.)
• The number of passengers and
amount of luggage
●The high beam ma y be turned on
or off when the driver does not
expect it.
●Bicycles or similar objects may not
be detected.
●In the situations shown below, the
system may not be able to accu-
rately detect surrounding bright-
ness levels. This may cause the
low beams to remain on or the
high beams to cause problems for
pedestrians, vehicles ahead or
other parties. In these cases,
manually switch between the high
and low beams.