TOYOTA SIENNA 2009 XL20 / 2.G Owners Manual
SIENNA 2009 XL20 / 2.G
TOYOTA
TOYOTA
https://www.carmanualsonline.info/img/14/6800/w960_6800-0.png
TOYOTA SIENNA 2009 XL20 / 2.G Owners Manual
Trending: cooling, roof, torque, brake pads, steering, coolant reservoir, display
Page 431 of 592
431
4-3. Do-it-yourself maintenance
4
Maintenance and care
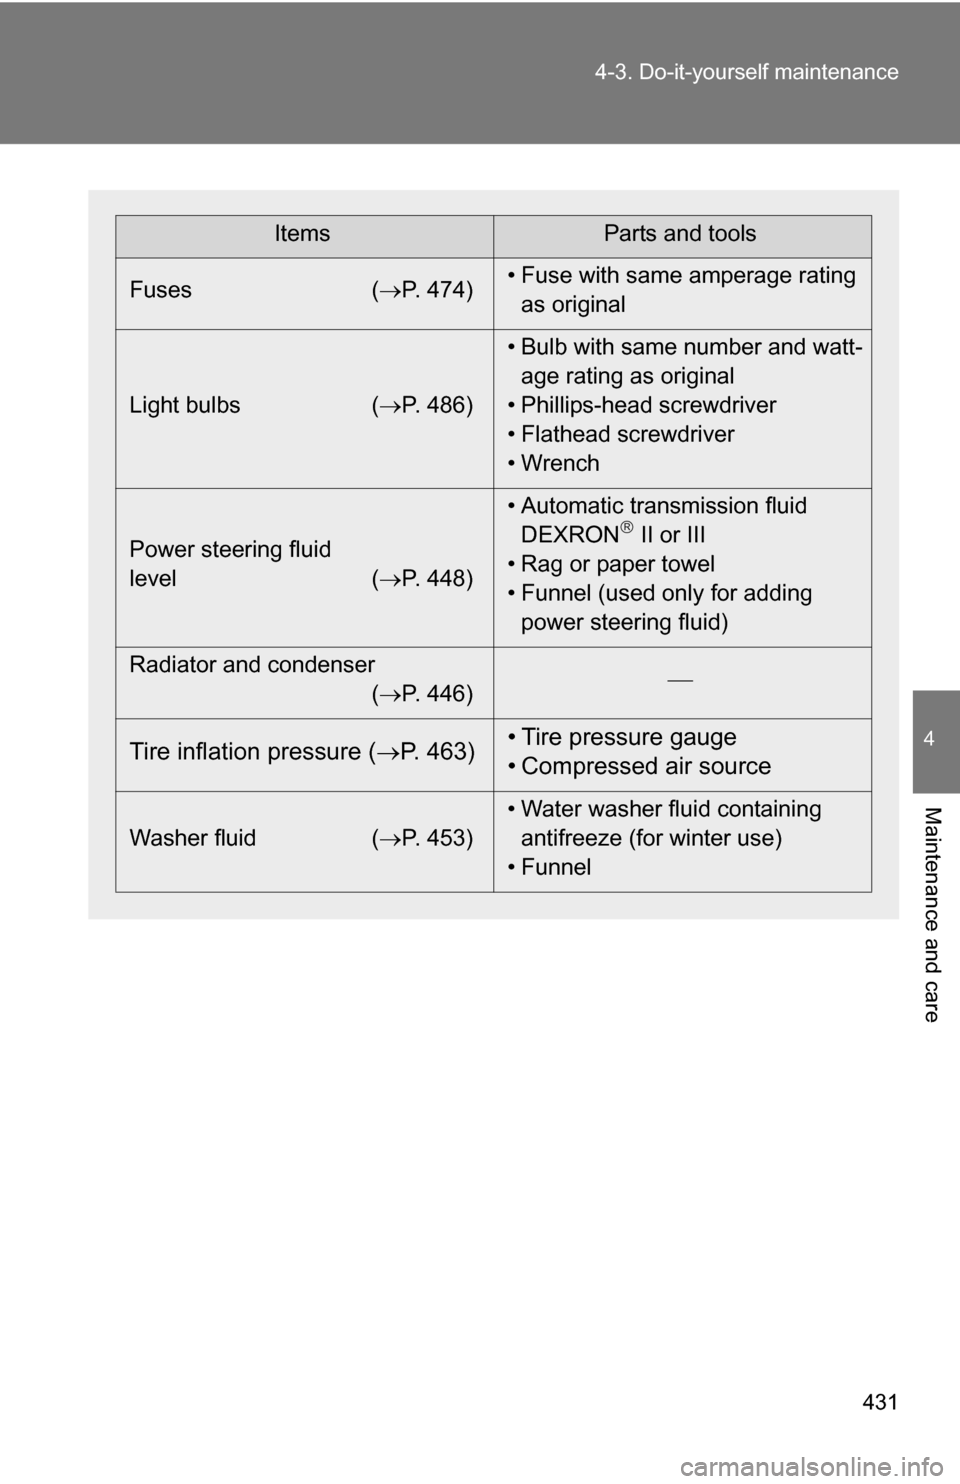
ItemsParts and tools
Fuses ( P. 474)• Fuse with same amperage rating
as original
Light bulbs ( P. 486)• Bulb with same number and watt-
age rating as original
• Phillips-head screwdriver
• Flathead screwdriver
• Wrench
Power steering fluid
level ( P. 448)• Automatic transmission fluid
DEXRON
II or III
• Rag or paper towel
• Funnel (used only for adding power steering fluid)
Radiator and condenser (P. 446)
Tire inflation pressure (
P. 463) • Tire pressure gauge
• Compressed air source
Washer fluid
(P. 453) • Water washer fluid containing
antifreeze (for winter use)
• Funnel
Page 432 of 592
432 4-3. Do-it-yourself maintenance
CAUTION
The engine compartment contains many mechanisms and fluids that may
move suddenly, become hot, or become electrically energized. To avoid death
or serious injury, observe the following precautions.
■When working on the engine compartment
●Keep hands, clothing, and tools away from the moving fan and engine
drive belt.
● Be careful not to touch the engine, radiator, exhaust manifold, etc. right
after driving as they may be hot. Oil and other fluids may also be hot.
● Do not leave anything that may burn easily, such as paper or rags, in the
engine compartment.
● Do not smoke, cause sparks or expose an open flame to fuel or the bat-
tery. Fuel and battery fumes are flammable.
● Be extremely cautious when working on the battery. It contains poisonous
and corrosive sulfuric acid.
● Take care because brake fluid can harm your hands or eyes and damage
painted surfaces.
If fluid gets on your hands or in your eyes, flush the affected area with
clean water immediately.
If you still experience discomfort, see a doctor.
● Do not touch the engine compartment when the electric cooling fan is
operating.
The electric cooling fan may keep rotating for about 3 minutes even after
the engine switch is turned to the “LOCK” position.
With the engine switch in the “ON” position, the electric cooling fan may
automatically start to run if the air conditioning is on and/or the coolant
temperature is high. Be sure the engine switch is in the “LOCK” position
and that the electric cooling fan is completely stopped when working near
the electric cooling fan or radiator grille.
■ Safety glasses
Wear safety glasses to prevent flying or falling material, fluid spray, etc. from
getting in the eyes.
Page 433 of 592
433
4-3. Do-it-yourself maintenance
4
Maintenance and care
NOTICE
■
If you remove the air cleaner
Driving with the air cleaner removed may cause excessive engine wear due
to dirt in the air. Also a backfire could cause a fire in the engine compart-
ment.
Page 434 of 592
434
4-3. Do-it-yourself maintenance
Hood
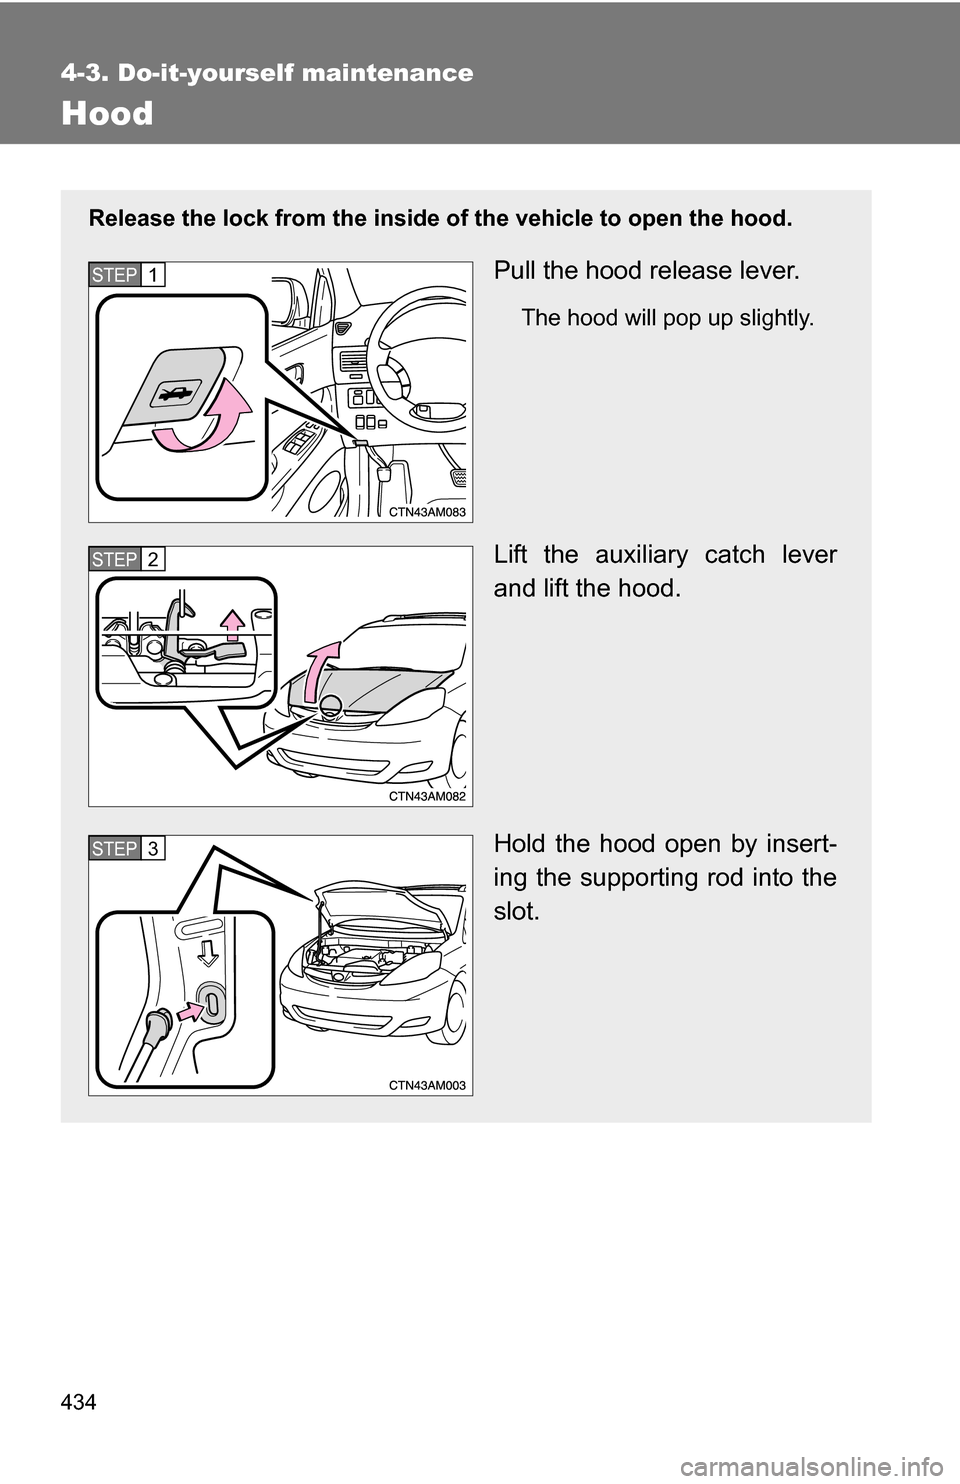
Release the lock from the inside of the vehicle to open the hood.
Pull the hood release lever.
The hood will pop up slightly.
Lift the auxiliary catch lever
and lift the hood.
Hold the hood open by insert-
ing the supporting rod into the
slot.
STEP1
STEP2
STEP3
Page 435 of 592
435
4-3. Do-it-yourself maintenance
4
Maintenance and care
CAUTION
■
Pre-driving check
Check that the hood is fully closed and locked.
If the hood is not locked properly, it may open while the vehicle is in motion
and cause an accident, which may result in death or serious injury.
■ After installing the support rod into the slot
Make sure the rod supports the hood securely from falling down on to your
head or body.
NOTICE
■When closing the hood
Be sure to return the support rod to its clip before closing the hood. Closing
the hood with the support rod up could cause the hood to bend.
Page 436 of 592
436
4-3. Do-it-yourself maintenance
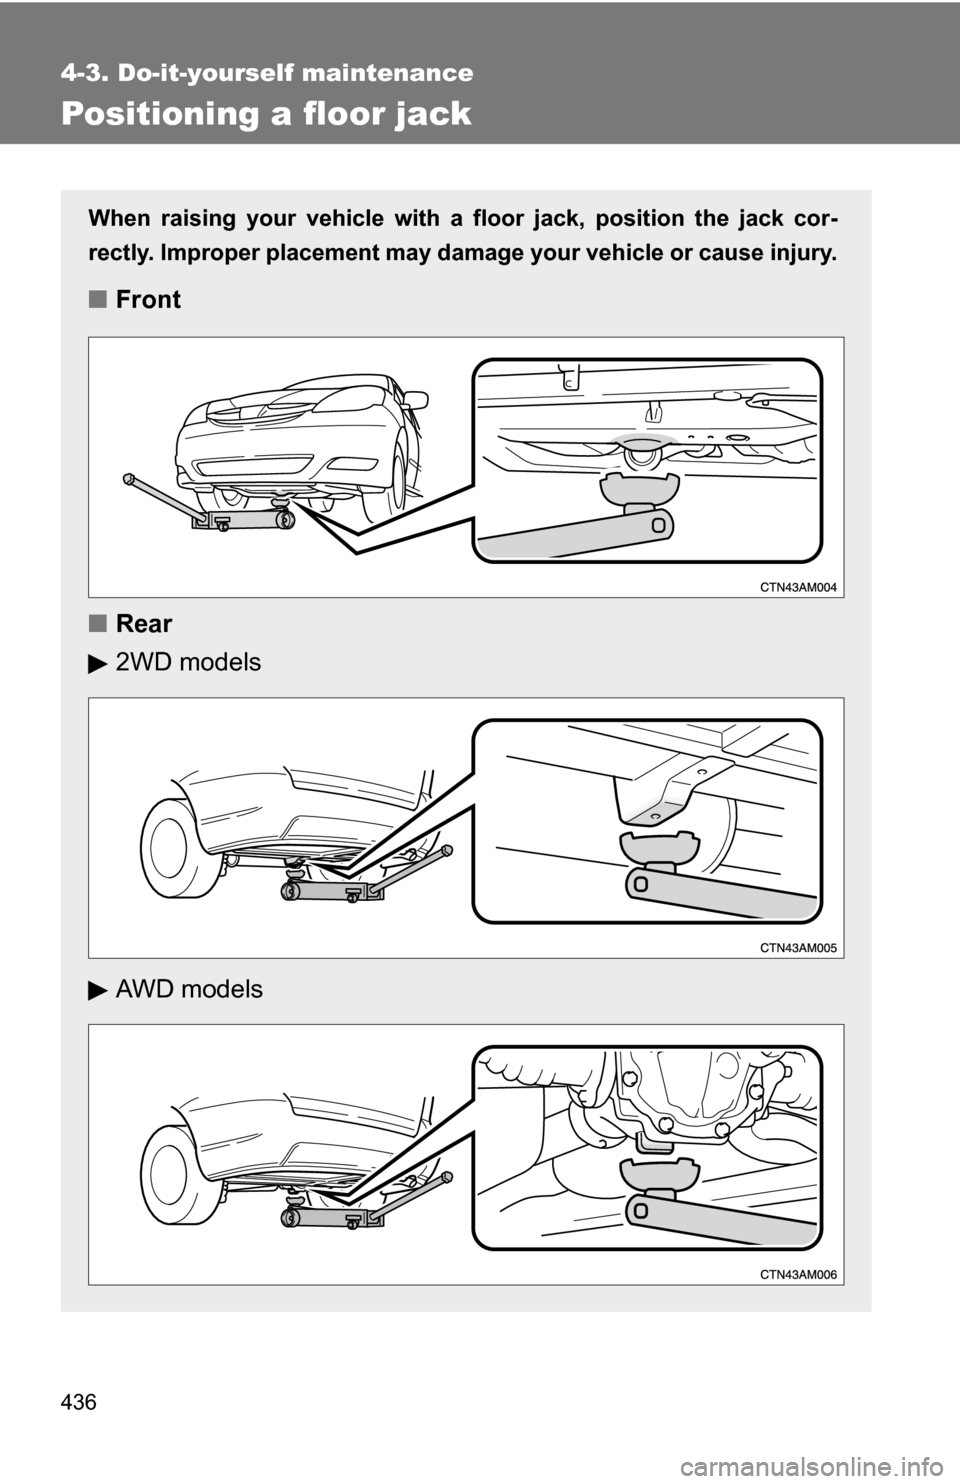
Positioning a floor jack
When raising your vehicle with a floor jack, position the jack cor-
rectly. Improper placement may damage your vehicle or cause injury.
■Front
■ Rear
2WD models
AWD models
Page 437 of 592
437
4-3. Do-it-yourself maintenance
4
Maintenance and care
CAUTION
■
When raising your vehicle
Make sure to observe the following to reduce the possibility of death or\
seri-
ous injury.
●Do not use the jack that was supplied with your vehicle.
● Do not put any part of your body or get underneath the vehicle supported
only by the floor jack.
Always use automotive jack stands on a solid, level surface.
● Do not start the engine while the vehicle is supported by the floor jack.
● Stop the vehicle on level firm ground, firmly set the parking brake and shift
the shift lever in P.
● Make sure to set the floor jack properly at the jack point.
Raising the vehicle with an improperly positioned floor jack will damage
the vehicle and may cause the vehicle to fall off the floor jack.
● Do not raise the vehicle while someone is in the vehicle.
● When raising the vehicle, do not place any objects on top of or underneath
the floor jack.
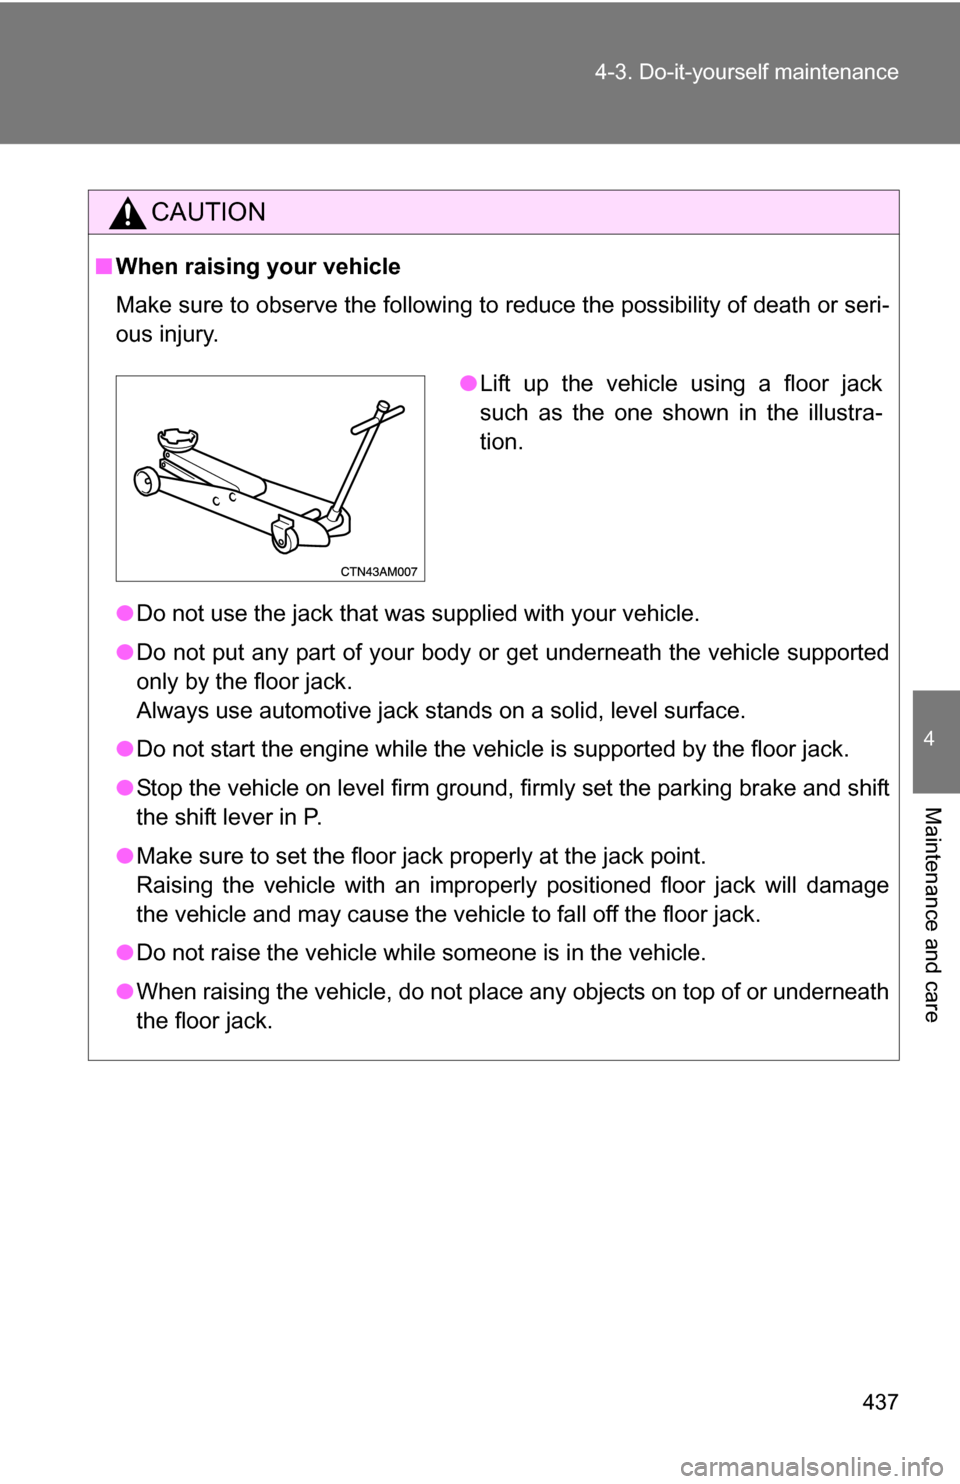
●Lift up the vehicle using a floor jack
such as the one shown in the illustra-
tion.
Page 438 of 592
438
4-3. Do-it-yourself maintenance
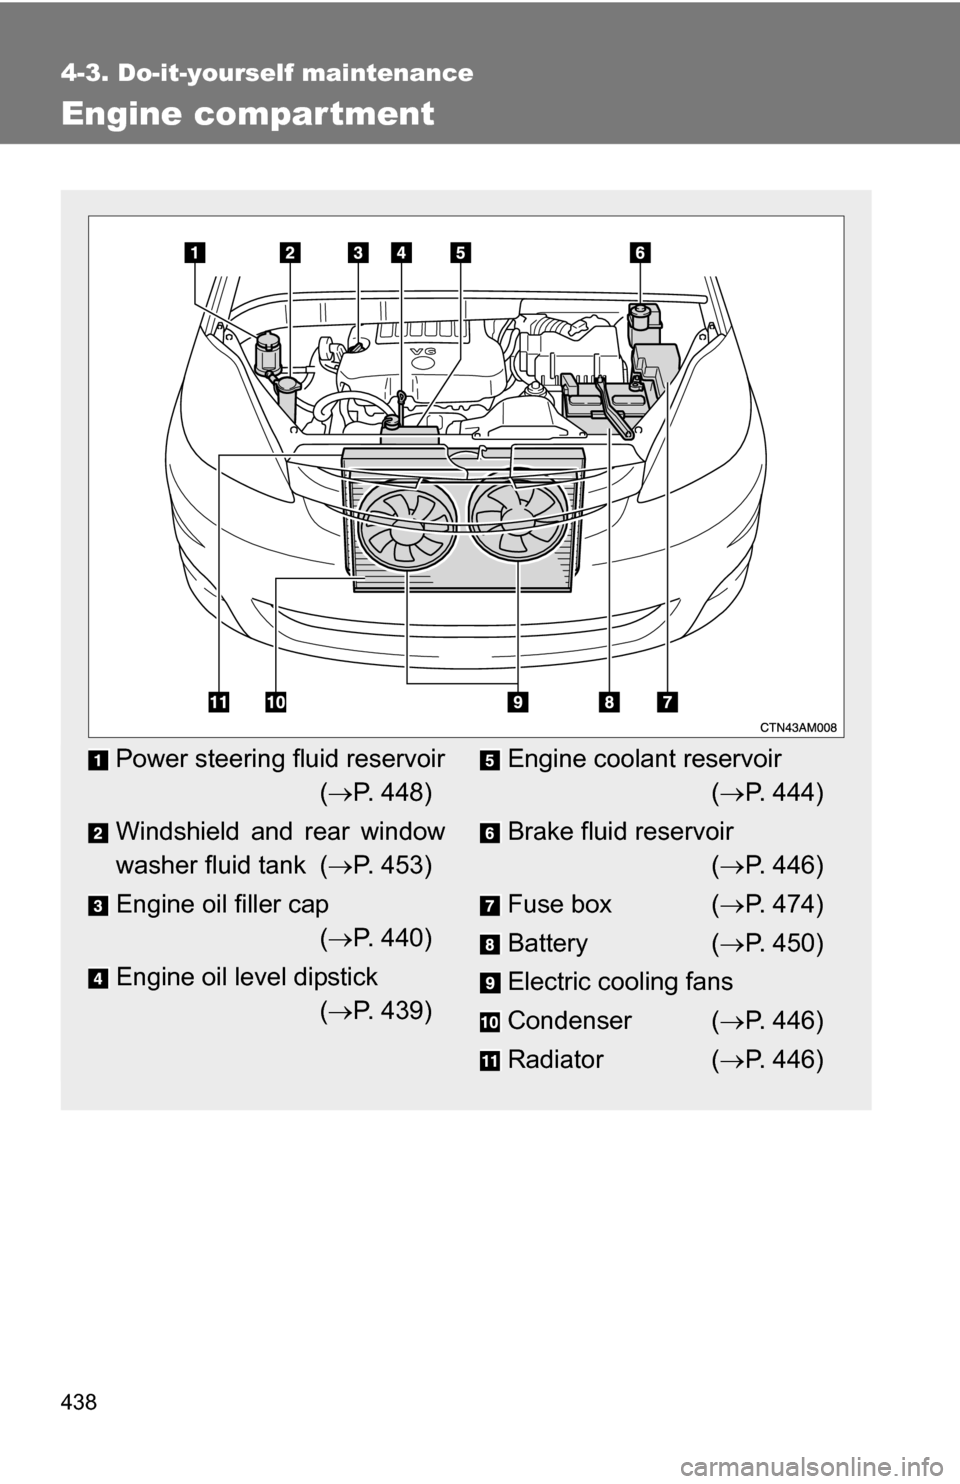
Engine compar tment
Power steering fluid reservoir( P. 448)
Windshield and rear window
washer fluid tank ( P. 453)
Engine oil filler cap ( P. 440)
Engine oil level dipstick ( P. 439)Engine coolant reservoir
( P. 444)
Brake fluid reservoir ( P. 446)
Fuse box ( P. 474)
Battery ( P. 450)
Electric cooling fans
Condenser ( P. 446)
Radiator ( P. 446)
Page 439 of 592
439
4-3. Do-it-yourself maintenance
4
Maintenance and care
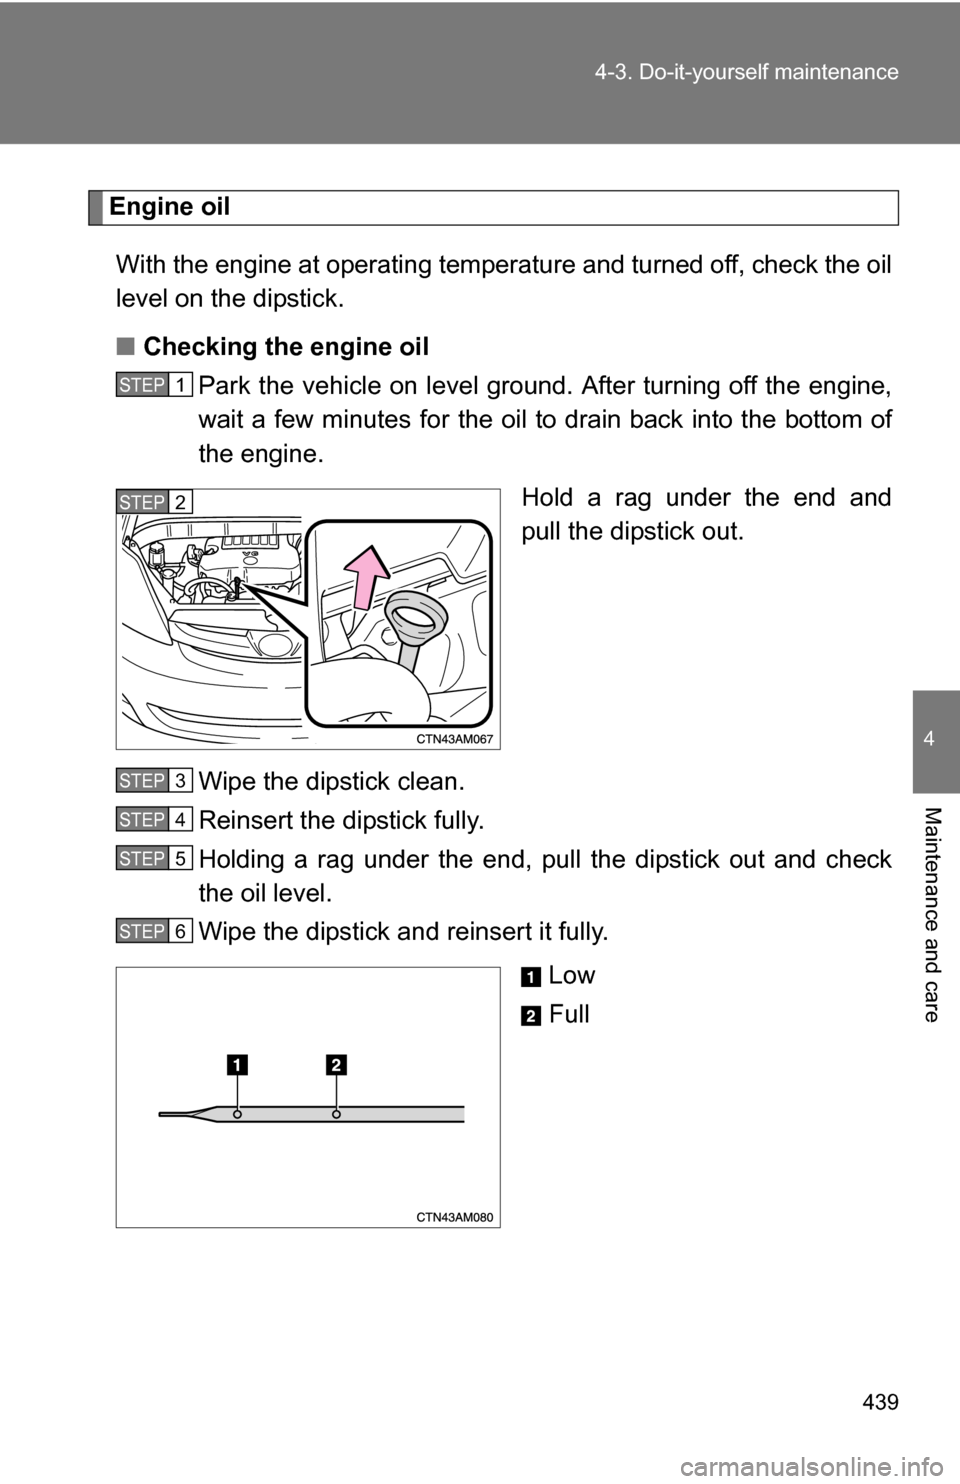
Engine oil
With the engine at operating temperature and turned off, check the oil
level on the dipstick.
■ Checking the engine oil
Park the vehicle on level gro und. After turning off the engine,
wait a few minutes for the oil to drain back into the bottom of
the engine.
Hold a rag under the end and
pull the dipstick out.
Wipe the dipstick clean.
Reinsert the dipstick fully.
Holding a rag under the end, pull the dipstick out and check
the oil level.
Wipe the dipstick and reinsert it fully. Low
Full
STEP1
STEP2
STEP3
STEP4
STEP5
STEP6
Page 440 of 592
440 4-3. Do-it-yourself maintenance
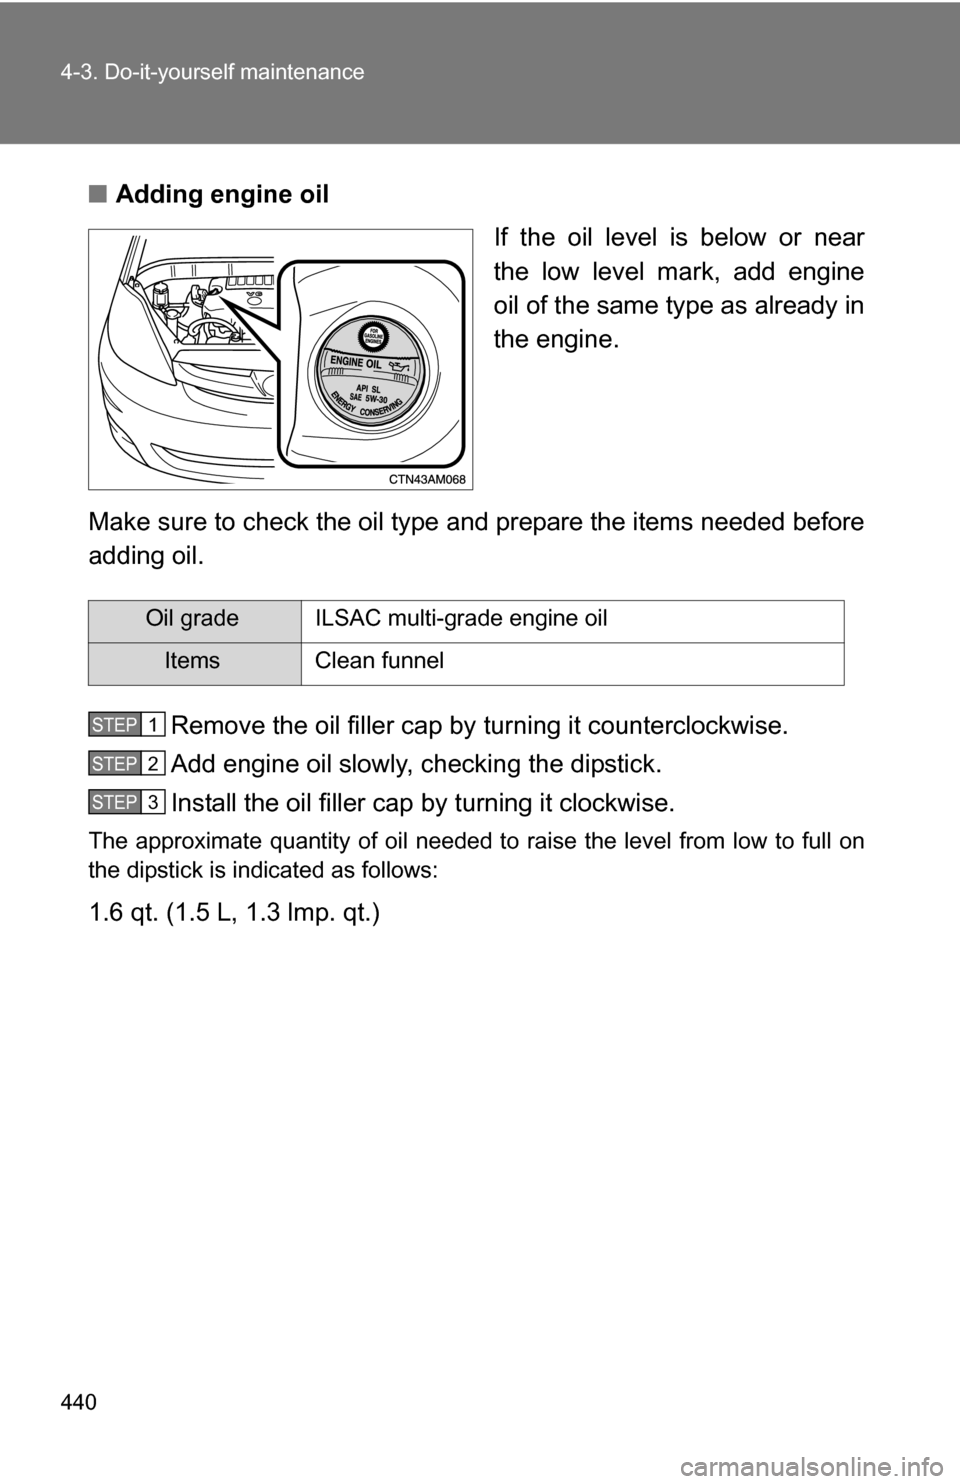
■Adding engine oil
If the oil level is below or near
the low level mark, add engine
oil of the same type as already in
the engine.
Make sure to check the oil type and prepare the items needed before
adding oil. Remove the oil filler cap by turning it counterclockwise.
Add engine oil slowly, checking the dipstick.
Install the oil filler cap by turning it clockwise.
The approximate quantity of oil needed to raise the level from low to full on
the dipstick is indicated as follows:
1.6 qt. (1.5 L, 1.3 lmp. qt.)
Oil grade ILSAC multi-grade engine oil
Items Clean funnel
STEP1
STEP2
STEP3
Trending: hood open, fuel cap release, power steering fluid, fuel type, weight, fog light, oil capacity
