headlights TOYOTA SIENNA 2012 XL30 / 3.G User Guide
[x] Cancel search | Manufacturer: TOYOTA, Model Year: 2012, Model line: SIENNA, Model: TOYOTA SIENNA 2012 XL30 / 3.GPages: 860, PDF Size: 15.08 MB
Page 277 of 860

277
2-3. Operating the lights and wipers
2
When driving
SIENNA_U (OM45477U)
●
In the situations below, the system may not be able to correctly detect the
surrounding brightness levels, and may flash or expose nearby pedestri-
ans to the high beam. Therefore, you should consider turning the high
beam on or off manually rather than relying on the Automatic High Beam
system.
• In bad weather (rain, snow, fog, sandstorms etc.)
• The windshield is obscured by fog, mist, ice, dirt etc.
• The windshield is cracked or damaged.
• The inside rear view mirror or ca mera sensor is deformed or dirty.
• Surrounding brightness levels are equal to those of headlights, tail lights or fog lights.
• Vehicles ahead have headlights that are either switched off, dirty, are changing color, or are not aimed properly.
• When driving through an area of intermittently changing brightness and darkness
• When frequently and repeatedly driving ascending/descending roads, or roads with rough, bumpy or uneven surfaces (such as stone-paved
roads, gravel tracks etc.)
• When frequently and repeatedly taking curves or driving on a winding road
• There is a highly reflective object ahead of the vehicle, such as a sign or a mirror.
• The vehicle’s headlights are damaged or dirty.
• The vehicle is lifting or tilting, due to a flat tire, a trailer being towed etc.
• The Automatic High Beam indicator is flashing.
• The high beam and low beam are repeatedly being switched between in an abnormal manner.
• The driver believes that the high beam may be causing problems or distress to other drivers or pedestrians nearby.
Page 279 of 860
279
2-3. Operating the lights and wipers
2
When driving
SIENNA_U (OM45477U)
NOTICE
■
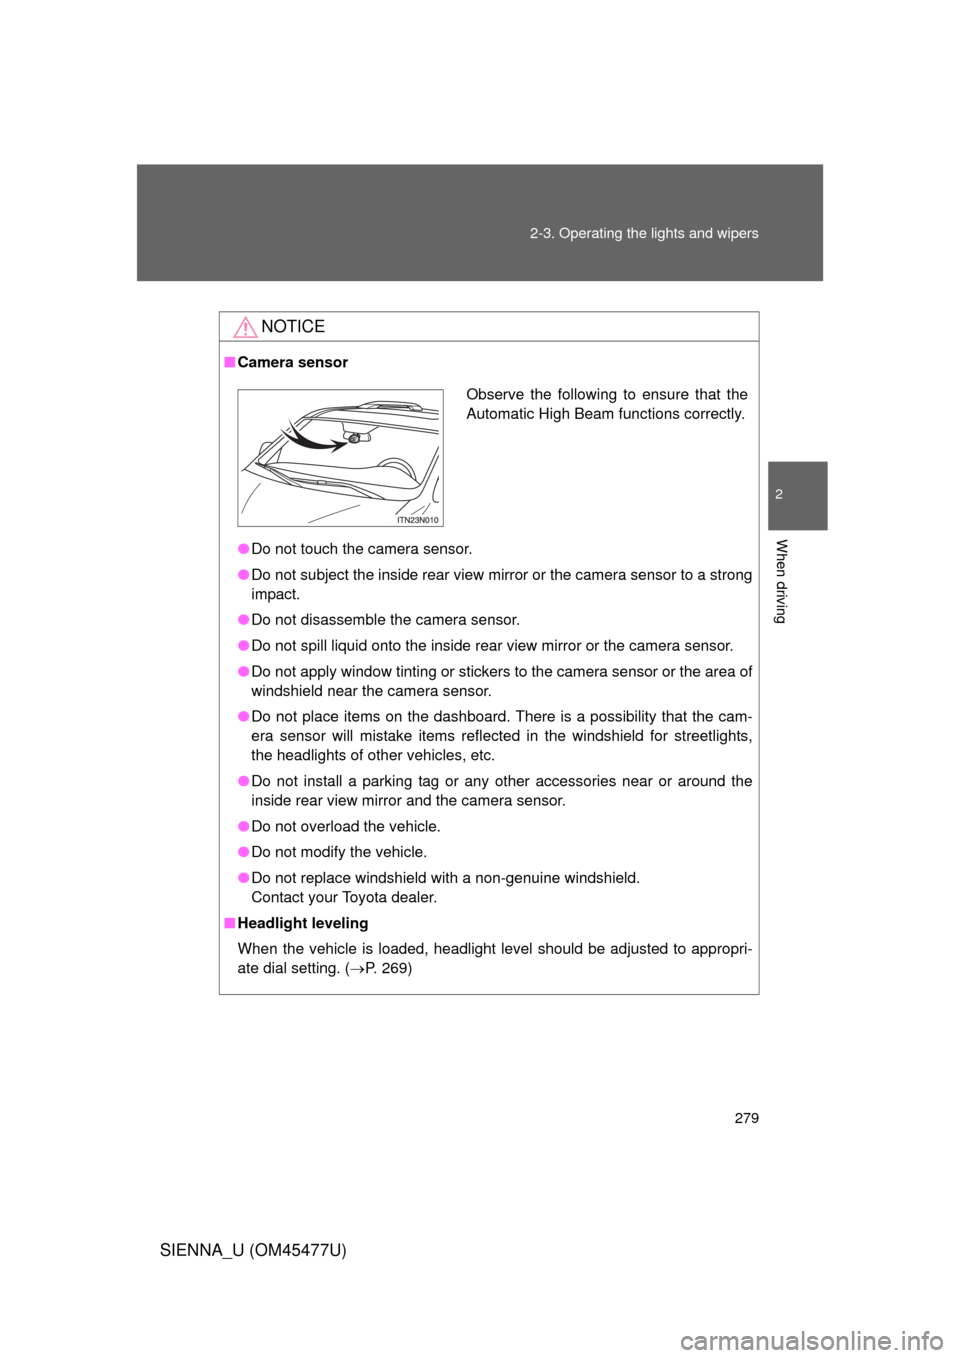
Camera sensor
● Do not touch the camera sensor.
● Do not subject the inside rear view mirror or the camera sensor to a strong
impact.
● Do not disassemble the camera sensor.
● Do not spill liquid onto the inside rear view mirror or the camera sensor.
● Do not apply window tinting or stickers to the camera sensor or the area of
windshield near the camera sensor.
● Do not place items on the dashboard. There is a possibility that the cam-
era sensor will mistake items reflected in the windshield for streetlights,
the headlights of other vehicles, etc.
● Do not install a parking tag or an y other accessories near or around the
inside rear view mirror and the camera sensor.
● Do not overload the vehicle.
● Do not modify the vehicle.
● Do not replace windshield with a non-genuine windshield.
Contact your Toyota dealer.
■ Headlight leveling
When the vehicle is loaded, headlight level should be adjusted to appropri-
ate dial setting. ( P. 269)
Observe the following to ensure that the
Automatic High Beam functions correctly.
Page 281 of 860
281
2-3. Operating the lights and wipers
2
When driving
SIENNA_U (OM45477U)
■
Fog lights can be used when
The headlights are on in low beam.
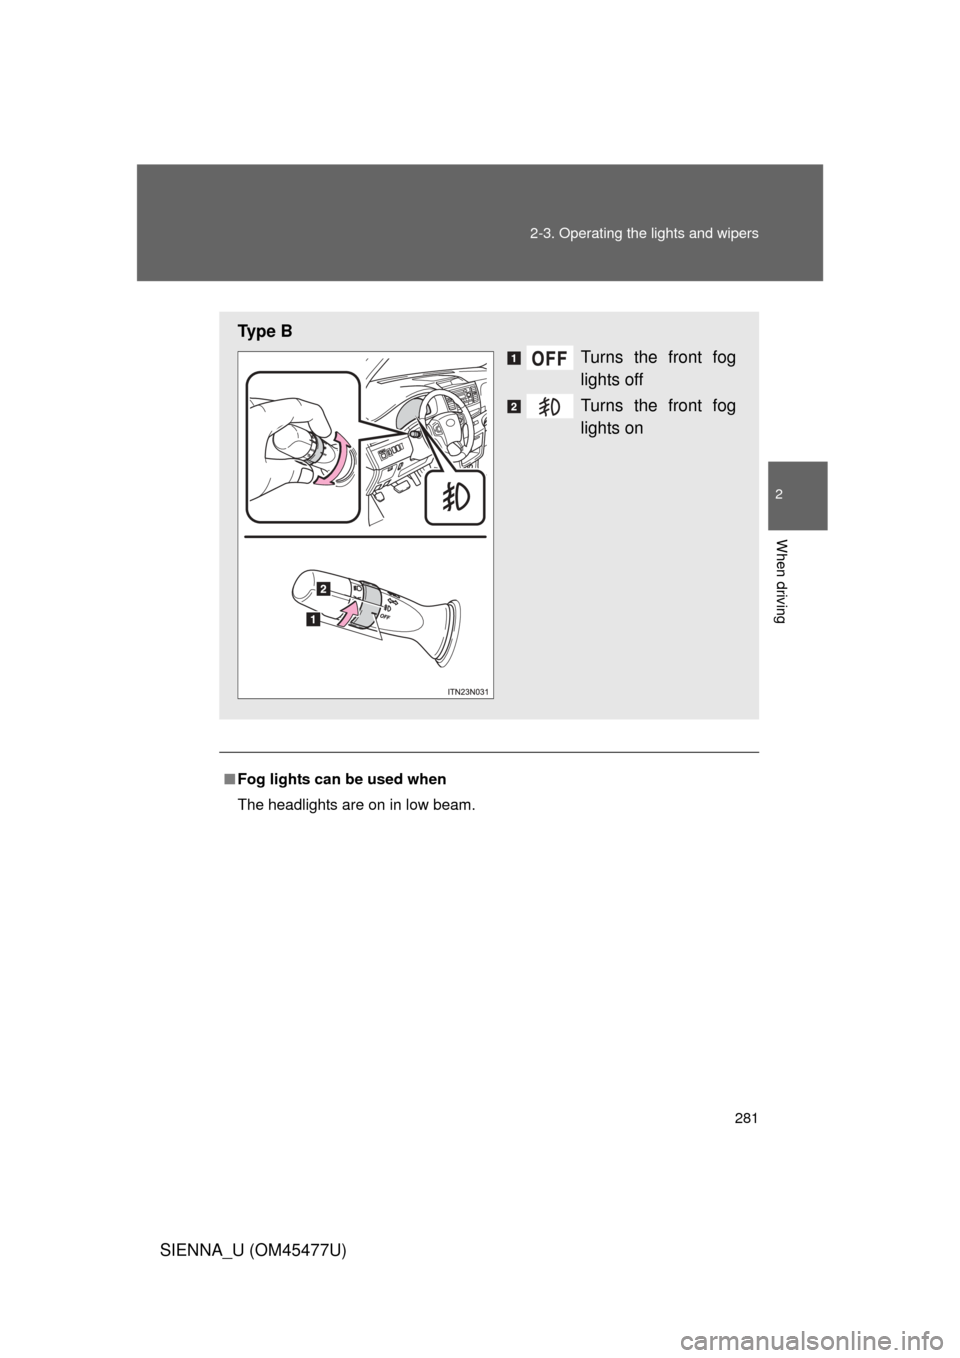
Ty p e B
Turns the front fog
lights off
Turns the front fog
lights on
Page 323 of 860
323
2-4. Using other
driving systems
2
When driving
SIENNA_U (OM45477U)
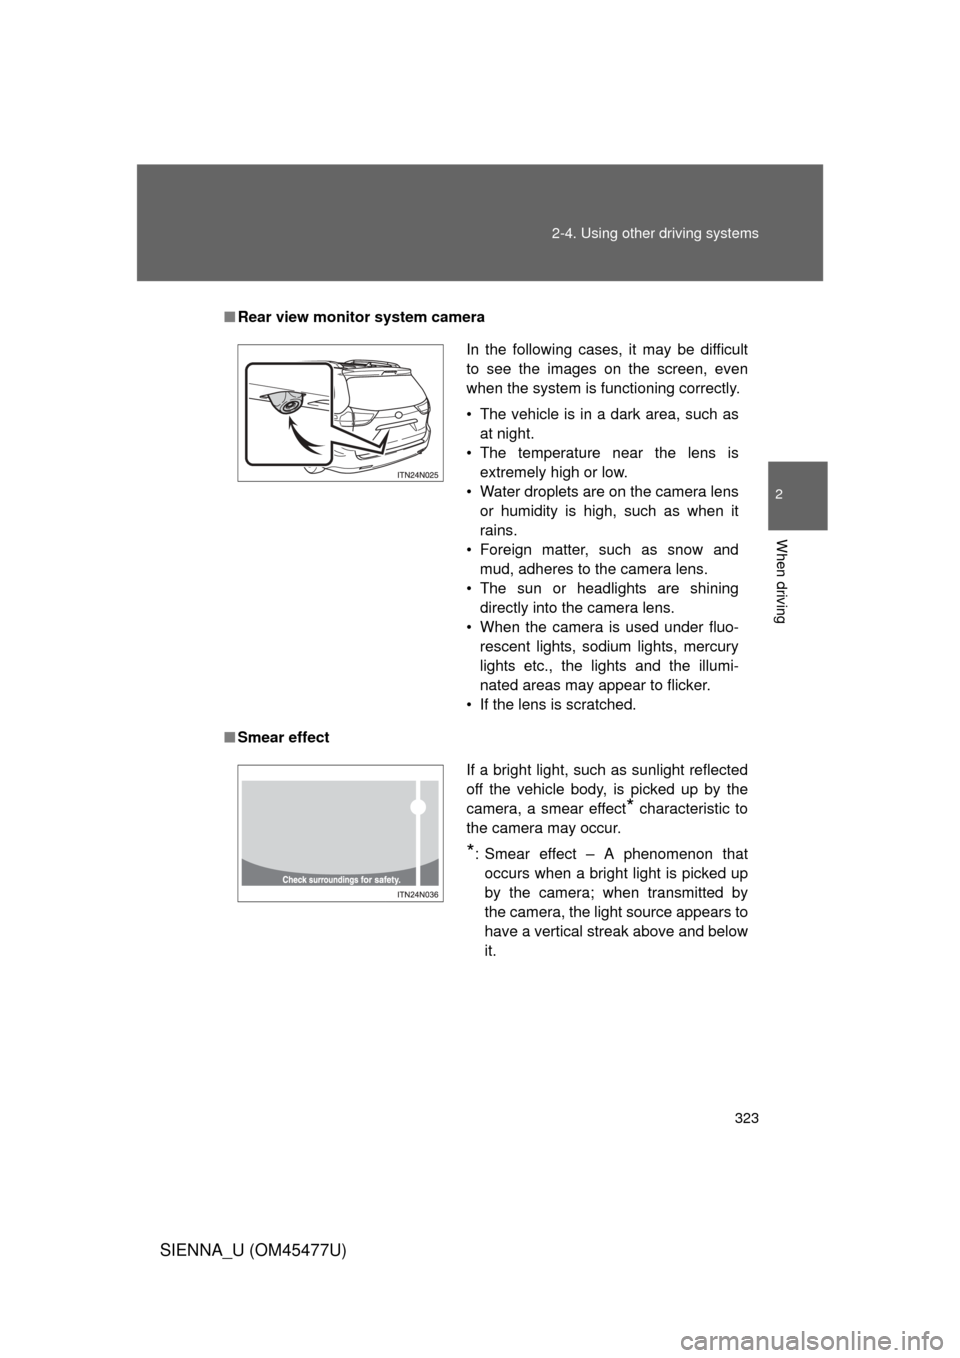
■Rear view monitor system camera
■ Smear effect
In the following cases, it may be difficult
to see the images on the screen, even
when the system is functioning correctly.
• The vehicle is in a dark area, such as
at night.
• The temperature near the lens is extremely high or low.
• Water droplets are on the camera lens or humidity is high, such as when it
rains.
• Foreign matter, such as snow and mud, adheres to the camera lens.
• The sun or headlights are shining directly into the camera lens.
• When the camera is used under fluo- rescent lights, sodium lights, mercury
lights etc., the lights and the illumi-
nated areas may appear to flicker.
• If the lens is scratched.
If a bright light, such as sunlight reflected
off the vehicle body, is picked up by the
camera, a smear effect
* characteristic to
the camera may occur.
*: Smear effect – A phenomenon that occurs when a bright light is picked up
by the camera; when transmitted by
the camera, the light source appears to
have a vertical streak above and below
it.
Page 644 of 860

644 4-2. Maintenance
SIENNA_U (OM45477U)
ItemsCheck points
Indicators/buzzers • Do the indicators and buzzers
function properly?
Lights • Do all the lights come on?
• Are the headlights aimed cor-
rectly?
Parking brake • Does the parking brake lever or
pedal move smoothly?
• When parked on a slope with the parking brake on, is the vehicle
securely stopped?
Seat belts • Do the seat belts operate
smoothly?
• The seat belts should not be dam- aged.
Seats • Do the seat controls operate
properly?
Steering wheel • Does the steering wheel rotate
smoothly?
• Does the steering wheel have the correct amount of free play?
• There should not be any strange sounds coming from the steering
wheel.
Page 703 of 860
703
4-3. Do-it-yourself maintenance
4
Maintenance and care
SIENNA_U (OM45477U)
*1: Vehicles with discharge headlights only
*2: Vehicles with a 1AR-FE engine only
*3: Vehicles with a 2GR-FE engine only
*4: Vehicles without discharge headlights only
*5: Vehicles without a smart key system only
*6: Vehicles with a smart key system only
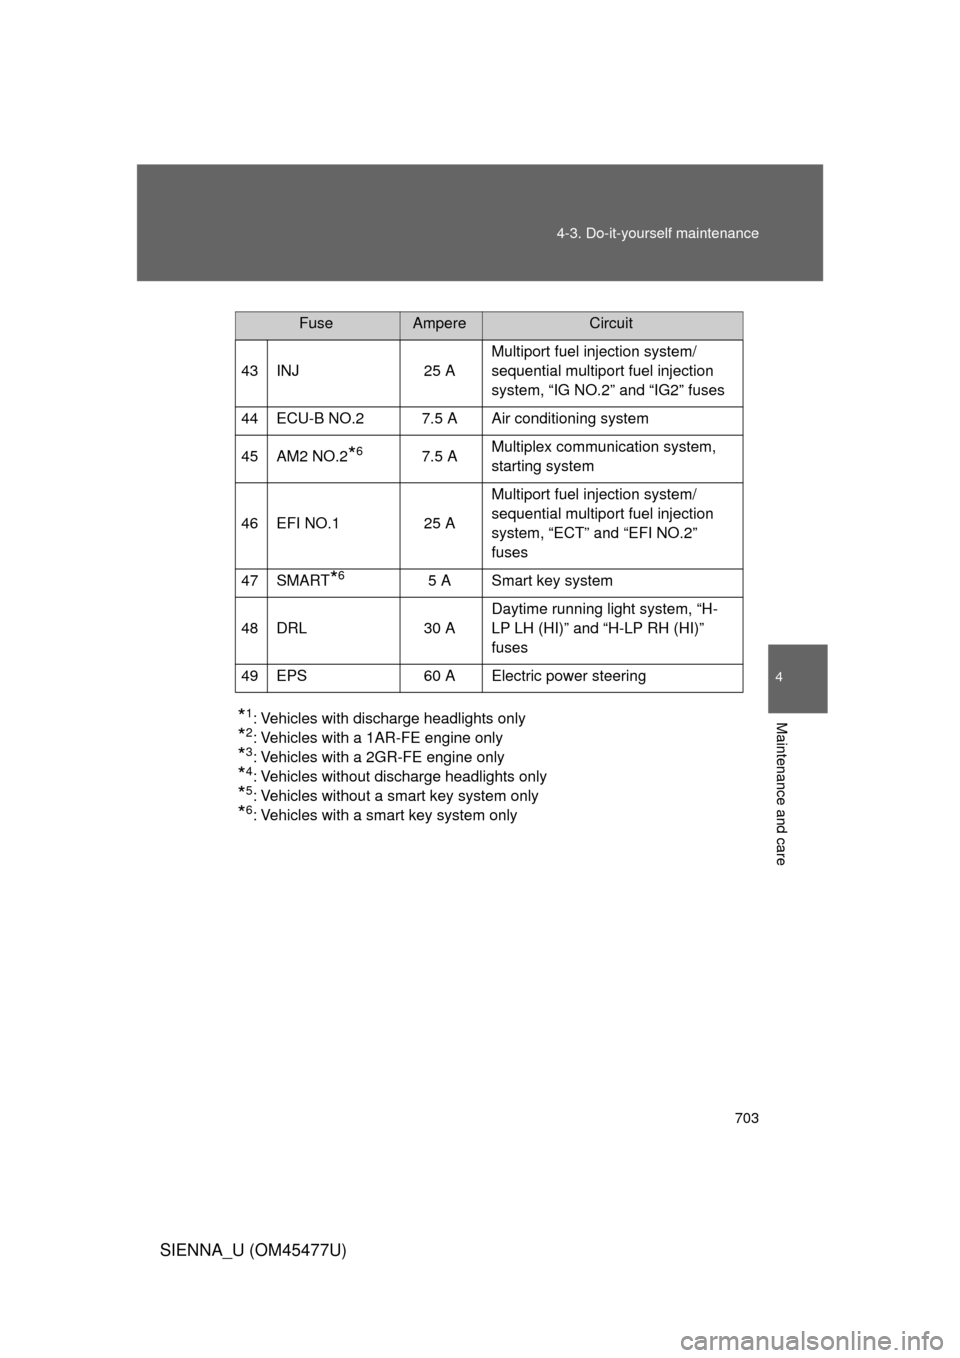
FuseAmpereCircuit
43 INJ 25 A Multiport fuel injection system/
sequential multiport fuel injection
system, “IG NO.2” and “IG2” fuses
44 ECU-B NO.2 7.5 A Air conditioning system
45 AM2 NO.2
*67.5 A Multiplex communication system,
starting system
46 EFI NO.1 25 A Multiport fuel injection system/
sequential multiport fuel injection
system, “ECT” and “EFI NO.2”
fuses
47 SMART
*65 A Smart key system
48 DRL 30 A Daytime running light system, “H-
LP LH (HI)” and “H-LP RH (HI)”
fuses
49 EPS 60 A Electric power steering
Page 713 of 860
713
4-3. Do-it-yourself maintenance
4
Maintenance and care
SIENNA_U (OM45477U)
■
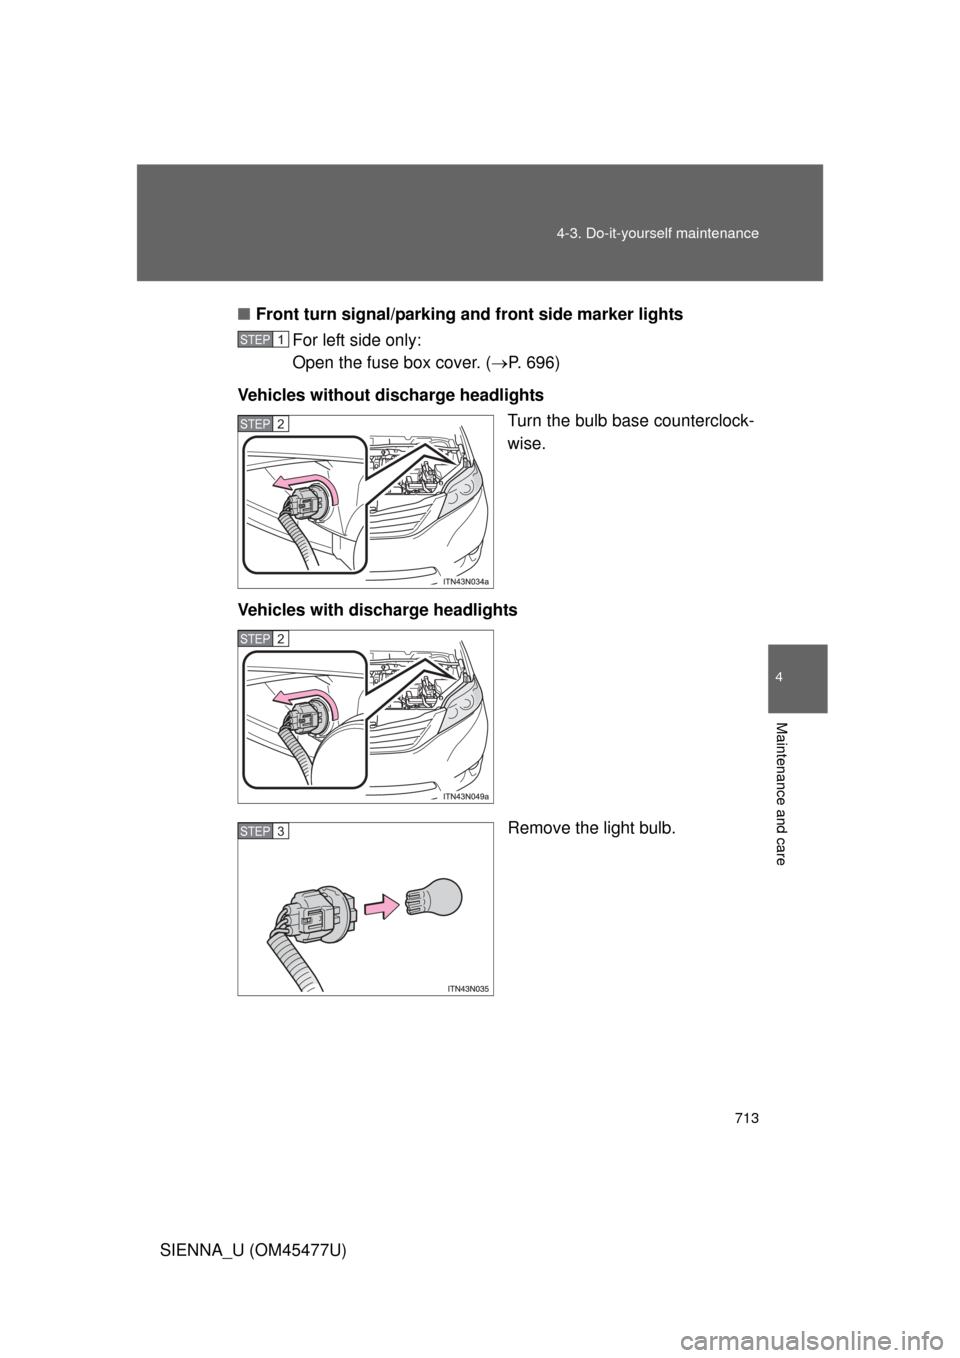
Front turn signal/parking and front side marker lights
For left side only:
Open the fuse box cover. ( P. 696)
Vehicles without discharge headlights Turn the bulb base counterclock-
wise.
Vehicles with discharge headlights
Remove the light bulb.
STEP1
STEP2
STEP2
STEP3
Page 718 of 860
718 4-3. Do-it-yourself maintenance
SIENNA_U (OM45477U)
CAUTION
■Replacing light bulbs
● Turn off the lights. Do not attempt to replace the bulb immediately after
turning off the lights.
The bulbs become very hot and may cause burns.
● Do not touch the glass portion of the light bulb with bare hands. Hold the
bulb by the plastic or metal portion.
If the bulb is scratched or dropped it may blow out or crack.
● Fully install light bulbs and any parts used to secure them. Failure to do so
may result in heat damage, fire, or water entering the headlight unit. This
may damage the headlights or cause condensation to build up on the lens.
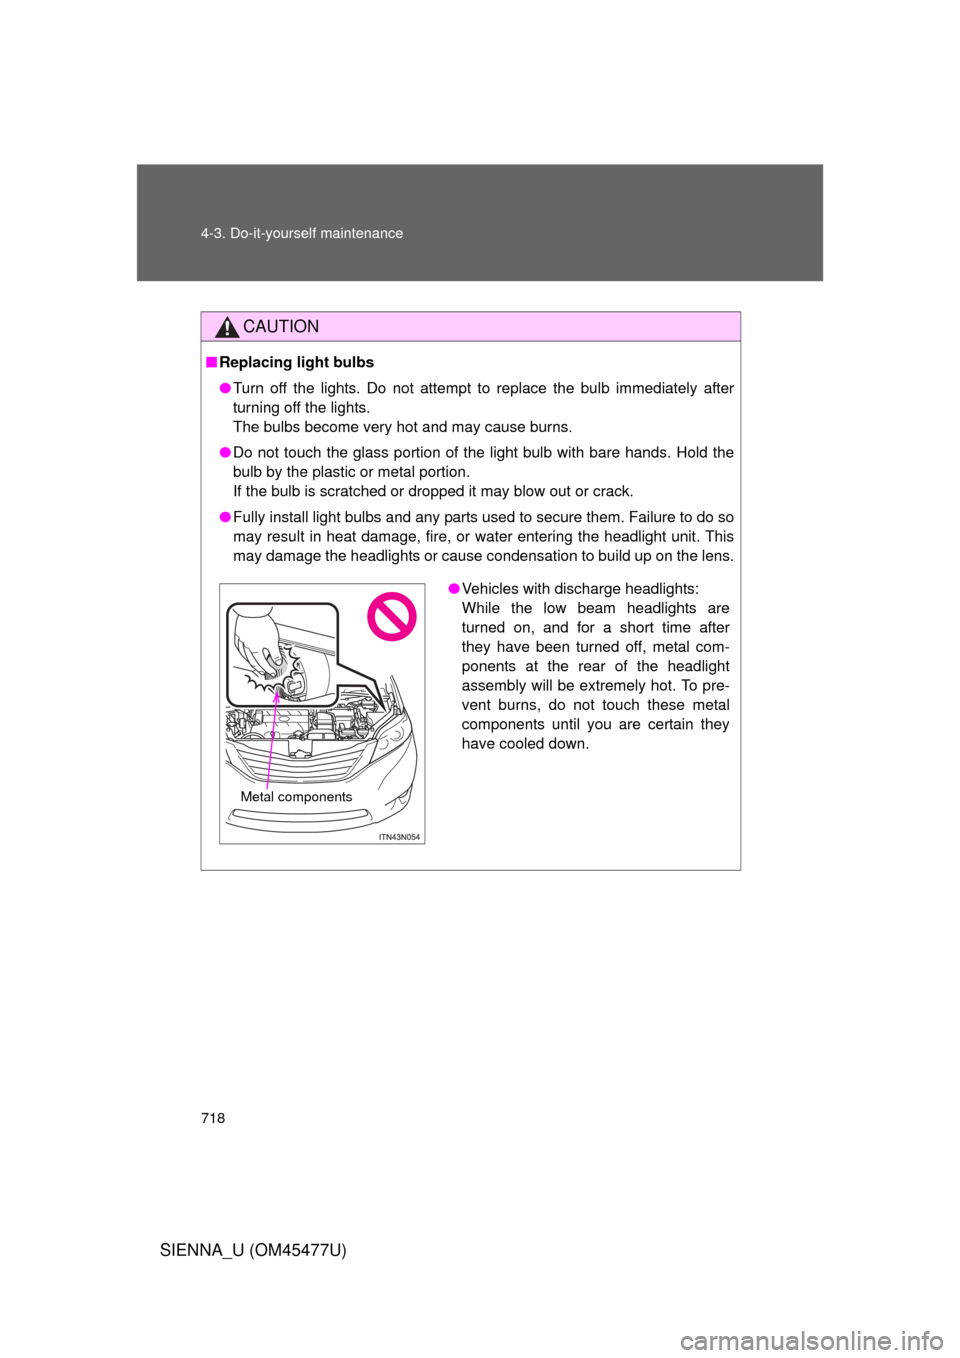
●Vehicles with discharge headlights:
While the low beam headlights are
turned on, and for a short time after
they have been turned off, metal com-
ponents at the rear of the headlight
assembly will be extremely hot. To pre-
vent burns, do not touch these metal
components until you are certain they
have cooled down.
Metal components
Page 719 of 860
719
4-3. Do-it-yourself maintenance
4
Maintenance and care
SIENNA_U (OM45477U)
CAUTION
■
Discharge headligh ts (if equipped)
● Contact your Toyota dealer before replacing discharge headlights (includ-
ing light bulbs).
● Do not touch the discharge headlight’s high voltage socket when the head-
lights are turned on.
An extremely high voltage of 30000 V will be discharged and could result
in serious injury or death by electric shock.
● Do not attempt to take apart or repair the low beam headlight bulbs, con-
nectors, power supply circuits, or related components.
Doing so could result in electric shock and serious injury or death.
■ To prevent damage or fire
Make sure bulbs are fully seated and locked.
NOTICE
■When installing the back door trim
To prevent damage, be careful not to pinch any of the wire harnesses or
connectors with the back door trim.
Page 762 of 860
762
5-2. Steps to take in an emergency
SIENNA_U (OM45477U)
If the engine will not star t
If the engine will not start even though correct starting procedures
are being followed ( P. 226, 229), consider each of the following
points:
■ The engine will not start even though the starter motor
operates normally.
One of the following may be the cause of the problem:
●There may not be sufficient fuel in the vehicle’s tank.
Refuel the vehicle.
● The engine may be flooded.
Try to restart the engine again following correct starting proce-
dures. ( P. 226, 229)
● There may be a malfunction in the engine immobilizer system
(if equipped). ( P. 159)
■ The starter motor turns over slowly, the interior lights and
headlights are dim, or the horn does not sound or sounds at
a low volume.
One of the following may be the cause of the problem:
●The battery may be discharged. ( P. 770)
● The battery terminal connec tions may be loose or corroded.
■ The starter motor does not turn over.
The engine starting system may be malfunctioning due to an
electrical problem such as an open circuit or a blown fuse. How-
ever, an interim measure is available to start the engine.