towing TOYOTA T100 1997 Owners Manual
[x] Cancel search | Manufacturer: TOYOTA, Model Year: 1997, Model line: T100, Model: TOYOTA T100 1997Pages: 212, PDF Size: 3.17 MB
Page 27 of 212

25
Remove excess length of the belt and adjust the belt position.
To shorten the belt, pull the free end of thebelt. Position the lap belt as low as possible on your hipsÐnot on your waist. then adjustit to a snug fit.
CAUTION!
High-positioned and loose-fitting
lap belts could increase the chance
of injury due to sliding under the lap
belt during an accident. Keep the lap
belt positioned as low on your hip
bone as possible.
To release the belt, press the buckle- release button.The front center seat belt can be
stowed in the seat side pocket when
not in use.
ÐStowing the front center
seat belt (split bench seat)
Page 28 of 212
26
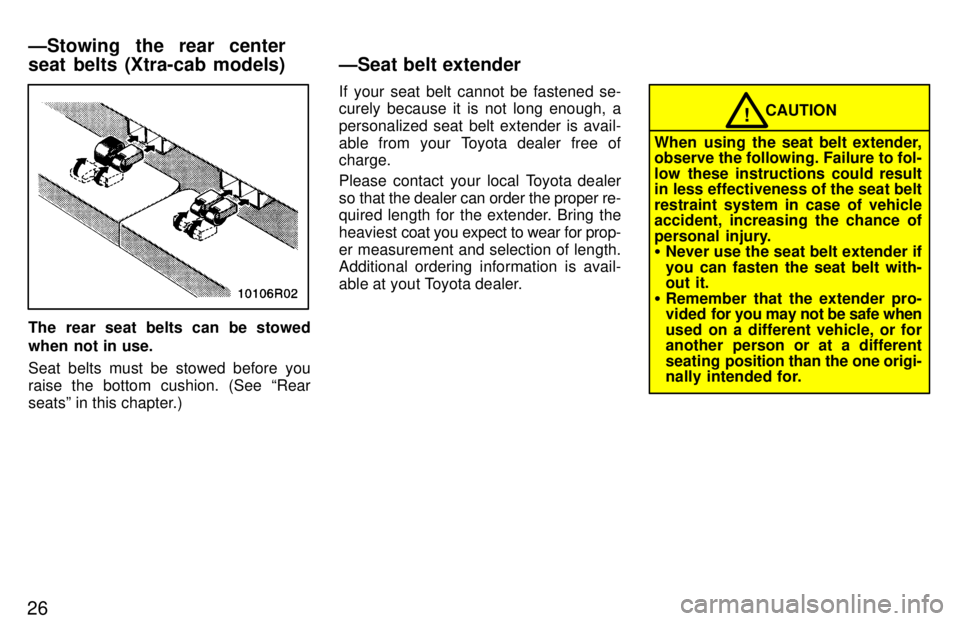
The rear seat belts can be stowed
when not in use.
Seat belts must be stowed before you
raise the bottom cushion. (See Rear
seatsº in this chapter.)If your seat belt cannot be fastened se- curely because it is not long enough, a
personalized seat belt extender is avail-
able from your Toyota dealer free of charge.
Please contact your local Toyota dealer
so that the dealer can order the proper re-
quired length for the extender. Bring the heaviest
coat you expect to wear for prop-
er measurement and selection of length.
Additional ordering information is avail-
able at yout Toyota dealer.
CAUTION!
When using the seat belt extender,
observe the following. Failure to fol-
low these instructions could result
in less effectiveness of the seat belt
restraint system in case of vehicle accident, increasing the chance of
personal injury. � Never use the seat belt extender if
you can fasten the seat belt with-
out it.
� Remember that the extender pro-
vided for you may not be safe when
used on a different vehicle, or for
another person or at a different
seating position than the one origi-
nally intended for.
ÐSeat belt extender
ÐStowing the rear center
seat belts (Xtra-cab models)
Page 60 of 212

56
The gauge works when the ignition
switch is on and indicates the approxi-
mate quantity of fuel remaining in the tank.
It is a good idea to keep the tank over 1/4 full.
This fuel gauge has a non-return typ
needle which remains at the last inidi-
cated position when the ignition switch is
turned off.
If the level approaches Eº or the low fuel
level warning light (on some models)
comes on, fill the fuel tank as soon as pos- sible.
If the fuel tank is completely empty, the malfunction indicator lamp comes on. Fill
the fuel tank immediately. The indicator lamp goes off after driving
several times. If the indicator lamp does
not go off, contact your Toyota dealer assoon as possible.The gauge indicates the engine cool-
ant temperature when the ignition
switch is on. The engine operating
temperature will vary with changes inweather and engine load. If the needle moves into the red zone, or
higher
stop your vehicle and allow the en-
gine to cool.
Your vehicle may overheat during severe operating conditions, such as: � Driving up a long hill on a hot day.
� Reducing speed or stopping after high
speed driving.
� Idling for a long period with the air con-
ditioning on in stop-and-go traffic.
� Towing a trailer
Engine coolant temperature gauge
Fuel gauge(with tachometer)
Page 69 of 212
65
Your automatic transmission has a shift
lock system to minimize the possibility of
incorrect operation. This means you can
only shift out of Pº position when the brake
pedal is depressed (with the ignition
switch in ONº position and the selector le- ver pulled toward you).
(a) Normal driving
1. Start the engine as instructed in How to start the engineº in Part 3. The trans- mission must be in Pº or Nº.
2. With your foot holding down the brake pedal, shift the selector lever to Dº.
In Dº position, the automatic transmis-
sion system will select the most suitable
gear for running conditions such as nor-
mal cruising, hill climbing, hard towing, etc.
Always turn the overdrive switch on for
better fuel economy and quieter driving.
Two-wheel drive models-If the engine
coolant temperature is low, the transmis-
sion will not shift into the overdrive gear
even with the overdrive switch on. Four-wheel drive models-If the engine
coolant t
emperautre is low and the vehicle
is travelling at low speed or when the four-
wheel drive control lever is in L4º (four-
wheel drive, low range), the transmission
will not shift into the overdrive gear evenwith the overdrive switch on. (See Four-
wheel drive systemº in this Chapter for in-
formation of the four-wheel drive control
lever.)
Never put your foot on the accelera-
tor pedal while shifting. CAUTION
!
3. Release the parking brake and brake pedal. Depress the accelerator pedal
slowly for smooth starting.
(b) Using engine braking
To use engine braking, you can downshift the transmission as follows: � Turn off the overdrive switch. The O/D
OFFº indicator light will come on andthe transmission will downshift to the
third gear. �
Shift into the 2º position. The trans-
mission will downshift to the second
gear when the vehicle speed dropsdown to or lower than the followingspeed, and more powerful engine
braking will be obtained.
Two-wheel drive models.Ð
3RZ-FE engine...112 km/h (70 mph)
5VZ-FE engine...117 km/h (73 mph)
Four-wheel drive models- ÐFour wheel drive control lever
in H2º and H4º...112 km/h (70 mph) ÐFour-wheel drive control lever in L4º...38 km/h (24 mph)
� Shift into the Lº position. The trans- mission will downshift to the first gear
when the vehicle speed drops down to
or lower than the following speed, and
maximum engine braking will be ap- plied.
Two-wheel drive modelsÐ 3RZ-FE engine...54 km/h (34 mph)5VZ-FE engine...56 km/h (35 mph)
Four-wheel drive modelsÐ ÐFour-wheel drive control lever in H2º and H4º...54 km/h (34 mph)
ÐFour-wheel drive control lever in
L4º...10 km/h (6 mph)
Page 70 of 212
66Vehicles with cruise controlÐWhen the
cruise control is being used, even if you
downshift the transmission by turning offthe overdrive switch, engine braking will
not be applied because the cruise control
is not cancelled. For ways to decrease the
vehicle speed, see Cruise controlº in
this
chapter.
Be careful when downshifting on a
slippery surface. Abrupt shifting
could cause the vehicle to spin orskid. CAUTION
!
(c) Using the 2º and Lº positions
The 2º and Lº positions are used for
strong engine braking as described pre-
viously. With the selector lever in 2º or Lº, you
can start the vehicle in motion as with the
lever in Dº. With the selector lever in 2º, the vehicle
will start in the first gear and automatically
shift to the second gear.
With the selector lever in Lº, the trans-
mission is engaged in the first gear.
NOTICE
�Be careful not to overrev the en-
gine. Watch the tachometer to
keep engine rpm from going intothe red zone. The approximatemaximum allowable speed for
each position is given below for your reference:Two-wheel drive modelsÐ
2º 100 km/h (62 mph)Lº 55 km/h (34 mph)
Four-wheel drive modelsÐ
ÐFour-wheel drive control lever
in H2º and H4º 2º 100 km/h (62 mph)
Lº 55 km/h (34 mph)
ÐFour-wheel drive control lever in LFº
2º 35 km/h (21 mph)Lº 20 km/h (12 mph)
�Do not continue hill climbing for along time in the 2º or Lº posi-tion. This may cause severe auto-matic transmission damage from
overheating. To prevent such damage, use Dº position for hillclimbing or hard towing.
(d) Backing up
1. Bring the vehicle to a complete stop.
2. With the brake pedal held down with your foot, shift the selector lever to the
Rº position.
NOTICE
Never shift into reverse while the vehicle is moving.
(e) Parking
1. Bring the vehicle to a complete stop. � Pull the parking brake lever up fully to securely apply the parking brake.
� With the brake pedal pressed down,
shift the selector lever to the Pº posi- tion.
While the vehicle is moving, never
attempt to move the selector lever
into Pº position under any circum-
stances. Serious mechanical dam-
age and loss of vehicle control mayresult. CAUTION
!
Page 71 of 212
67
(f) Good driving practice �
If the transmission is repeatedly up-
shifted and downshifted between third
gear and overdrive when climbing a
gentle slope, the overdrive switch
should be turned off. Be sure to turn the switch on immediately afterward.
� When towing a trailer, in order to main-
tain engine braking efficiency, do notuse overdrive.
Always keep your foot on the brake
pedal while stopped with the engine
running. This prevents the vehicle
from creeping. CAUTION
!
NOTICE
Do not hold the vehicle on an upgrade with the accelerator pedal.
It can cause the transmission tooverheat. Always use the brake pedal or parking brake.
(g) Rocking your vehicle if stuck
If you rock your vehicle to make it
out when it becomes stuck in snow,
mud, sand, etc., first check that
there is no physical object or people
around the vehicle. During opera-
tion, the vehicle may suddenly
move forward or backward causing
injury or damage to nearby people
or objects. CAUTION
!
NOTICE
If you rock your vehicle, observe the following precautions to prevent
damage to the transmission andother parts.
�Do not depress the acceleratorpedal while shifting the selector
lever or before the transmission is
completely shifted to forward or
reverse gear.
�Do not race the engine and avoidspinning the wheels.
�If your vehicle remains stuck after
rocking the vehicle several times,
consider other ways such as tow-ing.
Page 73 of 212
69
1/2-ton models 3RZ-FE engine
gear km/h (mph)
1 40 (25)
2 75 (47)
3 115 (71)
4 165 (103)
5VZ-FE engine
gear km/h (mph)
1 40 (25)
2 75 (47)
3 115 (71)
4 165 (103)
Four-wheel drive models
gear km/h (mph) H2º and H4º L4º
1 40 (25) 15 (9)
2 75 (47) 30 (18)
3 115 (71) 40 (25)
4 165 (103) 60 (37)
NOTICE
Do not downshift if you are going faster than the maximum allowable
speed for the next lower gear.
Good driving practice � If it is difficult to shift into reverse, put
the transmission in neutral, release
the clutch pedal momentarily, and then
try again.
� When towing a trailer, in order to main-
tain engine braking efficiency, do not
use the fifth gear.
Be careful when downshifting on a
slippery surface. Abrupt shifting
could cause the vehicle to spin orskid. CAUTION
!
NOTICE
Make sure the vehicle is completely stopped before shifting into
reverse.
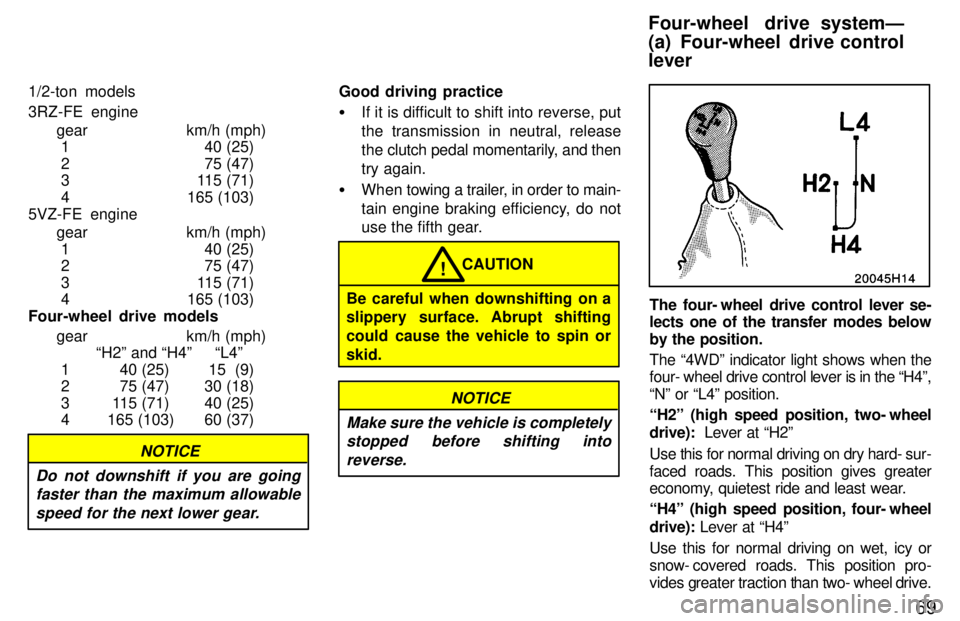
The four- wheel drive control lever se-
lects one of the transfer modes below
by the position.
The 4WDº indicator light shows when the
four- wheel drive control lever is in the H4º,
Nº or L4º position.
H2º (high speed position, two- wheel
drive): Lever at H2º
Use this for normal driving on dry hard- sur-
faced roads. This position gives greater
economy, quietest ride and least wear.
H4º (high speed position, four- wheel
drive): Lever at H4º
Use this for normal driving on wet, icy or
snow- covered roads. This position pro-
vides greater traction than two- wheel drive.
Four-wheel drive systemÐ
(a) Four-wheel drive control lever
Page 120 of 212
11 6When stowing luggage or cargo in the ve-
hicle, observe the following: �
Put luggage or cargo in the rear deck
when at all possible. Be sure all items are secured in place.
� Be careful to keep the vehicle bal- anced. Locating the weight as far
forward as possible helps maintain balance.
� For better fuel economy, do not carry
unneeded weight.
CAUTION!
� To prevent luggage or packages
from sliding forward during brak-
ing, do not stack anything behind
the front seats higher than the seat-
backs (Xtra-cab models). Keep lug-
gage or packages low, as close to
the floor as possible.
� Never allow anyone to ride in the
rear deck. It is not designed for pas-
sengers. They should ride in their
seats with wearing their seat belts.
Otherwise, they are much more
likely suffer serious bodily injury,
in the event of sudden braking or a collision.
� Do not drive with objects left on
top of the instrument panel. They
may interfere with the driver's field
of view. Or they may move during
sharp vehicle acceleration or turn-
ing, and impair the driver's control
of the vehicle. In an accident they
may injure the vehicle occupants.
Do not load the vehicle beyond the
cargo weight rating given in Part 8.
NOTICE
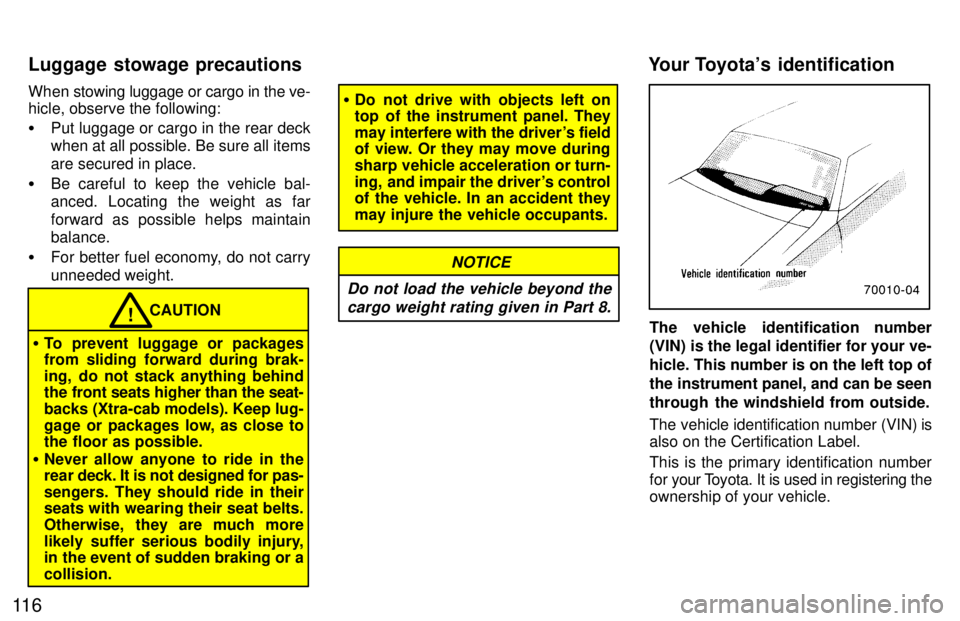
The vehicle identification number
(VIN) is the legal identifier for your ve- hicle. This number is on the left top of
the instrument panel, and can be seen
through the windshield from outside.
The vehicle identification number (VIN) is
also on the Certification Label.
This is the primary identification number
for your T oyota. It is used in registering the
ownership of your vehicle.
Luggage stowage precautions
Your Toyota's identification
Page 125 of 212
Part 3How to start the engineÐ (a) Before cranking
Before starting the engine
121
STARTING AND DRIVING �
Before starting the engine
�How to start the engine
�Tips for driving in various conditions
�Off-road driving precautions
�Winter driving tips
�Trailer towing
�How to save fuel and make your
vehicle last longer, too
1. Check
the area around the vehicle be-
fore entering it.
2. Adjust seat position, seatback angle, seat cushion angle, head restraint
height and steering wheel angle.
3. Adjust inside and outside rear view mirrors.
4. Lock both doors.
5. Fasten seat belts. 1. Apply the parking brake firmly.
2. Turn off unnecessary lights and acces-
sories.
3. Manual transmission: Press the
clutch pedal to the floor and shift the
transmission into neutral. Hold theclutch pedal to the floor until the engine
is started. A starter safety device willprevent the starter from operating if
the clutch pedal is not fully depressed.
Automatic transmission: Put the se-
lector lever in Pº. If you need to restart
the engine while the vehicle is moving, put the selector lever in Nº. A starter
safety device will prevent the starter
from operating if the selector lever is in
any drive position.
4. Automatic transmission only: De-
press the brake pedal and hold it to the
floor until driving off.
Page 130 of 212

126Use a washer fluid containing an anti-
freeze solution.
This product is available at your Toyota
dealer and most auto parts stores. Follow
the manufacturer's directions for how
much to mix with water.
Do not use engine antifreeze or any
other substitute as washer fluid
because it may damage your vehicle's paint.
NOTICE
Do not use your parking brake when there is a possibility it could freeze. When parking, put the transmission into
Pº (automatic) or into first or reverse
(manual) and block the front wheels. Do
not use the parking brake, or snow or wa-
ter accumulated in and around the parkingbrake mechanism may freeze, making it
hard to release. Keep ice and snow from accumulating
under the fenders.
Ice and snow built up under your fenders
can make steering difficult. During bad winter driving, stop and check under the
fenders occasionally. Depending on where you are driving,
we recommend you carry some emer- gency equipment.
Some of the things you might put in the ve-
hicle are tire chains, window scraper, bag of sand or salt, flares, small shovel, jump- er cables, etc.
Your vehicle is designed primarily as a
passenger - and - load - carrying vehicle.
Towing a trailer will have an adverse ef
fect
on handling, performance, braking, dura-
bility and driving economy (fuel consump-
tion, etc.). Your safety and satisfaction de-
pend on the proper use of correct
equipment and cautious driving habits.
For your safety and the safety of others,you must not overload your vehicle or
trailer. Ask your local T oyota dealer for fur-
ther details before towing. WEIGHT LIMITS
Before towing, make sure the total
trailer weight, gross combination
weight, gross vehicle weight, grossaxle weight and trailer tongue load are
all within the limits.
The total trailer weight and tongue load
can be measured with platform scales
found at a highway weighing station,
building supply company, trucking com-
pany, junk yard, etc.
Trailer towing