TOYOTA TACOMA 1996 Owner's Manual
Manufacturer: TOYOTA, Model Year: 1996, Model line: TACOMA, Model: TOYOTA TACOMA 1996Pages: 196, PDF Size: 1.8 MB
Page 21 of 196
20
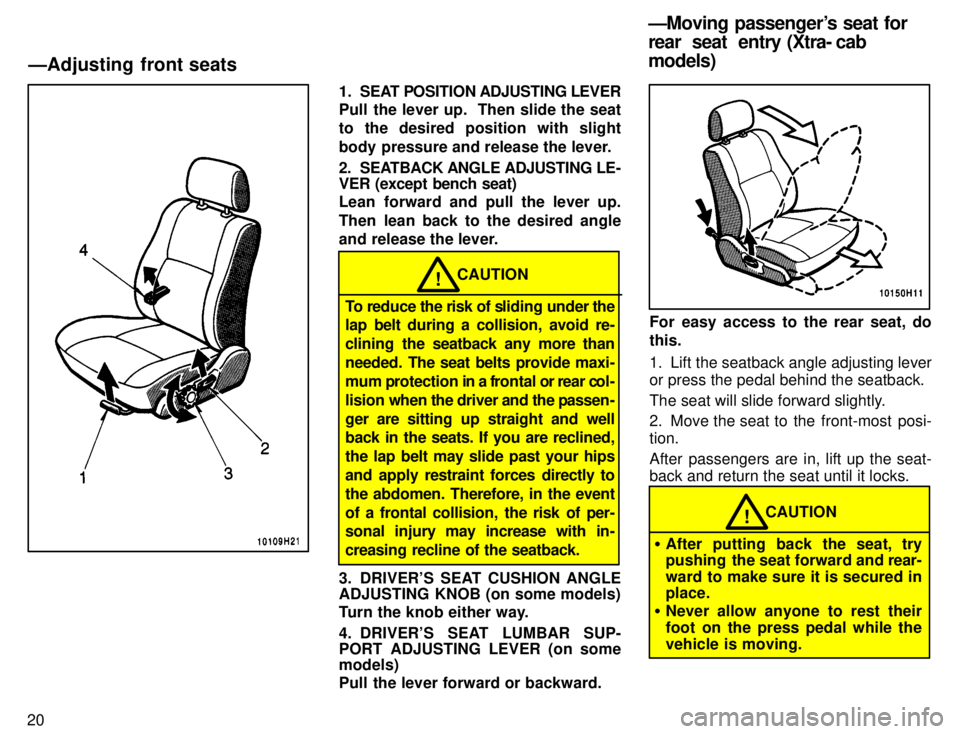
1. SEAT POSITION ADJUSTING LEVER
Pull the lever up. Then slide the seat
to the desired position with slight
body pressure and release the lever.
2. SEATBACK ANGLE ADJUSTING LE-
VER (except bench seat)
Lean forward and pull the lever up.
Then lean back to the desired angle
and release the lever.
CAUTION!
To reduce the risk of sliding under the
lap belt during a collision, avoid re-
clining the seatback any more than
needed. The seat belts provide maxi-
mum protection in a frontal or rear col-
lision when the driver and the passen-
ger are sitting up straight and well
back in the seats. If you are reclined,
the lap belt may slide past your hips
and apply restraint forces directly to
the abdomen. Therefore, in the event
of a frontal collision, the risk of per-
sonal injury may increase with in-
creasing recline of the seatback.
3. DRIVER'S SEAT CUSHION ANGLE
ADJUSTING KNOB (on some models)
Turn the knob either way.
4. DRIVER'S SEAT LUMBAR SUP-
PORT ADJUSTING LEVER (on somemodels)
Pull the lever forward or backward.
For easy access to the rear seat, do this.
1. Lift the seatback angle adjusting lever or press the pedal behind the seatback.
The seat will slide forward slightly.
2. Move the seat to the front-most posi- tion.
After passengers are in, lift up the seat- back and return the seat until it locks.
CAUTION!
� After putting back the seat, try
pushing the seat forward and rear-
ward to make sure it is secured inplace.
� Never allow anyone to rest their
foot on the press pedal while the
vehicle is moving.
ÐAdjusting front seats
ÐMoving passenger's seat for
rear seat entry (Xtra- cab
models)
Page 22 of 196
21
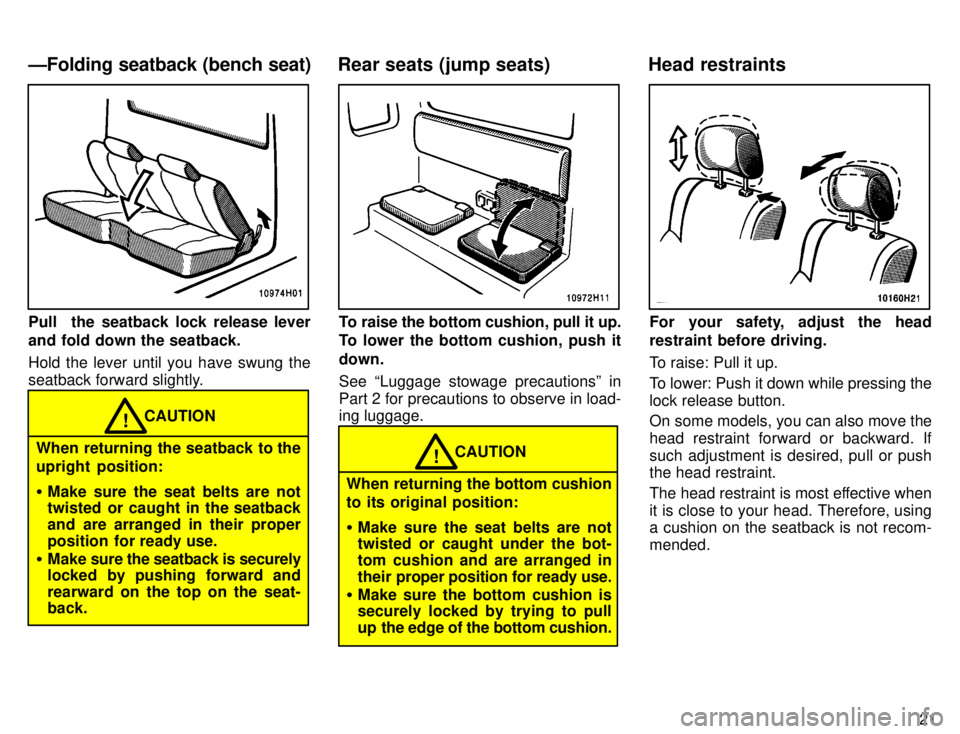
Pull the seatback lock release lever
and fold down the seatback.
Hold the lever until you have swung the
seatback forward slightly.
CAUTION!
When returning the seatback to the upright position: � Make sure the seat belts are not
twisted or caught in the seatback
and are arranged in their proper
position for ready use.
� Make sure the seatback is securely
locked by pushing forward and rearward on the top on the seat- back.
To raise the bottom cushion, pull it up.
To lower the bottom cushion, push it down. See Luggage stowage precautionsº in
Part 2 for precautions to observe in load- ing luggage.
CAUTION!
When returning the bottom cushion
to its original position: � Make sure the seat belts are not twisted or caught under the bot-
tom cushion and are arranged in
their proper position for ready use.
� Make sure the bottom cushion is securely locked by trying to pull
up the edge of the bottom cushion.
For your safety, adjust the head
restraint before driving.
To raise: Pull it up.
To lower: Push it down while pressing the lock release button.
On some models, you can also move the
head restraint forward or backward. If
such adjustment is desired, pull or push the head restraint.
The head restraint is most effective when
it is close to your head. Therefore, using a cushion on the seatback is not recom- mended.
ÐFolding seatback (bench seat) Rear seats (jump seats) Head restraints
Page 23 of 196
22
CAUTION!
� Adjust the top of the head restraint
so that it is closest to the top of
your ears.
� After adjusting the head restraint,
make sure it is locked in position.
� Do not drive with the head re-
straints removed.
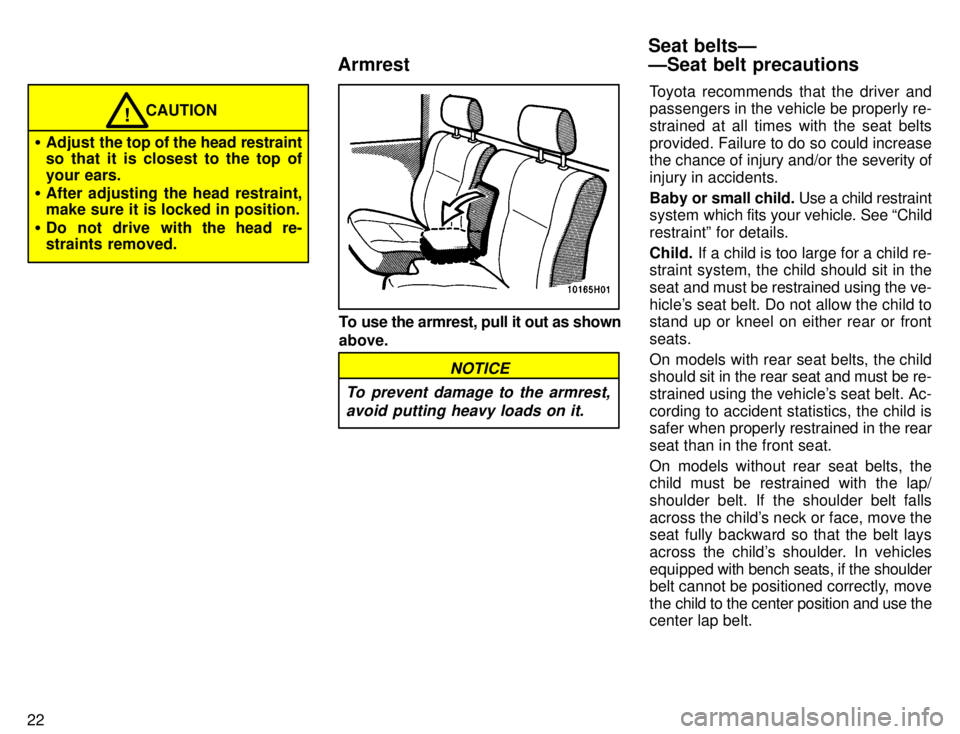
To use the armrest, pull it out as shown above.
NOTICE
To prevent damage to the armrest, avoid putting heavy loads on it.
Toyota recommends that the driver and
passengers in the vehicle be properly re- strained at all times with the seat belts
provided. Failure to do so could increase
the chance of injury and/or the severity of
injury in accidents.
Baby or small child. Use a child restraint
system which fits your vehicle. See Child
restraintº for details.
Child. If a child is too large for a child re-
straint system, the child should sit in the
seat and must be restrained using the ve-
hicle's seat belt. Do not allow the child to stand up or kneel on either rear or front seats.
On models with rear seat belts, the child
should sit in the rear seat and must be re-
strained using the vehicle's seat belt. Ac-
cording to accident statistics, the child is
safer when properly restrained in the rear
seat than in the front seat.
On models without rear seat belts, the
child must be restrained with the lap/
shoulder belt. If the shoulder belt falls
across the child's neck or face, move the
seat fully backward so that the belt lays
across the child's shoulder. In vehicles
equipped with bench seats, if the shoulder
belt cannot be positioned correctly, move
the child to the center position and use the
center lap belt.
Seat beltsÐ ÐSeat belt precautions
Armrest
Page 24 of 196
22
CAUTION!
� Adjust the top of the head restraint
so that it is closest to the top of
your ears.
� After adjusting the head restraint,
make sure it is locked in position.
� Do not drive with the head re-
straints removed.
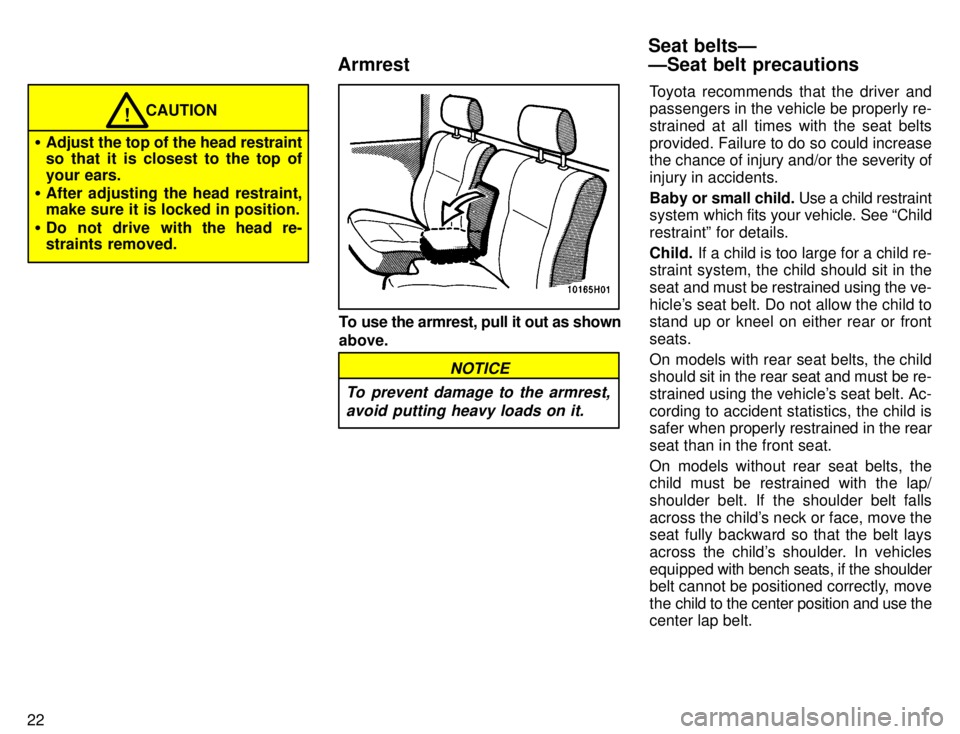
To use the armrest, pull it out as shown above.
NOTICE
To prevent damage to the armrest, avoid putting heavy loads on it.
Toyota recommends that the driver and
passengers in the vehicle be properly re- strained at all times with the seat belts
provided. Failure to do so could increase
the chance of injury and/or the severity of
injury in accidents.
Baby or small child. Use a child restraint
system which fits your vehicle. See Child
restraintº for details.
Child. If a child is too large for a child re-
straint system, the child should sit in the
seat and must be restrained using the ve-
hicle's seat belt. Do not allow the child to stand up or kneel on either rear or front seats.
On models with rear seat belts, the child
should sit in the rear seat and must be re-
strained using the vehicle's seat belt. Ac-
cording to accident statistics, the child is
safer when properly restrained in the rear
seat than in the front seat.
On models without rear seat belts, the
child must be restrained with the lap/
shoulder belt. If the shoulder belt falls
across the child's neck or face, move the
seat fully backward so that the belt lays
across the child's shoulder. In vehicles
equipped with bench seats, if the shoulder
belt cannot be positioned correctly, move
the child to the center position and use the
center lap belt.
Seat beltsÐ ÐSeat belt precautions
Armrest
Page 25 of 196
23
Small-framed person or youth in a
3-point type seat belt.
On models with
a bench seat, have a small-framed per-
son or youth sit slightly closer to the center
of the vehicle (so the shoulder belt does
not cross over the neck). On models withseparate seats, move the seat fully back- ward.
Pregnant woman. Toyota recommends
the use of a seat belt. Ask your doctor for
specific recommendations. The lap belt
should be worn securely and as low as
possible over the hips and not on the waist.
Injured person. Toyota recommends the
use of a seat belt. Depending on the injury,
however, first check with your doctor.
CAUTION!
Persons should ride in their seats
properly wearing their seat belts whenever the vehicle is moving.
Otherwise, they are much more like-
ly to suffer serious bodily injury in
the event of sudden braking or acollision.
When using the seat belts, observe the following: � Use the belt for only one person at
a time. Do not use a single belt for
two or more peopleÐeven children.
�Avoid reclining the seatbacks too
much. The seat belts provide max-
imum protection when the seat-
backs are in the upright position. (See the seat adjustment instruc-tions.)
� Be careful not to damage the belt
webbing or hardware. Take care
that they do not get caught or
pinched in the seat or side doors.
� Inspect the belt system periodical-
ly. Check for cuts, fraying, and
loose parts. Damaged parts
should be replaced. Do not disas- semble or modify the system.
� Keep the belts clean and dry. If
they need cleaning, use a mild
soap solution or lukewarm water.
Never use bleach, dye, or abrasive
cleanersÐthey may severely
weaken the belts.
� Replace the belt assembly (includ-
ing bolts) If it has been used in a
severe impact. The entire assem-
bly should be replaced even if
damage is not obvious.
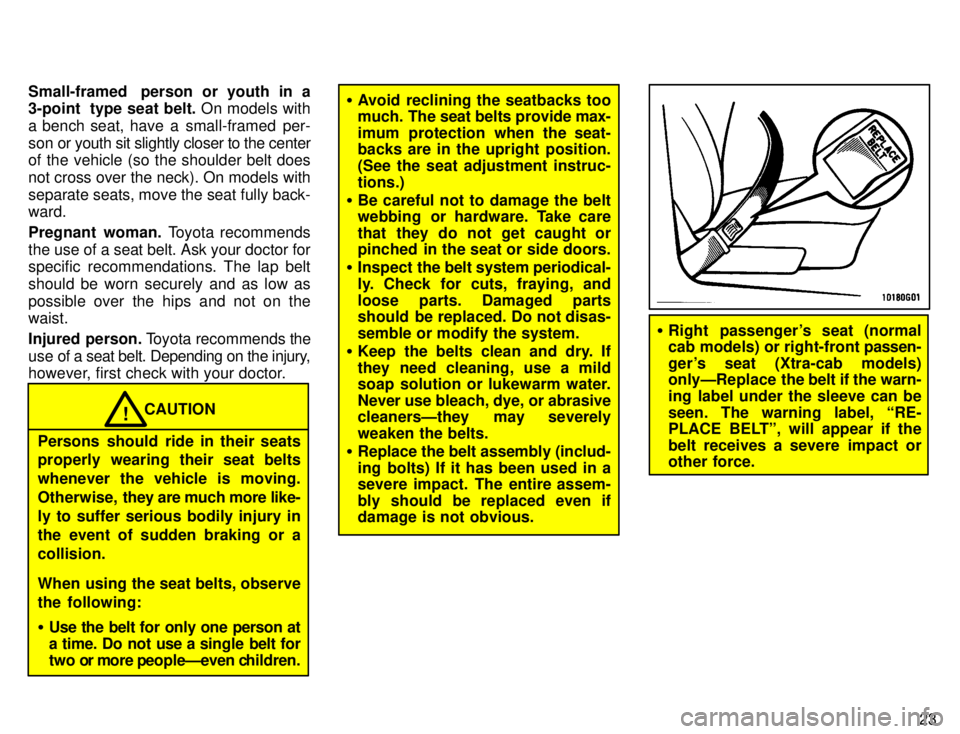
�Right passenger's seat (normal
cab models) or right-front passen-
ger 's seat (Xtra-cab models)
onlyÐReplace the belt if the warn-
ing label under the sleeve can be
seen. The warning label, RE-
PLACE BELTº, will appear if the
belt receives a severe impact or
other force.
Page 26 of 196
24
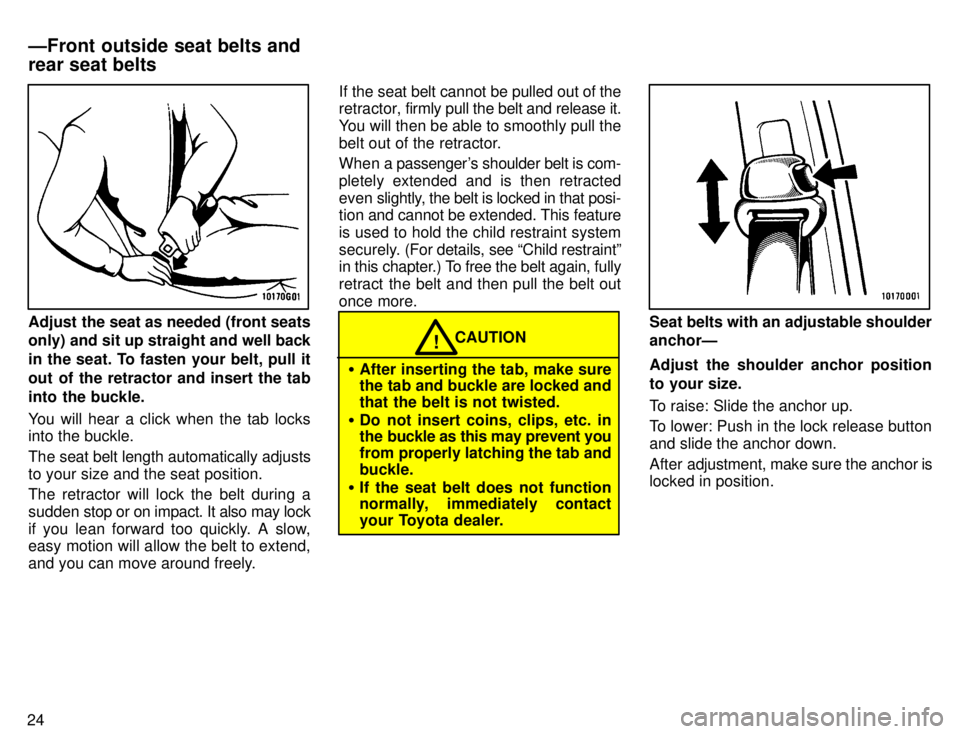
Adjust the seat as needed (front seats only) and sit up straight and well back
in the seat. To fasten your belt, pull it
out of the retractor and insert the tab
into the buckle.
You will hear a click when the tab locks into the buckle.
The seat belt length automatically adjusts
to your size and the seat position.
The retractor will lock the belt during a
sudden stop or on impact. It also may lock
if you lean forward too quickly. A slow, easy motion will allow the belt to extend,
and you can move around freely. If the seat belt cannot be pulled out of the
retractor,
firmly pull the belt and release it.
You will then be able to smoothly pull the
belt out of the retractor.
When a passenger's shoulder belt is com-
pletely extended and is then retracted
even slightly, the belt is locked in that posi-
tion and cannot be extended. This feature
is used to hold the child restraint system
securely. (For details, see Child restraintº
in this chapter.) To free the belt again, fully
retract the belt and then pull the belt out
once more.CAUTION!
� After inserting the tab, make sure
the tab and buckle are locked and
that the belt is not twisted.
� Do not insert coins, clips, etc. in
the buckle as this may prevent you
from properly latching the tab andbuckle.
� If the seat belt does not function
normally, immediately contact
your Toyota dealer.
Seat belts with an adjustable shoulder anchorÐ
Adjust the shoulder anchor position
to your size.
To raise: Slide the anchor up.
To lower: Push in the lock release button and slide the anchor down.
After adjustment, make sure the anchor is
locked in position.
ÐFront outside seat belts and rear seat belts
Page 27 of 196
25
CAUTION!
Always make sure the shoulder belt
is positioned across the center of
your shoulder. The belt should be
kept away from your neck, but not
falling off your shoulder. Failure to
do so could reduce the amount of
protection in an accident and
increase the chance of injury.
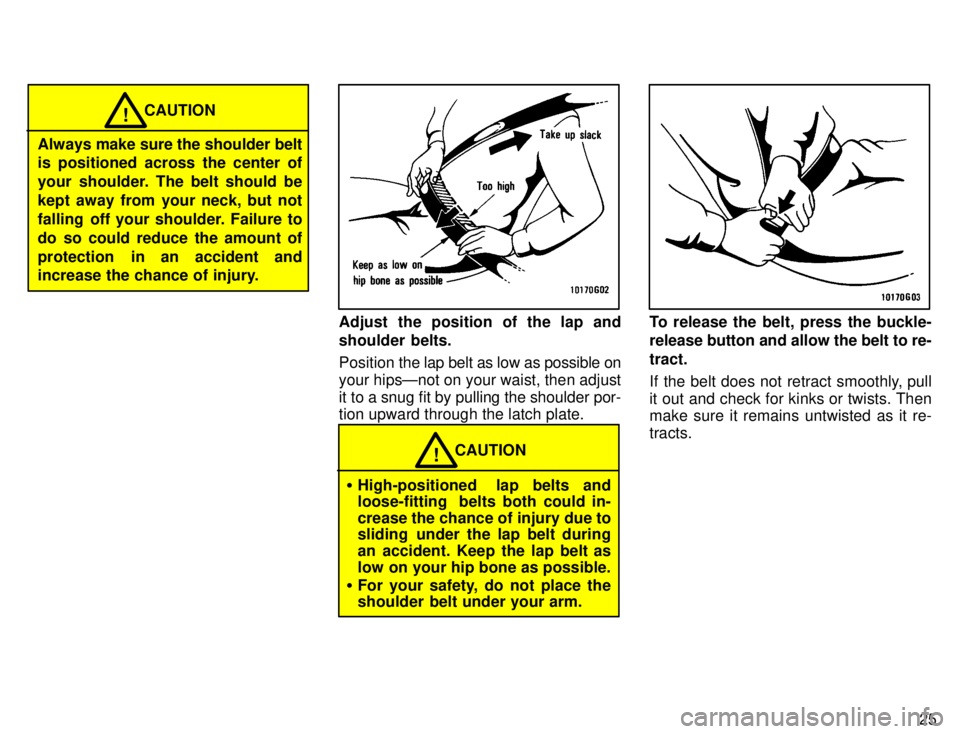
Adjust the position of the lap and
shoulder belts. Position the lap belt as low as possible on
your hipsÐnot on your waist, then adjust
it to a snug fit by pulling the shoulder por- tion upward through the latch plate.
CAUTION!
� High-positioned lap belts and
loose-fitting belts both could in-
crease the chance of injury due to
sliding under the lap belt during
an accident. Keep the lap belt as
low on your hip bone as possible.
� For your safety, do not place the
shoulder belt under your arm.
To release the belt, press the buckle-
release button and allow the belt to re- tract.
If the belt does not retract smoothly, pull
it out and check for kinks or twists. Then make sure it remains untwisted as it re- tracts.
Page 28 of 196
26
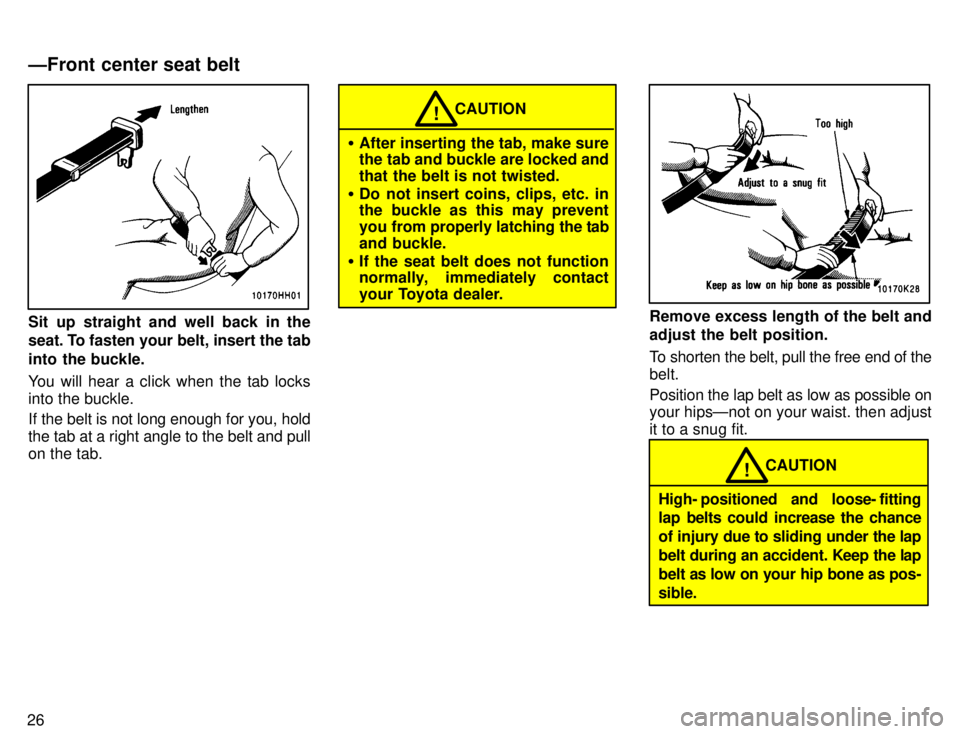
Sit up straight and well back in the
seat. To fasten your belt, insert the tab
into the buckle.
You will hear a click when the tab locks into the buckle.
If the belt is not long enough for you, hold the tab at a right angle to the belt and pull
on the tab.
CAUTION!
� After inserting the tab, make sure
the tab and buckle are locked and
that the belt is not twisted.
� Do not insert coins, clips, etc. in
the buckle as this may prevent
you from properly latching the tab
and buckle.
� If the seat belt does not function
normally, immediately contact
your Toyota dealer.
Remove excess length of the belt and adjust the belt position.
To shorten the belt, pull the free end of the belt. Position the lap belt as low as possible on your hipsÐnot on your waist. then adjust it to a snug fit.
CAUTION!
High- positioned and loose- fitting
lap belts could increase the chance
of injury due to sliding under the lap
belt during an accident. Keep the lap
belt as low on your hip bone as pos-
sible.
ÐFront center seat belt
Page 29 of 196
27
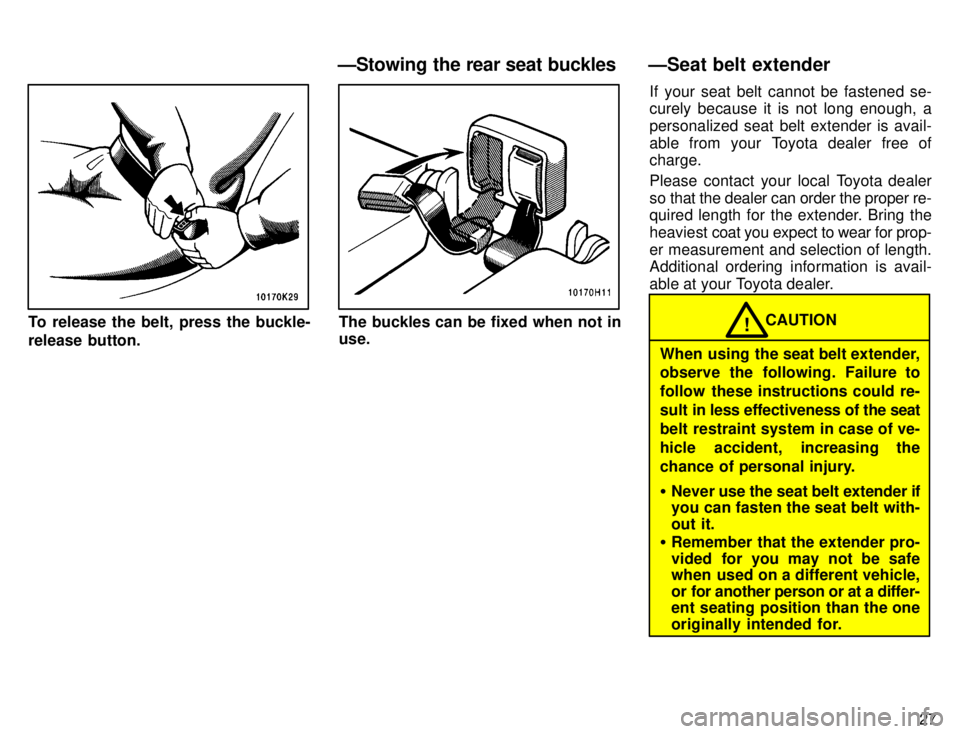
To release the belt, press the buckle-
release button.The buckles can be fixed when not in use.If your seat belt cannot be fastened se-curely because it is not long enough, a
personalized seat belt extender is avail-
able from your Toyota dealer free of charge.
Please contact your local Toyota dealer
so that the dealer can order the proper re-
quired length for the extender. Bring the heaviest
coat you expect to wear for prop-
er measurement and selection of length.
Additional ordering information is avail-
able at your Toyota dealer.CAUTION!
When using the seat belt extender,
observe the following. Failure to
follow these instructions could re-
sult in less effectiveness of the seat
belt restraint system in case of ve-
hicle accident, increasing the
chance of personal injury. � Never use the seat belt extender if
you can fasten the seat belt with- out it.
� Remember that the extender pro-
vided for you may not be safe
when used on a different vehicle,
or for another person or at a differ-
ent seating position than the one
originally intended for.
ÐStowing the rear seat buckles ÐSeat belt extender
Page 30 of 196
28
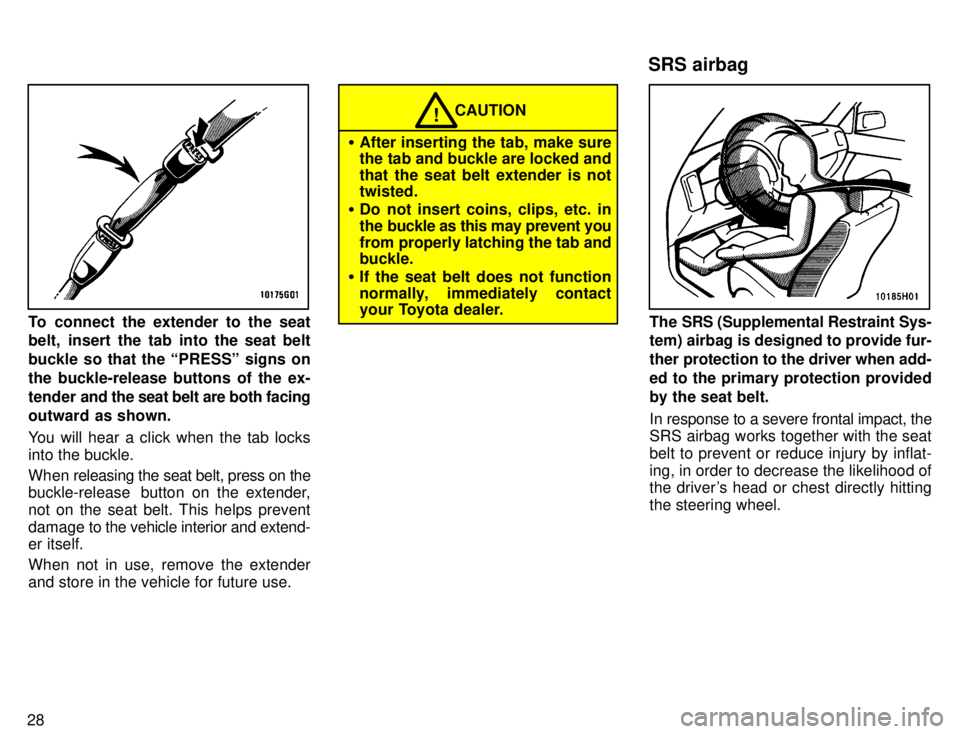
To connect the extender to the seat
belt, insert the tab into the seat belt
buckle so that the PRESSº signs onthe buckle-release buttons of the ex-
tender and the seat belt are both facing
outward as shown.
You will hear a click when the tab locks into the buckle.
When releasing the seat belt, press on the
buckle-release button on the extender, not on the seat belt. This helps prevent
damage to the vehicle interior and extend- er itself.
When not in use, remove the extender
and store in the vehicle for future use.
CAUTION!
� After inserting the tab, make sure
the tab and buckle are locked and
that the seat belt extender is not twisted.
� Do not insert coins, clips, etc. in
the buckle as this may prevent you
from properly latching the tab and buckle.
� If the seat belt does not function
normally, immediately contact
your Toyota dealer.
The SRS (Supplemental Restraint Sys-
tem) airbag is designed to provide fur-
ther protection to the driver when add-
ed to the primary protection providedby the seat belt.
In response to a severe frontal impact, the
SRS airbag works together with the seat belt to prevent or reduce injury by inflat-ing, in order to decrease the likelihood of
the driver's head or chest directly hitting the steering wheel.
SRS airbag