clock TOYOTA TACOMA 2010 Owners Manual (in English)
[x] Cancel search | Manufacturer: TOYOTA, Model Year: 2010, Model line: TACOMA, Model: TOYOTA TACOMA 2010Pages: 532, PDF Size: 15.03 MB
Page 4 of 532

TABLE OF CONTENTSIndex
4
3-5. Using the storage features
List of storage features....... 302
• Glove box ......................... 302
• Console boxes ................. 303
• Cup holders ...................... 304
• Bottle holders ................... 306
• Auxiliary boxes ................. 307
• Overhead console ............ 309
3-6. Other interior features
Sun visors .......................... 310
Vanity mirrors ..................... 311
Clock .................................. 312
Outside temperature display
(vehicles with accessory
meter) ............................... 313
Cigarette lighter .................. 314
Power outlet (12V DC) ....... 315
Power outlet (115V AC) ..... 316
Seatback table ................... 322
Floor mat ............................ 323
Luggage compartment
features ............................ 324
Garage door opener box .... 333
Compass (vehicles with
accessory meter).............. 337
4-1. Maintenance and care
Cleaning and protecting
the vehicle exterior ........... 344
Cleaning and protecting
the vehicle interior ............ 3474-2. Maintenance
Maintenance
requirements .................... 350
General maintenance ......... 352
Emission inspection and
maintenance (I/M)
programs .......................... 355
4-3. Do-it-yourself maintenance
Do-it-yourself service
precautions ....................... 356
Hood ................................... 360
Engine compartment .......... 362
Tires.................................... 378
Tire inflation pressure ......... 386
Wheels................................ 391
Air conditioning filter ........... 393
Wireless remote control
battery .............................. 396
Checking and replacing
fuses ................................. 398
Light bulbs .......................... 408
5-1. Essential information
Emergency flashers ............ 420
If your vehicle needs to be
towed ................................ 421
If you think something is
wrong ................................ 427
Fuel pump shut off
system .............................. 428
Event data recorder ............ 429
4Maintenance and care
5When trouble arises
Page 96 of 532
96 1-7. Safety information
Passenger airbag off switch (Access Cab models)
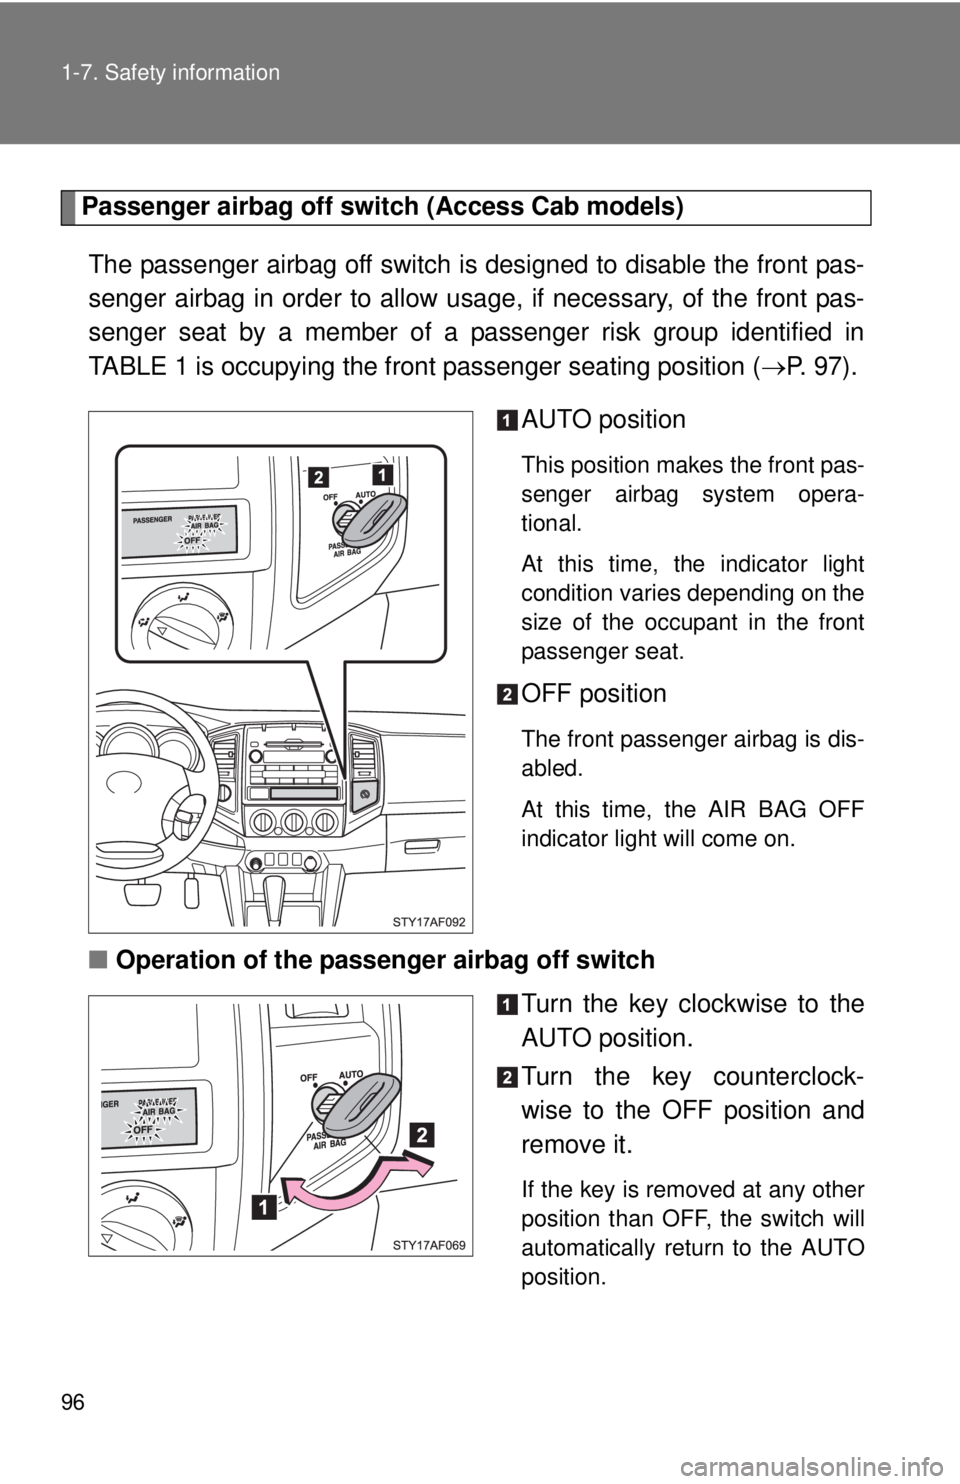
The passenger airbag off switch is designed to disable the front pas-
senger airbag in order to allow usage, if necessary, of the front pas-
senger seat by a member of a passenger risk group identified in
TABLE 1 is occupying the front passenger seating position (P. 97).
AUTO position
This position makes the front pas-
senger airbag system opera-
tional.
At this time, the indicator light
condition varies depending on the
size of the occupant in the front
passenger seat.
OFF position
The front passenger airbag is dis-
abled.
At this time, the AIR BAG OFF
indicator light will come on.
■Operation of the passenger airbag off switch
Turn the key clockwise to the
AUTO position.
Turn the key counterclock-
wise to the OFF position and
remove it.
If the key is removed at any other
position than OFF, the switch will
automatically return to the AUTO
position.
Page 115 of 532
115 1-7. Safety information
1
Before driving
Installing the child restraint system on the front passenger seat
(Access Cab models)
When you install a child restraint system which belongs to a passen-
ger risk group on the front passenger seat, do the following proce-
dure.
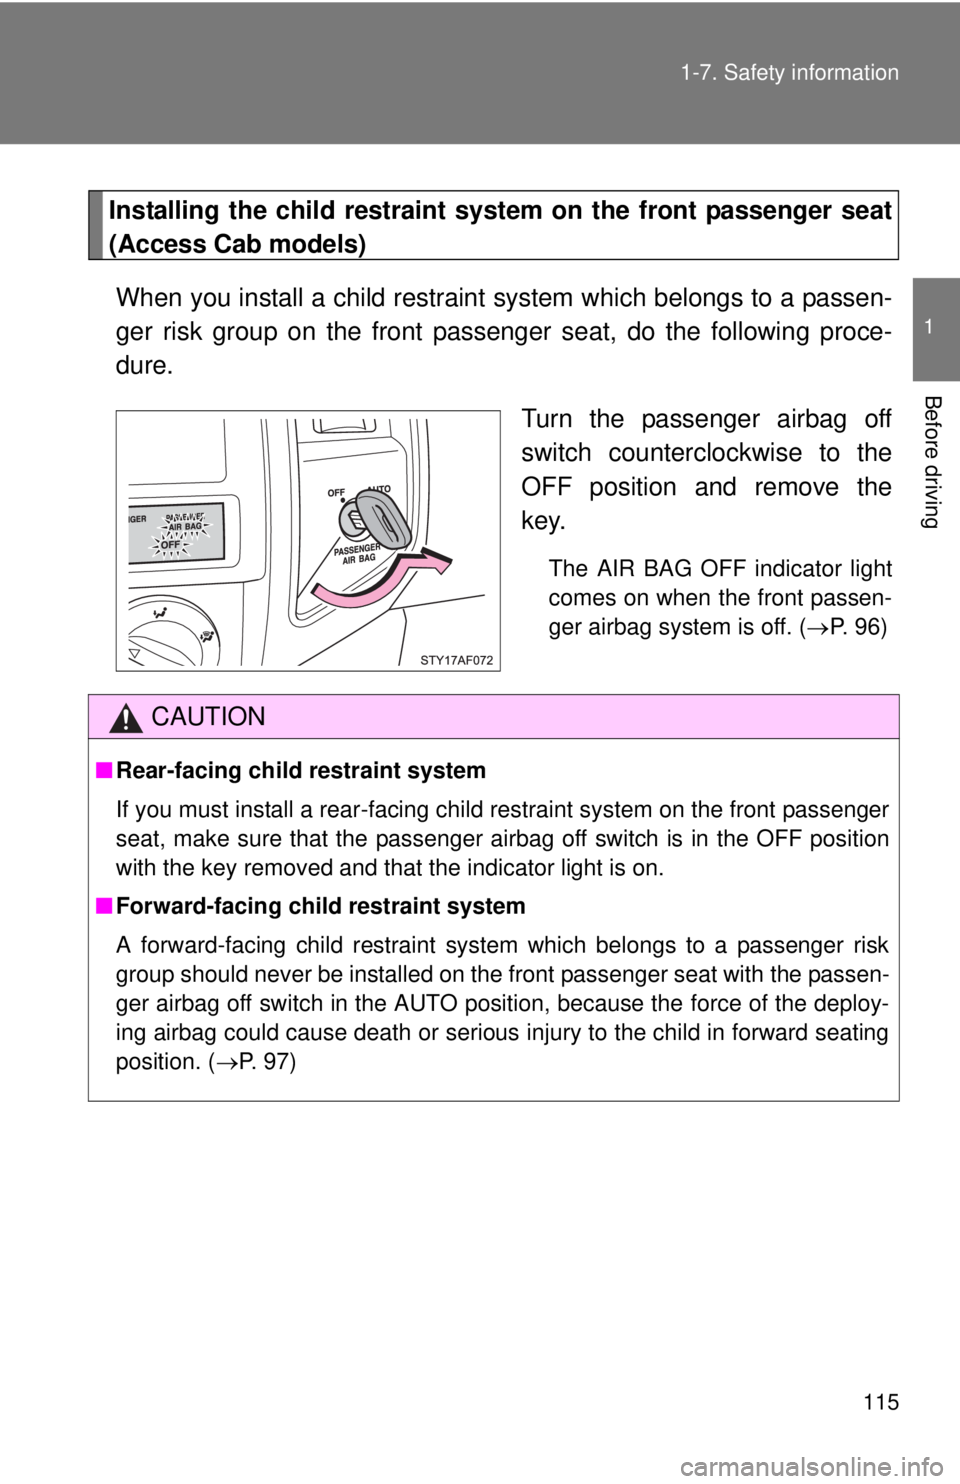
Turn the passenger airbag off
switch counterclockwise to the
OFF position and remove the
key.
The AIR BAG OFF indicator light
comes on when the front passen-
ger airbag system is off. (P. 96)
CAUTION
■Rear-facing child restraint system
If you must install a rear-facing child restraint system on the front passenger
seat, make sure that the passenger airbag off switch is in the OFF position
with the key removed and that the indicator light is on.
■Forward-facing child restraint system
A forward-facing child restraint system which belongs to a passenger risk
group should never be installed on the front passenger seat with the passen-
ger airbag off switch in the AUTO position, because the force of the deploy-
ing airbag could cause death or serious injury to the child in forward seating
position. (P. 97)
Page 154 of 532
154
2-1. Driving procedures
Parking brake
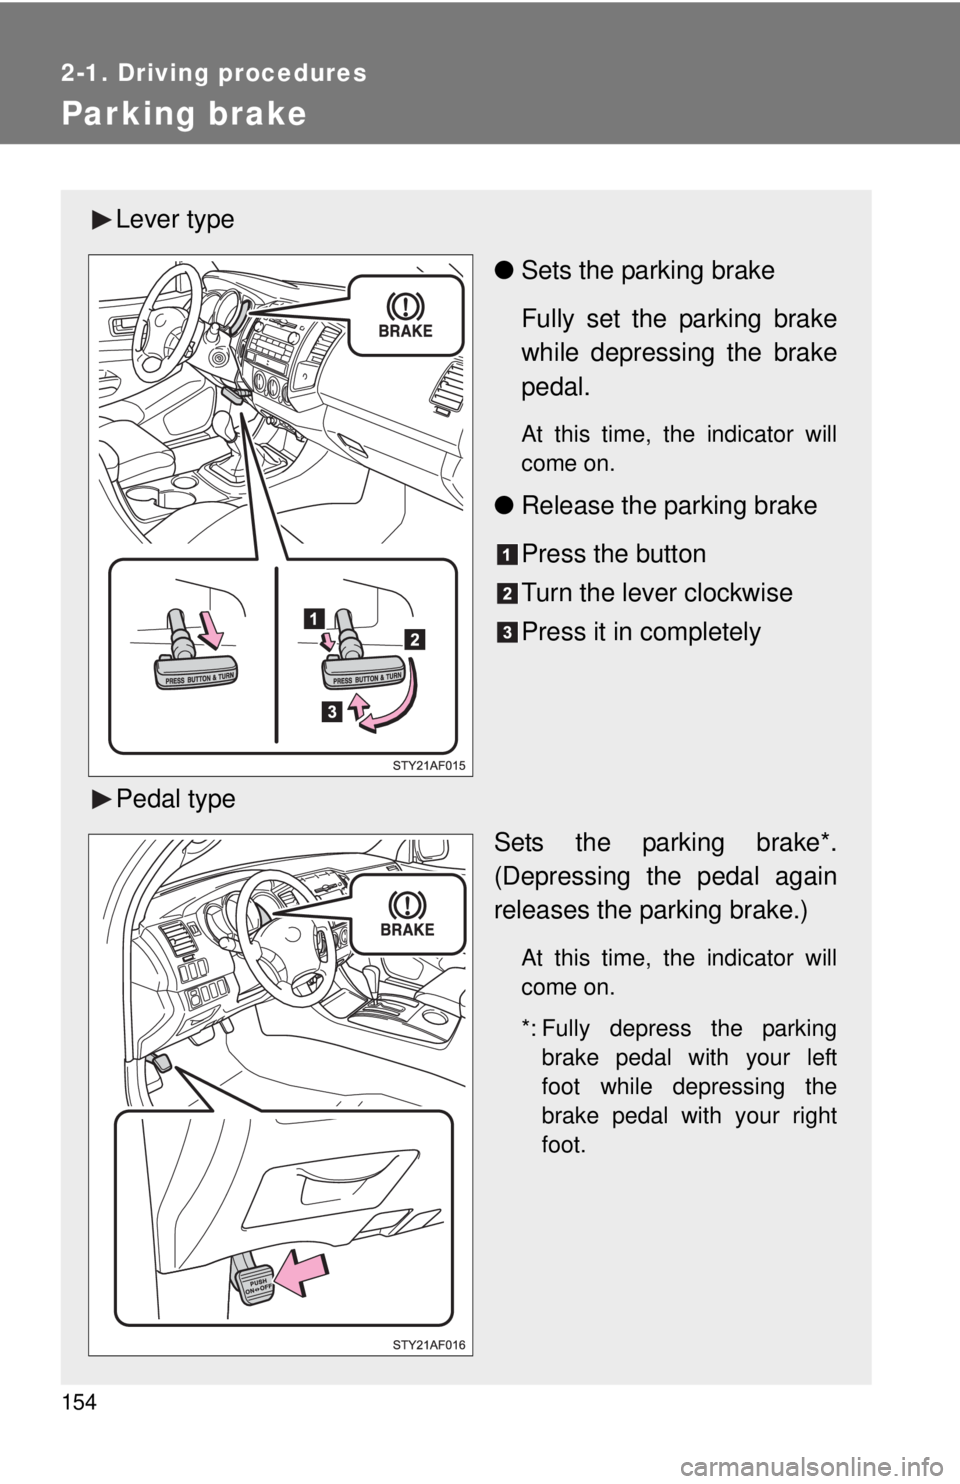
Lever type
●Sets the parking brake
Fully set the parking brake
while depressing the brake
pedal.
At this time, the indicator will
come on.
●Release the parking brake
Press the button
Turn the lever clockwise
Press it in completely
Pedal type
Sets the parking brake*.
(Depressing the pedal again
releases the parking brake.)
At this time, the indicator will
come on.
*: Fully depress the parking
brake pedal with your left
foot while depressing the
brake pedal with your right
foot.
Page 178 of 532
178 2-4. Using other driving systems
Shifting between H4 and L4
■Shifting from H4 to L4
Automatic transmission
Stop the vehicle completely.
Shift the shift lever to N.
Push and turn the front-wheel drive control switch fully clock-
wise.
If the four-wheel drive indicator flashes and the buzzer
sounds, try the above steps again.
Manual transmission
Stop the vehicle or reduce your speed to less than 2 mph (3
km/h).
Depress the clutch pedal all the way.
Push and turn the front-wheel drive control switch fully clock-
wise.
If the four-wheel drive indicator flashes and the buzzer
sounds, try the above steps again.
■Shifting from L4 to H4
Automatic transmission
Stop the vehicle completely.
Shift the shift lever to N.
Turn the front-wheel drive control switch counterclockwise.
If the four-wheel drive indicator flashes and the buzzer
sounds, try the above steps again.
Manual transmission
Stop the vehicle or reduce your speed to less than 2 mph (3
km/h).
Depress the clutch pedal all the way.
Turn the front-wheel drive control switch counterclockwise.
If the four-wheel drive indicator flashes and the buzzer
sounds, try the above steps again.
Page 179 of 532

179 2-4. Using other driving systems
2
When driving
■Shifting between H2 and H4
●Shifting from H2 to H4
Reduce the vehicle speed to less than 62 mph (100 km/h) and turn the
front-wheel drive control switch fully clockwise.
●Shifting from H4 to H2.
Turn the front-wheel drive control switch fully counterclockwise.
This can be done at any speed. You need not depress the clutch pedal.
(manual transmission)
■If the four-wheel drive indicator light or the 4LO indicator light blinks
●Shifting from H2 to H4
• If the four-wheel drive indicator continues to blink, drive straight ahead
while accelerating or decelerating.
• If the four-wheel drive indicator continues to blink and the buzzer
sounds, stop the vehicle or reduce the vehicle speed to less than 62
mph (100 km/h). Operate the switch again.
●Shifting from H4 to H2
If the four-wheel drive indicator continues to blink, drive straight ahead
while accelerating or decelerating, or drive forward or backward in a short
distance.
●Shifting to H4 or L4
Automatic transmission
If the 4LO indicator continues to blink when you operate the front-wheel
drive control switch to the H4 or L4 position, drive forward or backward in a
short distance, then stop the vehicle completely, shift the shift lever
securely to N and operate the switch again.
Manual transmission
If the 4LO indicator continues to blink when you operate the front-wheel
drive control switch to the H4 or L4 position, drive forward or backward in a
short distance, then stop the vehicle completely, depress the clutch pedal
and operate the switch again.
If the indicator light continues to blink even if doing so, contact your Toyota
dealer as soon as possible. There may be a trouble in the four-wheel drive
system.
Page 227 of 532
Interior and exterior
features3
227
3-1. Using the air conditioning
system and defogger
Air conditioning system .... 228
3-2. Using the audio system
Audio system types .......... 236
Using the radio ................. 239
Using the CD player ......... 245
Playing back MP3 and
WMA discs ..................... 251
Optimal use of the audio
system ........................... 259
Operating the sub woofer
(on some Access Cab
models) .......................... 262
Using the AUX adapter .... 263
Using the steering wheel
audio switches ............... 265
3-3. Using the hands-free phone
system (for cellular phone)
Hands-free phone system
(for cellular phone) ......... 268
Using the hands-free
phone system ................ 272
Making a phone call ......... 280
Setting a cellular phone ... 285
Security and system
setup .............................. 290
Using the phone book ...... 293
3-4. Using the interior lights
Interior lights list ............... 300
• Interior light .................... 301
• Personal lights ............... 3013-5. Using the storage features
List of storage features .... 302
• Glove box....................... 302
• Console boxes ............... 303
• Cup holders ................... 304
• Bottle holders ................. 306
• Auxiliary boxes ............... 307
• Overhead console .......... 309
3-6. Other interior features
Sun visors ........................ 310
Vanity mirrors ................... 311
Clock ................................ 312
Outside temperature
display (vehicles with
accessory meter) ........... 313
Cigarette lighter................ 314
Power outlet (12V DC) ..... 315
Power outlet (115V AC) ... 316
Seatback table ................. 322
Floor mat .......................... 323
Luggage compartment
features .......................... 324
Garage door opener
box ................................. 333
Compass (vehicles with
accessory meter) ........... 337
Page 229 of 532
229 3-1. Using the air conditioning system and defogger
3
Interior and exterior features
Adjusting the settings
■Adjusting the temperature setting (Type A)
Turn the temperature control dial clockwise to increase the temper-
ature.
■Adjusting the temperature setting (Type B)
Turn the temperature control dial clockwise (warm) or counter-
clockwise (cool).
If is not pressed, the system will blow ambient temperature air or
heated air.
For quick cooling, turn the temperature control dial to the MAX A/C posi-
tion. The air conditioning will automatically turn on and the air intake
selector will be set to recirculated air mode.
■Adjusting the fan speed
Turn the fan speed control dial clockwise (increase) or counter-
clockwise (decrease).
Set the dial to OFF to turn the fan off.
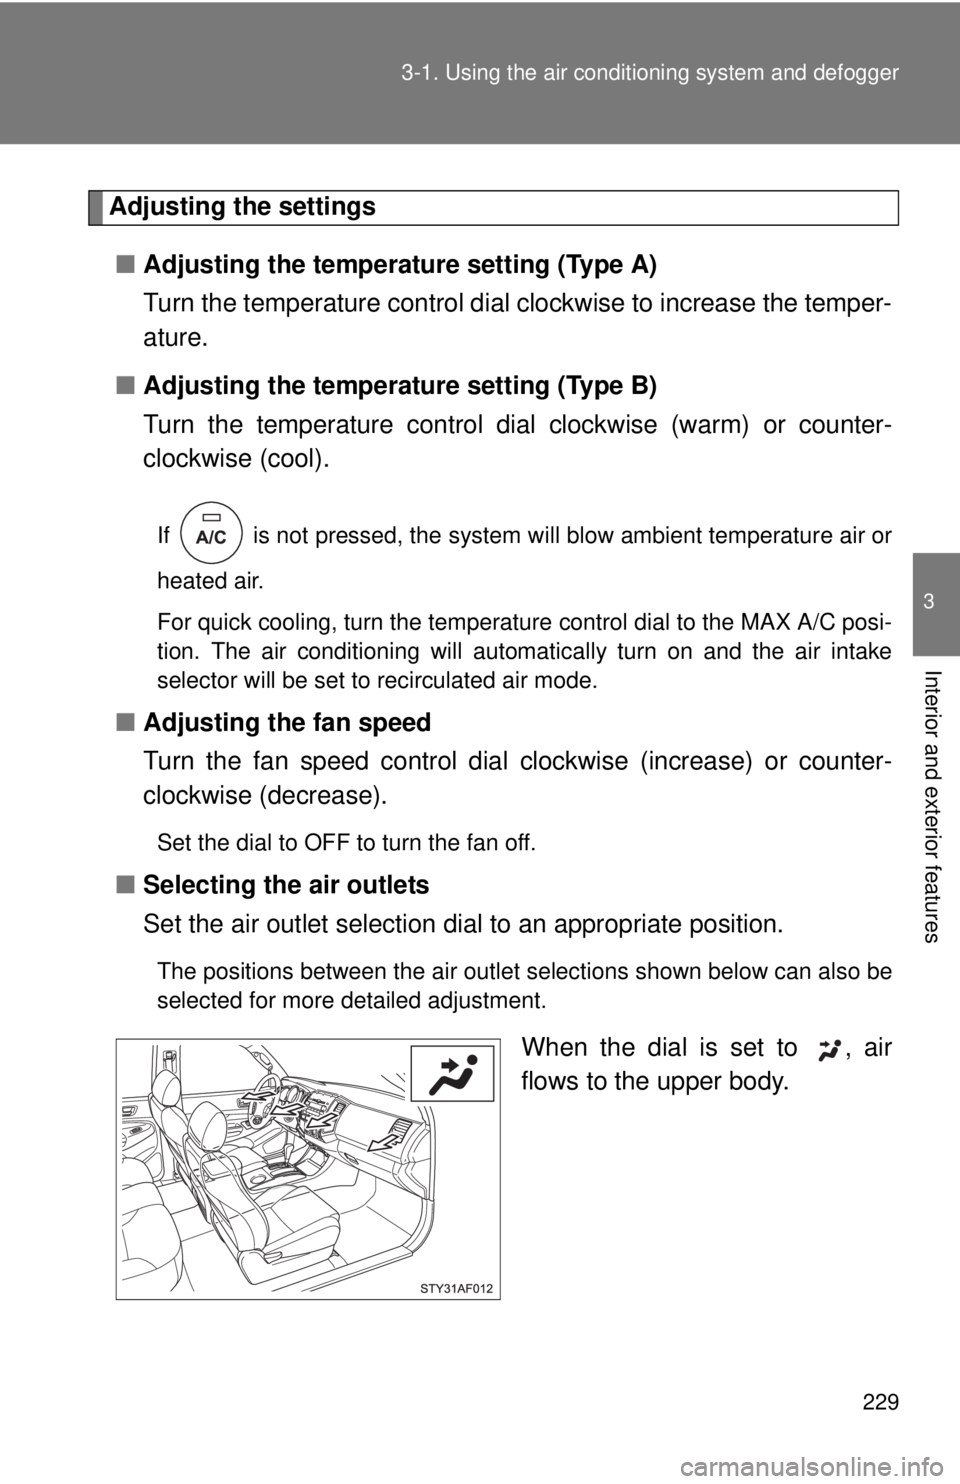
■Selecting the air outlets
Set the air outlet selection dial to an appropriate position.
The positions between the air outlet selections shown below can also be
selected for more detailed adjustment.
When the dial is set to , air
flows to the upper body.
Page 292 of 532
292 3-3. Using the hands-free phone system (for cellular phone)
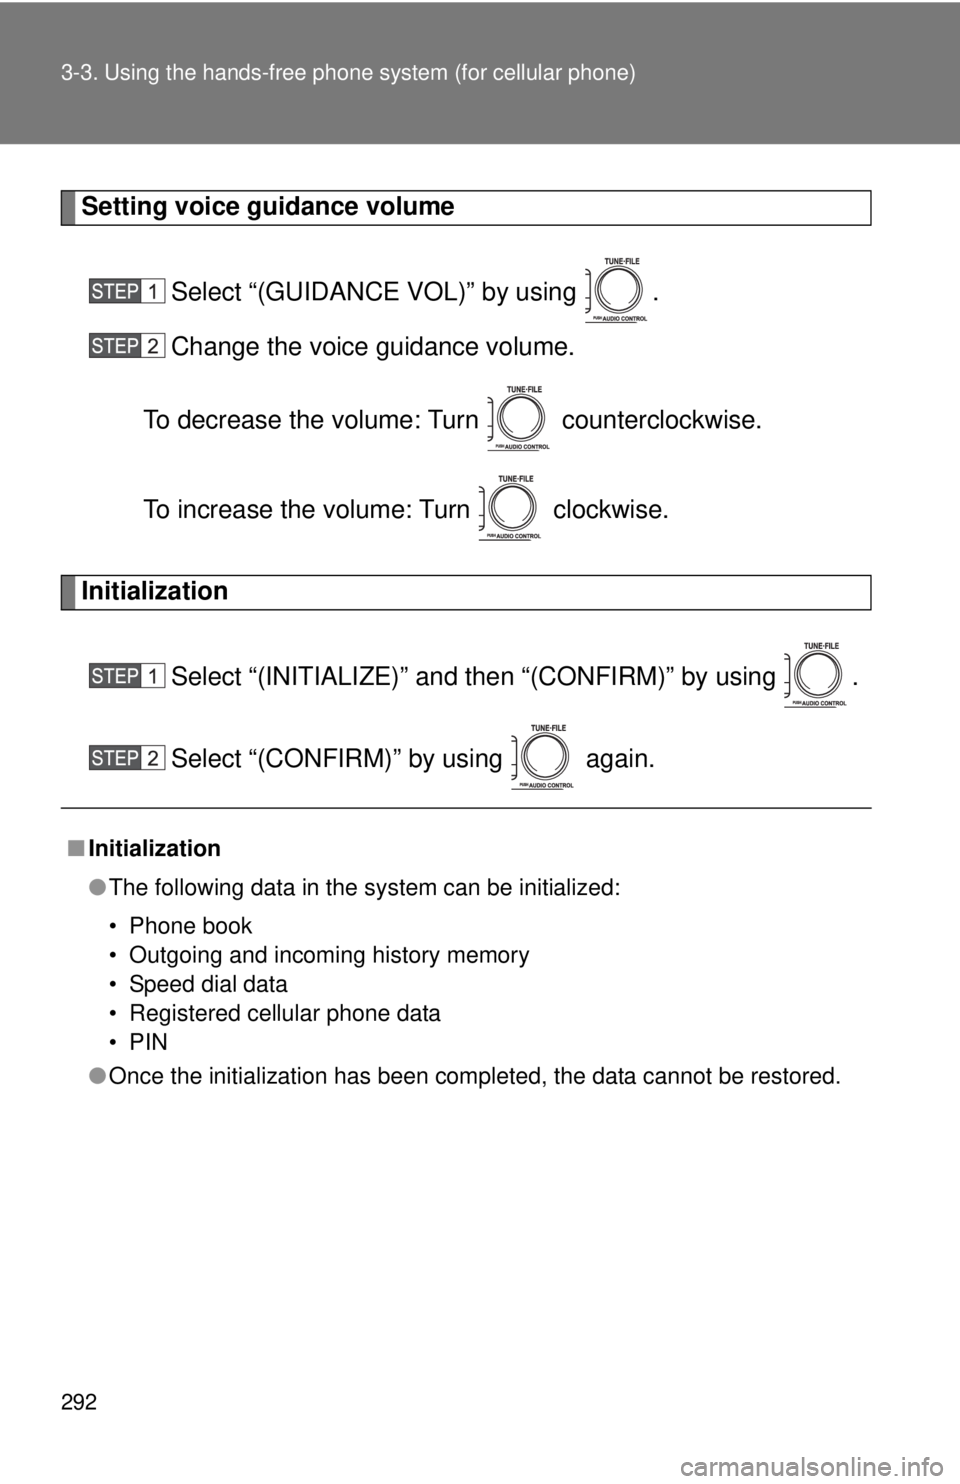
Setting voice guidance volume
Select “(GUIDANCE VOL)” by using .
Change the voice guidance volume.
To decrease the volume: Turn counterclockwise.
To increase the volume: Turn clockwise.
Initialization
Select “(INITIALIZE)” and then “(CONFIRM)” by using .
Select “(CONFIRM)” by using again.
■Initialization
●The following data in the system can be initialized:
• Phone book
• Outgoing and incoming history memory
• Speed dial data
• Registered cellular phone data
•PIN
●Once the initialization has been completed, the data cannot be restored.
Page 308 of 532
308 3-5. Using the storage features
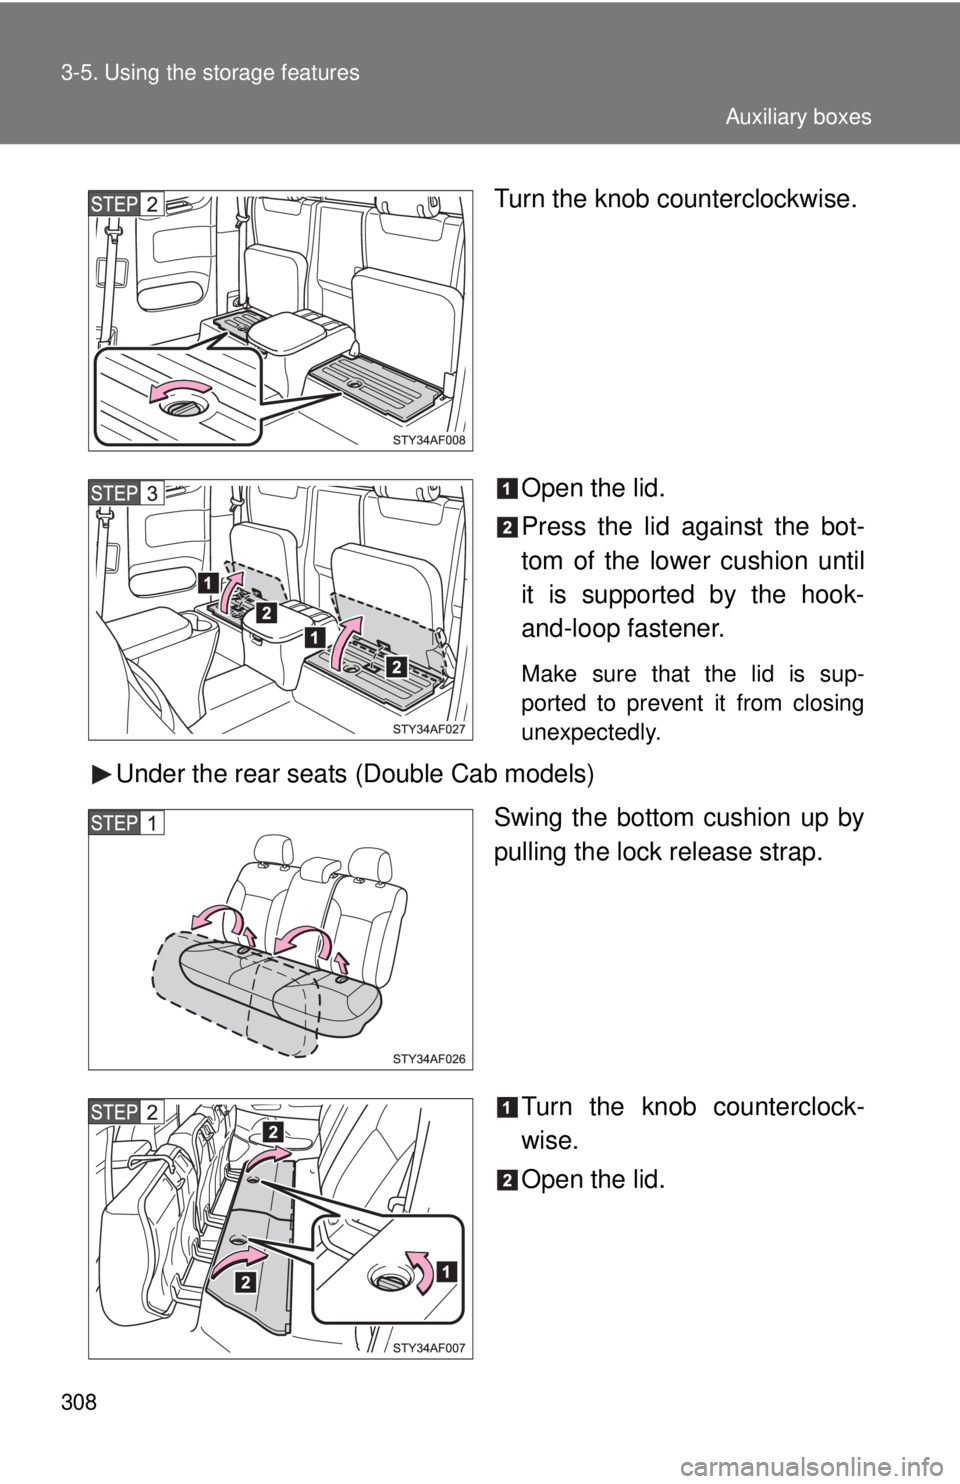
Turn the knob counterclockwise.
Open the lid.
Press the lid against the bot-
tom of the lower cushion until
it is supported by the hook-
and-loop fastener.
Make sure that the lid is sup-
ported to prevent it from closing
unexpectedly.
Under the rear seats (Double Cab models)
Swing the bottom cushion up by
pulling the lock release strap.
Turn the knob counterclock-
wise.
Open the lid.
Auxiliary boxes