door lock TOYOTA TACOMA 2013 (in English) Owner's Manual
[x] Cancel search | Manufacturer: TOYOTA, Model Year: 2013, Model line: TACOMA, Model: TOYOTA TACOMA 2013Pages: 524, PDF Size: 10.96 MB
Page 131 of 524
131
2-1. Driving procedures
2
When driving
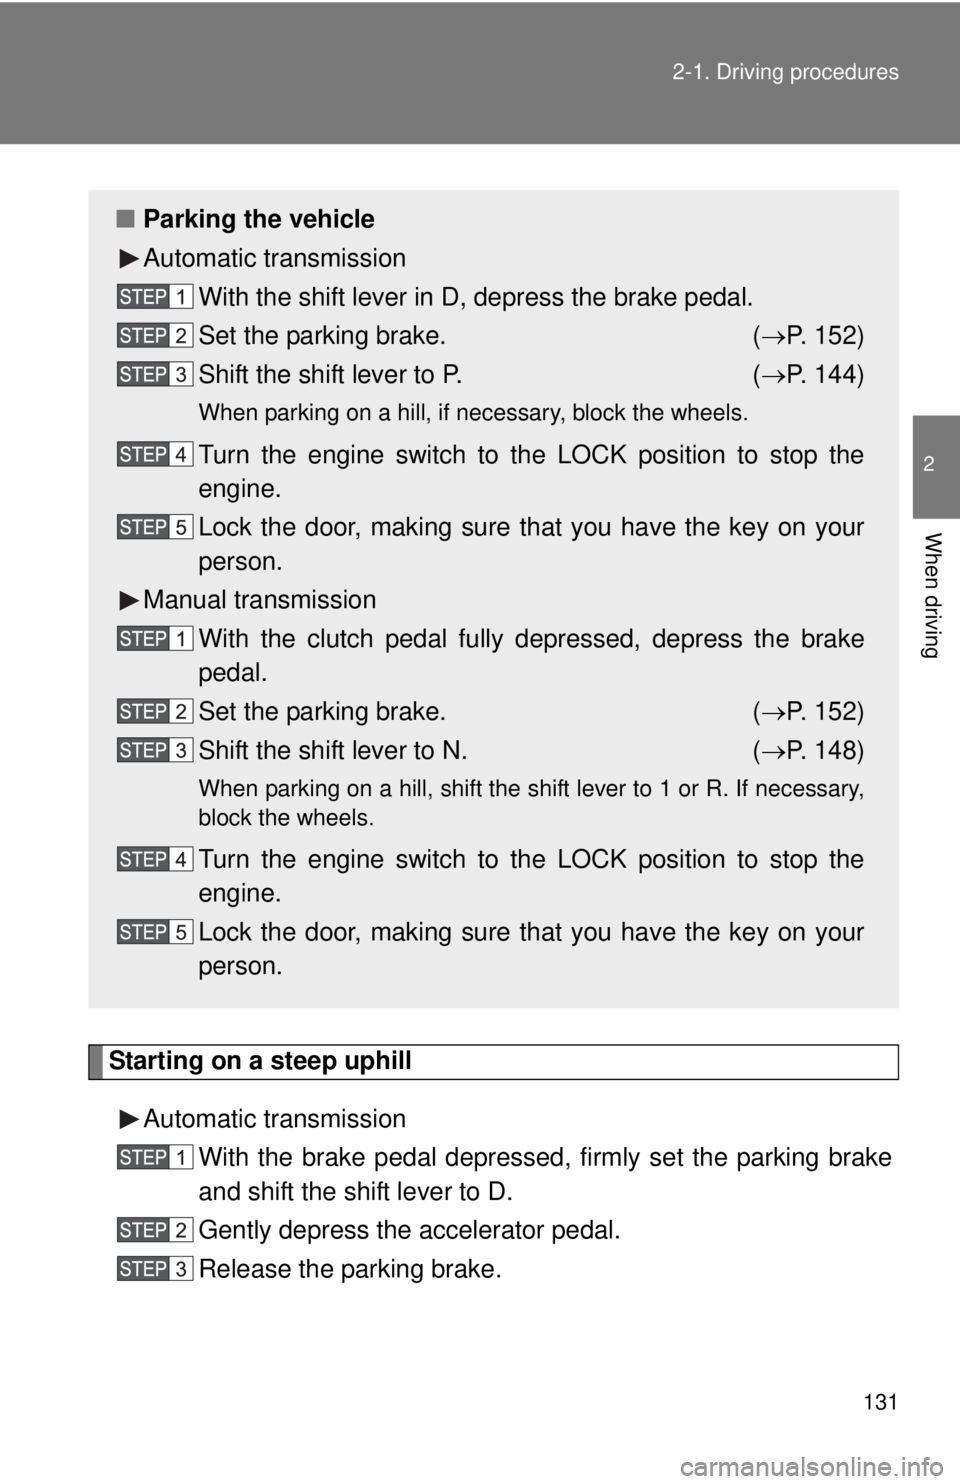
Starting on a steep uphill
Automatic transmission With the brake pedal depressed, firmly set the parking brake
and shift the shift lever to D.
Gently depress the accelerator pedal.
Release the parking brake.
■Parking the vehicle
Automatic transmission
With the shift lever in D, depress the brake pedal.
Set the parking brake. ( P. 152)
Shift the shift lever to P. ( P. 144)
When parking on a hill, if necessary, block the wheels.
Turn the engine switch to the LOCK position to stop the
engine.
Lock the door, making sure that you have the key on your
person.
Manual transmission With the clutch pedal fully depressed, depress the brake
pedal.
Set the parking brake. ( P. 152)
Shift the shift lever to N. ( P. 148)
When parking on a hill, shift the shift lever to 1 or R. If necessary,
block the wheels.
Turn the engine switch to the LOCK position to stop the
engine.
Lock the door, making sure that you have the key on your
person.
Page 142 of 524
142 2-1. Driving procedures
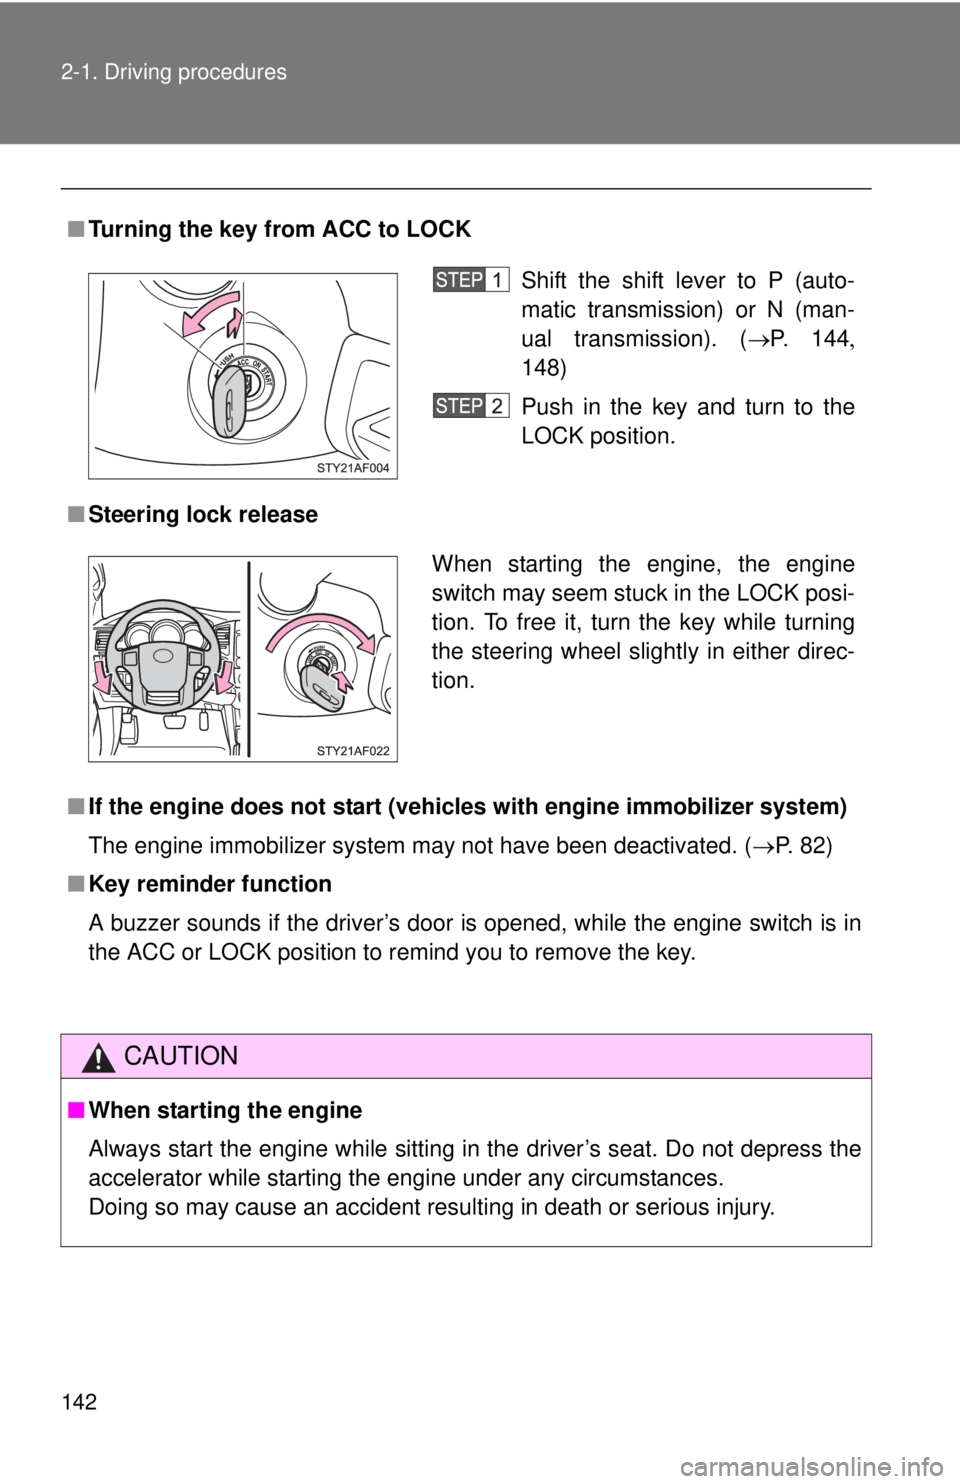
■Turning the key from ACC to LOCK
■ Steering lock release
■ If the engine does not start (vehic les with engine immobilizer system)
The engine immobilizer system may not have been deactivated. ( P. 82)
■ Key reminder function
A buzzer sounds if the driver’s door is opened, while the engine switch is in
the ACC or LOCK position to remind you to remove the key.
CAUTION
■When starting the engine
Always start the engine while sitting in the driver’s seat. Do not depress the
accelerator while starting the engine under any circumstances.
Doing so may cause an accident resulting in death or serious injury.
Shift the shift lever to P (auto-
matic transmission) or N (man-
ual transmission). ( P. 144
148)
Push in the key and turn to the
LOCK position.
When starting the engine, the engine
switch may seem stuck in the LOCK posi-
tion. To free it, turn the key while turning
the steering wheel slightly in either direc-
tion.
Page 164 of 524
164 2-3. Operating the lights and wipers
■Daytime running light system
●To make your vehicle more visible to other drivers, the front turn signal
lights turn on automatically whenever the engine is started and the park-
ing brake is released. Daytime running lights are not designed for use at
night.
Type A: Daytime running lights can be turned off by operating the switch.
● Compared to turning on the headlights, the daytime running light system
offers greater durability and consumes less electricity, so it can help
improve fuel economy.
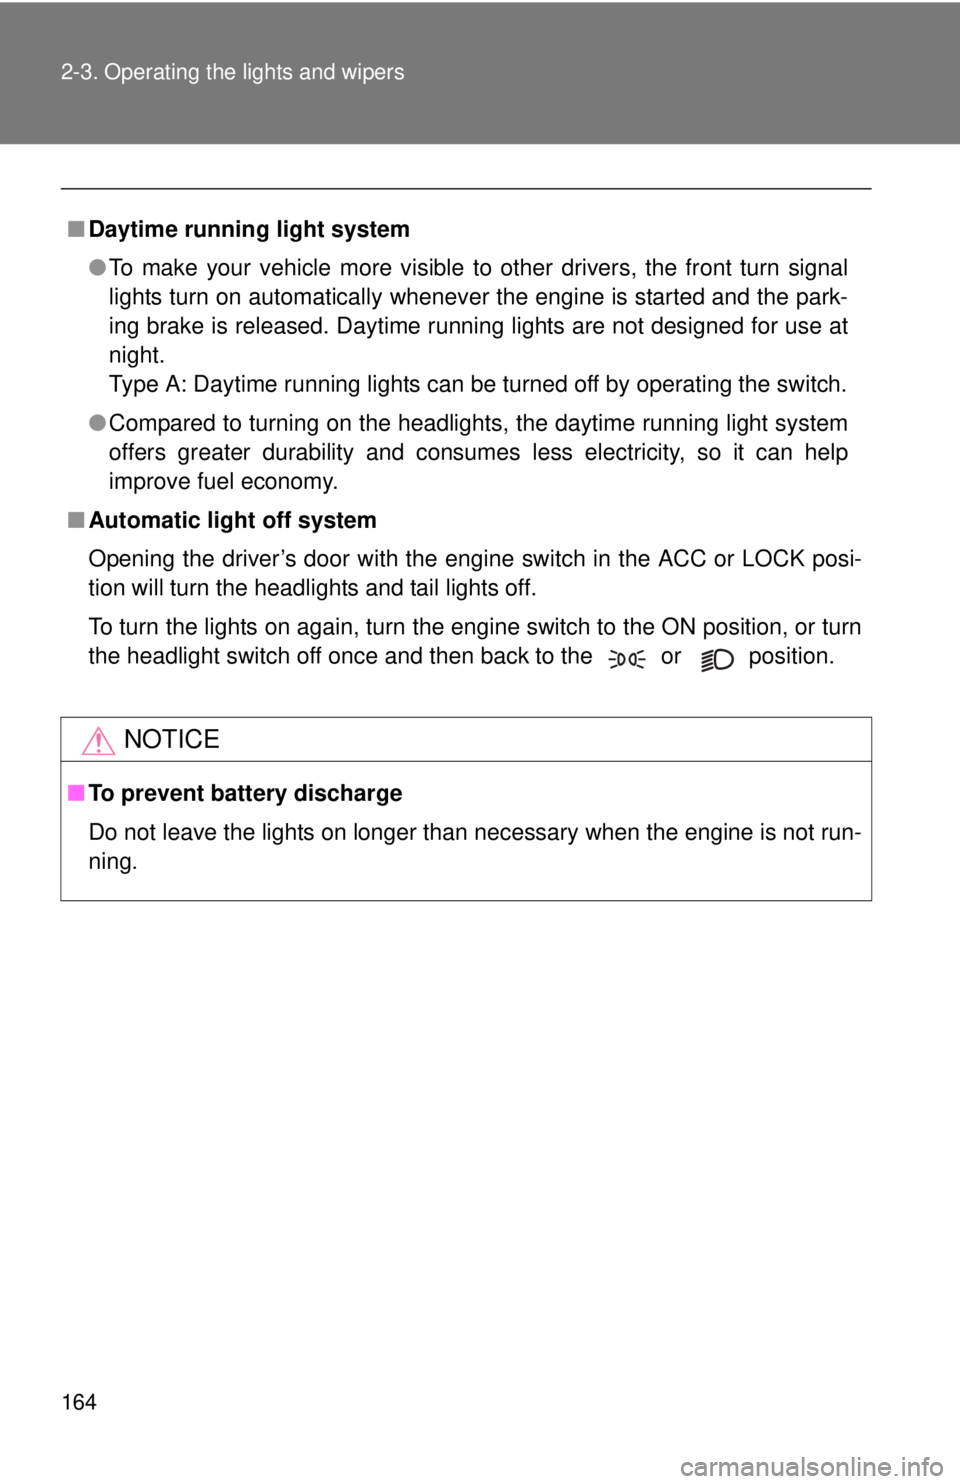
■ Automatic light off system
Opening the driver’s door with the engine switch in the ACC or LOCK posi-
tion will turn the headlights and tail lights off.
To turn the lights on again, turn the engine switch to the ON position, or turn
the headlight switch off once and then back to the or position.
NOTICE
■To prevent battery discharge
Do not leave the lights on longer than necessary when the engine is not run-
ning.
Page 243 of 524
Interior and exteriorfeatures3
243
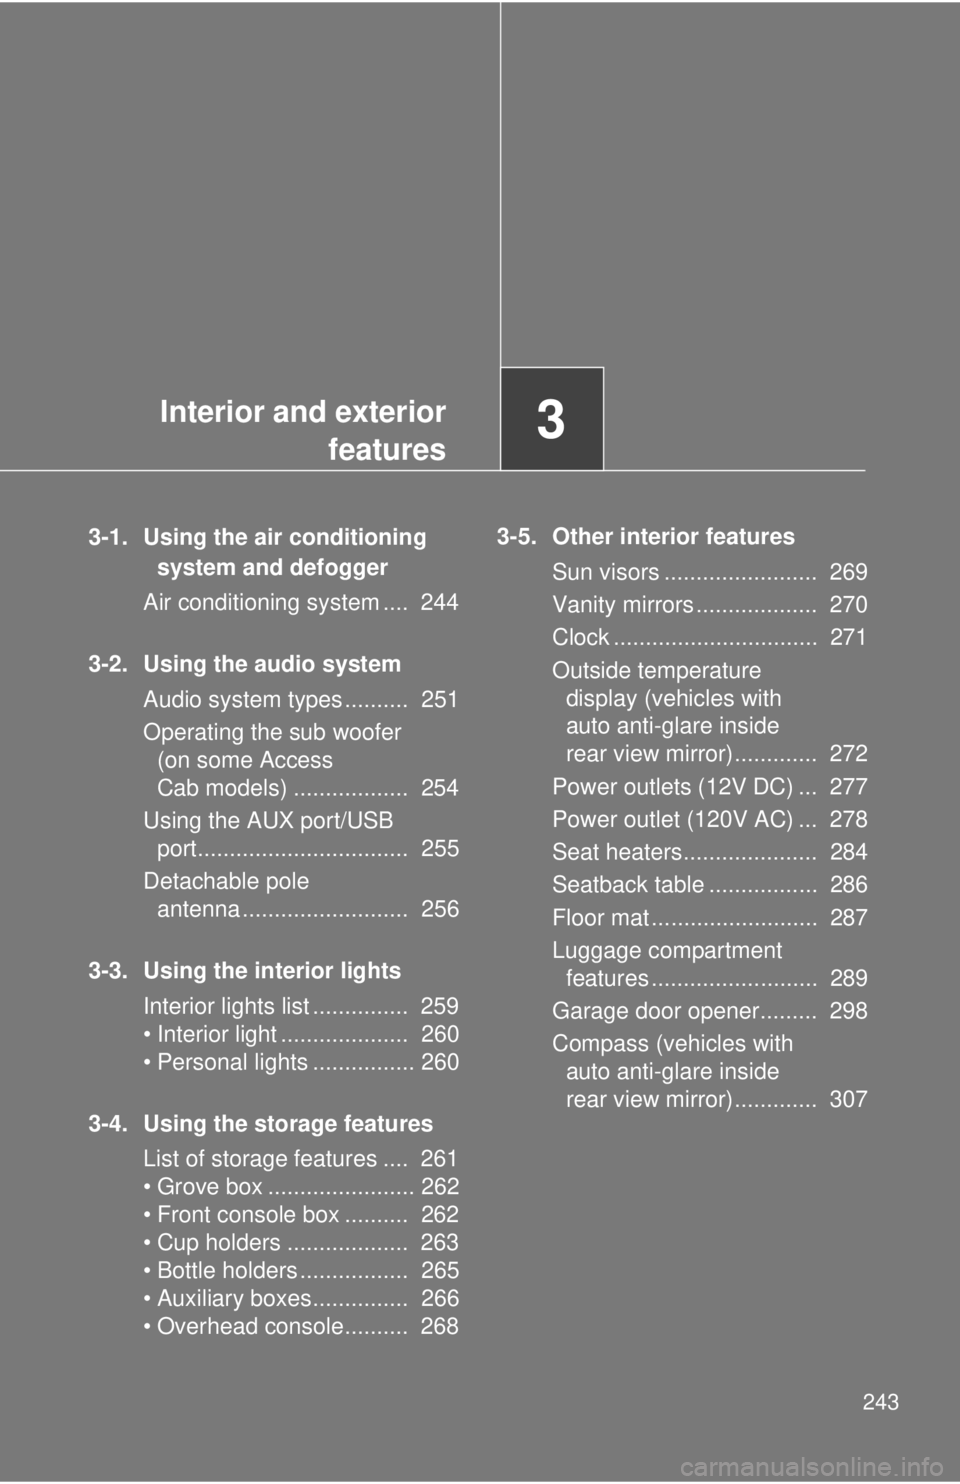
3-1. Using the air conditioning
system and defogger
Air conditioning system .... 244
3-2. Using the audio system Audio system types .......... 251
Operating the sub woofer (on some Access
Cab models) .................. 254
Using the AUX port/USB port................................. 255
Detachable pole antenna .......................... 256
3-3. Using the interior lights Interior lights list ............... 259
• Interior light .................... 260
• Personal lights ................ 260
3-4. Using the storage features List of storage features .... 261
• Grove box ....................... 262
• Front console box .......... 262
• Cup holders ................... 263
• Bottle holders ................. 265
• Auxiliary boxes............... 266
• Overhead console.......... 268 3-5. Other interior features
Sun visors ........................ 269
Vanity mirrors ................... 270
Clock ................................ 271
Outside temperature display (vehicles with
auto anti-glare inside
rear view mirror) ............. 272
Power outlets (12V DC) ... 277
Power outlet (120V AC) ... 278
Seat heaters..................... 284
Seatback table ................. 286
Floor mat .......................... 287
Luggage compartment features .......................... 289
Garage door opener......... 298
Compass (vehicles with auto anti-glare inside
rear view mirror) ............. 307
Page 259 of 524
259
3
Interior and exterior features
3-3. Using the interior lights
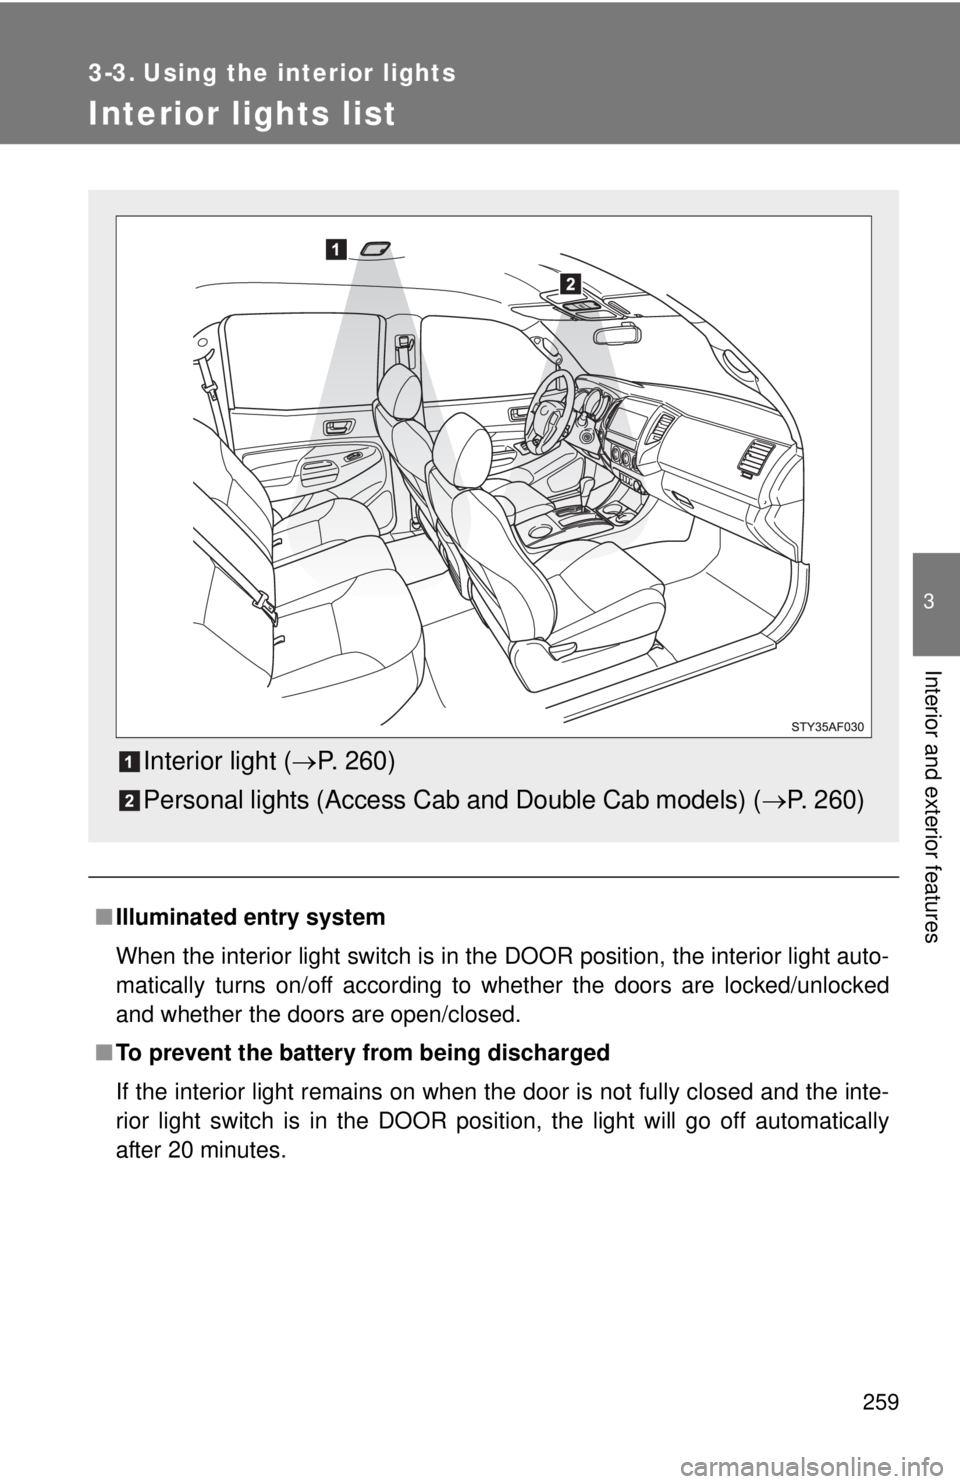
Interior lights list
■Illuminated entry system
When the interior light switch is in the DOOR position, the interior light auto-
matically turns on/off according to whether the doors are locked/unlocked
and whether the doors are open/closed.
■ To prevent the battery from being discharged
If the interior light remains on when the door is not fully closed and the inte-
rior light switch is in the DOOR position, the light will go off automatically
after 20 minutes.
Interior light ( P. 260)
Personal lights (Access C ab and Double Cab models) ( P. 260)
Page 298 of 524
298
3-5. Other interior features
Garage door opener
The garage door opener (HomeLink® Universal Transceiver) is manufac-
tured under license from HomeLink®.
Training the HomeLink® (for U.S. owners)
The HomeLink
® compatible transceiver in your vehicle has 3 buttons
which can be trained to operate 3 different devices. Refer to the train-
ing method below appropriate for the device.
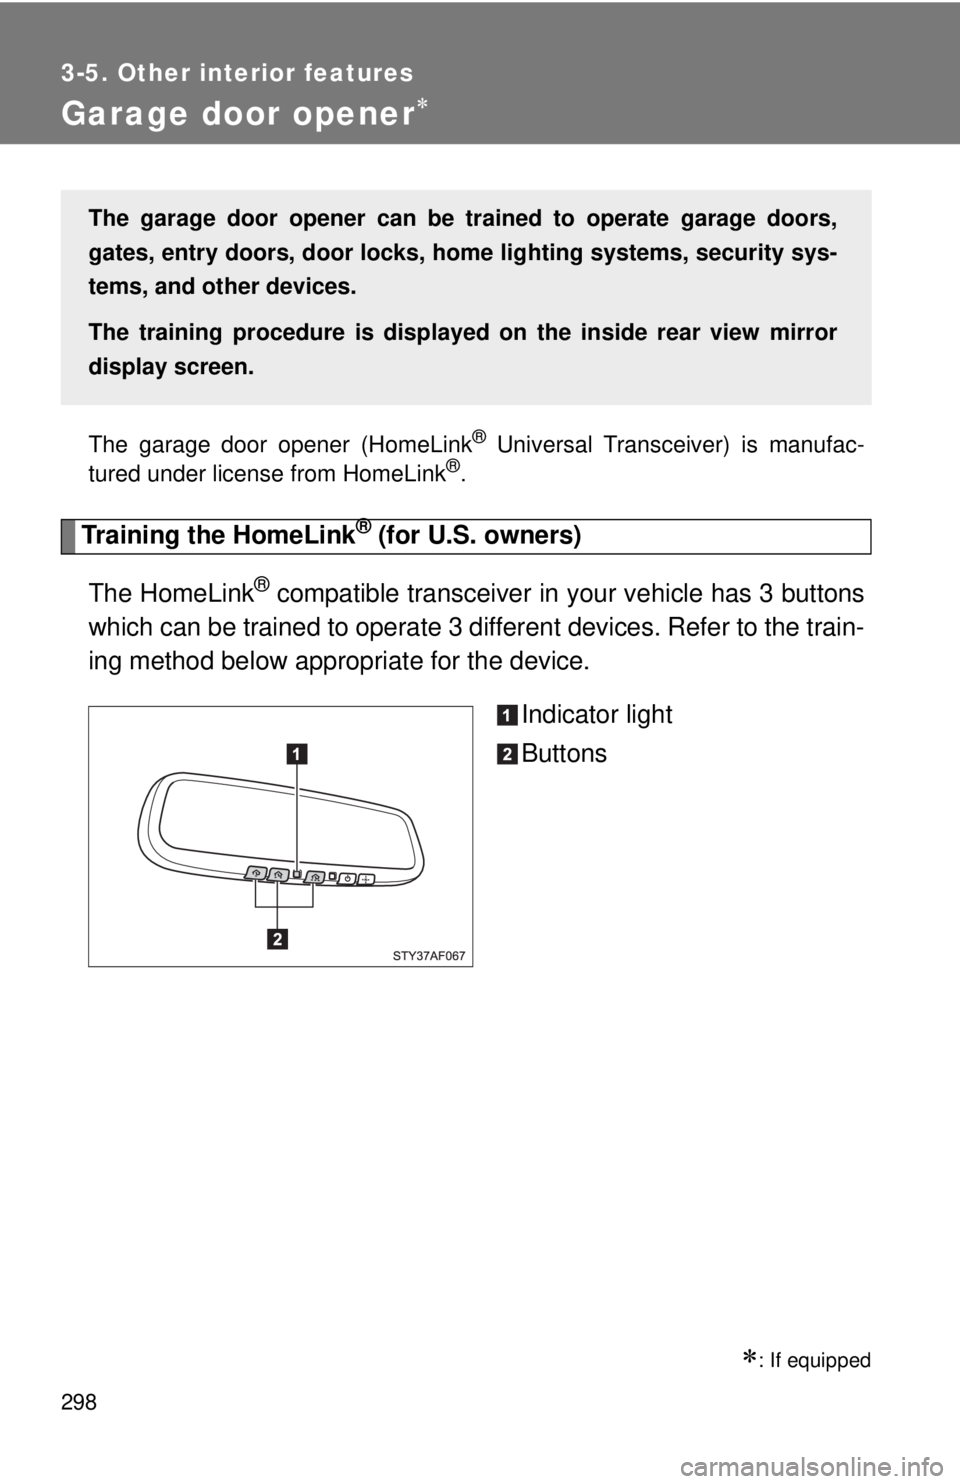
Indicator light
Buttons
: If equipped
The garage door opener can be trained to operate garage doors,
gates, entry doors, door locks, home lighting systems, security sys-
tems, and other devices.
The training procedure is displayed on the inside rear view mirror
display screen.
Page 302 of 524

302 3-5. Other interior features
■Training an entry gate (for U.S. owners)/Training a device in
the Canadian market
Place the remote control transmitter 1 to 3 in. (25 to 75 mm)
away from the HomeLink
® buttons
Keep the HomeLink® indicator light in view while training.
Press and hold the selected HomeLink® button.
Repeatedly press and release (c ycle) one of the buttons on
the remote control transmitter for 2 seconds at a time until is completed.
When the HomeLink
® indicator light starts to flash rapidly,
release the buttons on the HomeLink®.
Test the HomeLink
® operation by pressing the newly trained
button. Check to see if the gate/device operates correctly.
Repeat the steps above to train another device for any of the
remaining HomeLink
® buttons.
■ Training other devices
To train other devices such as home security systems, home door
locks and lighting, contact your Toyota dealer for assistance.
■ Retraining a button
The individual HomeLink
® buttons cannot be erased but can be
retrained. To retrain a button, follow the “Retraining a HomeLink®
button” instructions.
Page 313 of 524
313
3-5. Other interior features
3
Interior and exterior features
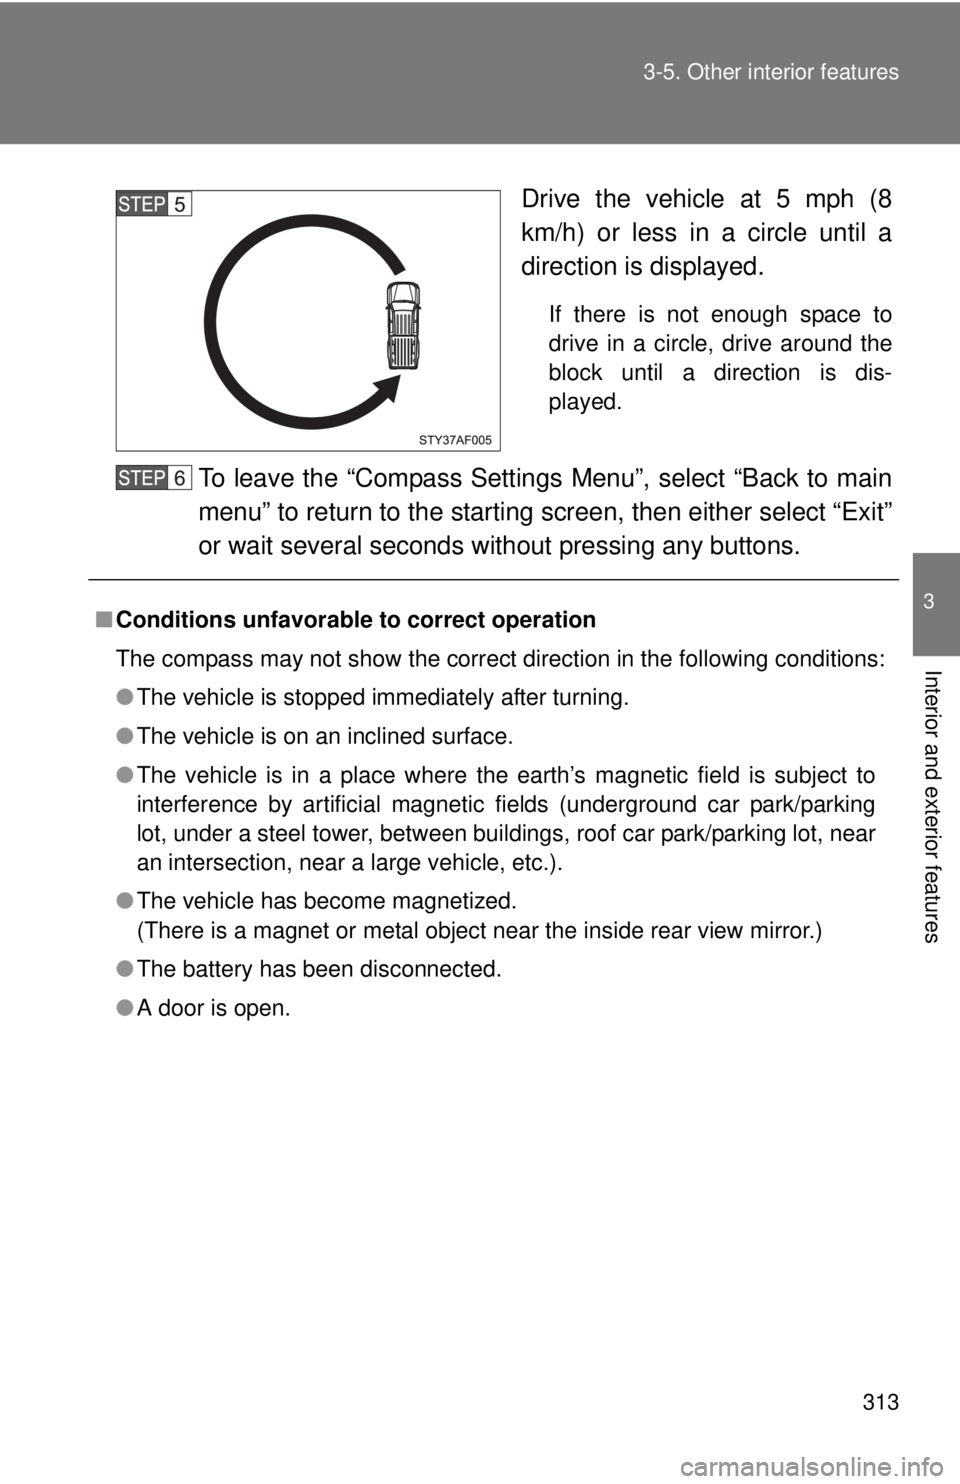
Drive the vehicle at 5 mph (8
km/h) or less in a circle until a
direction is displayed.
If there is not enough space to
drive in a circle, drive around the
block until a direction is dis-
played.
To leave the “Compass Settings Menu”, select “Back to main
menu” to return to the starting screen, then either select “Exit”
or wait several seconds without pressing any buttons.
■
Conditions unfavorable to correct operation
The compass may not show the correct direction in the following conditions:
●The vehicle is stopped immediately after turning.
● The vehicle is on an inclined surface.
● The vehicle is in a place where the earth’s magnetic field is subject to
interference by artificial magnetic fields (underground car park/parking
lot, under a steel tower, between buildings, roof car park/parking lot, near
an intersection, near a large vehicle, etc.).
● The vehicle has become magnetized.
(There is a magnet or metal object near the inside rear view mirror.)
● The battery has been disconnected.
● A door is open.
Page 326 of 524
326 4-2. Maintenance
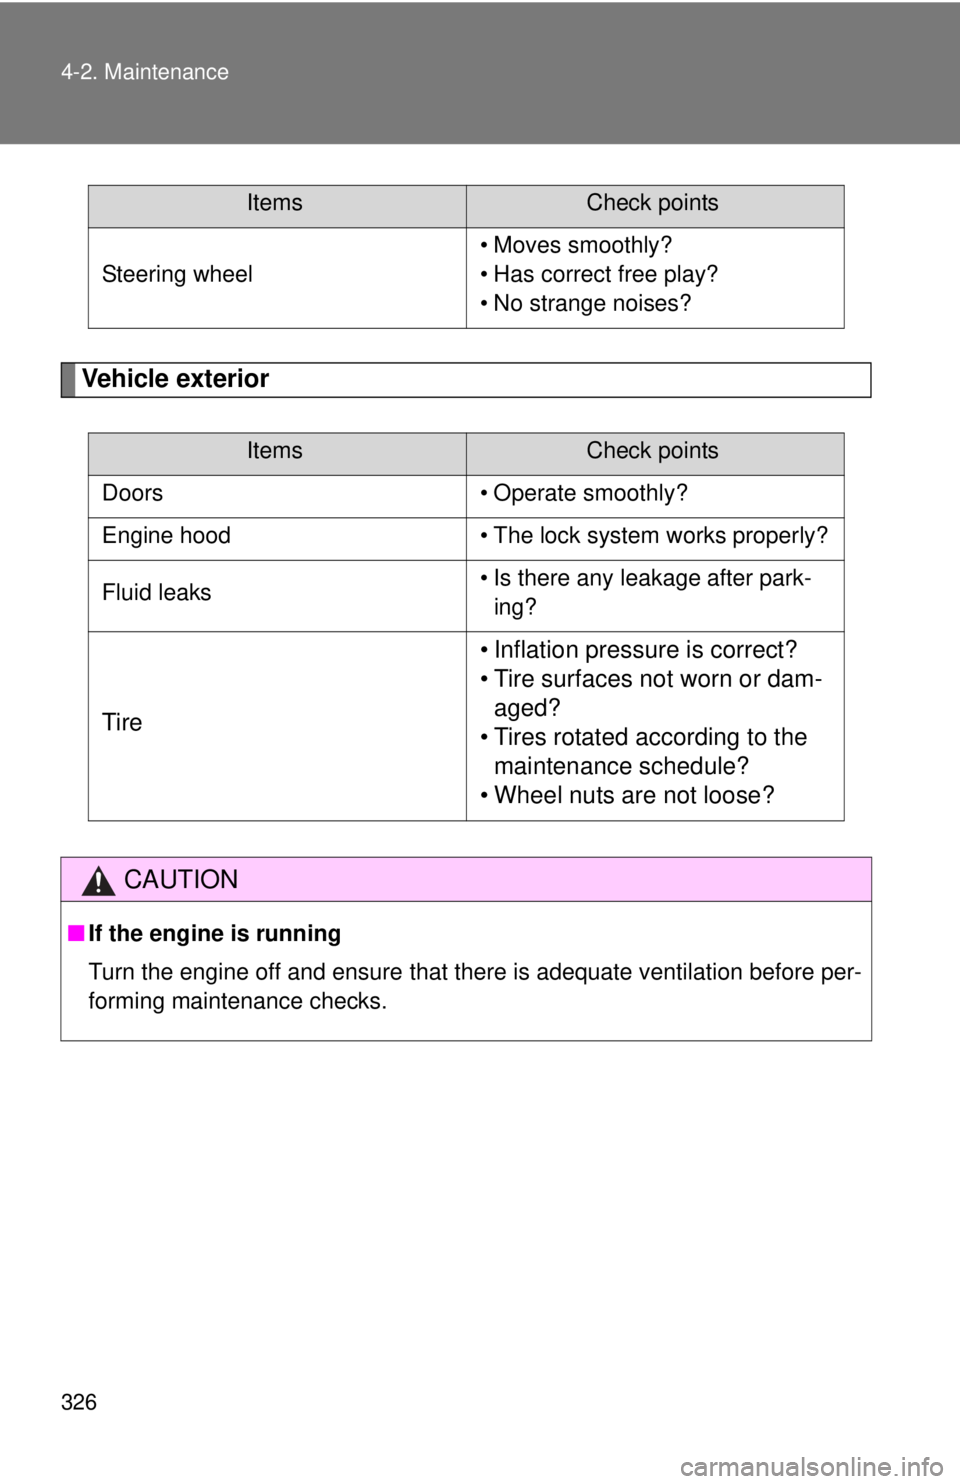
Vehicle exterior
Steering wheel• Moves smoothly?
• Has correct free play?
• No strange noises?
ItemsCheck points
Doors • Operate smoothly?
Engine hood • The lock system works properly?
Fluid leaks • Is there any leakage after park-
ing?
Tire • Inflation pressure is correct?
• Tire surfaces not worn or dam-
aged?
• Tires rotated according to the maintenance schedule?
• Wheel nuts are not loose?
CAUTION
■ If the engine is running
Turn the engine off and ensure that there is adequate ventilation before per-
forming maintenance checks.
ItemsCheck points
Page 377 of 524
377
4-3. Do-it-yourself maintenance
4
Maintenance and care
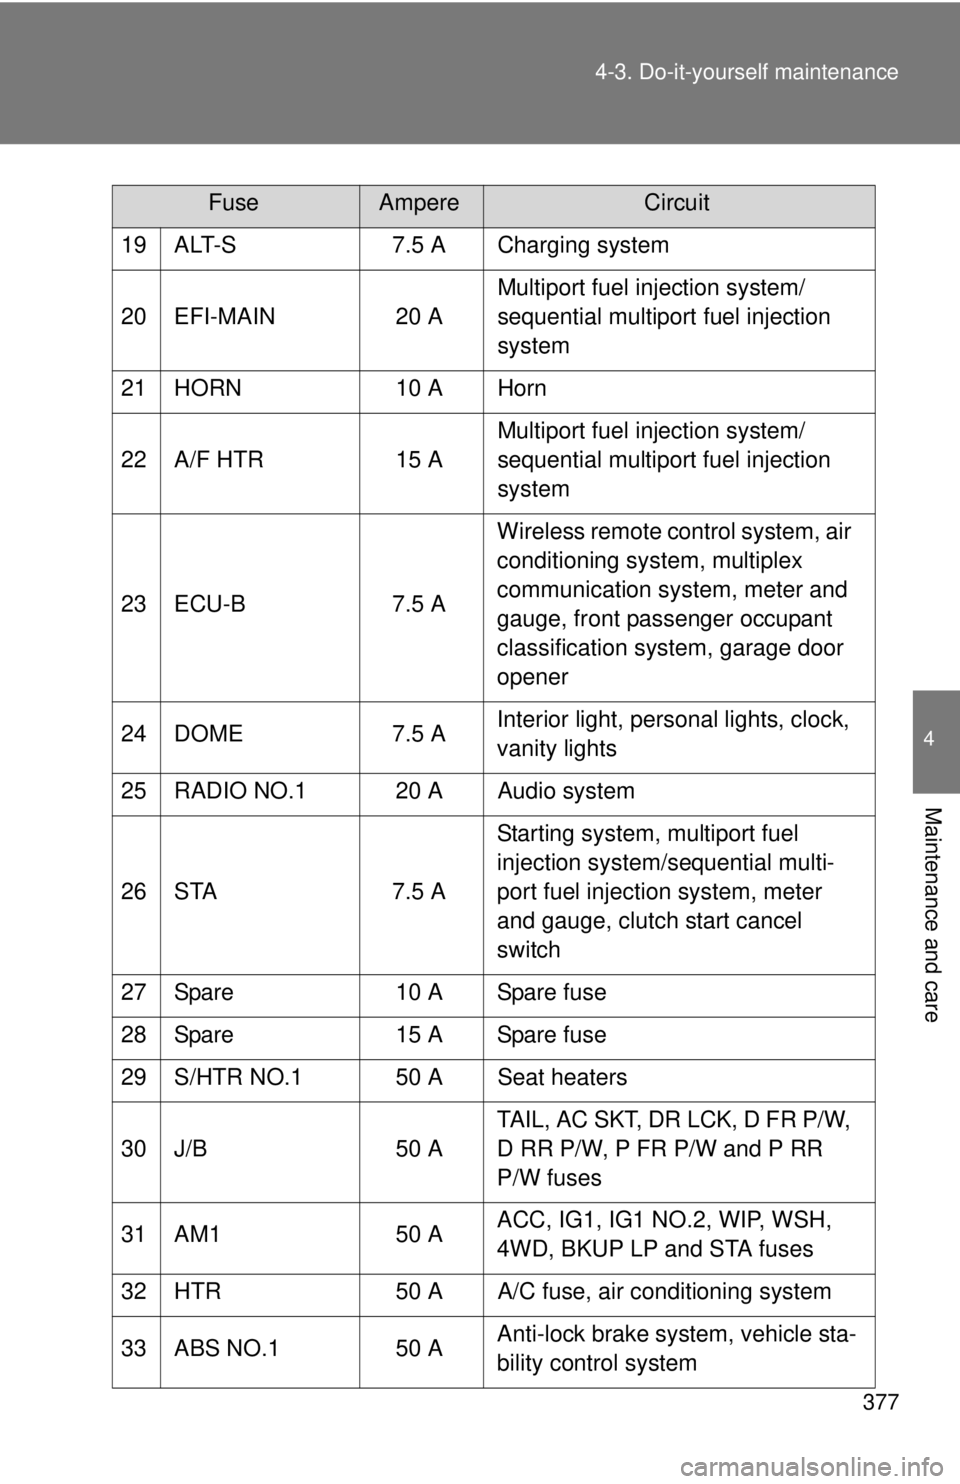
19 ALT-S
7.5 A Charging system
20 EFI-MAIN 20 AMultiport fuel injection system/
sequential multiport fuel injection
system
21 HORN 10 A Horn
22 A/F HTR 15 AMultiport fuel injection system/
sequential multiport fuel injection
system
23 ECU-B 7.5 AWireless remote control system, air
conditioning system, multiplex
communication system, meter and
gauge, front passenger occupant
classification system, garage door
opener
24 DOME 7.5 AInterior light, personal lights, clock,
vanity lights
25 RADIO NO.1 20 A Audio system
26 STA 7.5 AStarting system, multiport fuel
injection system/sequential multi-
port fuel injection system, meter
and gauge, clutch start cancel
switch
27 Spare 10 A Spare fuse
28 Spare 15 A Spare fuse
29 S/HTR NO.1 50 A Seat heaters
30 J/B 50 ATAIL, AC SKT, DR LCK, D FR P/W,
D RR P/W, P FR P/W and P RR
P/W fuses
31 AM1 50 AACC, IG1, IG1 NO.2, WIP, WSH,
4WD, BKUP LP and STA fuses
32 HTR 50 A A/C fuse, air conditioning system
33 ABS NO.1 50 AAnti-lock brake system, vehicle sta-
bility control system
FuseAmpereCircuit