navigation system TOYOTA TACOMA 2019 Accessories, Audio & Navigation (in English)
[x] Cancel search | Manufacturer: TOYOTA, Model Year: 2019, Model line: TACOMA, Model: TOYOTA TACOMA 2019Pages: 294, PDF Size: 7.96 MB
Page 259 of 294
259
5. SETUP
NAVIGATION SYSTEM
8
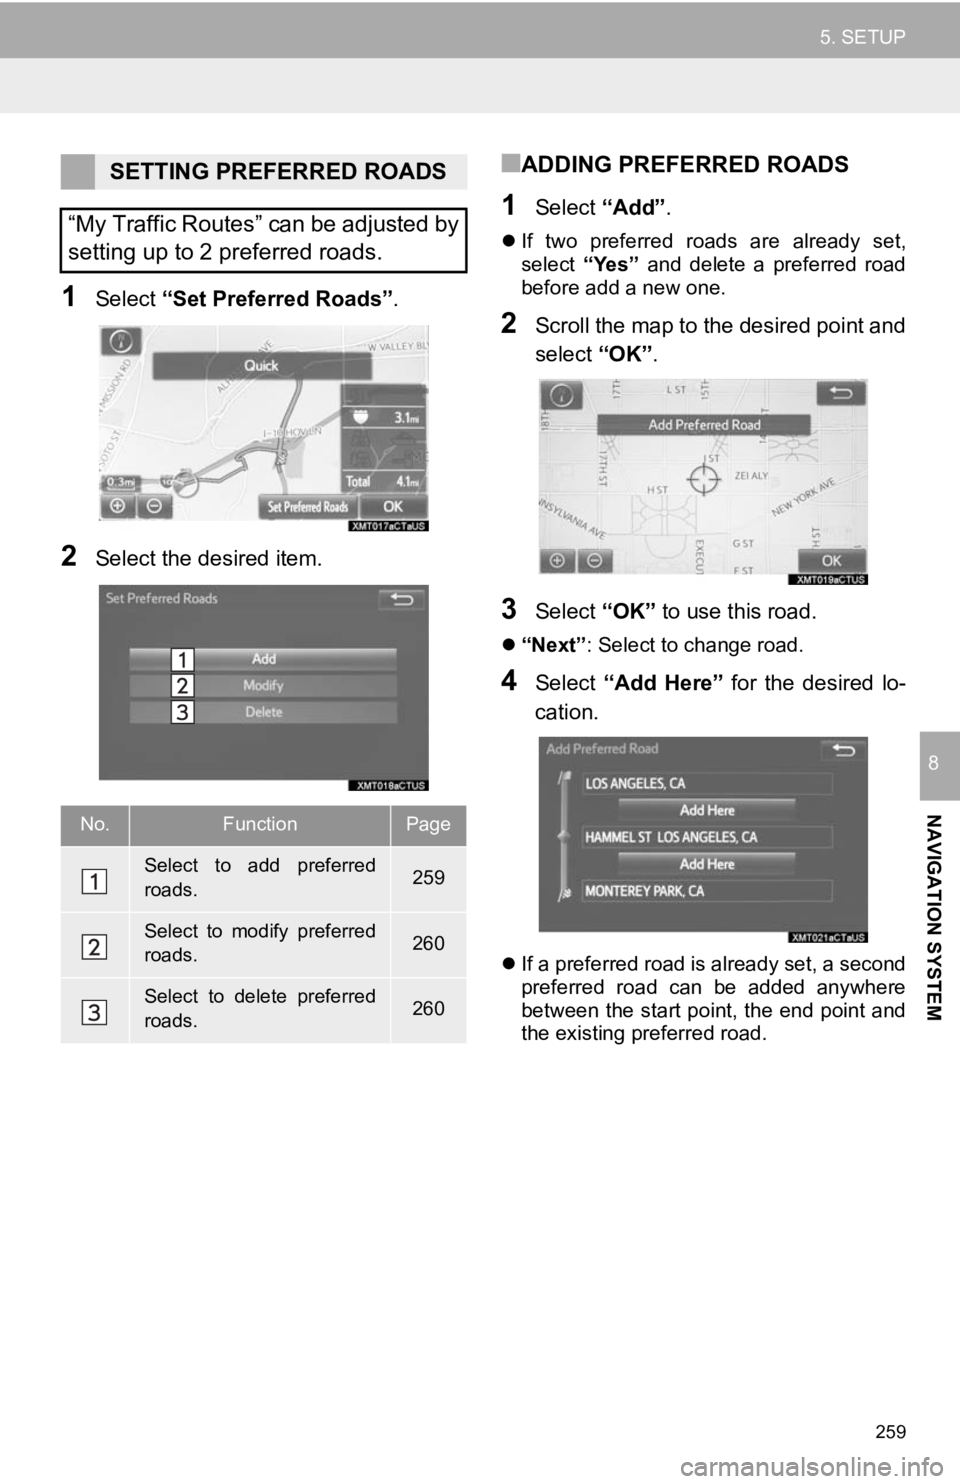
1Select “Set Preferred Roads” .
2Select the desired item.
■ADDING PREFERRED ROADS
1Select “Add”.
If two preferred roads are already set,
select “Yes” and delete a preferred road
before add a new one.
2Scroll the map to the desired point and
select “OK”.
3Select “OK” to use this road.
“Next” : Select to change road.
4Select “Add Here” for the desired lo-
cation.
If a preferred road is already set, a second
preferred road can be added anywhere
between the start point, the end point and
the existing preferred road.
SETTING PREFERRED ROADS
“My Traffic Routes” can be adjusted by
setting up to 2 preferred roads.
No.FunctionPage
Select to add preferred
roads.259
Select to modify preferred
roads.260
Select to delete preferred
roads.260
Page 261 of 294
261
NAVIGATION SYSTEM
8
6. TIPS FOR THE NAVIGATION SYSTEM
1. GPS (GLOBAL POSITIONING SYSTEM)
The Global Positioning System (GPS) de-
veloped and operated by the U.S. Depart-
ment of Defense provides an accurate
current position, normally using 4 or more
satellites, and in some case 3 satellites.
The GPS system has a certain level of in-
accuracy. While the navigation system
compensates for this most of the time, oc-
casional positioning errors of up to 300 ft.
(100 m) can and should be expected. Gen-
erally, position errors will be corrected
within a few seconds. When the vehicle is receiving signals from
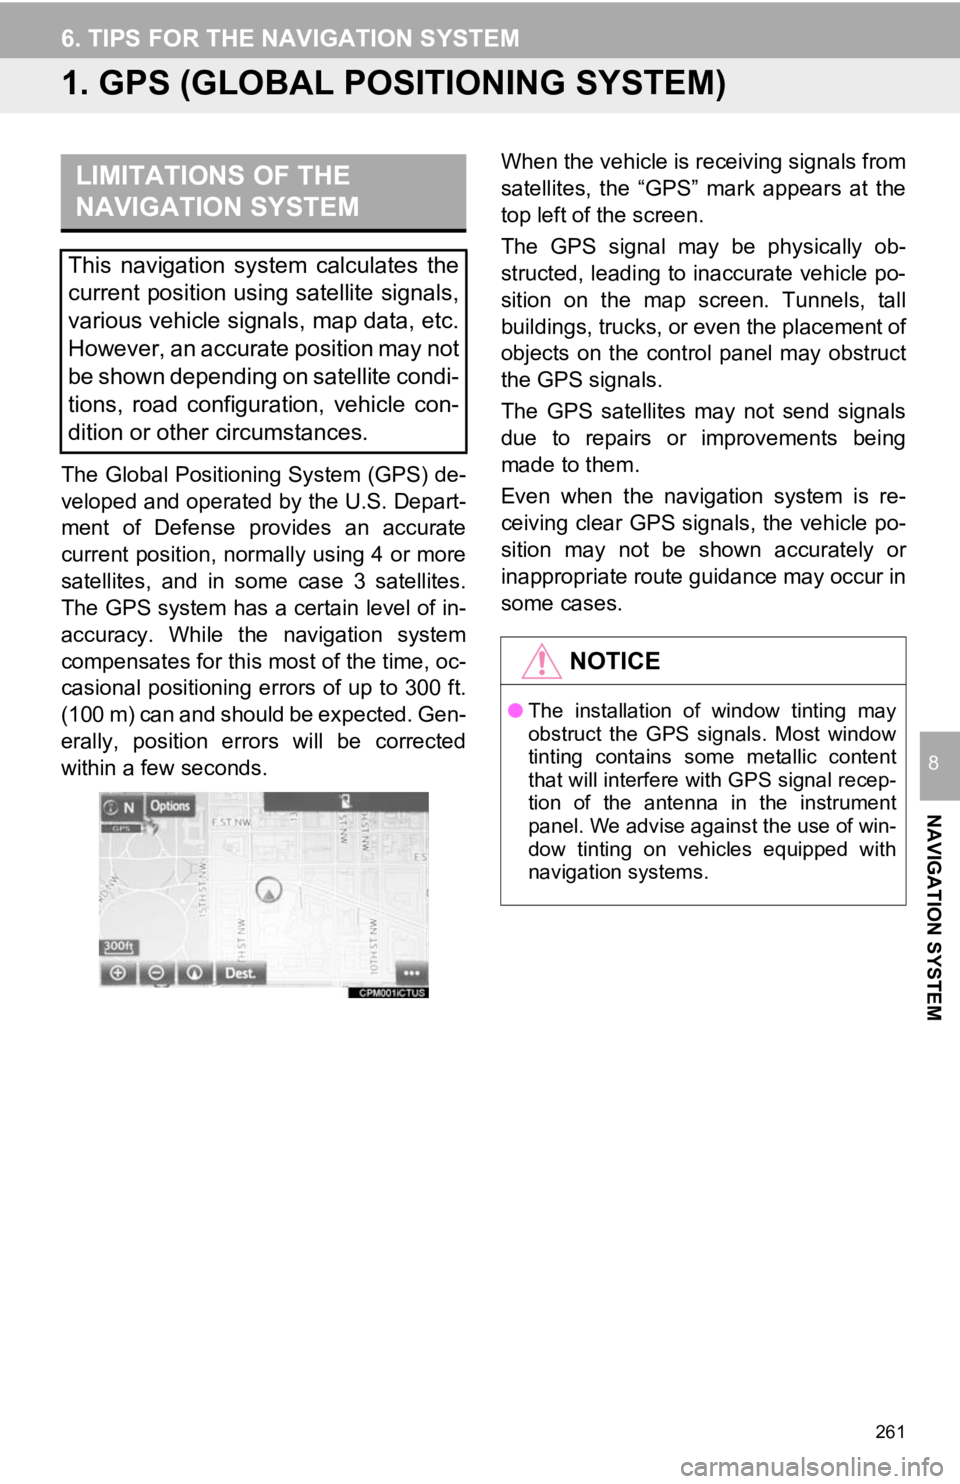
satellites, the “GPS” mark appears at the
top left of the screen.
The GPS signal may be physically ob-
structed, leading to inaccurate vehicle po-
sition on the map screen. Tunnels, tall
buildings, trucks, or even the placement of
objects on the control panel may obstruct
the GPS signals.
The GPS satellites may not send signals
due to repairs or improvements being
made to them.
Even when the navigation system is re-
ceiving clear GPS signals, the vehicle po-
sition may not be shown accurately or
inappropriate route guidance may occur in
some cases.
LIMITATIONS OF THE
NAVIGATION SYSTEM
This navigation system calculates the
current position using satellite signals,
various vehicle signals, map data, etc.
However, an accurate position may not
be shown depending on satellite condi-
tions, road configuration, vehicle con-
dition or other circumstances.
NOTICE
●
The installation of window tinting may
obstruct the GPS signals. Most window
tinting contains some metallic content
that will interfere with GPS signal recep-
tion of the antenna in the instrument
panel. We advise against the use of win-
dow tinting on vehicles equipped with
navigation systems.
Page 262 of 294
262
6. TIPS FOR THE NAVIGATION SYSTEM
Accurate current position may not be
shown in the following cases:
• When driving on a small angled Y-
shaped road.
• When driving on a winding road.
• When driving on a slippery road such as in sand, gravel, snow, etc.
• When driving on a long straight road.
• When freeway and surface streets run in parallel.
• After moving by ferry or vehicle carrier.
• When a long route is searched during high speed driving.
• When driving without setting the current
position calibration correctly.
• After repeating a change of direction by going forward and backward, or turning
on a turntable in a parking lot.
• When leaving a covered parking lot or parking garage.
• When a roof carrier is installed.
• When driving with tire chains installed.
• When the tires are worn.
• After replacing a tire or tires.
• When using tires that are smaller or larger than the factory specifications.
• When the tire pressure in any of the 4 tires is not correct.
Inappropriate route guidance may occur in
the following cases:
• When turning at an intersection off the
designated route guidance.
• If you set more than 1 destination but
skip any of them, auto reroute will dis-
play a route returning to the destination
on the previous route.
• When turning at an intersection for which there is no route guidance.
• When passing through an intersection
for which there is no route guidance.
• During auto reroute, the route guidance may not be available for the next turn to
the right or left.
• During high speed driving, it may take a long time for auto reroute to operate. In
auto reroute, a detour route may be
shown.
• After auto reroute, the route may not be
changed.
• If an unnecessary U-turn is shown or announced.
• If a location has multiple names and the system announces 1 or more of them.
• When a route cannot be searched.
• If the route to your destination includes gravel, unpaved roads or alleys, the
route guidance may not be shown.
• Your destination point might be shown on the opposite side of the street.
• When a portion of the route has regula-
tions prohibiting the entry of the vehicle
that vary by time or season or other rea-
sons.
• The road and map data stored in the navigation system may not be complete
or may not be the latest version.
If the vehicle cannot receive GPS sig-
nals, the current position can be
adjusted manually. For information on
setting the current position calibration:
P. 2 5 3
After replacing a tire: P. 2 5 4
INFORMATION
● This navigation system uses tire turning
data and is designed to work with fac-
tory-specified tires for the vehicle.
Installing tires that are larger or smaller
than the originally equipped diameter
may cause inaccurate display of the cur-
rent position. The tire pressure also
affects the diameter of the tires, so make
sure that the tire pressure of all 4 tires is
correct.
Page 263 of 294
263
6. TIPS FOR THE NAVIGATION SYSTEM
NAVIGATION SYSTEM
8
2. MAP DATABASE VERSION AND COVERED AREA
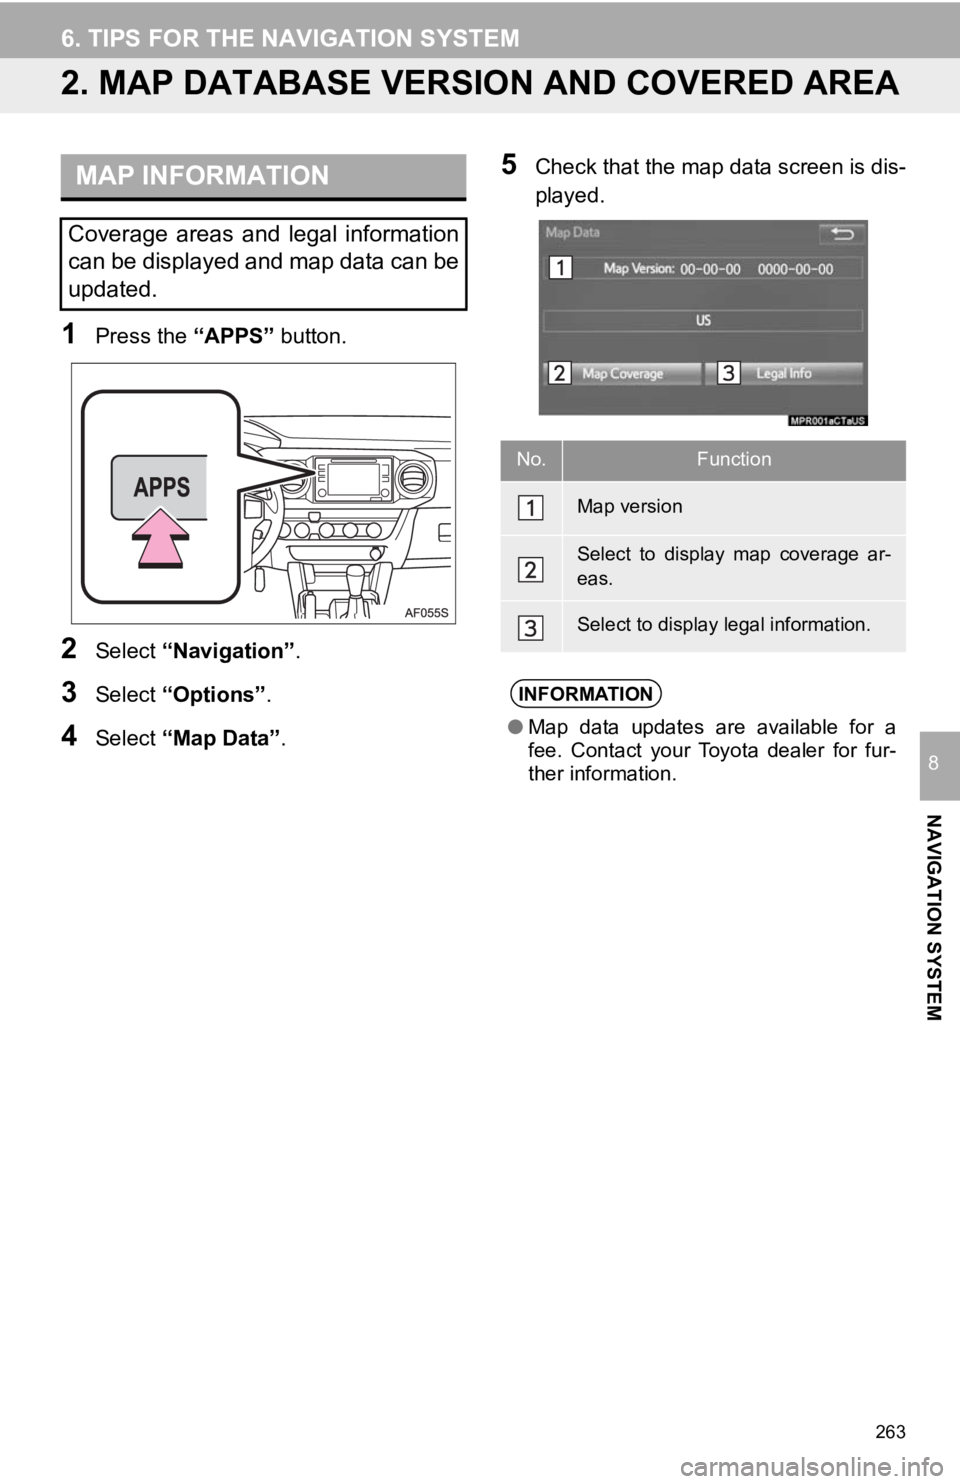
1Press the “APPS” button.
2Select “Navigation” .
3Select “Options”.
4Select “Map Data” .
5Check that the map data screen is dis-
played.MAP INFORMATION
Coverage areas and legal information
can be displayed and map data can be
updated.
No.Function
Map version
Select to display map coverage ar-
eas.
Select to display legal information.
INFORMATION
●Map data updates are available for a
fee. Contact your Toyota dealer for fur-
ther information.
Page 264 of 294
264
6. TIPS FOR THE NAVIGATION SYSTEM
ABOUT THE MAP DATA
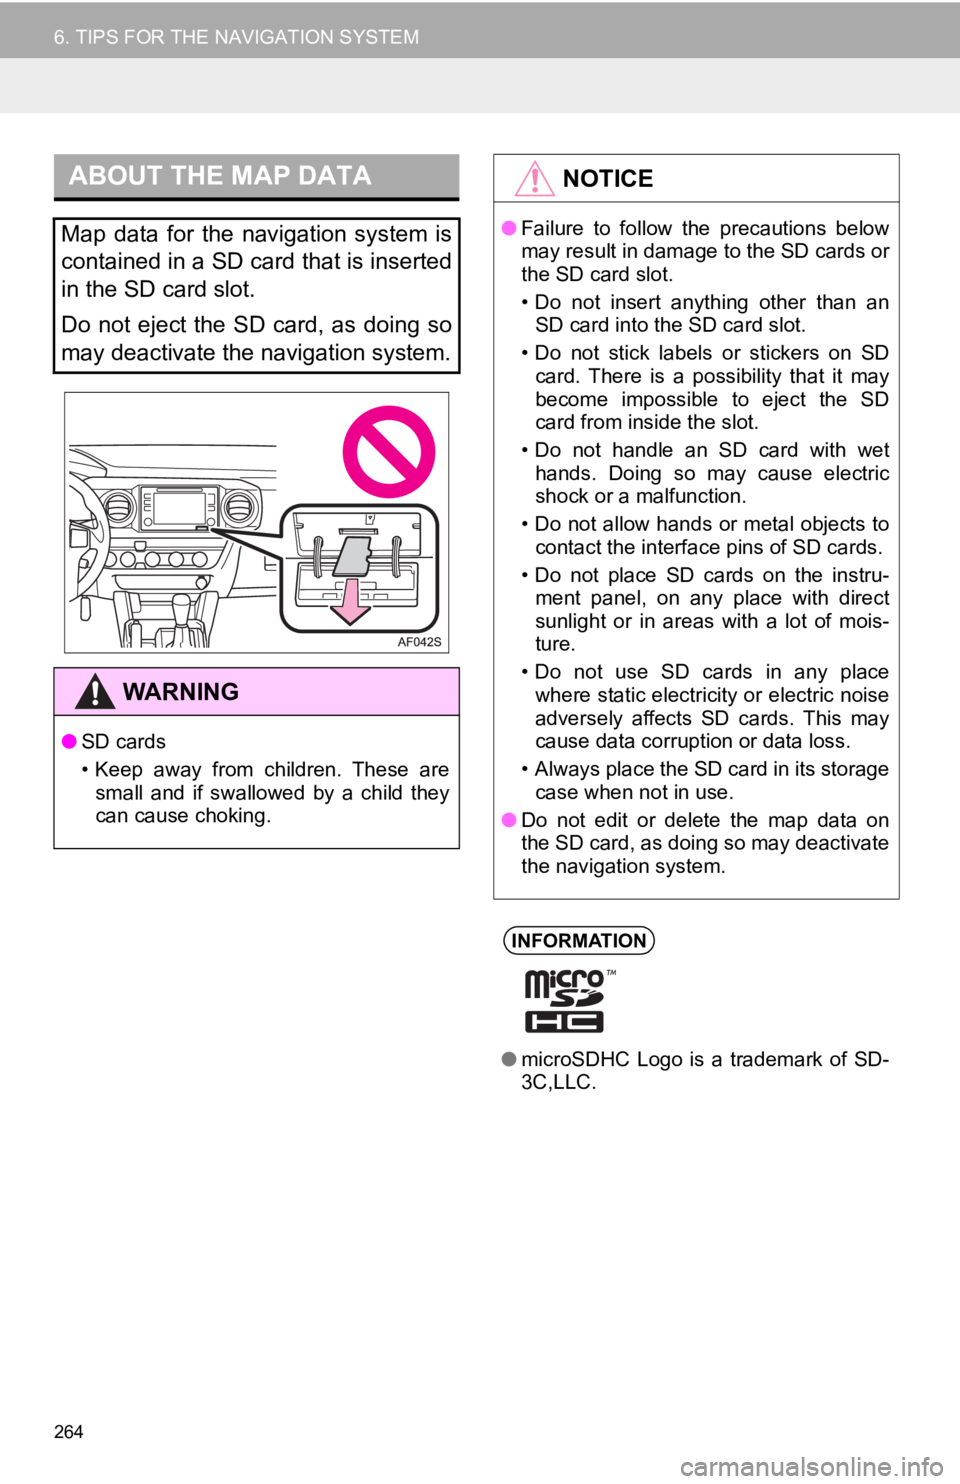
Map data for the navigation system is
contained in a SD card that is inserted
in the SD card slot.
Do not eject the SD card, as doing so
may deactivate the navigation system.
WA R N I N G
●SD cards
• Keep away from children. These are
small and if swallowed by a child they
can cause choking.
NOTICE
● Failure to follow the precautions below
may result in damage to the SD cards or
the SD card slot.
• Do not insert anything other than an
SD card into the SD card slot.
• Do not stick labels or stickers on SD card. There is a possibility that it may
become impossible to eject the SD
card from inside the slot.
• Do not handle an SD card with wet hands. Doing so may cause electric
shock or a malfunction.
• Do not allow hands or metal objects to contact the interface pins of SD cards.
• Do not place SD cards on the instru- ment panel, on any place with direct
sunlight or in areas with a lot of mois-
ture.
• Do not use SD cards in any place where static electricity or electric noise
adversely affects SD cards. This may
cause data corruption or data loss.
• Always place the SD card in its storage case when not in use.
● Do not edit or delete the map data on
the SD card, as doing so may deactivate
the navigation system.
INFORMATION
●microSDHC Logo is a trademark of SD-
3C,LLC.
Page 268 of 294
268
1. Entune App Suite OVERVIEW
User registration is required to start using
the Entune App Suite service.
Entune App Suite does not require an acti-
vation fee or monthly recurring fees.
Services requiring a separate contract can
also be used.*
*: For details, refer to http://
www.toyota.com/entune/ or call 1-800-
331-4331.
Entune App Suite is available in the con-
tiguous United States, D.C. and Alaska.
The following personal data can be
deleted from the system and returned to
their default settings:
• Downloaded applications
• Downloaded application content
BEFORE USING
THE FUNCTION
SUBSCRIPTION
AVAILABILITY OF SERVICE
INFORMATION
●When using Entune App Suite, depend-
ing on the details of your cellular phone
contract, data usage fees may apply.
Confirm data usage fees before using
this service.
● In this section, the required actions to
activate applications, connect a cellular
phone to the navigation system and reg-
istration steps for Entune App Suite are
explained. For details regarding Entune
App Suite operations and each of the
applications, refer to http://www.toy-
ota.com/entune/.
● The actual service availability is depen-
dent on the cellular network condition.
INITIALIZING PERSONAL
DATA
The personal data used in applications
can be removed from the multimedia
system. ( P.62)
INFORMATION
●Once initialized, data will be erased from
the system. Pay close attention when
initializing the data.
Page 275 of 294
275
2. Entune App Suite OPERATION
Entune App Suite
9
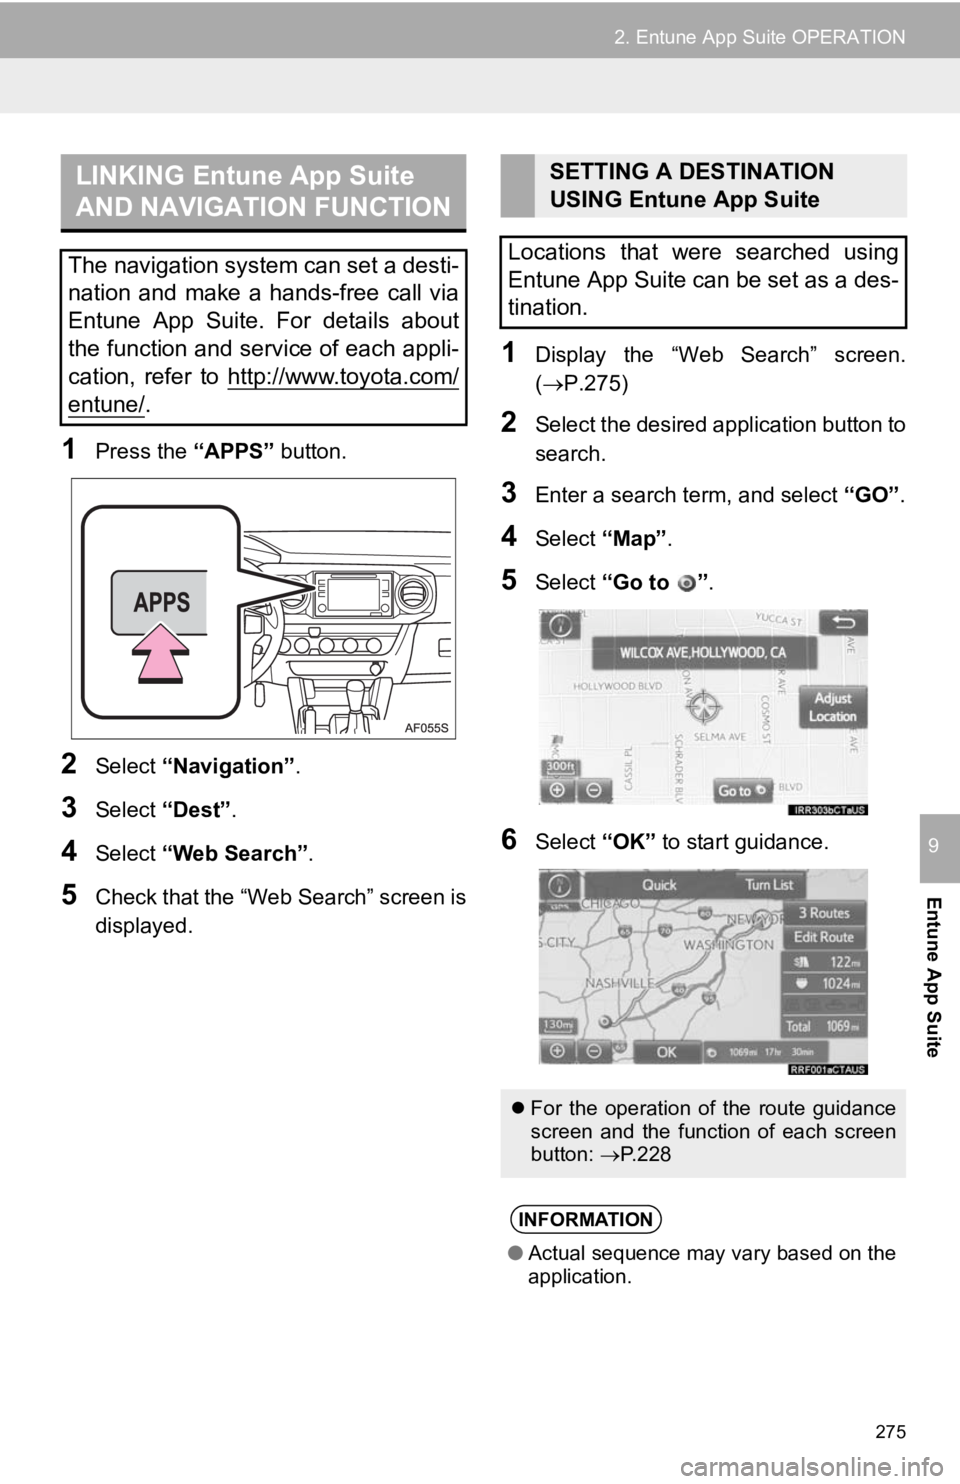
1Press the “APPS” button.
2Select “Navigation” .
3Select “Dest”.
4Select “Web Search” .
5Check that the “Web Search” screen is
displayed.
1Display the “Web Search” screen.
(P.275)
2Select the desired application button to
search.
3Enter a search term, and select “GO”.
4Select “Map”.
5Select “Go to ” .
6Select “OK” to start guidance.
LINKING Entune App Suite
AND NAVIGATION FUNCTION
The navigation system can set a desti-
nation and make a hands-free call via
Entune App Suite. For details about
the function and service of each appli-
cation, refer to http://www.toyota.com/
entune/.
SETTING A DESTINATION
USING Entune App Suite
Locations that were searched using
Entune App Suite can be set as a des-
tination.
For the operation of the route guidance
screen and the function of each screen
button: P.228
INFORMATION
● Actual sequence may vary based on the
application.
Page 281 of 294

281
E
Editing route........................................... 238Adding destinations ............................ 239
Deleting destinations .......................... 239
Detour setting ..................................... 240
Reordering destinations ..................... 239
Selecting route type ........................... 240
Setting route preferences ................... 239
Emergency............................................. 225
Entering letters and numbers/ list screen operation ............................. 37
Entune App Suite ................................... 271
Entune App Suite keyword operation......................................... 276
Linking Entune App Suite and navigation function.......................... 275
Using Entune App Suite application .... 271
F
FM radio ................................................... 79
G
General settings ....................................... 58
GPS (Global Positioning System) .......... 261
H
Hands-free system .................................. 158
HOME button ........................................... 12
“Home” screen ......................................... 16
Home screen operation............................ 35
Page 283 of 294

283
N
Navigation .............................................. 199
Navigation option screen ........................ 202
P
Phone/message settings ....................... 178“Contact/Call History Settings” screen ............................................. 180
“Messaging Settings” screen.............. 188
“Phone Display Settings” screen ........ 189
“Sound Settings” screen..................... 179
PWR·VOL button ..................................... 12
R
Radio............................................. 79, 90, 97
Rear view monitor system ...................... 148
Registering home ..................................... 22
Registering preset destinations................ 24
Registering/connecting Bluetooth
®
device ................................................... 43
Certification .......................................... 47
Profiles ................................................. 45
Registering a Bluetooth
® audio player
for the first time ................................. 44
Registering a Bluetooth
® phone
for the first time ................................. 43
Route guidance screen .......................... 232
During freeway driving........................ 234
Route overview................................... 233
Screen for route guidance .................. 232
Turn list screen ................................... 236
Turn-by-turn arrow screen .................. 236
When approaching intersection .......... 235
Route trace ............................................ 210