display TOYOTA tC 2011 Owners Manual (in English)
[x] Cancel search | Manufacturer: TOYOTA, Model Year: 2011, Model line: tC, Model: TOYOTA tC 2011Pages: 473, PDF Size: 10.91 MB
Page 129 of 473
129
1
1-7. Safety information
Before driving
Installing child restraints
Follow the child restraint system manufacturer’s instructions. Firmly
secure child restraints to the seat s using the LATCH anchors or a
seat belt. Attach the top tether stra p when installing a child restraint.
The lap/shoulder belt can be used if your child restraint system is
not compatible with the LATCH (Low er Anchors and Tethers for Chil-
dren) system.
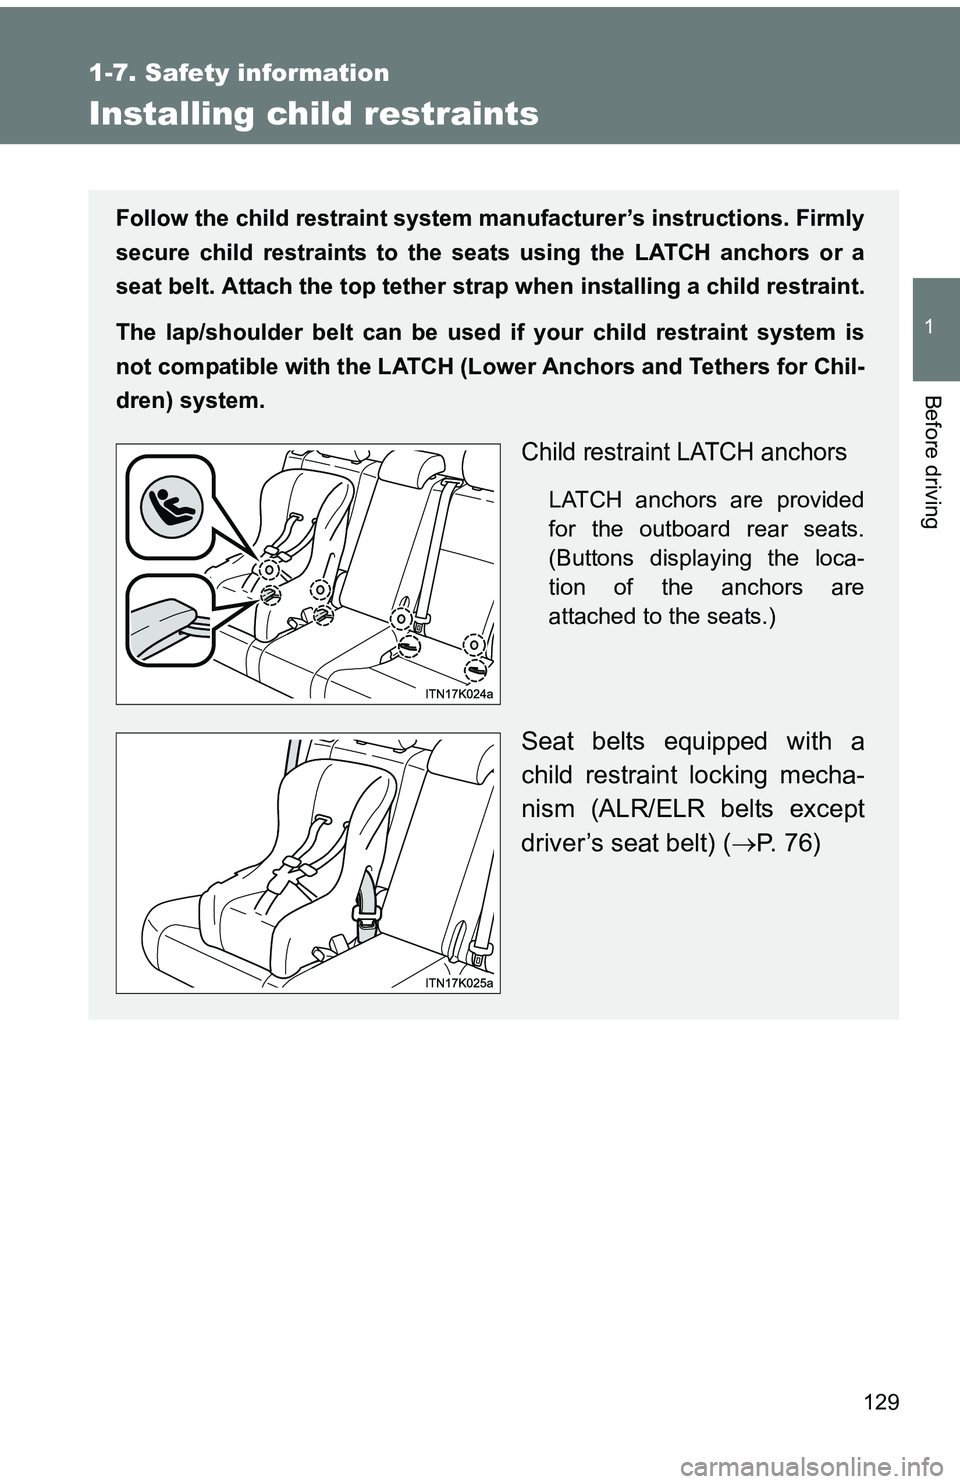
Child restraint LATCH anchors
LATCH anchors are provided
for the outboard rear seats.
(Buttons displaying the loca-
tion of the anchors are
attached to the seats.)
Seat belts equipped with a
child restraint locking mecha-
nism (ALR/ELR belts except
driver’s seat belt) ( P. 76)
Page 174 of 473
174 2-1. Driving procedures
Changing shift range in D position■ Shift lever
If the shift lever is shifted into the D position, the most appropriate
gear is automatically selected, as determined by the driving condi-
tions.
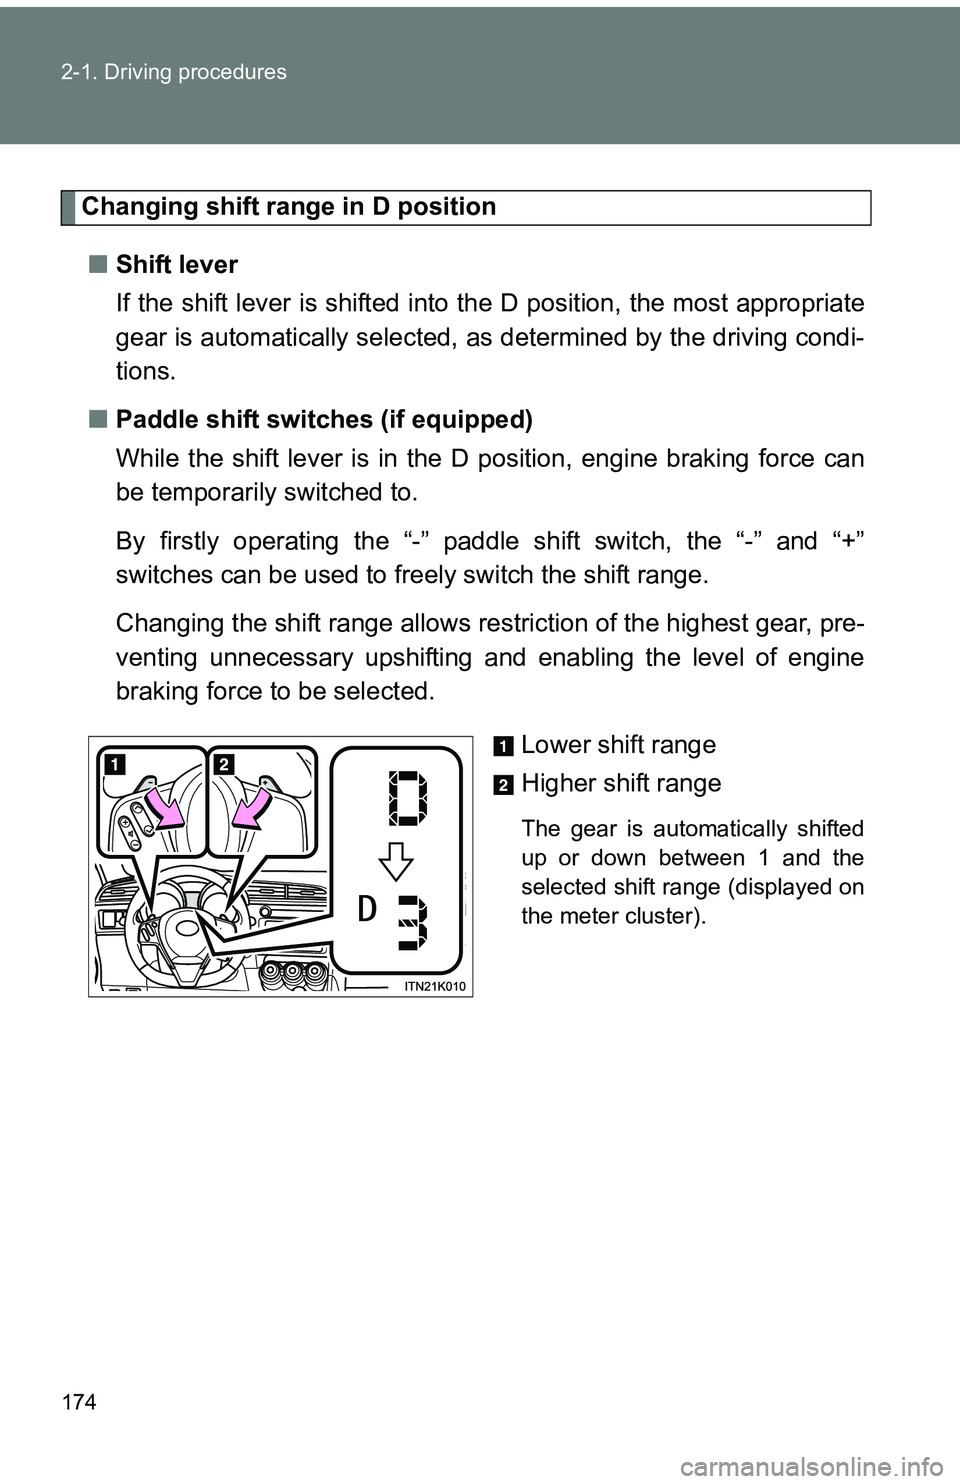
■ Paddle shift switches (if equipped)
While the shift lever is in the D position, engine braking force can
be temporarily switched to.
By firstly operating the “-” paddle shift switch, the “-” and “+”
switches can be used to freely switch the shift range.
Changing the shift range allows rest riction of the highest gear, pre-
venting unnecessary upshifting and enabling the level of engine
braking force to be selected.
Lower shift range
Higher shift range
The gear is automatically shifted
up or down between 1 and the
selected shift range (displayed on
the meter cluster).
Page 176 of 473
176 2-1. Driving procedures
Changing shift range in S modeWhen the shift lever is in the S posit ion, the shift lever or paddle shift
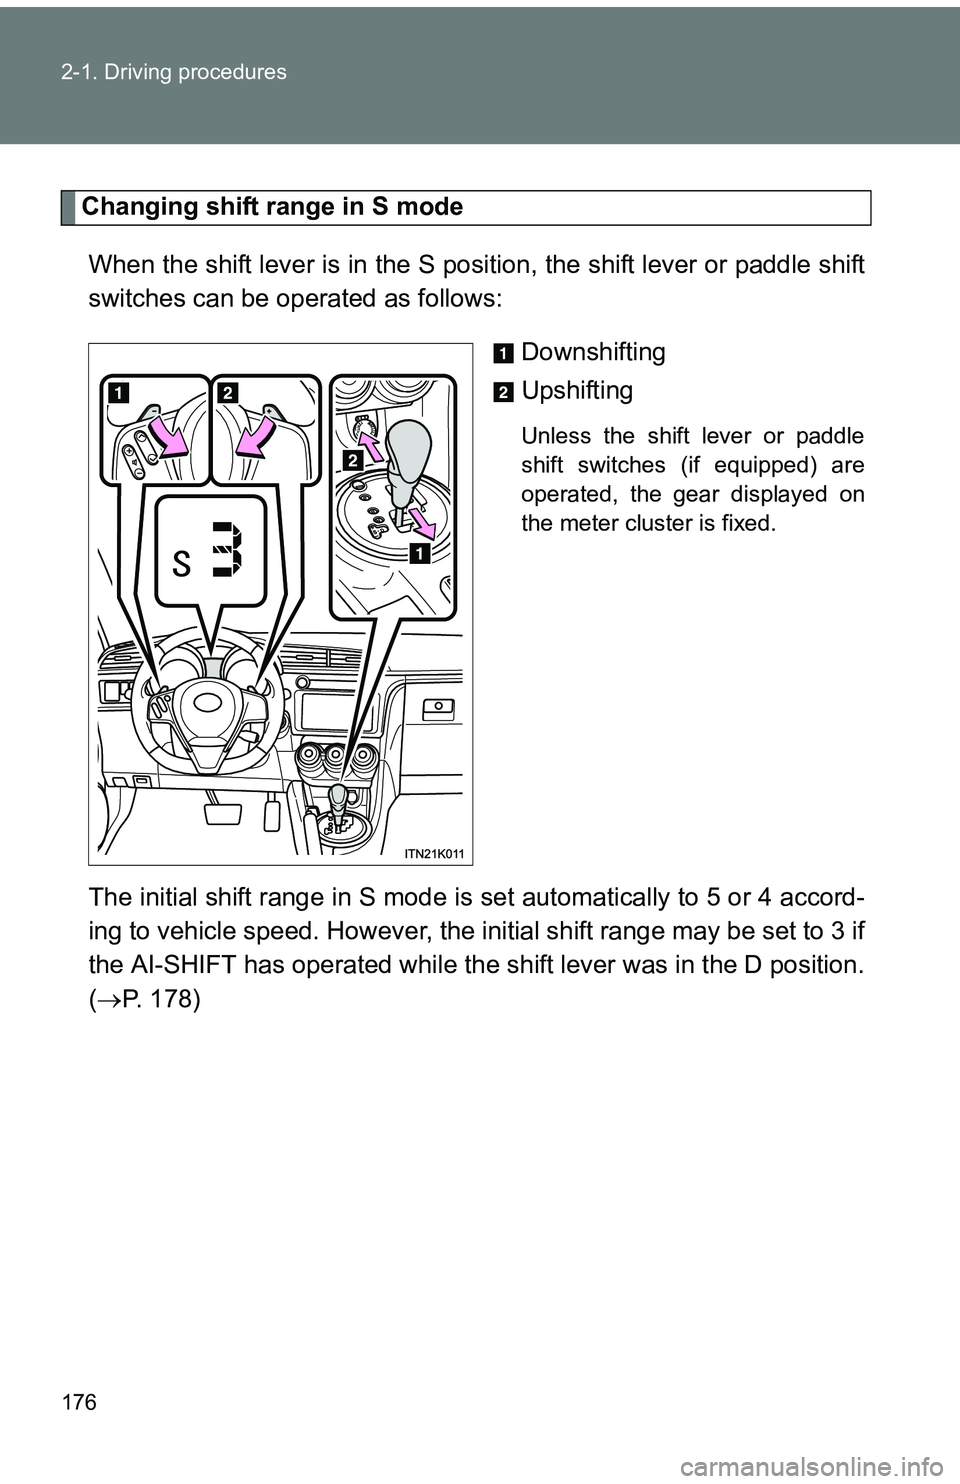
switches can be operated as follows:
Downshifting
Upshifting
Unless the shift lever or paddle
shift switches (if equipped) are
operated, the gear displayed on
the meter cluster is fixed.
The initial shift range in S mode is set automatically to 5 or 4 accord-
ing to vehicle speed. However, the initial shift range may be set to 3 if
the AI-SHIFT has operated while the shift lever was in the D position.
( P. 178)
Page 184 of 473
184
2-2. Instrument cluster
Gauges and meters
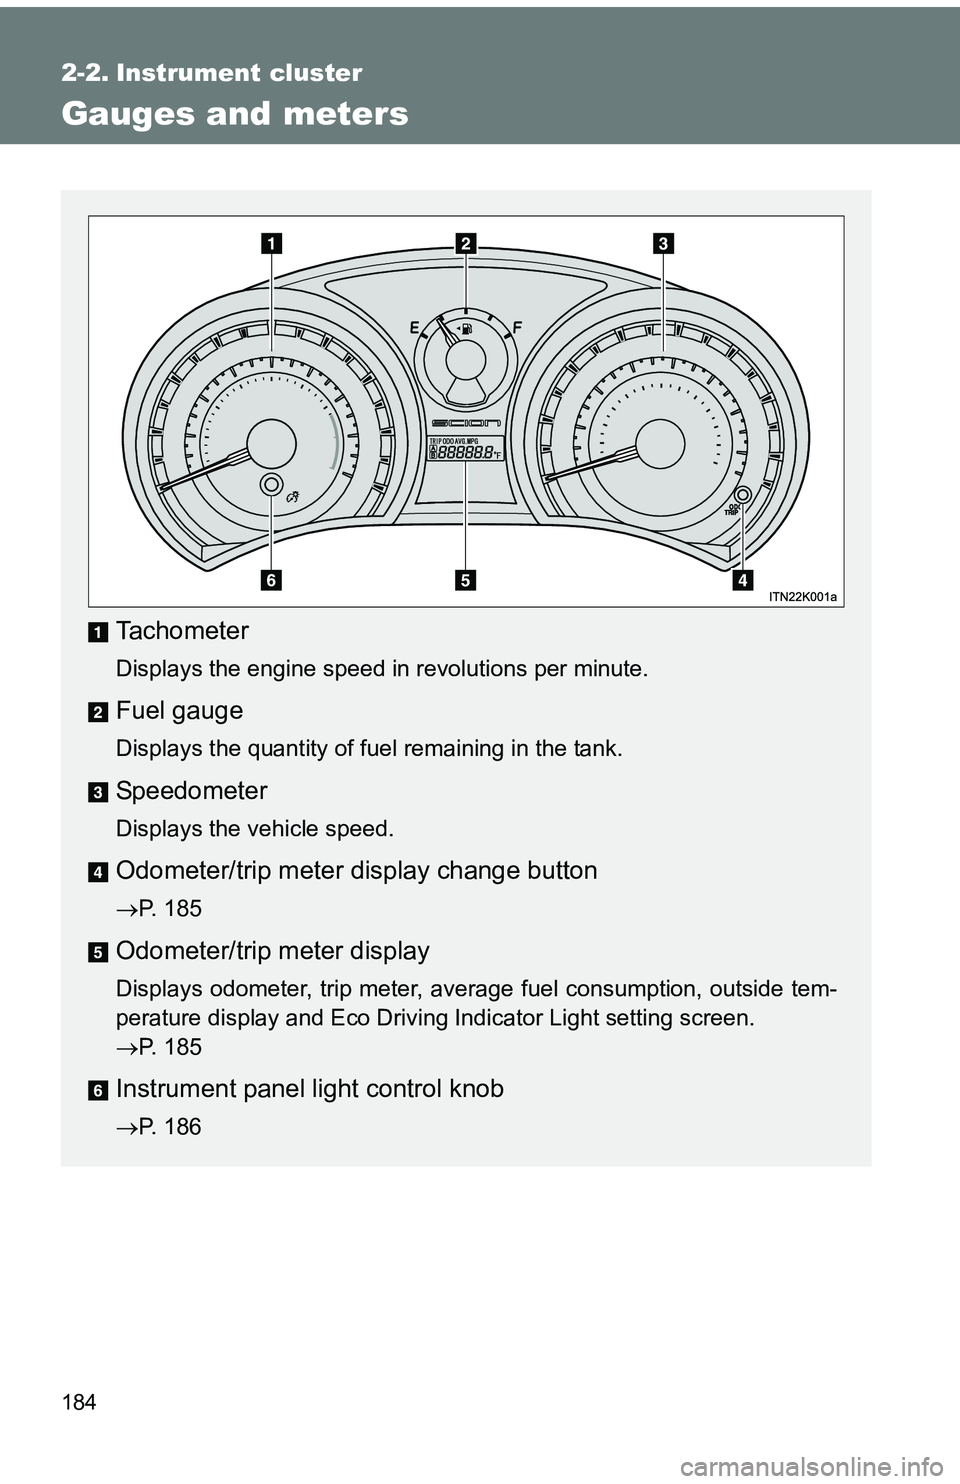
Tachometer
Displays the engine speed in revolutions per minute.
Fuel gauge
Displays the quantity of fuel remaining in the tank.
Speedometer
Displays the vehicle speed.
Odometer/trip meter display change button
P. 185
Odometer/trip meter display
Displays odometer, trip meter, average fuel consumption, outside tem-
perature display and Eco Driving Indicator Light setting screen.
P. 185
Instrument panel light control knob
P. 186
Page 185 of 473
185
2-2. Instrument cluster
2
When driving
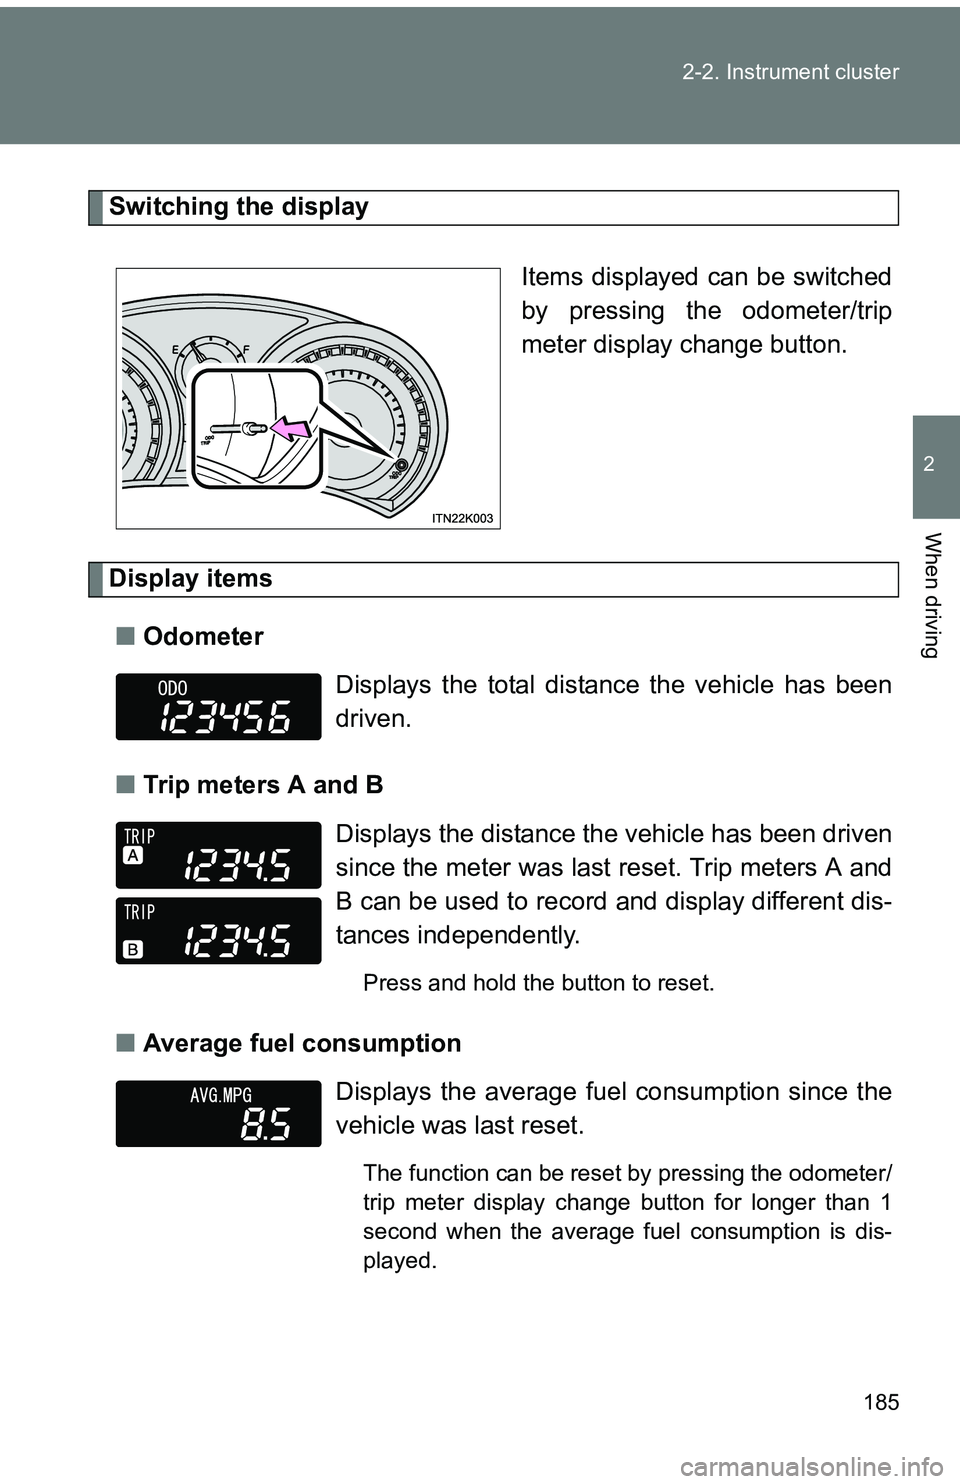
Switching the display
Items displayed can be switched
by pressing the odometer/trip
meter display change button.
Display items■ Odometer
■ Trip meters A and B
■ Average fuel consumption
Displays the total distance the vehicle has been
driven.
Displays the distance the vehicle has been driven
since the meter was last reset. Trip meters A and
B can be used to record and display different dis-
tances independently.
Press and hold the button to reset.
Displays the average fuel consumption since the
vehicle was last reset.
The function can be reset by pressing the odometer/
trip meter display change button for longer than 1
second when the average fuel consumption is dis-
played.
Page 186 of 473
186 2-2. Instrument cluster
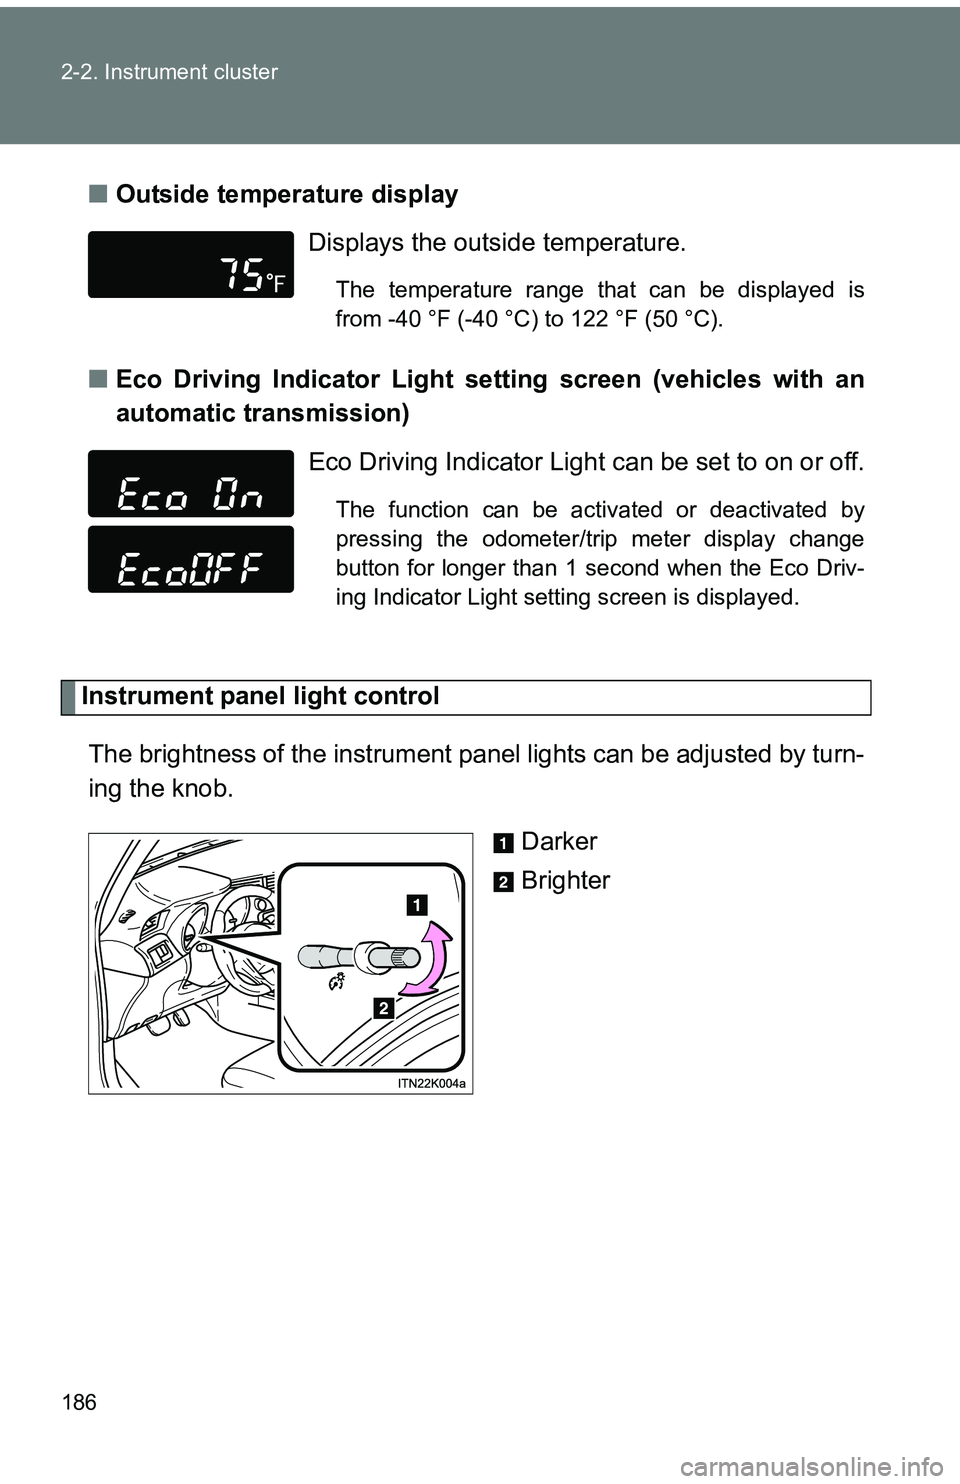
■Outside temperature display
■ Eco Driving Indicator Light set ting screen (vehicles with an
automatic transmission)
Instrument panel light control
The brightness of the instrument pa nel lights can be adjusted by turn-
ing the knob.
Darker
Brighter
Displays the outside temperature.
The temperature range that can be displayed is
from -40 °F (-40 °C) to 122 °F (50 °C).
Eco Driving Indicator Light can be set to on or off.
The function can be activated or deactivated by
pressing the odometer/trip meter display change
button for longer than 1 second when the Eco Driv-
ing Indicator Light setting screen is displayed.
Page 187 of 473
187
2-2. Instrument cluster
2
When driving
■
The brightness of the instrument panel lights
When the headlight switch is turned to on, the brightness will be reduced
slightly unless the control knob is turned fully clockwise.
■ Outside temperature display
●In the following situations, the correct outside temperature may not be
displayed, or the display may take longer than normal to change.
• When stopped, or driving at low speeds (less than 12 mph [20 km/h])
• When the outside temperature has changed suddenly (at the entrance/
exit of a garage, tunnel, etc.)
● When “--” is displayed, the system may be malfunctioning.
Take your vehicle to your Scion dealer.
NOTICE
■To prevent damage to the engine and its components
Do not let the indicator needle of the tachometer enter the red zone, which
indicates the maximum engine speed.
■ The odometer/trip meter di splay at low temperatures
Allow the interior of the vehicle to warm up before using the liquid crystal
information display. At extremely low temperatures, the information display
monitor may respond slowly, and display changes may be delayed.
Page 249 of 473
249
3-5. Other interior features
3
Interior features
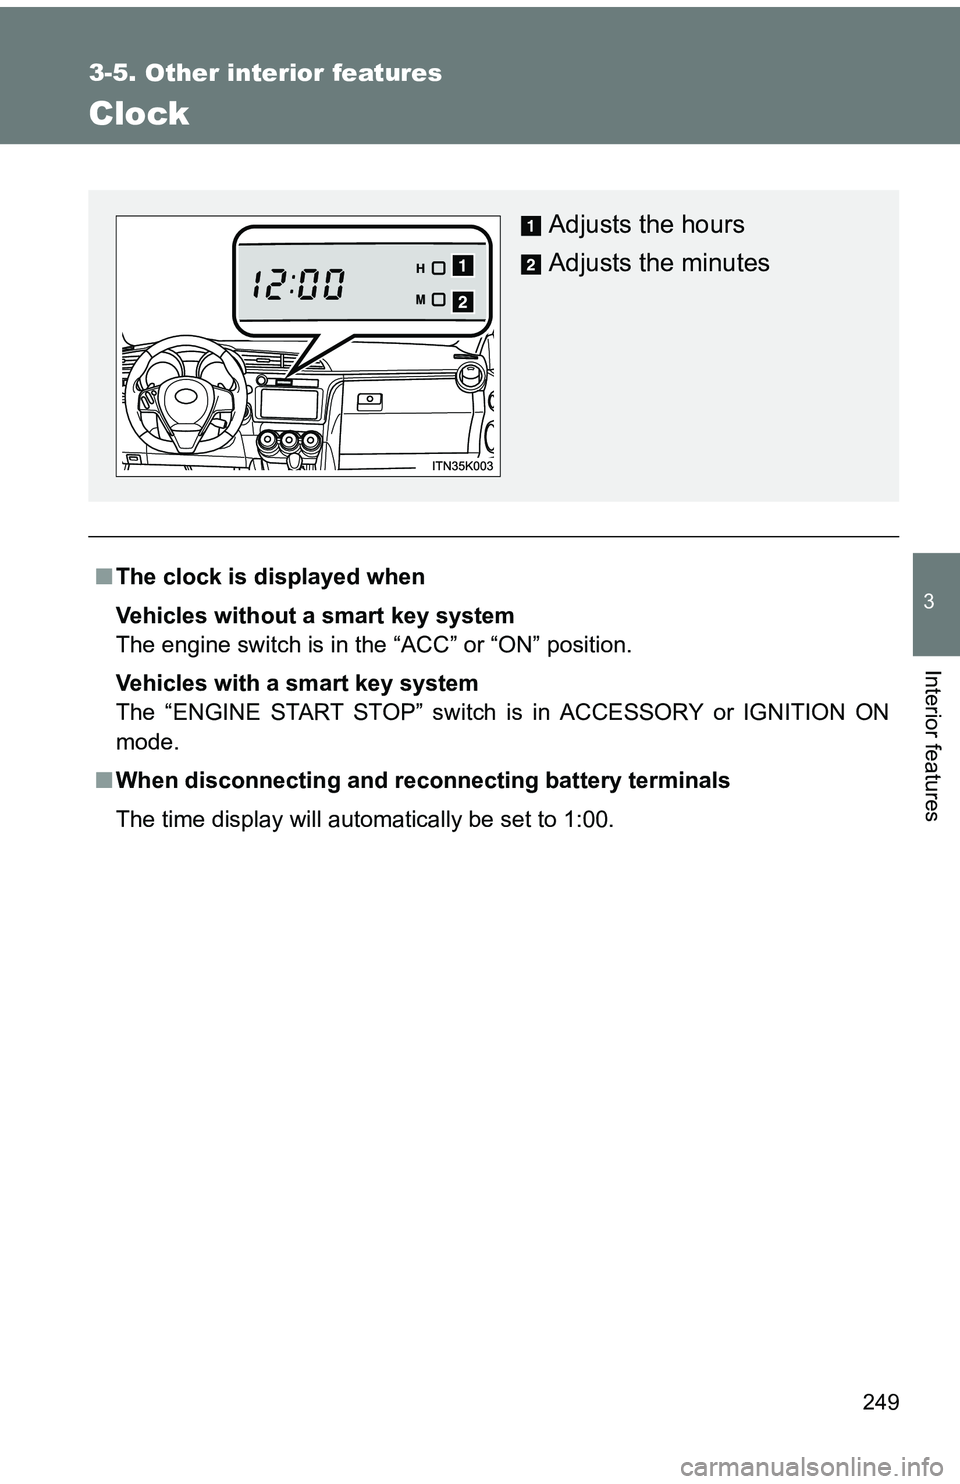
Clock
■The clock is displayed when
Vehicles without a smart key system
The engine switch is in the “ACC” or “ON” position.
Vehicles with a smart key system
The “ENGINE START STOP” switch is in ACCESSORY or IGNITION ON
mode.
■ When disconnecting and reco nnecting battery terminals
The time display will automatically be set to 1:00.
Adjusts the hours
Adjusts the minutes
Page 270 of 473
270 4-2. Maintenance
■Reset the maintenance data (U.S.A. only)
After the required maintenance is performed accroding to the maintenance
schedule, please reset the maintenance data.
To reset the data, follow the procedures described below:
Switch the display to the trip meter A when the engine is running.
(P. 184)
Vehicles without a smart key system
Turn the engine switch off.
Vehicles with a smart key system
Turn the “ENGINE START STOP” switch off.
Vehicles without a smart key system
While pressing the odometer/trip meter display change button
( P. 184), turn the engine switch to the “ON” position (do not start
the engine because reset mode will be canceled). Continue to
press and hold the button until the trip meter displays “000000”.
Vehicles with a smart key system
While pressing the odometer/trip meter display change button
( P. 184), turn the “ENGINE START STOP” switch to the IGNI-
TION ON mode (do not start the engine because otherwise the
reset mode will be canceled). Continue to press and hold the but-
ton until the trip meter displays “000000”.
■ Allow inspection and repairs to be performed by a Scion dealer
●Scion technicians are well-trained specialists and are kept up to date with
the latest service information. They are well informed about the opera-
tions of all systems on your vehicle.
● Keep a copy of the repair order. It proves that the maintenance that has
been performed is under warranty coverage. If any problem should arise
while your vehicle is under warranty, your Scion dealer will promptly take
care of it.
STEP 1
STEP 2
STEP 3
Page 313 of 473
312
4-3. Do-it-yourself maintenance
Tire inflation pressure
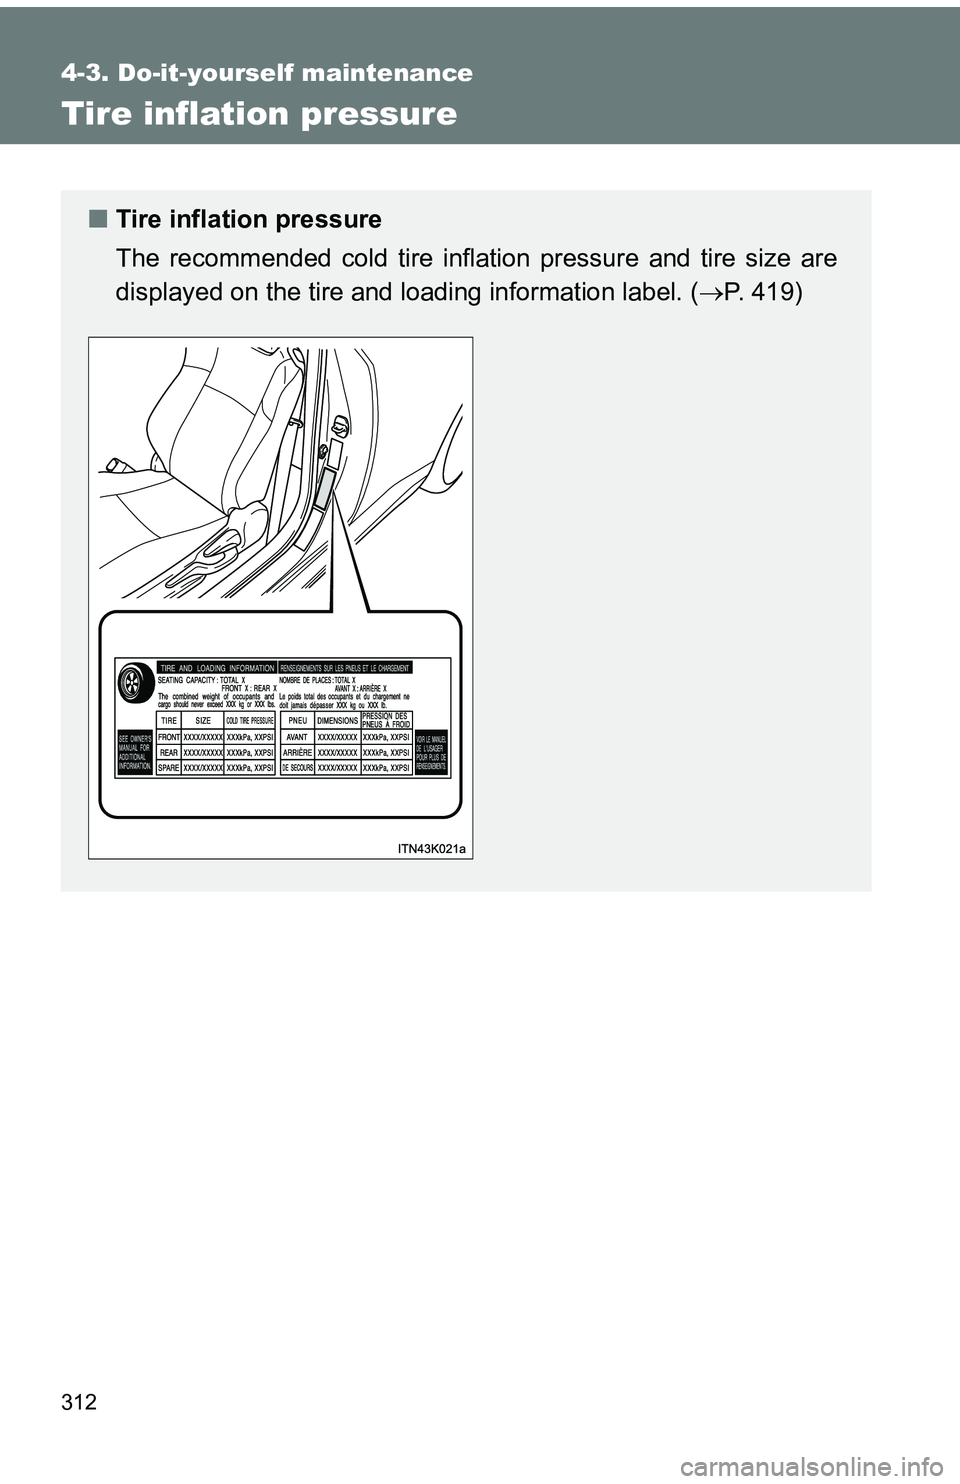
■Tire inflation pressure
The recommended cold tire inflation pressure and tire size are
displayed on the tire and loading information label. ( P. 419)