light TOYOTA tC 2015 Owners Manual (in English)
[x] Cancel search | Manufacturer: TOYOTA, Model Year: 2015, Model line: tC, Model: TOYOTA tC 2015Pages: 492, PDF Size: 9.63 MB
Page 321 of 492
321
4-3. Do-it-yourself maintenance
4
Maintenance and care
tC_OM_OM21057U_(U)
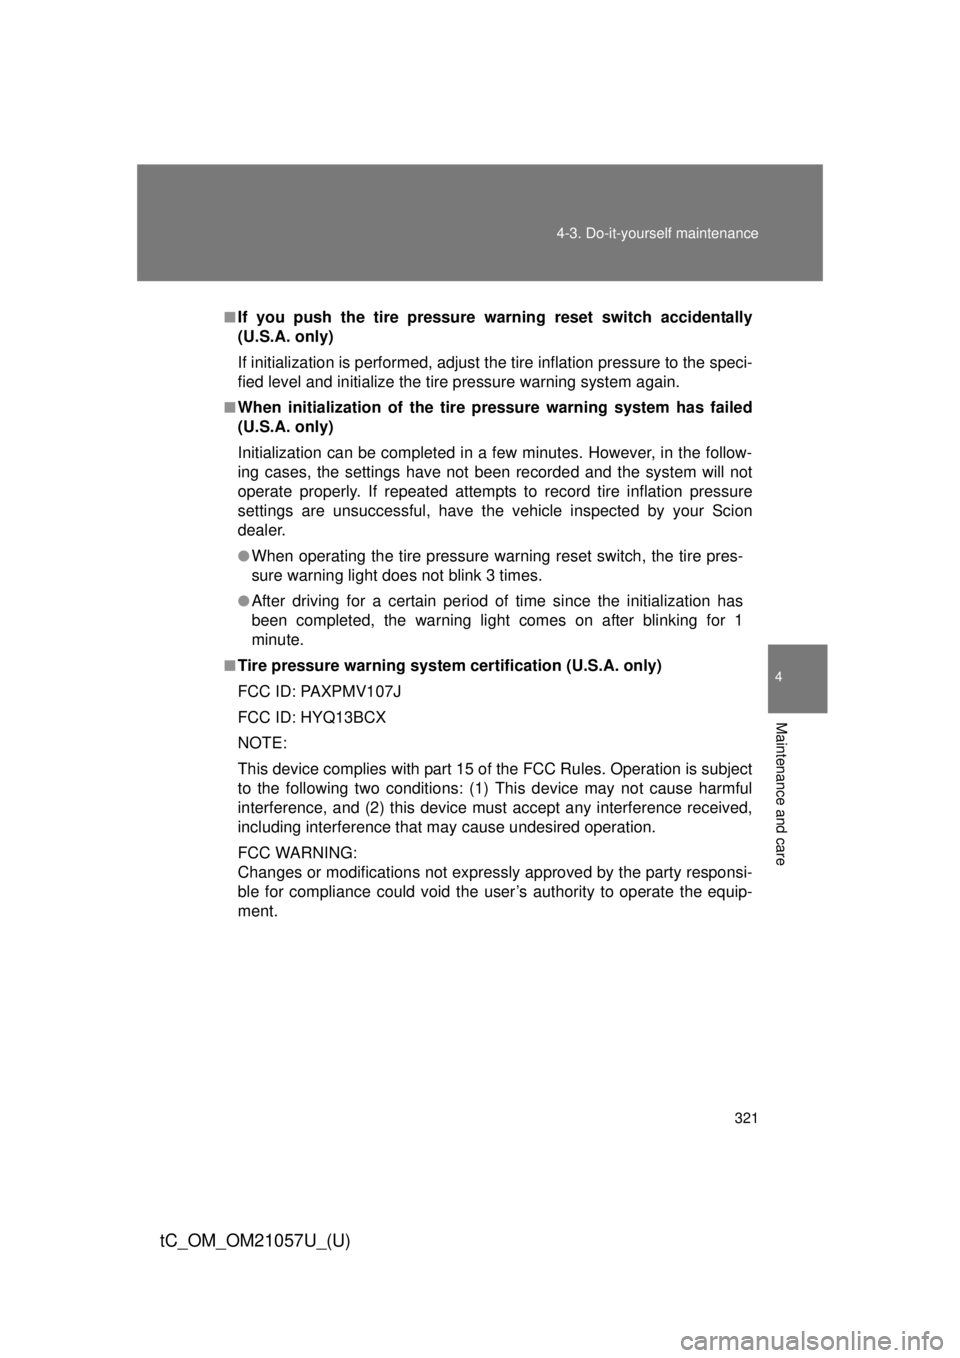
■If you push the tire pressure warning reset switch accidentally
(U.S.A. only)
If initialization is performed, adjust t
he tire inflation pressure to the speci-
fied level and initialize the tire pressure warning system again.
■When initialization of the tire pressure warning system has failed
(U.S.A. only)
Initialization can be completed in a few minutes. However, in the follow-
ing cases, the settings have not b een recorded and the system will not
operate properly. If repeated attempts to record tire inflation pressure
settings are unsuccessful, have the vehicle inspected by your Scion
dealer.
●When operating the tire pressure warning reset switch, the tire pres-
sure warning light doe s not blink 3 times.
●After driving for a certain period of time since the initialization has
been completed, the wa rning light comes on after blinking for 1
minute.
■Tire pressure warning system certification (U.S.A. only)
FCC ID: PAXPMV107J
FCC ID: HYQ13BCX
NOTE:
This device complies with part 15 of the FCC Rules. Operation is subject
to the following two conditions: (1) This device may not cause harmful
interference, and (2) this device must accept any interference received,
including interference that may cause undesired operation.
FCC WARNING:
Changes or modifications not expre ssly approved by the party responsi-
ble for compliance could void the user’s authority to operate the equip-
ment.
Page 322 of 492
322 4-3. Do-it-yourself maintenance
tC_OM_OM21057U_(U)
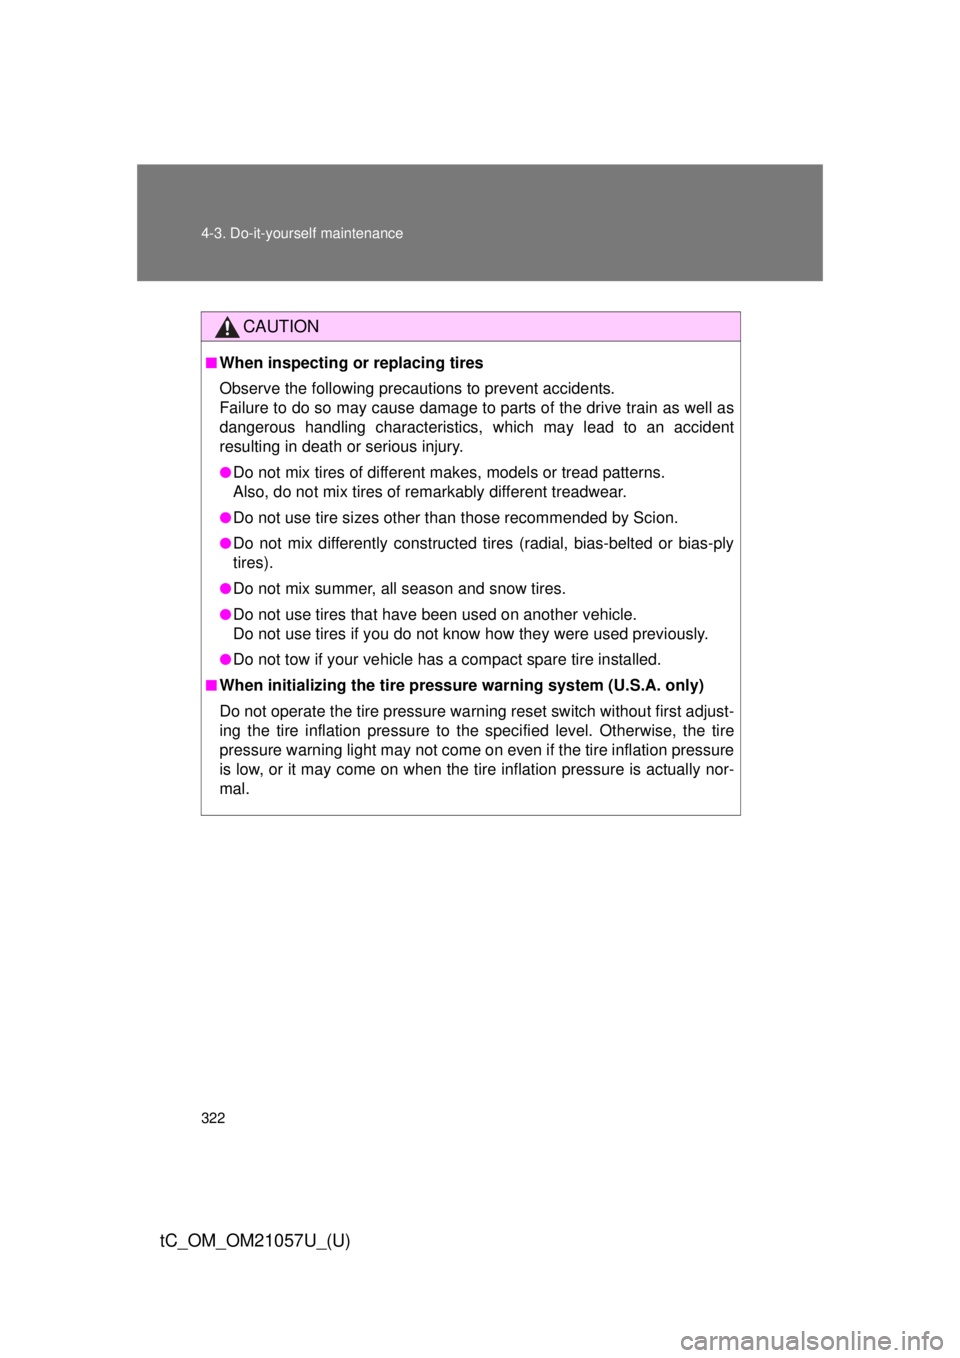
CAUTION
■When inspecting or replacing tires
Observe the following precautions to prevent accidents.
Failure to do so may cause damage to parts of the drive train as well as
dangerous handling characteristics, which may lead to an accident
resulting in death or serious injury.
●Do not mix tires of different makes, models or tread patterns.
Also, do not mix tires of remarkably different treadwear.
●Do not use tire sizes other t han those recommended by Scion.
●Do not mix differently constructed ti res (radial, bias-belted or bias-ply
tires).
●Do not mix summer, all season and snow tires.
●Do not use tires that have been used on another vehicle.
Do not use tires if you do not know how they were used previously.
●Do not tow if your vehicle has a compact spare tire installed.
■When initializing the tire pressure warning system (U.S.A. only)
Do not operate the tire pressure wa rning reset switch without first adjust-
ing the tire inflation pr essure to the specified level. Otherwise, the tire
pressure warning light may not come on even if the tire inflation pressure
is low, or it may come on when the tire inflation pressure is actually nor-
mal.
Page 345 of 492
345
4-3. Do-it-yourself maintenance
4
Maintenance and care
tC_OM_OM21057U_(U)
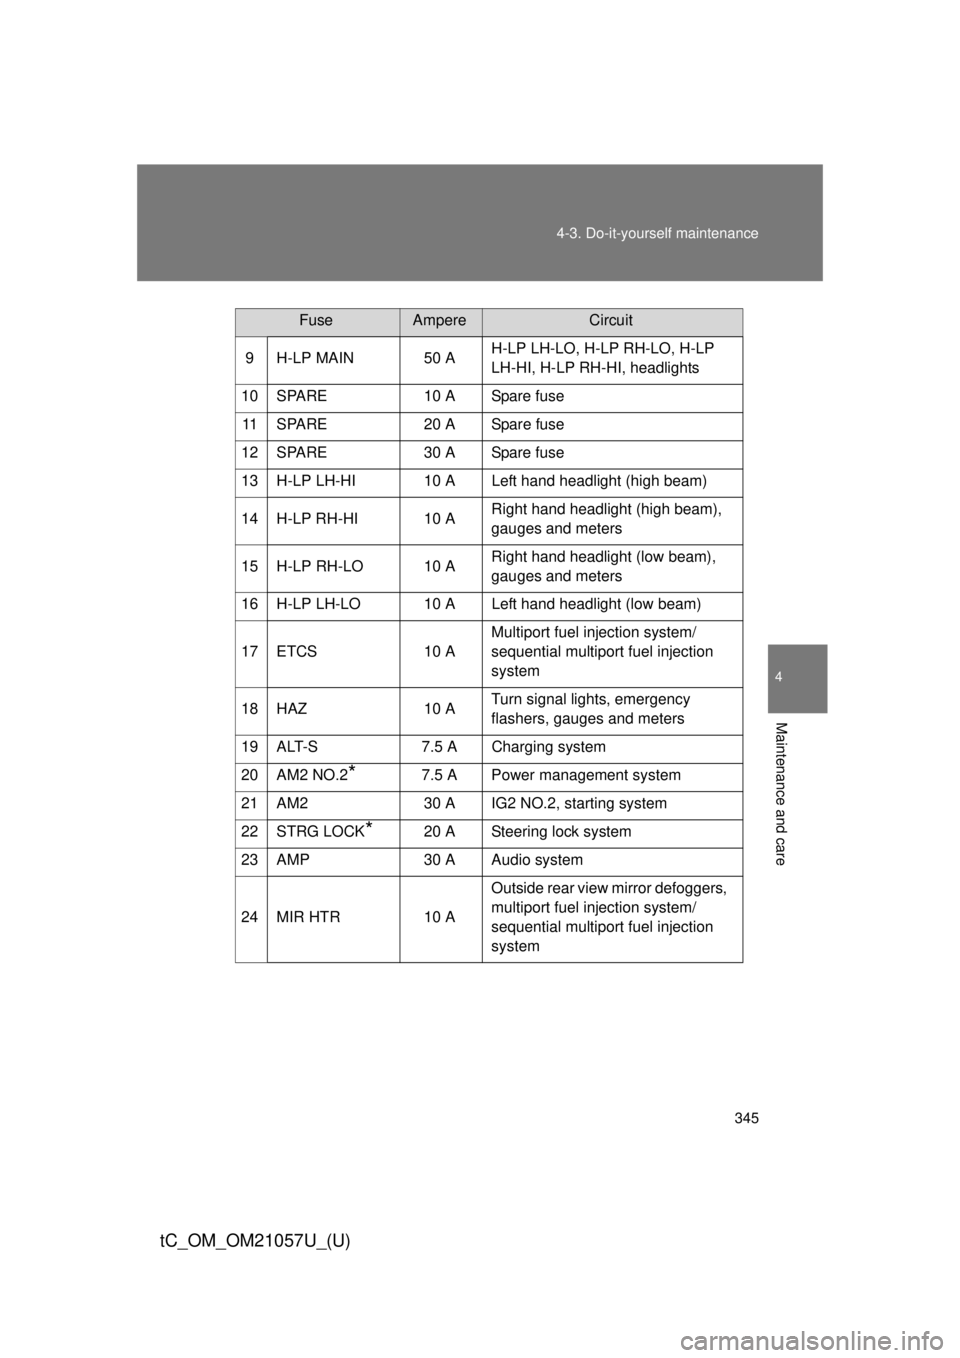
9 H-LP MAIN 50 A
H-LP LH-LO, H-LP RH-LO, H-LP
LH-HI, H-LP RH-HI, headlights
10 SPARE 10 A Spare fuse 11 SPARE 20 A Spare fuse
12 SPARE 30 A Spare fuse
13 H-LP LH-HI 10 A Left hand headlight (high beam)
14 H-LP RH-HI 10 A Right hand headlight (high beam),
gauges and meters
15 H-LP RH-LO 10 A Right hand headlight (low beam),
gauges and meters
16 H-LP LH-LO 10 A Left hand headlight (low beam)
17 ETCS 10 A Multiport fuel injection system/
sequential multiport fuel injection
system
18 HAZ 10 A Turn signal lights, emergency
flashers, gauges and meters
19 ALT-S 7.5 A Charging system
20 AM2 NO.2
*7.5 A Power management system
21 AM2 30 A IG2 NO.2, starting system
22 STRG LOCK
*20 A Steering lock system
23 AMP 30 A Audio system
24 MIR HTR 10 A Outside rear view mirror defoggers,
multiport fuel injection system/
sequential multiport fuel injection
system
FuseAmpereCircuit
Page 346 of 492

346 4-3. Do-it-yourself maintenance
tC_OM_OM21057U_(U)
25 ECU-B NO.2 10 AAutomatic transmission, power
windows, clock, smart key system,
wireless remote control, front pas-
senger occupant classification sys-
tem
26 ECU-B 10 ABody ECU, gauges and meters,
steering sensor, wireless remote
control, smart key system
27 RAD NO.1 15 A Audio system
28 DOME 10 AInterior light, luggage compartment
light
29 STOP 10 AMultiport fuel injection system/
sequential multiport fuel injection
system, ABS, VSC, automatic
transmission, shift lock system,
stop lights, high mounted stoplight,
power management system
30 DOOR 20 A Power windows
FuseAmpereCircuit
Page 349 of 492
349
4-3. Do-it-yourself maintenance
4
Maintenance and care
tC_OM_OM21057U_(U)
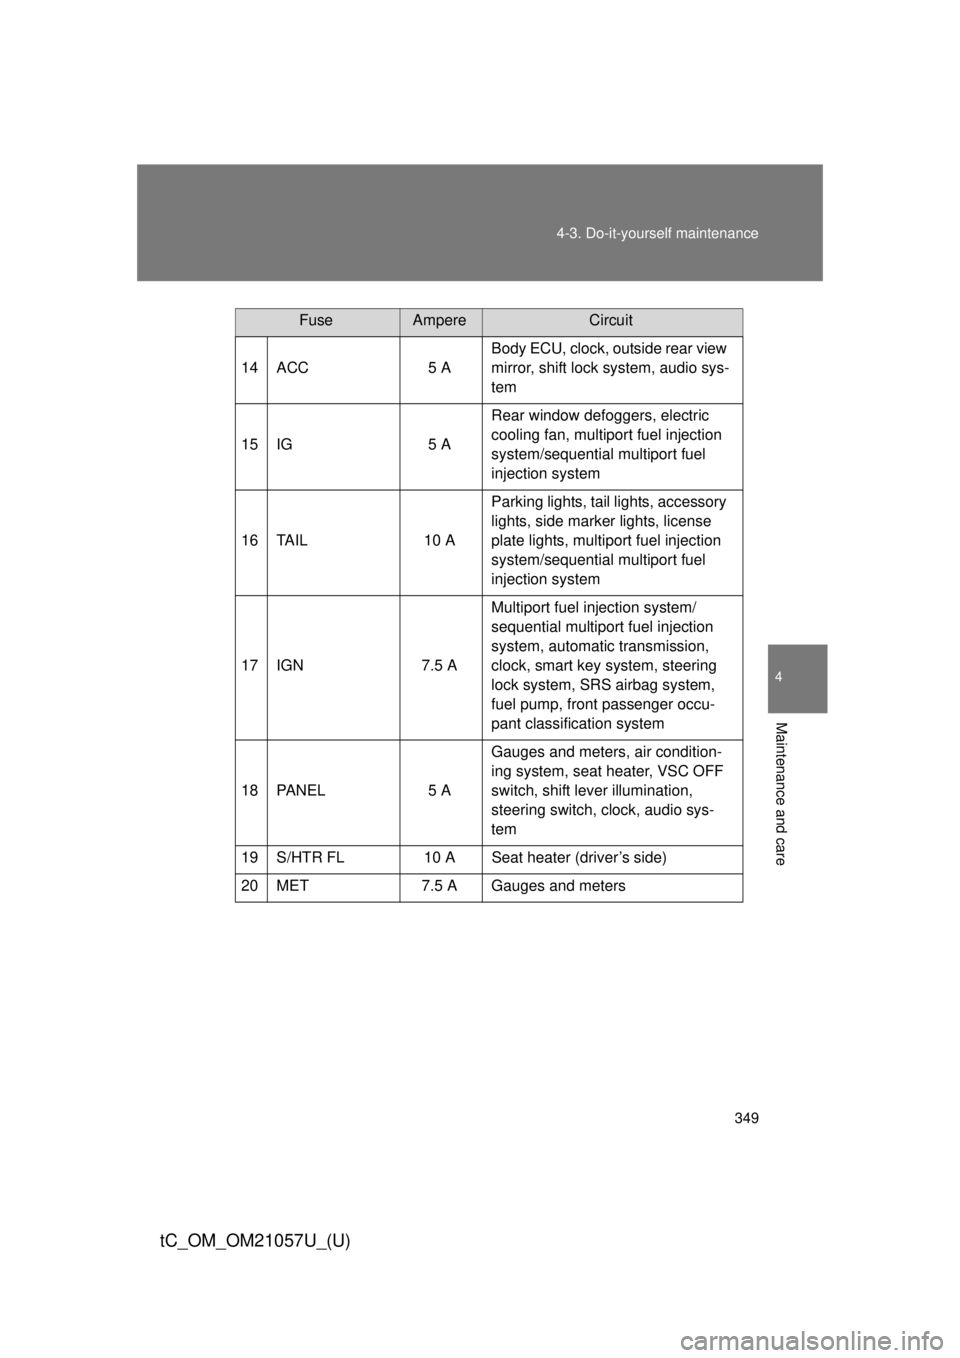
14 ACC
5 ABody ECU, clock, outside rear view
mirror, shift lock system, audio sys-
tem
15 IG 5 ARear window defoggers, electric
cooling fan, multiport fuel injection
system/sequential multiport fuel
injection system
16 TAIL 10 AParking lights, tail lights, accessory
lights, side marker lights, license
plate lights, multiport fuel injection
system/sequential multiport fuel
injection system
17 IGN 7.5 AMultiport fuel injection system/
sequential multiport fuel injection
system, automatic transmission,
clock, smart key system, steering
lock system, SRS airbag system,
fuel pump, front passenger occu-
pant classification system
18 PANEL 5 AGauges and meters, air condition-
ing system, seat heater, VSC OFF
switch, shift lever illumination,
steering switch, clock, audio sys-
tem
19 S/HTR FL 10 A Seat heater (driver’s side)
20 MET 7.5 A Gauges and meters
FuseAmpereCircuit
Page 350 of 492
350 4-3. Do-it-yourself maintenance
tC_OM_OM21057U_(U)
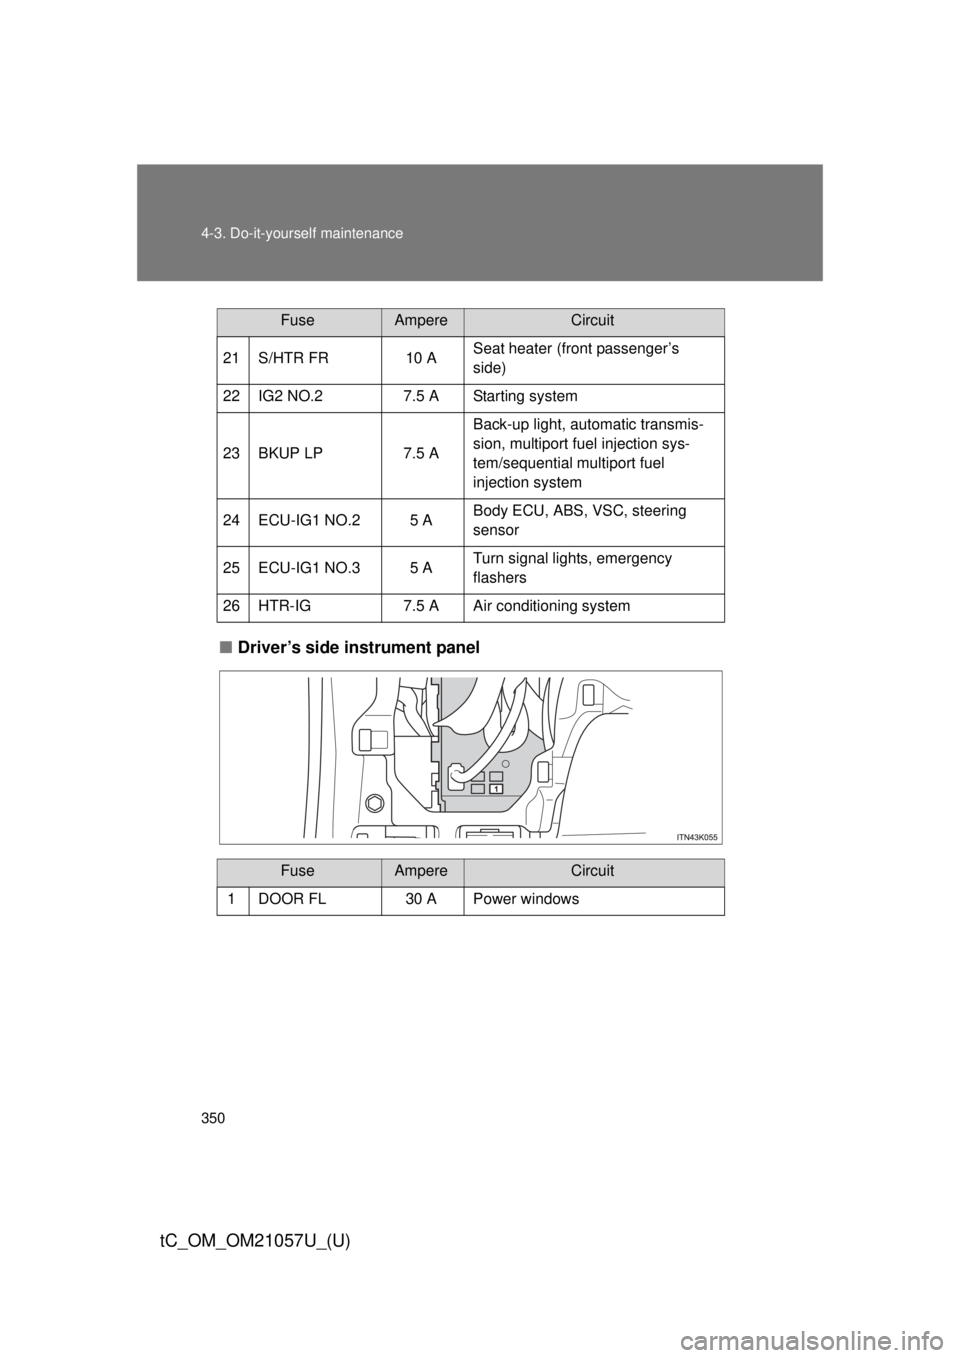
■Driver’s side instrument panel
21 S/HTR FR 10 ASeat heater (front passenger’s
side)
22 IG2 NO.2 7.5 A Starting system
23 BKUP LP 7.5 ABack-up light, automatic transmis-
sion, multiport fuel injection sys-
tem/sequential multiport fuel
injection system
24 ECU-IG1 NO.2 5 A Body ECU, ABS, VSC, steering
sensor
25 ECU-IG1 NO.3 5 A Turn signal lights, emergency
flashers
26 HTR-IG 7.5 A Air conditioning system
FuseAmpereCircuit
1DOOR FL30 APower windows
FuseAmpereCircuit
Page 351 of 492
351
4-3. Do-it-yourself maintenance
4
Maintenance and care
tC_OM_OM21057U_(U)
■
After a fuse is replaced
●If the lights do not turn on even after the fuse has been replaced, a bulb
may need replacement. ( P. 352)
● If the replaced fuse blows again, have the vehicle inspected by your
Scion dealer.
■ If there is an overload in the circuits
The fuses are designed to blow, protecting the wiring harness from damage.
CAUTION
■To prevent system breakdowns and vehicle fire
Observe the following precautions.
Failing to do so may cause damage to the vehicle, and possibly a fire or
injury.
●Never use a fuse of a higher amperage rating than that indicated, or use
any other object in place of a fuse.
● Always use a genuine Scion fuse or equivalent.
Never replace a fuse with a wire, even as a temporary fix.
● Do not modify the fuse or the fuse box.
NOTICE
■Before replacing fuses
Have the cause of electrical overload determined and repaired by your Scion
dealer, as soon as possible.
Page 352 of 492
352
4-3. Do-it-yourself maintenance
tC_OM_OM21057U_(U)
Light bulbs
You may replace the following bulbs by yourself. The difficulty level
of replacement varies depending on the bulb. If necessary bulb
replacement seems difficult to perf orm, contact your Scion dealer.
For more information about replacing other light bulbs, contact your
Scion dealer.
■ Preparing for light bulb replacement
Check the wattage of the light bulb to be replaced. ( P. 440)
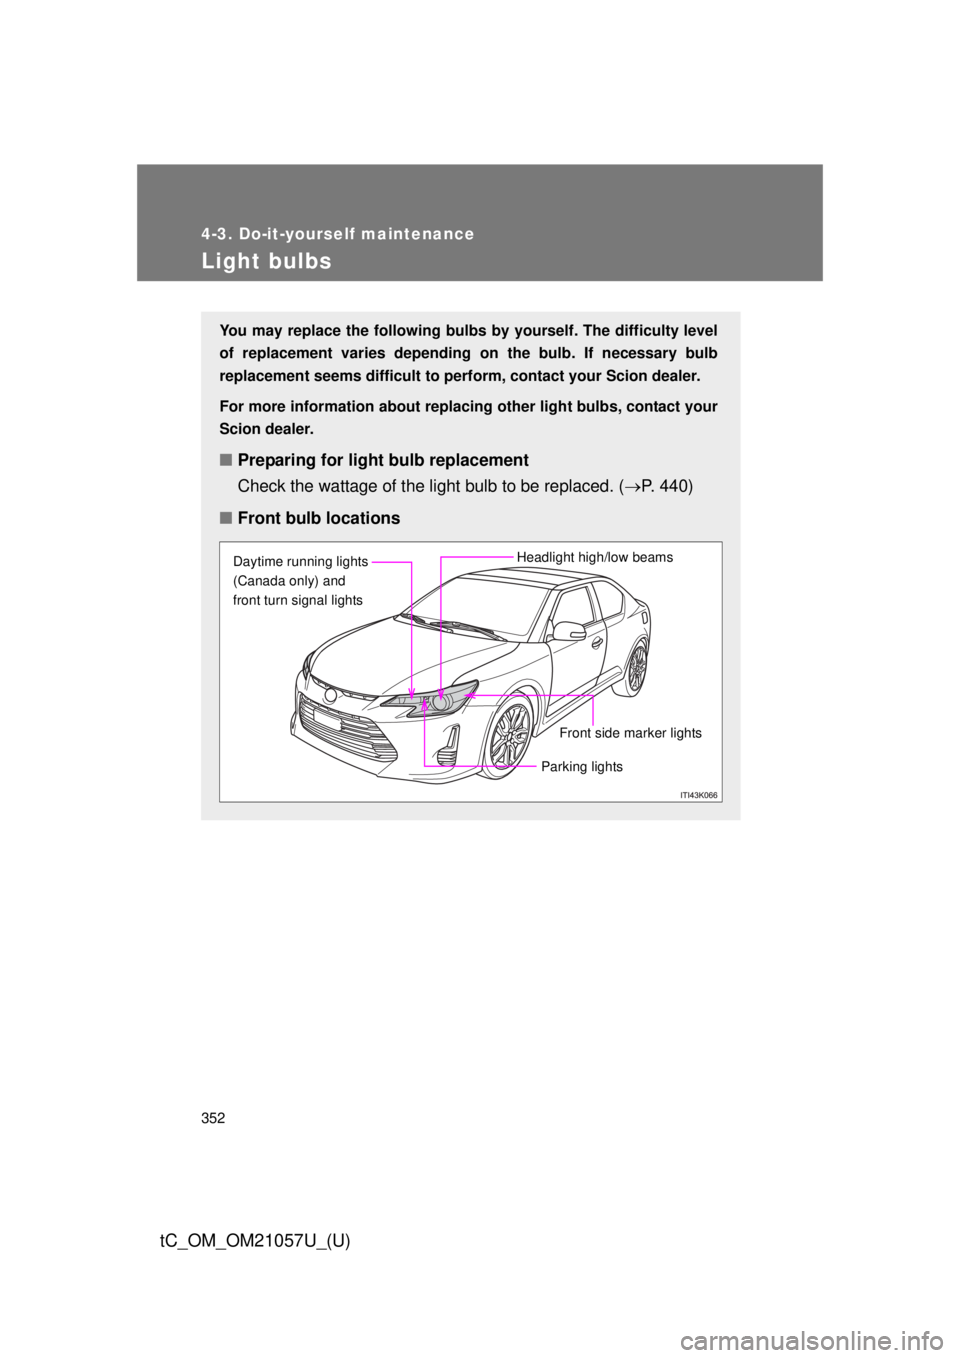
■ Front bulb locations
Front side marker lights
Headlight high/low beams
Daytime running lights
(Canada only) and
front turn signal lights
Parking lights
Page 353 of 492
353
4-3. Do-it-yourself maintenance
4
Maintenance and care
tC_OM_OM21057U_(U)
■
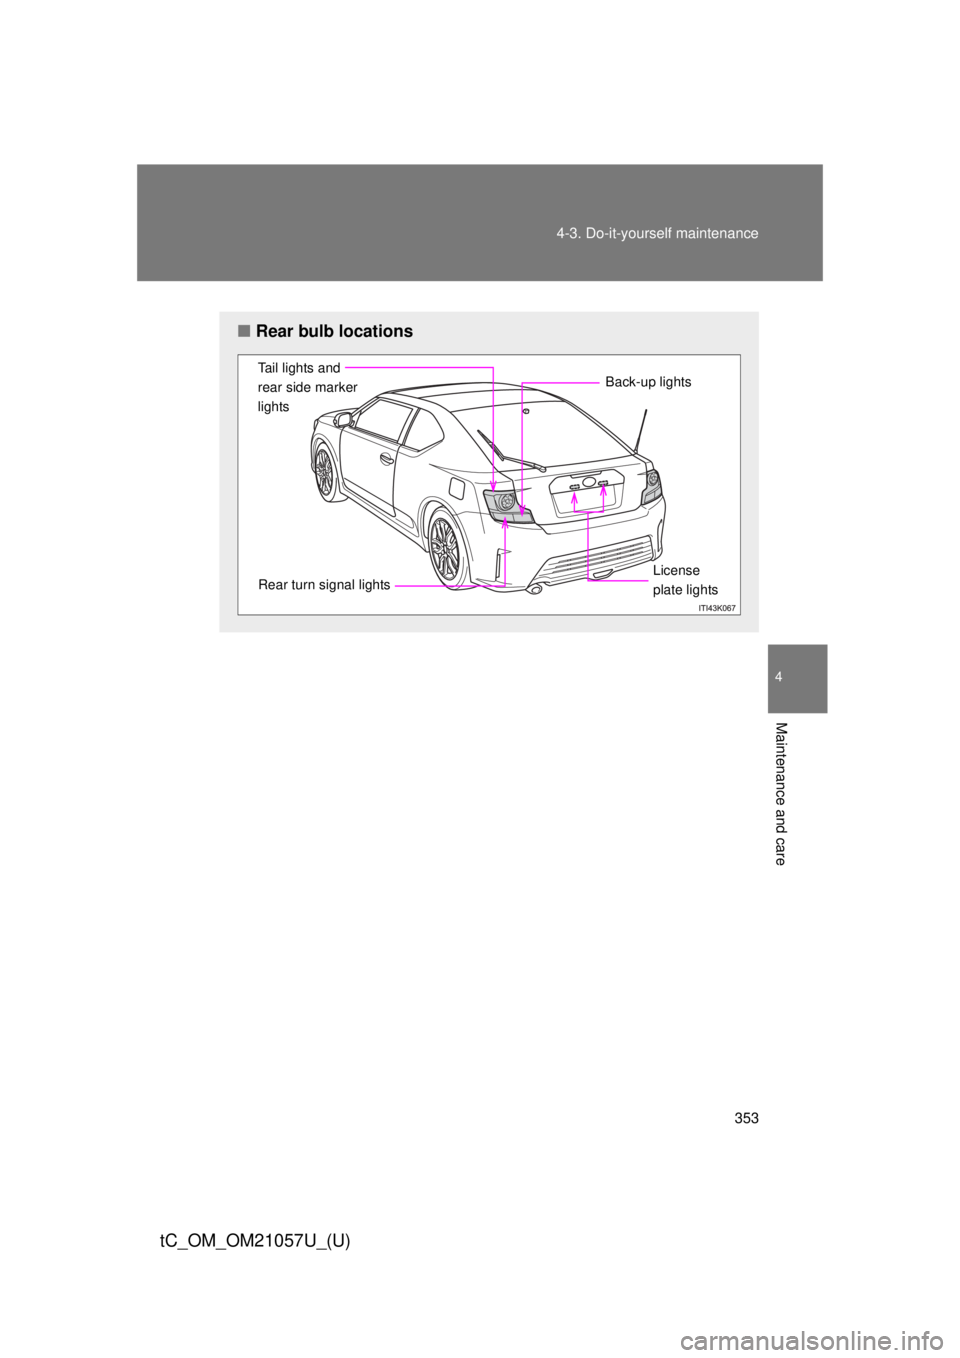
Rear bulb locations
Tail lights and
rear side marker
lights
Rear turn signal lights Back-up lightsLicense
plate lights
Page 354 of 492
354 4-3. Do-it-yourself maintenance
tC_OM_OM21057U_(U)
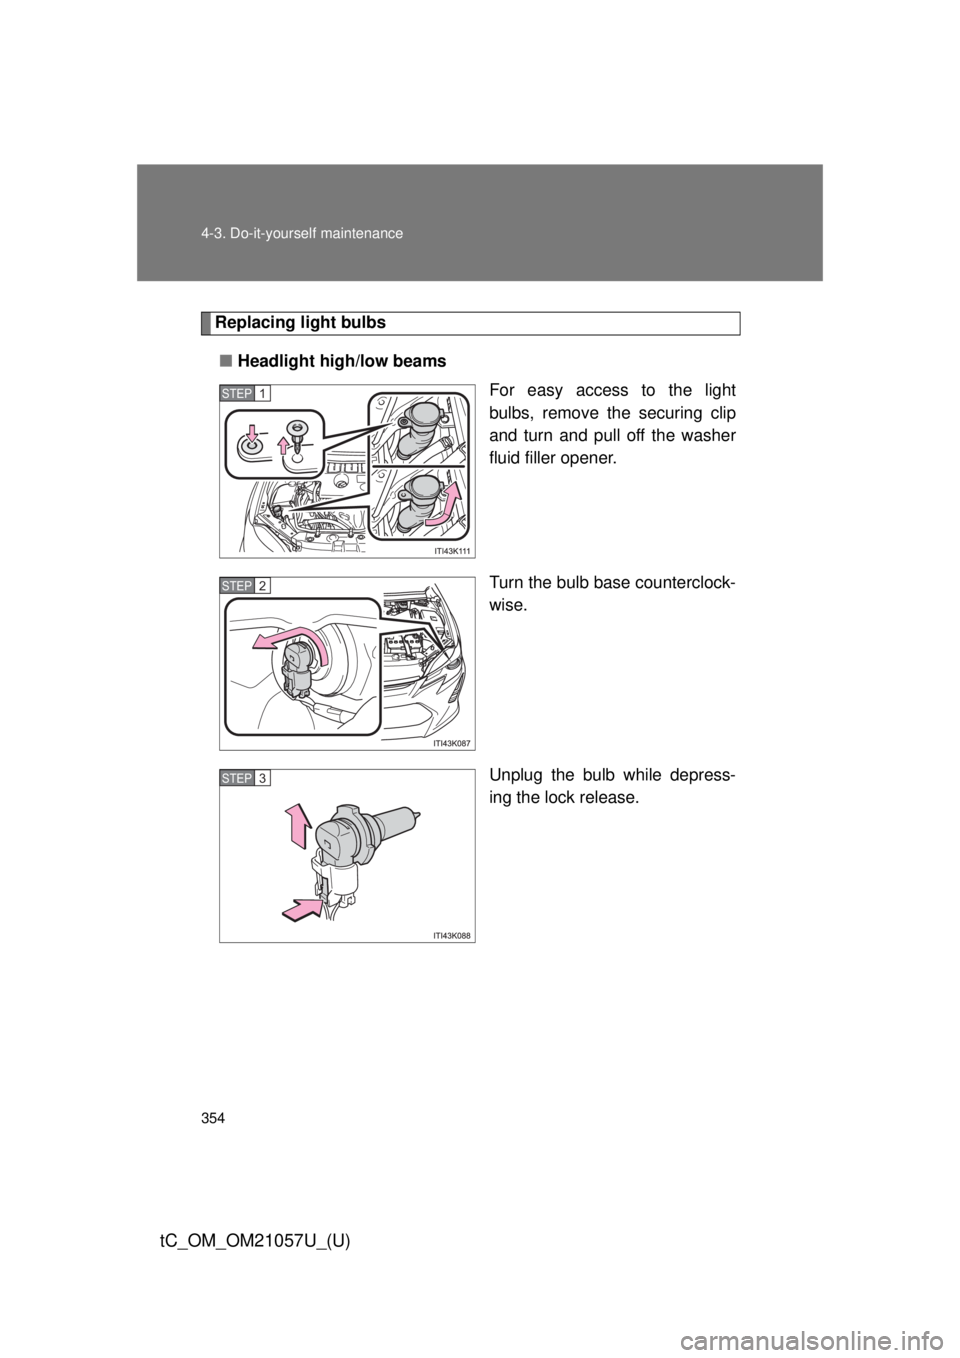
Replacing light bulbs■ Headlight high/low beams
For easy access to the light
bulbs, remove the securing clip
and turn and pull off the washer
fluid filler opener.
Turn the bulb base counterclock-
wise.
Unplug the bulb while depress-
ing the lock release.
STEP 1
STEP 2
STEP 3