clock TOYOTA tC 2016 Owners Manual (in English)
[x] Cancel search | Manufacturer: TOYOTA, Model Year: 2016, Model line: tC, Model: TOYOTA tC 2016Pages: 492, PDF Size: 9.44 MB
Page 3 of 492

1
2
3
4
5
6
7
3
tC_OM_OM21056U_(U)
2-3. Operating the lights and windshield wipers
Headlight switch .................. 199
Windshield wipers and washer .............................. 204
Rear window wiper and washer .............................. 208
2-4. Using other driving systems Cruise control ...................... 211
Driving assist systems ........ 215
2-5. Driving information Cargo and luggage ............. 220
Vehicle load limits ............... 225
Winter driving tips ............... 226
Trailer towing ...................... 232
Dinghy towing (automatic transmission) .................... 233
Dinghy towing (manual transmission) .................... 234
3-1. Using the air conditioning system and defogger
Air conditioning system ....... 238
Rear window and outside rear view mirror defogger
switch ................................ 245 3-2. Using the audio system
Using the AUX port/USB port........................... 247
Using the steering wheel audio switches.................. 248
Using the microphone ........ 249
3-3. Using the interior lights Interior lights list ................. 250
• Interior lights..................... 251
3-4. Using the storage features List of storage features ....... 253
• Glove box ......................... 254
• Console box ..................... 255
• Auxiliary box ..................... 256
• Cup holders ...................... 256
• Bottle holders ................... 257
3-5. Other interior features Sun visors........................... 258
Vanity mirrors ..................... 259
Clock .................................. 260
Power outlet ....................... 261
Seat heaters ....................... 262
Sunshades ......................... 264
Assist grips ......................... 266
Floor mat ............................ 267
Luggage compartment features ............................ 269
3Interior features
Page 13 of 492
13
tC_OM_OM21056U_(U)
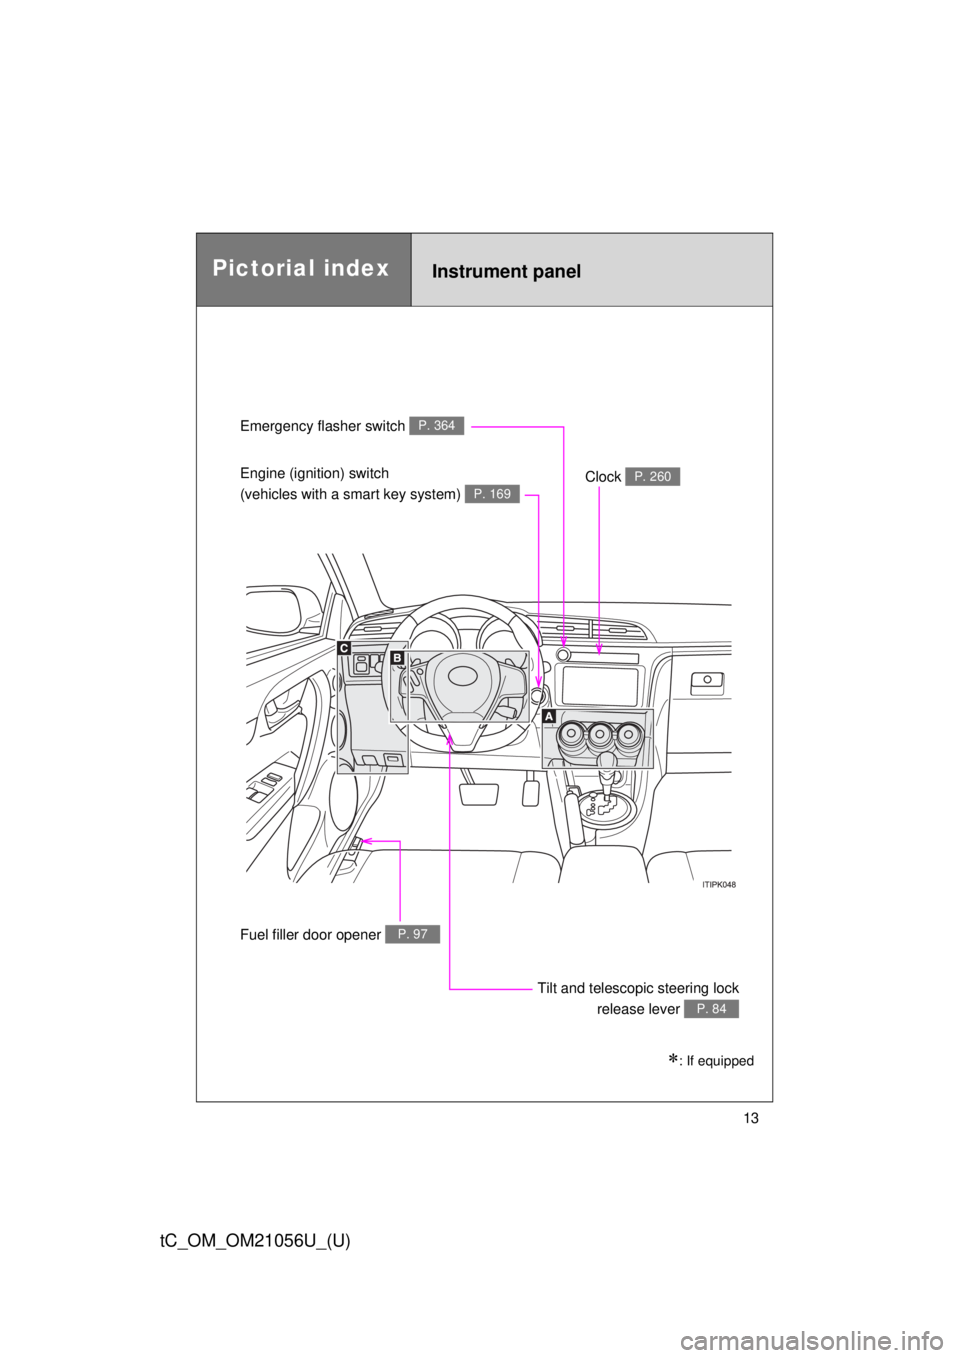
Emergency flasher switch P. 364
Engine (ignition) switch
(vehicles with a smart key system)
P. 169
Clock P. 260
Tilt and telescopic steering lockrelease lever
P. 84
Fuel filler door opener P. 97
Instrument panelPictorial index
: If equipped
Page 193 of 492

193
2-2. Instrument cluster
2
When driving
tC_OM_OM21056U_(U)
■
The brightness of the instrument panel lights
When the headlight switch is turned to on, the brightness will be reduced
slightly unless the control knob is turned fully clockwise.
■ Outside temperature display
● In the following situations, the correct outside temperature may not be
displayed, or the display may take longer than normal to change.
• When stopped, or driving at low speeds (less than 12 mph [20 km/h])
• When the outside temperature has changed suddenly (at the entrance/
exit of a garage, tunnel, etc.)
● When “--” is displayed, the system may be malfunctioning.
Take your vehicle to your Scion dealer.
NOTICE
■To prevent damage to the engine and its components
Do not let the indicator needle of the tachometer enter the red zone, which
indicates the maximum engine speed.
■ The odometer/trip meter di splay at low temperatures
Allow the interior of the vehicle to warm up before using the liquid crystal
information display. At extremely low temperatures, the information display
monitor may respond slowly, and display changes may be delayed.
Page 237 of 492
Interior features3
237
tC_OM_OM21056U_(U)
3-1. Using the air conditioning system and defogger
Air conditioning system .... 238
Rear window and outside rear view mirror
defogger switch.............. 245
3-2. Using the audio system Using the AUX port/USB port ........................ 247
Using the steering wheel audio switches ............... 248
Using the microphone ...... 249 3-3. Using the interior lights
Interior lights list ............... 250
• Interior lights .................. 251
3-4. Using the storage features List of storage features .... 253
• Glove box....................... 254
• Console box ................... 255
• Auxiliary box .................. 256
• Cup holders ................... 256
• Bottle holders ................. 257
3-5. Other interior features Sun visors ........................ 258
Vanity mirrors ................... 259
Clock ................................ 260
Power outlet ..................... 261
Seat heaters..................... 262
Sunshades ....................... 264
Assist grips....................... 266
Floor mat .......................... 267
Luggage compartment features .......................... 269
Page 239 of 492
239
3-1. Using the air conditioning system
and defogger
3
Interior features
tC_OM_OM21056U_(U)
Adjusting the settings
■ Basic setting
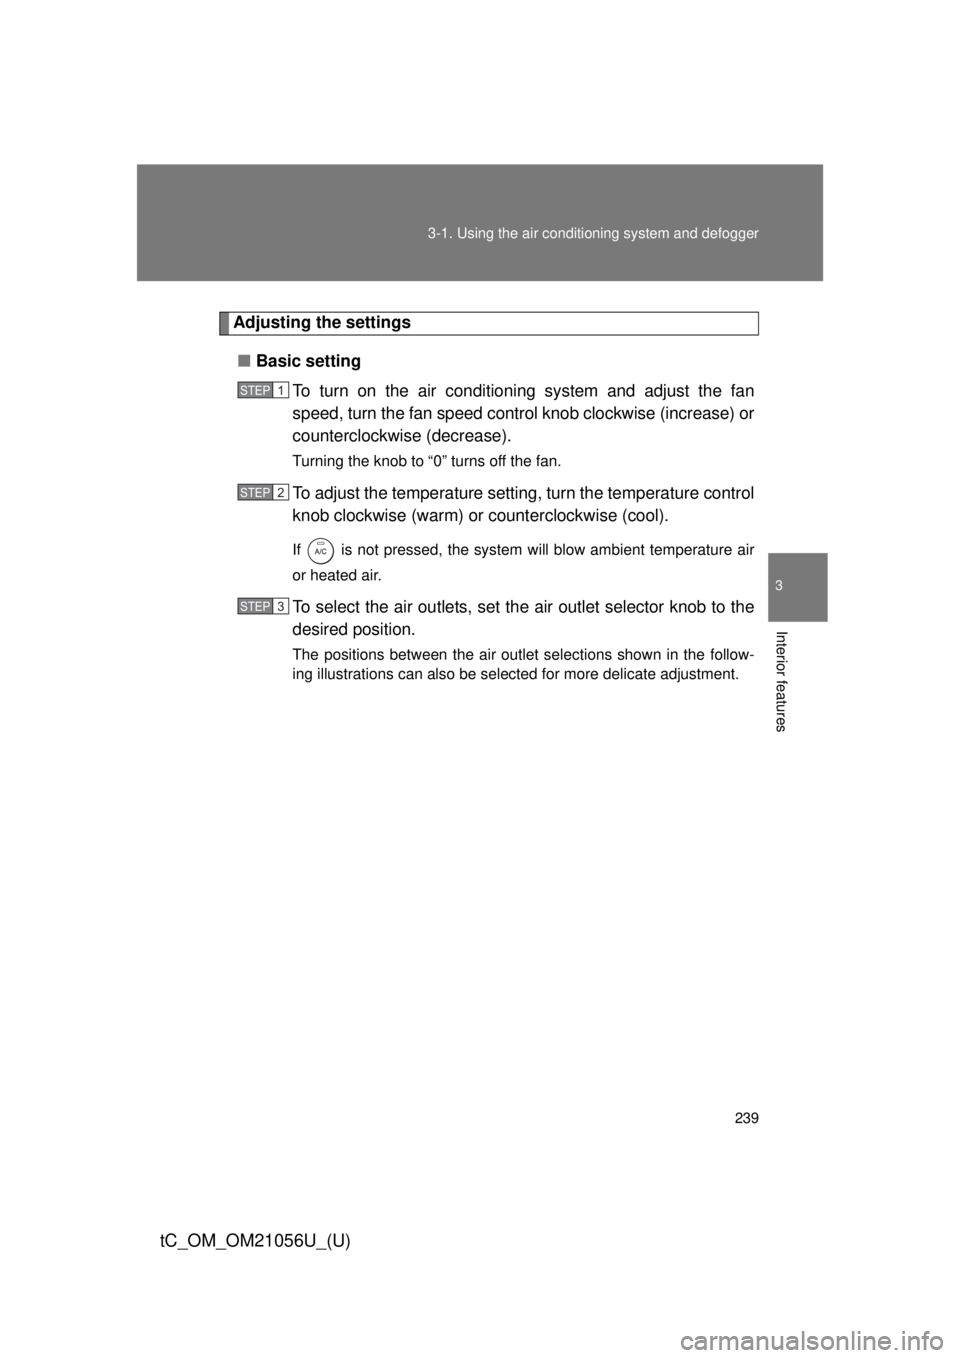
To turn on the air conditioning system and adjust the fan
speed, turn the fan speed control knob clockwise (increase) or
counterclockwise (decrease).
Turning the knob to “0” turns off the fan.
To adjust the temperature setting, turn the temperature control
knob clockwise (warm) or counterclockwise (cool).
If is not pressed, the system will blow ambient temperature air
or heated air.
To select the air outlets, set th e air outlet selector knob to the
desired position.
The positions between the air outlet selections shown in the follow-
ing illustrations can also be selected for more delicate adjustment.
STEP 1
STEP 2
STEP 3
Page 260 of 492
260
3-5. Other interior features
tC_OM_OM21056U_(U)
Clock
■The clock is displayed when
Vehicles without a smart key system
The engine switch is in the “ACC” or “ON” position.
Vehicles with a smart key system
The “ENGINE START STOP” switch is in ACCESSORY or IGNITION ON
mode.
■ When disconnecting and reco nnecting battery terminals
The time display will automatically be set to 1:00.
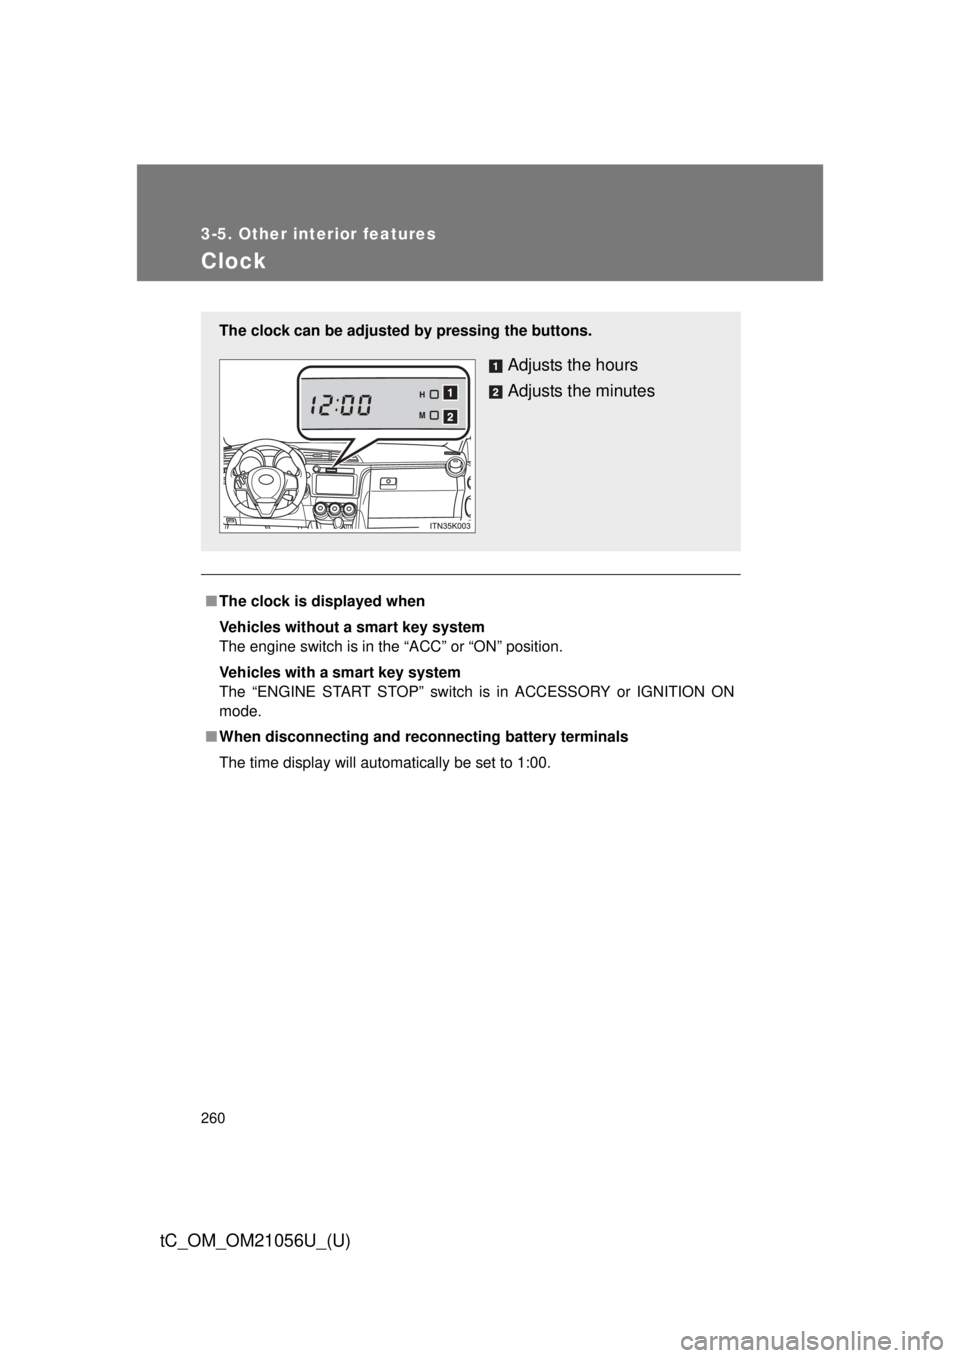
The clock can be adjusted by pressing the buttons.
Adjusts the hours
Adjusts the minutes
Page 300 of 492
300 4-3. Do-it-yourself maintenance
tC_OM_OM21056U_(U)
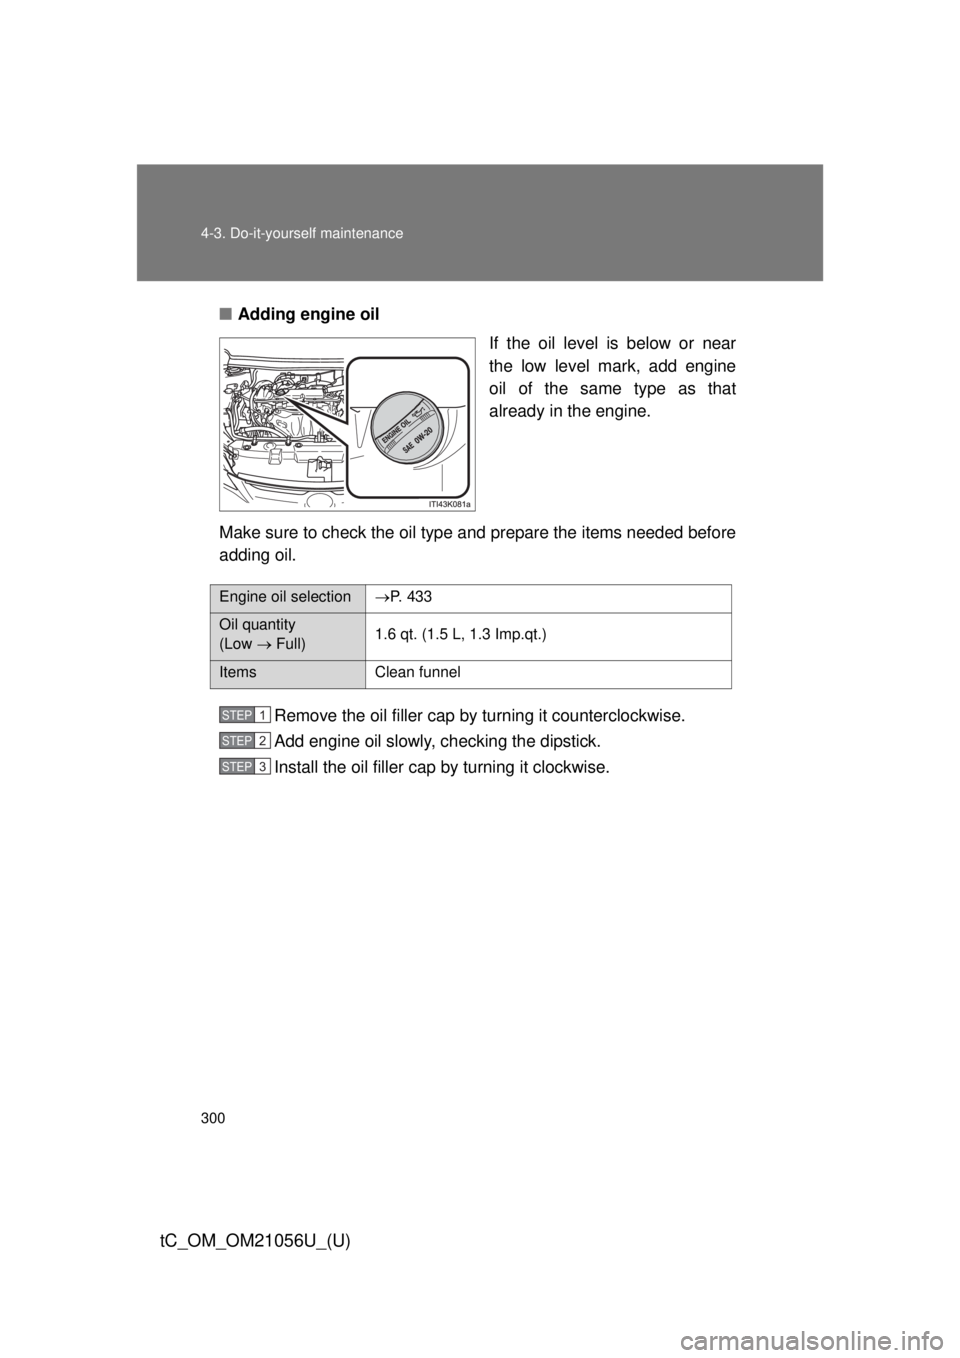
■Adding engine oil
If the oil level is below or near
the low level mark, add engine
oil of the same type as that
already in the engine.
Make sure to check the oil type and prepare the items needed before
adding oil.
Remove the oil filler cap by turning it counterclockwise.
Add engine oil slowly, checking the dipstick.
Install the oil filler cap by turning it clockwise.
Engine oil selection P. 4 3 3
Oil quantity
(Low Full)1.6 qt. (1.5 L, 1.3 Imp.qt.)
Items
Clean funnel
STEP 1
STEP 2
STEP 3
Page 346 of 492

346 4-3. Do-it-yourself maintenance
tC_OM_OM21056U_(U)
25 ECU-B NO.2 10 AAutomatic transmission, power
windows, clock, smart key system,
wireless remote control, front pas-
senger occupant classification sys-
tem
26 ECU-B 10 ABody ECU, gauges and meters,
steering sensor, wireless remote
control, smart key system
27 RAD NO.1 15 A Audio system
28 DOME 10 AInterior light, luggage compartment
light
29 STOP 10 AMultiport fuel injection system/
sequential multiport fuel injection
system, ABS, VSC, automatic
transmission, shift lock system,
stop lights, high mounted stoplight,
power management system
30 DOOR 20 A Power windows
FuseAmpereCircuit
Page 349 of 492

349
4-3. Do-it-yourself maintenance
4
Maintenance and care
tC_OM_OM21056U_(U)
14 ACC
5 ABody ECU, clock, outside rear view
mirror, shift lock system, audio sys-
tem
15 IG 5 ARear window defoggers, electric
cooling fan, multiport fuel injection
system/sequential multiport fuel
injection system
16 TAIL 10 AParking lights, tail lights, accessory
lights, side marker lights, license
plate lights, multiport fuel injection
system/sequential multiport fuel
injection system
17 IGN 7.5 AMultiport fuel injection system/
sequential multiport fuel injection
system, automatic transmission,
clock, smart key system, steering
lock system, SRS airbag system,
fuel pump, front passenger occu-
pant classification system
18 PANEL 5 AGauges and meters, air condition-
ing system, seat heater, VSC OFF
switch, shift lever illumination,
steering switch, clock, audio sys-
tem
19 S/HTR FL 10 A Seat heater (driver’s side)
20 MET 7.5 A Gauges and meters
FuseAmpereCircuit
Page 354 of 492
354 4-3. Do-it-yourself maintenance
tC_OM_OM21056U_(U)
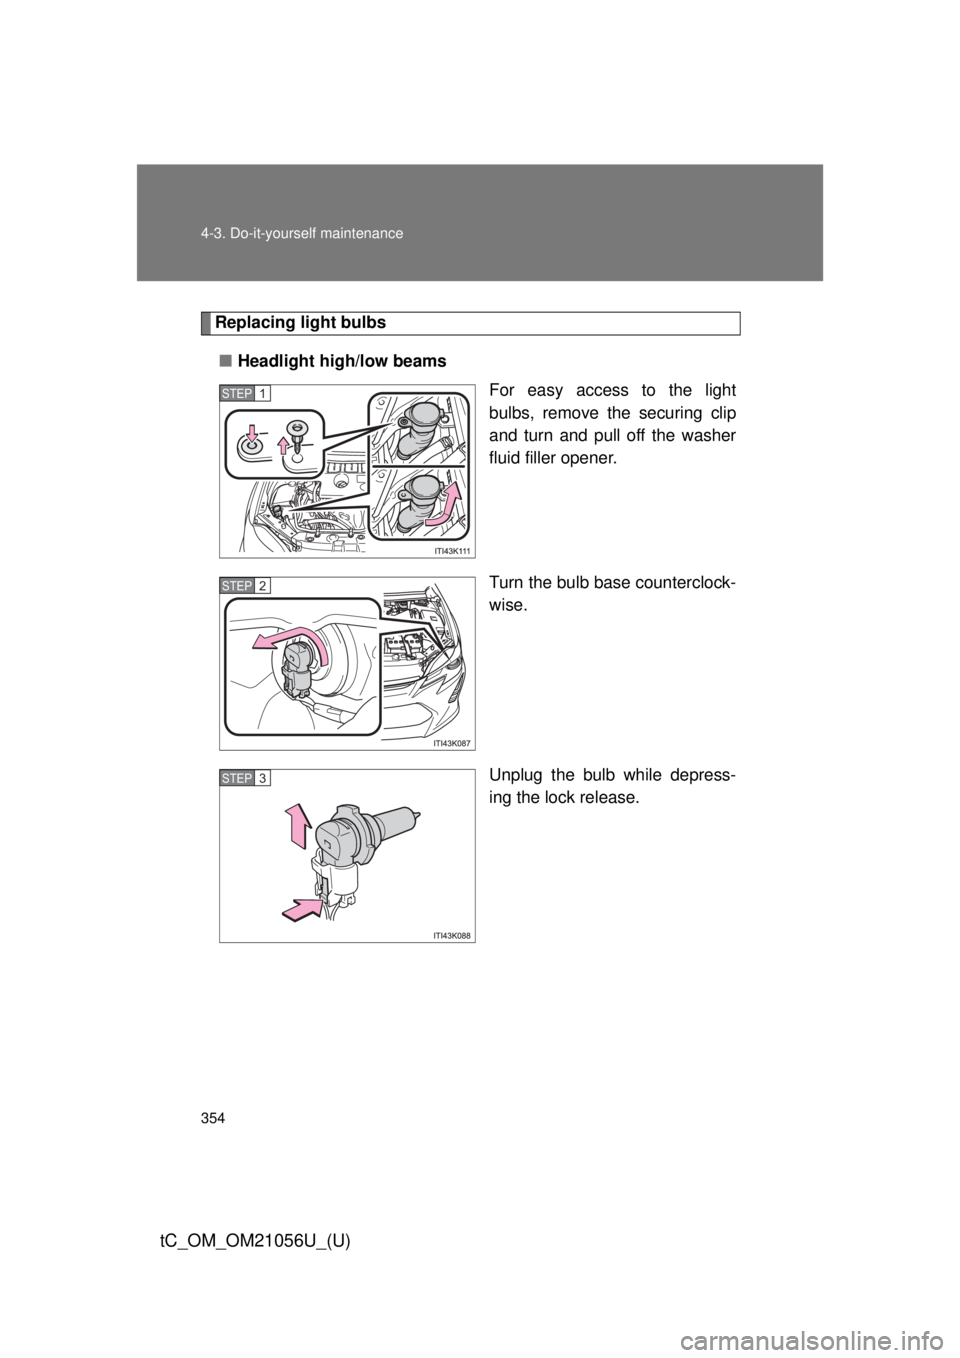
Replacing light bulbs■ Headlight high/low beams
For easy access to the light
bulbs, remove the securing clip
and turn and pull off the washer
fluid filler opener.
Turn the bulb base counterclock-
wise.
Unplug the bulb while depress-
ing the lock release.
STEP 1
STEP 2
STEP 3