Engine type TOYOTA TUNDRA 2022 Owners Manual
[x] Cancel search | Manufacturer: TOYOTA, Model Year: 2022, Model line: TUNDRA, Model: TOYOTA TUNDRA 2022Pages: 616, PDF Size: 11.13 MB
Page 2 of 616
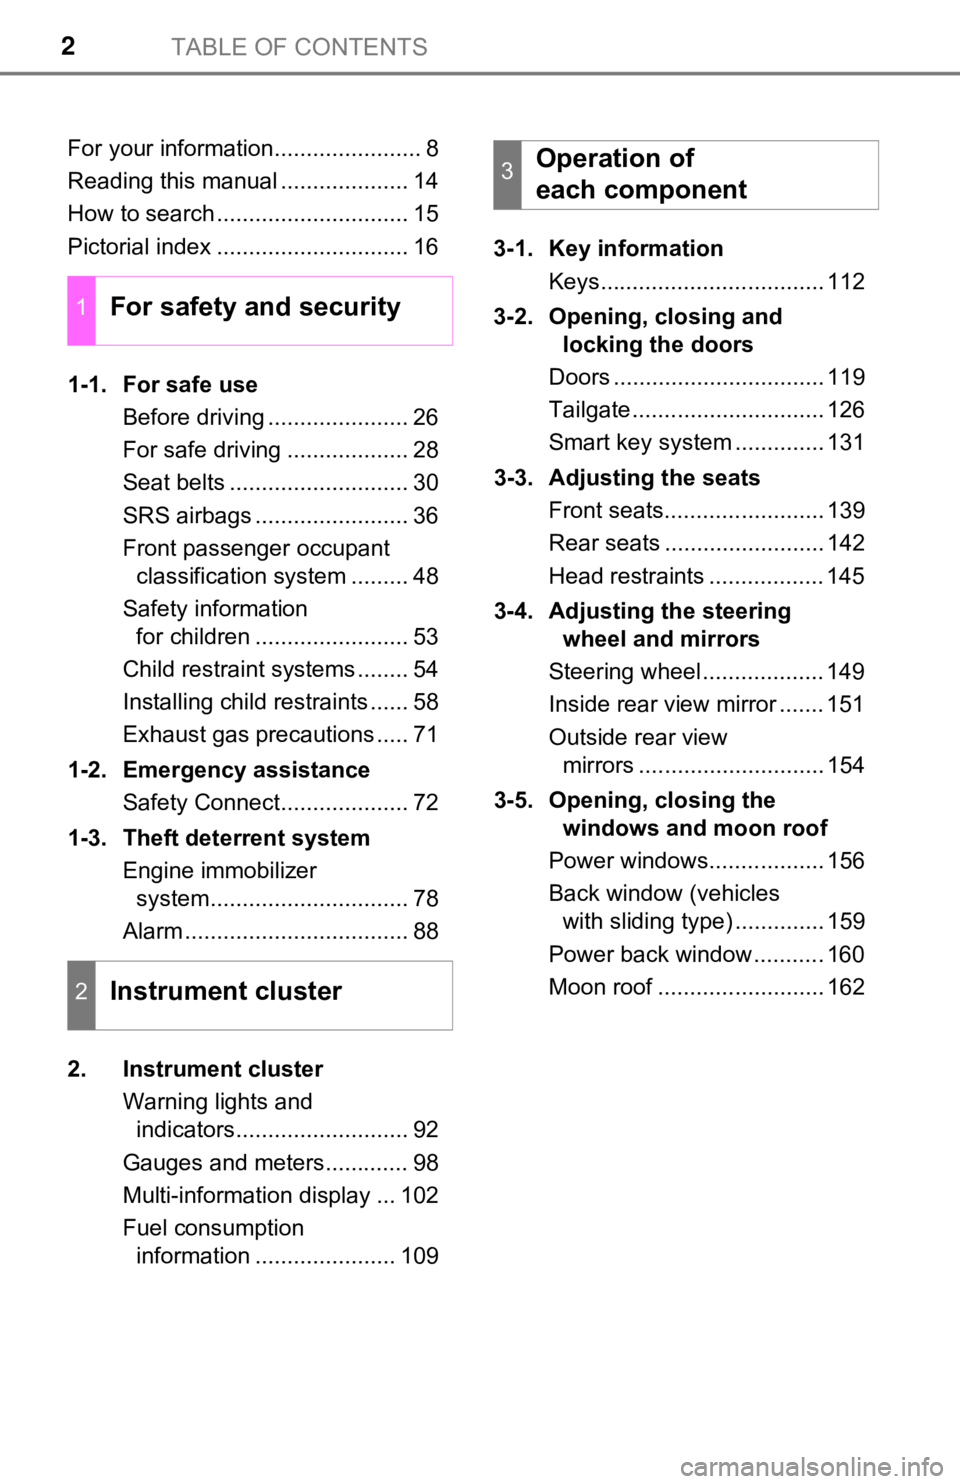
TABLE OF CONTENTS2
For your information....................... 8
Reading this manual .................... 14
How to search .............................. 15
Pictorial index .............................. 16
1-1. For safe useBefore driving ...................... 26
For safe driving ................... 28
Seat belts ............................ 30
SRS airbags ........................ 36
Front passenger occupant classification system ......... 48
Safety information for children ........................ 53
Child restraint systems ........ 54
Installing child restraints ...... 58
Exhaust gas precautions ..... 71
1-2. Emergency assistance Safety Connect.................... 72
1-3. Theft deterrent system Engine immobilizer system............................... 78
Alarm ................................... 88
2. Instrument cluster Warning lights and indicators........................... 92
Gauges and meters............. 98
Multi-information display ... 102
Fuel consumption information ...................... 109 3-1. Key information
Keys................................... 112
3-2. Opening, closing and locking the doors
Doors ................................. 119
Tailgate .............................. 126
Smart key system .............. 131
3-3. Adjusting the seats Front seats......................... 139
Rear seats ......................... 142
Head restraints .................. 145
3-4. Adjusting the steering wheel and mirrors
Steering wheel ................... 149
Inside rear view mirror ....... 151
Outside rear view mirrors ............................. 154
3-5. Opening, closing the windows and moon roof
Power windows.................. 156
Back window (vehicles with sliding type) .............. 159
Power back window ........... 160
Moon roof .......................... 162
1For safety and security
2Instrument cluster
3Operation of
each component
Page 17 of 616
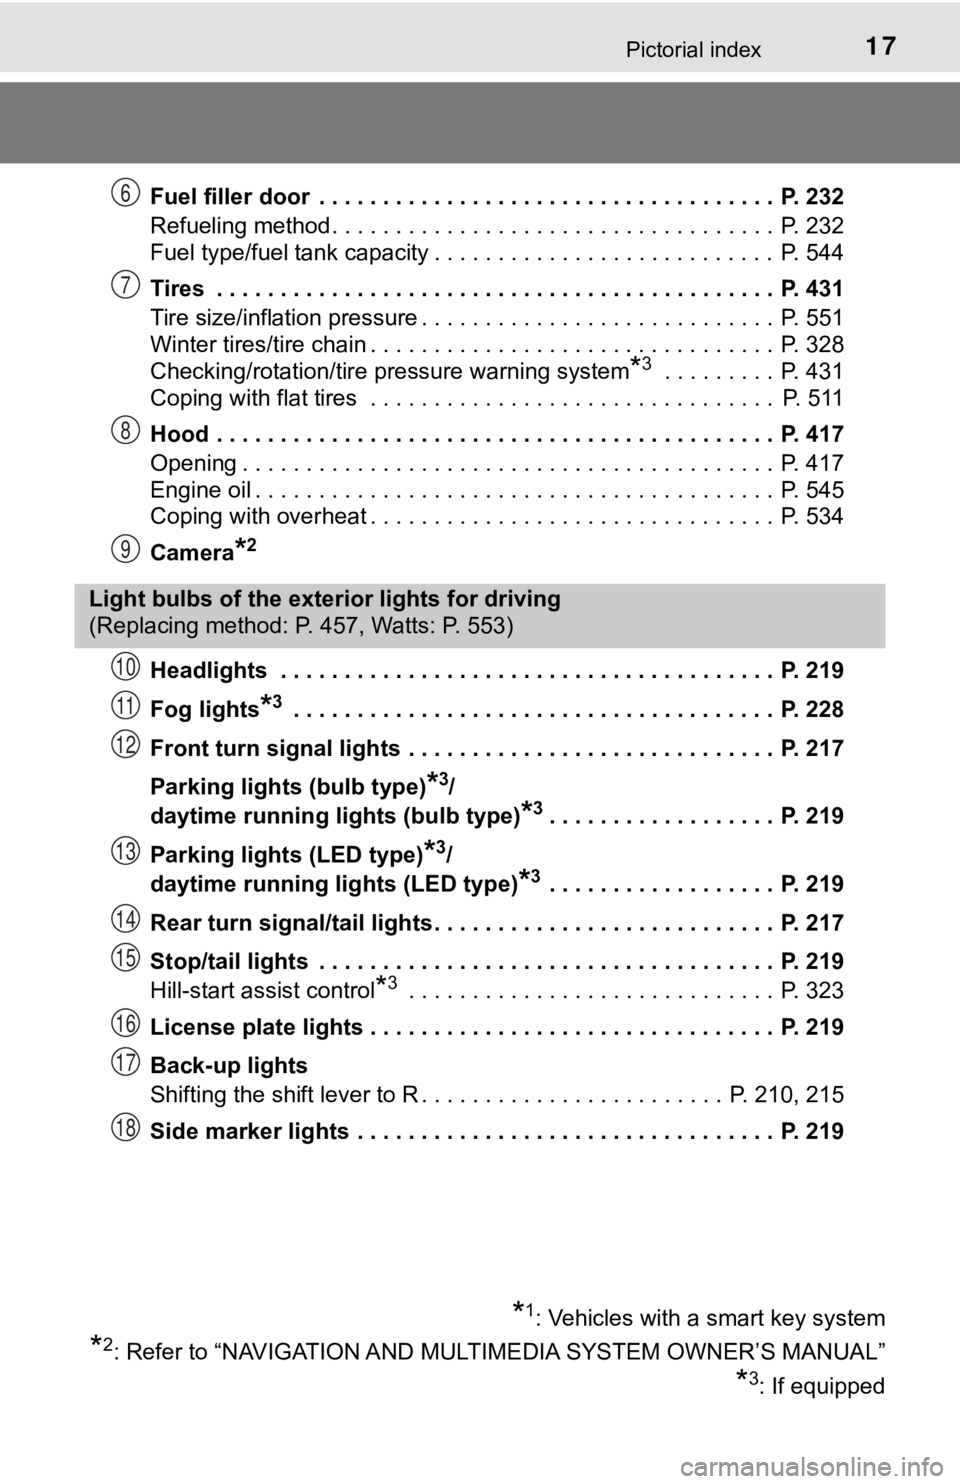
17Pictorial index
Fuel filler door . . . . . . . . . . . . . . . . . . . . . . . . . . . . . . . . . . . . P. 232
Refueling method . . . . . . . . . . . . . . . . . . . . . . . . . . . . . . . . . . . P. 232
Fuel type/fuel tank capacity . . . . . . . . . . . . . . . . . . . . . . . . . . . P. 544
Tires . . . . . . . . . . . . . . . . . . . . . . . . . . . . . . . . . . . . . . . . . . . . P. 431
Tire size/inflation pressure . . . . . . . . . . . . . . . . . . . . . . . . . . . . P. 551
Winter tires/tire chain . . . . . . . . . . . . . . . . . . . . . . . . . . . . . . . . P. 328
Checking/rotation/tire pressure warning system
*3 . . . . . . . . . P. 431
Coping with flat tires . . . . . . . . . . . . . . . . . . . . . . . . . . . . . . . . P. 511
Hood . . . . . . . . . . . . . . . . . . . . . . . . . . . . . . . . . . . . . . . . . . . . P. 417
Opening . . . . . . . . . . . . . . . . . . . . . . . . . . . . . . . . . . . . . . . . . . P. 417
Engine oil . . . . . . . . . . . . . . . . . . . . . . . . . . . . . . . . . . . . . . . . . P. 545
Coping with overheat . . . . . . . . . . . . . . . . . . . . . . . . . . . . . . . . P. 534
Camera
*2
Headlights . . . . . . . . . . . . . . . . . . . . . . . . . . . . . . . . . . . . . . . P. 219
Fog lights
*3 . . . . . . . . . . . . . . . . . . . . . . . . . . . . . . . . . . . . . . P. 228
Front turn signal lights . . . . . . . . . . . . . . . . . . . . . . . . . . . . . P. 217
Parking lights (bulb type)
*3/
daytime running lig hts (bulb type)
*3. . . . . . . . . . . . . . . . . . P. 219
Parking lights (LED type)
*3/
daytime running lights (LED type)
*3 . . . . . . . . . . . . . . . . . . P. 219
Rear turn signal/tail lights . . . . . . . . . . . . . . . . . . . . . . . . . . . P. 217
Stop/tail lights . . . . . . . . . . . . . . . . . . . . . . . . . . . . . . . . . . . . P. 219
Hill-start assist control
*3 . . . . . . . . . . . . . . . . . . . . . . . . . . . . . P. 3 23
License plate lights . . . . . . . . . . . . . . . . . . . . . . . . . . . . . . . . P. 219
Back-up lights
Shifting the shift lever to R . . . . . . . . . . . . . . . . . . . . . . . . P. 210, 215
Side marker lights . . . . . . . . . . . . . . . . . . . . . . . . . . . . . . . . . P. 219
6
7
8
9
Light bulbs of the exter ior lights for driving
(Replacing method: P. 457, Watts: P. 553)
*1: Vehicles with a smart key system
*2: Refer to “NAVIGATION AND MULTIMEDIA SYSTEM OWNER’S MANUAL”
*3: If equipped
10
11
12
13
14
15
16
17
18
Page 71 of 616
711-1. For safe use
1
For safety and security
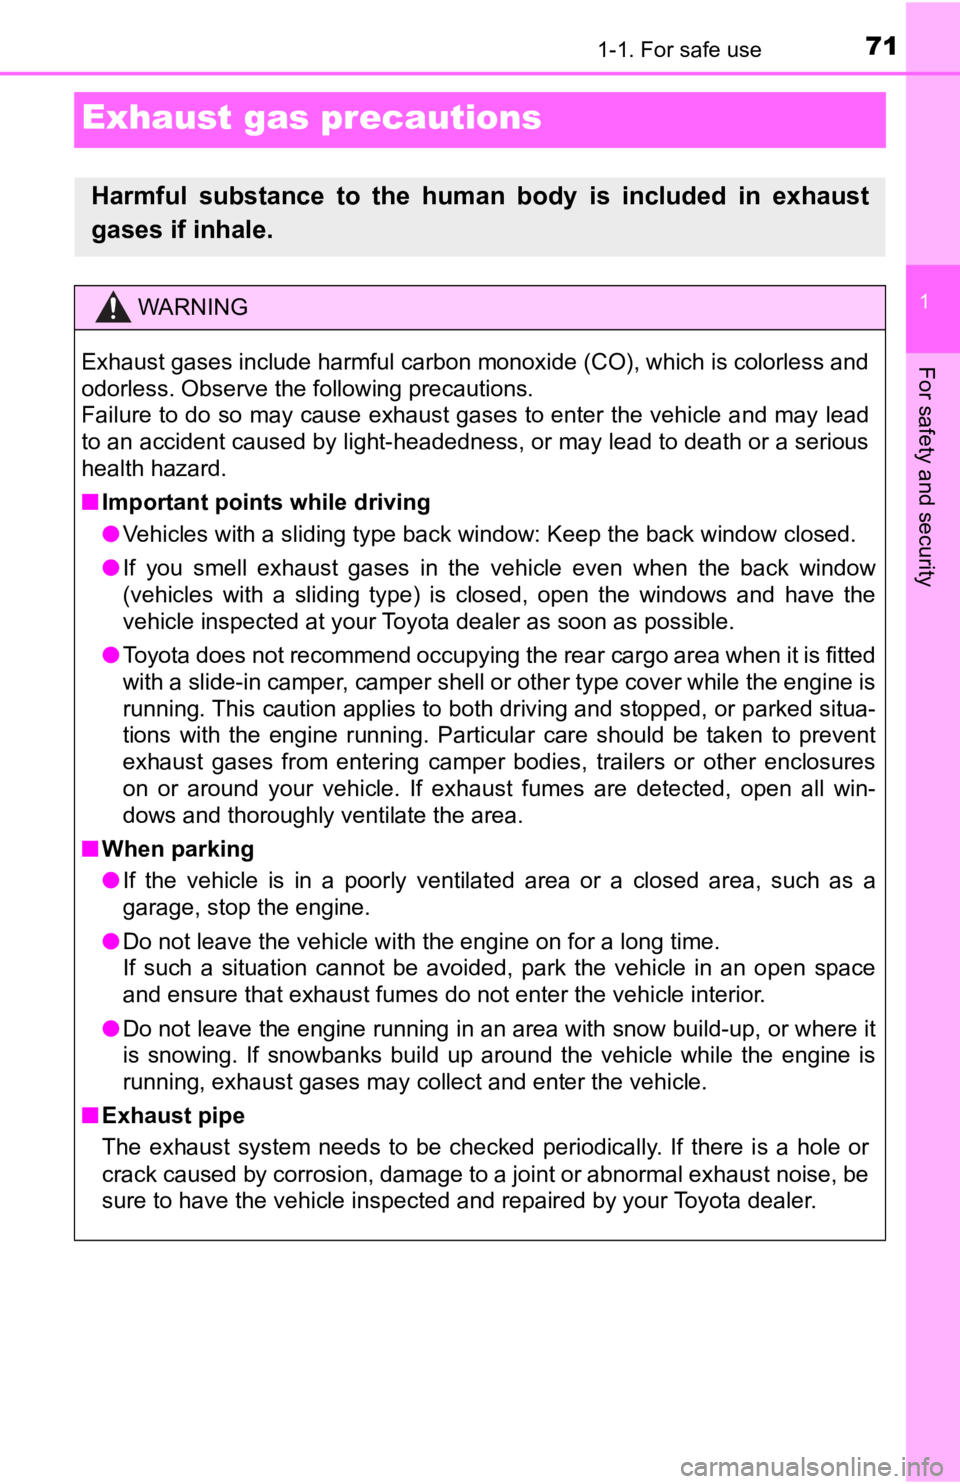
Exhaust gas precautions
Harmful substance to the human body is included in exhaust
gases if inhale.
WARNING
Exhaust gases include harmful carbon monoxide (CO), which is colorless and
odorless. Observe the following precautions.
Failure to do so may cause exhaust gases to enter the vehicle a nd may lead
to an accident caused by light-headedness, or may lead to death or a serious
health hazard.
■ Important points while driving
● Vehicles with a sliding type back window: Keep the back window closed.
● If you smell exhaust gases in the vehicle even when the back window
(vehicles with a sliding type) is closed, open the windows and have the
vehicle inspected at your Toyota dealer as soon as possible.
● Toyota does not recommend occupying the rear cargo area when it is fitted
with a slide-in camper, camper shell or other type cover while the engine is
running. This caution applies to both driving and stopped, or parked situa-
tions with the engine running. Particular care should be taken to prevent
exhaust gases from entering camper bodies, trailers or other enclosures
on or around your vehicle. If exhaust fumes are detected, open all win-
dows and thoroughly ventilate the area.
■ When parking
● If the vehicle is in a poorly ventilated area or a closed area, such as a
garage, stop the engine.
● Do not leave the vehicle with the engine on for a long time.
If such a situation cannot be avoided, park the vehicle in an open space
and ensure that exhaust fumes do not enter the vehicle interior .
● Do not leave the engine running in an area with snow build-up, or where it
is snowing. If snowbanks build up around the vehicle while the engine is
running, exhaust gases may collect and enter the vehicle.
■ Exhaust pipe
The exhaust system needs to be checked periodically. If there is a hole or
crack caused by corrosion, damage to a joint or abnormal exhaust noise, be
sure to have the vehicle inspected and repaired by your Toyota dealer.
Page 79 of 616
791-3. Theft deterrent system
1
For safety and security
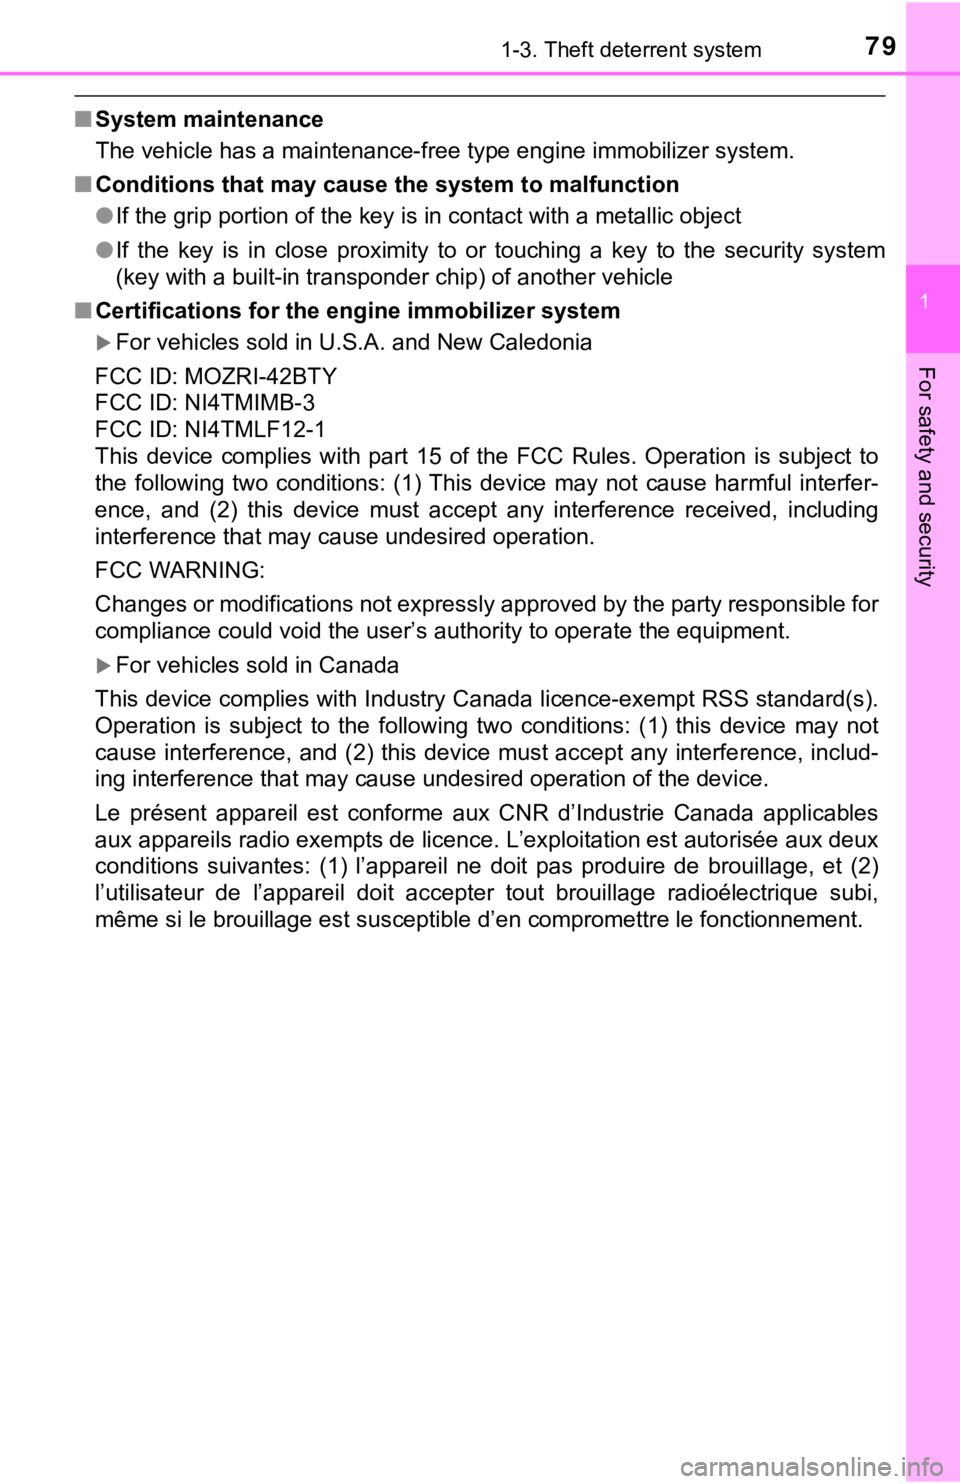
■System maintenance
The vehicle has a maintenance-free type engine immobilizer syst em.
■ Conditions that may cause the system to malfunction
●If the grip portion of the key is in contact with a metallic ob ject
● If the key is in close proximity to or touching a key to the security system
(key with a built-in transponder chip) of another vehicle
■ Certifications for the engine immobilizer system
For vehicles sold in U.S.A. and New Caledonia
FCC ID: MOZRI-42BTY
FCC ID: NI4TMIMB-3
FCC ID: NI4TMLF12-1
This device complies with part 15 of the FCC Rules. Operation is subject to
the following two conditions: (1) This device may not cause har mful interfer-
ence, and (2) this device must accept any interference received, including
interference that may cause undesired operation.
FCC WARNING:
Changes or modifications not expressly approved by the party re sponsible for
compliance could void the user’s authority to operate the equip ment.
For vehicles sold in Canada
This device complies with Industry Canada licence-exempt RSS standard(s).
Operation is subject to the following two conditions: (1) this device may not
cause interference, and (2) this device must accept any interfe rence, includ-
ing interference that may cause undesired operation of the devi ce.
Le présent appareil est conforme aux CNR d’Industrie Canada app licables
aux appareils radio exempts de licence. L’exploitation est auto risée aux deux
conditions suivantes: (1) l’appareil ne doit pas produire de brouillage, et (2)
l’utilisateur de l’appareil doit accepter tout brouillage radio électrique subi,
même si le brouillage est susceptible d’en compromettre le fonctionnement.
Page 116 of 616

1163-1. Key information
■Key battery depletion (type C or type D)
Type C
If the wireless remote control function does not operate, the b attery may be
depleted. Replace the battery when necessary. ( P. 451)
Type D
● The standard battery life is 1 to 2 years.
● If the battery becomes low, an alarm will sound in the cabin wh en the engine
stops. ( P. 508)
● As the electronic key always receives radio waves, the battery will become
depleted even if the electronic key is not used. The following symptoms indi-
cate that the electronic key battery may be depleted. Replace the battery
when necessary. ( P. 451)
• The smart key system or the wireless remote control does not o perate.
• The detection area becomes smaller.
• The LED indicator on the key surface does not turn on.
● To avoid serious deterioration, do not leave the electronic key within 1 m
(3 ft.) of the following electrical appliances that produce a ma gnetic field:
•TVs
• Personal computers
• Cellular phones, cordless phones and battery chargers
• Recharging cellular phones or cordless phones
• Table lamps
• Induction cookers
■ Replacing the battery (type C or type D)
P. 451
■ Confirmation of the registered key number
The number of keys already registered to the vehicle can be confirmed. Ask
your Toyota dealer for details.
■ Customization (type C or type D)
Settings (e.g. wireless remote control system) can be changed.
(Customizable features: P. 568)
Page 152 of 616
1523-4. Adjusting the steering wheel and mirrors
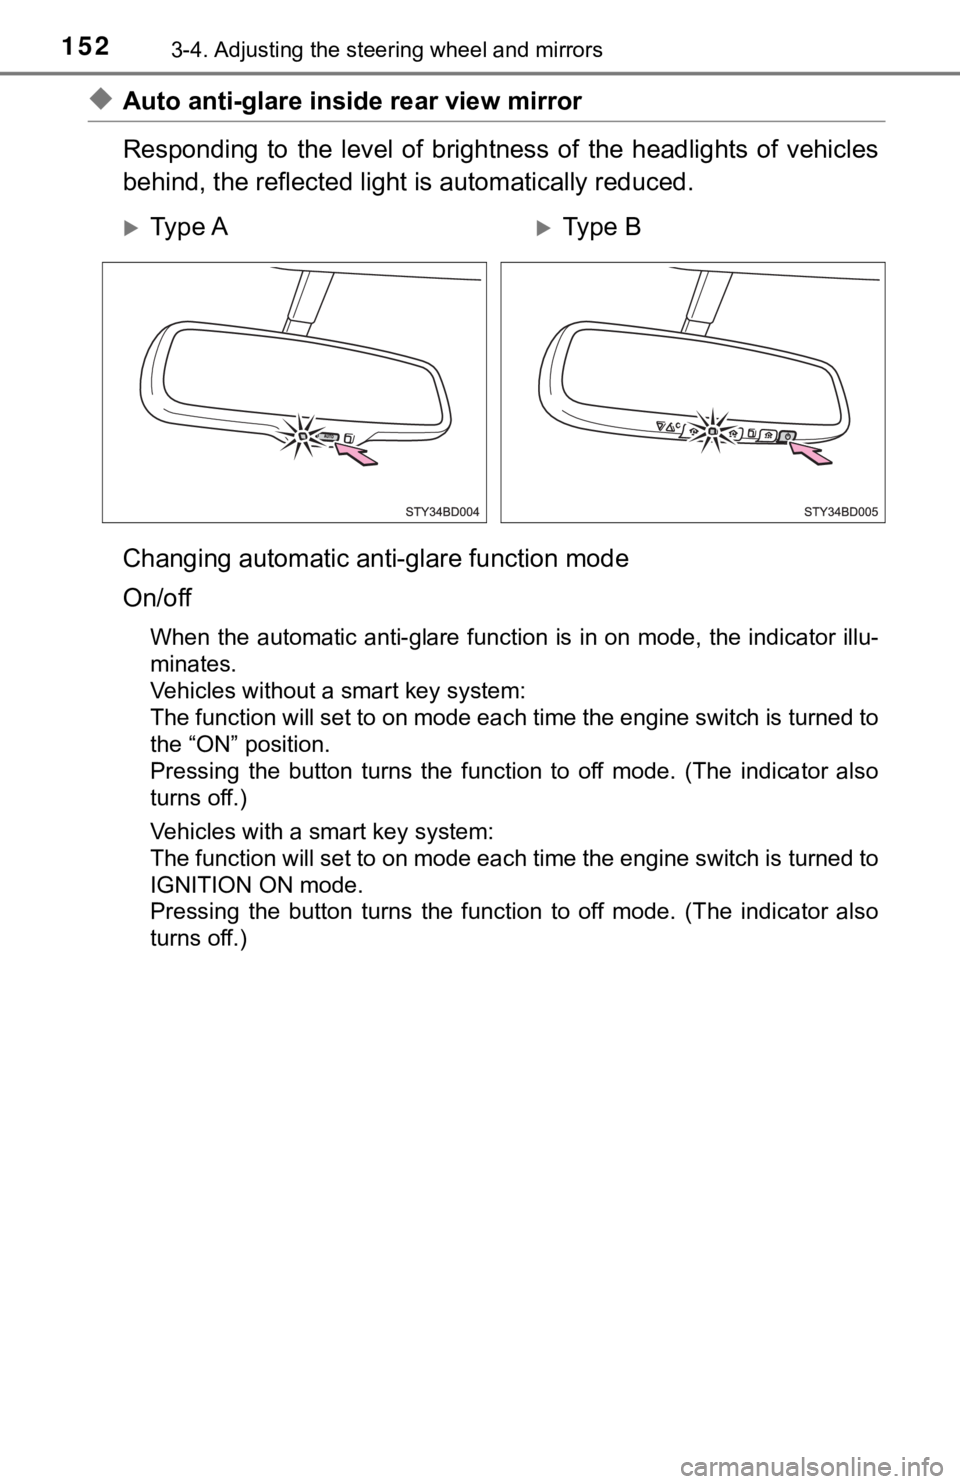
◆Auto anti-glare inside rear view mirror
Responding to the level of brigh tness of the headlights of vehicles
behind, the reflected light is automatically reduced.
Changing automatic anti- glare function mode
On/off
When the automatic anti-glare function is in on mode, the indicator illu-
minates.
Vehicles without a smart key system:
The function will set to on mode each time the engine switch is turned to
the “ON” position.
Pressing the button turns the function to off mode. (The indica tor also
turns off.)
Vehicles with a smart key system:
The function will set to on mode each time the engine switch is turned to
IGNITION ON mode.
Pressing the button turns the function to off mode. (The indica tor also
turns off.)
Ty p e AType B
Page 157 of 616
1573-5. Opening, closing the windows and moon roof
3
Operation of each component
■The power windows can be operated when
Vehicles without a smart key system
The engine switch is in the “ON” position.
Vehicles with a smart key system
The engine switch is in IGNITION ON mode.
■ Operating the power windows after turning the engine off
Vehicles without a smart key system
The power windows can be operated for approximately 45 seconds even
after the engine switch is turned to the “ACC” or “LOCK” positi on. They can-
not, however, be operated once either front door is opened.
Vehicles with a smart key system
The power windows can be operated for approximately 45 seconds even
after the engine switch is turned to ACCESSORY mode or turned o ff. They
cannot, however, be operated once either front door is opened.
■ Jam protection function (type B only)
If an object becomes caught between the window and the window f rame, win-
dow travel is stopped and the window is opened slightly.
■ When the power window does not close normally (type B only)
If the jam protection function is operating abnormally and a wi ndow cannot be
closed, perform the following operations using the power window switch on
the relevant door.
● After stopping the vehicle, the window can be closed by holding the power
window switch in the one-touch closing position while the engine switch is
turned to IGNITION ON mode.
● If the window still cannot be closed even by carrying out the o peration as
explained above, initialize the function by performing the following proce-
dure.
Hold the power window switch in the one-touch closing position. Continue
holding the switch for a further 4 seconds after the window has closed.
If jam detection occurs during step , repeat step within 4 seconds of
jam occurrence.
Hold the power window switch in the one-touch opening position. Con-
tinue holding the switch for more than 1 second after the window has
opened completely.
Hold the power window switch in the one-touch closing position once
again. Continue holding the switch for more than 1 second after the win-
dow has closed.
If you release the switch while the window is moving, start aga in from the
beginning.
If the window continues to close but then re-open slightly even after perform-
ing the above procedure correctly, have the vehicle inspected b y your Toyota
dealer.
1
11
2
3
Page 158 of 616
1583-5. Opening, closing the windows and moon roof
WARNING
Observe the following precautions.
Failure to do so may result in death or serious injury.
■Closing the windows
● The driver is responsible for all the power window operations, including the
operation for the passengers. In order to prevent accidental op eration,
especially by a child, do not let a child operate the power windows. It is
possible for children and other passengers to have body parts c aught in
the power window. Also, when riding with a child, it is recommended to use
the window lock switch. ( P. 156)
● Check to make sure that all passengers do not have any part of their body
in a position where it could be caught when a window is being o perated.
● When exiting the vehicle, turn the engine switch to the “LOCK” position
(vehicles without a smart key system) or off (vehicles with a smart key sys-
tem), carry the key and exit the vehicle along with the child. There may be
accidental operation, due to mischief, etc., that may possibly lead to an
accident.
■ Jam protection function (type B only)
● Never use any part of your body to intentionally activate the jam protection
function.
● The jam protection function may not work if something gets caught just
before the window fully closes.
Page 221 of 616
2214-3. Operating the lights and wipers
4
Driving
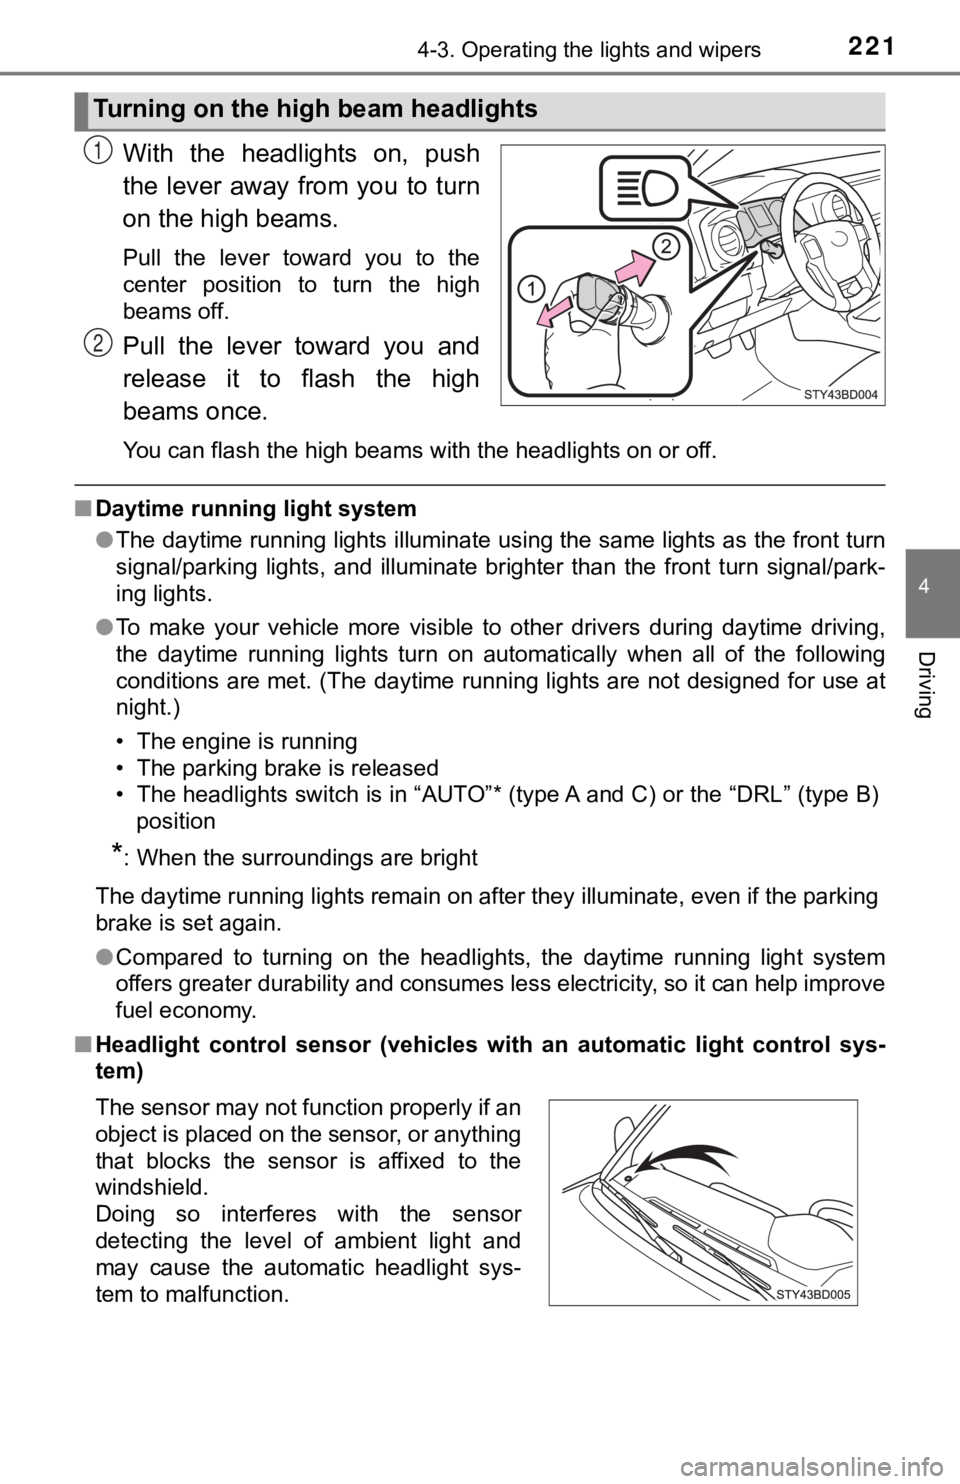
With the headlights on, push
the lever away from you to turn
on the high beams.
Pull the lever toward you to the
center position to turn the high
beams off.
Pull the lever toward you and
release it to flash the high
beams once.
You can flash the high beams with the headlights on or off.
■Daytime running light system
●The daytime running lights illuminate using the same lights as the front turn
signal/parking lights, and illuminate brighter than the front t urn signal/park-
ing lights.
● To make your vehicle more visible to other drivers during dayti me driving,
the daytime running lights turn on automatically when all of the following
conditions are met. (The daytime running lights are not designe d for use at
night.)
• The engine is running
• The parking brake is released
• The headlights switch is in “AUTO”* (type A and C) or the “DRL ” (type B)
position
*: When the surroundings are bright
The daytime running lights remain on after they illuminate, even if the parking
brake is set again.
● Compared to turning on the headlights, the daytime running ligh t system
offers greater durability and consumes less electricity, so it can help improve
fuel economy.
■ Headlight control sensor (vehicl es with an automatic light control sys-
tem)
Turning on the high beam headlights
1
2
The sensor may not function properly if an
object is placed on the sensor, or anything
that blocks the sensor is affixed to the
windshield.
Doing so interferes with the sensor
detecting the level of ambient light and
may cause the automatic headlight sys-
tem to malfunction.
Page 232 of 616
2324-4. Refueling
Opening the fuel tank cap
●Vehicles without a smart key system:
Turn the engine switch to the “LOCK” position and ensure that a ll
the doors and wind ows are closed.
● Vehicles with a smart key system:
Turn the engine switch off and ens ure that all the doors and win-
dows are closed.
● Confirm the type of fuel.
■Fuel types
P. 554
■ Fuel tank opening for unleaded gasoline
To help prevent incorrect fueling, your vehicle has a fuel tank opening that
only accommodates the special nozzle on unleaded fuel pumps.
■ If the malfunction indicator lamp illuminates
The malfunction indicator lamp may illuminate erroneously if re fueling is per-
formed repeatedly when the fuel tank is nearly full.
Perform the following steps to open the fuel tank cap:
Before refueling the vehicle