clock setting TOYOTA VENZA 2011 Owners Manual (in English)
[x] Cancel search | Manufacturer: TOYOTA, Model Year: 2011, Model line: VENZA, Model: TOYOTA VENZA 2011Pages: 680, PDF Size: 13.69 MB
Page 180 of 680
180
2-2. Instrument cluster
VENZA_U (OM73012U)
Multi-information display (TFT type)
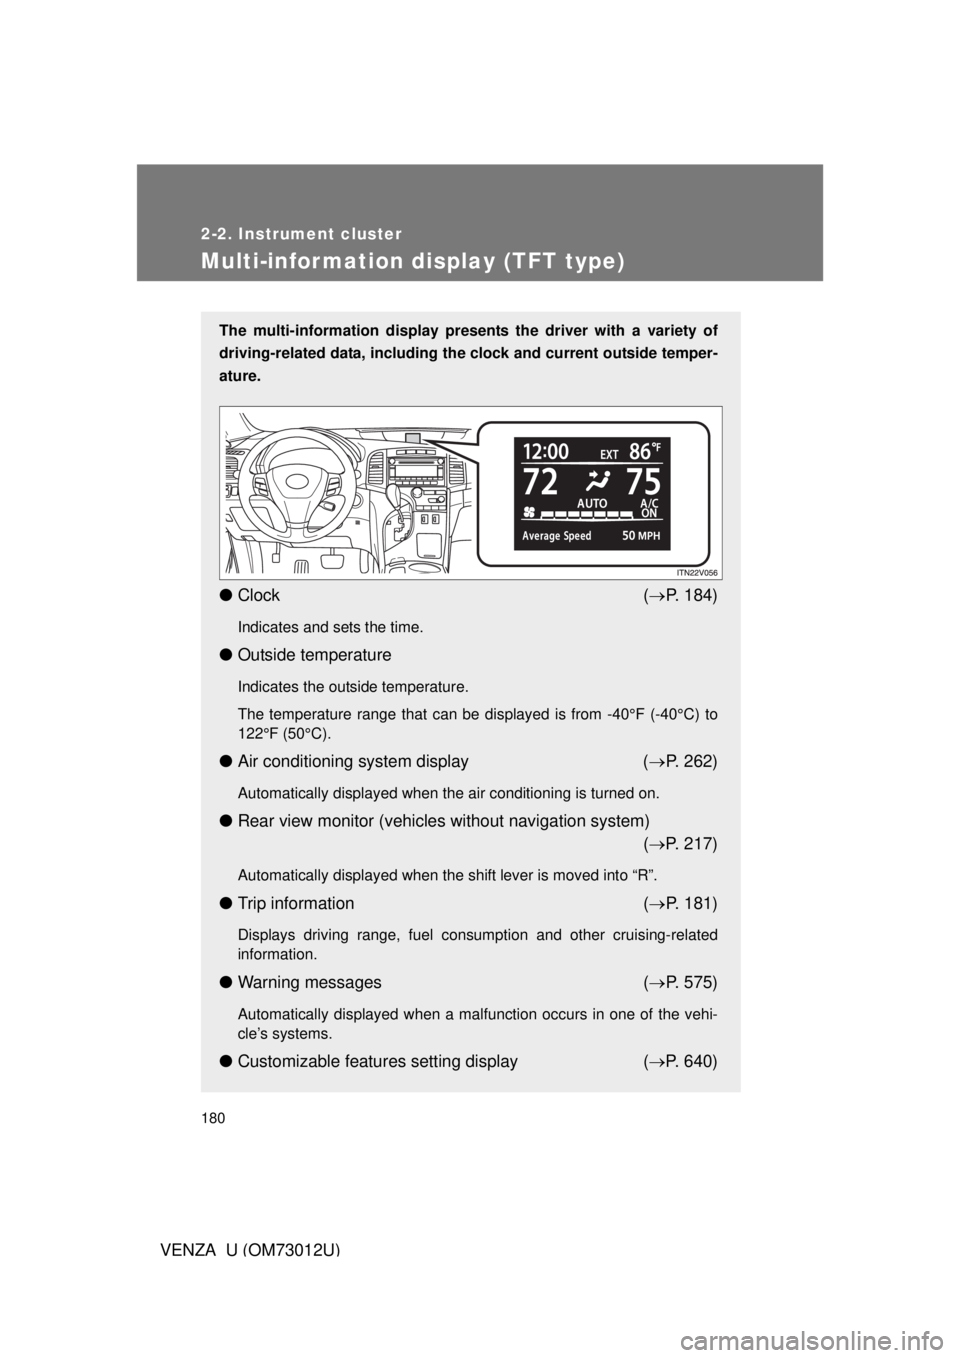
The multi-information display presents the driver with a variety of
driving-related data, including the clock and current outside temper-
ature.
● Clock ( P. 184)
Indicates and sets the time.
● Outside temperature
Indicates the outside temperature.
The temperature range that can be displayed is from -40°F (-40°C) to
122°F (50°C).
●Air conditioning system display ( P. 262)
Automatically displayed when the air conditioning is turned on.
● Rear view monitor (vehicles without navigation system)
( P. 217)
Automatically displayed when the shift lever is moved into “R”.
● Trip information ( P. 181)
Displays driving range, fuel consumption and other cruising-related
information.
● Warning messages ( P. 575)
Automatically displayed when a malfunction occurs in one of the vehi-
cle’s systems.
● Customizable features setting display ( P. 640)
Page 183 of 680
183
2-2. Instrument cluster
2
When driving
VENZA_U (OM73012U)
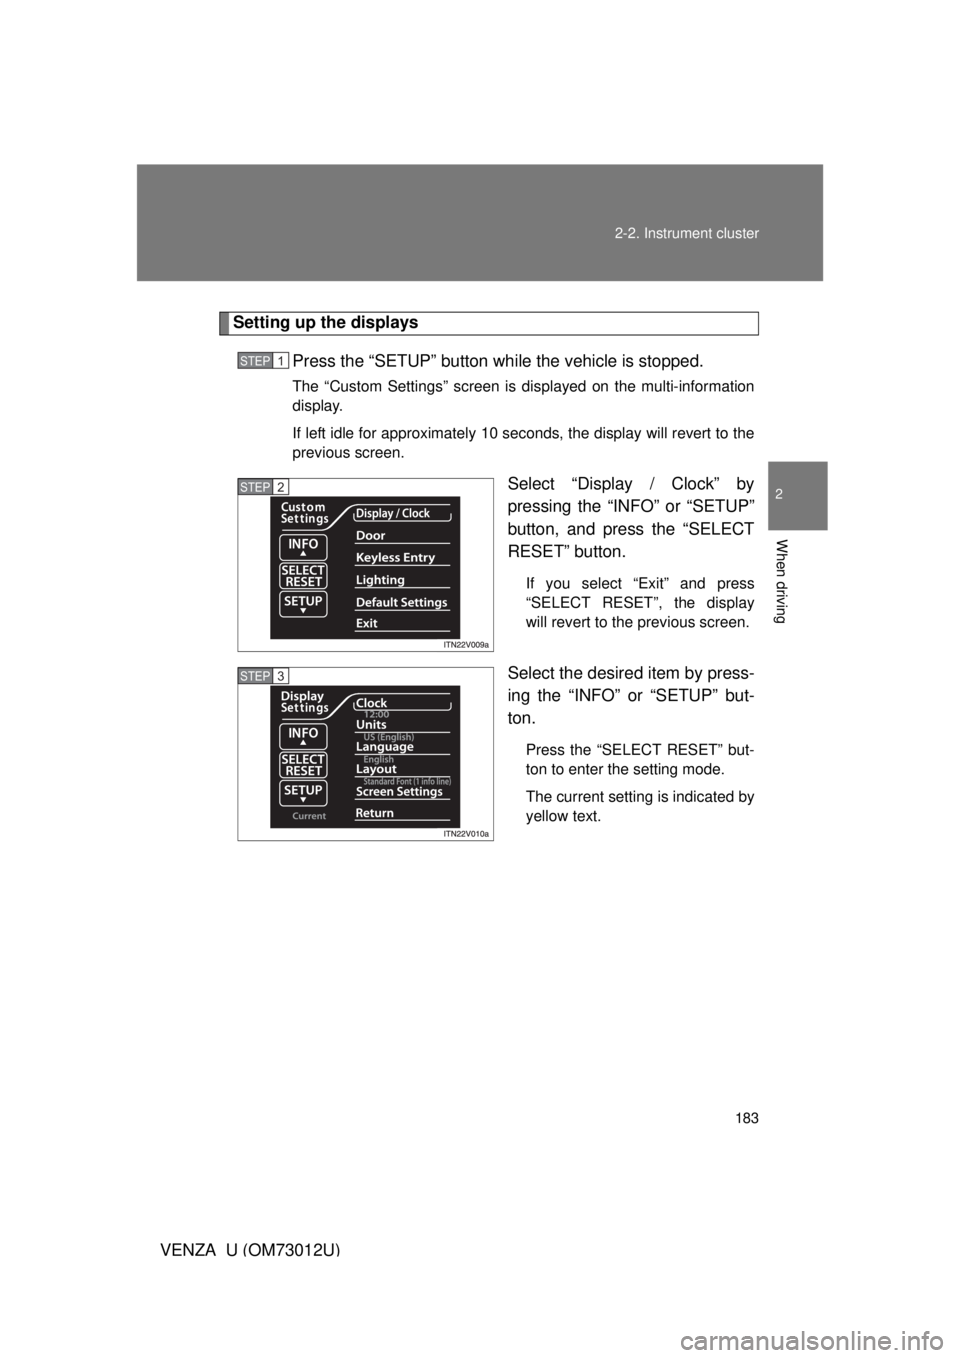
Setting up the displays
Press the “SETUP” button wh ile the vehicle is stopped.
The “Custom Settings” screen is displayed on the multi-information
display.
If left idle for approximately 10 seconds, the display will revert to the
previous screen.
Select “Display / Clock” by
pressing the “INFO” or “SETUP”
button, and press the “SELECT
RESET” button.
If you select “Exit” and press
“SELECT RESET”, the display
will revert to the previous screen.
Select the desired item by press-
ing the “INFO” or “SETUP” but-
ton.
Press the “SELECT RESET” but-
ton to enter the setting mode.
The current setting is indicated by
yellow text.
STEP1
STEP2
STEP3
Page 184 of 680
184 2-2. Instrument cluster
VENZA_U (OM73012U)■
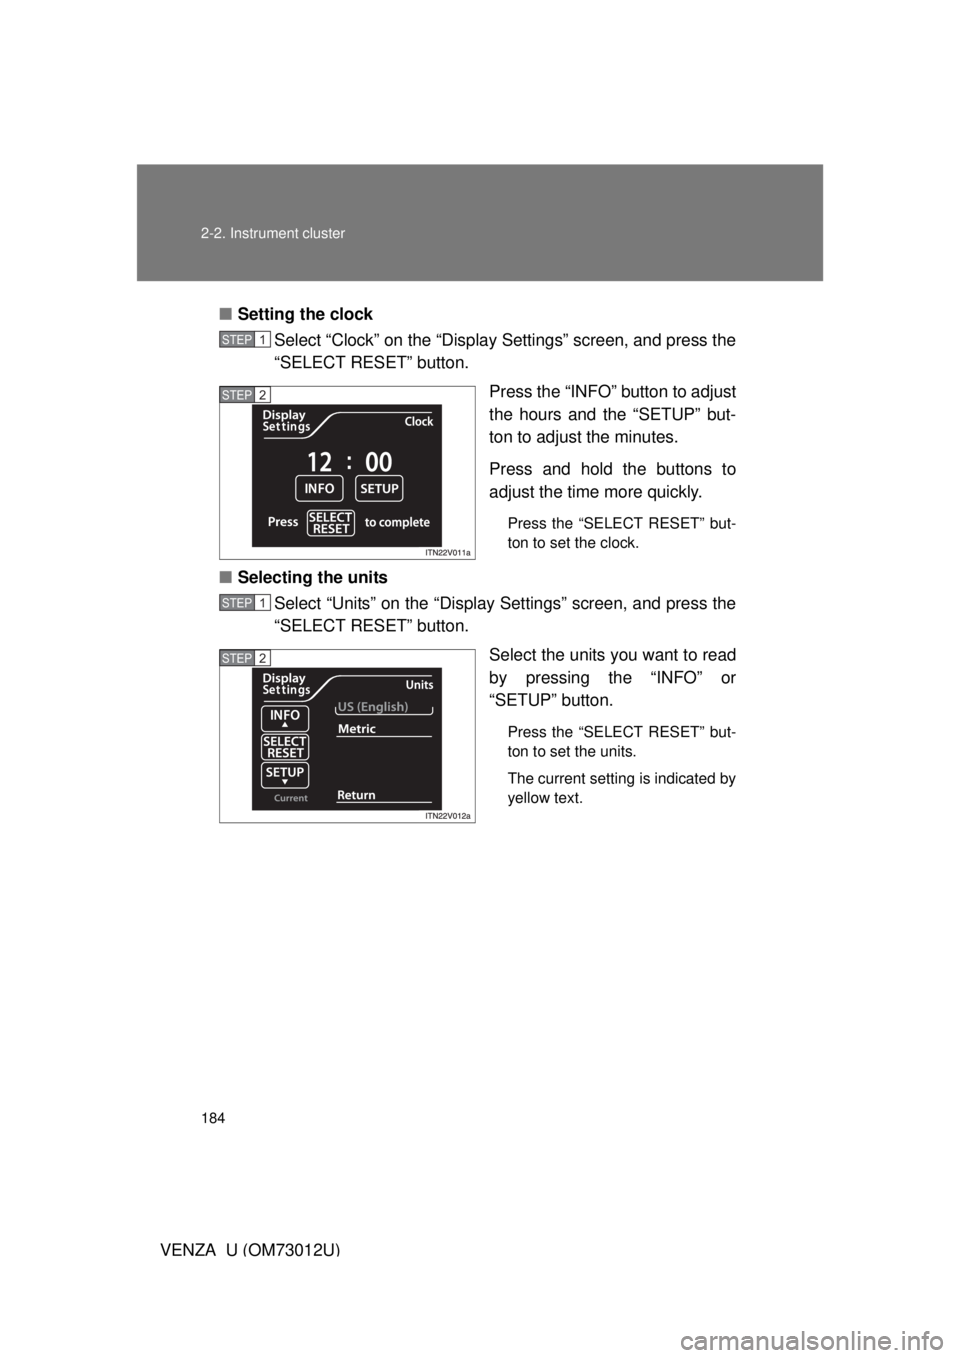
Setting the clock
Select “Clock” on the “Display Settings” screen, and press the
“SELECT RESET” button.
Press the “INFO” button to adjust
the hours and the “SETUP” but-
ton to adjust the minutes.
Press and hold the buttons to
adjust the time more quickly.
Press the “SELECT RESET” but-
ton to set the clock.
■Selecting the units
Select “Units” on the “Display Settings” screen, and press the
“SELECT RESET” button.
Select the units you want to read
by pressing the “INFO” or
“SETUP” button.
Press the “SELECT RESET” but-
ton to set the units.
The current setting is indicated by
yellow text.
STEP1
STEP2
STEP1
STEP2
Page 196 of 680

196 2-2. Instrument cluster
VENZA_U (OM73012U)■
Driving range (RANGE)
Displays the estimated maximum di stance that can be driven with
the quantity of fuel remaining.
● This distance is computed based on your average fuel consumption. As
a result, the actual distance that can be driven may differ from that dis-
played.
● When only a small amount of fuel is added to the tank, the display may
not be updated.
■Average vehicle speed (AVERAGE SPEED)
Displays the average vehicle speed since the engine was started
or since the function was reset.
The function can be reset by pressing and holding the “RESET-H” button
when the average vehicle speed is displayed.
Setting the clock
Press and hold the “INFO-CLOCK” button until part of the dis-
play begins to flash.
Press and hold the “RESET-H” button to adjust the hours and
the “US/M-M” button to adjust the minutes.
Press the “INFO-CLOCK” button to complete the setting.
Selecting the unitsPress the “US/M-M” button.
The unit changes each time the button is pressed.
STEP1
STEP2
STEP3
Page 264 of 680
264 3-1. Using the air conditioning system and defogger
VENZA_U (OM73012U)
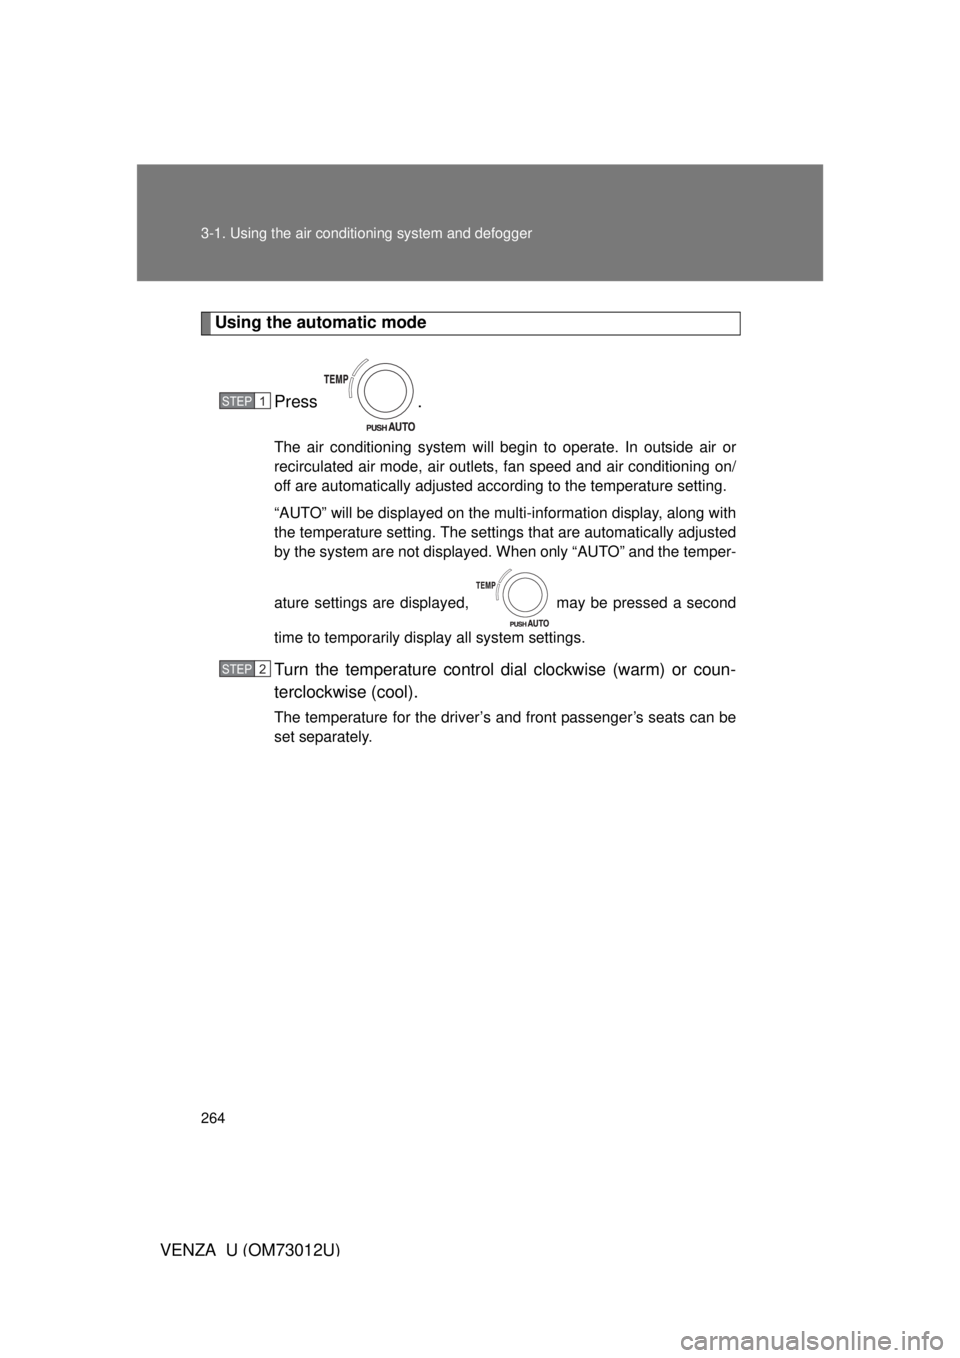
Using the automatic mode
Press .
The air conditioning system will begin to operate. In outside air or
recirculated air mode, air outlets, fan speed and air conditioning on/
off are automatically adjusted according to the temperature setting.
“AUTO” will be displayed on the multi-information display, along with
the temperature setting. The settings that are automatically adjusted
by the system are not displayed. When only “AUTO” and the temper-
ature settings are displayed, may be pressed a second
time to temporarily display all system settings.
Turn the temperature control dial clockwise (warm) or coun-
terclockwise (cool).
The temperature for the driver’s and front passenger’s seats can be
set separately.
STEP1
STEP2
Page 265 of 680
265
3-1. Using the air conditioning system
and defogger
3
Interior features
VENZA_U (OM73012U)
Adjusting the settings
■ Adjusting the temperature setting
Turn the temperature control dial clockwise (warm) or counter-
clockwise (cool).
The air conditioning system switches between dual and simulta-
neous modes each time is pressed.
Each temperature setting will be displayed on the multi-information
display.
Dual mode: The temperature for the driver’s seat and front passen-
ger’s seats can be set separately.
SYNC mode: Only (driver’s side) can be used to adjust
the temperature for all seats.
In SYNC mode, only one temperature setting will be displayed on
the multi-information display.
Page 273 of 680
273
3-1. Using the air conditioning system
and defogger
3
Interior features
VENZA_U (OM73012U)
Adjusting the settings
■ Adjusting the temperature setting
Turn the temperature control dial clockwise (warm) or counter-
clockwise (cool).
If is not pressed, the system will blow ambient temperature air
or heated air.
For quick cooling, turn the temperature selector knob to the “MAX
A/C” position. The air conditioning will automatically turn on and,
depending on the air outlet mode, the air intake mode will be set to
recirculated air mode.
■ Adjusting the fan speed
Turn the fan speed control dial clockwise (increase) or counter-
clockwise (decrease).
Set the dial to “OFF” to turn the fan off.
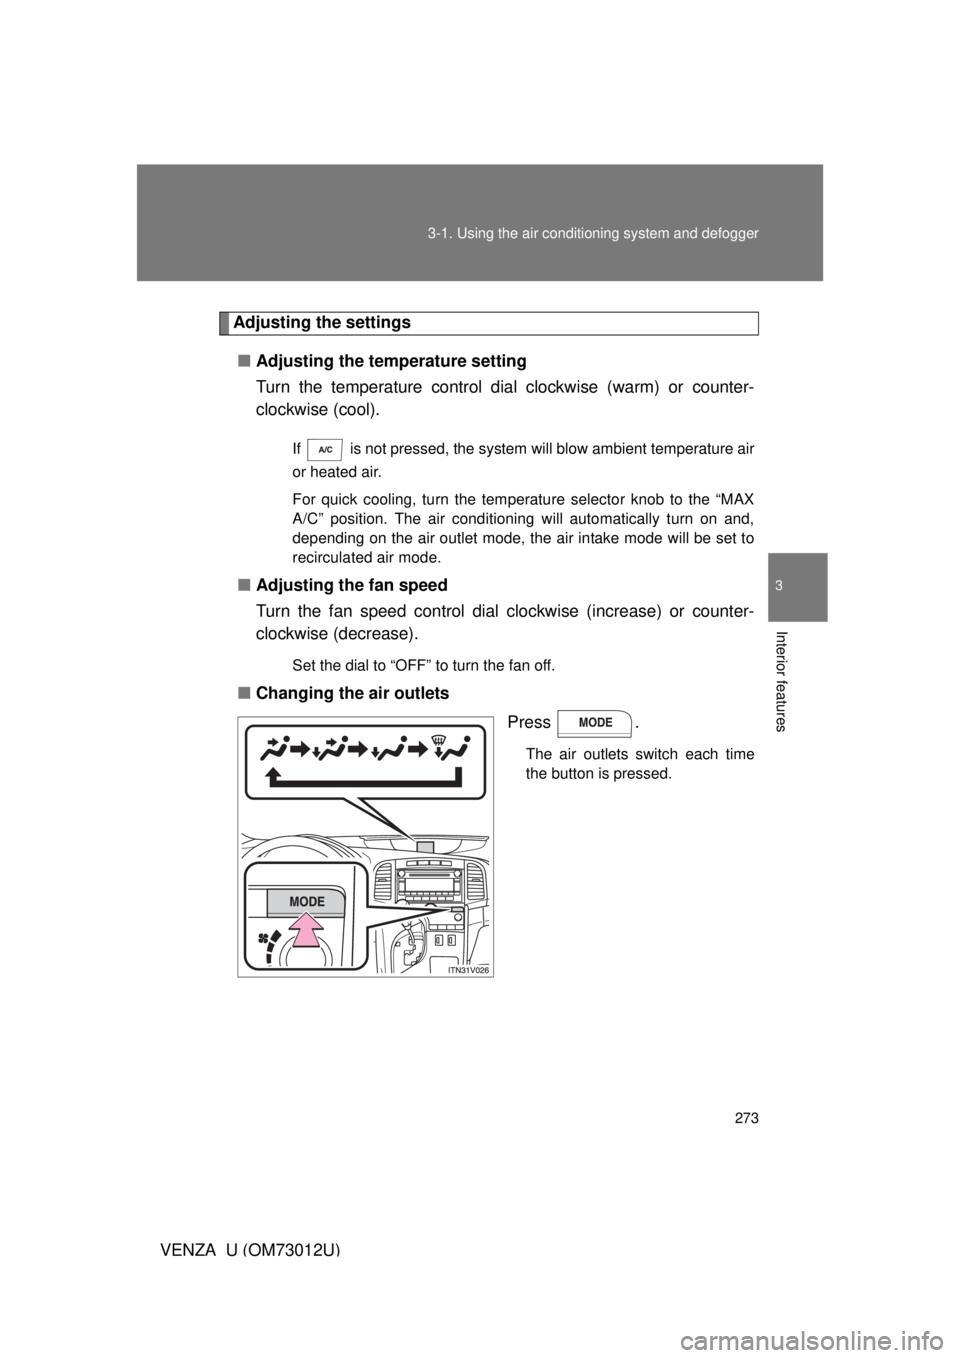
■ Changing the air outlets
Press .
The air outlets switch each time
the button is pressed.
Page 418 of 680
418 3-5. Using the hands-free system (for cellular phone)
VENZA_U (OM73012U)
Locking or unlocking the phone bookSelect “Phonebook Lock” or “Phonebook Unlock” by using a
voice command or .
Input the PIN by either of the following methods and select
“Confirm” by using a voice command or :
a. Press the talk switch and say the registered PIN.
b. Input a new PIN by using .
Setting voice guidance volume
Select “Guidance Volume” by using .
Change the voice guidance volume.
To decrease the volume: Turn counterclockwise.
To increase the volume: Turn clockwise.
STEP1
STEP2
STEP1
STEP2