key TOYOTA VENZA 2012 Accessories, Audio & Navigation (in English)
[x] Cancel search | Manufacturer: TOYOTA, Model Year: 2012, Model line: VENZA, Model: TOYOTA VENZA 2012Pages: 228, PDF Size: 3.73 MB
Page 14 of 228
14
1. CONTROLS AND FEATURES
3. TOUCH SCREEN OPERATION
To prevent damage to the screen, lightly
touch screen buttons on the screen with
the finger. When a screen button on the
screen is touched, a beep sounds. (To set
a beep sound, see page 197.)
Do not use objects other than your finger
to touch the screen.
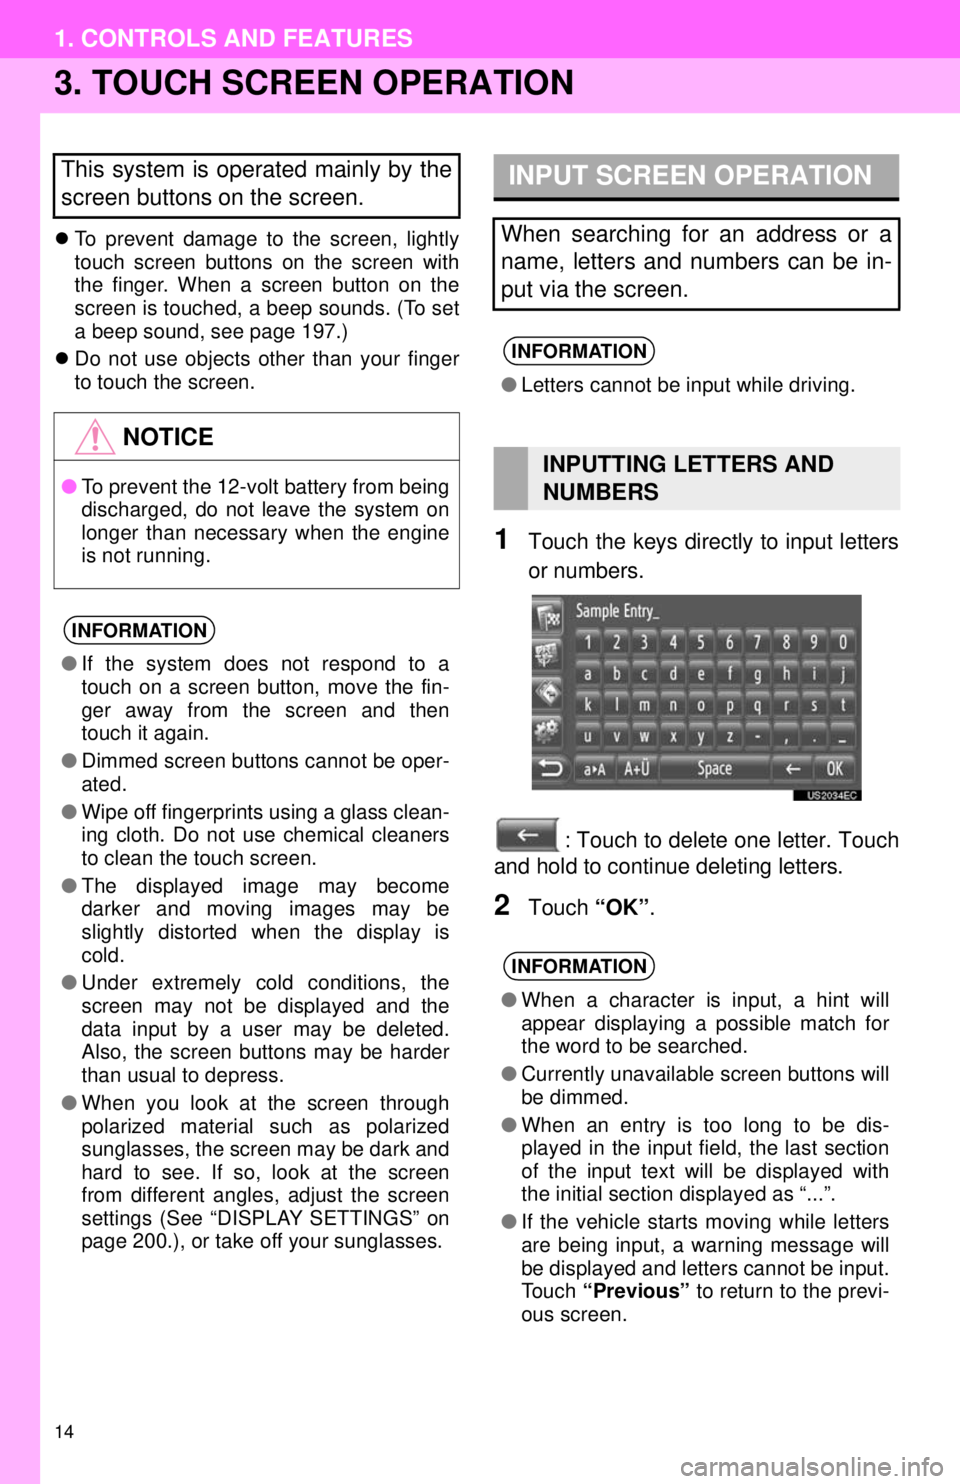
1Touch the keys directly to input letters
or numbers.
: Touch to delete one letter. Touch
and hold to continue deleting letters.
2Touch “OK”.
This system is operated mainly by the
screen buttons on the screen.
NOTICE
●To prevent the 12-volt battery from being
discharged, do not leave the system on
longer than necessary when the engine
is not running.
INFORMATION
●If the system does not respond to a
touch on a screen button, move the fin-
ger away from the screen and then
touch it again.
● Dimmed screen buttons cannot be oper-
ated.
● Wipe off fingerprints using a glass clean-
ing cloth. Do not use chemical cleaners
to clean the touch screen.
● The displayed image may become
darker and moving images may be
slightly distorted when the display is
cold.
● Under extremely cold conditions, the
screen may not be displayed and the
data input by a user may be deleted.
Also, the screen buttons may be harder
than usual to depress.
● When you look at the screen through
polarized material such as polarized
sunglasses, the screen may be dark and
hard to see. If so, look at the screen
from different angles, adjust the screen
settings (See “DISPLAY SETTINGS” on
page 200.), or take off your sunglasses.
INPUT SCREEN OPERATION
When searching for an address or a
name, letters and numbers can be in-
put via the screen.
INFORMATION
●Letters cannot be input while driving.
INPUTTING LETTERS AND
NUMBERS
INFORMATION
●When a character is input, a hint will
appear displaying a possible match for
the word to be searched.
● Currently unavailable screen buttons will
be dimmed.
● When an entry is too long to be dis-
played in the input field, the last section
of the input text will be displayed with
the initial section displayed as “...”.
● If the vehicle starts moving while letters
are being input, a warning message will
be displayed and letters cannot be input.
Touch “Previous” to return to the previ-
ous screen.
Page 15 of 228
15
1. CONTROLS AND FEATURES
1
QUICK GUIDE
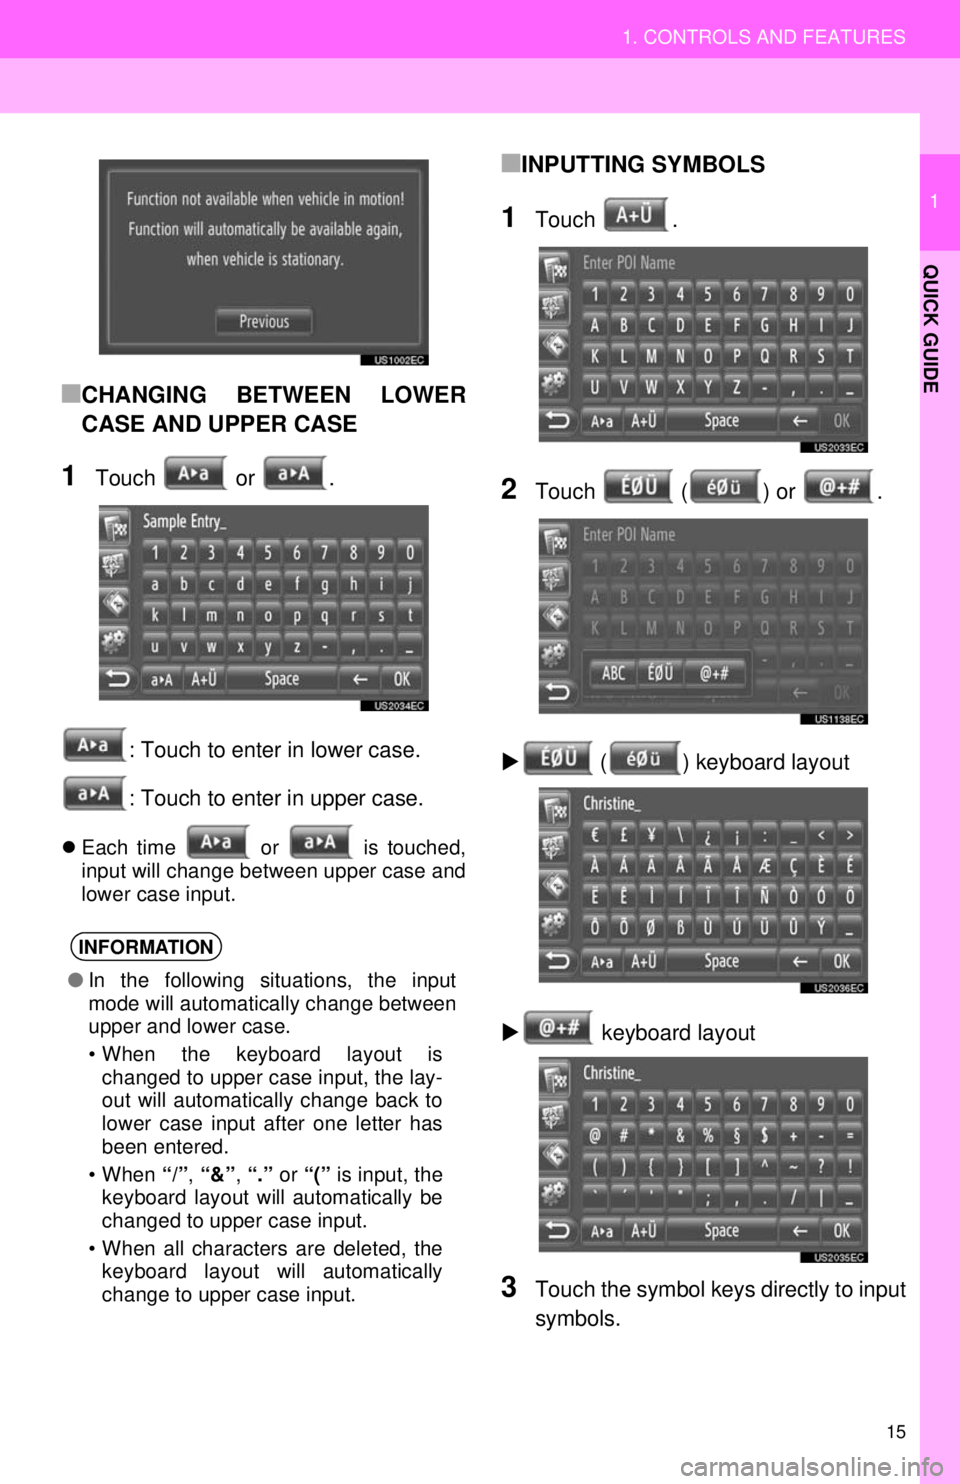
■CHANGING BETWEEN LOWER
CASE AND UPPER CASE
1Touch or .: Touch to enter in lower case.
: Touch to enter in upper case.
Each time or is touched,
input will change between upper case and
lower case input.
■INPUTTING SYMBOLS
1Touch .
2Touch ( ) or .
( ) keyboard layout
keyboard layout
3Touch the symbol keys directly to input
symbols.
INFORMATION
● In the following situations, the input
mode will automatically change between
upper and lower case.
• When the keyboard layout is
changed to upper case input, the lay-
out will automatically change back to
lower case input after one letter has
been entered.
• When “/”, “&” , “.” or “(” is input, the
keyboard layout will automatically be
changed to upper case input.
• When all characters are deleted, the keyboard layout will automatically
change to upper case input.
Page 155 of 228
155
1. BASIC INFORMATION BEFORE OPERATION
5
Bluetooth
® HANDS-FREE SYSTEM
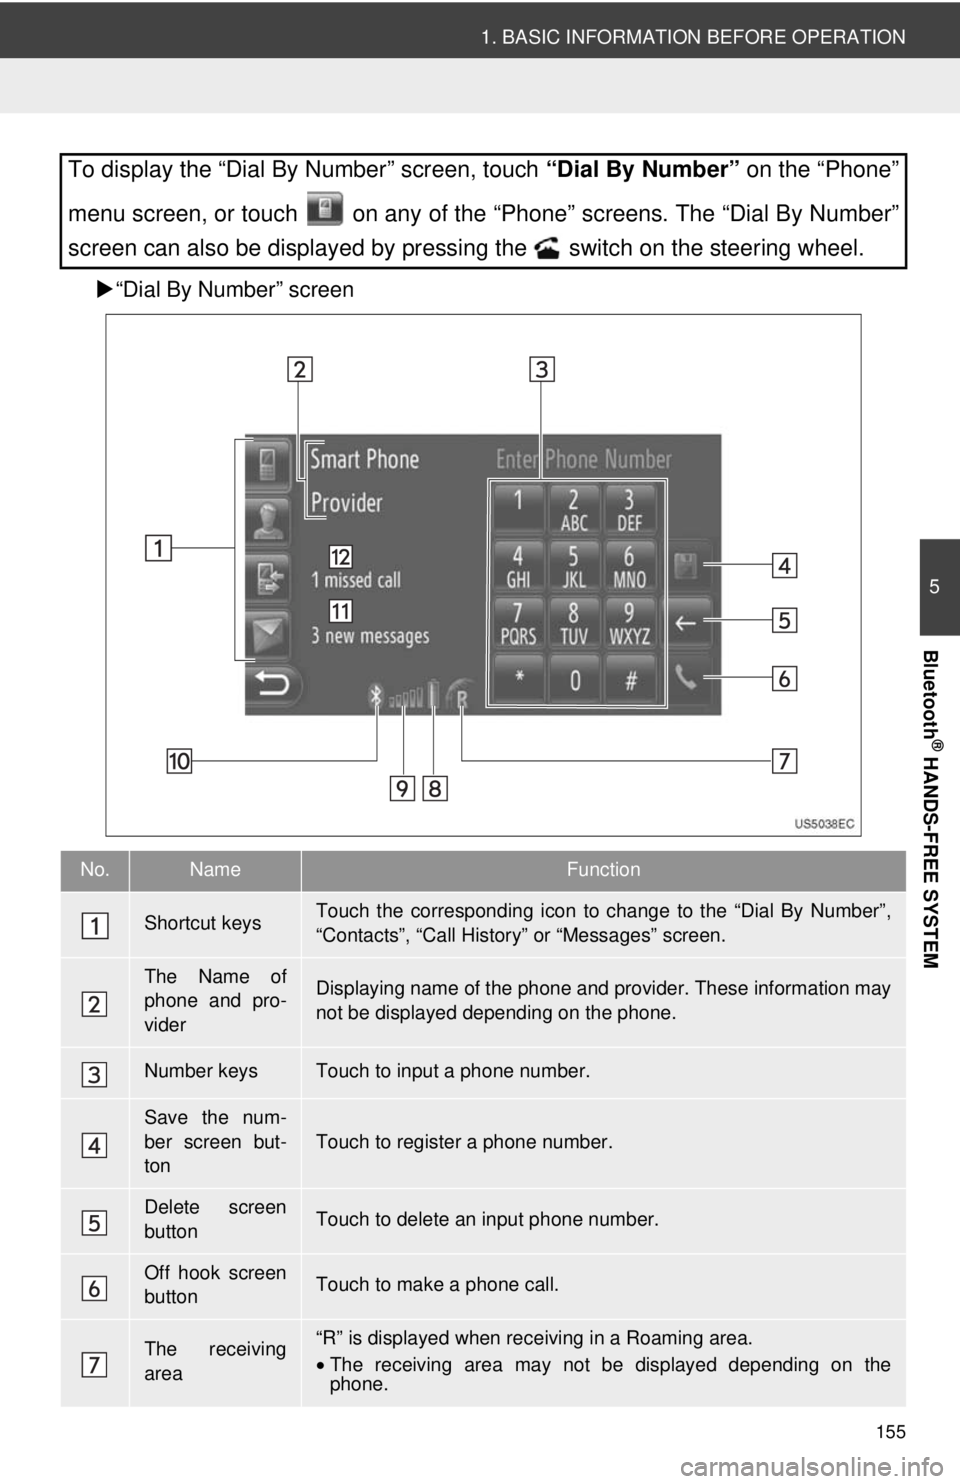
“Dial By Number” screen
To display the “Dial By Number” screen, touch “Dial By Number” on the “Phone”
menu screen, or touch on any of the “Phone” screens. The “Dial By Number”
screen can also be displayed by pressing the switch on the steering wheel.
No.NameFunction
Shortcut keysTouch the corresponding icon to change to the “Dial By Number”,
“Contacts”, “Call Histor y” or “Messages” screen.
The Name of
phone and pro-
viderDisplaying name of the phone and provider. These information may
not be displayed depending on the phone.
Number keysTouch to input a phone number.
Save the num-
ber screen but-
ton
Touch to register a phone number.
Delete screen
buttonTouch to delete an input phone number.
Off hook screen
buttonTouch to make a phone call.
The receiving
area“R” is displayed when rece iving in a Roaming area.
• The receiving area may not be displayed depending on the
phone.
Page 170 of 228
170
2. TELEPHONE OPERATION
1. CALLING ON A Bluetooth® PHONE
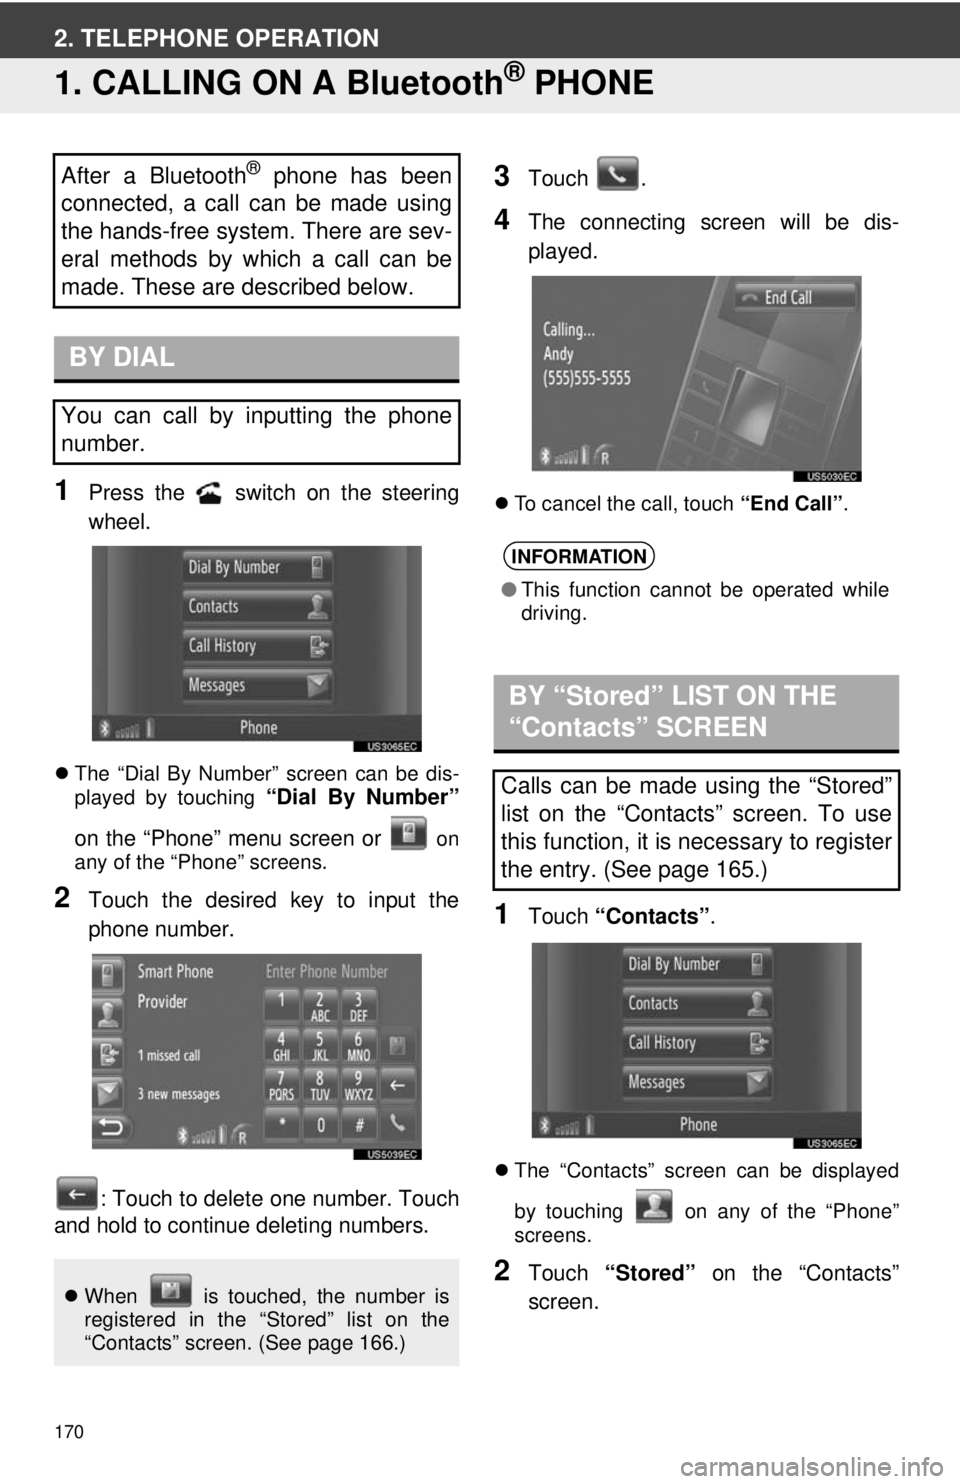
1Press the switch on the steering
wheel.
The “Dial By Number” screen can be dis-
played by touching “Dial By Number”
on the “Phone” menu screen or
on
any of the “Phone” screens.
2Touch the desired key to input the
phone number.
: Touch to delete one number. Touch
and hold to continue deleting numbers.
3Touch .
4The connecting screen will be dis-
played.
To cancel the call, touch “End Call”.
1Touch “Contacts” .
The “Contacts” screen can be displayed
by touching on any of the “Phone”
screens.
2Touch “Stored” on the “Contacts”
screen.
After a Bluetooth® phone has been
connected, a call can be made using
the hands-free system. There are sev-
eral methods by which a call can be
made. These are described below.
BY DIAL
You can call by inputting the phone
number.
When is touched, the number is
registered in the “Stored” list on the
“Contacts” screen. (See page 166.)
INFORMATION
●This function cannot be operated while
driving.
BY “Stored” LIST ON THE
“Contacts” SCREEN
Calls can be made using the “Stored”
list on the “Contacts” screen. To use
this function, it is necessary to register
the entry. (See page 165.)
Page 198 of 228
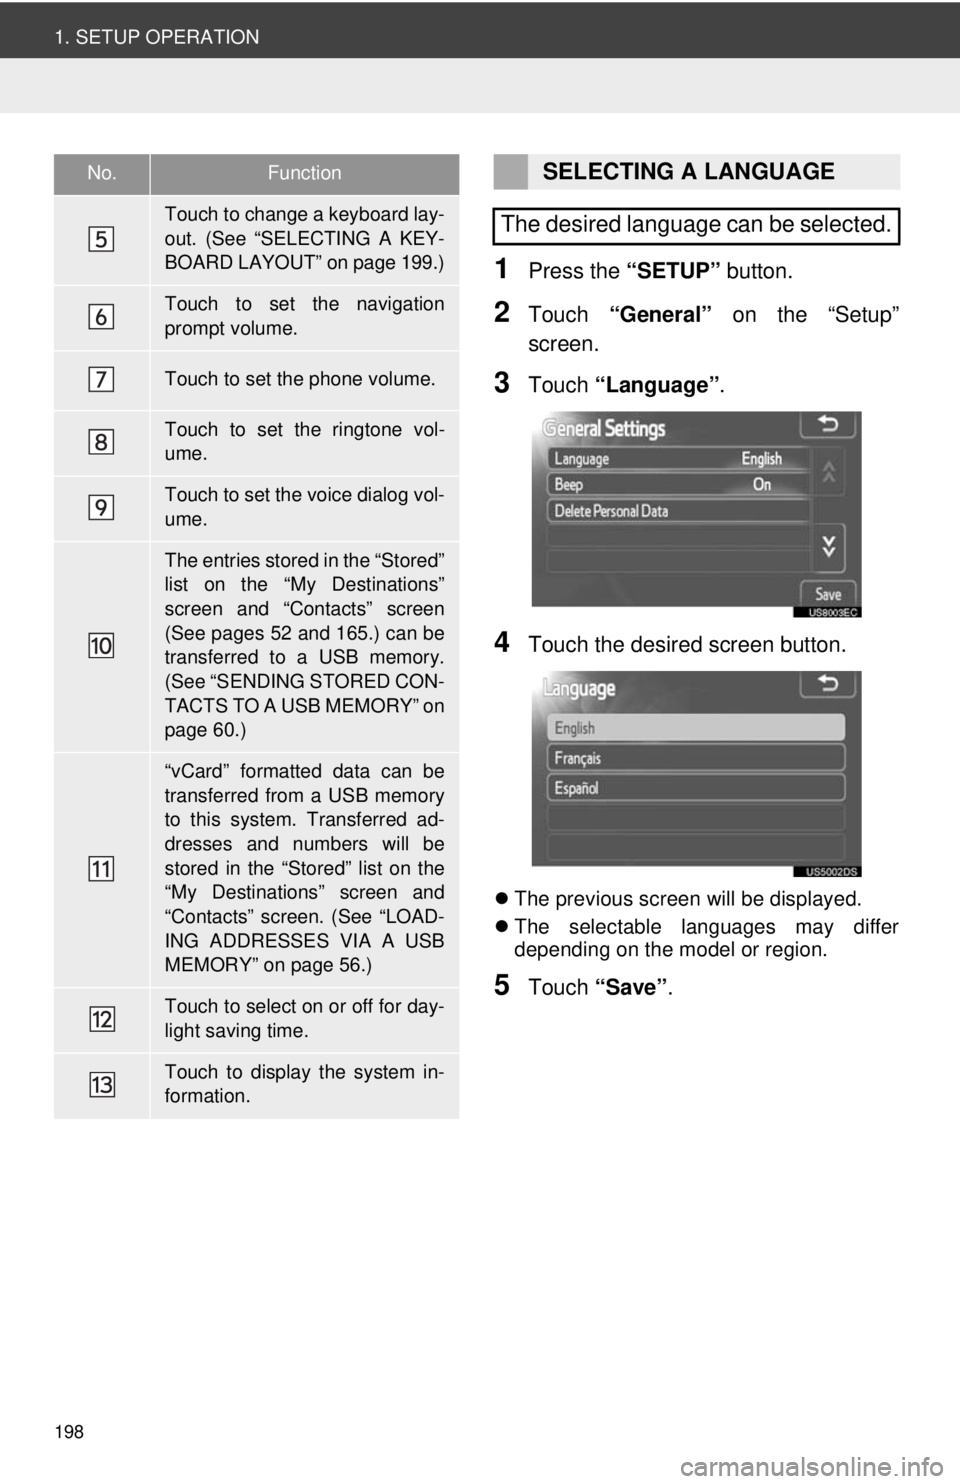
198
1. SETUP OPERATION
1Press the “SETUP” button.
2Touch “General” on the “Setup”
screen.
3Touch “Language” .
4Touch the desired screen button.
The previous screen will be displayed.
The selectable languages may differ
depending on the model or region.
5Touch “Save” .
Touch to change a keyboard lay-
out. (See “SELECTING A KEY-
BOARD LAYOUT” on page 199.)
Touch to set the navigation
prompt volume.
Touch to set the phone volume.
Touch to set the ringtone vol-
ume.
Touch to set the voice dialog vol-
ume.
The entries stored in the “Stored”
list on the “My Destinations”
screen and “Contacts” screen
(See pages 52 and 165.) can be
transferred to a USB memory.
(See “SENDING STORED CON-
TACTS TO A USB MEMORY” on
page 60.)
“vCard” formatted data can be
transferred from a USB memory
to this system. Transferred ad-
dresses and numbers will be
stored in the “Stored” list on the
“My Destinations” screen and
“Contacts” screen. (See “LOAD-
ING ADDRESSES VIA A USB
MEMORY” on page 56.)
Touch to select on or off for day-
light saving time.
Touch to display the system in-
formation.
No.FunctionSELECTING A LANGUAGE
The desired language can be selected.
Page 199 of 228
199
1. SETUP OPERATION
8
SETUP
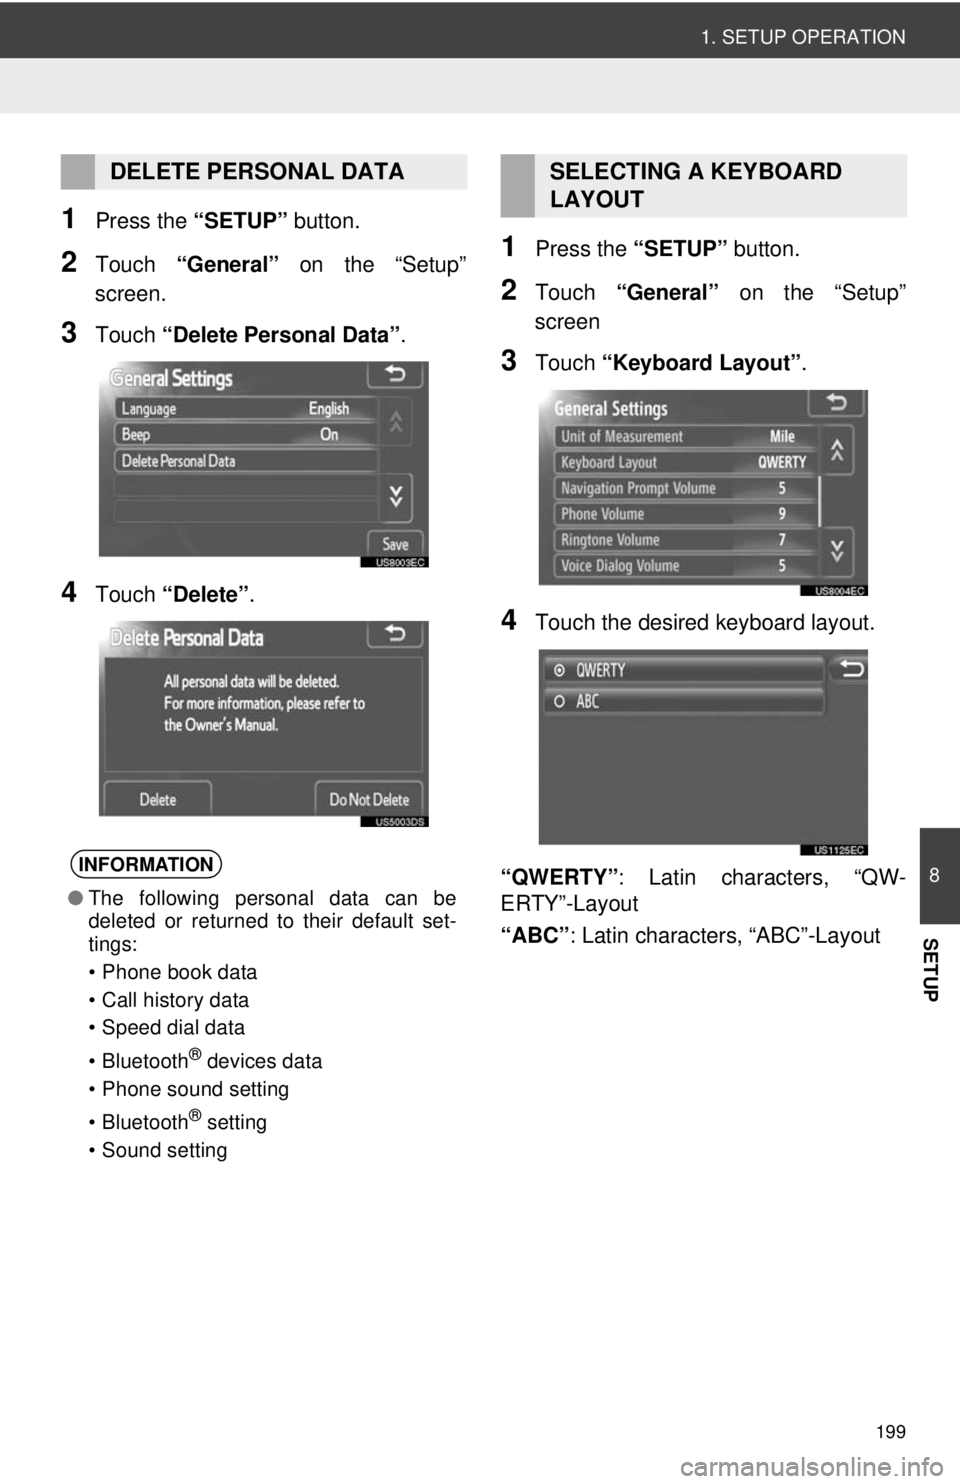
1Press the “SETUP” button.
2Touch “General” on the “Setup”
screen.
3Touch “Delete Personal Data” .
4Touch “Delete” .
1Press the “SETUP” button.
2Touch “General” on the “Setup”
screen
3Touch “Keyboard Layout” .
4Touch the desired keyboard layout.
“QWERTY” : Latin characters, “QW-
ERTY”-Layout
“ABC” : Latin characters, “ABC”-Layout
DELETE PERSONAL DATA
INFORMATION
●The following personal data can be
deleted or returned to their default set-
tings:
• Phone book data
• Call history data
• Speed dial data
• Bluetooth
® devices data
• Phone sound setting
• Bluetooth
® setting
• Sound setting
SELECTING A KEYBOARD
LAYOUT