TOYOTA VERSO S 2015 Owners Manual
Manufacturer: TOYOTA, Model Year: 2015, Model line: VERSO S, Model: TOYOTA VERSO S 2015Pages: 564, PDF Size: 18.47 MB
Page 91 of 564
91 1-3. Adjustable components (seats, mirrors, steering wheel)
1
Before driving
CAUTION
Seat belt damage and wear
Do not damage the seat belts by allowing the belt, plate, or buckle to be
jammed in the door.
Inspect the seat belt system periodically. Check for cuts, fraying, and loose
parts. Do not use a damaged seat belt until it is replaced. Damaged seat
belt cannot protect an occupant from death or serious injury.
Ensure that the belt and plate are locked and the belt is not twisted.
If the seat belt does not function correctly, immediately contact any autho-
rized Toyota dealer or repairer, or another duly qualified and equipped pro-
fessional.
Replace the seat assembly, including the belts, if your vehicle has been
involved in a serious accident, even if there is no obvious damage.
Do not attempt to install, remove, modify, disassemble or dispose of the
seat belts. Have any necessary repairs carried out by any authorized
Toyota dealer or repairer, or another duly qualified and equipped profes-
sional. Inappropriate handling of the pretensioner may prevent it from
operating properly, resulting in death or serious injury.
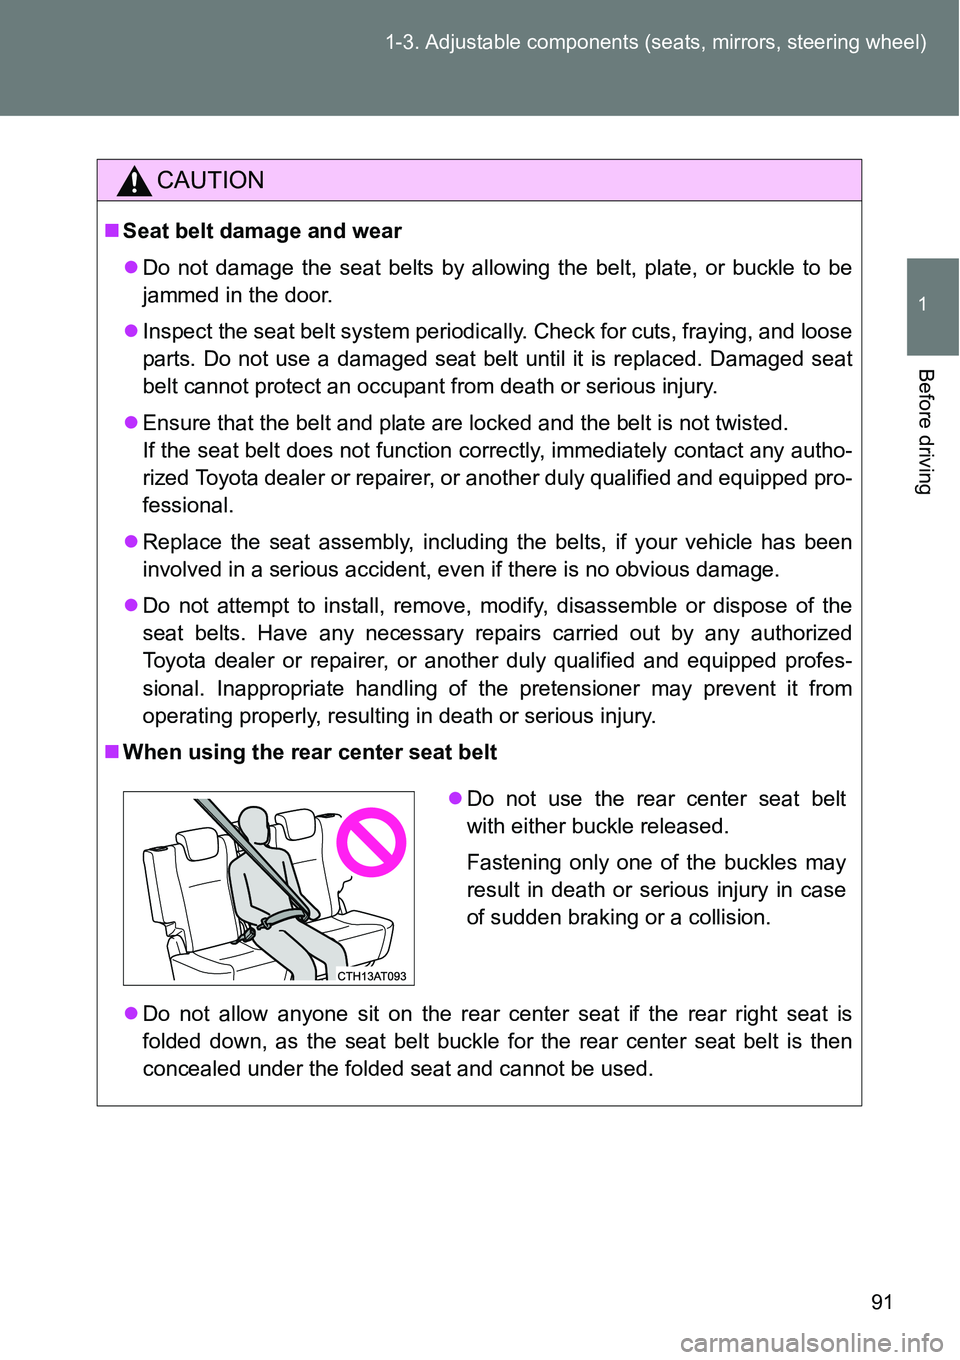
When using the rear center seat belt
Do not allow anyone sit on the rear center seat if the rear right seat is
folded down, as the seat belt buckle for the rear center seat belt is then
concealed under the folded seat and cannot be used.
Do not use the rear center seat belt
with either buckle released.
Fastening only one of the buckles may
result in death or serious injury in case
of sudden braking or a collision.
Page 92 of 564
92
1-3. Adjustable components (seats, mirrors, steering wheel)
Steering wheel
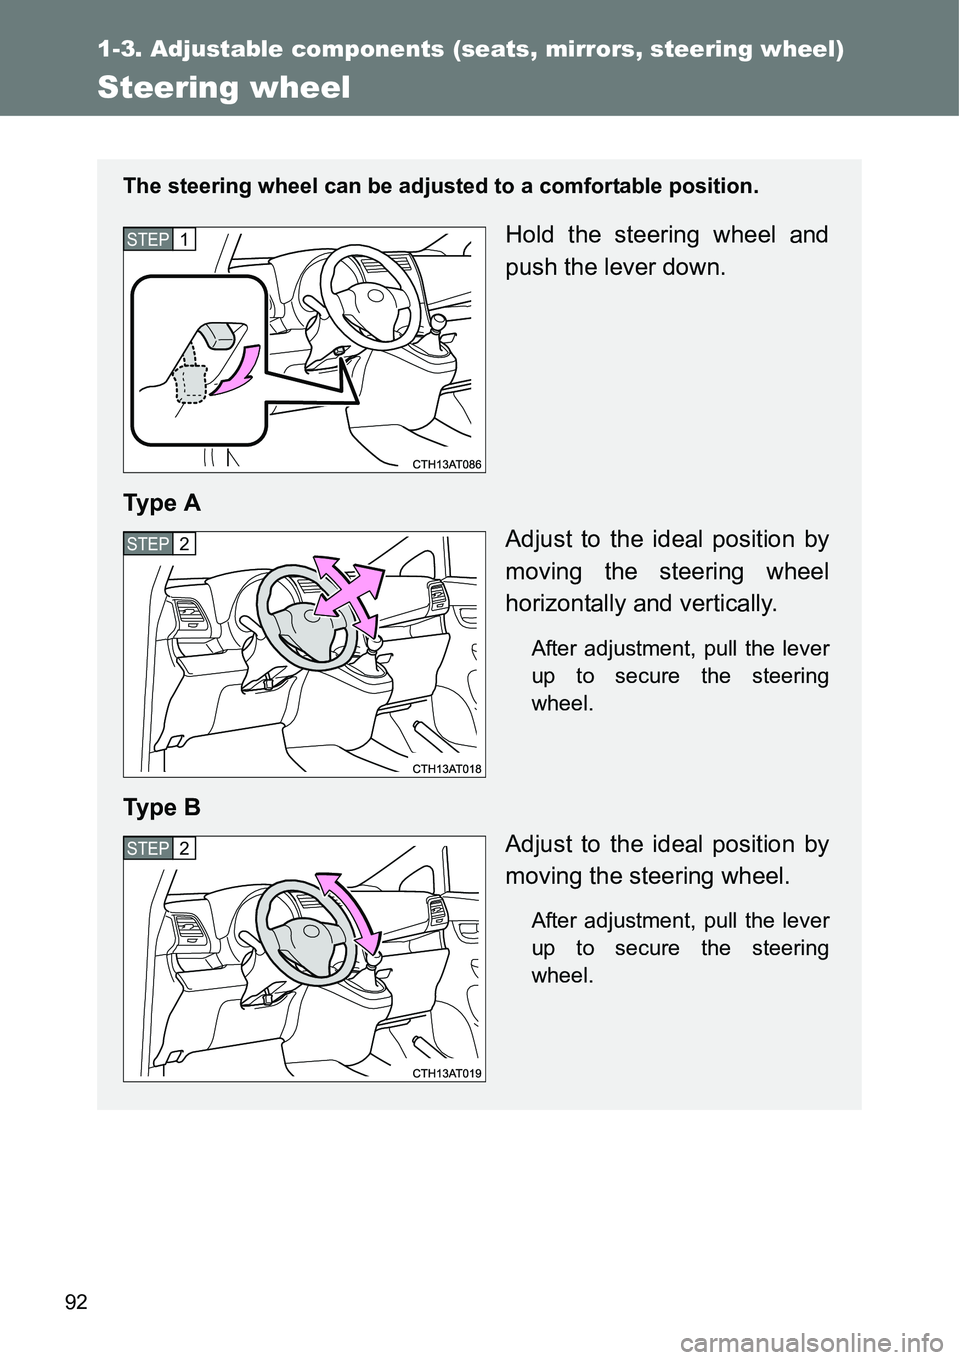
The steering wheel can be adjusted to a comfortable position.
Hold the steering wheel and
push the lever down.
Ty p e A
Adjust to the ideal position by
moving the steering wheel
horizontally and vertically.
After adjustment, pull the lever
up to secure the steering
wheel.
Ty p e B
Adjust to the ideal position by
moving the steering wheel.
After adjustment, pull the lever
up to secure the steering
wheel.
STEP1
STEP2
STEP2
Page 93 of 564
93 1-3. Adjustable components (seats, mirrors, steering wheel)
1
Before driving
CAUTION
Caution while driving
Do not adjust the steering wheel while driving.
Doing so may cause the driver to mishandle the vehicle and cause an acci-
dent, resulting in death or serious injury.
After adjusting the steering wheel
Make sure that the steering wheel is securely locked.
Otherwise, the steering wheel may move suddenly, possibly causing an
accident, and resulting in death or serious injury.
Page 94 of 564
94
1-3. Adjustable components (seats, mirrors, steering wheel)
Anti-glare inside rear view mirror
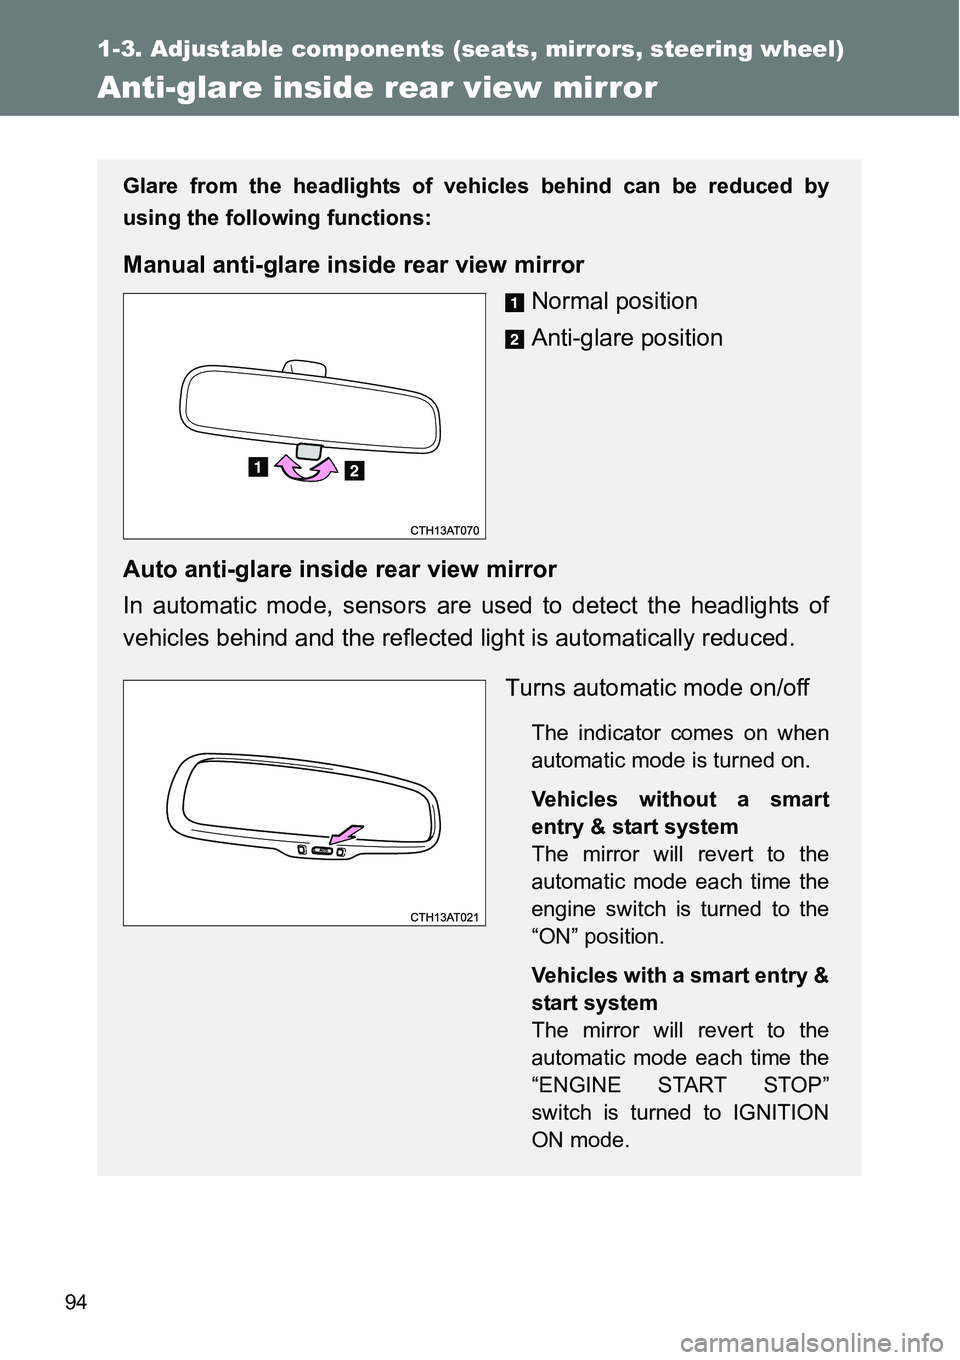
Glare from the headlights of vehicles behind can be reduced by
using the following functions:
Manual anti-glare inside rear view mirror
Normal position
Anti-glare position
Auto anti-glare inside rear view mirror
In automatic mode, sensors are used to detect the headlights of
vehicles behind and the reflected light is automatically reduced.
Turns automatic mode on/off
The indicator comes on when
automatic mode is turned on.
Vehicles without a smart
entry & start system
The mirror will revert to the
automatic mode each time the
engine switch is turned to the
“ON” position.
Vehicles with a smart entry &
start system
The mirror will revert to the
automatic mode each time the
“ENGINE START STOP”
switch is turned to IGNITION
ON mode.
Page 95 of 564
95 1-3. Adjustable components (seats, mirrors, steering wheel)
1
Before driving
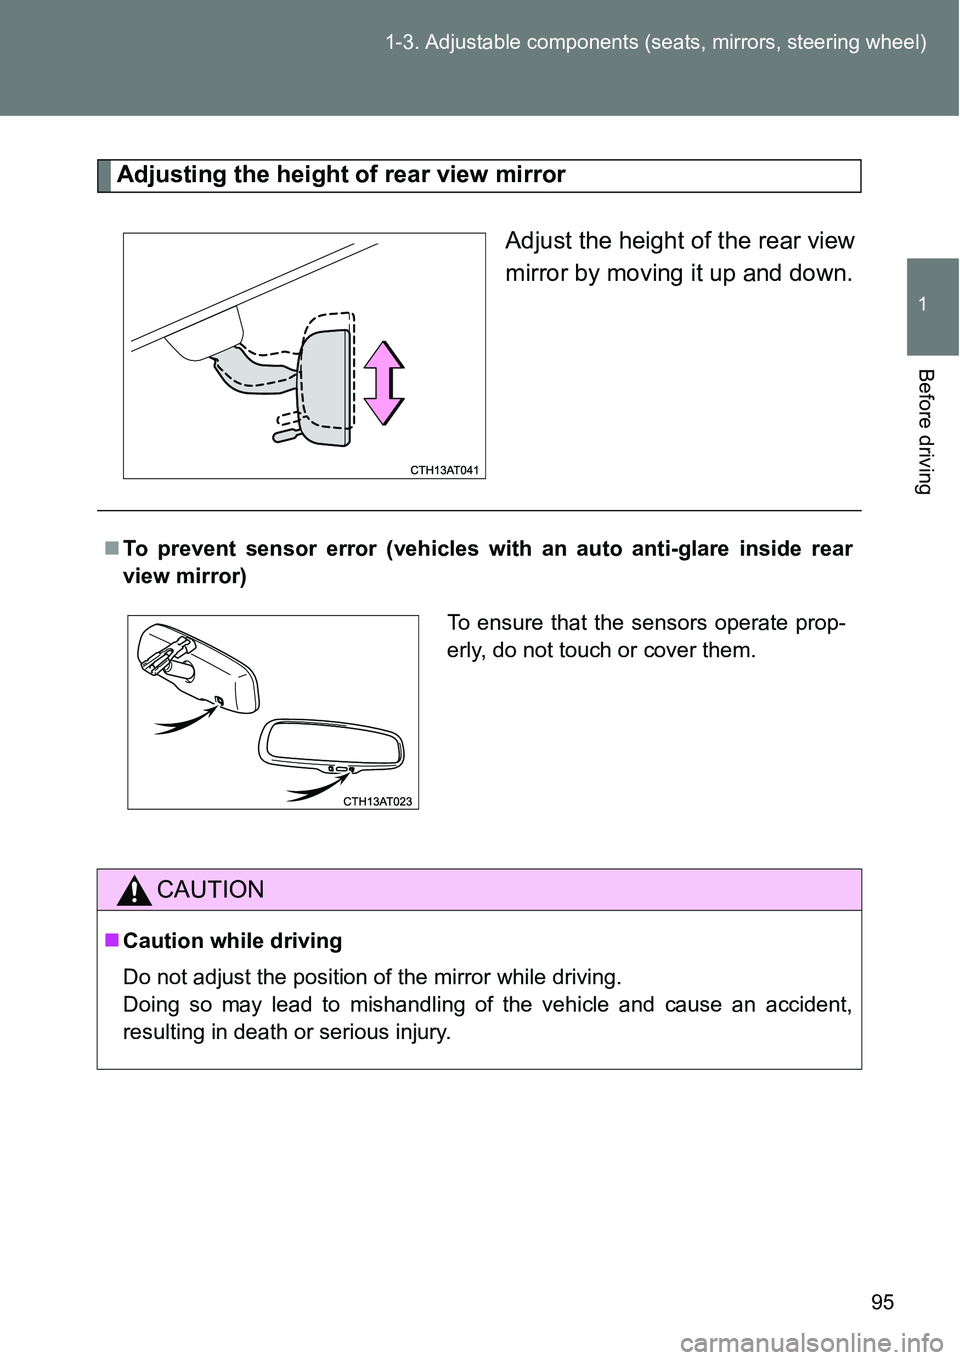
Adjusting the height of rear view mirror
Adjust the height of the rear view
mirror by moving it up and down.
To prevent sensor error (vehicles with an auto anti-glare inside rear
view mirror)
CAUTION
Caution while driving
Do not adjust the position of the mirror while driving.
Doing so may lead to mishandling of the vehicle and cause an accident,
resulting in death or serious injury.
To ensure that the sensors operate prop-
erly, do not touch or cover them.
Page 96 of 564
96
1-3. Adjustable components (seats, mirrors, steering wheel)
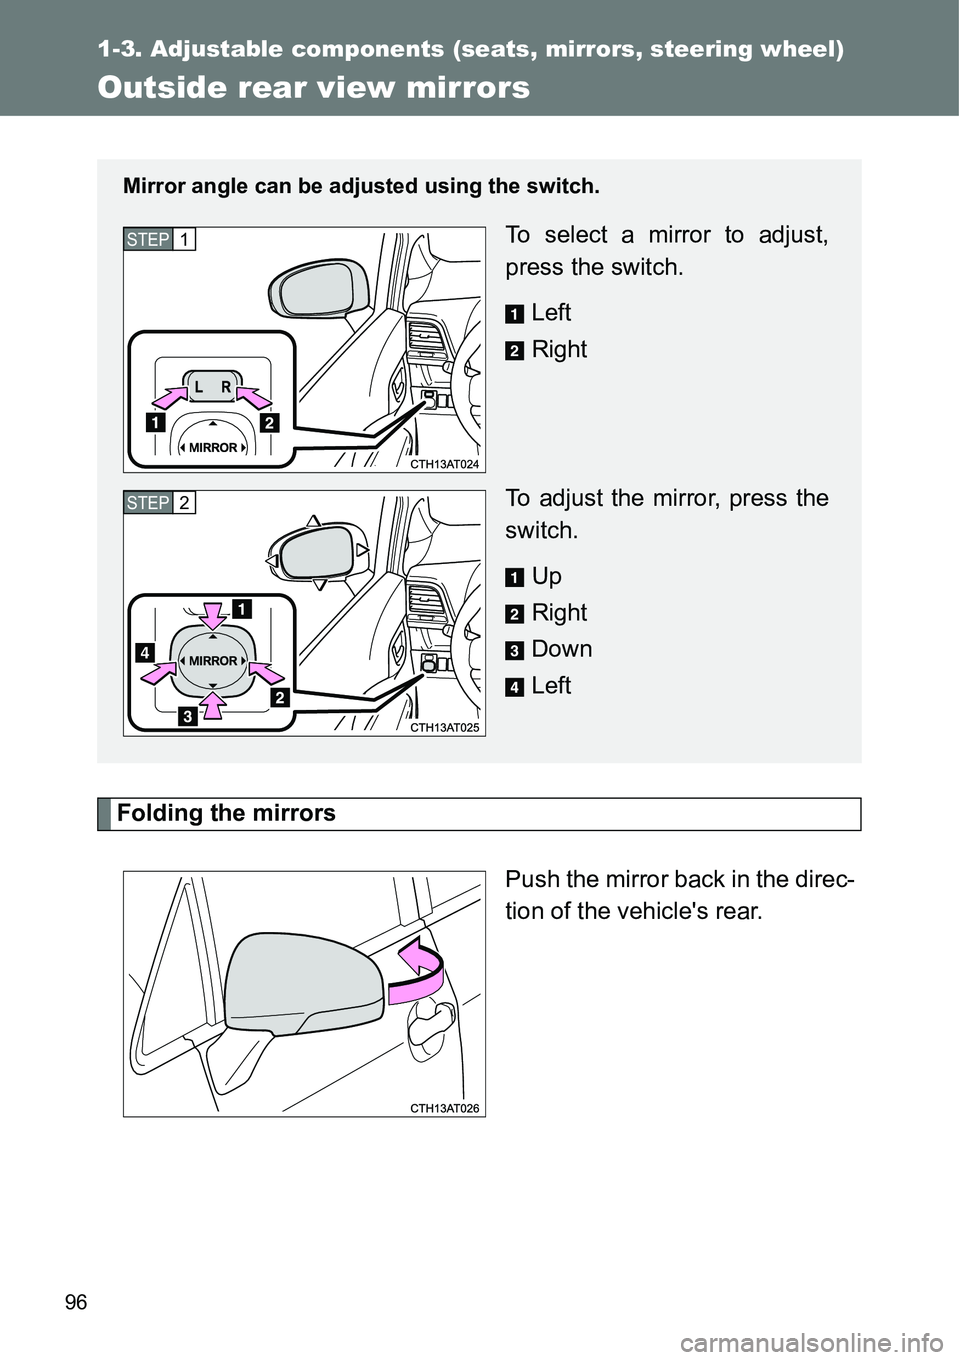
Outside rear view mirrors
Folding the mirrors
Push the mirror back in the direc-
tion of the vehicle's rear.
Mirror angle can be adjusted using the switch.
To select a mirror to adjust,
press the switch.
Left
Right
To adjust the mirror, press the
switch.
Up
Right
Down
LeftSTEP1
STEP2
Page 97 of 564
97 1-3. Adjustable components (seats, mirrors, steering wheel)
1
Before driving
Mirror angle can be adjusted when
Vehicles without a smart entry & start system
The engine switch is in the “ACC” or “ON” position.
Vehicles with a smart entry & start system
The “ENGINE START STOP” switch is in ACCESSORY or IGNITION ON
mode.
When the mirrors are fogged up (vehicles with outside rear view mirror
defoggers)
Turn on the mirror defoggers to defog the mirrors. (P. 281)
CAUTION
When driving the vehicle
Observe the following precautions while driving.
Failure to do so may result in loss of control of the vehicle and cause an
accident, resulting in death or serious injury.
Do not adjust the mirrors while driving.
Do not drive with the mirrors folded.
Both the driver and passenger side mirrors must be extended and properly
adjusted before driving.
When a mirror is moving
To avoid personal injury and mirror malfunction, be careful not to get your
hand caught by the moving mirror.
When the mirror defoggers are operating (vehicles with outside rear
view mirror defoggers)
Do not touch the rear view mirror surfaces, as they can become very hot and
burn you.
Page 98 of 564
98
1-4. Opening and closing the windows
Power windows
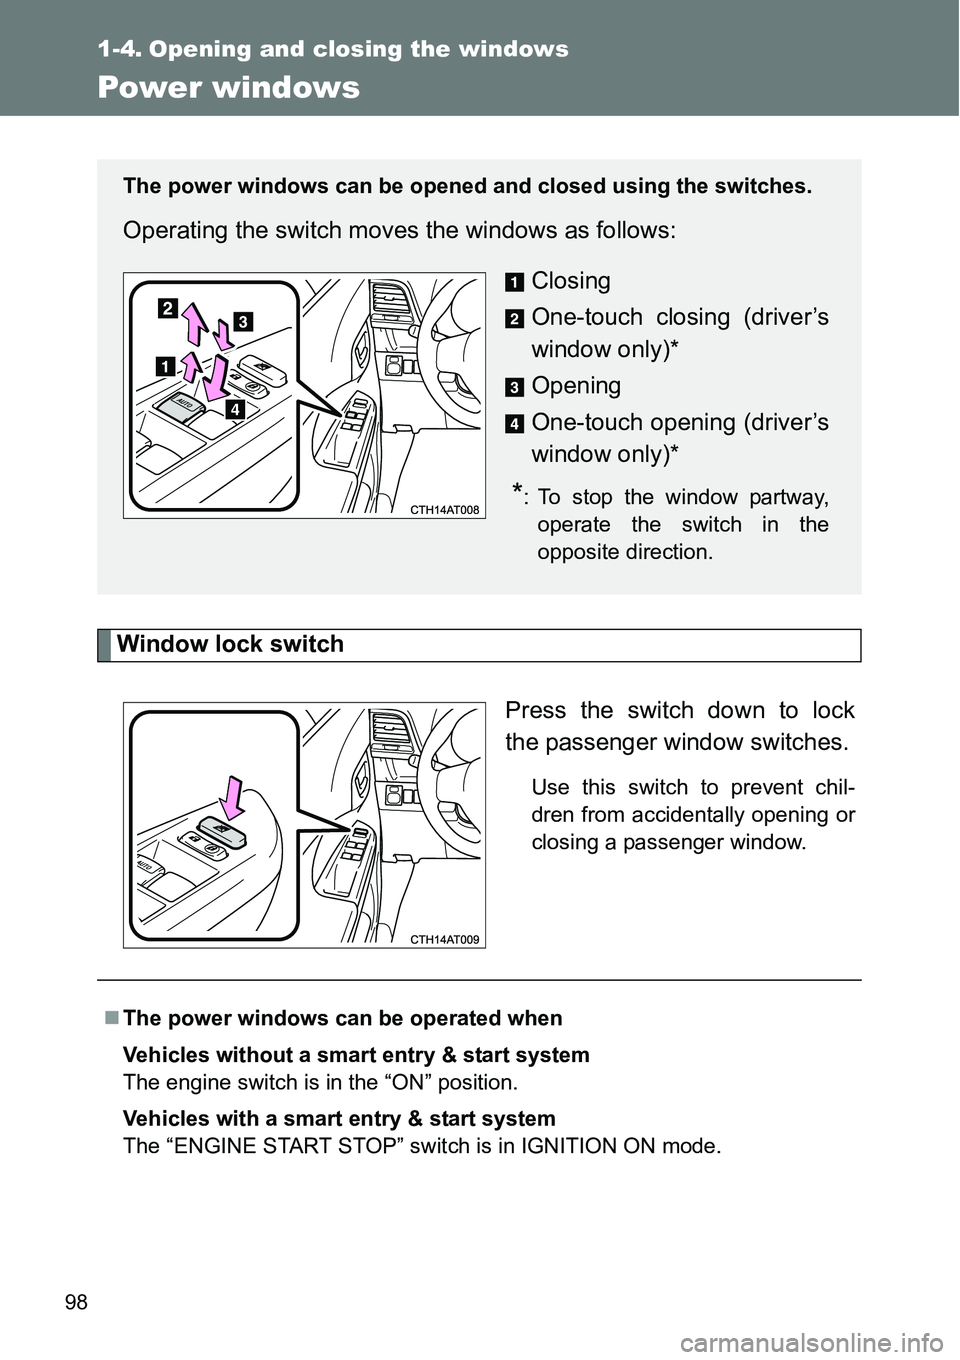
Window lock switch
Press the switch down to lock
the passenger window switches.
Use this switch to prevent chil-
dren from accidentally opening or
closing a passenger window.
The power windows can be opened and closed using the switches.
Operating the switch moves the windows as follows:
Closing
One-touch closing (driver’s
window only)*
Opening
One-touch opening (driver’s
window only)*
*: To stop the window partway,
operate the switch in the
opposite direction.
The power windows can be operated when
Vehicles without a smart entry & start system
The engine switch is in the “ON” position.
Vehicles with a smart entry & start system
The “ENGINE START STOP” switch is in IGNITION ON mode.
Page 99 of 564
99 1-4. Opening and closing the windows
1
Before driving
Operating the power windows after turning the engine off
Vehicles without a smart entry & start system
The power windows can be operated for approximately 45 seconds even
after the engine switch is turned to the “ACC” or “LOCK” position. They can-
not, however, be operated once either front door is opened.
Vehicles with a smart entry & start system
The power windows can be operated for approximately 45 seconds even
after the “ENGINE START STOP” switch is turned to ACCESSORY mode or
turned off. They cannot, however, be operated once either front door is
opened.
Jam protection function (driver’s side only)
If an object becomes caught between the window and the window frame,
window travel is stopped and the window is opened slightly.
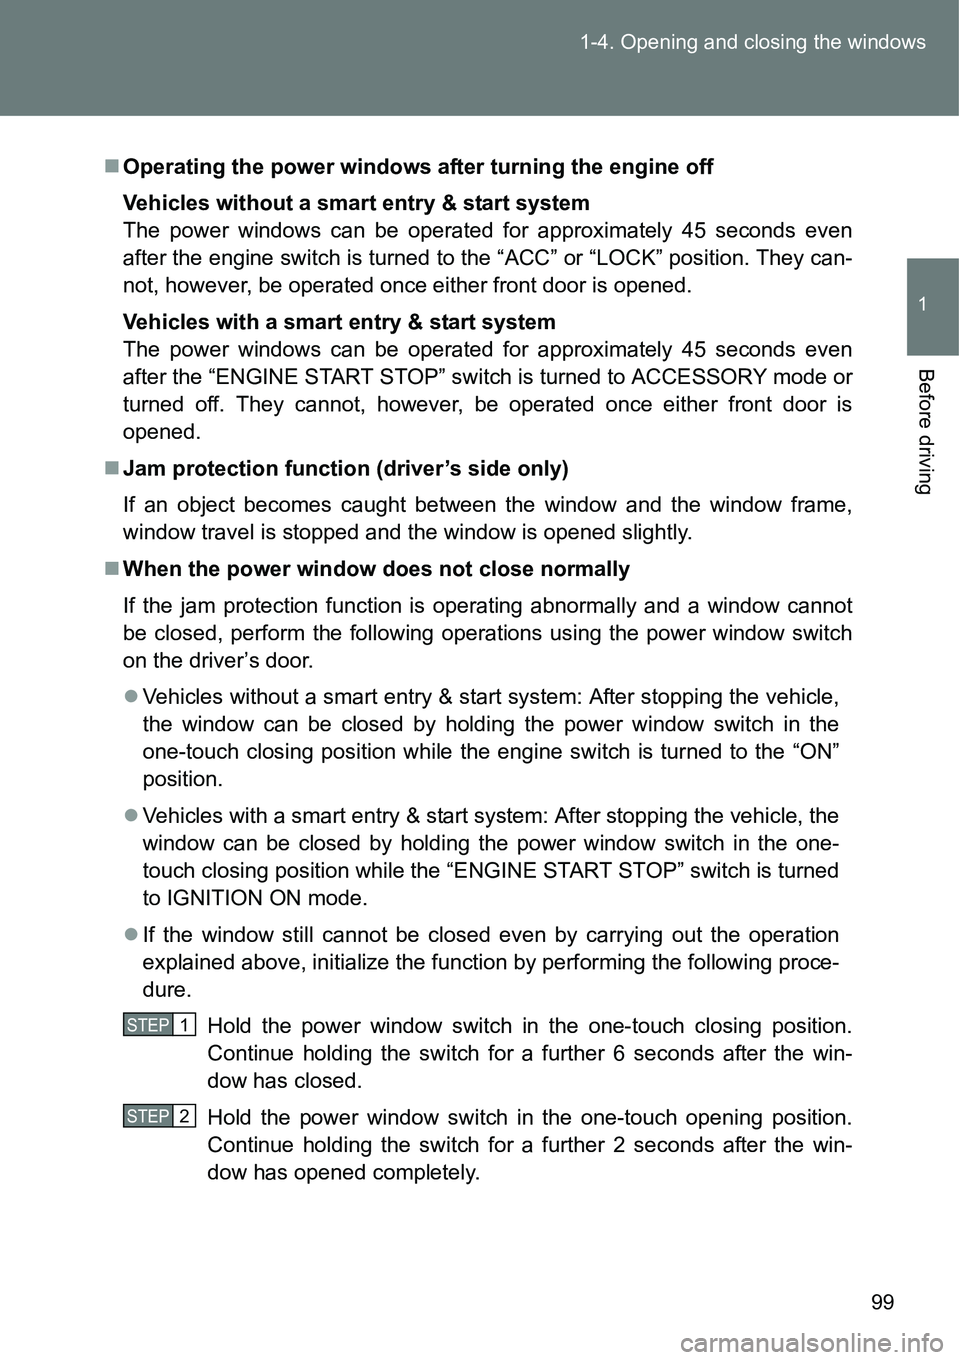
When the power window does not close normally
If the jam protection function is operating abnormally and a window cannot
be closed, perform the following operations using the power window switch
on the driver’s door.
Vehicles without a smart entry & start system: After stopping the vehicle,
the window can be closed by holding the power window switch in the
one-touch closing position while the engine switch is turned to the “ON”
position.
Vehicles with a smart entry & start system: After stopping the vehicle, the
window can be closed by holding the power window switch in the one-
touch closing position while the “ENGINE START STOP” switch is turned
to IGNITION ON mode.
If the window still cannot be closed even by carrying out the operation
explained above, initialize the function by performing the following proce-
dure.
Hold the power window switch in the one-touch closing position.
Continue holding the switch for a further 6 seconds after the win-
dow has closed.
Hold the power window switch in the one-touch opening position.
Continue holding the switch for a further 2 seconds after the win-
dow has opened completely.
STEP1
STEP2
Page 100 of 564
100 1-4. Opening and closing the windows
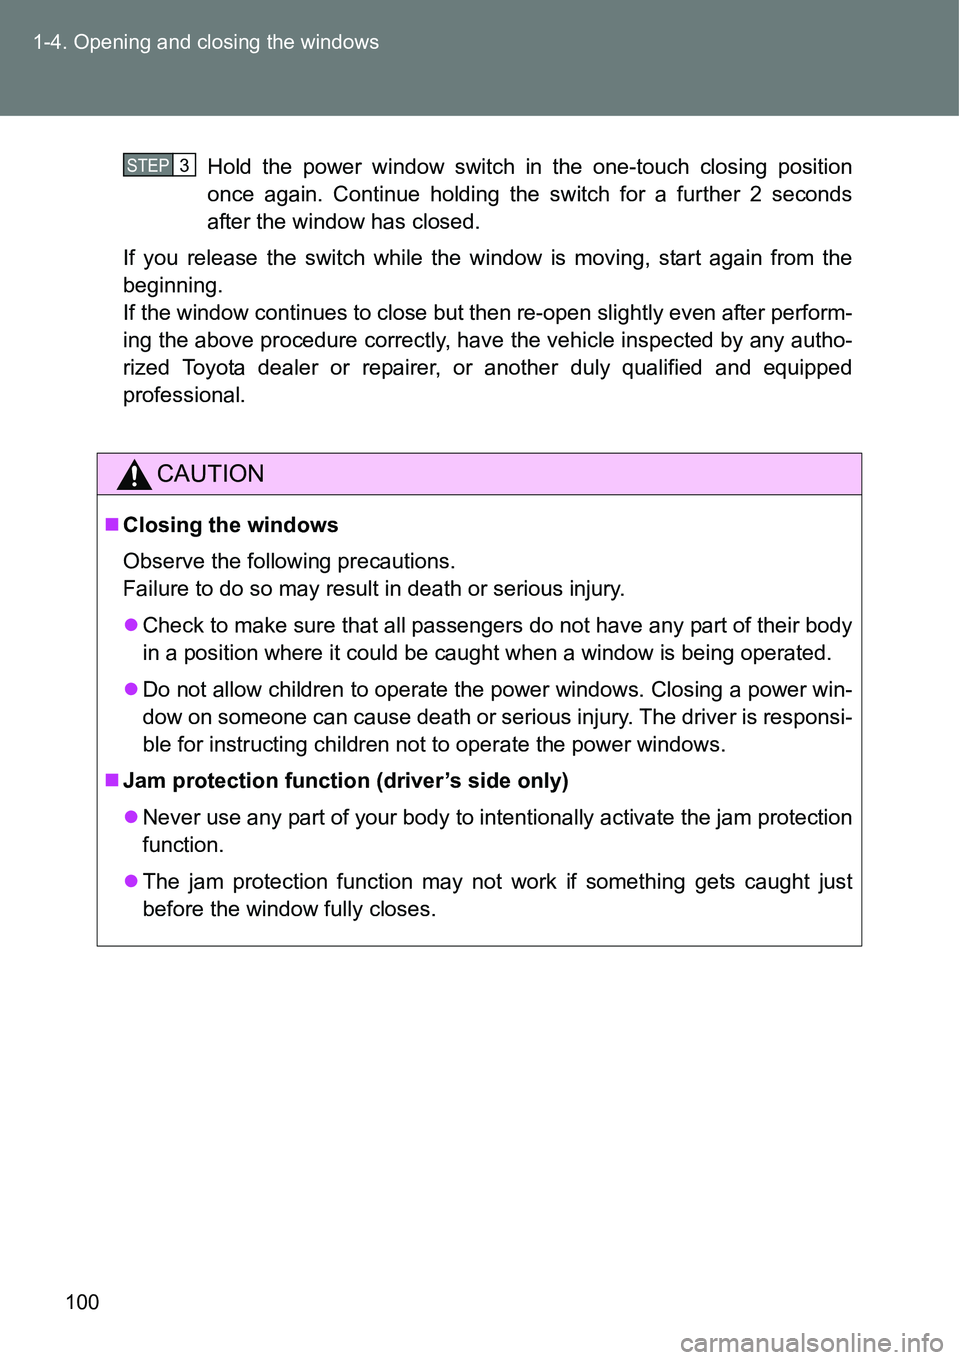
Hold the power window switch in the one-touch closing position
once again. Continue holding the switch for a further 2 seconds
after the window has closed.
If you release the switch while the window is moving, start again from the
beginning.
If the window continues to close but then re-open slightly even after perform-
ing the above procedure correctly, have the vehicle inspected by any autho-
rized Toyota dealer or repairer, or another duly qualified and equipped
professional.
CAUTION
Closing the windows
Observe the following precautions.
Failure to do so may result in death or serious injury.
Check to make sure that all passengers do not have any part of their body
in a position where it could be caught when a window is being operated.
Do not allow children to operate the power windows. Closing a power win-
dow on someone can cause death or serious injury. The driver is responsi-
ble for instructing children not to operate the power windows.
Jam protection function (driver’s side only)
Never use any part of your body to intentionally activate the jam protection
function.
The jam protection function may not work if something gets caught just
before the window fully closes.
STEP3