TOYOTA YARIS 2008 2.G Owners Manual
YARIS 2008 2.G
TOYOTA
TOYOTA
https://www.carmanualsonline.info/img/14/6848/w960_6848-0.png
TOYOTA YARIS 2008 2.G Owners Manual
Trending: trailer, CD player, Axle, low beam, air suspension, oil dipstick, Receiver
Page 211 of 388
211
3-4. Using the
storage features
3
Interior features
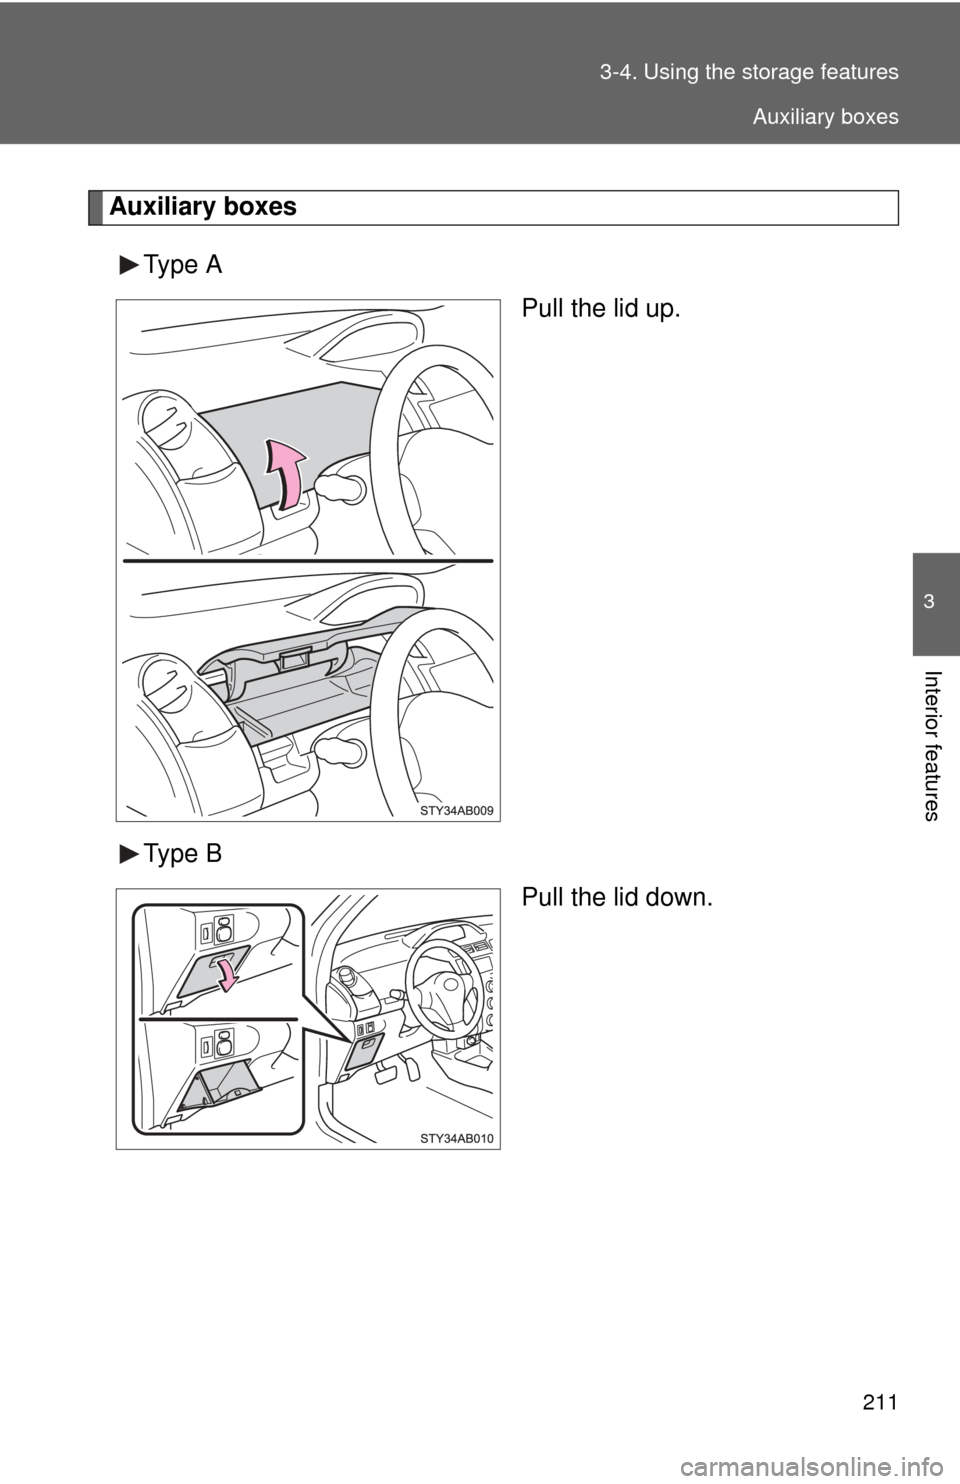
Auxiliary boxes
Type A Pull the lid up.
Type B Pull the lid down.
Auxiliary boxes
Page 212 of 388
212 3-4. Using the storage features
CAUTION
■Type A: Items that should not be left in the auxiliary box
Do not leave anything flammable or deformable such as a lighter, glasses,
etc. in the box.
If the interior of the vehicle becomes hot, they may explode, warp or crack.
■ Caution while driving
Keep the auxiliary box closed.
Injuries may result in the event of an accident or sudden braking.
Auxiliary boxes
Page 213 of 388
213
3
Interior features
3-5. Other interior features
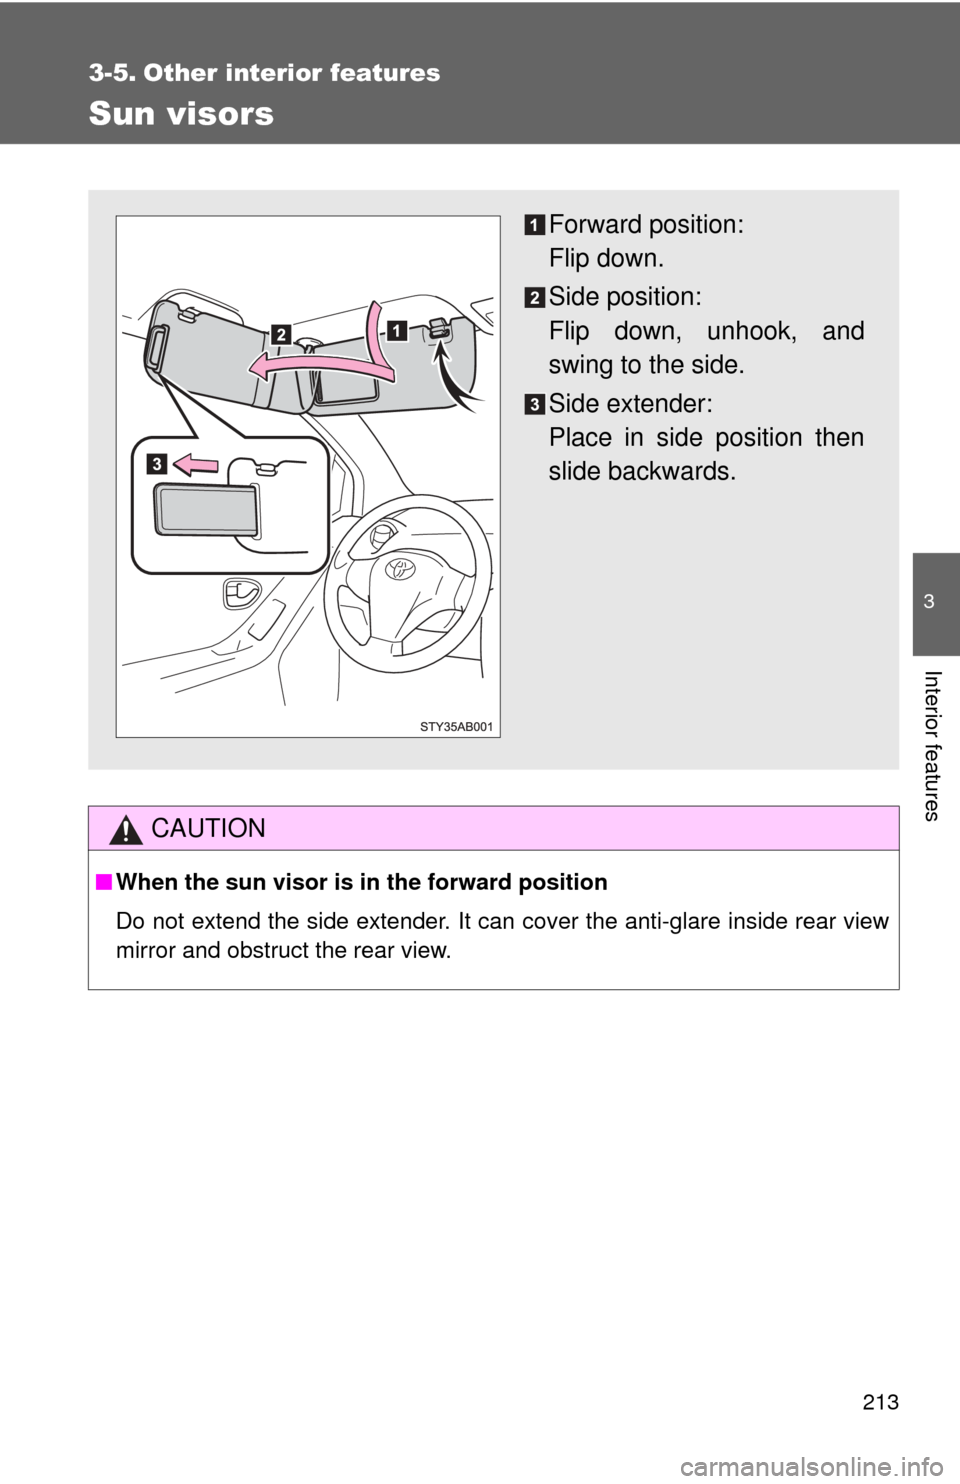
Sun visors
CAUTION
■When the sun visor is in the forward position
Do not extend the side extender. It can cover the anti-glare inside rear view
mirror and obstruct the rear view.
Forward position:
Flip down.
Side position:
Flip down, unhook, and
swing to the side.
Side extender:
Place in side position then
slide backwards.
Page 214 of 388
214
3-5. Other interior features
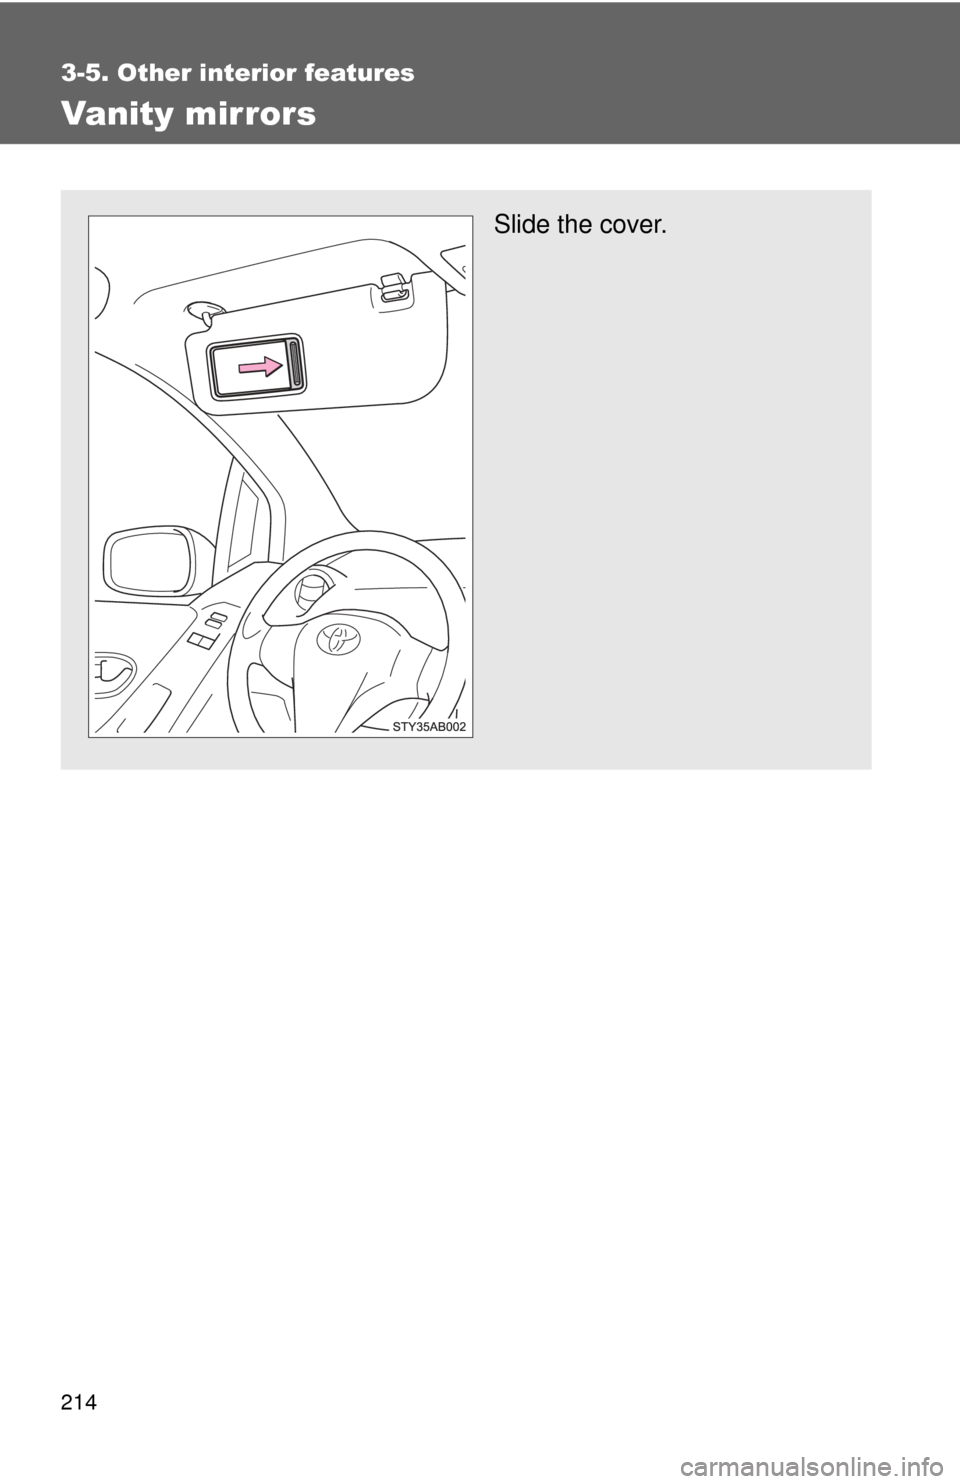
Vanity mirrors
Slide the cover.
Page 215 of 388
215
3-5. Other interior features
3
Interior features
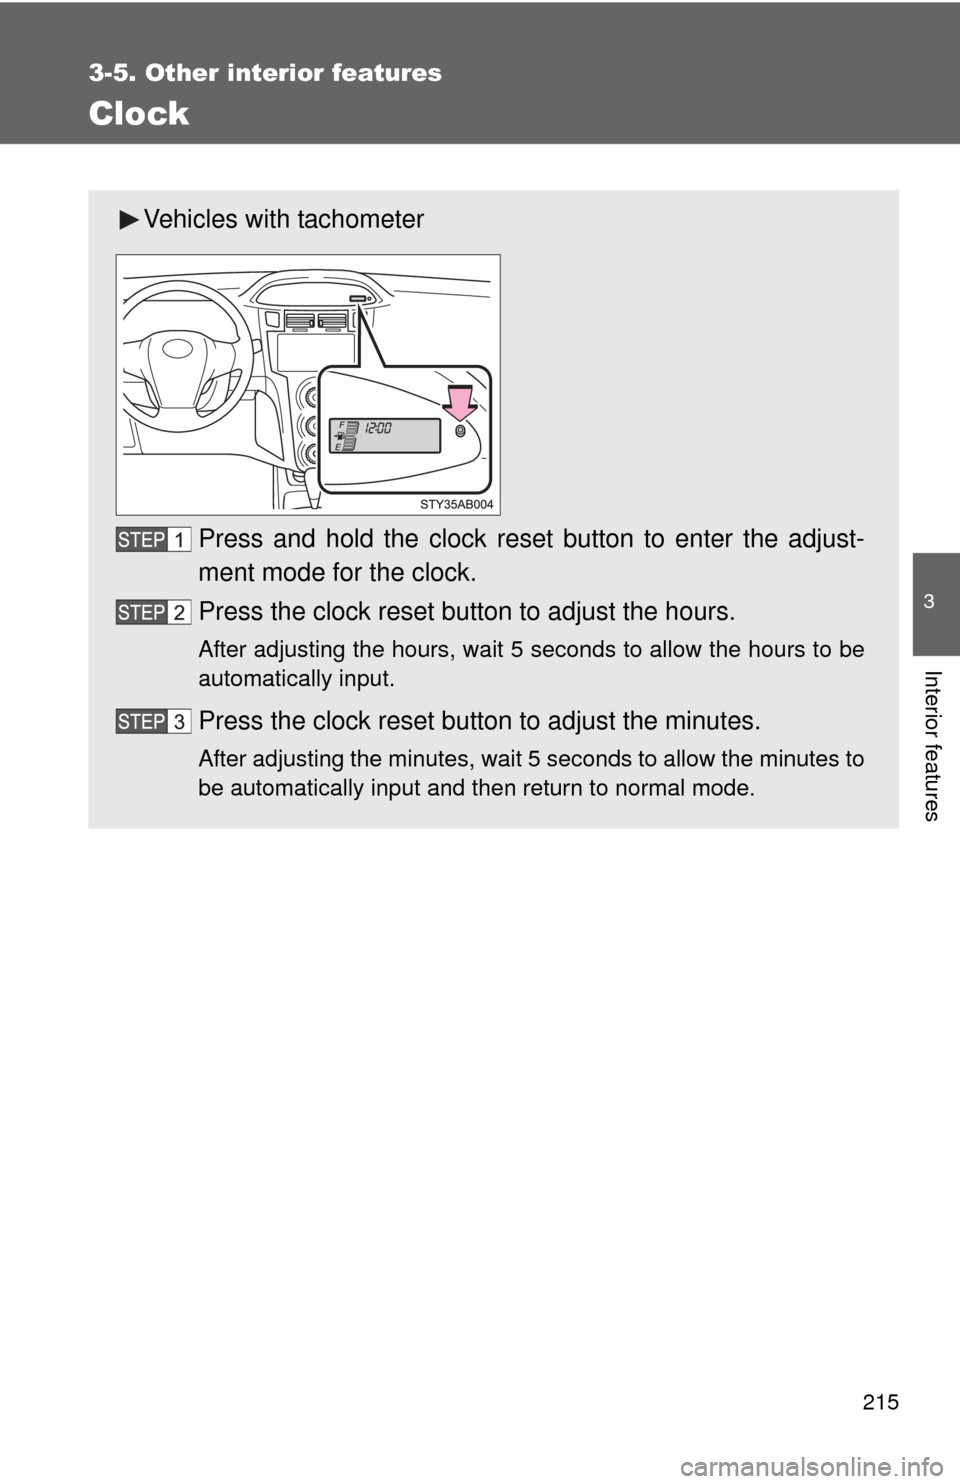
Clock
Vehicles with tachometerPress and hold the clock reset button to enter the adjust-
ment mode for the clock.
Press the clock reset button to adjust the hours.
After adjusting the hours, wait 5 seconds to allow the hours to be
automatically input.
Press the clock reset button to adjust the minutes.
After adjusting the minutes, wait 5 seconds to allow the minutes to
be automatically input and then return to normal mode.
Page 216 of 388
216 3-5. Other interior features
■The clock is displayed when
The engine switch is in the ON position.
■ When disconnecting and reco nnecting battery terminals
The time display will automatically be set to 1:00.
■ Adjusting to a full hour (vehicles without tachometer)
If you press the clock reset button, the minute values will be rounded to the
nearest hour. So, minute values from “:00” to “:29” are rounded down, and
values from “:30” to “:59” are rounded up.*
*: e.g.
1:00 to 1:29 1:00
1:30 to 1:59 2:00
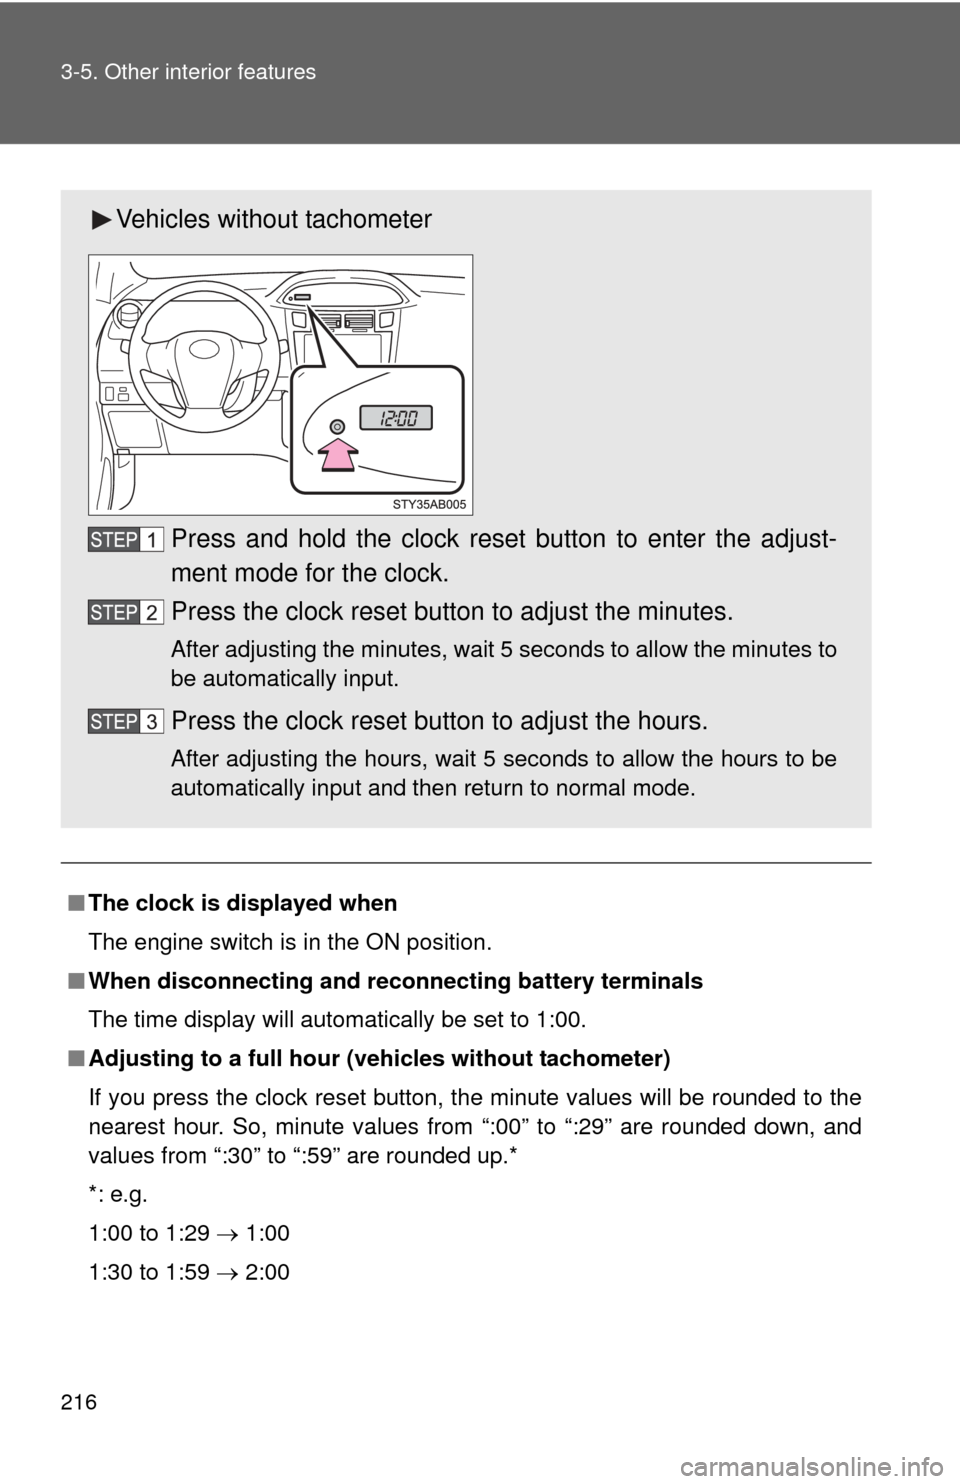
Vehicles without tachometer
Press and hold the clock reset button to enter the adjust-
ment mode for the clock.
Press the clock reset button to adjust the minutes.
After adjusting the minutes, wait 5 seconds to allow the minutes to
be automatically input.
Press the clock reset button to adjust the hours.
After adjusting the hours, wait 5 seconds to allow the hours to be
automatically input and then return to normal mode.
Page 217 of 388
217
3-5. Other interior features
3
Interior features
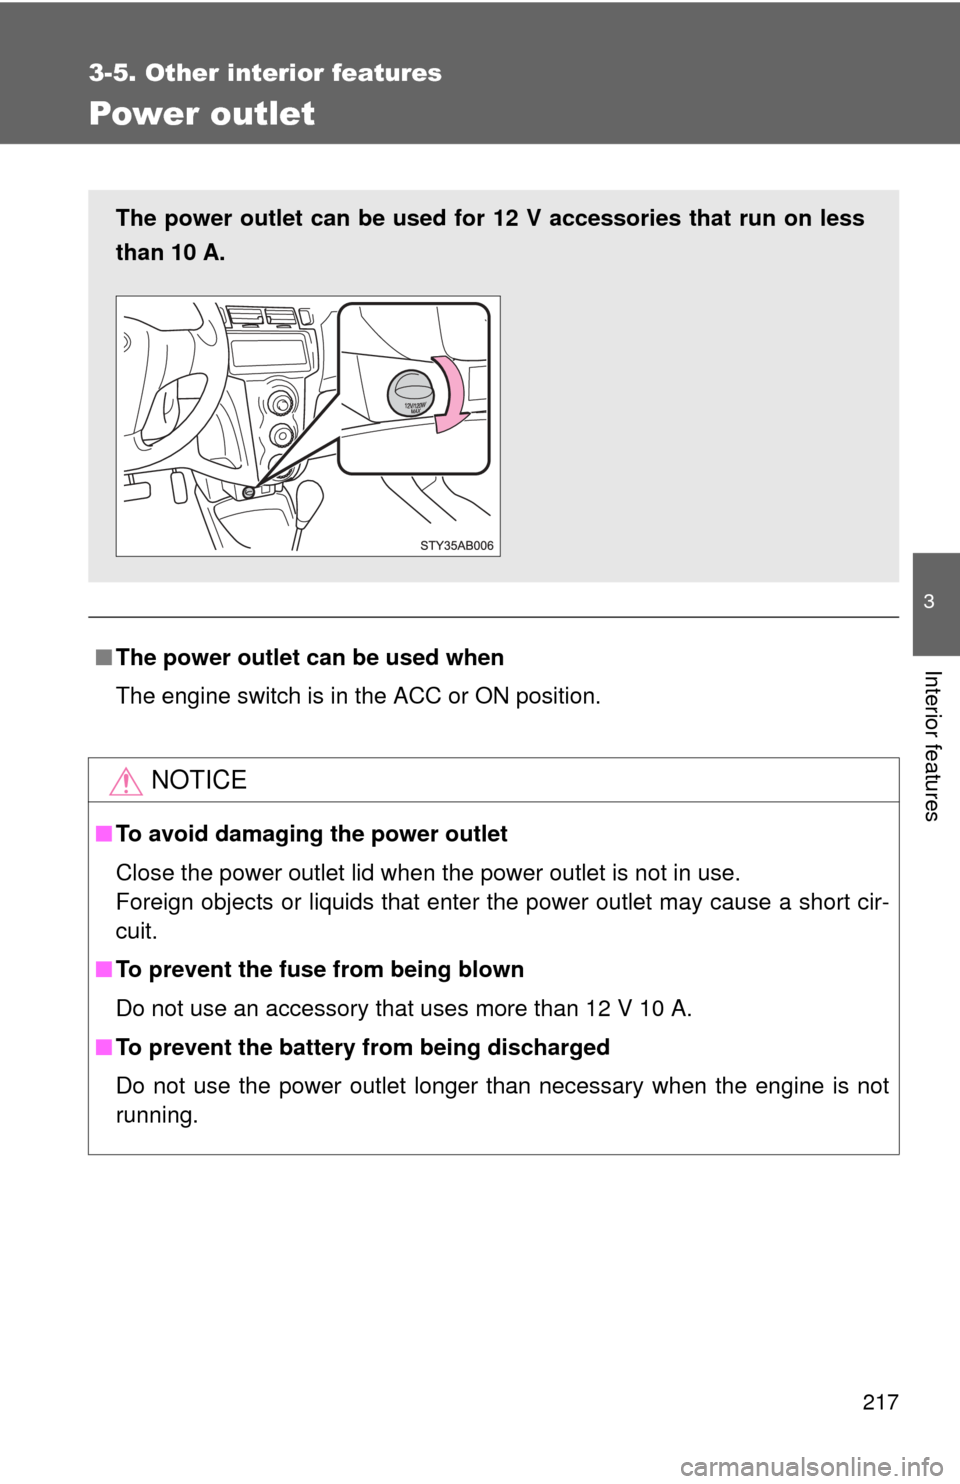
Power outlet
■The power outlet can be used when
The engine switch is in the ACC or ON position.
NOTICE
■To avoid damaging the power outlet
Close the power outlet lid when the power outlet is not in use.
Foreign objects or liquids that enter the power outlet may cause a short cir-
cuit.
■ To prevent the fuse from being blown
Do not use an accessory that uses more than 12 V 10 A.
■ To prevent the battery from being discharged
Do not use the power outlet longer than necessary when the engine is not\
running.
The power outlet can be used for 12 V accessories that run on less
than 10 A.
Page 218 of 388
218
3-5. Other interior features
Floor mat
CAUTION
■When inserting the floor mat
Observe the following precautions.
Failure to do so may result in the floor mat slipping and interfering wi\
th the
movement of the pedals during driving, resulting in an accident.
●Make sure the floor mat is properly placed on the vehicle carpet and the
correct side faces upward.
● Do not place floor mats on top of existing mats.
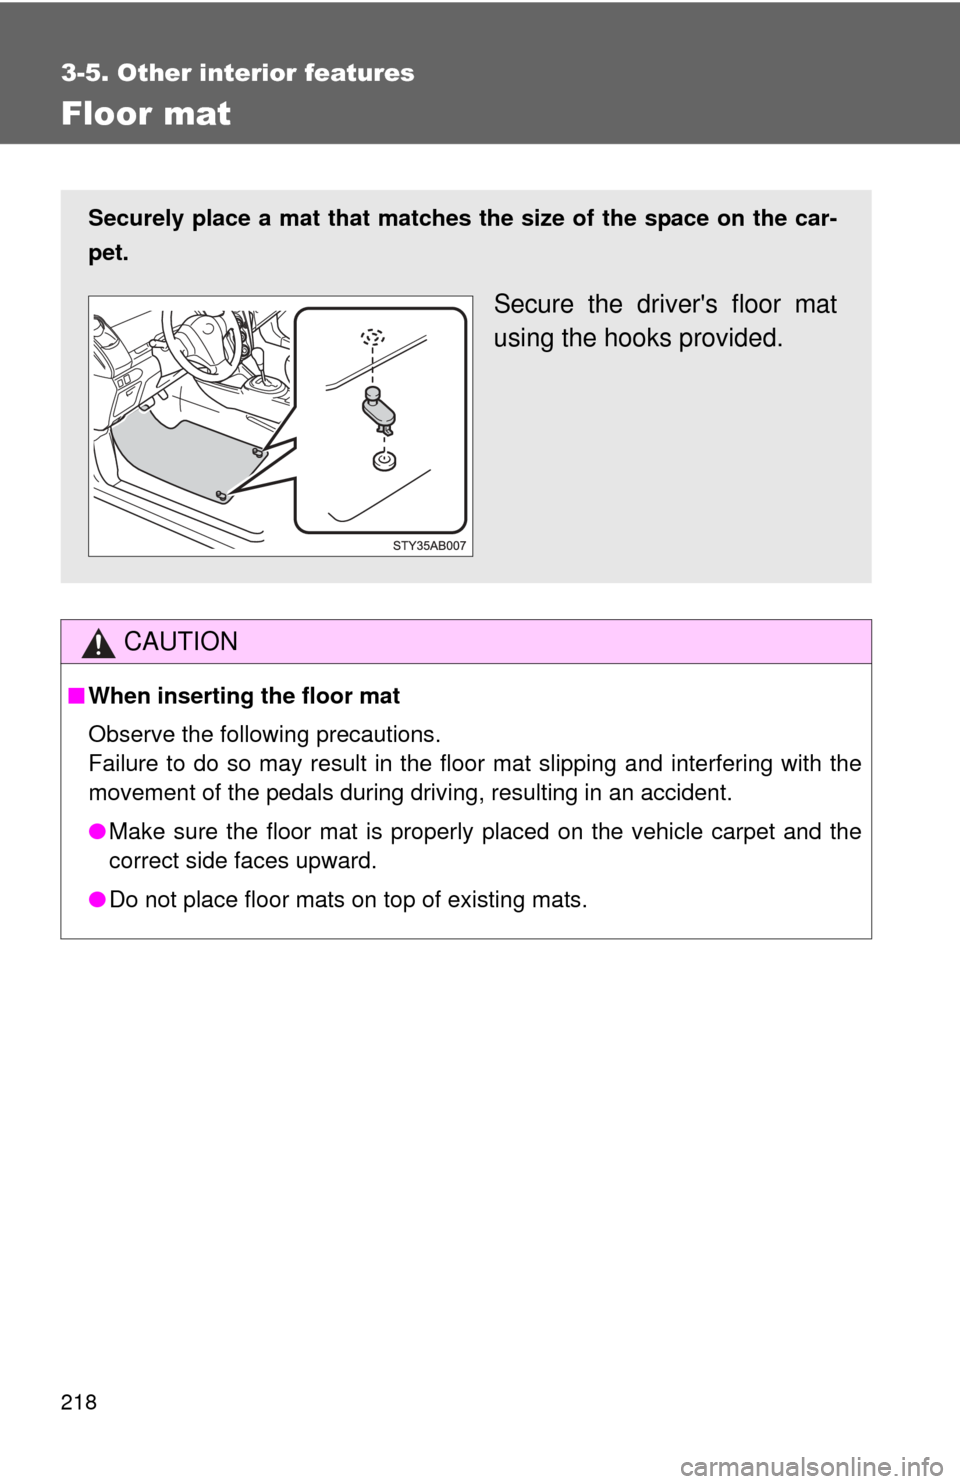
Securely place a mat that matches the size of the space on the car-
pet.
Secure the driver's floor mat
using the hooks provided.
Page 219 of 388
219
3-5. Other interior features
3
Interior features
Luggage compar tment features
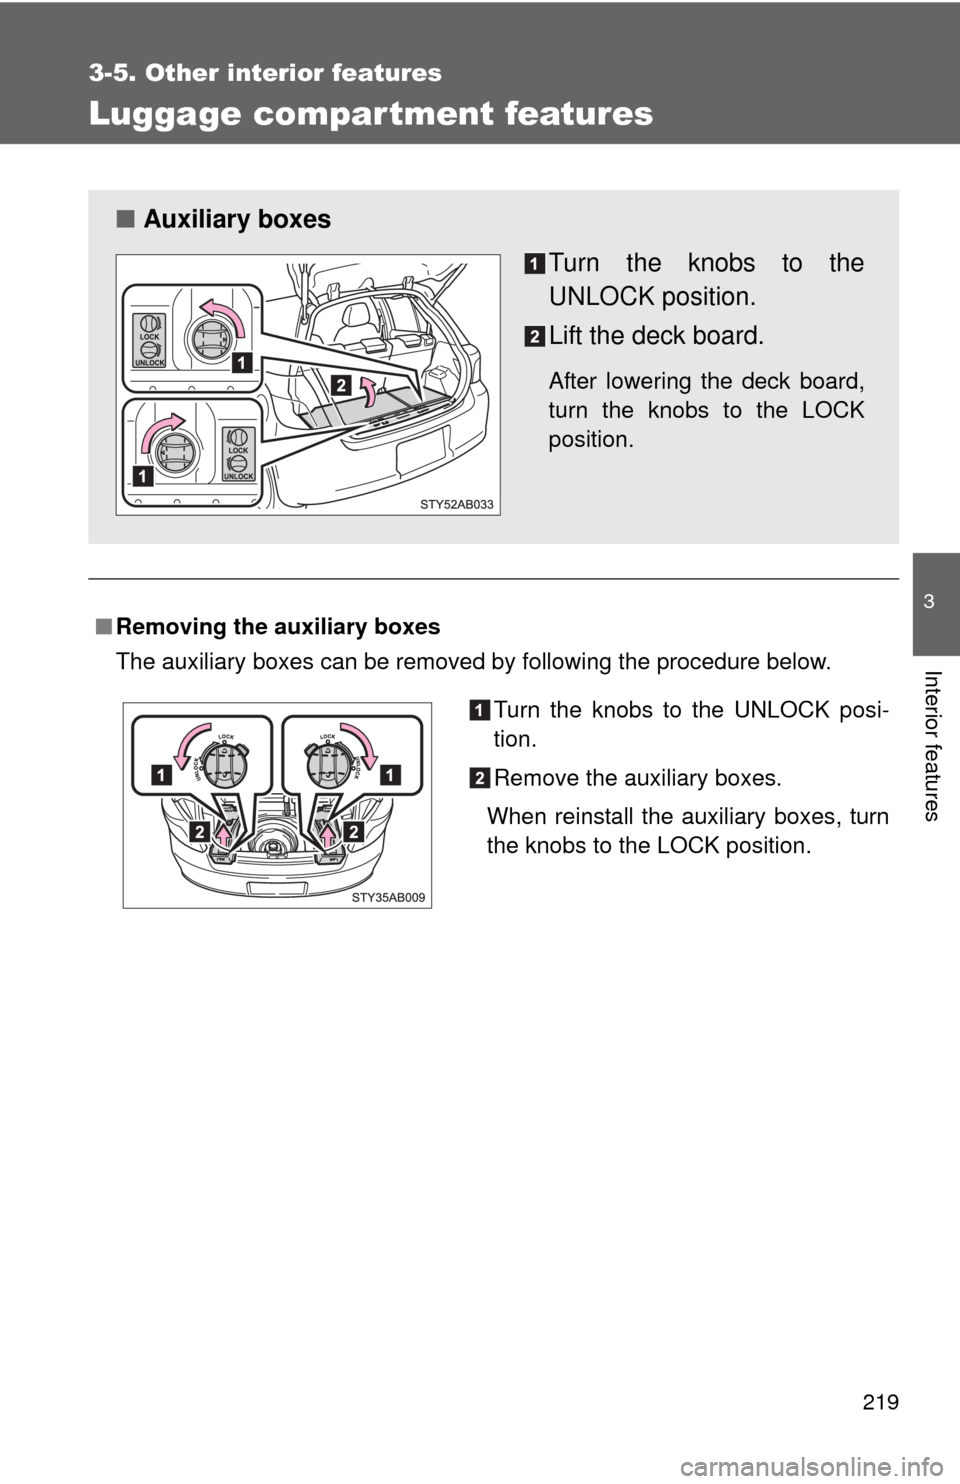
■Removing the auxiliary boxes
The auxiliary boxes can be removed by following the procedure below.
■ Auxiliary boxes
Turn the knobs to the
UNLOCK position.
Lift the deck board.
After lowering the deck board,
turn the knobs to the LOCK
position.
Turn the knobs to the UNLOCK posi-
tion.
Remove the auxiliary boxes.
When reinstall the auxiliary boxes, turn
the knobs to the LOCK position.
Page 220 of 388
220 3-5. Other interior features
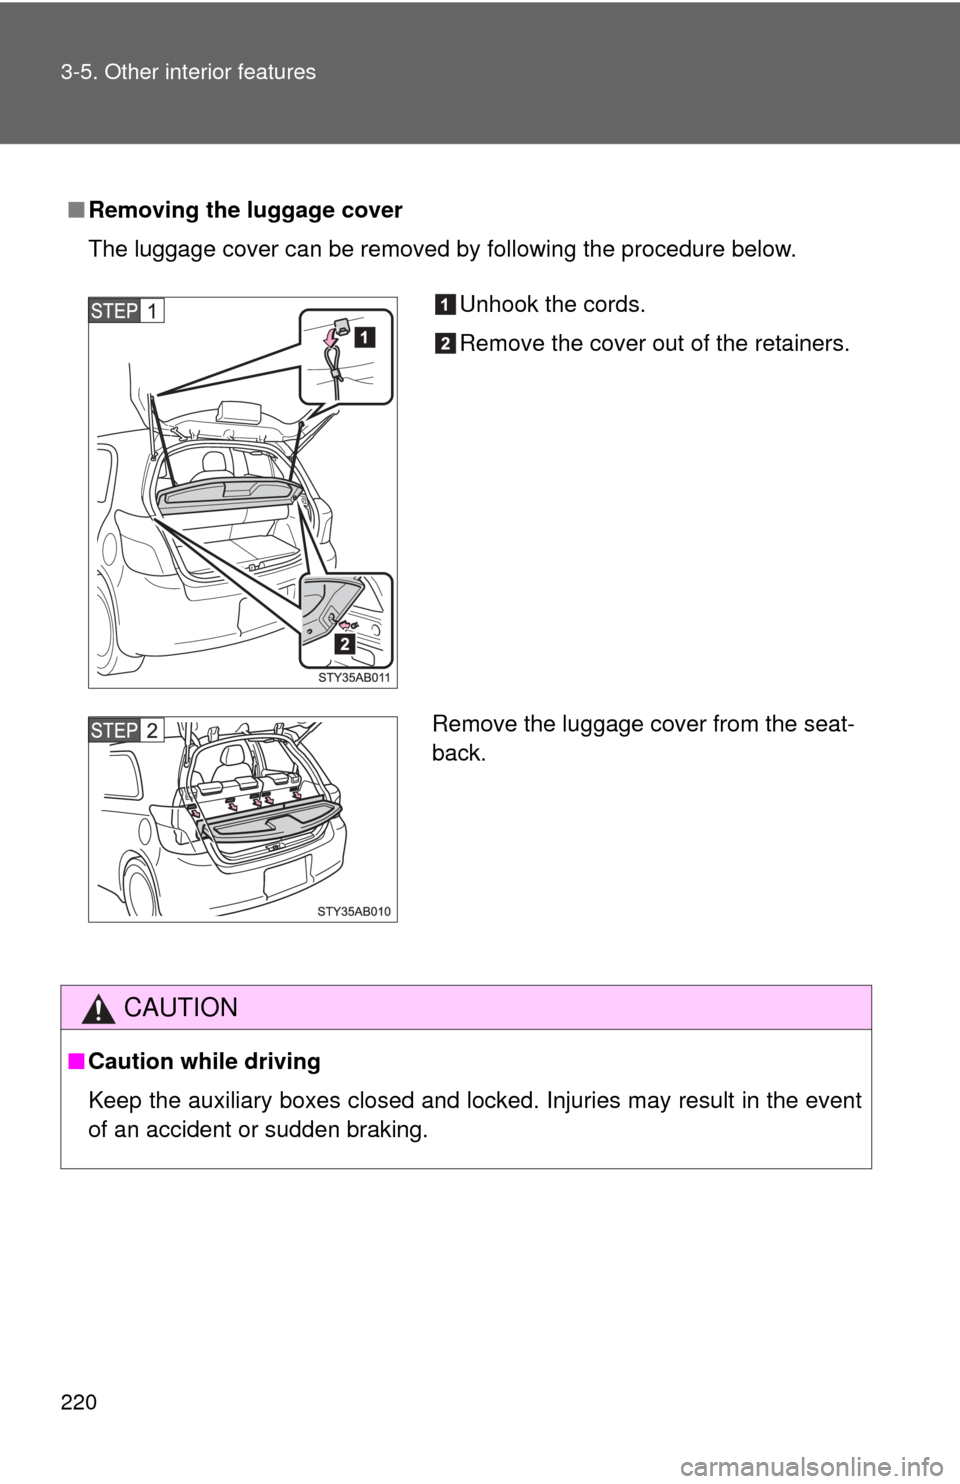
■Removing the luggage cover
The luggage cover can be removed by following the procedure below.
CAUTION
■Caution while driving
Keep the auxiliary boxes closed and locked. Injuries may result in the event
of an accident or sudden braking.
Unhook the cords.
Remove the cover out of the retainers.
Remove the luggage cover from the seat-
back.
Trending: radio controls, OBD port, radio, A off, Warning buzzer, Door, length
