audio TOYOTA YARIS HATCHBACK 2009 Owners Manual
[x] Cancel search | Manufacturer: TOYOTA, Model Year: 2009, Model line: YARIS HATCHBACK, Model: TOYOTA YARIS HATCHBACK 2009Pages: 402, PDF Size: 7.61 MB
Page 3 of 402
1
OVERVIEW
FEATURES/OPERATIONS
SAFETY AND EMERGENCY FEATURES
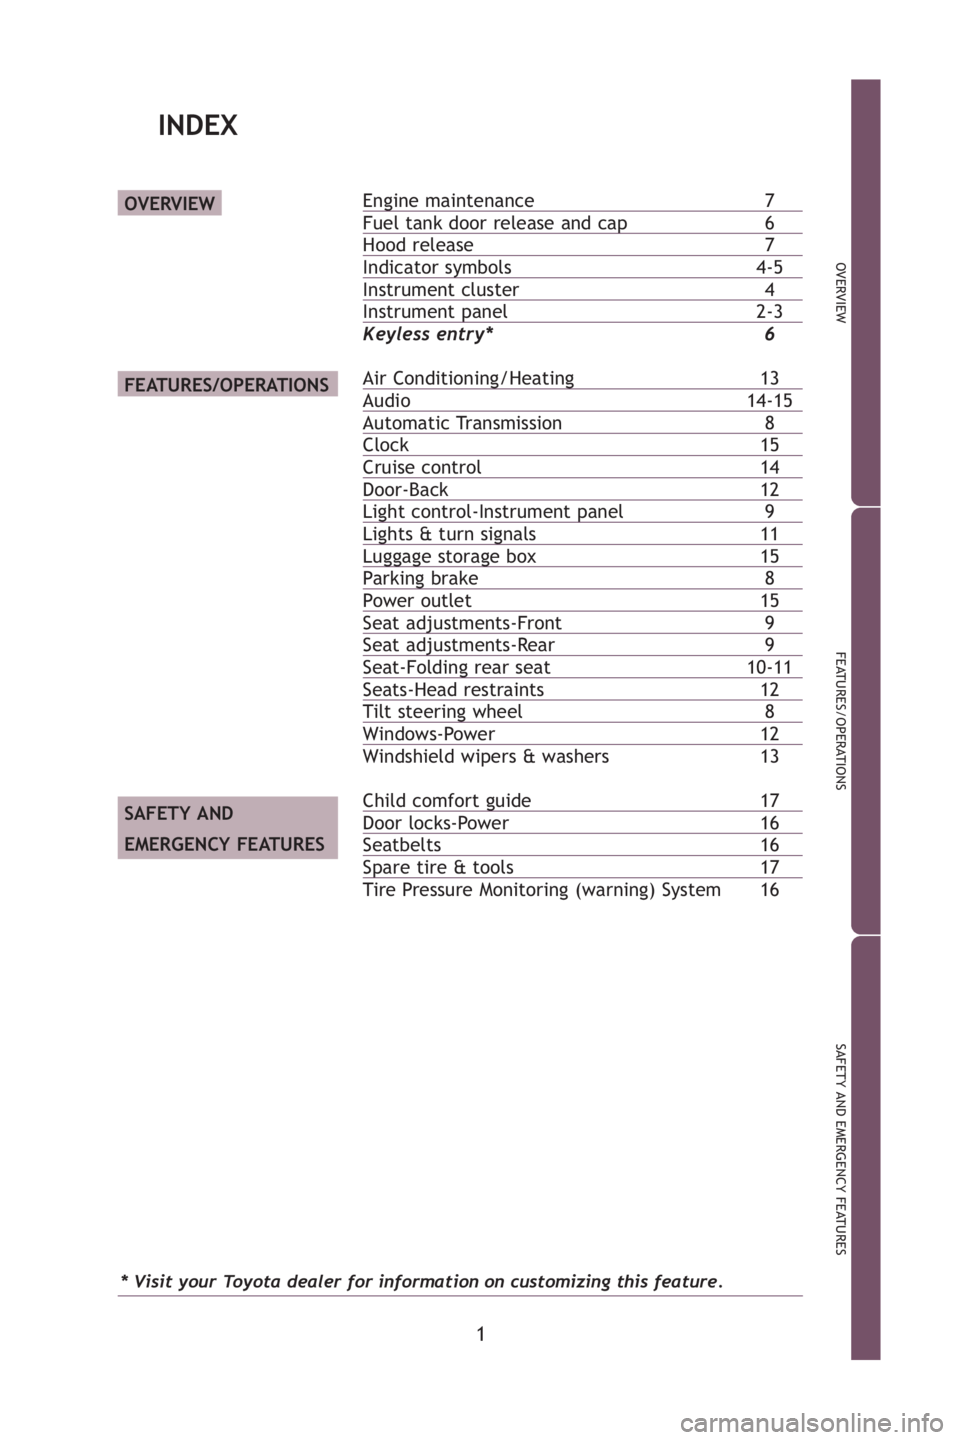
Enginemaintenance7Fuel tank door release and cap6Hood release 7Indicator symbols4-5Instrument cluster 4Instrument panel2-3
Keyless entry* 6
Air Conditioning/Heating13Audio 14-15Automatic Transmission 8Clock15Cruise control14Door-Back 12Lightcontrol-Instrument panel9Lights& turn signals11Luggagestoragebox15Parkingbrake 8Power outlet 15Seat adjustments-Front9Seat adjustments-Rear9Seat-Foldingrear seat10-11Seats-Head restraints 12Tilt steeringwheel8Windows-Power 12
Windshield wipers & washers 13
Child comfort guide17Door locks-Power 16Seatbelts16Sparetire & tools17
Tire Pressure Monitoring (warning) System 16
OVERVIEW
FEATURES/OPERATIONS
SAFETY AND
EMERGENCY FEATURES
INDEX
* Visit your Toyota dealer for information on customizing this feature.
412782M2.qxd:_412782M2 8/18/08 2:02 PM Page 1
Page 4 of 402
2
OVERVIEW
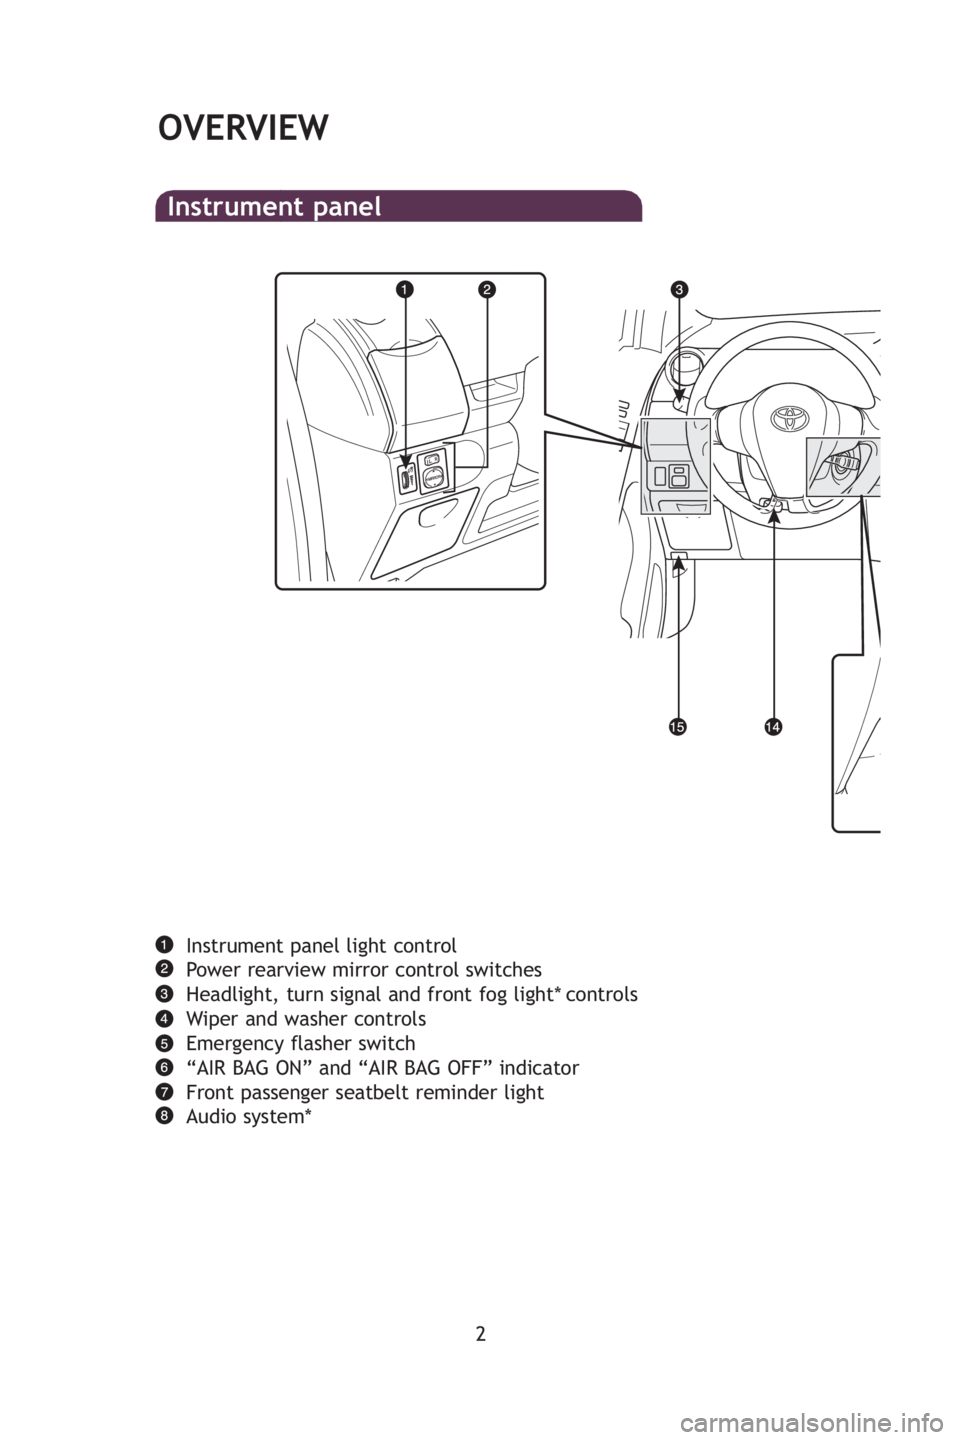
Instrument panel light control
Power rearview mirror control switches
Headlight, turn signal and front fog light* controls
Wiper and washer controls
Emergency flasher switch
“AIR BAG ON” and “AIR BAG OFF” indicator
Front passenger seatbelt reminder light
Audio system*
Instrument panel
A
R
12
C
E
T
i
H
*
412782M2.qxd:_412782M2 8/18/08 2:03 PM Page 2
Page 16 of 402
14
FEATURES/OPERATIONS
Audio (if equipped)
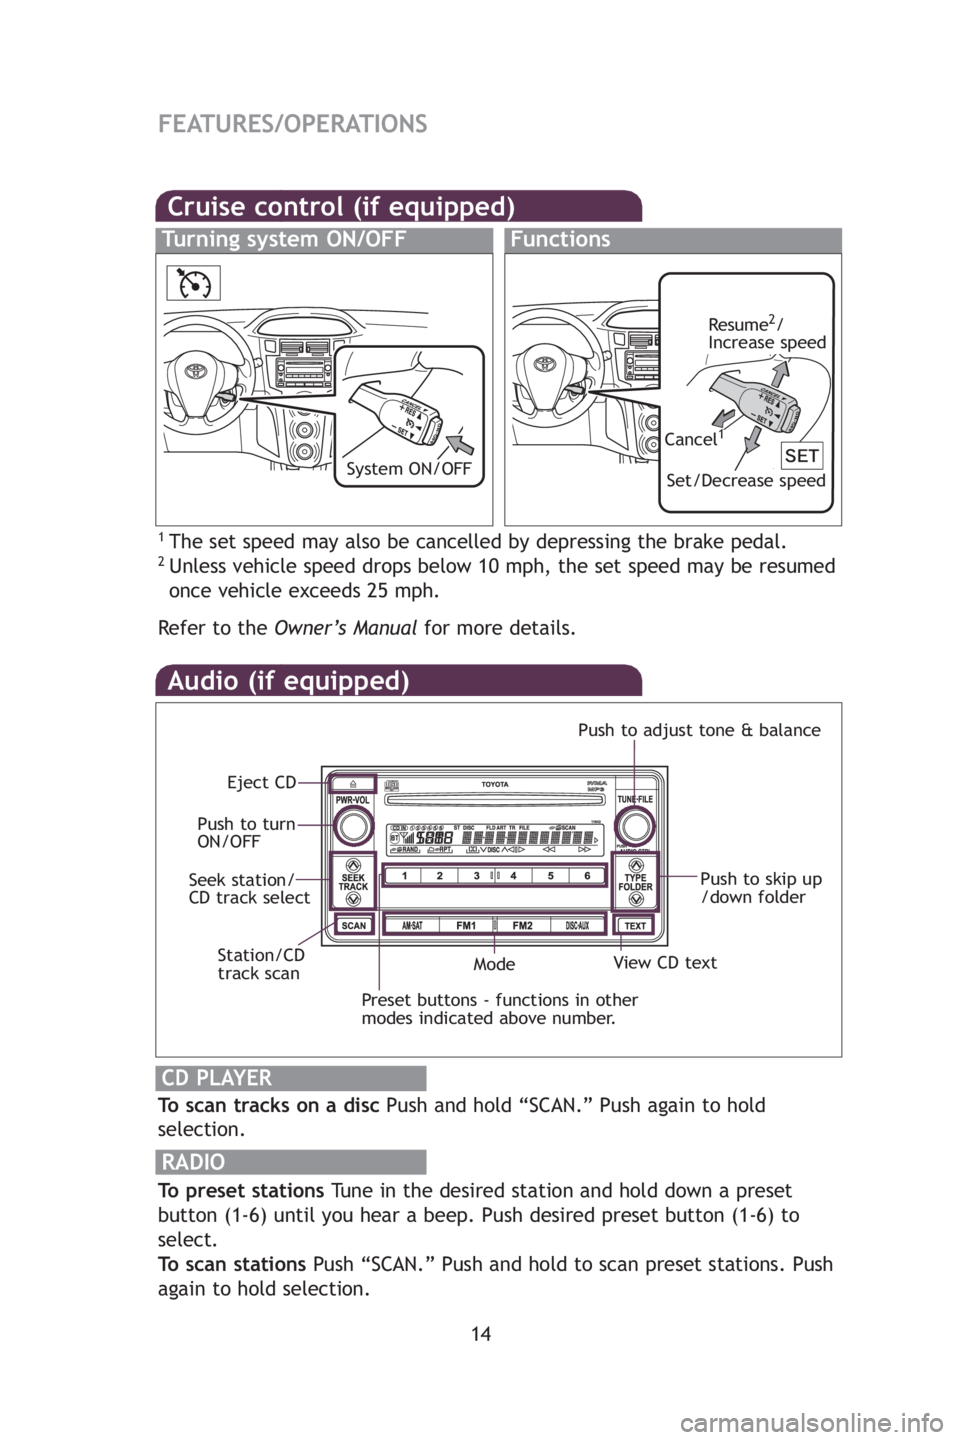
To scan tracks on a discPush and hold “SCAN.” Push again to hold
selection.
RADIO
To preset stations Tune in the desired station and hold down a preset
button (1-6) until you hear a beep. Push desired preset button (1-6) to
select.
To scan stations Push “SCAN.” Push and hold to scan preset stations. Push
again to hold selection.
CD PLAYER
Preset buttons - functions in other
modes indicated above number.
View CD text
Push to skip up
/down folder
Eject CD
Push to turn
ON/OFF Push to adjust tone & balance
Mode
Seek station/
CD track select
Station/CD
track scan
By in
AUX
thro
u
AUX
Lu
Ope
Cruise control (if equipped)
1The set speed may also be cancelled by depressing the brake pedal.2Unless vehicle speed drops below 10 mph, the set speed may be resumed
once vehicle exceeds 25 mph.
Refertothe Owner’s Manual for more details.
Turning system ON/OFFFunctions
Resume2/
Increase speed
Set/Decrease speed
Cancel1
System ON/OFFClo
Press
adju
Refe
Pow
Desig
posit
412782M2.qxd:_412782M2 8/18/08 2:08 PM Page 14
Page 17 of 402
15
OVERVIEW
FEATURES/OPERATIONS
SAFETY AND EMERGENCY FEATURES
Push
up
r
nce
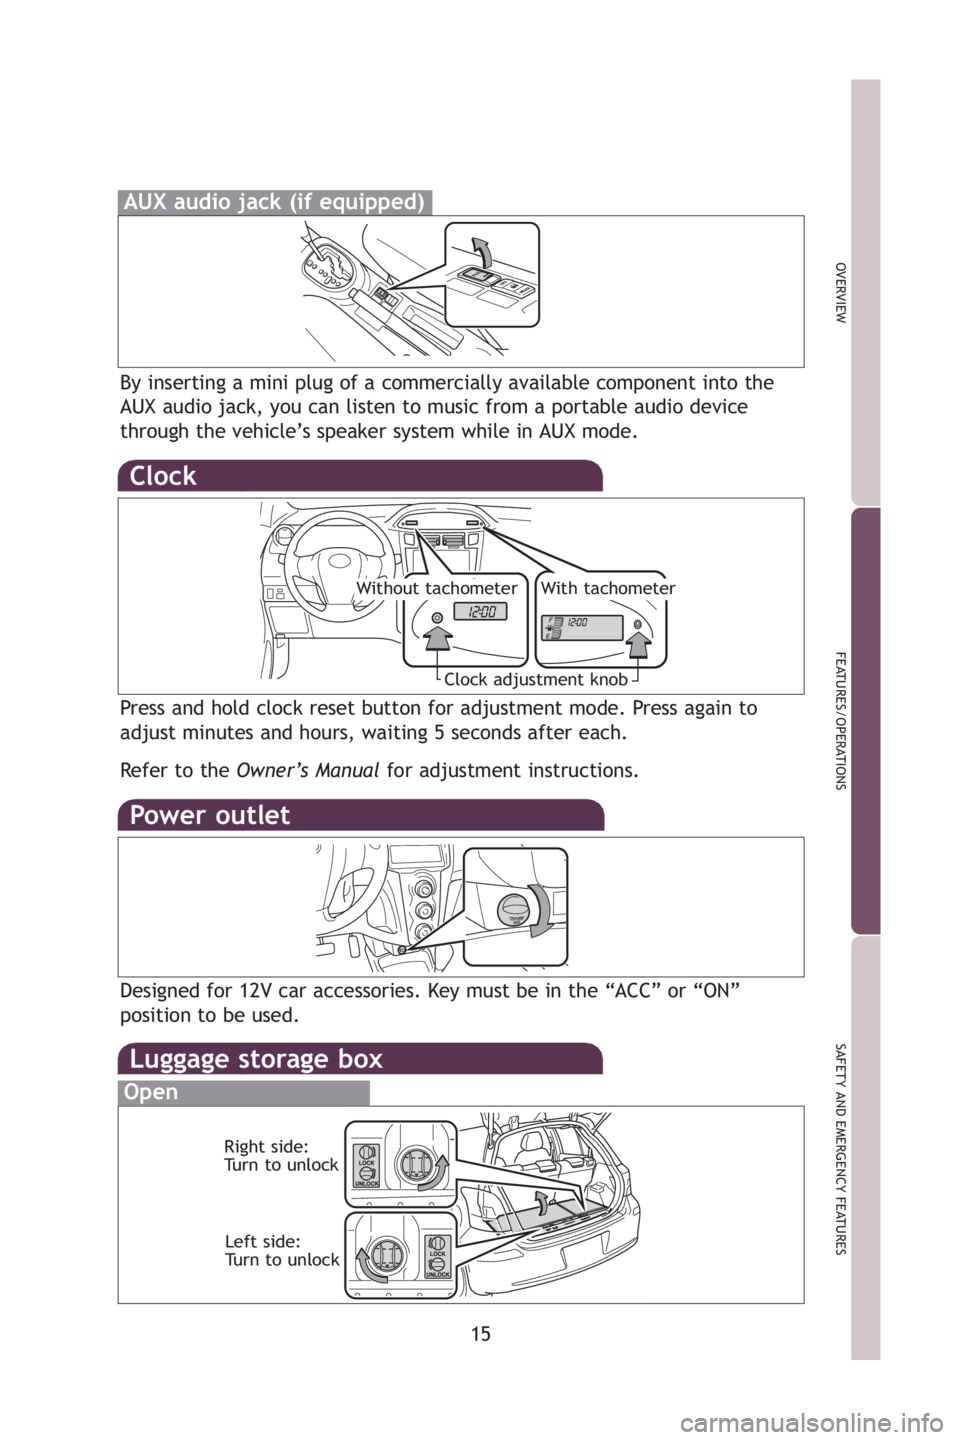
By inserting a mini plug of a commercially available component into the
AUX audio jack, you can listen to music from a portable audio device
through the vehicle’s speaker system while in AUX mode.
AUX audio jack (if equipped)
Luggage storage box
Open
Right side:
Turn to unlock
Left side:
Turn to unlock
med
eed
eedClock
Press and hold clock reset button for adjustment mode. Press again to
adjust minutes and hours, waiting 5 seconds after each.
Refer to the Owner’s Manual for adjustment instructions.
Power outlet
Designed for 12V car accessories. Key must be in the “ACC” or “ON”
position to be used.
Clock adjustment knob
Without tachometerWith tachometer
412782M2.qxd:_412782M2 8/18/08 2:08 PM Page 15
Page 25 of 402
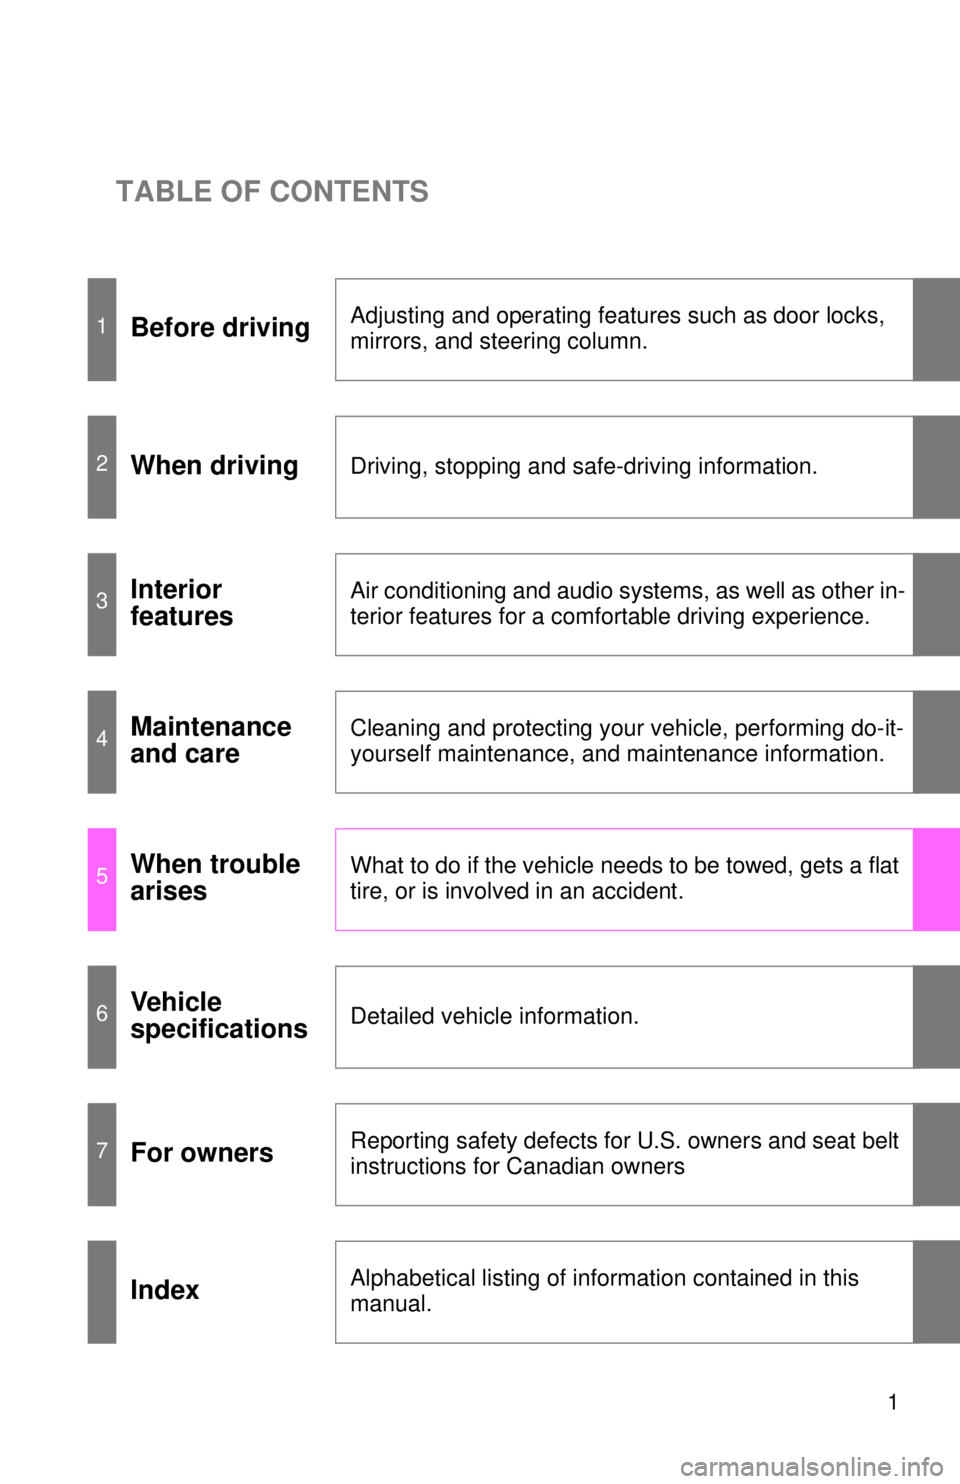
TABLE OF CONTENTS
1
1Before drivingAdjusting and operating features such as door locks,
mirrors, and steering column.
2When drivingDriving, stopping and safe-driving information.
3Interior
featuresAir conditioning and audio systems, as well as other in-
terior features for a comfortable driving experience.
4Maintenance
and careCleaning and protecting your vehicle, performing do-it-
yourself maintenance, and maintenance information.
5When trouble
arisesWhat to do if the vehicle needs to be towed, gets a flat
tire, or is involved in an accident.
6Vehicle
specificationsDetailed vehicle information.
7For ownersReporting safety defects for U.S. owners and seat belt
instructions for Canadian owners
IndexAlphabetical listing of information contained in this
manual.
Page 35 of 402
15
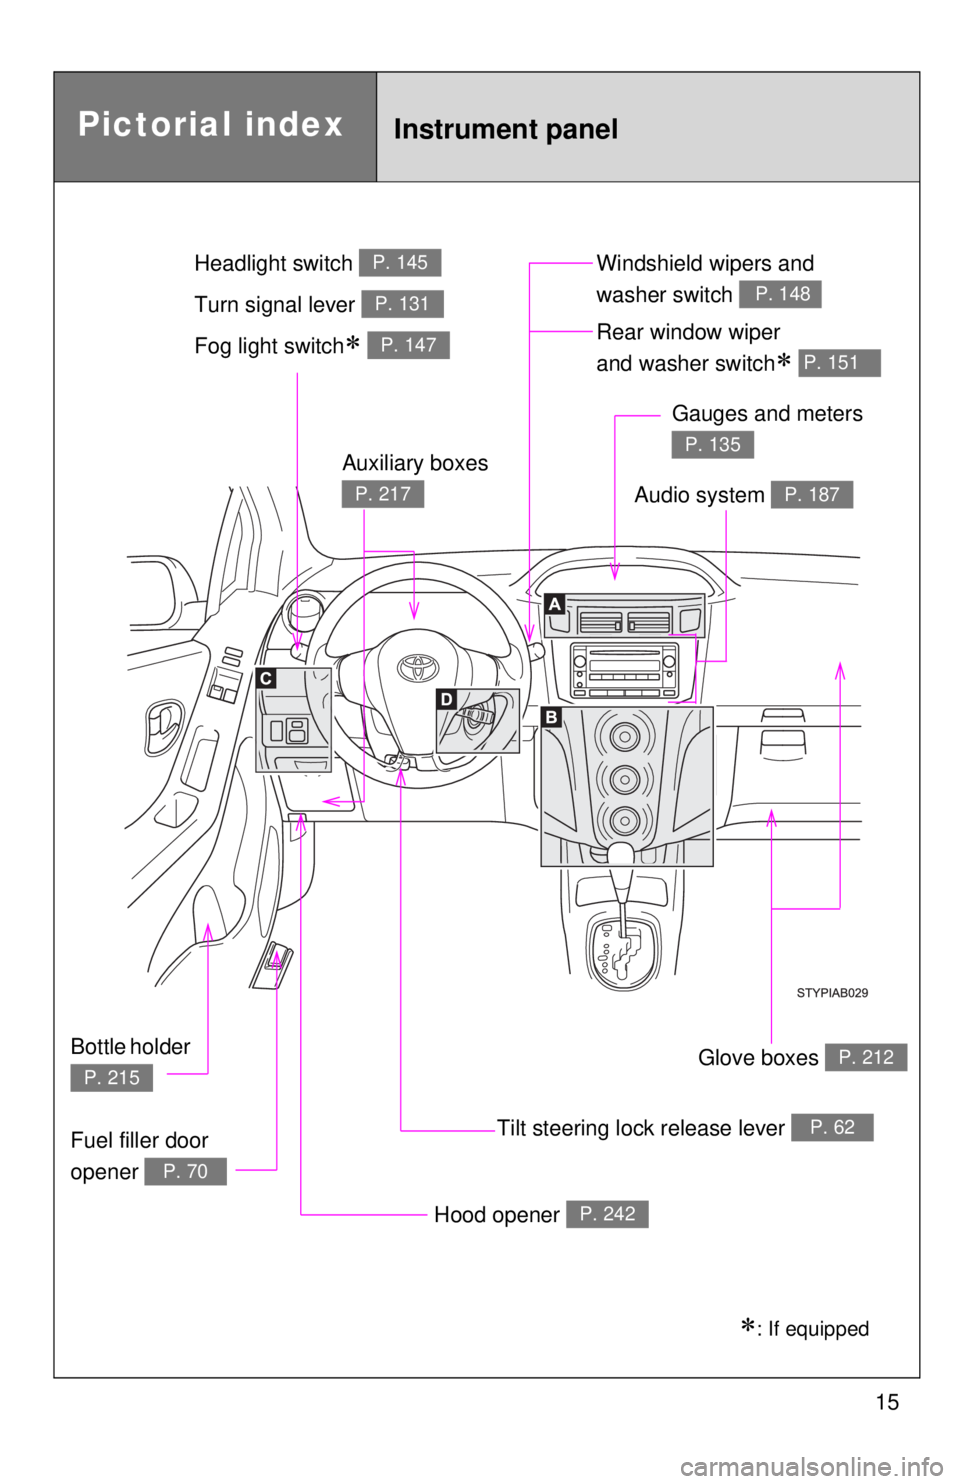
Pictorial indexInstrument panel
Fog light switch∗ P. 147Rear window wiper
and washer switch
∗ P. 151
Tilt steering lock release lever P. 62
Hood opener P. 242
Gauges and meters
P. 135
Audio system P. 187
Glove boxes P. 212
Fuel filler door
opener
P. 70
Auxiliary boxes
P. 217
Bottle holder
P. 215
Windshield wipers and
washer switch
P. 148Turn signal lever P. 131
Headlight switch P. 145
∗: If equipped
Page 138 of 402

125
2-1. Driving procedures
2
When driving
Engine (ignition) switch
nEngine switch
LOCK
The steering wheel is locked
and the key can be removed.
ACC
Some electrical components
such as the audio system can
be used.
ON
All electrical components can
be used.
START
For starting the engine.
nStarting the engine
Automatic transmission
Check that the parking brake is set.
Check that the shift lever is set in P.
Sit in the driver’s seat and firmly depress the brake pedal.
Turn the engine switch to the START position and start the
engine.
The engine will crank until it starts or for up to 20 seconds, which -
ever is less.
Continue depressing the brake pedal until the engine is com -
pletely started.
Page 187 of 402
174
2-5. Driving information
Dinghy towing (vehicles with a manual transmission)
Towing your vehicle with 4 wheels on the ground
To prevent damage to your vehicle, perform the following procedures
before towing.
Shift the shift lever to N.
Turn the engine switch to the ACC position.
Ensure that the audio system and other powered devices have been
turned off.
Release the parking brake.
After towing, leave the engine in idle for at least 3 minutes before
driving the vehicle.
nNecessary equipment and accessories
Specialized equipment and accessories are required for dinghy towing. Con -
tact the service branch of the motor home manufacturer regarding recom -
mended equipment.
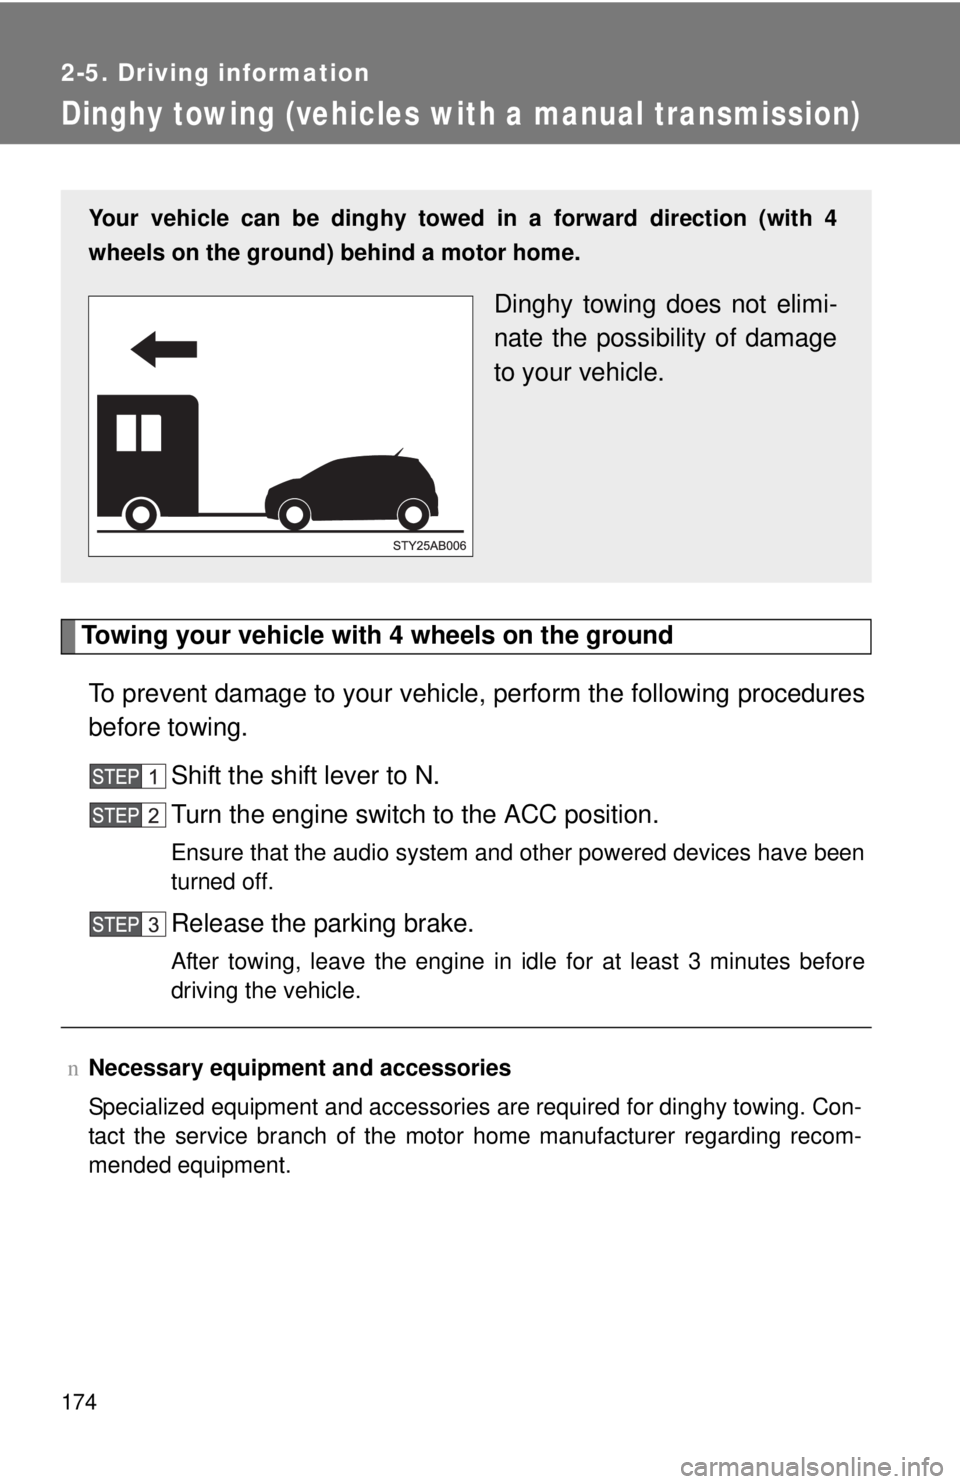
Your vehicle can be dinghy towed in a forward direction (with 4
wheels on the ground) behind a motor home.
Dinghy towing does not elimi -
nate the possibility of damage
t
o your vehicle.
Page 199 of 402
187
3
Interior features
3-2. Using the audio system
Audio system type
nUsing cellular phones
Interference may be heard through the audio system's speakers if a cellular
phone is being used inside or close to the vehicle while the audio syste\
m is
operatin
g.
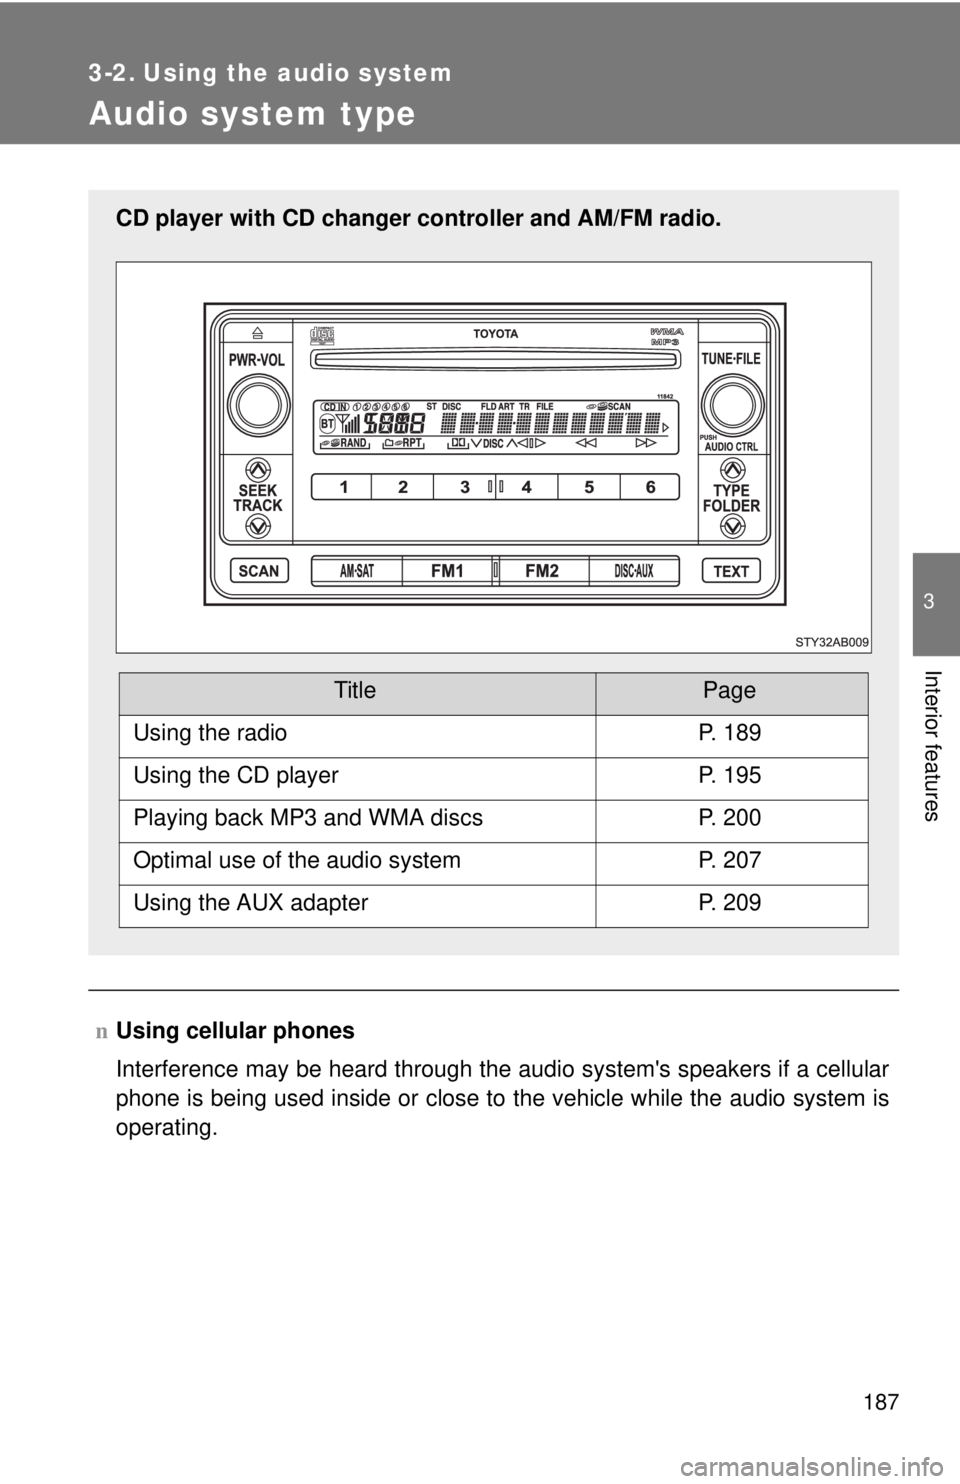
CD player with CD changer controller and AM/FM radio.
TitlePage
Using the radioP. 189
Using the CD playerP. 195
Playing back MP3 and WMA discsP. 200
Optimal use of the audio systemP. 207
Using the AUX adapterP. 209
Page 200 of 402
188 3-2. Using the audio system
CAUTION
nFor vehicles sold in U.S.A. and Canada
lPart 15 of the FCC Rules
FCC Warning:
Any unauthorized changes or modifications to this equipment will void the
user’s authority to operate this device.
l Laser products
Do not take this unit apart or attempt to make any changes yourself.
This is an intricate unit that uses a laser pickup to retrieve information from
the surface of compact discs. The laser is carefully shielded so that its
rays remain inside the cabinet. Therefore, never try to disassemble the
player or alter any of its parts since you may be exposed to laser rays and
dangerous voltages.
l CAUTION
This product utilizes a laser.
Use of controls or adjustments or performance of procedures other than
those specified herein may result in hazardous radiation exposure.
NOTICE
n To prevent battery discharge
Do not leave the audio system on longer than necessary with the engine o\
ff.
n To avoid damaging the audio system
Take care not to spill drinks or other fluids over the audio system.