engine oil TOYOTA YARIS HATCHBACK 2018 Owners Manual
[x] Cancel search | Manufacturer: TOYOTA, Model Year: 2018, Model line: YARIS HATCHBACK, Model: TOYOTA YARIS HATCHBACK 2018Pages: 520, PDF Size: 8.69 MB
Page 15 of 520
15Pictorial index
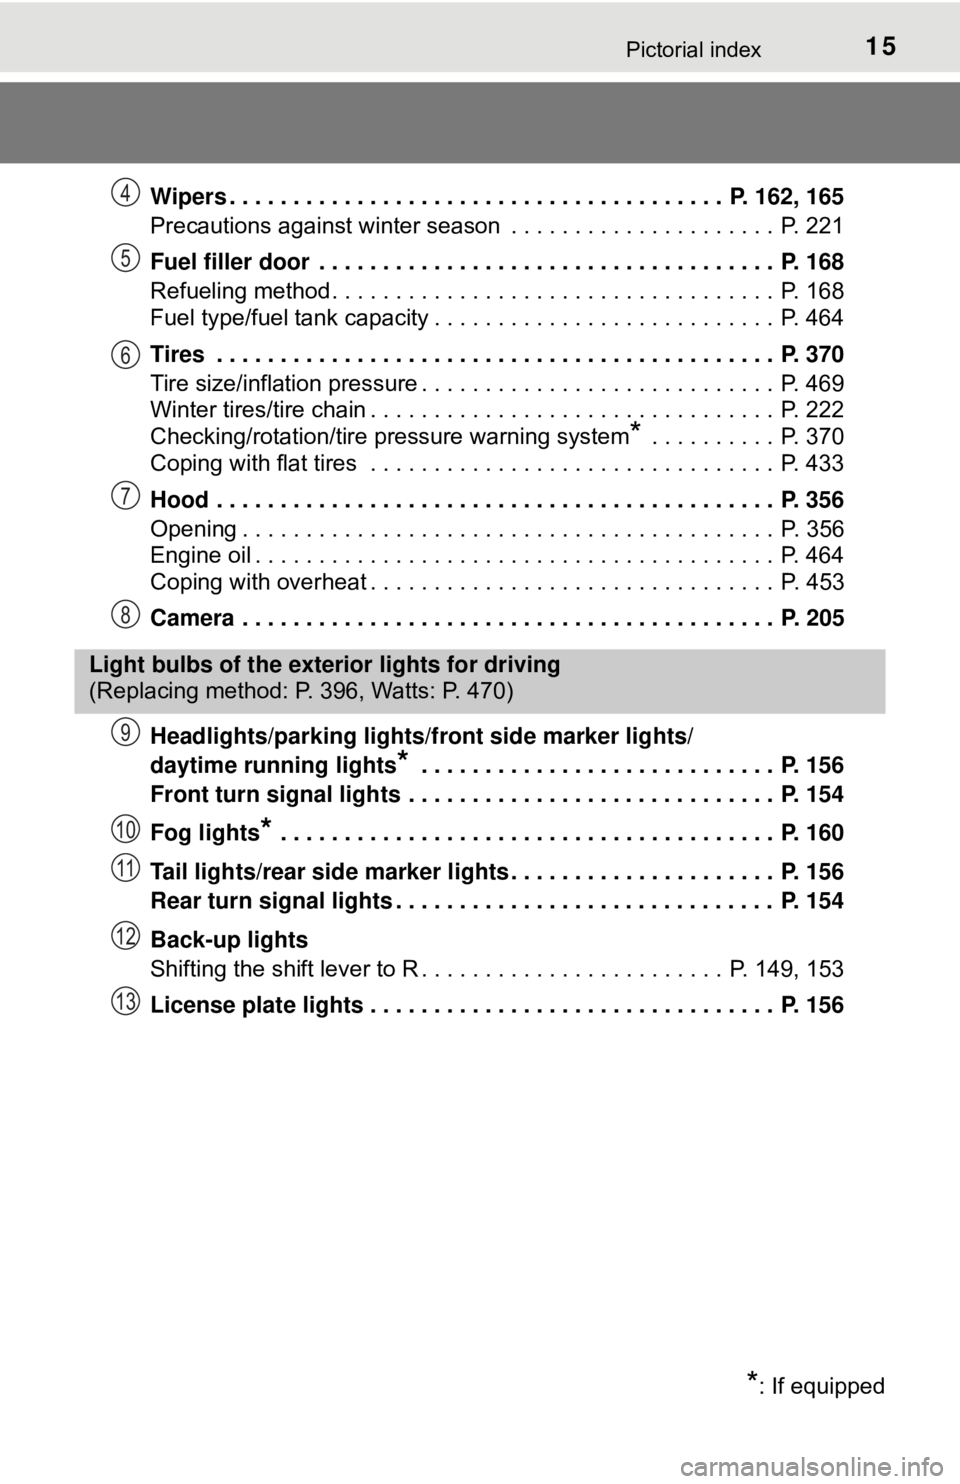
Wipers . . . . . . . . . . . . . . . . . . . . . . . . . . . . . . . . . . . . . . . P. 162, 165
Precautions against winter season . . . . . . . . . . . . . . . . . . . . . P. 221
Fuel filler door . . . . . . . . . . . . . . . . . . . . . . . . . . . . . . . . . . . . P. 168
Refueling method . . . . . . . . . . . . . . . . . . . . . . . . . . . . . . . . . . . P. 168
Fuel type/fuel tank capacity . . . . . . . . . . . . . . . . . . . . . . . . . . . P. 464
Tires . . . . . . . . . . . . . . . . . . . . . . . . . . . . . . . . . . . . . . . . . . . . P. 370
Tire size/inflation pressure . . . . . . . . . . . . . . . . . . . . . . . . . . . . P. 469
Winter tires/tire chain . . . . . . . . . . . . . . . . . . . . . . . . . . . . . . . . P. 222
Checking/rotation/tire pressure warning system
* . . . . . . . . . . P. 370
Coping with flat tires . . . . . . . . . . . . . . . . . . . . . . . . . . . . . . . . P. 433
Hood . . . . . . . . . . . . . . . . . . . . . . . . . . . . . . . . . . . . . . . . . . . . P. 356
Opening . . . . . . . . . . . . . . . . . . . . . . . . . . . . . . . . . . . . . . . . . . P. 356
Engine oil . . . . . . . . . . . . . . . . . . . . . . . . . . . . . . . . . . . . . . . . . P. 464
Coping with overheat . . . . . . . . . . . . . . . . . . . . . . . . . . . . . . . . P. 453
Camera . . . . . . . . . . . . . . . . . . . . . . . . . . . . . . . . . . . . . . . . . . P. 205
Headlights/parking lights/front side marker lights/
daytime running lights
* . . . . . . . . . . . . . . . . . . . . . . . . . . . . P. 156
Front turn signal lights . . . . . . . . . . . . . . . . . . . . . . . . . . . . . P. 154
Fog lights
* . . . . . . . . . . . . . . . . . . . . . . . . . . . . . . . . . . . . . . . P. 160
Tail lights/rear side marker lights . . . . . . . . . . . . . . . . . . . . . P. 156
Rear turn signal lights . . . . . . . . . . . . . . . . . . . . . . . . . . . . . . P. 154
Back-up lights
Shifting the shift lever to R . . . . . . . . . . . . . . . . . . . . . . . . P. 149, 153
License plate lights . . . . . . . . . . . . . . . . . . . . . . . . . . . . . . . . P. 156
4
5
6
7
8
Light bulbs of the exterior lights for driving
(Replacing method: P. 396, Watts: P. 470)
*: If equipped
9
10
11
12
13
Page 79 of 520
792. Instrument cluster
2
Instrument cluster
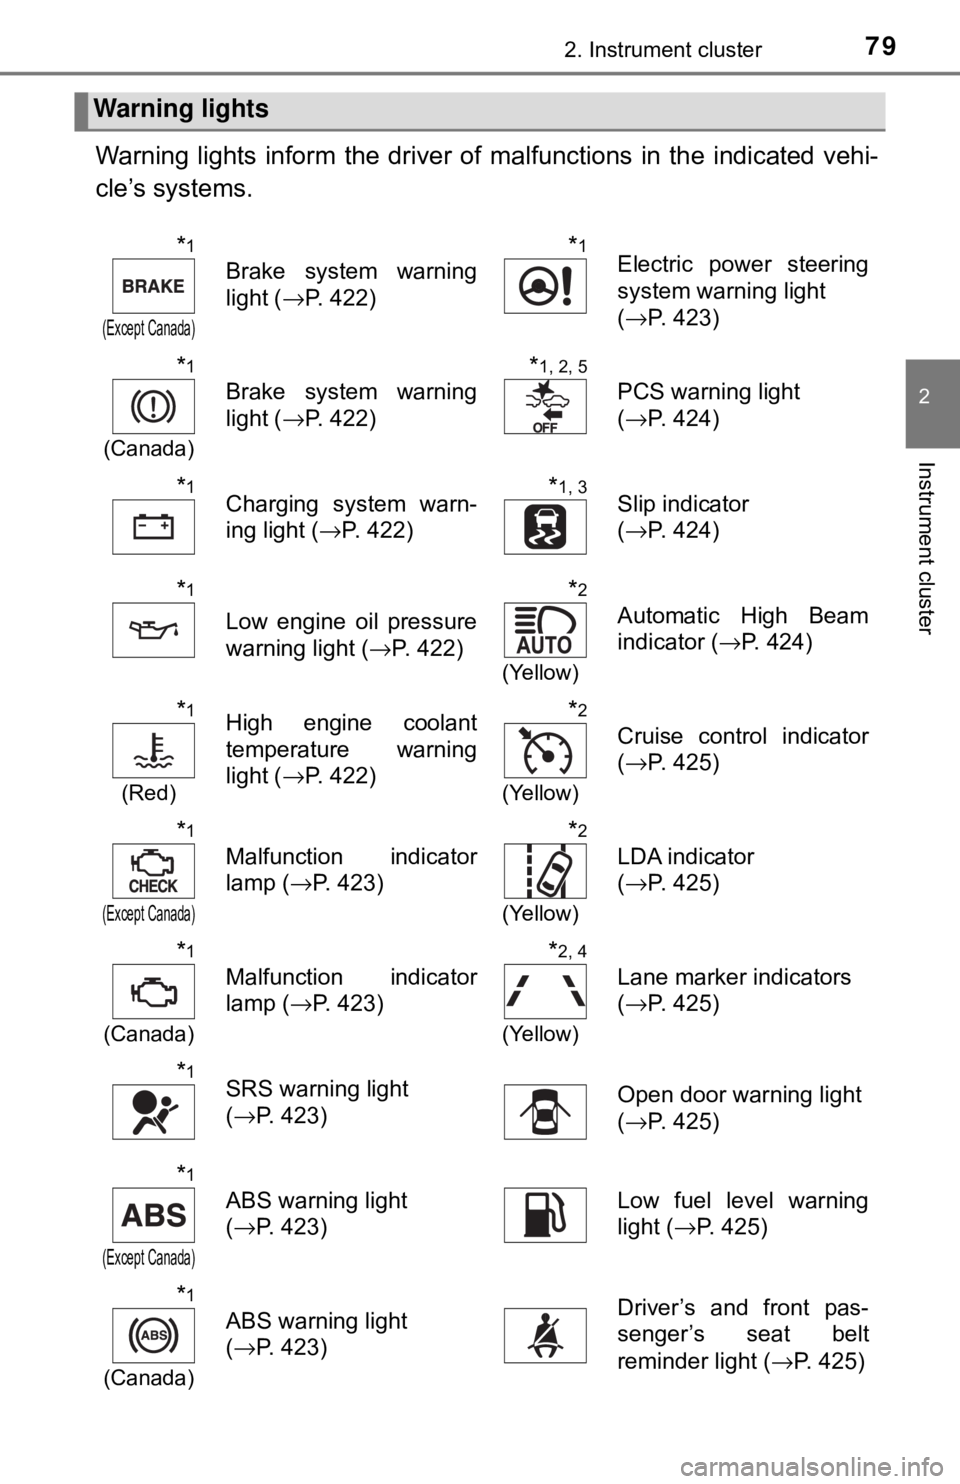
Warning lights inform the driver of malfunctions in the indicated vehi-
cle’s systems.
Warning lights
*1
(Except Canada)
Brake system warning
light ( →P. 422)
*1Electric power steering
system warning light
(→P. 423)
*1
(Canada)
Brake system warning
light ( →P. 422)
*1, 2, 5
PCS warning light
(→P. 424)
*1Charging system warn-
ing light ( →P. 422)*1, 3Slip indicator
(→P. 424)
*1
Low engine oil pressure
warning light ( →P. 422)
*2
(Yellow)
Automatic High Beam
indicator ( →P. 424)
*1
(Red)
High engine coolant
temperature warning
light ( →P. 422)*2
(Yellow)
Cruise control indicator
(→P. 425)
*1
(Except Canada)
Malfunction indicator
lamp ( →P. 423)
*2
(Yellow)
LDA indicator
(→P. 425)
*1
(Canada)
Malfunction indicator
lamp ( →P. 423)
*2, 4
(Yellow)
Lane marker indicators
(→P. 425)
*1SRS warning light
(→P. 423)Open door warning light
(→P. 425)
*1
(Except Canada)
ABS warning light
(→P. 423)Low fuel level warning
light ( →P. 425)
*1
(Canada)
ABS warning light
(→P. 423)Driver’s and front pas-
senger’s seat belt
reminder light ( →P. 425)
Page 136 of 520
1364-1. Before driving
NOTICE
■If you get a flat tire while driving
A flat or damaged tire may cause the following situations. Hold the steering
wheel firmly and gradually depress the brake pedal to slow down the vehi-
cle.
● It may be difficult to control your vehicle.
● The vehicle will make abnormal sounds or vibrations.
● The vehicle will lean abnormally.
Information on what to do in case of a flat tire ( →P. 433)
■ When encounterin g flooded roads
Do not drive on a road that has flooded after heavy rain, etc. Doing so may
cause the following serious damage to the vehicle:
● Engine stalling
● Short in electrical components
● Engine damage caused by water immersion
In the event that you drive on a flooded road and the vehicle is flooded, be
sure to have your Toyota dealer check the following:
● Brake function
● Changes in quantity and quality of engine oil and transmission fluid, et\
c.
● Lubricant condition for the bearings and suspension joints (where possi-
ble), and the function of all joints, bearings, etc.
Page 221 of 520
2214-7. Driving tips
4
Driving
Winter driving tips
●Use fluids that are appropriate to the prevailing outside tempera-
tures. • Engine oil
• Engine coolant
• Washer fluid
● Have a service technician ins pect the condition of the battery.
● Have the vehicle fitted with four snow tires or purchase a set of tire
chains for the front tires.
Ensure that all tires are the specified size and brand, and that chains
match the size of the tires.
Perform the following accordin g to the driving conditions:
● Do not try to forcibly open a window or move a wiper that is frozen.
Pour warm water over the frozen area to melt the ice. Wipe away
the water immediately to prevent it from freezing.
● To ensure proper operation of the climate control system fan,
remove any snow that has accumulated on the air inlet vents in
front of the windshield.
● Check for and remove any excess ice or snow that may have accu-
mulated on the exterior lights, vehicle’s roof, chassis, around the
tires or on the brakes.
● Remove any snow or mud from the bottom of your shoes before
getting in the vehicle.
Carry out the necessary preparations and inspections before
driving the vehicle in winter. Al ways drive the vehicle in a man-
ner appropriate to the prevailing weather conditions.
Preparation for winter
Before driving the vehicle
Page 348 of 520
3487-2. Maintenance
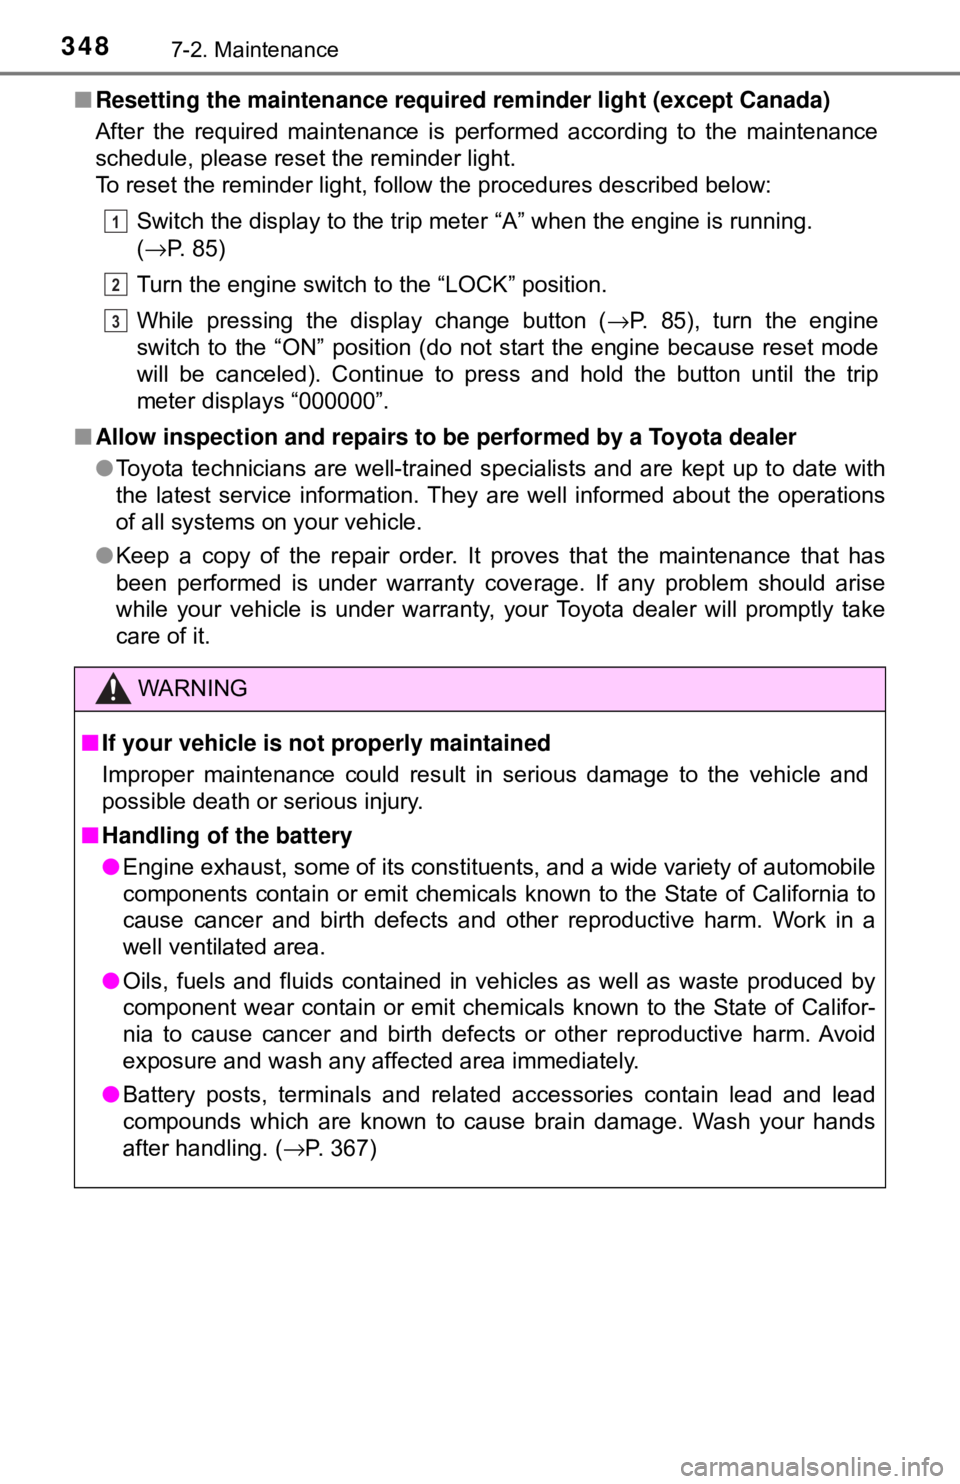
■Resetting the maintenance required reminder light (except Canada)
After the required maintenance is performed according to the maintenance
schedule, please reset the reminder light.
To reset the reminder light, follow the procedures described below:
Switch the display to the trip meter “A” when the engine is running.
(→ P. 85)
Turn the engine switch to the “LOCK” position.
While pressing the display change button ( →P. 85), turn the engine
switch to the “ON” position (do not start the engine because reset mode
will be canceled). Continue to press and hold the button until the trip
meter displays “000000”.
■ Allow inspection and repairs to be performed by a Toyota dealer
●Toyota technicians are well-trained specialists and are kept up to date with
the latest service information. They are well informed about the operations
of all systems on your vehicle.
● Keep a copy of the repair order. It proves that the maintenance that has
been performed is under warranty cove rage. If any problem should arise
while your vehicle is under warranty, your Toyota dealer will promptly take
care of it.
WARNING
■ If your vehicle is not properly maintained
Improper maintenance could result in serious damage to the vehicle and
possible death or serious injury.
■ Handling of the battery
● Engine exhaust, some of its constituents, and a wide variety of automobile
components contain or emit chemicals known to the State of California to
cause cancer and birth defects and other reproductive harm. Work in a
well ventilated area.
● Oils, fuels and fluids contained in vehicles as well as waste produced by
component wear contain or emit chemic als known to the State of Califor-
nia to cause cancer and birth defects or other reproductive harm. Avoid
exposure and wash any affected area immediately.
● Battery posts, terminals and related accessories contain lead and lead
compounds which are known to cause brain damage. Wash your hands
after handling. ( →P. 367)
1
2
3
Page 349 of 520
3497-2. Maintenance
7
Maintenance and care
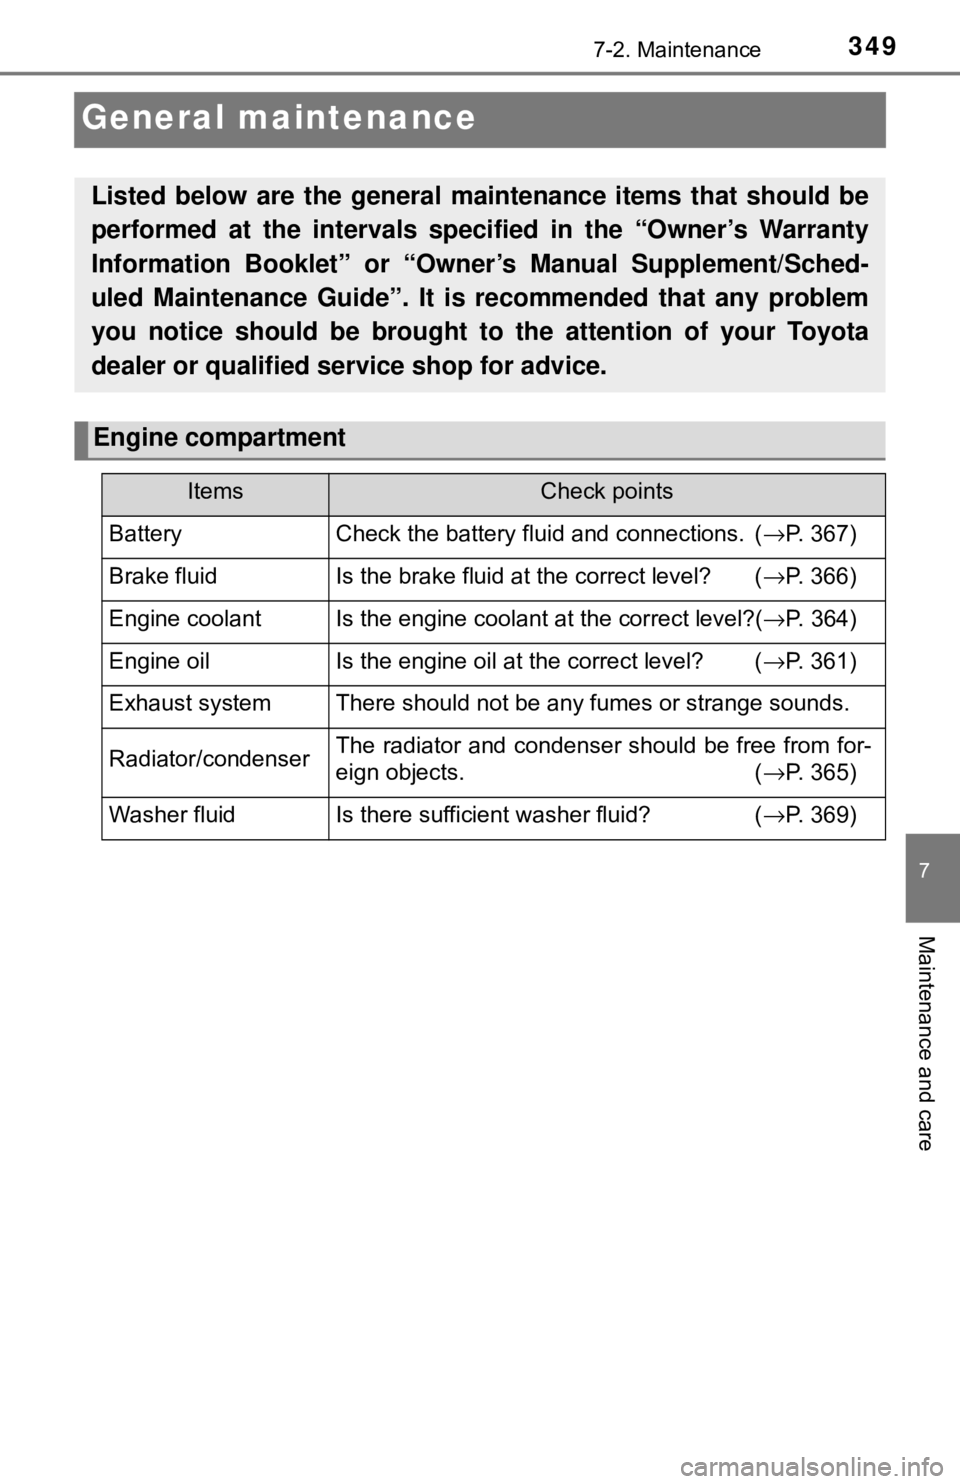
General maintenance
Listed below are the general maintenance items that should be
performed at the intervals specified in the “Owner’s Warranty
Information Booklet” or “Owner’s Manual Supplement/Sched-
uled Maintenance Guide”. It is recommended that any problem
you notice should be brought to the attention of your Toyota
dealer or qualified service shop for advice.
Engine compartment
ItemsCheck points
BatteryCheck the battery fluid and connections. ( →P. 367)
Brake fluidIs the brake fluid at the correct level? (→P. 366)
Engine coolantIs the engine coolant at the correct level?( →P. 364)
Engine oilIs the engine oil at the correct level? (→P. 361)
Exhaust systemThere should not be any fumes or strange sounds.
Radiator/condenserThe radiator and condenser should be free from for-
eign objects. (→P. 365)
Washer fluidIs there sufficient washer fluid? (→P. 369)
Page 353 of 520
3537-3. Do-it-yourself maintenance
7
Maintenance and care
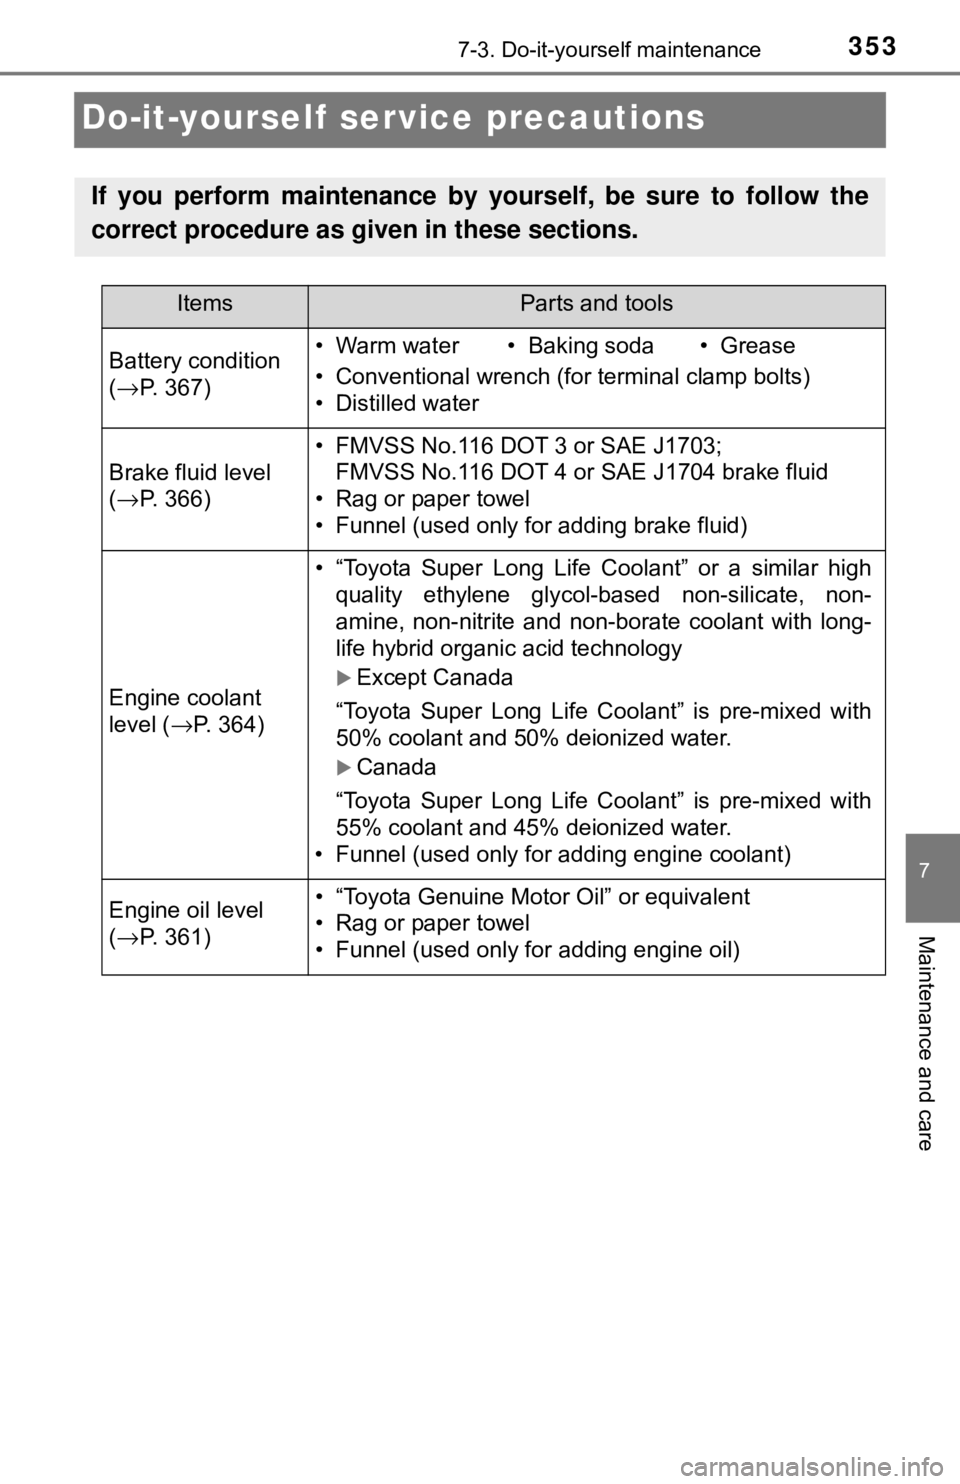
Do-it-yourself service precautions
If you perform maintenance by yourself, be sure to follow the
correct procedure as given in these sections.
ItemsParts and tools
Battery condition
(→ P. 367)• Warm water• Baking soda• Grease
• Conventional wrench (for terminal clamp bolts)
• Distilled water
Brake fluid level
(→ P. 366)
• FMVSS No.116 DOT 3 or SAE J1703;
FMVSS No.116 DOT 4 or SAE J1704 brake fluid
• Rag or paper towel
• Funnel (used only for adding brake fluid)
Engine coolant
level ( →P. 364)
• “Toyota Super Long Life Coolant” or a similar high
quality ethylene glycol-based non-silicate, non-
amine, non-nitrite and non-borate coolant with long-
life hybrid organic acid technology
Except Canada
“Toyota Super Long Life Coolant” is pre-mixed with
50% coolant and 50% deionized water.
Canada
“Toyota Super Long Life Coolant” is pre-mixed with
55% coolant and 45% deionized water.
• Funnel (used only for adding engine coolant)
Engine oil level
( → P. 361)• “Toyota Genuine Motor Oil” or equivalent
• Rag or paper towel
• Funnel (used only for adding engine oil)
Page 355 of 520
3557-3. Do-it-yourself maintenance
7
Maintenance and care
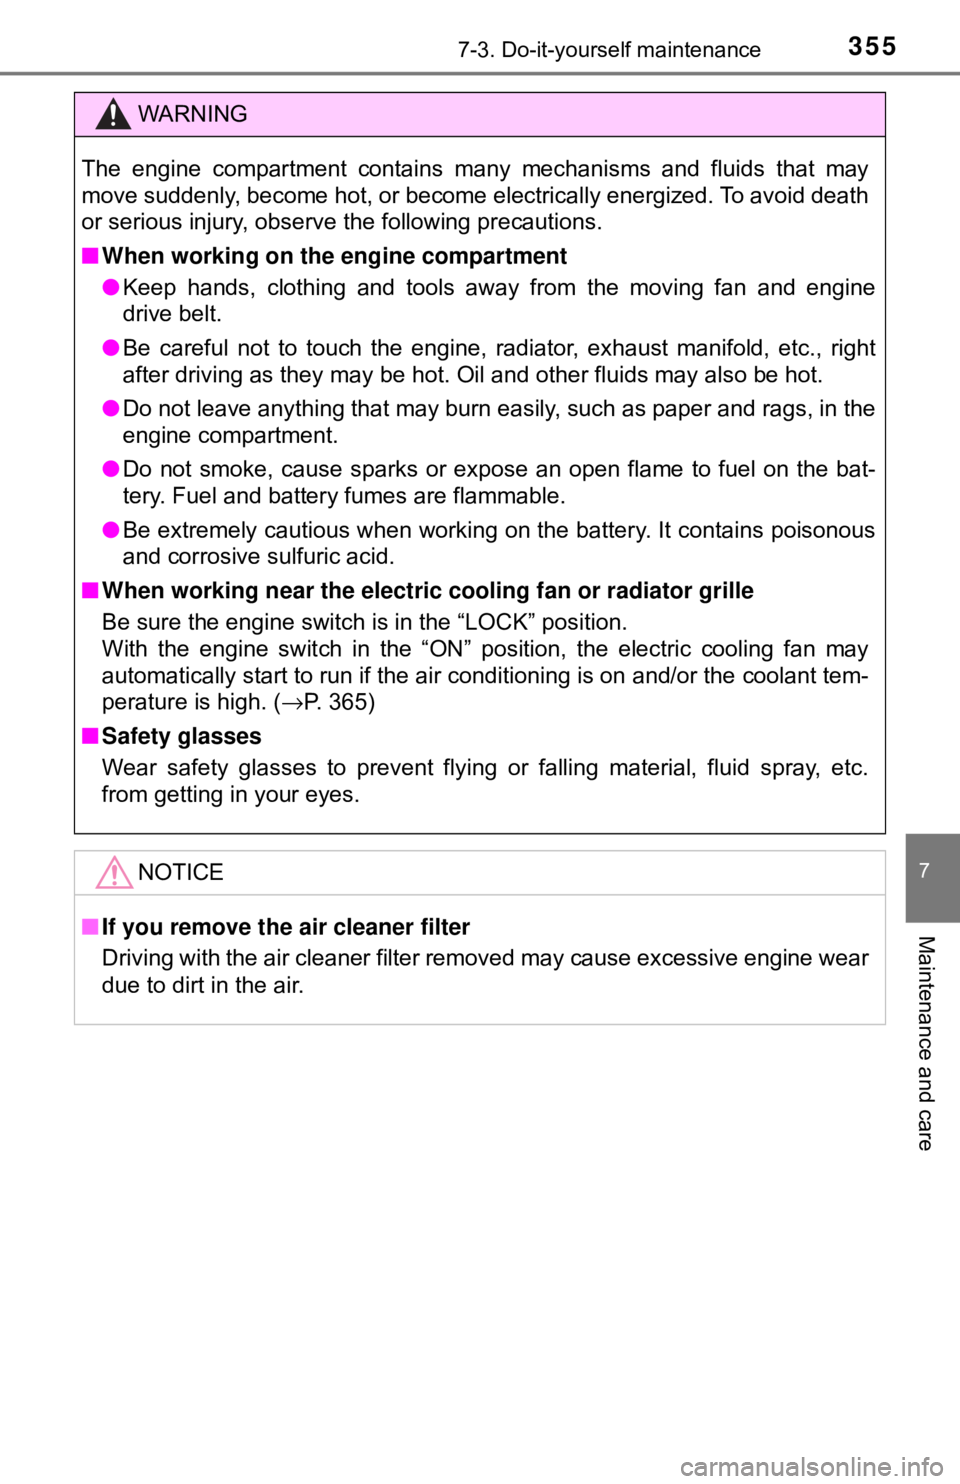
WARNING
The engine compartment contains many mechanisms and fluids that may
move suddenly, become hot, or become electrically energized. To avoid death
or serious injury, observe the following precautions.
■When working on the engine compartment
● Keep hands, clothing and tools away from the moving fan and engine
drive belt.
● Be careful not to touch the engine, radiator, exhaust manifold, etc., right
after driving as they may be hot. Oil and other fluids may also be hot.
● Do not leave anything that may burn easily, such as paper and rags, in the
engine compartment.
● Do not smoke, cause sparks or expose an open flame to fuel on the bat-
tery. Fuel and battery fumes are flammable.
● Be extremely cautious when working on the battery. It contains poisonous
and corrosive sulfuric acid.
■ When working near the electric cooling fan or radiator grille
Be sure the engine switch is in the “LOCK” position.
With the engine switch in the “ON” position, the electric cooling \
fan may
automatically start to run if the air conditioning is on and/or the coolant tem-
perature is high. ( →P. 365)
■ Safety glasses
Wear safety glasses to prevent flying or falling material, fluid spray, etc.
from getting in your eyes.
NOTICE
■If you remove the air cleaner filter
Driving with the air cleaner filter removed may cause excessive engine wear
due to dirt in the air.
Page 360 of 520
3607-3. Do-it-yourself maintenance
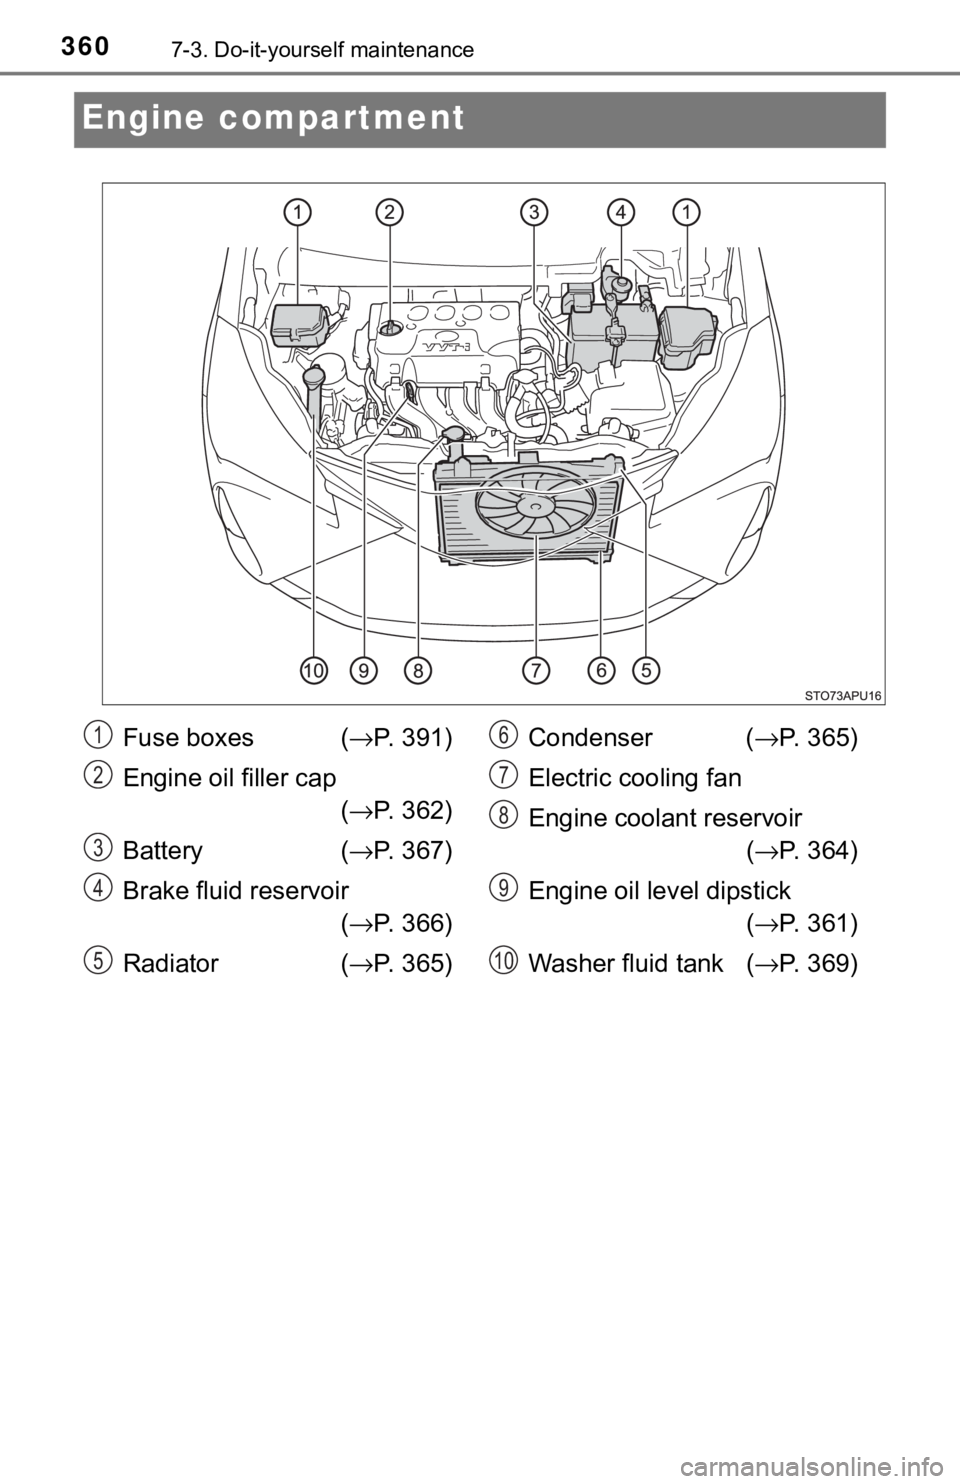
Engine compartment
Fuse boxes (→P. 391)
Engine oil filler cap (→ P. 362)
Battery ( →P. 367)
Brake fluid reservoir (→ P. 366)
Radiator (→ P. 365)Condenser (
→P. 365)
Electric cooling fan
Engine coolant reservoir (→ P. 364)
Engine oil level dipstick (→ P. 361)
Washer fluid tank ( →P. 369)1
2
3
4
5
6
7
8
9
10
Page 361 of 520
3617-3. Do-it-yourself maintenance
7
Maintenance and care
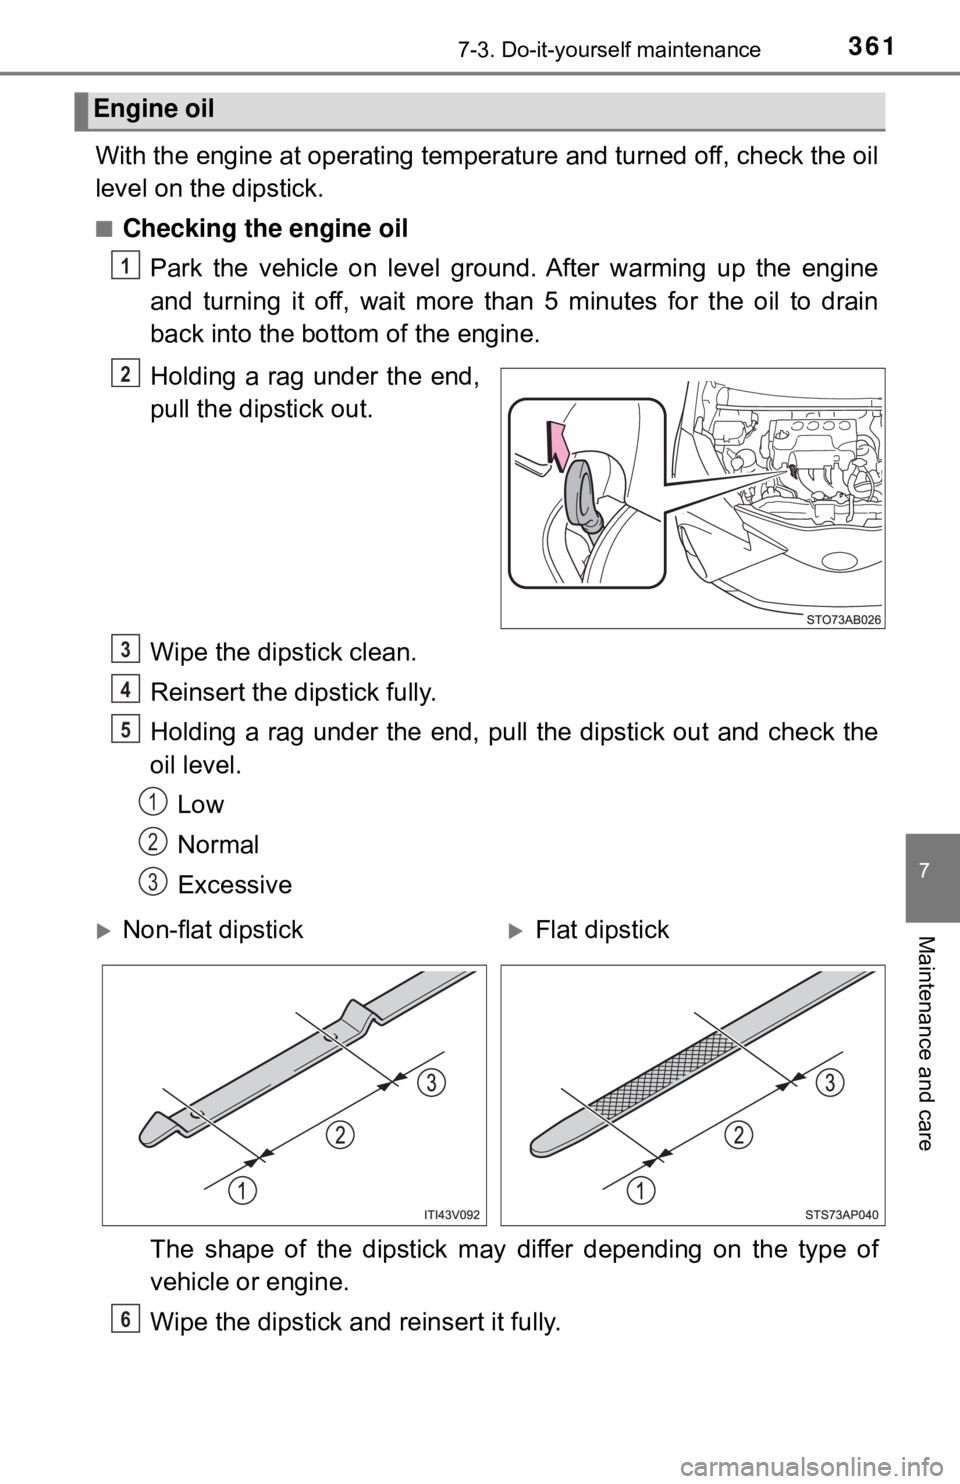
With the engine at operating temperature and turned off, check the oil
level on the dipstick.
■Checking the engine oilPark the vehicle on level ground. After warming up the engine
and turning it off, wait more than 5 minutes for the oil to drain
back into the bottom of the engine.
Holding a rag under the end,
pull the dipstick out.
Wipe the dipstick clean.
Reinsert the dipstick fully.
Holding a rag under the end, pull the dipstick out and check the
oil level.Low
Normal
Excessive
The shape of the dipstick may differ depending on the type of
vehicle or engine.
Wipe the dipstick and reinsert it fully.
Engine oil
1
2
3
4
5
1
2
3
Non-flat dipstickFlat dipstick
6