height TOYOTA YARIS HATCHBACK 2018 Owners Manual
[x] Cancel search | Manufacturer: TOYOTA, Model Year: 2018, Model line: YARIS HATCHBACK, Model: TOYOTA YARIS HATCHBACK 2018Pages: 520, PDF Size: 8.69 MB
Page 106 of 520
1063-3. Adjusting the seats
Front seats
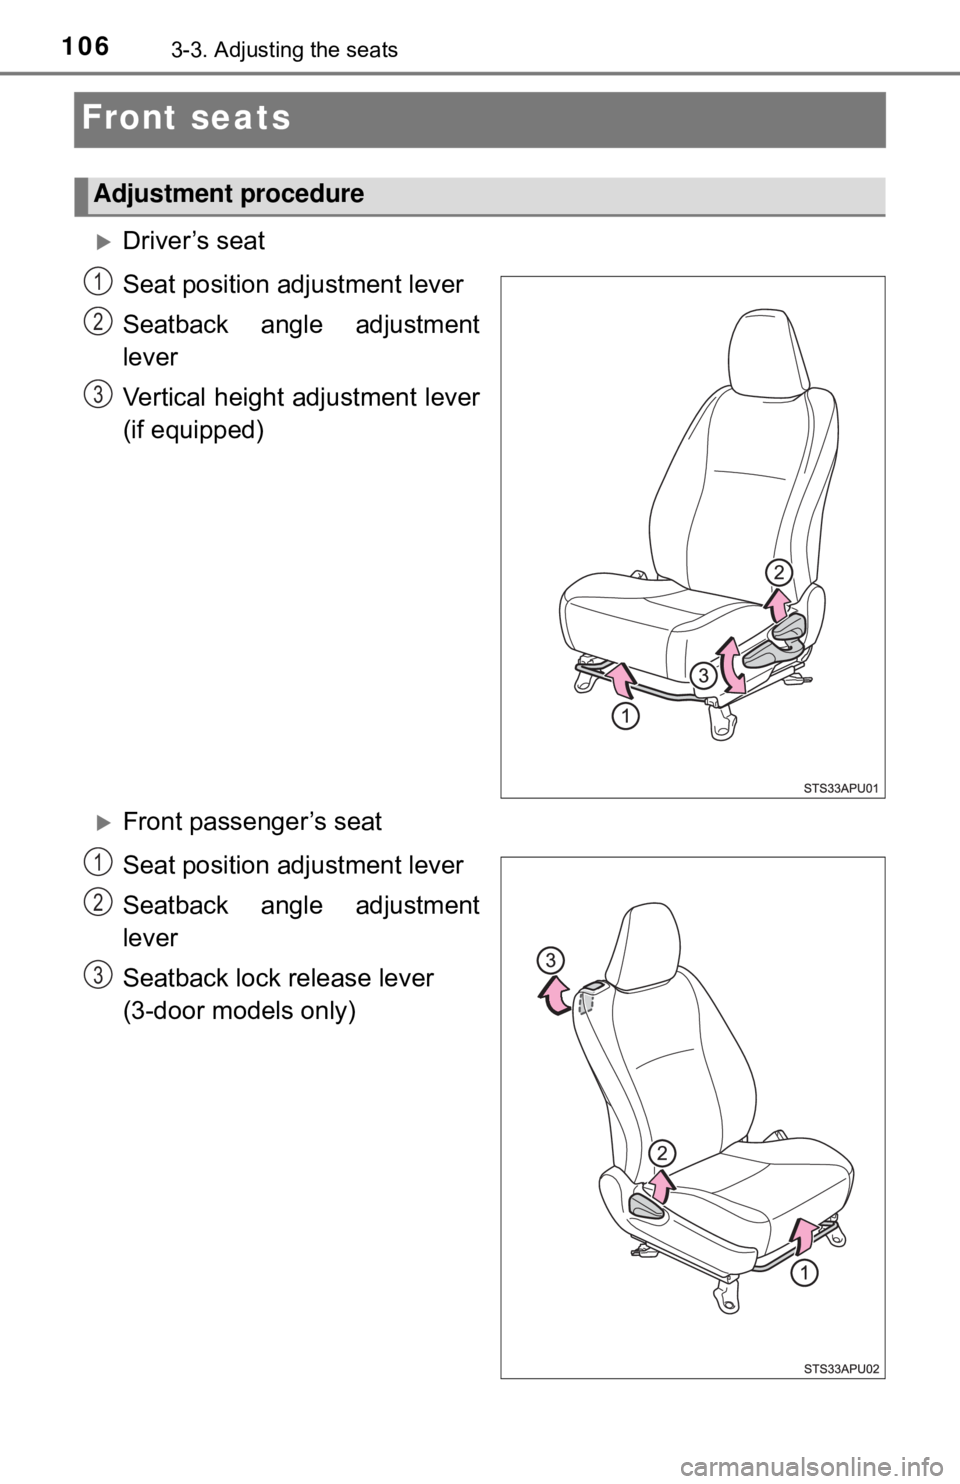
Driver’s seat
Seat position adjustment lever
Seatback angle adjustment
lever
Vertical height adjustment lever
(if equipped)
Front passenger’s seat
Seat position ad justment lever
Seatback angle adjustment
lever
Seatback lock release lever
(3-door models only)
Adjustment procedure
1
2
3
1
2
3
Page 114 of 520
1143-3. Adjusting the seats
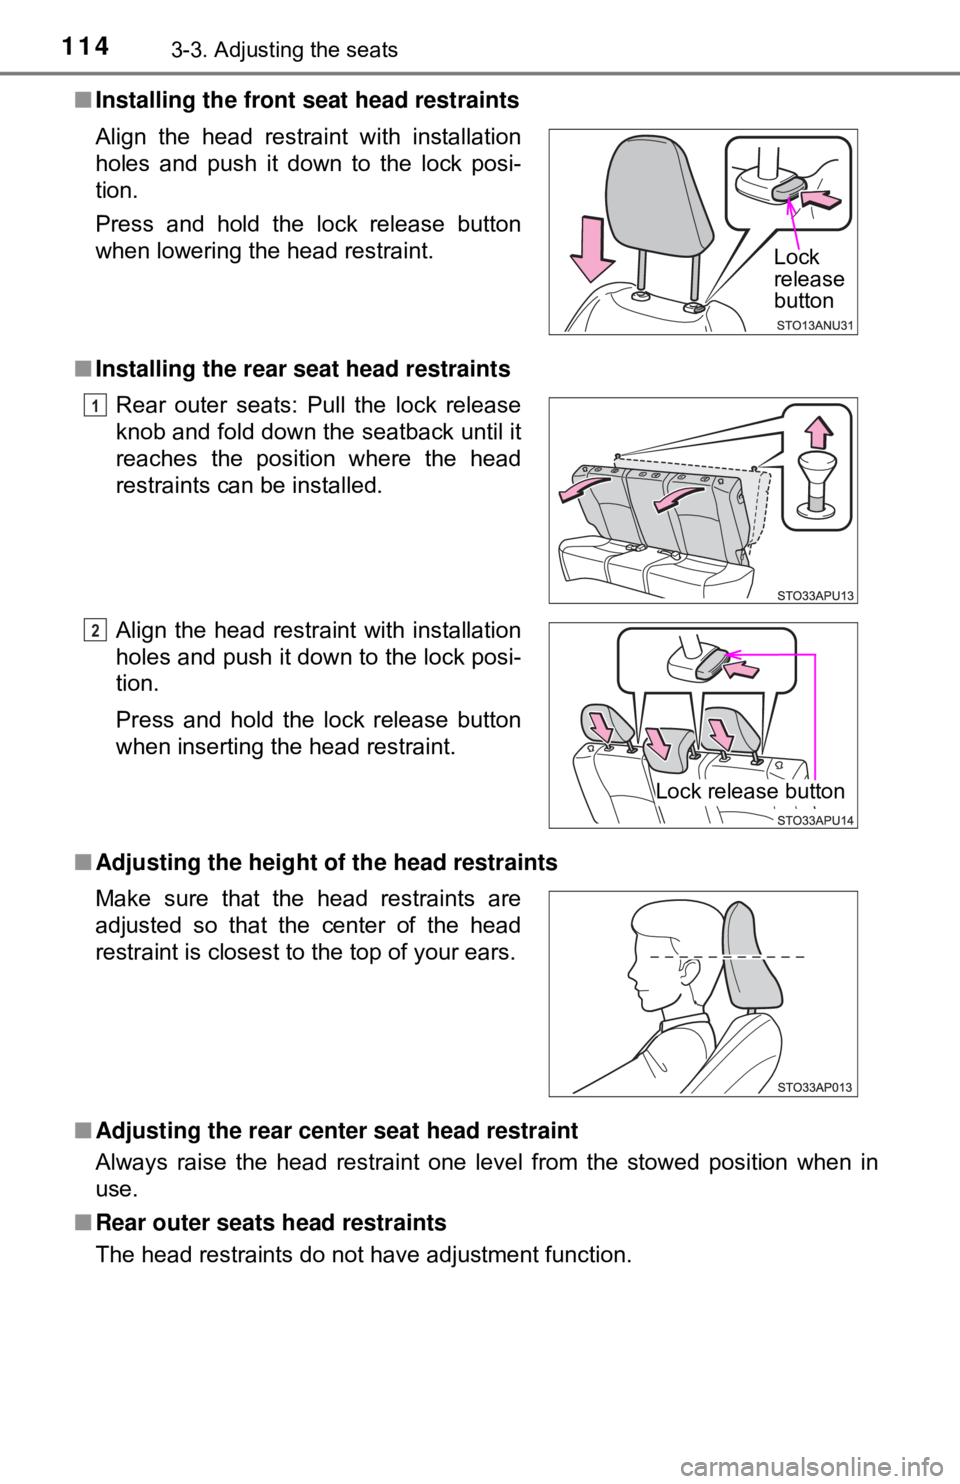
■Installing the front seat head restraints
■ Installing the rear seat head restraints
■ Adjusting the height of the head restraints
■ Adjusting the rear center seat head restraint
Always raise the head restraint one level from the stowed position when in
use.
■ Rear outer seats head restraints
The head restraints do not have adjustment function. Align the head restraint with installation
holes and push it down to the lock posi-
tion.
Press and hold the lock release button
when lowering the head restraint.
Rear outer seats: Pull the lock release
knob and fold down the seatback until it
reaches the position where the head
restraints can be installed.
Align the head restraint with installation
holes and push it down to the lock posi-
tion.
Press and hold the lock release button
when inserting the head restraint.
Make sure that the head restraints are
adjusted so that the center of the head
restraint is closest to the top of your ears.
Lock
release
button
1
2
Lock release button
Page 118 of 520
1183-4. Adjusting the steering wheel and mirrors
Inside rear view mirror
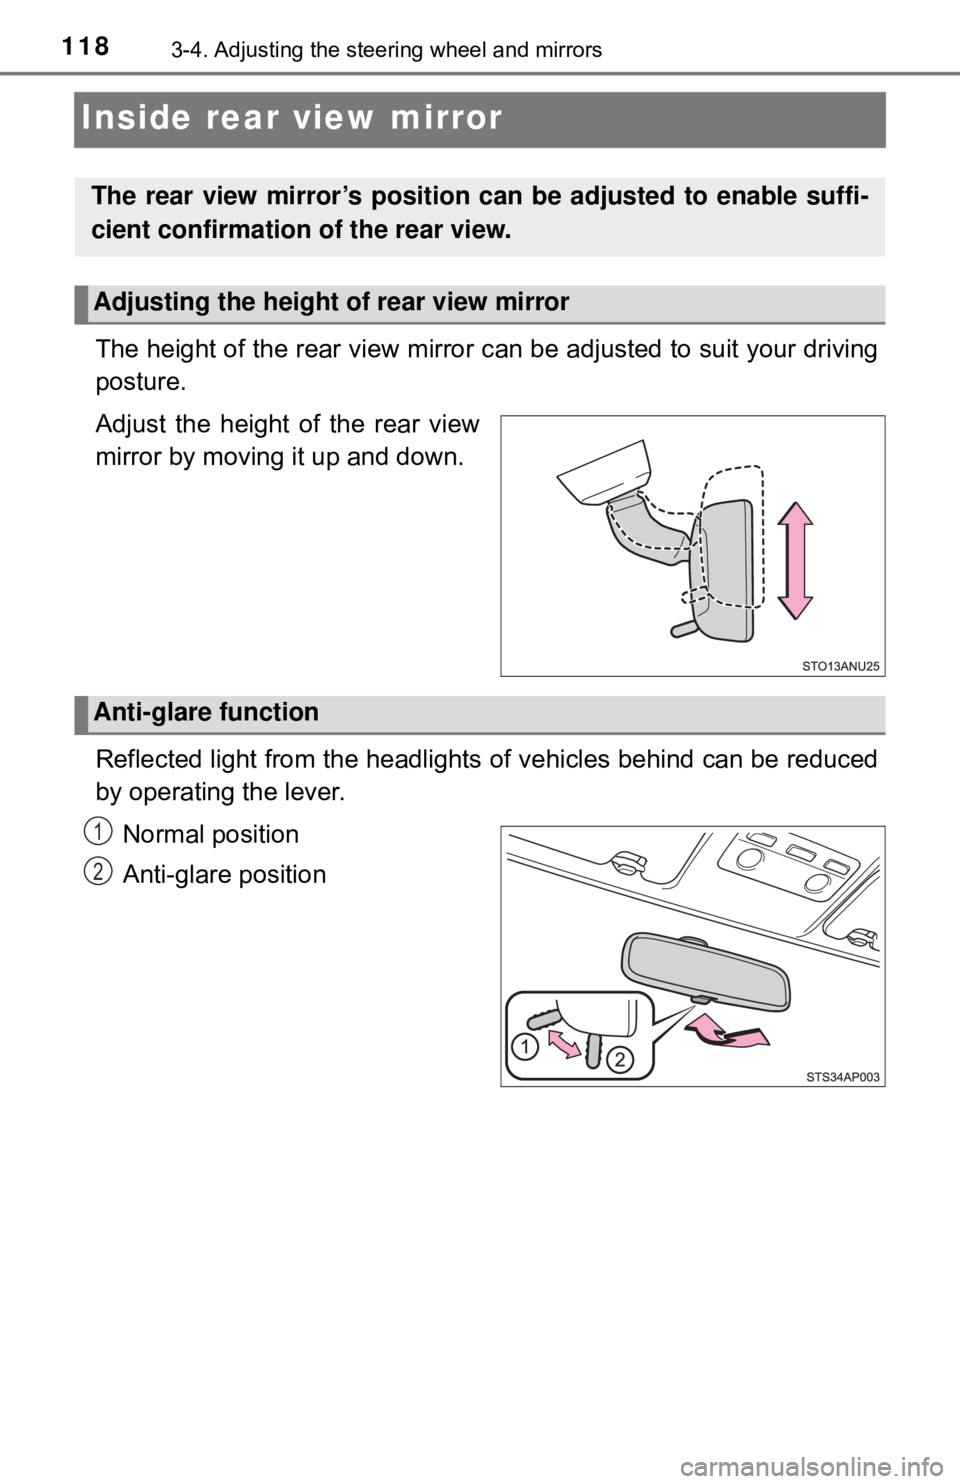
The height of the rear view mirror can be adjusted to suit your driving
posture.
Adjust the height of the rear view
mirror by moving it up and down.
Reflected light from the headlights of vehicles behind can be reduced
by operating the lever.
Normal position
Anti-glare position
The rear view mirror’s position can be adjusted to enable suffi-
cient confirmation of the rear view.
Adjusting the height of rear view mirror
Anti-glare function
1
2
Page 186 of 520
1864-5. Toyota Safety Sense C
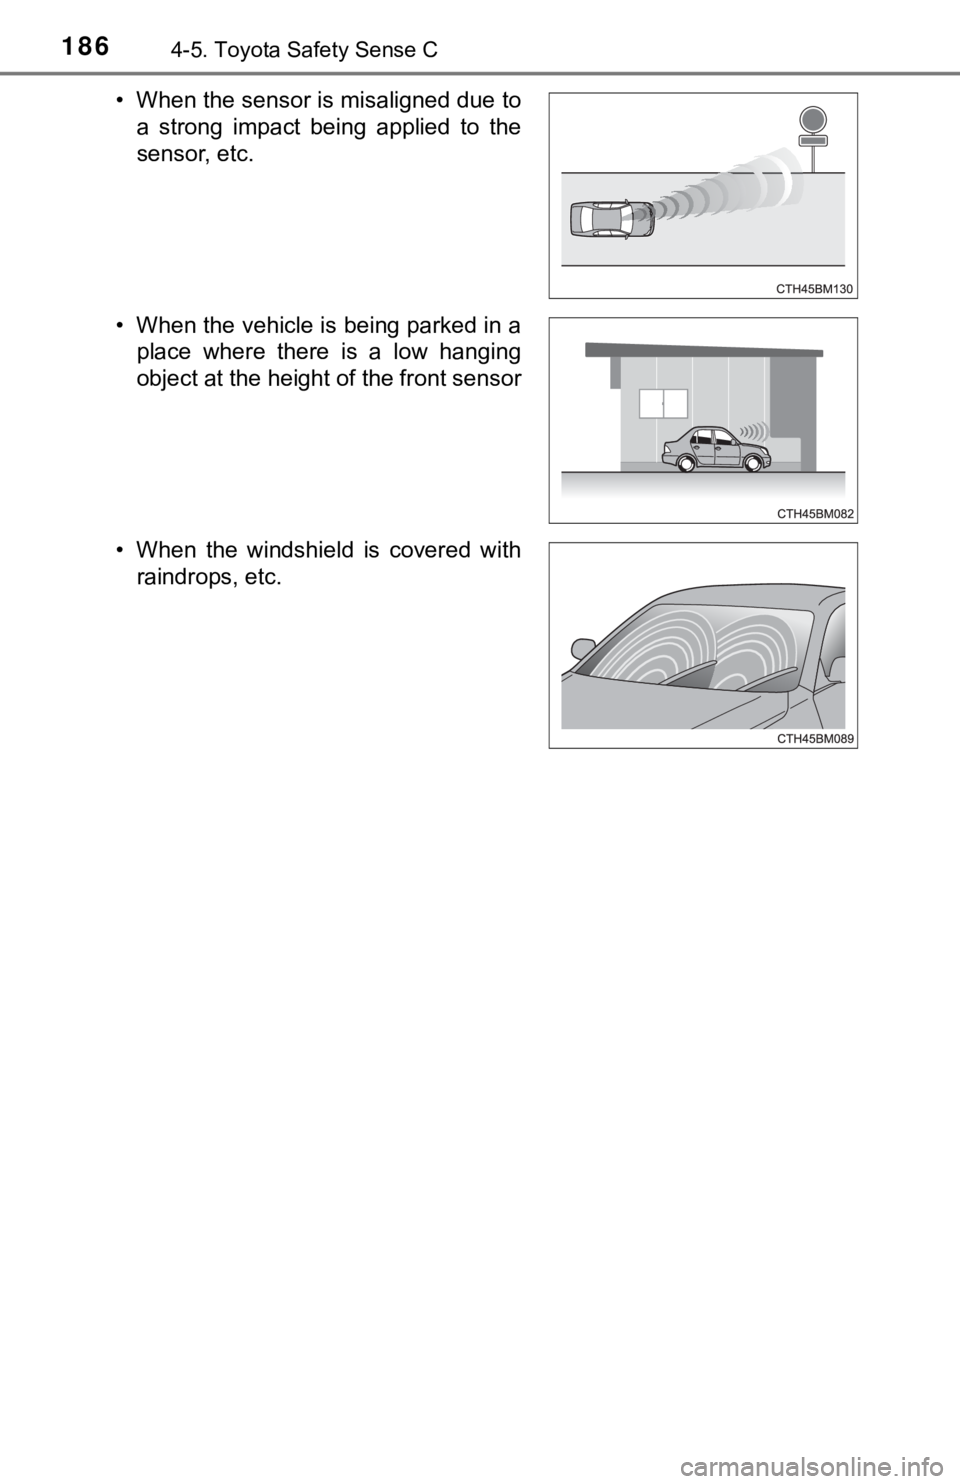
• When the sensor is misaligned due toa strong impact being applied to the
sensor, etc.
• When the vehicle is being parked in a place where there is a low hanging
object at the height of the front sensor
• When the windshield is covered with raindrops, etc.
Page 335 of 520
3356-3. Using the storage features
6
Interior features
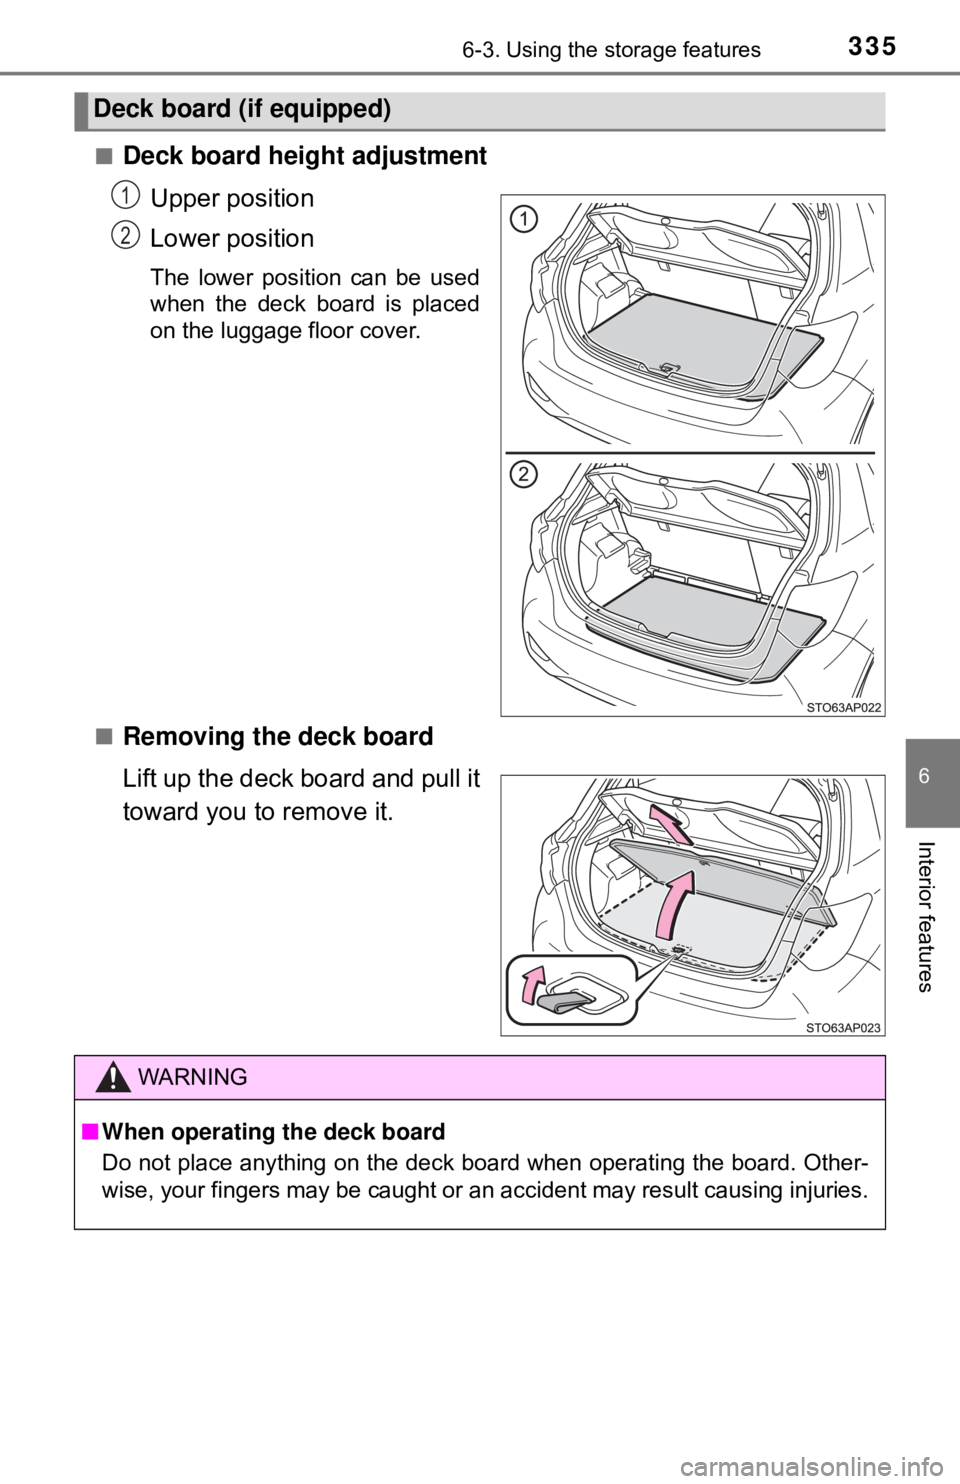
■Deck board height adjustmentUpper position
Lower position
The lower position can be used
when the deck board is placed
on the luggage floor cover.
■
Removing the deck board
Lift up the deck board and pull it
toward you to remove it.
Deck board (if equipped)
1
2
WARNING
■ When operating the deck board
Do not place anything on the deck board when operating the board. Other-
wise, your fingers may be caught or an accident may result causing injuries.
Page 435 of 520

4358-2. Steps to take in an emergency
8
When trouble arises
WARNING
■Using the tire jack
Observe the following precautions.
Improper use of the tire jack may cause the vehicle to suddenly fall off
the jack, leading to death or serious injury.
●Do not use the tire jack for any purpose other than replacing tires or
installing and removing tire chains.
●Only use the tire jack that comes with this vehicle for replacing a flat
tire.
Do not use it on other vehicles, and do not use other tire jacks for
replacing tires on this vehicle.
●Put the jack properly in its jack point.
●Do not put any part of your body under the vehicle while it is supported
by the jack.
●Do not start the engine or drive the vehicle while the vehicle is sup-
ported by the jack.
●Do not raise the vehicle while someone is inside.
●When raising the vehicle, do not put an object on or under the jack.
●Do not raise the vehicle to a height greater than that required to
replace the tire.
●Use a jack stand if it is necessary to get under the vehicle.
●When lowering the vehicle, make su re that there is no-one near the
vehicle. If there are people nearby, warn them vocally before lowering.
Page 444 of 520

4448-2. Steps to take in an emergency
■The compact spare tire
●The compact spare tire is identified by the label “TEMPORARY USE
ONLY” on the tire sidewall.
Use the compact spare tire temporarily, and only in an emergency.
●Make sure to check the tire inflation pressure of the compact spare tire.
(→ P. 469)
■After completing the tire change (vehicles with a tire pressure warn-
ing system)
The tire pressure warning system must be reset. ( →P. 372)
■When using the compact spare tire (vehicles with a tire pressure
warning system)
As the compact spare tire is not equipped with a tire pressure warning
valve and transmitter, low inflation pressure of the spare tire will not be
indicated by the tire pressure warning system. Also, if you replace the
compact spare tire after the tire pressure warning light comes on, the light
remains on.
■When the compact spare tire is equipped
The vehicle height may become lower when driving with the compact
spare tire compared to when driving with standard tires.
■If you have a flat front tire on a road covered with snow or ice
Install the compact spare tire on one of the rear wheels of the vehicle.
Perform the following steps and fit tire chains to the front tires:
Replace a rear tire with the compact spare tire.
Replace the flat front tire with the tire removed from the rear of the
vehicle.
Fit tire chains to the front tires.
1
2
3
Page 460 of 520
4609-1. Specifications
Maintenance data (fuel, oil level, etc.)
*1: Unladen vehicles
*2: P175/65R15 tires
*3: P195/50R16 tires
Dimensions and weights
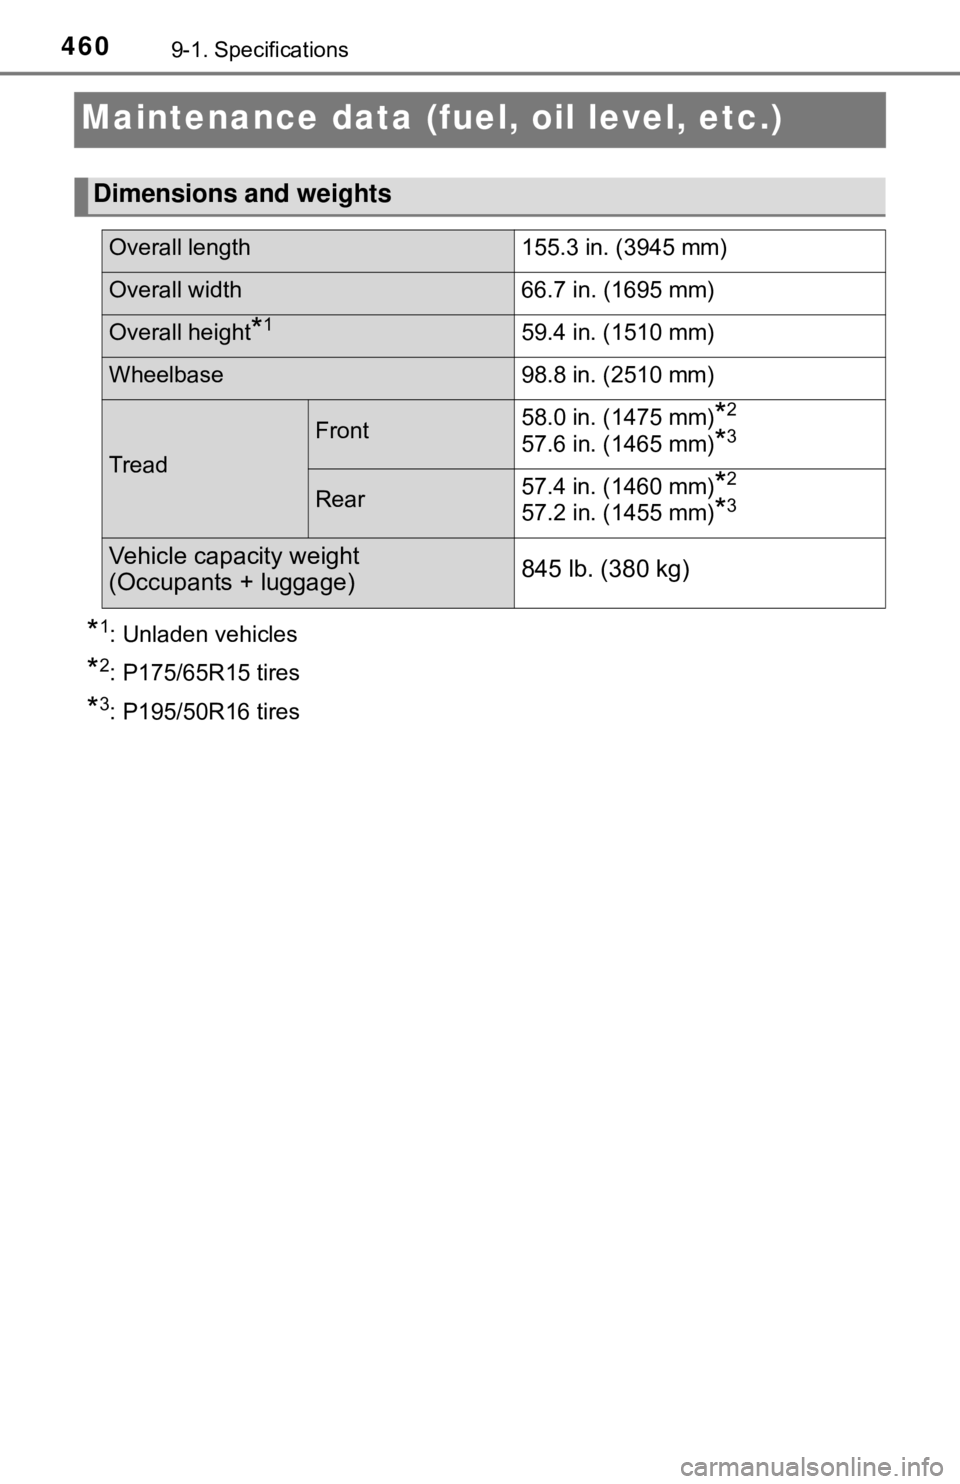
Overall length 155.3 in. (3945 mm)
Overall width 66.7 in. (1695 mm)
Overall height*159.4 in. (1510 mm)
Wheelbase98.8 in. (2510 mm)
Tread
Front58.0 in. (1475 mm)*2
57.6 in. (1465 mm)*3
Rear57.4 in. (1460 mm)*2
57.2 in. (1455 mm)*3
Vehicle capacity weight
(Occupants + luggage)
845 lb. (380 kg)
Page 477 of 520
4779-1. Specifications
9
Vehicle specifications
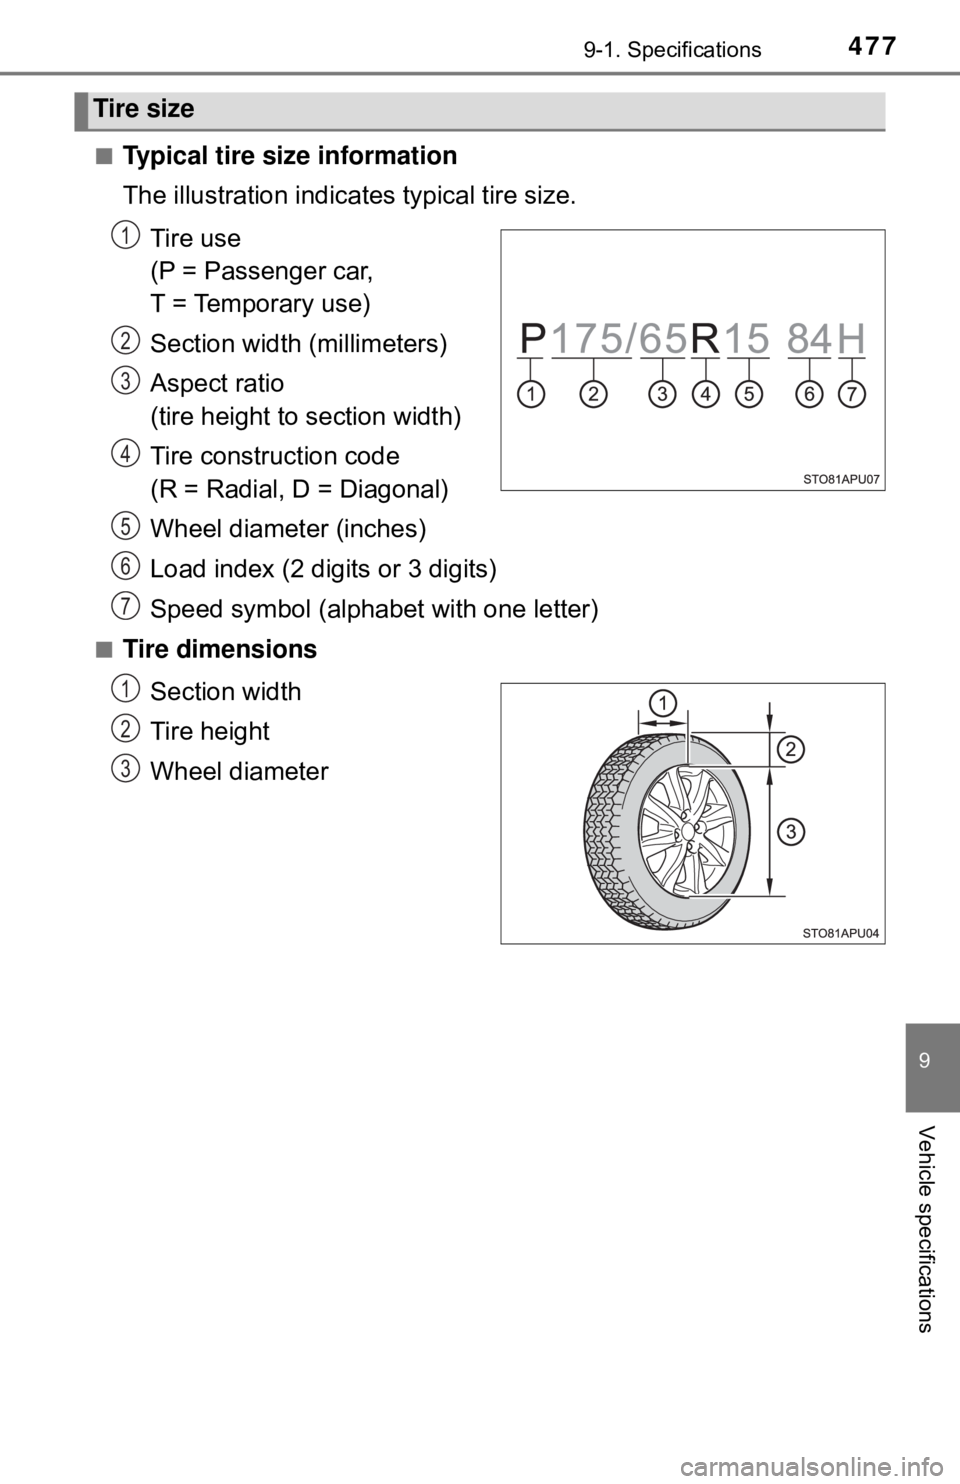
■Typical tire size information
The illustration indicates typical tire size.Tire use
(P = Passenger car,
T = Temporary use)
Section width (millimeters)
Aspect ratio
(tire height to section width)
Tire construction code
(R = Radial, D = Diagonal)
Wheel diameter (inches)
Load index (2 digits or 3 digits)
Speed symbol (alphabet with one letter)
■Tire dimensionsSection width
Tire height
Wheel diameter
Tire size
1
2
3
4
5
6
7
1
2
3