TOYOTA YARIS LIFTBACK 2020 (in English) Manual PDF
Manufacturer: TOYOTA, Model Year: 2020, Model line: YARIS LIFTBACK, Model: TOYOTA YARIS LIFTBACK 2020Pages: 520, PDF Size: 8.71 MB
Page 71 of 520
711-2. Child safety
1
For safety and security
If the child restraint has a top tether strap, follow the child
restraint manufacturer’s operation manual regarding the installa-
tion, using the top tether strap to latch onto the top tether strap
anchor. (→ P. 7 2 )
After installing the child restraint system, rock it back and forth to
ensure that it is installed securely. ( →P. 68)
■Laws and regulations pertaining to anchors
The LATCH system conforms to FMVSS225 or CMVSS210.2.
Child restraint systems conforming to FMVSS213 or CMVSS213 specifica-
tions can be used.
This vehicle is designed to conform to SAE J1819.
WARNING
■When installing a child restraint system
Observe the following precautions.
Failure to do so may result in death or serious injury.
● When using the LATCH anchors, be sure that there are no foreign objects
around the anchors and that the seat belt is not caught behind the child
restraint system.
● Follow all installation instructions provided by the child restraint system
manufacturer.
● When securing some types of child restraint systems in rear seats, it may
not be possible to properly use the seat belts in positions next to the child
restraint without interfering with it or affecting seat belt effectiveness. Be
sure your seat belt fits snugly across your shoulder and low on your hips. If
it does not, or if it interferes with the child restraint, move to a different
position. Failure to do so may result in death or serious injury.
3
4
Page 72 of 520
721-2. Child safety
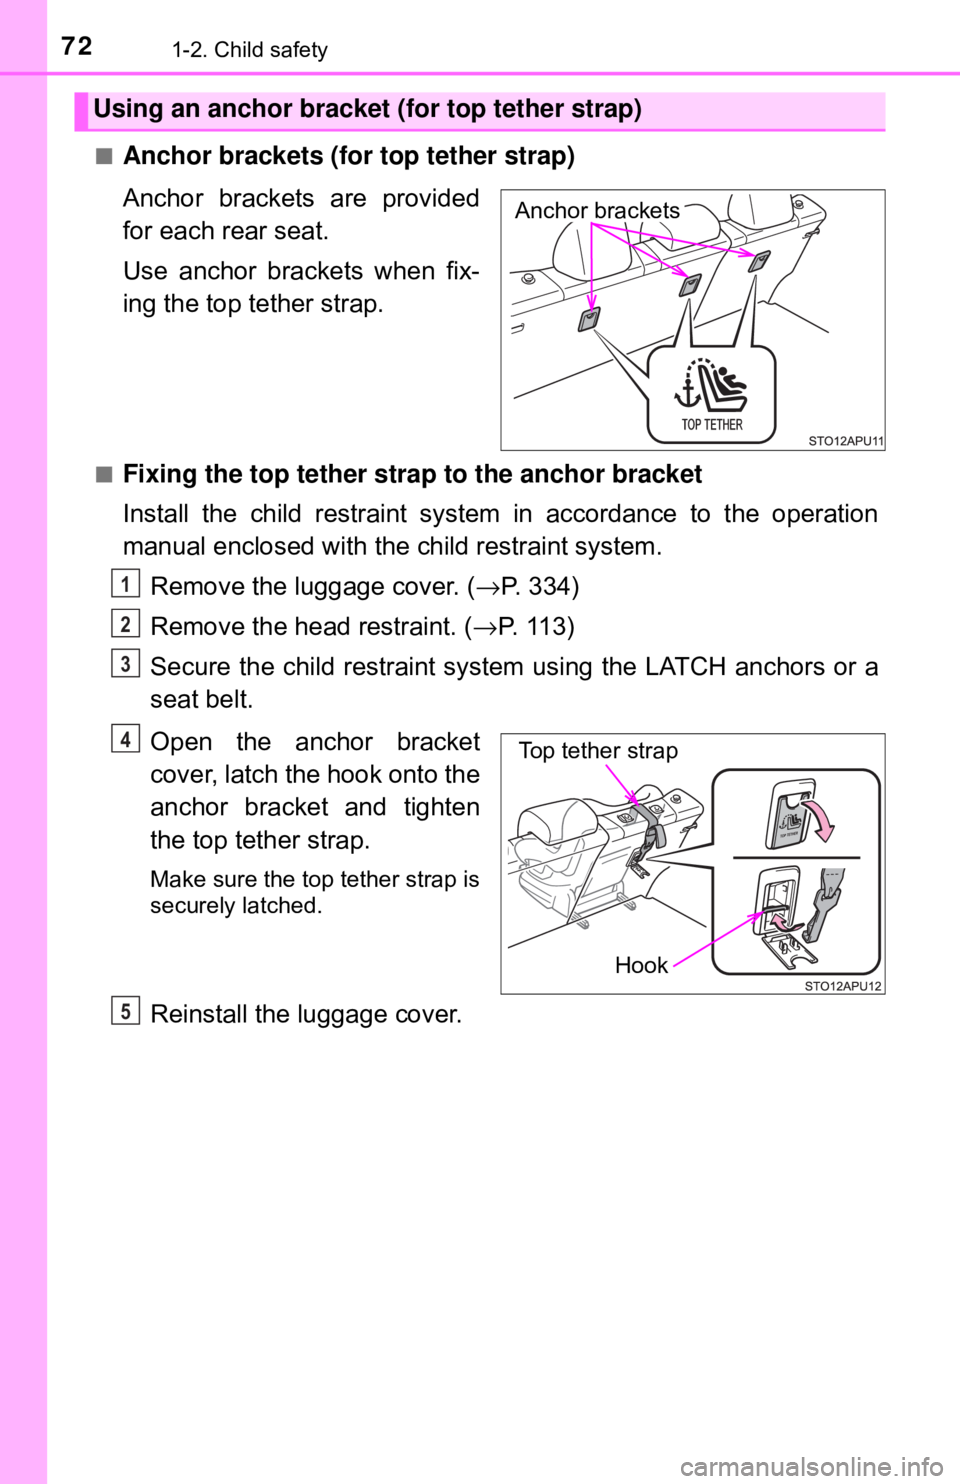
■Anchor brackets (for top tether strap)
Anchor brackets are provided
for each rear seat.
Use anchor brackets when fix-
ing the top tether strap.
■Fixing the top tether strap to the anchor bracket
Install the child restraint system in accordance to the operation
manual enclosed with the child restraint system.Remove the luggage cover. ( →P. 334)
Remove the head restraint. ( →P. 1 1 3 )
Secure the child restraint syst em using the LATCH anchors or a
seat belt.
Open the anchor bracket
cover, latch the hook onto the
anchor bracket and tighten
the top tether strap.
Make sure the top tether strap is
securely latched.
Reinstall the luggage cover.
Using an anchor bracket (for top tether strap)
Anchor brackets
1
2
3
Top tether strap
Hook
4
5
Page 73 of 520
731-2. Child safety
1
For safety and security
■Laws and regulations pertaining to anchors
The LATCH system conforms to FMVSS225 or CMVSS210.2.
Child restraint systems conforming to FMVSS213 or CMVSS213 specifica-
tions can be used.
This vehicle is designed to conform to SAE J1819.
WARNING
■When installing a child restraint system
Observe the following precautions.
Failure to do so may result in death or serious injury.
● Firmly attach the top tether strap and make sure that the belt is not twisted.
● Do not attach the top tether strap to anything other than the anchor
bracket.
● After securing a child restraint system, never adjust the seat.
● Follow all installation instructions provided by the child restraint system
manufacturer.
● When a child restraint system with a top tether strap is installed, do not
install the head restraint. The head restraint may interfere with the top
tether strap preventing secure installation of the child restraint system.
● Make sure to properly store the removed head restraint in a secure place
when you use the child restraint system on the rear seat.
NOTICE
■Anchor brackets (for top tether strap)
When not in use, make certain to close the lid. If it remains open, the lid
may be damaged.
Page 74 of 520
741-3. Theft deterrent system
Engine immobilizer system∗
The system begins operating after the key has been removed from
the engine switch. The system is canceled after the registered key
has been inserted into the engine switch.
■System maintenance
The vehicle has a maintenance-free type engine immobilizer system.
■ Conditions that may cause the system to malfunction
●If the grip portion of the key is in contact with a metallic object
● If the key is in close proximity to or touching a key to the security system
(key with a built-in transponder chip) of another vehicle
∗: If equipped
The vehicle’s keys have built-in transponder chips that prevent
the engine from starting if a key has not been previously regis-
tered in the vehicle’s on-board computer.
Never leave the keys inside the vehicle when you leave the vehi-
cle.
This system is designed to help prevent vehicle theft but does
not guarantee absolute security against all vehicle thefts.
Page 75 of 520
751-3. Theft deterrent system
1
For safety and security
■Certifications for the engine immobilizer system
U.S.A.
FCC ID: PSIRI-43BTY
This device complies with part 15 of the FCC Rules. Operation is subject to
the following two conditions: (1) This device may not cause harmful interfer-
ence; and (2) This device must accept any interference received, including
interference that may cause undesired operation.
Changes or modifications not expressly approved by the party responsible for
compliance could void the user’s authority to operate the equipment.
Canada
This device complies with Industry Canada licence-exempt RSSs.
Operation is subject to the following two conditions: (1) This device may not
cause interference; and (2) This device must accept any interference, includ-
ing interference that may cause undesired operation of the device.
NOTICE
■ To ensure the system operates correctly
Do not modify or remove the system. If modified or removed, the proper
operation of the system cannot be guaranteed.
Page 76 of 520
761-3. Theft deterrent system
Theft prevention labels (except Canada)
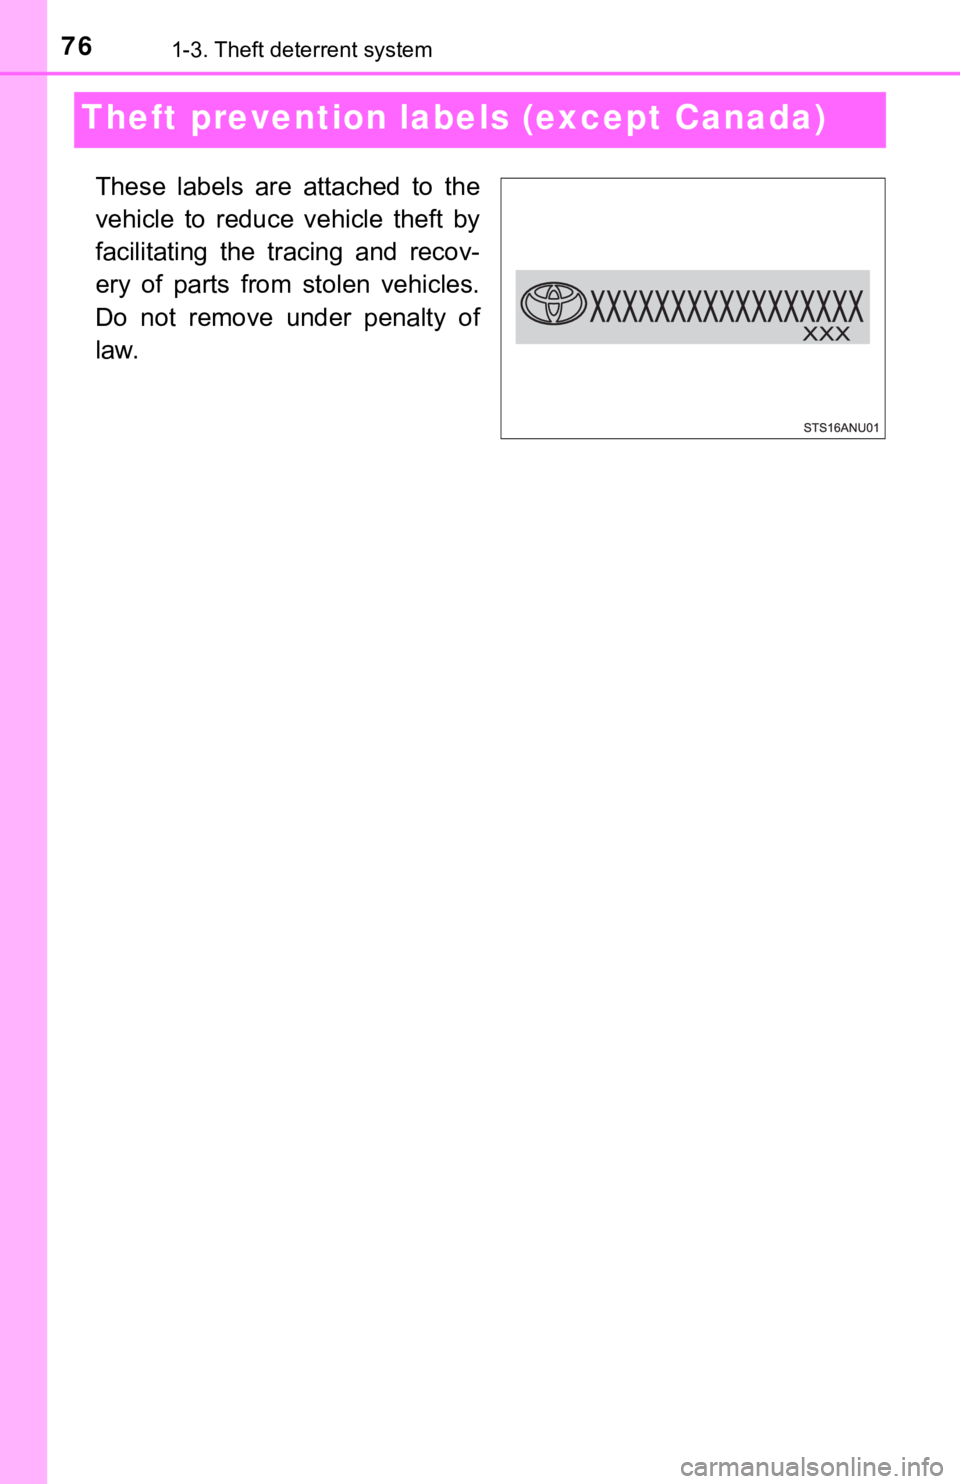
These labels are attached to the
vehicle to reduce vehicle theft by
facilitating the tracing and recov-
ery of parts from stolen vehicles.
Do not remove under penalty of
law.
Page 77 of 520
77
Instrument cluster2
2. Instrument clusterWarning lights and indicators .......................... 78
Gauges and meters ............ 83
Multi-information display ..... 85
Fuel consumption information ........................ 89
Page 78 of 520
782. Instrument cluster
Warning lights and indicators
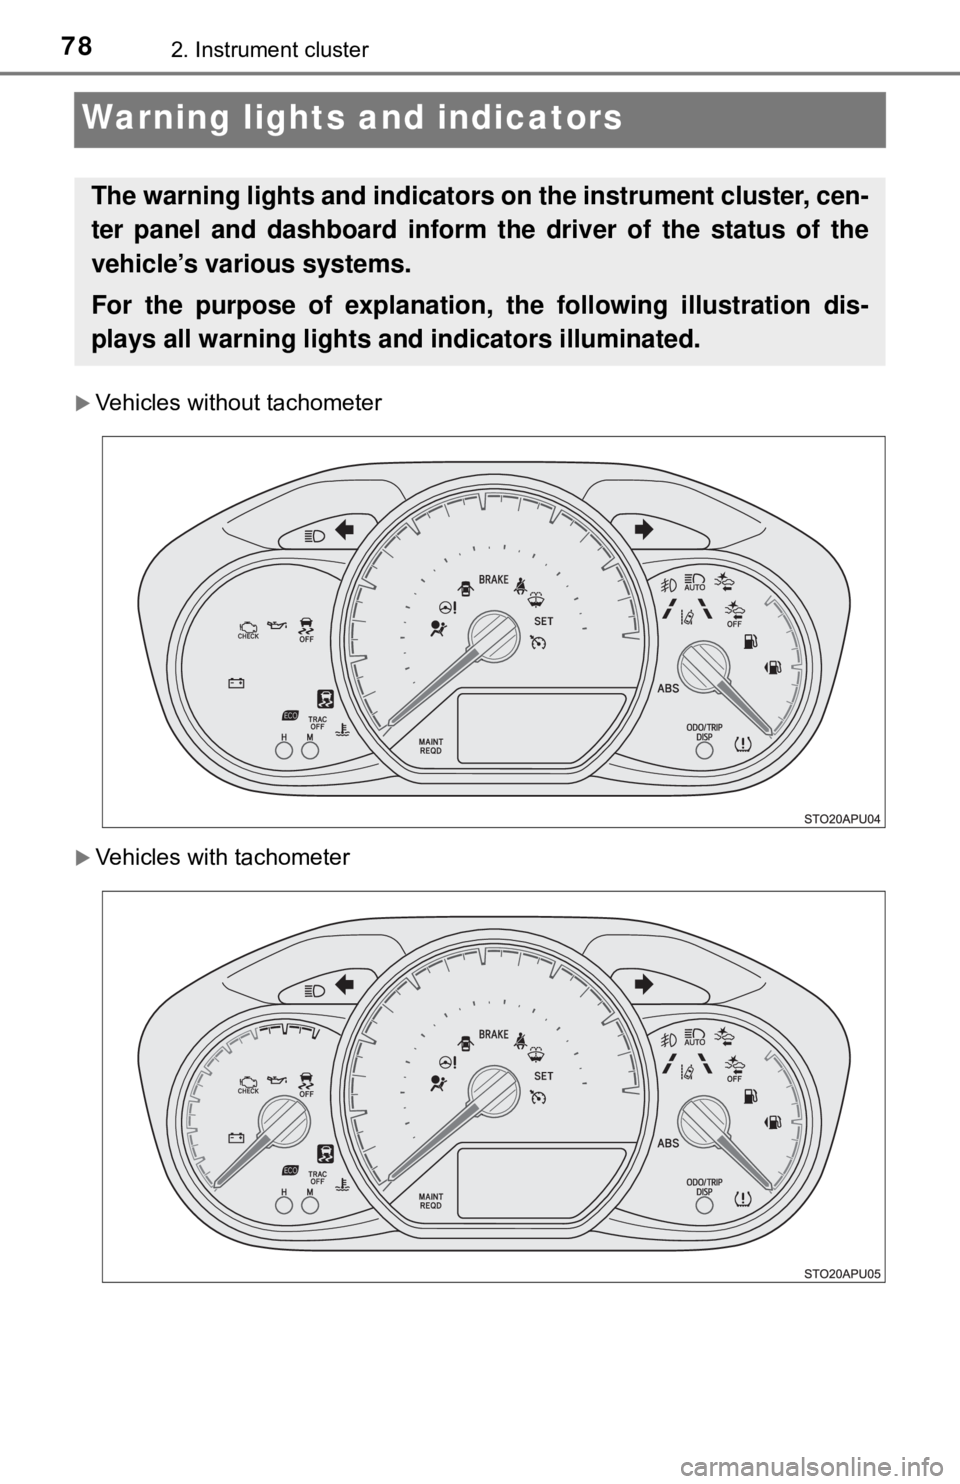
Vehicles without tachometer
Vehicles with tachometer
The warning lights and indicators on the instrument cluster, cen-
ter panel and dashboard inform th e driver of the status of the
vehicle’s various systems.
For the purpose of explanation, the following illustration dis-
plays all warning lights a nd indicators illuminated.
Page 79 of 520
792. Instrument cluster
2
Instrument cluster
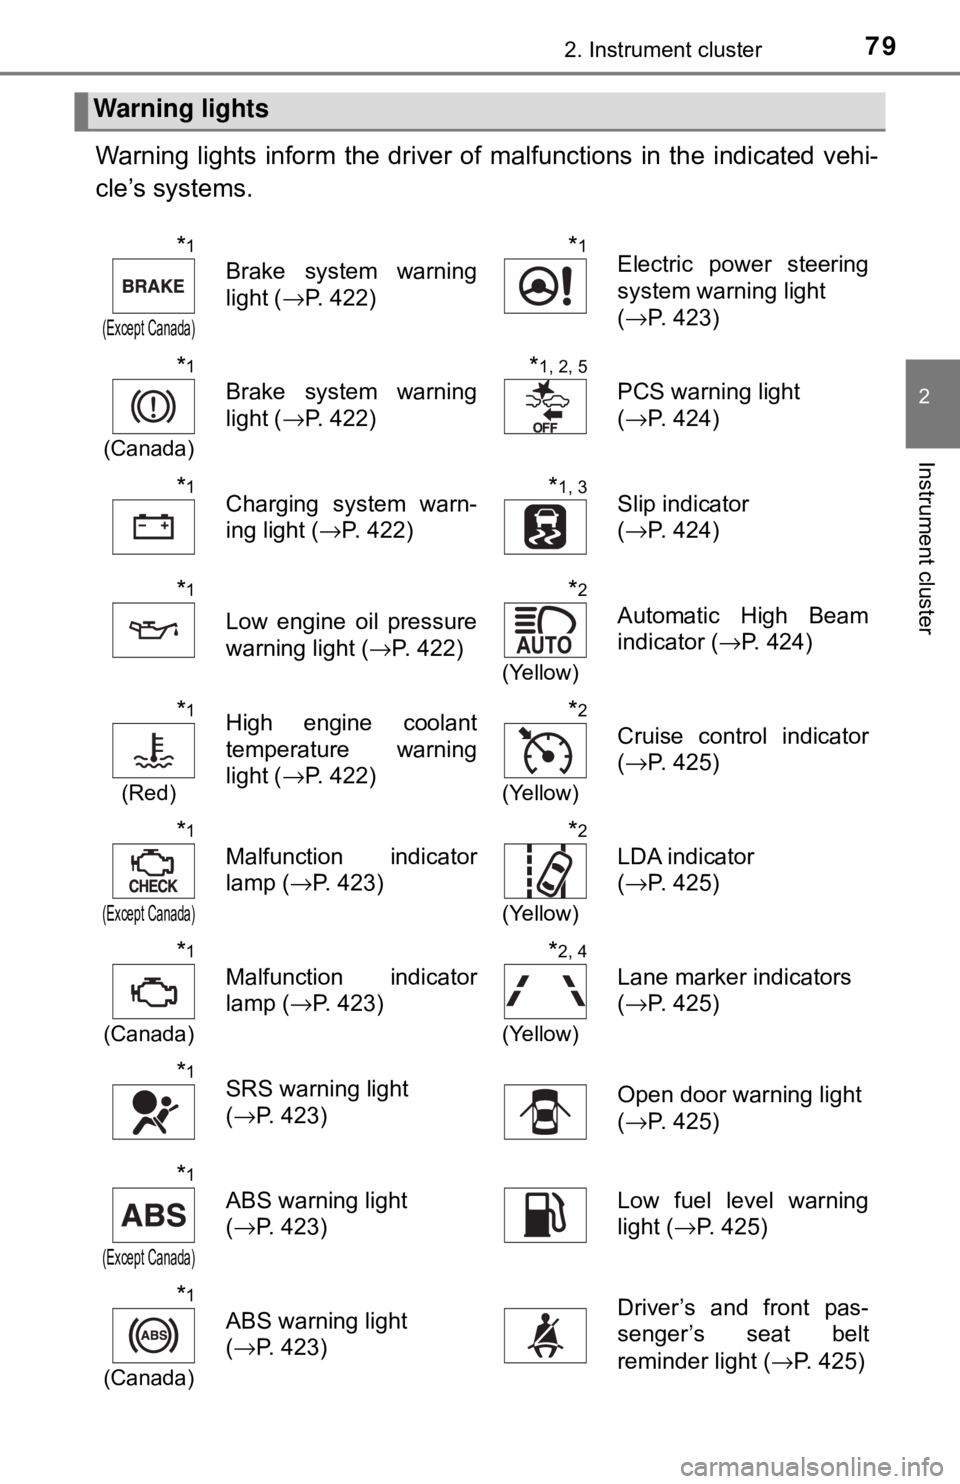
Warning lights inform the driver of malfunctions in the indicated vehi-
cle’s systems.
Warning lights
*1
(Except Canada)
Brake system warning
light ( →P. 422)
*1Electric power steering
system warning light
(→P. 423)
*1
(Canada)
Brake system warning
light ( →P. 422)
*1, 2, 5
PCS warning light
(→P. 424)
*1Charging system warn-
ing light ( →P. 422)*1, 3Slip indicator
(→P. 424)
*1
Low engine oil pressure
warning light ( →P. 422)
*2
(Yellow)
Automatic High Beam
indicator ( →P. 424)
*1
(Red)
High engine coolant
temperature warning
light ( →P. 422)*2
(Yellow)
Cruise control indicator
(→P. 425)
*1
(Except Canada)
Malfunction indicator
lamp ( →P. 423)
*2
(Yellow)
LDA indicator
(→P. 425)
*1
(Canada)
Malfunction indicator
lamp ( →P. 423)
*2, 4
(Yellow)
Lane marker indicators
(→P. 425)
*1SRS warning light
(→P. 423)Open door warning light
(→P. 425)
*1
(Except Canada)
ABS warning light
(→P. 423)Low fuel level warning
light ( →P. 425)
*1
(Canada)
ABS warning light
(→P. 423)Driver’s and front pas-
senger’s seat belt
reminder light ( →P. 425)
Page 80 of 520
802. Instrument cluster
*1: These lights turn on when the engine switch is turned to the “ON” positionto indicate that a system check is being performed. They will turn off after
the engine is started, or after a few seconds. There may be a malfunction
in a system if a light does not come on, or if the lights do not turn off. Have
the vehicle inspected by your Toyota dealer.
*2: If equipped
*3: The light flashes to indicate that the system is operating and come on toindicate a malfunction.
*4: The lights turn on with LDA indicator to indicate a malfunction.
*5: The light flashes to indicate a malfunction.
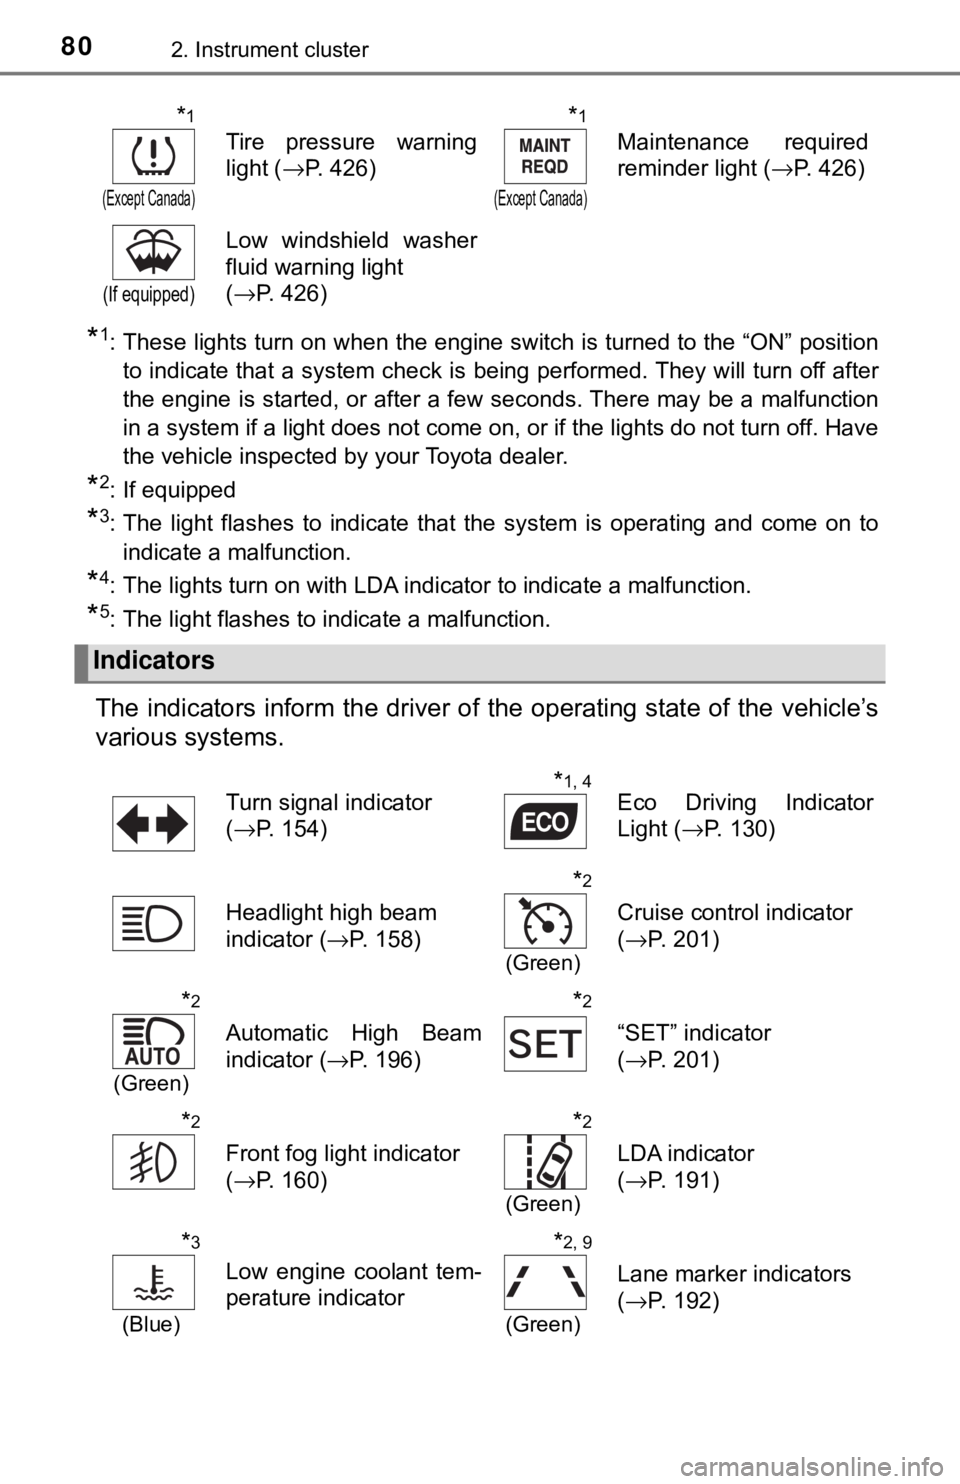
The indicators inform the driver of the operating state of the vehicle’s
various systems.
*1
(Except Canada)
Tire pressure warning
light ( →P. 426)
*1
(Except Canada)
Maintenance required
reminder light ( →P. 426)
(If equipped)
Low windshield washer
fluid warning light
(→P. 426)
Indicators
Turn signal indicator
(→P. 154)*1, 4Eco Driving Indicator
Light ( →P. 130)
Headlight high beam
indicator ( →P. 158)
*2
(Green)
Cruise control indicator
(→P. 201)
*2
(Green)
Automatic High Beam
indicator ( →P. 196)
*2
“SET” indicator
(→P. 201)
*2
Front fog light indicator
(→P. 160)
*2
(Green)
LDA indicator
(→P. 191)
*3
(Blue)
Low engine coolant tem-
perature indicator
*2, 9
(Green)
Lane marker indicators
(→P. 192)