height VAUXHALL ADAM 2014.5 Owner's Manual
[x] Cancel search | Manufacturer: VAUXHALL, Model Year: 2014.5, Model line: ADAM, Model: VAUXHALL ADAM 2014.5Pages: 217, PDF Size: 6.68 MB
Page 9 of 217
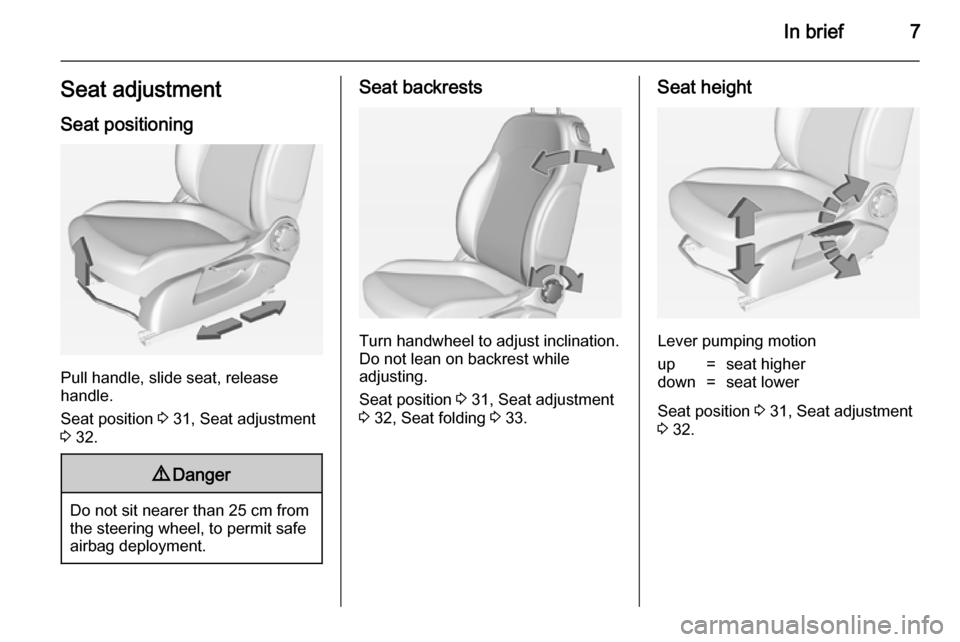
In brief7Seat adjustmentSeat positioning
Pull handle, slide seat, release
handle.
Seat position 3 31, Seat adjustment
3 32.
9 Danger
Do not sit nearer than 25 cm from
the steering wheel, to permit safe
airbag deployment.
Seat backrests
Turn handwheel to adjust inclination.
Do not lean on backrest while
adjusting.
Seat position 3 31, Seat adjustment
3 32, Seat folding 3 33.
Seat height
Lever pumping motion
up=seat higherdown=seat lower
Seat position 3 31, Seat adjustment
3 32.
Page 10 of 217
8In briefHead restraint adjustment
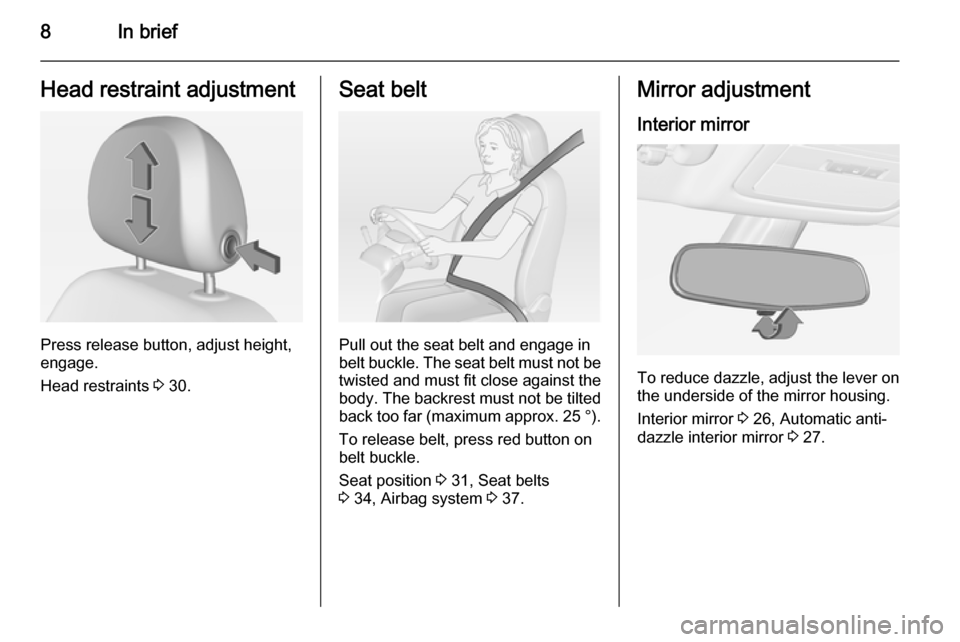
Press release button, adjust height,
engage.
Head restraints 3 30.
Seat belt
Pull out the seat belt and engage in
belt buckle. The seat belt must not be twisted and must fit close against the
body. The backrest must not be tilted
back too far (maximum approx. 25 ° ).
To release belt, press red button on belt buckle.
Seat position 3 31, Seat belts
3 34, Airbag system 3 37.
Mirror adjustment
Interior mirror
To reduce dazzle, adjust the lever on the underside of the mirror housing.
Interior mirror 3 26, Automatic anti-
dazzle interior mirror 3 27.
Page 32 of 217
30Seats, restraintsSeats, restraintsHead restraints............................ 30
Front seats ................................... 31
Seat belts ..................................... 34
Airbag system .............................. 37
Child restraints ............................. 43Head restraints
Position9 Warning
Only drive with the head restraint
set to the proper position.
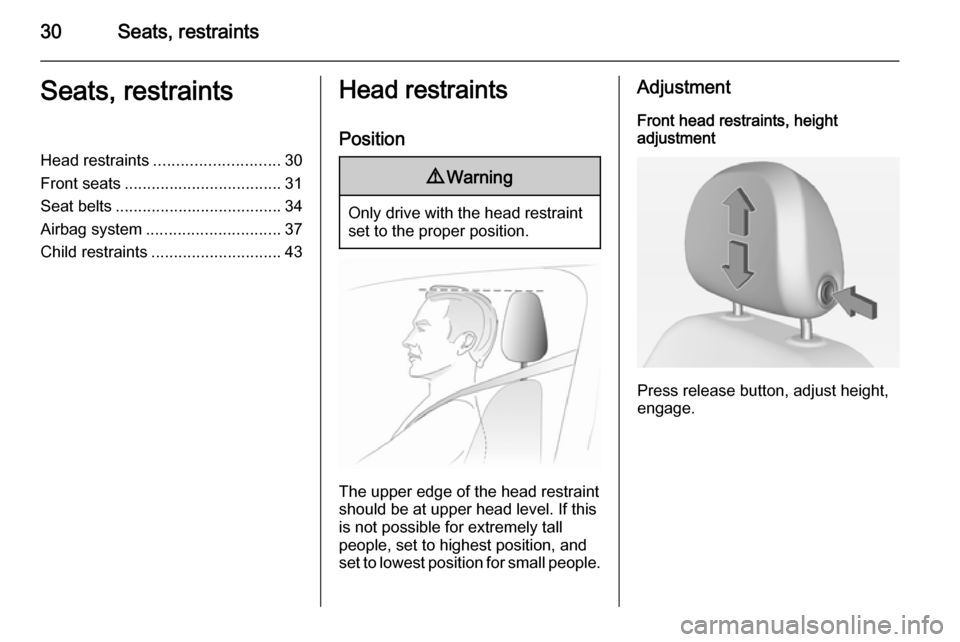
The upper edge of the head restraint
should be at upper head level. If this
is not possible for extremely tall
people, set to highest position, and
set to lowest position for small people.
Adjustment
Front head restraints, height
adjustment
Press release button, adjust height,
engage.
Page 33 of 217
Seats, restraints31
Rear head restraints, heightadjustment
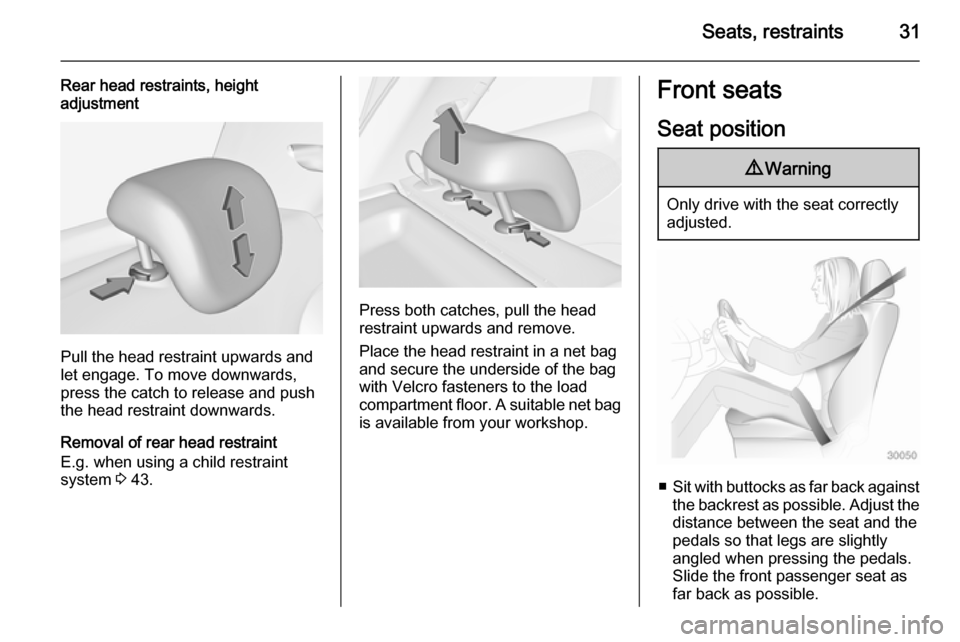
Pull the head restraint upwards and
let engage. To move downwards, press the catch to release and push
the head restraint downwards.
Removal of rear head restraint
E.g. when using a child restraint
system 3 43.
Press both catches, pull the head
restraint upwards and remove.
Place the head restraint in a net bag
and secure the underside of the bag
with Velcro fasteners to the load
compartment floor. A suitable net bag
is available from your workshop.
Front seats
Seat position9 Warning
Only drive with the seat correctly
adjusted.
■ Sit with buttocks as far back against
the backrest as possible. Adjust the distance between the seat and the
pedals so that legs are slightly
angled when pressing the pedals.
Slide the front passenger seat as
far back as possible.
Page 34 of 217
32Seats, restraints
■ Sit with shoulders as far backagainst the backrest as possible.Set the backrest rake so that it is
possible to easily reach the
steering wheel with arms slightly
bent. Maintain contact between
shoulders and the backrest when
turning the steering wheel. Do not
angle the backrest too far back. We recommend a maximum rake ofapprox. 25°.
■ Adjust the steering wheel 3 69.
■ Set seat height high enough to have a clear field of vision on allsides and of all display instruments.
There should be at least one hand
of clearance between head and the
roof frame. Your thighs should rest
lightly on the seat without pressing
into it.
■ Adjust the head restraint 3 30.Seat adjustment9 Danger
Do not sit nearer than 25 cm from
the steering wheel, to permit safe
airbag deployment.
9 Warning
Never adjust seats while driving as
they could move uncontrollably.
9 Warning
Never store any objects under the
seats.
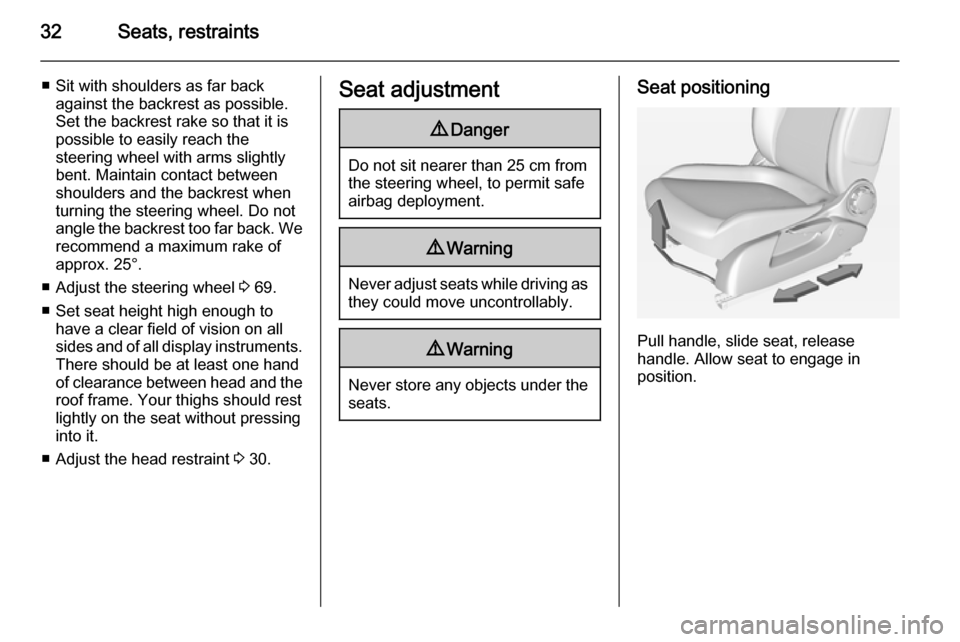
Seat positioning
Pull handle, slide seat, release
handle. Allow seat to engage in
position.
Page 35 of 217
Seats, restraints33
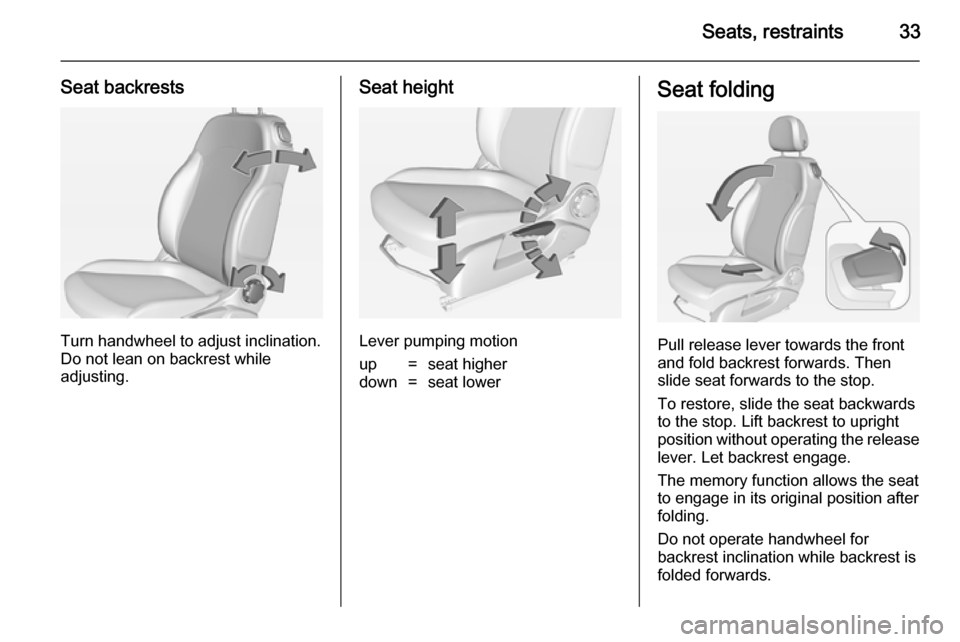
Seat backrests
Turn handwheel to adjust inclination.
Do not lean on backrest while
adjusting.
Seat height
Lever pumping motion
up=seat higherdown=seat lowerSeat folding
Pull release lever towards the front
and fold backrest forwards. Then
slide seat forwards to the stop.
To restore, slide the seat backwards
to the stop. Lift backrest to upright
position without operating the release
lever. Let backrest engage.
The memory function allows the seat
to engage in its original position after
folding.
Do not operate handwheel for
backrest inclination while backrest is
folded forwards.
Page 36 of 217
34Seats, restraintsCaution
When seat height is in the highestposition, push head restraints
down and fold up sun visors before
folding backrest forwards.
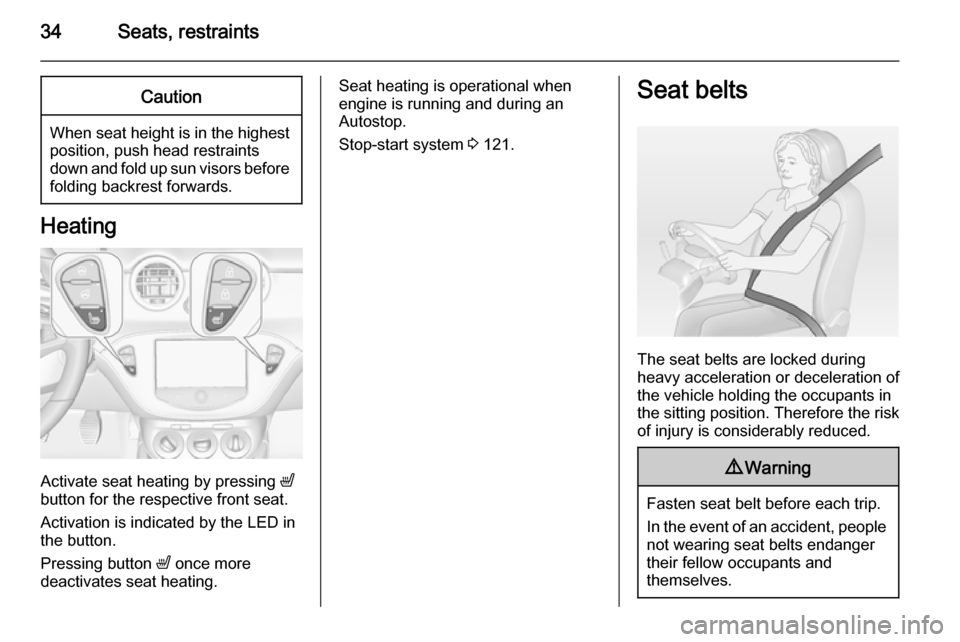
Heating
Activate seat heating by pressing ß
button for the respective front seat.
Activation is indicated by the LED in
the button.
Pressing button ß once more
deactivates seat heating.
Seat heating is operational when engine is running and during an
Autostop.
Stop-start system 3 121.Seat belts
The seat belts are locked during
heavy acceleration or deceleration of
the vehicle holding the occupants in
the sitting position. Therefore the risk
of injury is considerably reduced.
9 Warning
Fasten seat belt before each trip.
In the event of an accident, people
not wearing seat belts endanger their fellow occupants and
themselves.
Page 48 of 217

46Seats, restraints
1=If the child restraint system is being secured using a three-point seat belt, move seat height adjustment in the
uppermost position. Adjust seat backrest inclination as far as necessary to a vertical position to ensure that the belt
is tight on the buckle side.2=Remove rear head restraint when using child restraint systems in this group 3 30.*=Move the respective front seat ahead of the child restraint system in one of the foremost adjustment positions.**=Move the front passenger seat in the rearmost adjustment position. Move seat height adjustment in the uppermost
position and the headrest in the lowest position. Adjust seat backrest inclination as far as necessary to a vertical
position to ensure that vehicle safety belt runs forwards from the upper anchorage point.U=Universal suitability in conjunction with three-point seat belt.X=No child restraint system permitted in this weight class.
Permissible options for fitting an ISOFIX child restraint system
Weight classSize classFixtureOn front passenger seatOn rear seatsGroup 0: up to 10 kg
or approx. 10 monthsEISO/R1XIL *Group 0+: up to 13 kg
or approx. 2 yearsEISO/R1XIL *DISO/R2XXCISO/R3XX
Page 145 of 217
Driving and operating143Side blind spot alertThe Side blind spot alert system
detects and reports objects on either
side of the vehicle, within a specified
"blind spot" zone. The system alerts
visually in each exterior mirror, when
detecting objects that may not be
visible in the interior and exterior
mirrors.
Side blind spot alert uses some of the
advanced parking assist sensors
which are located in the front and rear bumper on both sides of the vehicle.9 Warning
Side blind spot alert does not
replace driver vision.
The system does not detect: ■ Vehicles outside the side blind zones which may be rapidly
approaching.
■ Pedestrians, cyclists or animals.
Before changing a lane, always
check all mirrors, look over the
shoulder and use the turn signal.
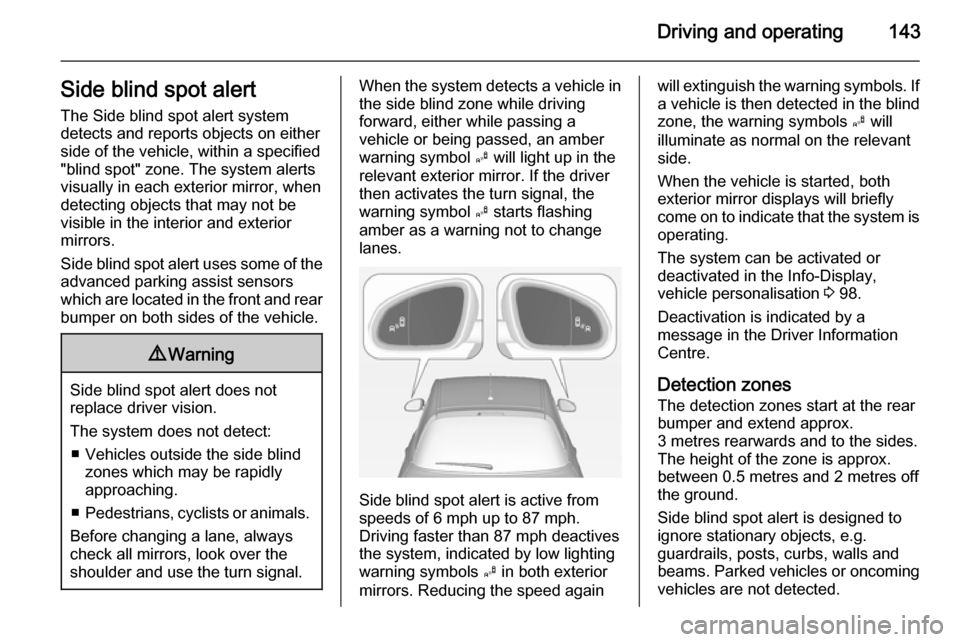
When the system detects a vehicle in the side blind zone while driving
forward, either while passing a
vehicle or being passed, an amber warning symbol B will light up in the
relevant exterior mirror. If the driver then activates the turn signal, the
warning symbol B starts flashing
amber as a warning not to change
lanes.
Side blind spot alert is active from
speeds of 6 mph up to 87 mph.
Driving faster than 87 mph deactives
the system, indicated by low lighting warning symbols B in both exterior
mirrors. Reducing the speed again
will extinguish the warning symbols. If a vehicle is then detected in the blindzone, the warning symbols B will
illuminate as normal on the relevant
side.
When the vehicle is started, both
exterior mirror displays will briefly
come on to indicate that the system is
operating.
The system can be activated or
deactivated in the Info-Display,
vehicle personalisation 3 98.
Deactivation is indicated by a
message in the Driver Information
Centre.
Detection zonesThe detection zones start at the rear
bumper and extend approx.
3 metres rearwards and to the sides. The height of the zone is approx.
between 0.5 metres and 2 metres off
the ground.
Side blind spot alert is designed to ignore stationary objects, e.g.
guardrails, posts, curbs, walls and
beams. Parked vehicles or oncoming
vehicles are not detected.
Page 173 of 217

Vehicle care171
Vehicles with spare wheel
The jack, the wheel bolt wrench, the
tools and two straps for securing a
damaged wheel are in the tool box below the load compartment floor
cover 3 64.
On version with storage box, remove
box first 3 62.
Wheels and tyres
Tyre condition, wheel condition Drive over edges slowly and at right
angles if possible. Driving over sharp
edges can cause tyre and wheel
damage. Do not trap tyres on the kerb when parking.
Regularly check the wheels for
damage. Seek the assistance of a workshop in the event of damage or
unusual wear.
We recommend not swapping the
front wheels with the rear wheels and vice versa, as this can affect vehicle
stability. Always use less worn tyres
on the rear axle.
Winter tyres Winter tyres improve driving safety attemperatures below 7 °C and shouldtherefore be fitted on all wheels.
In accordance with country-specific
regulations, affix the speed sticker in
the driver's field of view.Tyre designations
E.g. 195/55 R 16 95 H195=Tyre width, mm55=Cross-section ratio (tyre
height to tyre width), %R=Belt type: RadialRF=Type: RunFlat16=Wheel diameter, inches95=Load index e.g. 95 is
equivalent to 690 kgH=Speed code letter
Speed code letter:
Q=up to 100 mphS=up to 112 mphT=up to 118 mphH=up to 130 mphV=up to 150 mphW=up to 168 mph
Tyre pressure
Check the pressure of cold tyres at
least every 14 days and before any
long journey. Do not forget the spare
wheel. This also applies to vehicles
with tyre pressure monitoring system.
Unscrew the valve cap.