lock VAUXHALL ADAM 2014.5 User Guide
[x] Cancel search | Manufacturer: VAUXHALL, Model Year: 2014.5, Model line: ADAM, Model: VAUXHALL ADAM 2014.5Pages: 217, PDF Size: 6.68 MB
Page 25 of 217
Keys, doors and windows23
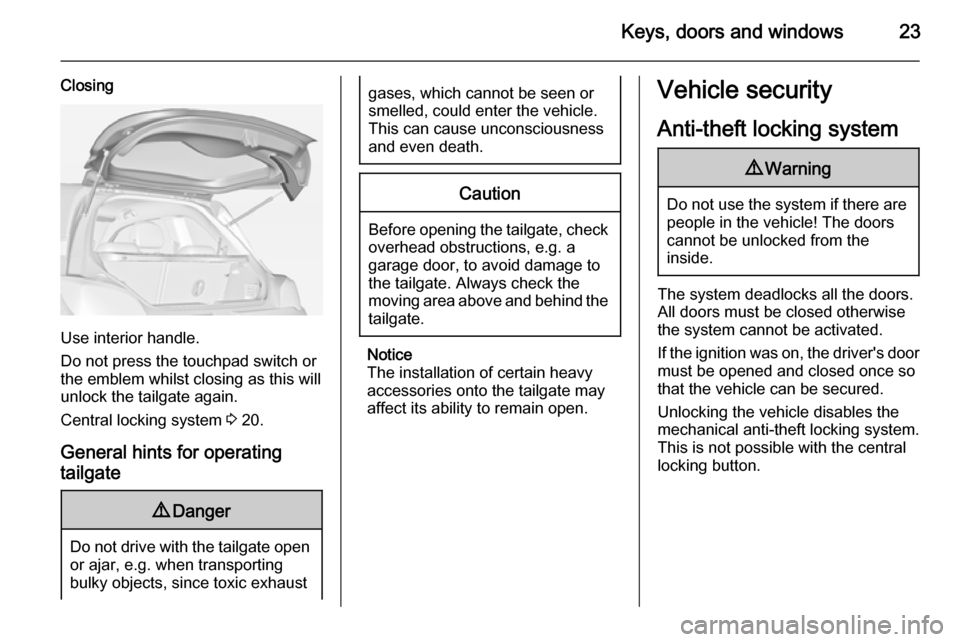
Closing
Use interior handle.
Do not press the touchpad switch or
the emblem whilst closing as this will
unlock the tailgate again.
Central locking system 3 20.
General hints for operating tailgate
9 Danger
Do not drive with the tailgate open
or ajar, e.g. when transporting
bulky objects, since toxic exhaust
gases, which cannot be seen or
smelled, could enter the vehicle.
This can cause unconsciousness
and even death.Caution
Before opening the tailgate, check overhead obstructions, e.g. a
garage door, to avoid damage to
the tailgate. Always check the
moving area above and behind the
tailgate.
Notice
The installation of certain heavy
accessories onto the tailgate may
affect its ability to remain open.
Vehicle security
Anti-theft locking system9 Warning
Do not use the system if there are
people in the vehicle! The doorscannot be unlocked from the
inside.
The system deadlocks all the doors.
All doors must be closed otherwise
the system cannot be activated.
If the ignition was on, the driver's door
must be opened and closed once so
that the vehicle can be secured.
Unlocking the vehicle disables the
mechanical anti-theft locking system.
This is not possible with the central
locking button.
Page 26 of 217
24Keys, doors and windows
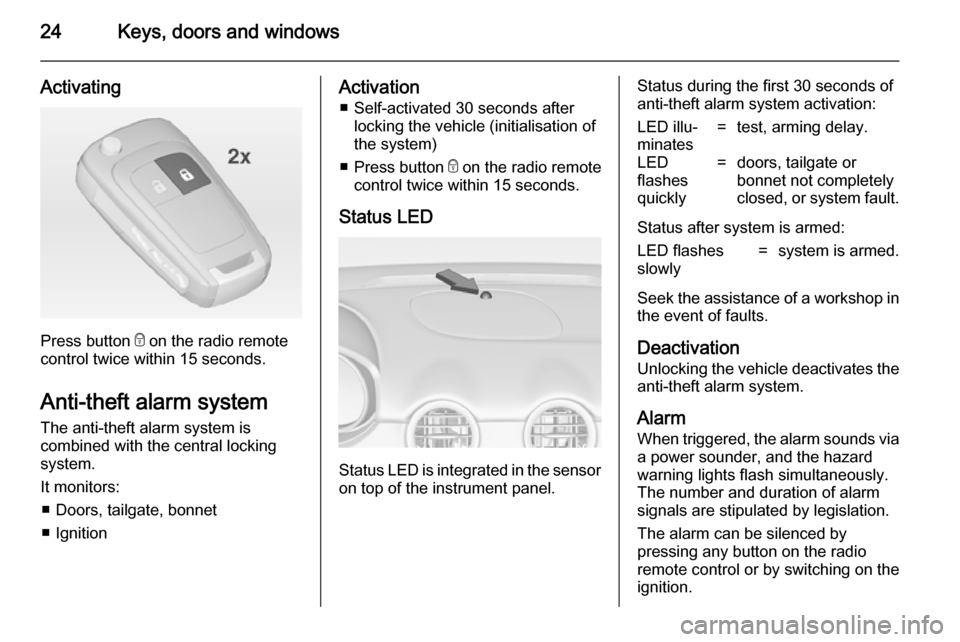
Activating
Press button e on the radio remote
control twice within 15 seconds.
Anti-theft alarm system
The anti-theft alarm system is
combined with the central locking
system.
It monitors: ■ Doors, tailgate, bonnet
■ Ignition
Activation ■ Self-activated 30 seconds after locking the vehicle (initialisation of
the system)
■ Press button e on the radio remote
control twice within 15 seconds.
Status LED
Status LED is integrated in the sensor
on top of the instrument panel.
Status during the first 30 seconds of
anti-theft alarm system activation:LED illu‐
minates=test, arming delay.LED
flashes
quickly=doors, tailgate or
bonnet not completely
closed, or system fault.
Status after system is armed:
LED flashes
slowly=system is armed.
Seek the assistance of a workshop in the event of faults.
Deactivation
Unlocking the vehicle deactivates the
anti-theft alarm system.
AlarmWhen triggered, the alarm sounds via
a power sounder, and the hazard
warning lights flash simultaneously.
The number and duration of alarm
signals are stipulated by legislation.
The alarm can be silenced by
pressing any button on the radio
remote control or by switching on the
ignition.
Page 27 of 217

Keys, doors and windows25
The anti-theft alarm system can only
be deactivated by pressing button c
on the radio remote control or by switching on the ignition.
A triggered alarm, which has not been interrupted by the driver, will be
indicated by the hazard warning
lights. They will flash quickly three
times when the vehicle is unlocked
with the radio remote control.
Vehicle messages 3 93.
If the vehicle's battery is to be
disconnected (e.g. for maintenance
work), the alarm siren must be
deactivated as follows: switch the
ignition on then off, then disconnect
the vehicle's battery within
15 seconds.
Immobiliser
The system is part of the ignition
switch and checks whether the
vehicle is allowed to be started with
the key being used.
The immobiliser is activated
automatically after the key has been
removed from the ignition switch.If the control indicator d flashes when
the ignition is on, there is a fault in the
system; the engine cannot be started. Switch off the ignition and repeat the
start attempt.
If the control indicator continues
flashing, attempt to start the engine
using the spare key and seek the
assistance of a workshop.
Notice
The immobiliser does not lock the
doors. You should always lock the
vehicle after leaving it and switch on the anti-theft alarm system 3 20,
3 24.
Control indicator d 3 86.Exterior mirrors
Convex shape
The convex exterior mirror contains
an aspherical area and reduces blind spots. The shape of the mirror makes
objects appear smaller, which will
affect the ability to estimate
distances.
Electric adjustment
Select the relevant exterior mirror by
turning the control to left (L) or right
(R) . Then swivel the control to adjust
the mirror.
Page 36 of 217
34Seats, restraintsCaution
When seat height is in the highestposition, push head restraints
down and fold up sun visors before
folding backrest forwards.
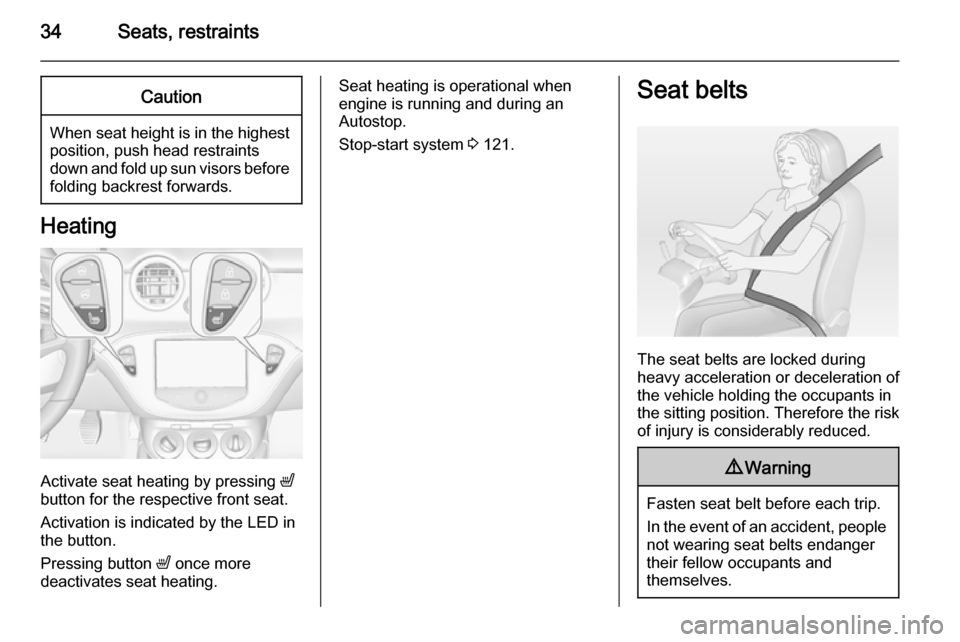
Heating
Activate seat heating by pressing ß
button for the respective front seat.
Activation is indicated by the LED in
the button.
Pressing button ß once more
deactivates seat heating.
Seat heating is operational when engine is running and during an
Autostop.
Stop-start system 3 121.Seat belts
The seat belts are locked during
heavy acceleration or deceleration of
the vehicle holding the occupants in
the sitting position. Therefore the risk
of injury is considerably reduced.
9 Warning
Fasten seat belt before each trip.
In the event of an accident, people
not wearing seat belts endanger their fellow occupants and
themselves.
Page 52 of 217
50StorageStorageStorage compartments................50
Load compartment .......................61
Roof rack system .........................67
Loading information .....................67Storage compartments9Warning
Do not not store heavy or sharp
objects in the storage
compartments. Otherwise, the
storage compartment lid could
open and vehicle occupants could be injured by objects being thrown
around in the event of sharp
braking, a sudden change in
direction or an accident.
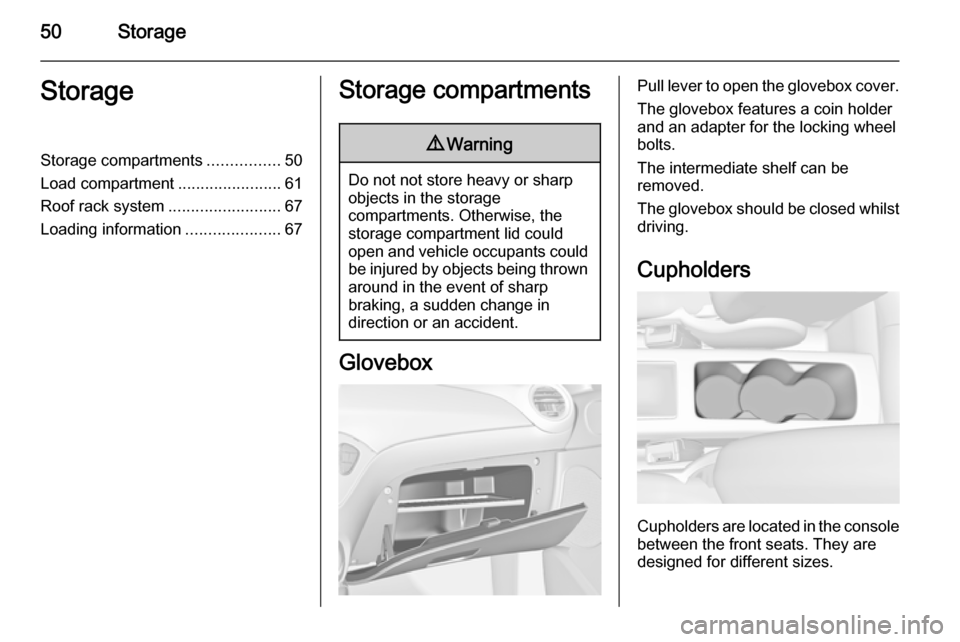
Glovebox
Pull lever to open the glovebox cover.
The glovebox features a coin holder
and an adapter for the locking wheel
bolts.
The intermediate shelf can be
removed.
The glovebox should be closed whilst
driving.
Cupholders
Cupholders are located in the consolebetween the front seats. They are
designed for different sizes.
Page 56 of 217

54Storage
Swivel both tail lamps backwards as
far as it will go.
Fold out wheel recess
Remove strap and fold out the wheel
recess.
Lock the rear carrier system
Remove strap and swivel both
clamping levers sidewards as far as it will go.
Otherwise safe functionality is not
guaranteed.
Assembling the bicycle rack
Lift the rack at the rear (1) and pull it
backwards.
Fold up the rack (2).
Page 58 of 217
56Storage
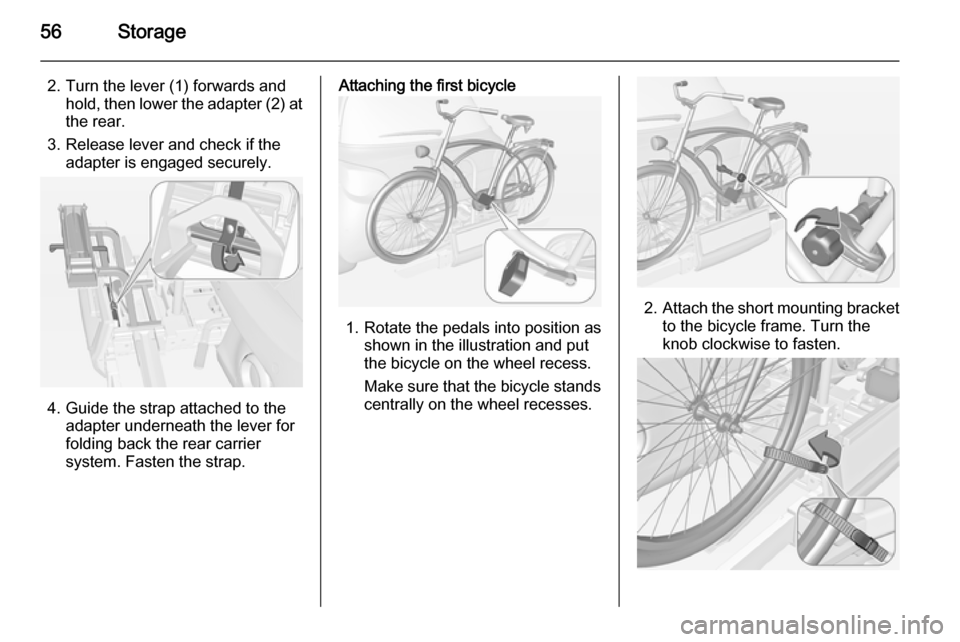
2. Turn the lever (1) forwards andhold, then lower the adapter (2) at
the rear.
3. Release lever and check if the adapter is engaged securely.
4. Guide the strap attached to theadapter underneath the lever for
folding back the rear carrier system. Fasten the strap.
Attaching the first bicycle
1. Rotate the pedals into position as shown in the illustration and put
the bicycle on the wheel recess.
Make sure that the bicycle stands centrally on the wheel recesses.
2. Attach the short mounting bracket
to the bicycle frame. Turn the
knob clockwise to fasten.
Page 60 of 217

58Storage
■ Without attached adapter:
Push the lever (1) to disengage andhold.
Pull the rack (2) backwards to fold
the rear carrier system.
■ With attached adapter:
9 Warning
Take care when disengaging the
rear carrier system as it will tilt
backwards. Risk of injury.
Hold frame (1) of rear bicycle with
one hand and pull the loop (2) to
disengage.
Hold rear bicycle with both hands
and fold the rear carrier system
backwards.
To increase visibility, the tail lights of
the vehicle are activated when the
rear carrier system is folded back.
9 Warning
When folding the rear carrier
system forwards again, take care
that the system is engaged
securely.
Removing bicycles
Undo strap retainers on both bicycle
tyres.
Turn knob anti-clockwise and remove
mounting brackets.
Detaching adapter 1. Fold in wheel recesses.
2. Unbutton the strap.
Page 62 of 217

60Storage
Fold the rack backwards, then push
forwards until it stops (1).
Press the rack down at the rear (2).
Fold in wheel recess
Fold in wheel recess. Fasten strap.Stow the strap retainers accurately.
Unlock the rear carrier system
Swivel both clamping levers inwards
as far as it will go. Fasten strap.
Fold in tail lamps
First swivel tail lamps (1) forwards as
far as it will go.
Then swivel hinges (2) forwards as far as it will go.
Page 64 of 217
62Storage
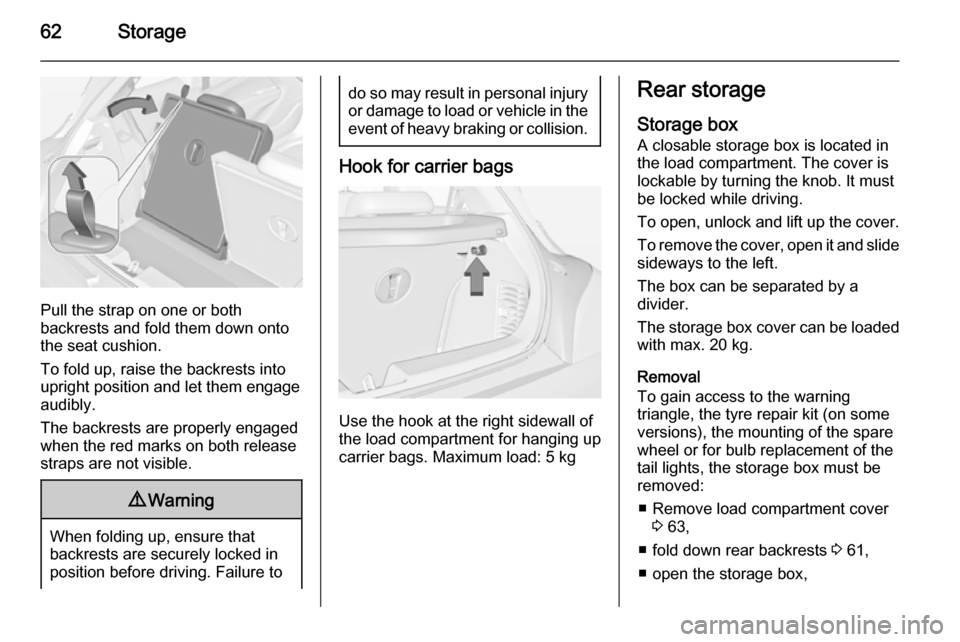
Pull the strap on one or both
backrests and fold them down onto the seat cushion.
To fold up, raise the backrests into
upright position and let them engage
audibly.
The backrests are properly engaged
when the red marks on both release
straps are not visible.
9 Warning
When folding up, ensure that
backrests are securely locked in
position before driving. Failure to
do so may result in personal injury or damage to load or vehicle in the event of heavy braking or collision.
Hook for carrier bags
Use the hook at the right sidewall of
the load compartment for hanging up carrier bags. Maximum load: 5 kg
Rear storage
Storage box A closable storage box is located in
the load compartment. The cover is lockable by turning the knob. It must
be locked while driving.
To open, unlock and lift up the cover.
To remove the cover, open it and slide
sideways to the left.
The box can be separated by a
divider.
The storage box cover can be loaded with max. 20 kg.
Removal
To gain access to the warning
triangle, the tyre repair kit (on some
versions), the mounting of the spare
wheel or for bulb replacement of the
tail lights, the storage box must be
removed:
■ Remove load compartment cover 3 63,
■ fold down rear backrests 3 61,
■ open the storage box,