instrument panel VAUXHALL ADAM 2015 Owner's Manual
[x] Cancel search | Manufacturer: VAUXHALL, Model Year: 2015, Model line: ADAM, Model: VAUXHALL ADAM 2015Pages: 225, PDF Size: 6.81 MB
Page 12 of 225

10In briefInstrument panel overview
Page 13 of 225

In brief11
1Power windows .....................28
2 Exterior mirrors .....................27
3 Cruise control .....................132
Speed limiter ....................... 134
4 Side air vents ...................... 119
5 Turn and lane-change
signals, headlight flash,
low beam and high beam ....106
Exit lighting ......................... 109
Parking lights ...................... 106
Buttons for Driver
Information Centre ................89
6 Instruments .......................... 79
7 Steering wheel controls .......71
8 Driver Information Centre ...... 89
9 Windscreen wiper,
windscreen washer
system, headlight washer
system, rear wiper, rear
washer system ......................73
10 Central locking system ..........21
City mode ............................ 131
Fuel selector ......................... 80Eco button for stop-start
system ................................. 123
Parking assist ..................... 135
Seat heating .......................... 36
Heated steering wheel ..........72
11 Colour-Info-Display ..............94
Graphic-Info-Display .............95
12 Hazard warning flashers ....105
Control indicator for airbag
deactivation .......................... 85
Control indicator for front
passenger seat belt .............84
13 Anti-theft alarm system
status LED ........................... 25
14 Centre air vents .................. 119
15 Side air vents passenger
side ..................................... 119
16 Glovebox .............................. 52
Fuse box ............................ 171
17 Climate control system ........ 111
18 Power outlet .......................... 78
19 AUX input, USB input ...........1020Selector lever, manual
transmission ....................... 127
21 Parking brake ......................128
22 Ignition switch with
steering wheel lock ............122
23 Horn ..................................... 72
Driver airbag ........................ 42
24 Bonnet release lever ..........154
25 Steering wheel adjustment ..71
26 Light switch ........................ 103
Headlight range
adjustment ......................... 105
Rear fog light ...................... 106
Brightness of instrument
panel illumination ................107
Brightness of ambient light 107
Page 27 of 225
Keys, doors and windows25Vehicle security
Anti-theft locking system9 Warning
Do not use the system if there are
people in the vehicle! The doorscannot be unlocked from the
inside.
The system deadlocks all the doors.
All doors must be closed otherwise
the system cannot be activated.
If the ignition was on, the driver's door
must be opened and closed once so
that the vehicle can be secured.
Unlocking the vehicle disables the
mechanical anti-theft locking system.
This is not possible with the central
locking button in the passenger
compartment.
Activating
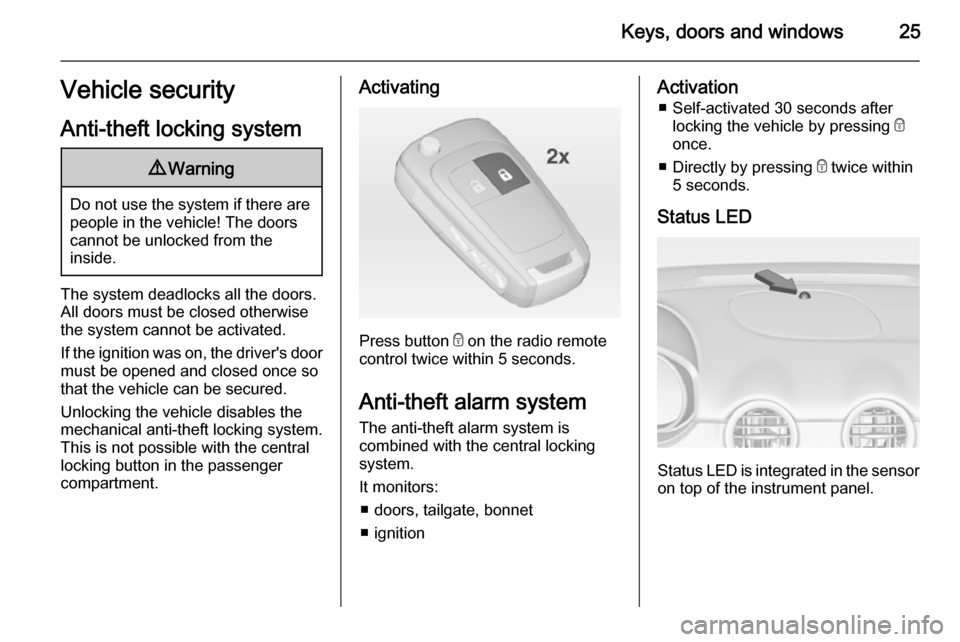
Press button e on the radio remote
control twice within 5 seconds.
Anti-theft alarm system The anti-theft alarm system is
combined with the central locking
system.
It monitors: ■ doors, tailgate, bonnet
■ ignition
Activation ■ Self-activated 30 seconds after locking the vehicle by pressing e
once.
■ Directly by pressing e twice within
5 seconds.
Status LED
Status LED is integrated in the sensor
on top of the instrument panel.
Page 41 of 225
Seats, restraints39Airbag system
The airbag system consists of a
number of individual systems
depending on the scope of
equipment.
When triggered, the airbags inflate
within milliseconds. They also deflate
so quickly that it is often unnoticeable during the collision.9 Warning
If handled improperly the airbag
systems can be triggered in an
explosive manner.
Notice
The airbag systems and belt
pretensioner control electronics are
located in the centre console area.
Do not put any magnetic objects in
this area.
Do not affix any objects onto the
airbag covers and do not cover them with other materials.
Each airbag is triggered only once.
Have deployed airbags replaced by
a workshop. Furthermore, it may be
necessary to have the steering
wheel, the instrument panel, parts of
the panelling, the door seals,
handles and the seats replaced.
Do not make any modifications to
the airbag system as this will
invalidate the vehicle type approval.
When the airbags inflate escaping hot gases may cause burns.
Fault If there is a fault in the airbag system,
the control indicator v illuminates and
a message or a warning code
appears in the Driver Information
Centre. The system is not
operational.
Have the cause of the fault remedied by a workshop.
Control indicator for airbag systems
3 85.Child restraint systems on front
passenger seat with airbag
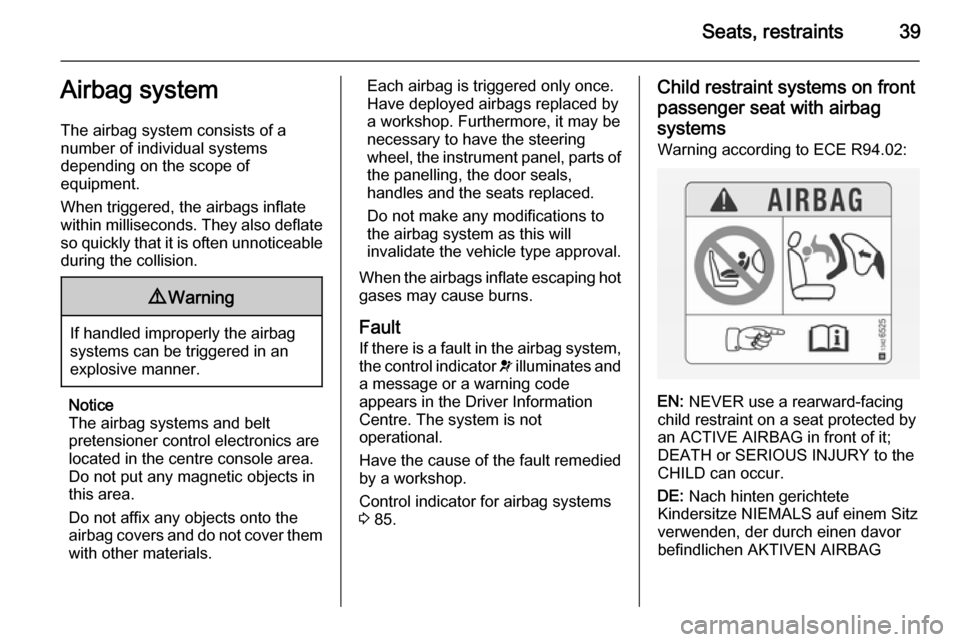
systems Warning according to ECE R94.02:
EN: NEVER use a rearward-facing
child restraint on a seat protected by
an ACTIVE AIRBAG in front of it;
DEATH or SERIOUS INJURY to the
CHILD can occur.
DE: Nach hinten gerichtete
Kindersitze NIEMALS auf einem Sitz
verwenden, der durch einen davor
befindlichen AKTIVEN AIRBAG
Page 44 of 225
42Seats, restraints
LV: NEKĀDĀ GADĪJUMĀ
neizmantojiet uz aizmuguri vērstu
bērnu sēdeklīti sēdvietā, kas tiek
aizsargāta ar tās priekšā uzstādītu
AKTĪVU DROŠĪBAS SPILVENU, jo
pretējā gadījumā BĒRNS var gūt
SMAGAS TRAUMAS vai IET BOJĀ.
ET: ÄRGE kasutage tahapoole
suunatud lapseturvaistet istmel, mille
ees on AKTIIVSE TURVAPADJAGA
kaitstud iste, sest see võib
põhjustada LAPSE SURMA või
TÕSISE VIGASTUSE.
MT: QATT tuża trażżin għat-tfal li
jħares lejn in-naħa ta’ wara fuq sit
protett b’AIRBAG ATTIV quddiemu;
dan jista’ jikkawża l-MEWT jew
ĠRIEĦI SERJI lit-TFAL.
Beyond the warning required by
ECE R94.02, for safety reasons a
forward-facing child restraint system
must only be used subject to the
instructions and restrictions in the
table 3 47.
The airbag label is located on both
sides of the front passenger sun visor.
Airbag deactivation 3 44.Front airbag system
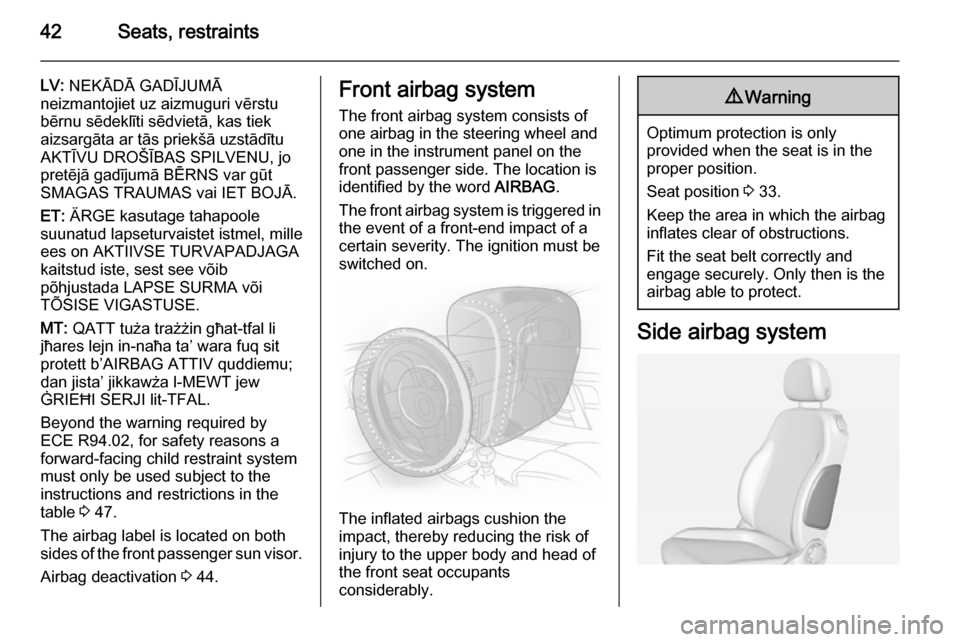
The front airbag system consists of
one airbag in the steering wheel and
one in the instrument panel on the
front passenger side. The location is
identified by the word AIRBAG.
The front airbag system is triggered in
the event of a front-end impact of a
certain severity. The ignition must be
switched on.
The inflated airbags cushion the
impact, thereby reducing the risk of
injury to the upper body and head of
the front seat occupants
considerably.
9 Warning
Optimum protection is only
provided when the seat is in the
proper position.
Seat position 3 33.
Keep the area in which the airbag
inflates clear of obstructions.
Fit the seat belt correctly and
engage securely. Only then is the
airbag able to protect.
Side airbag system
Page 71 of 225
Storage69Roof rack system
Roof rack For safety reasons and to avoiddamage to the roof, the vehicle
approved roof rack system is
recommended. For further
information contact your workshop.
Follow the installation instructions and remove the roof rack when not in
use.
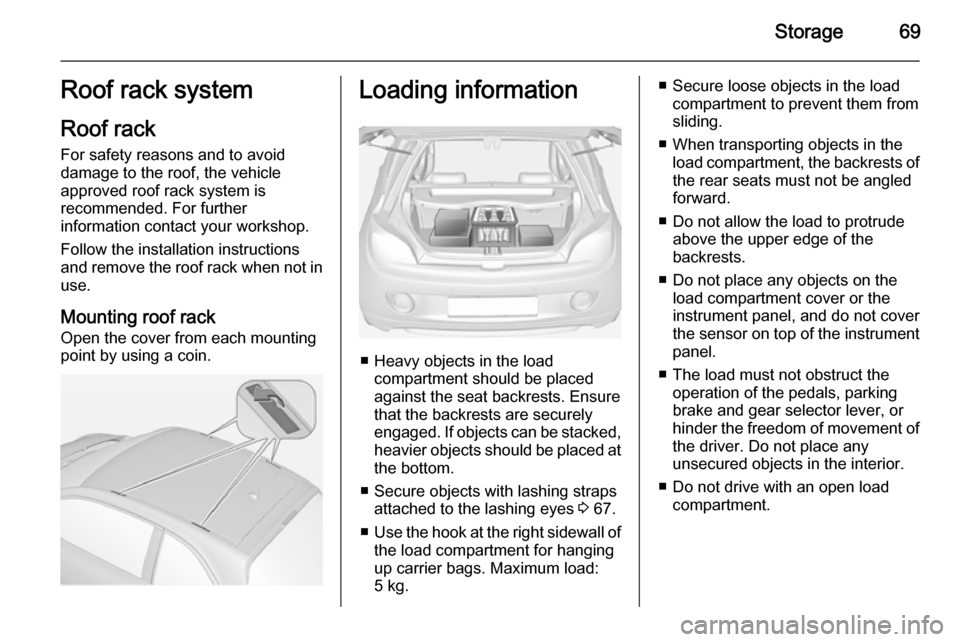
Mounting roof rack Open the cover from each mounting
point by using a coin.Loading information
■ Heavy objects in the load compartment should be placedagainst the seat backrests. Ensure
that the backrests are securely
engaged. If objects can be stacked, heavier objects should be placed at
the bottom.
■ Secure objects with lashing straps attached to the lashing eyes 3 67.
■ Use the hook at the right sidewall of
the load compartment for hanging
up carrier bags. Maximum load: 5 kg.
■ Secure loose objects in the load compartment to prevent them from
sliding.
■ When transporting objects in the load compartment, the backrests ofthe rear seats must not be angled
forward.
■ Do not allow the load to protrude above the upper edge of the
backrests.
■ Do not place any objects on the load compartment cover or theinstrument panel, and do not cover
the sensor on top of the instrument
panel.
■ The load must not obstruct the operation of the pedals, parking
brake and gear selector lever, or
hinder the freedom of movement of the driver. Do not place any
unsecured objects in the interior.
■ Do not drive with an open load compartment.
Page 102 of 225
100Instruments and controls
Auto rear demist: Activates
automatically rear heated window.
■ Comfort settings
Chime volume : Changes the
volume of warning chimes.
Personalization by driver : Activates
or deactivates the personalisation
function.
Rear auto wipe in reverse :
Activates or deactivates automatic
switching on of the rear window
wiper when reverse gear is
engaged.
■ Park assist / Collision detection
Park assist : Activates or
deactivates the ultrasonic sensors.
Side blind zone alert : Changes the
settings for the side blind spot alert
system.
■ Exterior ambient lighting
Exterior lighting by unlocking :
Activates or deactivates the entry
lighting.
Duration upon exit of vehicle :Activates or deactivates and
changes the duration of exit
lighting.
■ Power door locks
Auto door lock : Activates or
deactivates the automatic door
locking function after switching on
ignition.
Stop door lock if door open :
Activates or deactivates the door
locking function while a door is
open.
Delayed door lock : Activates or
deactivates the delayed door
locking function. This menu option
is displayed with Stop door lock if
door open deactivated. Central
locking system 3 21.
■ Remote locking, unlocking, starting
Remote unlock feedback :
Activates or deactivates the hazard warning flasher feedback whilst
unlocking.
Passive door unlock : Changes the
configuration to unlock only the
driver's door or the whole vehicle
whilst unlocking.Auto relock doors : Activates or
deactivates the automatic relock
function after unlocking without opening the vehicle.
■ Restore factory settings :
Resets all settings to the default settings.
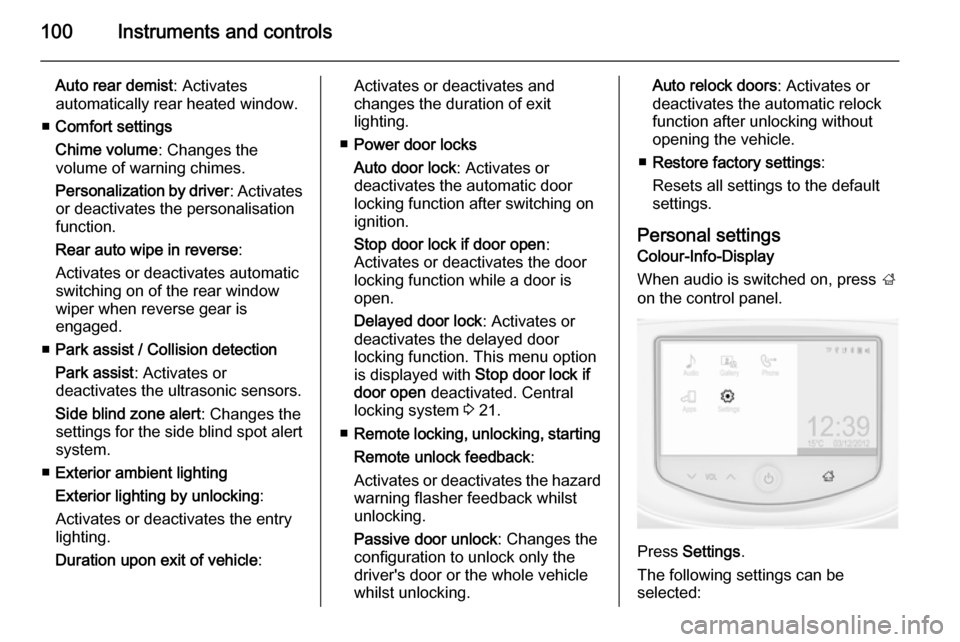
Personal settings Colour-Info-Display
When audio is switched on, press ;
on the control panel.
Press Settings .
The following settings can be
selected:
Page 109 of 225

Lighting107Reversing lightsThe reversing light comes on when
the ignition is on and reverse gear is
selected.
Misted light covers The inside of the light housing may
mist up briefly in poor, wet and cold weather conditions, in heavy rain or
after washing. The mist disappears
quickly by itself; to help switch on the
headlights.Interior lighting
Instrument panel
illumination control
Brightness of the following lights can
be adjusted when the exterior lights
are on:
■ instrument panel illumination
■ ambient light
■ dome light
■ Info-Display
■ illuminated switches and operation elements
Turn thumb wheel A and hold until
the desired brightness is obtained.
Interior lights Front courtesy lightDuring entry and exit of the vehicle,
the courtesy light automatically
switches on and then off after a delay.
Operate rocker switch:
w=automatic switching on
and offpress u=onpress v=off
Page 110 of 225
108Lighting
Notice
In the event of an accident with
airbag deployment the courtesy
lights are turned on automatically.
Dome light Spotlight incorporated in the interior
lighting comes on when headlights
are switched on.
Dome light illuminates gear shifting
console indirectly.
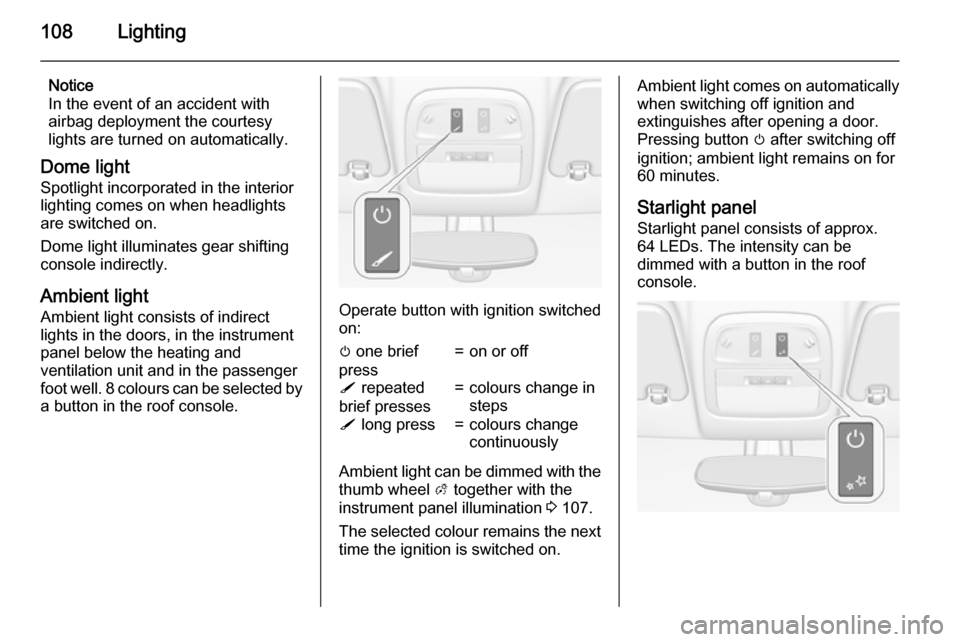
Ambient light Ambient light consists of indirect
lights in the doors, in the instrument
panel below the heating and
ventilation unit and in the passenger
foot well. 8 colours can be selected by
a button in the roof console.
Operate button with ignition switched
on:
m one brief
press=on or offS repeated
brief presses=colours change in
stepsS long press=colours change
continuously
Ambient light can be dimmed with the thumb wheel A together with the
instrument panel illumination 3 107.
The selected colour remains the next
time the ignition is switched on.
Ambient light comes on automatically when switching off ignition and
extinguishes after opening a door.
Pressing button m after switching off
ignition; ambient light remains on for
60 minutes.
Starlight panel
Starlight panel consists of approx.
64 LEDs. The intensity can be
dimmed with a button in the roof
console.
Page 111 of 225

Lighting109
Operate button with ignition switched
on:m one brief
press=on or offT repeated
brief presses=dimming
stepwiseT long press=dimming
continuously
The selected intensity remains the
next time the ignition is switched on.
Starlight comes on automatically
when switching off ignition and
extinguishes after opening a door.
Pressing button m after switching off
ignition; starlight remains on for
60 minutes.
Lighting features
Entry lighting
Welcome lighting The following lights are switched on
for a short time by unlocking the
vehicle with the radio remote control:
■ headlights
■ tail lights
■ number plate lights
■ instrument panel light
■ interior lights
Some functions are only operable
when it is dark outside to facilitate
locating the vehicle.
The lighting switches off immediately
when the ignition key is turned to
position 1 3 122.
Activation or deactivation of this
function can be changed in the
Info-Display.
Vehicle personalisation 3 99.
The settings can be saved for the key
being used 3 21.The following lights will additionally
switch on when the driver's door is
opened:
■ all switches
■ Driver Information Centre
■ ambient light
■ starlight panel
Exit lighting
The following lights switch on if the
key is removed from the ignition
switch:
■ interior lights
■ instrument panel light (only when it is dark)
■ ambient light
■ starlight panel
They will switch off automatically after a delay and will be activated again if
the driver's door is opened.
Path lighting Headlights, tail lights and number
plate lights illuminate the surrounding area for an adjustable time after
leaving the vehicle.