steering VAUXHALL ADAM 2015 User Guide
[x] Cancel search | Manufacturer: VAUXHALL, Model Year: 2015, Model line: ADAM, Model: VAUXHALL ADAM 2015Pages: 225, PDF Size: 6.81 MB
Page 89 of 225

Instruments and controls87
EcoFlex drive assistant 3 89.
Power steering c illuminates yellow.
Illuminates with power steering reduced Power steering is reduced due to
overheating of the system. Control
indicator extinguishes when the
system has cooled down.
Stop-start system 3 123.
Illuminates with power steering disabled Failure in the power steering system.
Consult a workshop.
Illumination of c and b
simultaneously Power steering system must be
calibrated, system calibration 3 131.
Ultrasonic parking assist
r illuminates yellow.
Fault in systemor
Fault due to sensors that are dirty or
covered by ice or snow
or
Interference due to external sources
of ultrasound. Once the source of interference is removed, the system
will operate normally.
Have the cause of the fault in the
system remedied by a workshop.
Ultrasonic parking assist 3 135.
Electronic Stability Control
and Traction Control
system
b flashes or illuminates yellow.
Flashes
The system is actively engaged.
Engine output may be reduced and
the vehicle may be braked
automatically to a small degree.Illuminates
A fault in the system is present. A
warning message appears in the
Driver Information Centre. Continued
driving is possible. The system is not
operational. Driving stability,
however, may deteriorate depending
on road surface conditions.
Have the cause of the fault remedied
by a workshop.
Electronic Stability Control 3 130,
Traction Control system 3 129.
Tyre pressure monitoring
system
w illuminates or flashes yellow.
Illuminates
Tyre pressure loss. Stop immediately and check tyre pressure.
Flashes
Fault in system or tyre without
pressure sensor mounted (e.g. spare wheel). After 60-90 seconds the
control indicator illuminates
continuously. Consult a workshop.
Page 90 of 225
88Instruments and controls
Tyre pressure monitoring system
3 176.
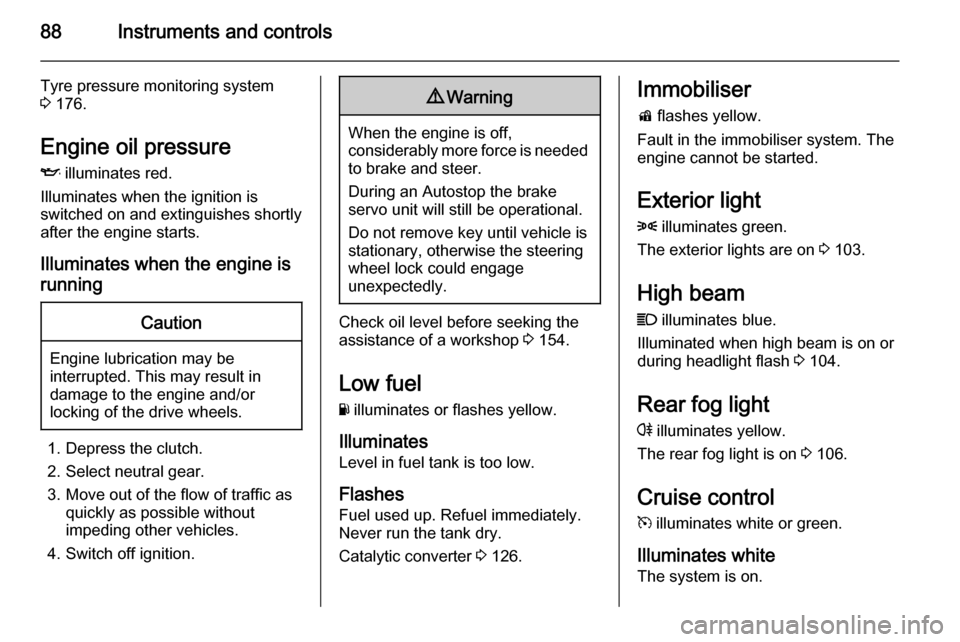
Engine oil pressure
I illuminates red.
Illuminates when the ignition is
switched on and extinguishes shortly
after the engine starts.
Illuminates when the engine isrunningCaution
Engine lubrication may be
interrupted. This may result in
damage to the engine and/or
locking of the drive wheels.
1. Depress the clutch.
2. Select neutral gear.
3. Move out of the flow of traffic as quickly as possible without
impeding other vehicles.
4. Switch off ignition.
9 Warning
When the engine is off,
considerably more force is needed
to brake and steer.
During an Autostop the brake
servo unit will still be operational.
Do not remove key until vehicle is stationary, otherwise the steeringwheel lock could engage
unexpectedly.
Check oil level before seeking the
assistance of a workshop 3 154.
Low fuel
Y illuminates or flashes yellow.
Illuminates
Level in fuel tank is too low.
Flashes Fuel used up. Refuel immediately.
Never run the tank dry.
Catalytic converter 3 126.
Immobiliser
d flashes yellow.
Fault in the immobiliser system. The
engine cannot be started.
Exterior light8 illuminates green.
The exterior lights are on 3 103.
High beam
C illuminates blue.
Illuminated when high beam is on or
during headlight flash 3 104.
Rear fog light
r illuminates yellow.
The rear fog light is on 3 106.
Cruise control m illuminates white or green.
Illuminates white The system is on.
Page 98 of 225
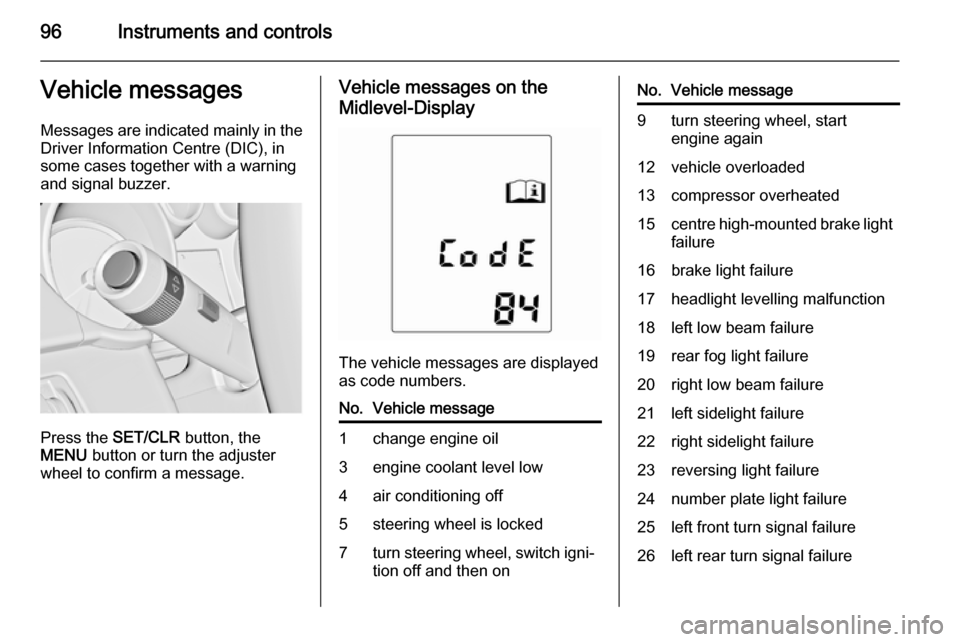
96Instruments and controlsVehicle messagesMessages are indicated mainly in the
Driver Information Centre (DIC), in
some cases together with a warning
and signal buzzer.
Press the SET/CLR button, the
MENU button or turn the adjuster
wheel to confirm a message.
Vehicle messages on the
Midlevel-Display
The vehicle messages are displayed
as code numbers.
No.Vehicle message1change engine oil3engine coolant level low4air conditioning off5steering wheel is locked7turn steering wheel, switch igni‐
tion off and then onNo.Vehicle message9turn steering wheel, start
engine again12vehicle overloaded13compressor overheated15centre high-mounted brake light
failure16brake light failure17headlight levelling malfunction18left low beam failure19rear fog light failure20right low beam failure21left sidelight failure22right sidelight failure23reversing light failure24number plate light failure25left front turn signal failure26left rear turn signal failure
Page 99 of 225

Instruments and controls97
No.Vehicle message27right front turn signal failure28right rear turn signal failure35replace battery in radio remote
control48clean side blind spot alert
system53tighten gas cap56tyre pressure imbalance on
front axle57tyre pressure imbalance on rear
axle58winter tyres detection59open and then close driver
window60open and then close front
passenger window66service theft alarm system67service steering wheel lock68service power steeringNo.Vehicle message75service air conditioning76service side blind spot alert
system79top up engine oil82change engine oil soon84engine power reduced89service vehicle soon95service airbag128bonnet open134park assist fault, clean bumper136service parking assist174low vehicle battery258park assist offVehicle messages on the
Uplevel-Display
The vehicle messages are displayed
as text. Follow the instructions given
in the messages.
The system displays messages
regarding the following topics:
■ fluid levels
■ anti-theft alarm system
■ brakes
■ ride control systems
■ cruise control, speed limiter
■ parking assist systems
Page 108 of 225
106LightingTurn and lane-change
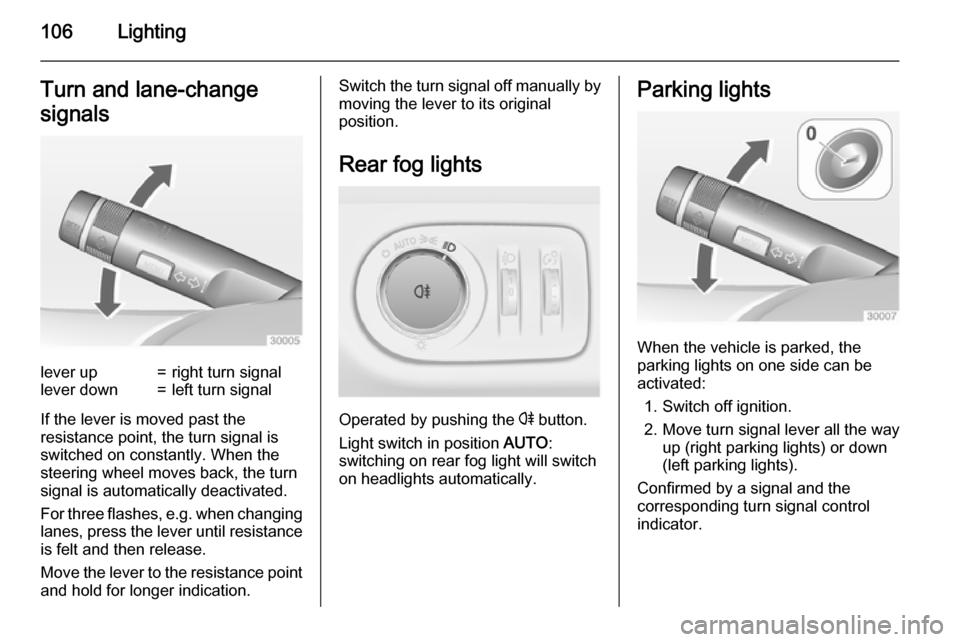
signalslever up=right turn signallever down=left turn signal
If the lever is moved past the
resistance point, the turn signal is
switched on constantly. When the
steering wheel moves back, the turn
signal is automatically deactivated.
For three flashes, e.g. when changing lanes, press the lever until resistance
is felt and then release.
Move the lever to the resistance point
and hold for longer indication.
Switch the turn signal off manually by moving the lever to its original
position.
Rear fog lights
Operated by pushing the r button.
Light switch in position AUTO:
switching on rear fog light will switch
on headlights automatically.
Parking lights
When the vehicle is parked, the
parking lights on one side can be
activated:
1. Switch off ignition.
2. Move turn signal lever all the way up (right parking lights) or down
(left parking lights).
Confirmed by a signal and the
corresponding turn signal control
indicator.
Page 113 of 225
Climate control111Climate controlClimate control systems ............. 111
Air vents ..................................... 119
Maintenance .............................. 119Climate control systems
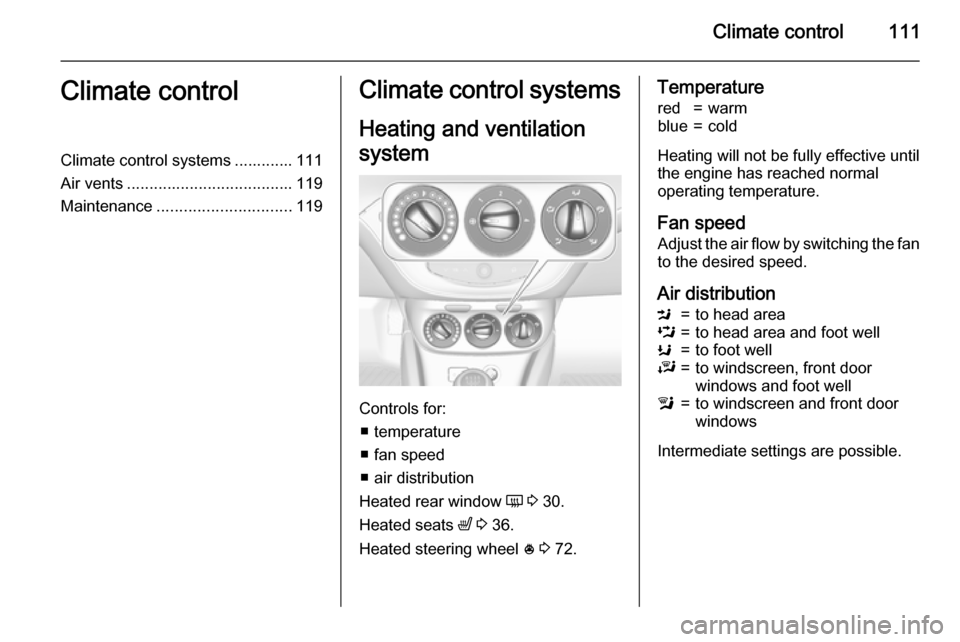
Heating and ventilation
system
Controls for: ■ temperature
■ fan speed
■ air distribution
Heated rear window Ü 3 30.
Heated seats ß 3 36.
Heated steering wheel * 3 72.
Temperaturered=warmblue=cold
Heating will not be fully effective until
the engine has reached normal
operating temperature.
Fan speed Adjust the air flow by switching the fan
to the desired speed.
Air distribution
M=to head areaL=to head area and foot wellK=to foot wellJ=to windscreen, front door
windows and foot welll=to windscreen and front door
windows
Intermediate settings are possible.
Page 114 of 225
112Climate control
Demisting and defrosting the
windows
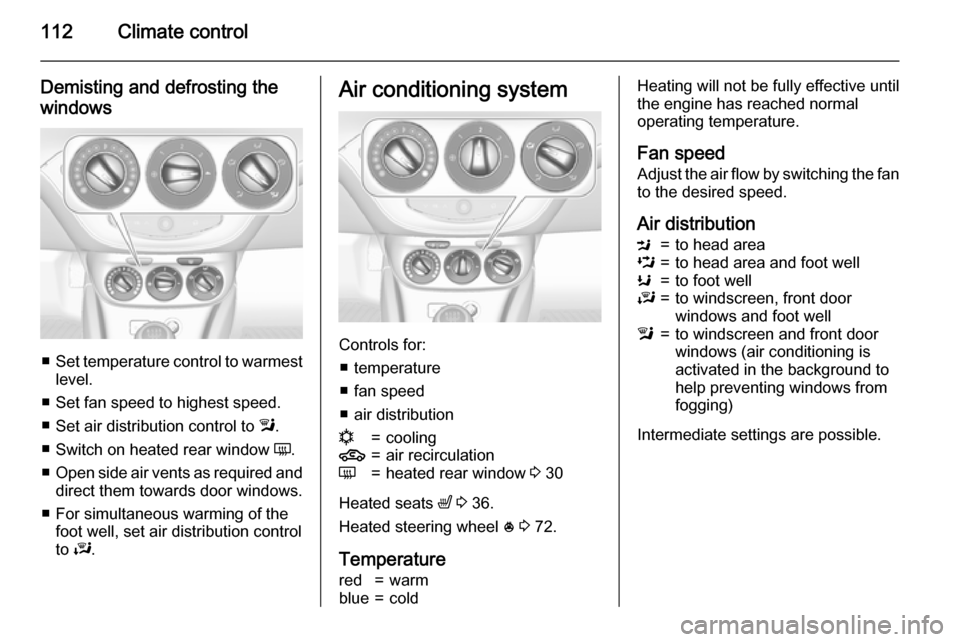
■ Set temperature control to warmest
level.
■ Set fan speed to highest speed.
■ Set air distribution control to l.
■ Switch on heated rear window Ü.
■ Open side air vents as required and
direct them towards door windows.
■ For simultaneous warming of the foot well, set air distribution control
to J.
Air conditioning system
Controls for:
■ temperature
■ fan speed
■ air distribution
n=cooling4=air recirculationÜ=heated rear window 3 30
Heated seats ß 3 36.
Heated steering wheel * 3 72.
Temperature
red=warmblue=coldHeating will not be fully effective until
the engine has reached normal
operating temperature.
Fan speed Adjust the air flow by switching the fan
to the desired speed.
Air distributionM=to head areaL=to head area and foot wellK=to foot wellJ=to windscreen, front door
windows and foot welll=to windscreen and front door
windows (air conditioning is
activated in the background to
help preventing windows from
fogging)
Intermediate settings are possible.
Page 117 of 225
Climate control115
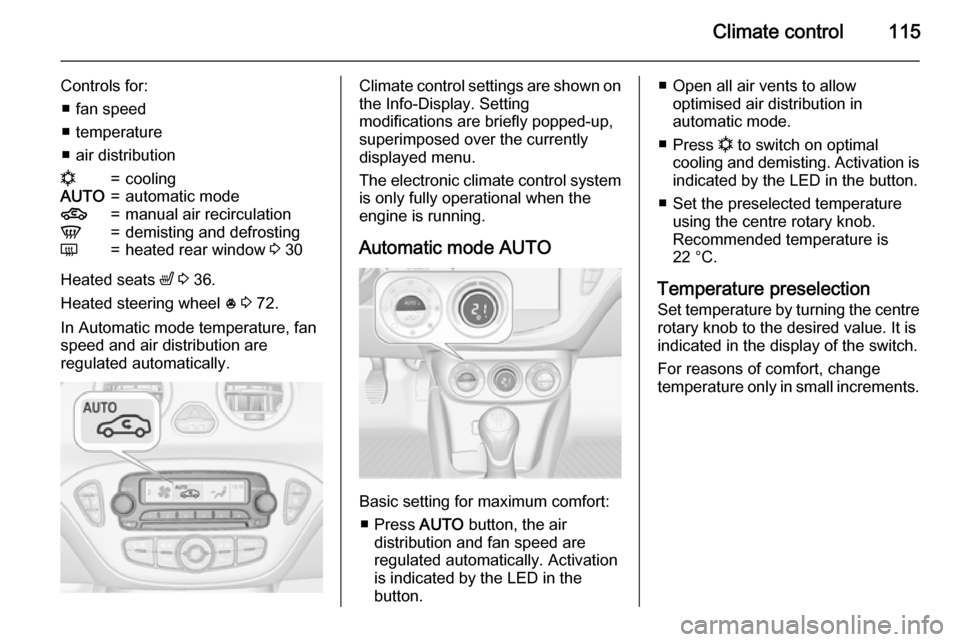
Controls for:■ fan speed
■ temperature
■ air distributionn=coolingAUTO=automatic mode4=manual air recirculationV=demisting and defrostingÜ=heated rear window 3 30
Heated seats ß 3 36.
Heated steering wheel * 3 72.
In Automatic mode temperature, fan
speed and air distribution are
regulated automatically.
Climate control settings are shown on the Info-Display. Setting
modifications are briefly popped-up,
superimposed over the currently
displayed menu.
The electronic climate control system
is only fully operational when the
engine is running.
Automatic mode AUTO
Basic setting for maximum comfort: ■ Press AUTO button, the air
distribution and fan speed are
regulated automatically. Activation
is indicated by the LED in the
button.
■ Open all air vents to allow optimised air distribution in
automatic mode.
■ Press n to switch on optimal
cooling and demisting. Activation is indicated by the LED in the button.
■ Set the preselected temperature using the centre rotary knob.
Recommended temperature is
22 °C.
Temperature preselection
Set temperature by turning the centre
rotary knob to the desired value. It is
indicated in the display of the switch.
For reasons of comfort, change
temperature only in small increments.
Page 123 of 225

Driving and operating121Driving and operatingDriving hints............................... 121
Starting and operating ...............121
Engine exhaust .......................... 126
Manual transmission ..................127
Brakes ........................................ 127
Ride control systems .................129
Driver assistance systems .........132
Fuel ............................................ 146Driving hints
Control of the vehicleNever coast with engine not
running
Many systems will not function in this
situation ( e.g. brake servo unit, power
steering). Driving in this manner is a
danger to yourself and others.
All systems function during an
Autostop.
Stop-start system 3 123.
Idle boost
If charging of the vehicle battery is
required due to battery condition, the
power output of the generator must be increased. This will be achieved by
an idle boost which may be audible.
A message appears in the Driver
Information Centre.
Pedals To ensure the pedal travel is
uninhibited, there must be no mats in
the area of the pedals.Starting and operating
New vehicle running-in Do not brake unnecessarily hard for
the first few journeys.
During the first drive, smoke may
occur because of wax and oil
evaporating off the exhaust system. Park the vehicle in the open for a
while after the first drive and avoid
inhaling the fumes.
During the running-in period fuel and engine oil consumption may be
higher.
Autostop may be inhibited to allow for charging the vehicle battery.
Page 124 of 225
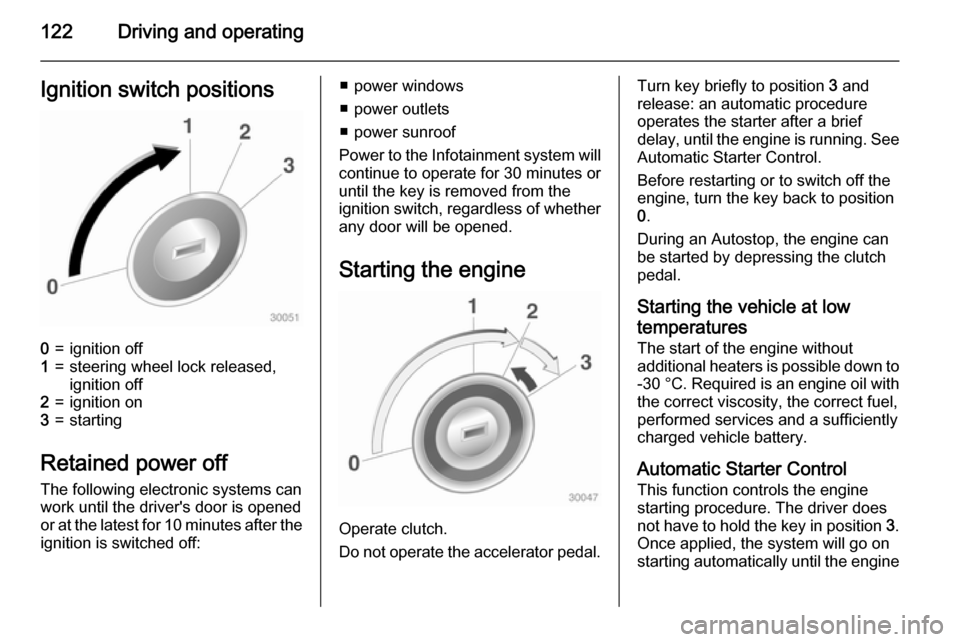
122Driving and operatingIgnition switch positions0=ignition off1=steering wheel lock released,
ignition off2=ignition on3=starting
Retained power off
The following electronic systems can
work until the driver's door is opened
or at the latest for 10 minutes after the
ignition is switched off:
■ power windows
■ power outlets
■ power sunroof
Power to the Infotainment system will continue to operate for 30 minutes or
until the key is removed from the
ignition switch, regardless of whether
any door will be opened.
Starting the engine
Operate clutch.
Do not operate the accelerator pedal.
Turn key briefly to position 3 and
release: an automatic procedure operates the starter after a brief
delay, until the engine is running. See
Automatic Starter Control.
Before restarting or to switch off the
engine, turn the key back to position
0 .
During an Autostop, the engine can
be started by depressing the clutch
pedal.
Starting the vehicle at low
temperatures
The start of the engine without
additional heaters is possible down to -30 °C . Required is an engine oil with
the correct viscosity, the correct fuel,
performed services and a sufficiently
charged vehicle battery.
Automatic Starter Control
This function controls the engine
starting procedure. The driver does
not have to hold the key in position 3.
Once applied, the system will go on starting automatically until the engine