ESP VAUXHALL ADAM 2016 Owner's Guide
[x] Cancel search | Manufacturer: VAUXHALL, Model Year: 2016, Model line: ADAM, Model: VAUXHALL ADAM 2016Pages: 237, PDF Size: 7.16 MB
Page 145 of 237

Driving and operating143Indication
The system warns the driver with
acoustic signals against potentially
hazardous obstacles behind the
vehicle in a distance range up to
1.5 metres. The interval between the
sounds becomes shorter as the
vehicle gets closer to that obstacle.
When the distance is less than about
30 cm, the sound is continuous.
Additionally the distance to obstacles
is shown in the Driver Information
Centre 3 87 or, depending on the
version, on the Colour-Info-Display
3 92.
DeactivationThe system automatically switches
off when reverse gear is disengaged.
Manual deactivation is also possible
by pressing the parking assist button
r .
In both cases the LED in the button extinguishes.
Fault
In the event of a fault or if the system does not work temporarily, e.g.
because of high external noise level
or other interference factors, the LED
in the button flashes for three
seconds and then extinguishes.
Control indicator r illuminates in
the instrument cluster 3 85 and a
message pops-up in the Driver
Information Centre.Front-rear parking assist9 Warning
The driver bears full responsibility
for the parking manoeuvre.
Always check the surrounding
area when driving backwards or
forwards while using parking
assist system.
The front-rear parking assist
measures the distance between the vehicle and obstacles in front and
behind the vehicle. The system gives acoustic signals and display
messages.
Page 147 of 237

Driving and operating145When the system is deactivated, the
LED in the button extinguishes and
Park Assist Off pops-up in the Driver
Information Centre.
The system is deactivated
automatically when vehicle speed
exceeds 16 mph.
Indication
The system warns the driver with
acoustic signals against potentially
hazardous obstacles behind the
vehicle in a distance range up to
1.5 metres and in front up to
1.2 metres . Depending on which side
of the vehicle is closer to an obstacle,
you will hear acoustic warning signals in the vehicle on the respective side.
The interval between the sounds
becomes shorter as the vehicle gets
closer to that obstacle. When the
distance is less than approx. 30 cm, the sound is continuous.
Additionally the distance to obstacles
is shown in the Driver Information Centre 3 87 or, depending on the
version, on the Colour-Info-Display
3 92.
The distance to a front and rear
obstacle is displayed by changing
distance lines in the Driver
Information Centre.
The distance indication can be
inhibited by vehicle messages with a higher priority. After approving the
message by pressing SET/CLR on
the turn signal lever, distance
indication appears again.The distance to obstacles is shown on the Colour-Info-Display by colouredzones in front of or behind the vehicle
3 92.
Fault
In the event of a fault or if the system does not work temporarily, e.g.
because of high external noise level
or other interference factors, the LED in the button flashes for three
seconds then extinguishes. Control
indicator r illuminates in the
instrument cluster 3 85 and a
message pops-up in the Driver
Information Centre.
Vehicle messages 3 94.
Page 148 of 237

146Driving and operatingAdvanced parking assist9Warning
The driver bears full responsibility
for accepting the parking slot
suggested by the system and the
parking manoeuvre.
Always check the surrounding
area in all directions when using
the advanced parking assist.
The advanced parking assist
measures a suitable parking slot
while passing, calculates the
trajectory and automatically steers
the vehicle into a parallel or
perpendicular parking slot.
Instructions are given in the Driver
Information Centre 3 87 or,
depending on the version, on the
Colour-Info-Display 3 92, supported
by acoustic signals.
The driver must control acceleration,
braking and gear shifting, while
steering is done automatically.
Advanced parking assist can only be
activated when driving forwards.Advanced parking assist is always
combined with front-rear parking assist, see previous section. Both
systems use the same sensors in the front and rear bumper.
Button D and operation logic
Advanced parking assist and front-
rear parking assist both use the same
button for activation and deactivation:
A brief press of D activates or
deactivates the parking assist.
A long press of D (approx.
one second) activates or deactivates
the advanced parking assist, see
separate description below.
Button logic operates the systems by
pressing as follows:
● If only front-rear parking assist is active, a brief press deactivates
front-rear parking assist.
● If only front-rear parking assist is active, a long press activates
advanced parking assist.
● If only advanced parking assist is
active, a brief press activates
front-rear parking assist.
● If only advanced parking assist is
active, a long press deactivates
advanced parking assist.
● If forward gear or neutral is selected, a brief press activates
or deactivates only front parking
assist.
● If reverse gear is selected, a brief
press activates or deactivates
front and rear parking assist.
Page 152 of 237

150Driving and operatingBasic notes on parking assist
systems9 Warning
Under certain circumstances,
various reflective surfaces on
objects or clothing as well as
external noise sources may cause the system to fail to detect
obstacles.
Special attention must be paid to
low obstacles which can damage
the lower part of the bumper.
Caution
Performance of the system can be reduced when sensors are
covered, e.g. by ice or snow.
Performance of the parking assist
system can be reduced due to
heavy loading.
Special conditions apply if there
are taller vehicles in the vicinity
(e.g. off-road vehicles, mini vans,
vans). Object identification and
correct distance indication in the
upper part of these vehicles
cannot be guaranteed.
Objects with a very small reflection
cross-section, e.g. objects of
narrow size or soft materials, may
not be detected by the system.
Parking assist systems do not
detect objects outside the
detection range.
Notice
It is possible that the sensor detects a non-existing object caused by
echo disturbance from external
acoustic noise or mechanical
misalignments (sporadic false
warnings may occur).
Make sure that the front number
plate is properly mounted (not bent
and no gaps to the bumper on the left
or right side) and the sensors are
firmly in place.
Advanced parking assist system
may not respond to changes in the
available parking space after
initiating a parking manoeuvre. The
system may recognize an entry, a
gateway, a courtyard or even a crossing as a parking slot. After
selecting reverse gear the system
would start a parking manoeuvre.
Take care of the availability of the
suggested parking slot.
Surface irregularities, e.g. on
construction zones, are not detected
by the system. The driver accepts
responsibility.
Notice
If engaging a forward gear and
exceeding a certain speed, the rear
parking assist will be deactivated
when the rear carrier system is
extended.
If engaging reverse at first, the
parking assist will detect the rear
carrier system and provide a buzzing
sound. Press r or D briefly to
deactivate the parking assist.
Notice
After production, the system
requires a calibration. For optimal
parking guidance, a driving distance
of at least 6 miles, including a
number of bends, is required.
Page 163 of 237
Vehicle care161If the bonnet is opened during an
Autostop, the engine will be restarted
automatically for safety reasons.
Closing Before closing the bonnet, press the
support into the holder.
Lower the bonnet and allow it to fall
into the latch from a low height
(20-25 cm). Check that the bonnet is
engaged.Caution
Do not press the bonnet into the
latch, to avoid dents.
Engine oil
Check the engine oil level manually
on a regular basis to prevent damage
to the engine. Ensure that the correct specification of oil is used.
Recommended fluids and lubricants
3 208.
The maximum engine oil
consumption is 0.6 l per 1000 km.
Check with the vehicle on a level
surface. The engine must be at
operating temperature and switched
off for at least five minutes.
Pull out the dipstick, wipe it clean, insert it to the stop on the handle, pull
out and read the engine oil level.Caution
It is the owner's responsibility to
maintain the proper level of an
appropriate quality oil in the
engine.
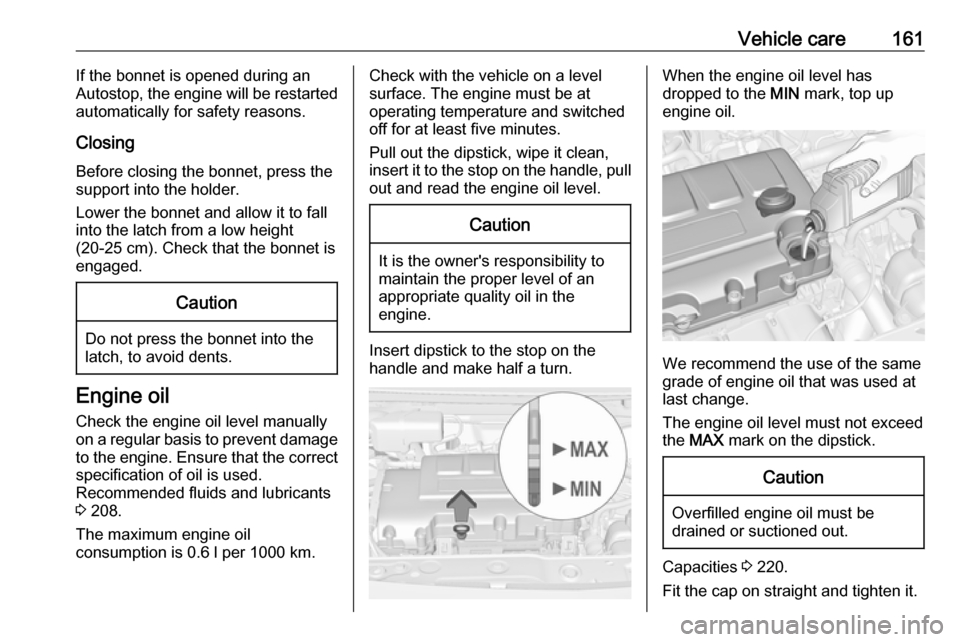
Insert dipstick to the stop on the
handle and make half a turn.
When the engine oil level has
dropped to the MIN mark, top up
engine oil.
We recommend the use of the same
grade of engine oil that was used at
last change.
The engine oil level must not exceed
the MAX mark on the dipstick.
Caution
Overfilled engine oil must be
drained or suctioned out.
Capacities 3 220.
Fit the cap on straight and tighten it.
Page 172 of 237
170Vehicle care6. Insert the bulb socket into theassembly and turn clockwise.
7. Attach light assembly into the bumper and fix with both screws.
8. Insert and engage cover into the bumper. Insert small cap.
Tail lights Versions with subwoofer box
Remove the load compartment floor
cover. On right side also remove the
tool box to gain access to the cover
3 64.
Versions with storage box
Remove storage box to gain access
to the cover 3 63.
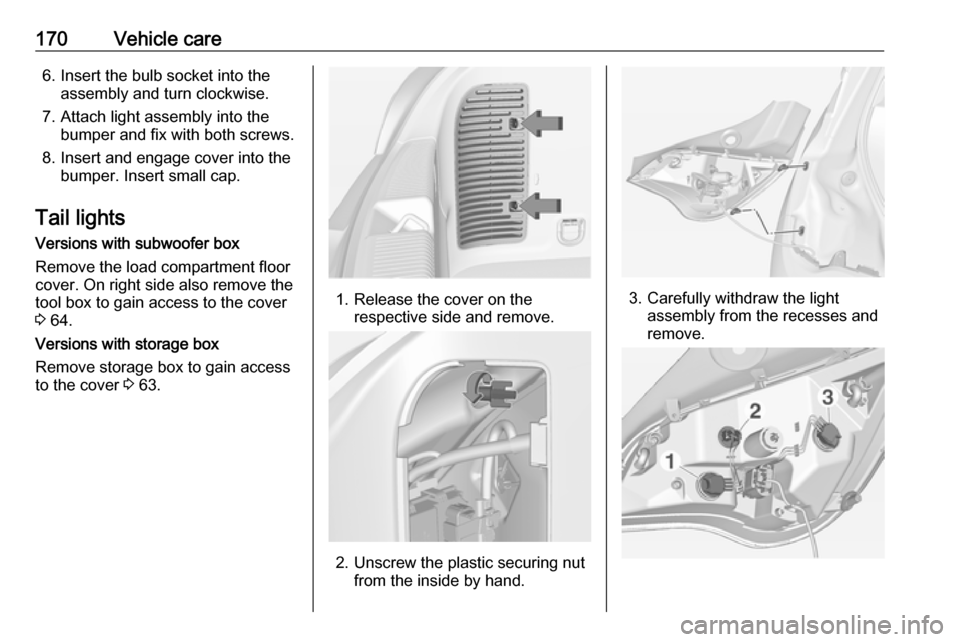
1. Release the cover on the
respective side and remove.
2. Unscrew the plastic securing nutfrom the inside by hand.
3. Carefully withdraw the lightassembly from the recesses and
remove.
Page 177 of 237
Vehicle care175Electrical system
Fuses Data on the replacement fuse must
match the data on the defective fuse.
There are two fuse boxes in the
vehicle:
● in the front left of the engine compartment,
● in left-hand drive vehicles behind
the light switch, or, in right-hand
drive vehicles, behind the
glovebox.
Before replacing a fuse, turn off the
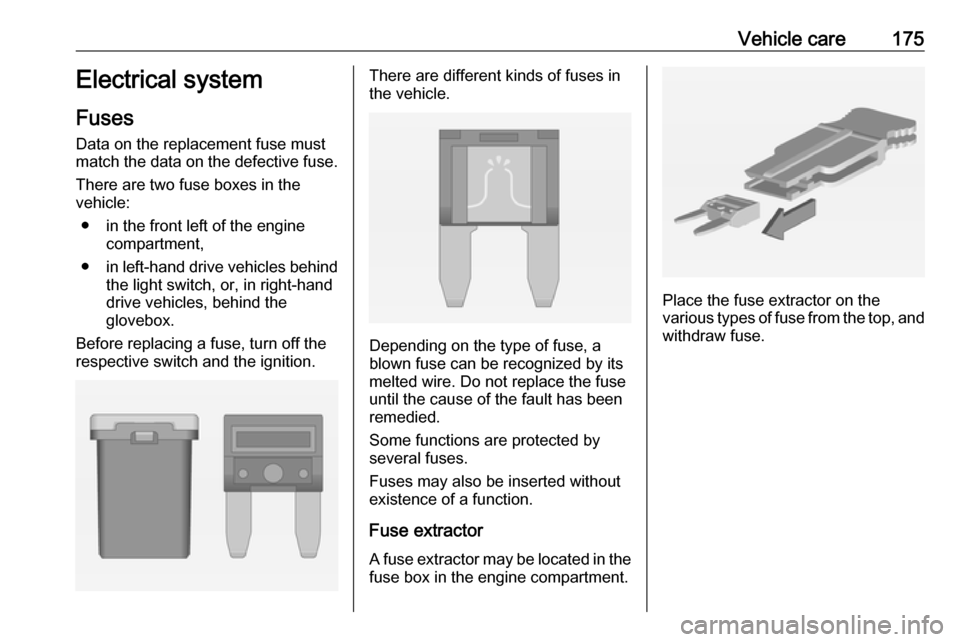
respective switch and the ignition.There are different kinds of fuses in
the vehicle.
Depending on the type of fuse, a
blown fuse can be recognized by its
melted wire. Do not replace the fuse until the cause of the fault has been
remedied.
Some functions are protected by
several fuses.
Fuses may also be inserted without existence of a function.
Fuse extractorA fuse extractor may be located in the
fuse box in the engine compartment.
Place the fuse extractor on the
various types of fuse from the top, and withdraw fuse.
Page 184 of 237
182Vehicle careThe maximum speed is achievable atkerb weight with driver (75 kg) plus
125 kg payload. Optional equipment
could reduce the maximum speed of
the vehicle.
Performance 3 217.
Directional tyres
Directional tyres must be mounted so that they rotate in the correct
direction. The proper rotation
direction is indicated by a symbol
(e.g. an arrow) on the sidewall.
Tyre pressure
Check the pressure of cold tyres at
least every 14 days and before any
long journey. Do not forget the spare
wheel.
This also applies to vehicles with tyre
pressure monitoring system.
Unscrew the valve cap.
Tyre pressure 3 221.
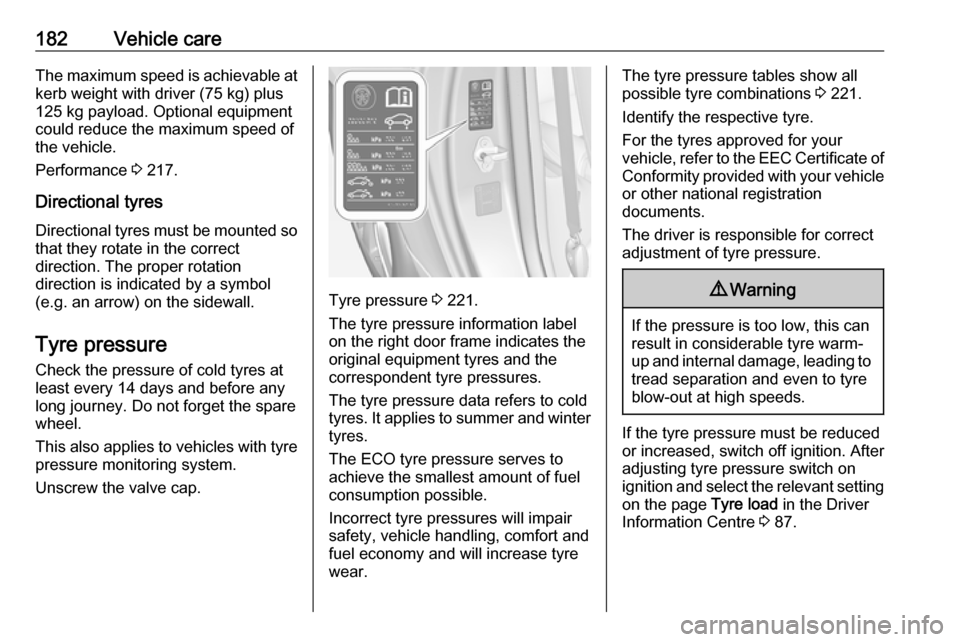
The tyre pressure information label
on the right door frame indicates the
original equipment tyres and the
correspondent tyre pressures.
The tyre pressure data refers to cold
tyres. It applies to summer and winter tyres.
The ECO tyre pressure serves to
achieve the smallest amount of fuel
consumption possible.
Incorrect tyre pressures will impair
safety, vehicle handling, comfort and fuel economy and will increase tyre
wear.
The tyre pressure tables show all
possible tyre combinations 3 221.
Identify the respective tyre.
For the tyres approved for your
vehicle, refer to the EEC Certificate of Conformity provided with your vehicle
or other national registration
documents.
The driver is responsible for correct
adjustment of tyre pressure.9 Warning
If the pressure is too low, this can
result in considerable tyre warm-
up and internal damage, leading to tread separation and even to tyre
blow-out at high speeds.
If the tyre pressure must be reduced
or increased, switch off ignition. After
adjusting tyre pressure switch on
ignition and select the relevant setting on the page Tyre load in the Driver
Information Centre 3 87.
Page 186 of 237

184Vehicle careSystem status and pressure warningsare displayed by a message with the
corresponding tyre flashing in the
Driver Information Centre.
The system considers the tyre
temperature for the warnings.
Temperature dependency 3 182.
A detected low tyre pressure
condition is indicated by the control
indicator w 3 86.
If w illuminates, stop as soon as
possible and inflate the tyres as
recommended 3 221.
If
w flashes for 60-90 seconds then
illuminates continuously, there is a
fault in the system. Consult a
workshop.
After inflating, some driving may be
required to update the tyre pressure
values in the Driver Information
Centre. During this time w may
illuminate.
If w illuminates at lower temperatures
and extinguishes after some driving,
this could be an indicator for
approaching a low tyre pressure
condition. Check tyre pressure.
Vehicle messages 3 94.
If the tyre pressure must be reduced
or increased, switch off ignition.
Only mount wheels with pressure
sensors, otherwise the tyre pressure
will not be displayed and w
illuminates continuously.
A spare wheel or temporary spare
wheel is not equipped with pressure
sensors. The tyre pressure
monitoring system is not operational
for these tyres. Control indicator willuminates. For the further three
tyres, the system remains
operational.
The use of commercially-available liquid tyre repair kits can impair the
function of the system. Factory-
approved repair kits can be used.
Operating electronic devices or being close to facilities using similar wave
frequencies could disrupt the tyre
pressure monitoring system.
Each time the tyres are replaced, tyre
pressure monitoring system sensors
must be dismounted and serviced.
For the screwed sensor; replace
valve core and sealing ring. For the
clipped sensor; replace complete
valve stem.
Vehicle loading status
Adjust tyre pressure to load condition according to the tyre information labelor tyre pressure chart 3 221, and
select the appropriate setting in the menu Tyre Load in the Driver
Information Centre, Vehicle
Information Menu 3 87 . This setting is
the reference for the tyre pressure
warnings.
Page 189 of 237
Vehicle care187speedometer as well as the nominal
tyre pressure and to make other
vehicle modifications.
After converting to a different tyre size, have the label with tyre
pressures replaced.Caution
When converting to wheels with 14'', the ground clearance will be
reduced. This must be considered
when passing over obstacles.
9 Warning
Use of unsuitable tyres or wheels
may lead to accidents and will
invalidate the vehicle type
approval.
Wheel covers
Wheel covers and tyres that are
factory approved for the respective
vehicle and comply with all of the
relevant wheel and tyre combination requirements must be used.
If the wheel covers and tyres used are
not factory approved, the tyres must
not have a rim protection ridge.
Wheel covers must not impair brake
cooling.9 Warning
Use of unsuitable tyres or wheel
covers could lead to sudden
pressure loss and thereby
accidents.
Steel wheels: When using locking
wheel bolts, do not attach wheel
covers.
Tyre chains
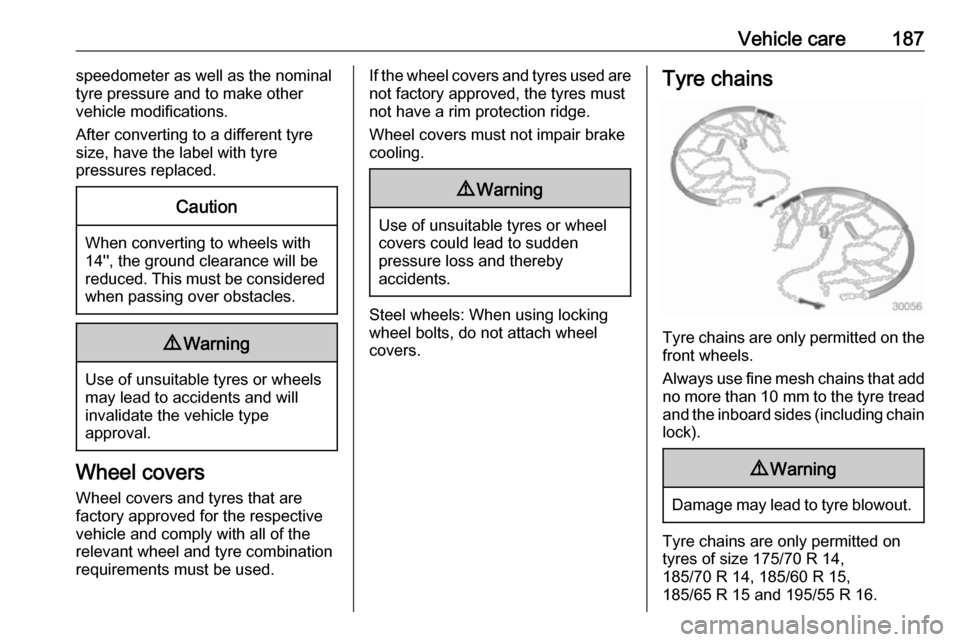
Tyre chains are only permitted on the
front wheels.
Always use fine mesh chains that add no more than 10 mm to the tyre tread
and the inboard sides (including chain lock).
9 Warning
Damage may lead to tyre blowout.
Tyre chains are only permitted on
tyres of size 175/70 R 14,
185/70 R 14, 185/60 R 15,
185/65 R 15 and 195/55 R 16.