light VAUXHALL ADAM 2019 User Guide
[x] Cancel search | Manufacturer: VAUXHALL, Model Year: 2019, Model line: ADAM, Model: VAUXHALL ADAM 2019Pages: 223, PDF Size: 6.54 MB
Page 45 of 223
Seats, restraints43
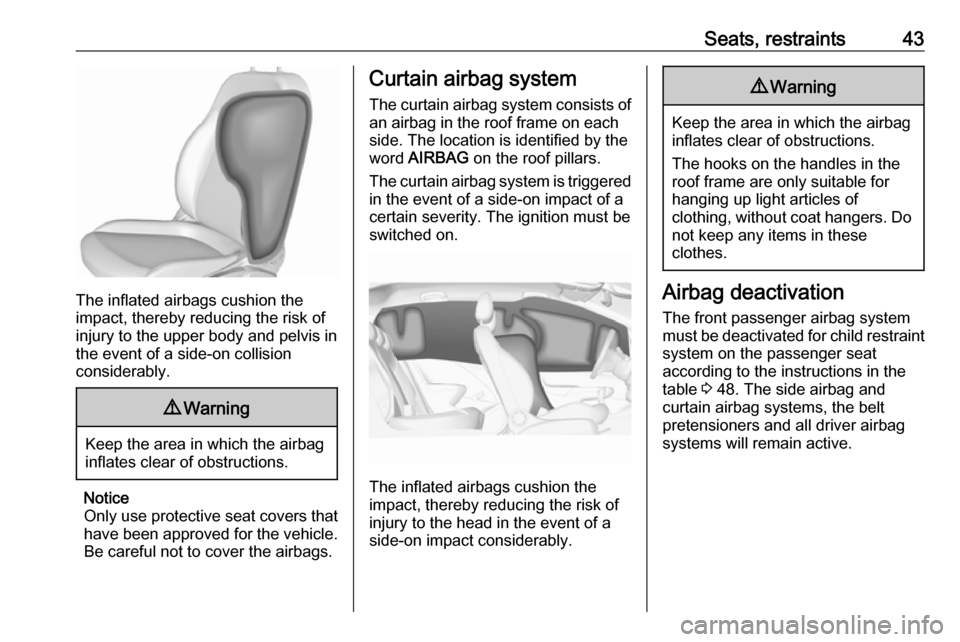
The inflated airbags cushion the
impact, thereby reducing the risk of
injury to the upper body and pelvis in
the event of a side-on collision
considerably.
9 Warning
Keep the area in which the airbag
inflates clear of obstructions.
Notice
Only use protective seat covers that
have been approved for the vehicle.Be careful not to cover the airbags.
Curtain airbag system
The curtain airbag system consists of an airbag in the roof frame on each
side. The location is identified by the
word AIRBAG on the roof pillars.
The curtain airbag system is triggered
in the event of a side-on impact of a
certain severity. The ignition must be
switched on.
The inflated airbags cushion the
impact, thereby reducing the risk of
injury to the head in the event of a
side-on impact considerably.
9 Warning
Keep the area in which the airbag
inflates clear of obstructions.
The hooks on the handles in the
roof frame are only suitable for
hanging up light articles of
clothing, without coat hangers. Do not keep any items in these
clothes.
Airbag deactivation
The front passenger airbag system must be deactivated for child restraint
system on the passenger seat
according to the instructions in the
table 3 48. The side airbag and
curtain airbag systems, the belt
pretensioners and all driver airbag
systems will remain active.
Page 54 of 223
52Storage
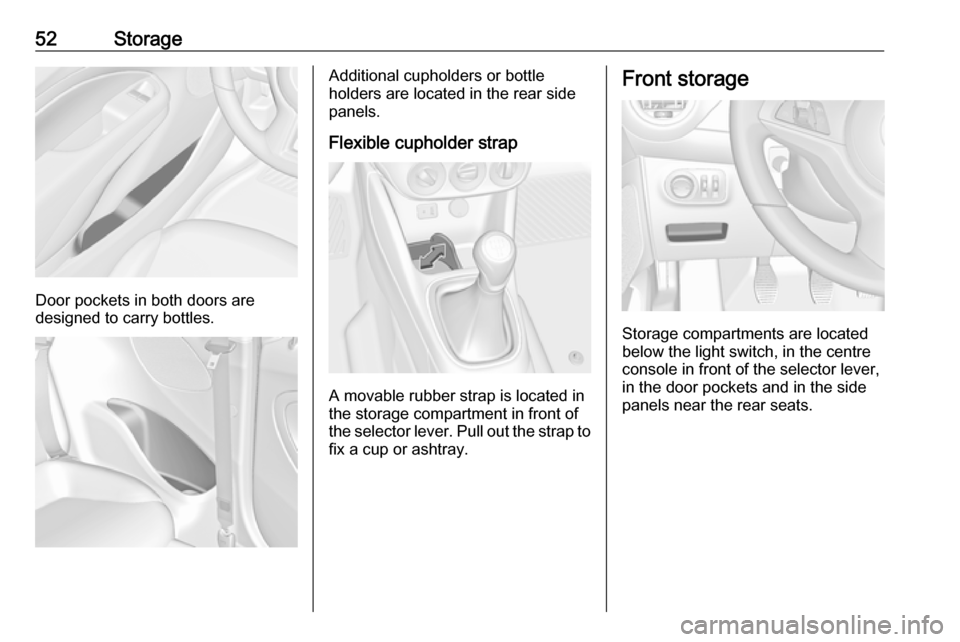
Door pockets in both doors are
designed to carry bottles.
Additional cupholders or bottle
holders are located in the rear side
panels.
Flexible cupholder strap
A movable rubber strap is located in
the storage compartment in front of
the selector lever. Pull out the strap to fix a cup or ashtray.
Front storage
Storage compartments are located
below the light switch, in the centre
console in front of the selector lever,
in the door pockets and in the side
panels near the rear seats.
Page 56 of 223
54StorageRear storage
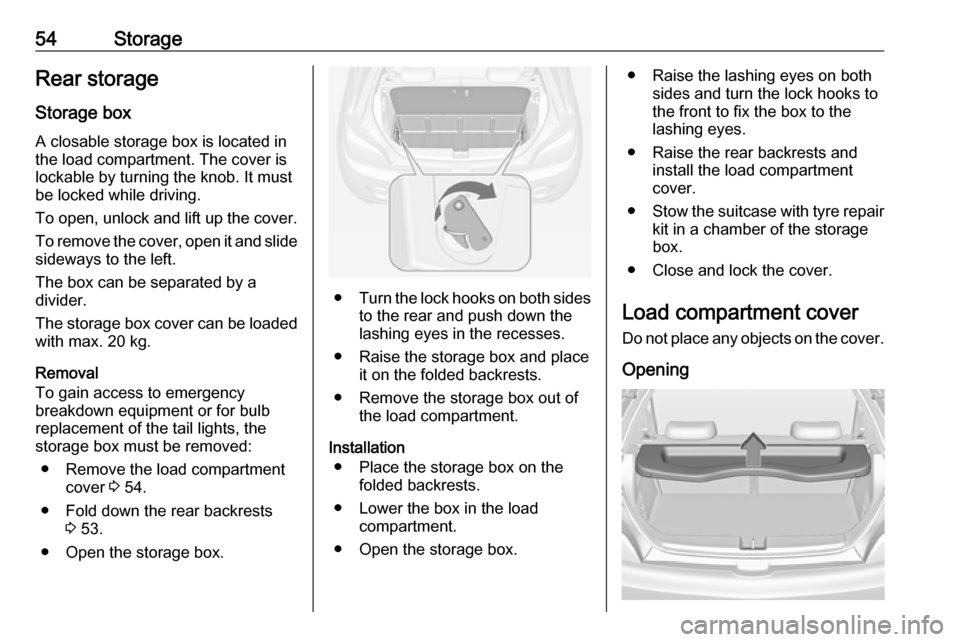
Storage box A closable storage box is located in
the load compartment. The cover is
lockable by turning the knob. It must be locked while driving.
To open, unlock and lift up the cover.
To remove the cover, open it and slide
sideways to the left.
The box can be separated by a
divider.
The storage box cover can be loaded with max. 20 kg.
Removal
To gain access to emergency
breakdown equipment or for bulb
replacement of the tail lights, the
storage box must be removed:
● Remove the load compartment cover 3 54.
● Fold down the rear backrests 3 53.
● Open the storage box.
● Turn the lock hooks on both sides
to the rear and push down the
lashing eyes in the recesses.
● Raise the storage box and place it on the folded backrests.
● Remove the storage box out of the load compartment.
Installation ● Place the storage box on the folded backrests.
● Lower the box in the load compartment.
● Open the storage box.
● Raise the lashing eyes on both sides and turn the lock hooks to
the front to fix the box to the
lashing eyes.
● Raise the rear backrests and install the load compartment
cover.
● Stow the suitcase with tyre repair
kit in a chamber of the storage
box.
● Close and lock the cover.
Load compartment cover
Do not place any objects on the cover.
Opening
Page 57 of 223
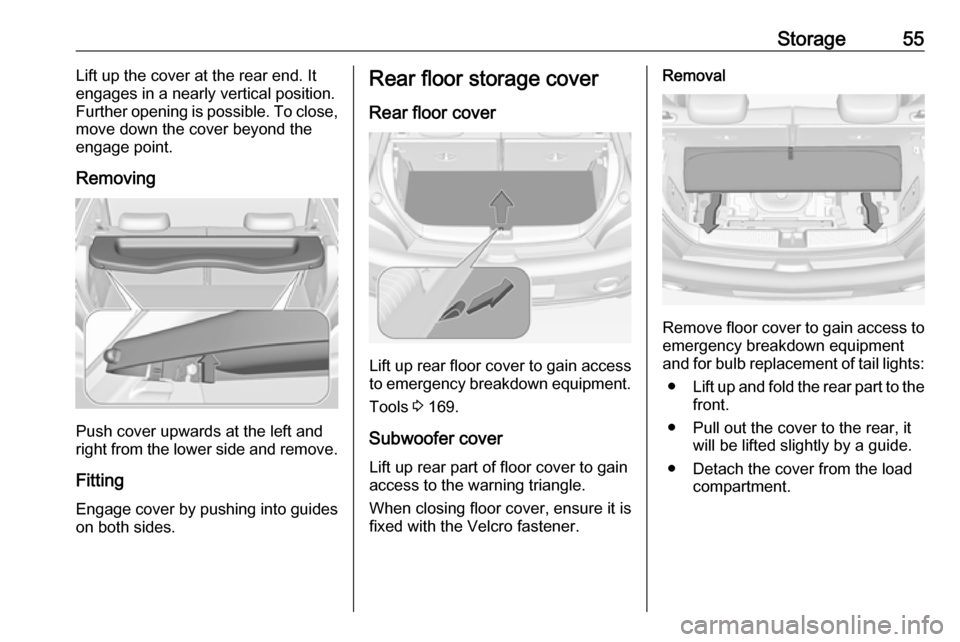
Storage55Lift up the cover at the rear end. It
engages in a nearly vertical position.
Further opening is possible. To close,
move down the cover beyond the
engage point.
Removing
Push cover upwards at the left and
right from the lower side and remove.
Fitting Engage cover by pushing into guides
on both sides.
Rear floor storage cover
Rear floor cover
Lift up rear floor cover to gain access
to emergency breakdown equipment.
Tools 3 169.
Subwoofer cover
Lift up rear part of floor cover to gain
access to the warning triangle.
When closing floor cover, ensure it is
fixed with the Velcro fastener.
Removal
Remove floor cover to gain access to
emergency breakdown equipment
and for bulb replacement of tail lights:
● Lift up and fold the rear part to the
front.
● Pull out the cover to the rear, it will be lifted slightly by a guide.
● Detach the cover from the load compartment.
Page 62 of 223

60Instruments and controlsInstruments and
controlsControls ....................................... 61
Steering wheel adjustment ........61
Steering wheel controls .............61
Heated steering wheel ...............61
Horn ........................................... 62
Windscreen wiper and washer ..62
Rear window wiper and washer ...................................... 63
Outside temperature ..................64
Clock ......................................... 65
Power outlets ............................. 66
Cigarette lighter ......................... 67
Ashtrays .................................... 67
Warning lights, gauges and indi‐ cators ........................................... 68
Instrument cluster ......................68
Speedometer ............................. 68
Odometer .................................. 68
Trip odometer ............................ 68
Tachometer ............................... 68
Fuel gauge ................................ 69
Fuel selector .............................. 69
Engine coolant temperature gauge ....................................... 70Service display.......................... 71
Control indicators ......................72
Turn lights .................................. 74
Seat belt reminder .....................74
Airbag and belt tensioners .........75
Airbag deactivation ....................75
Charging system .......................75
Malfunction indicator light ..........76
Service vehicle soon .................76
Brake and clutch system ...........76
Operate pedal ............................ 76
Antilock brake system (ABS) .....77
Gear shifting .............................. 77
Power steering .......................... 77
Parking assist ............................ 77
Electronic Stability Control off ...77
Electronic Stability Control and Traction Control system ...........77
Exhaust filter .............................. 78
Tyre pressure monitoring system ...................................... 78
Engine oil pressure ....................78
Low fuel ..................................... 79
Immobiliser ................................ 79
Exterior light .............................. 79
High beam ................................. 79
Rear fog light ............................. 79
Cruise control ............................ 79
Door open .................................. 79Displays....................................... 80
Driver Information Centre ..........80
Info Display ................................ 85
Vehicle messages ........................87
Warning chimes .........................89
Battery voltage .......................... 89
Vehicle personalisation ................90
Telematics service .......................93
OnStar ....................................... 93
Page 64 of 223
62Instruments and controlsThe highlighted grip areas of the
steering wheel are heated quicker
and to a higher temperature than the
other areas.
Heating is operational when the
engine is running and during an
Autostop.
Stop-start system 3 118.
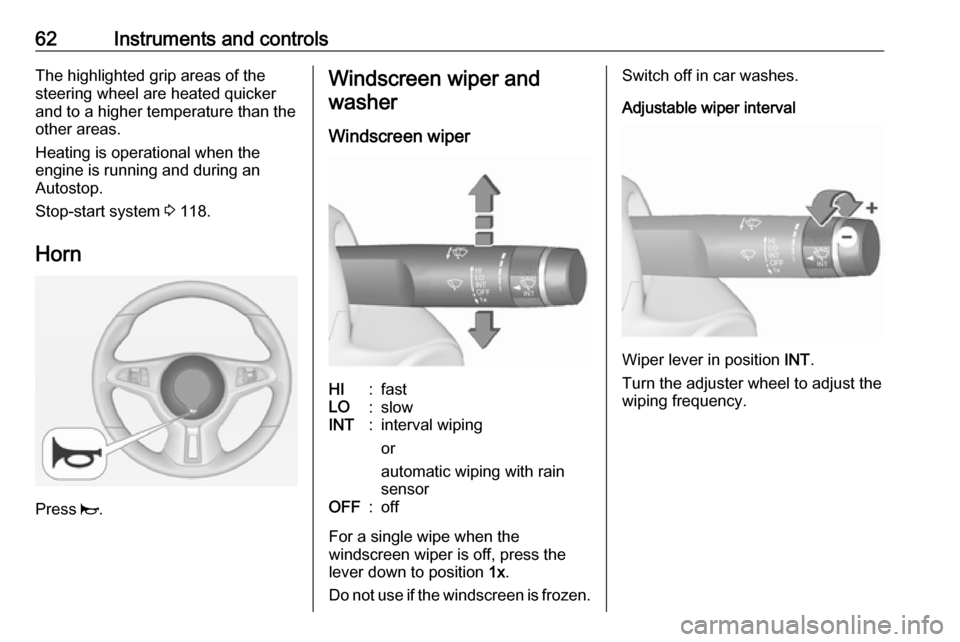
Horn
Press j.
Windscreen wiper and
washer
Windscreen wiperHI:fastLO:slowINT:interval wiping
or
automatic wiping with rain
sensorOFF:off
For a single wipe when the
windscreen wiper is off, press the
lever down to position 1x.
Do not use if the windscreen is frozen.
Switch off in car washes.
Adjustable wiper interval
Wiper lever in position INT.
Turn the adjuster wheel to adjust the
wiping frequency.
Page 65 of 223
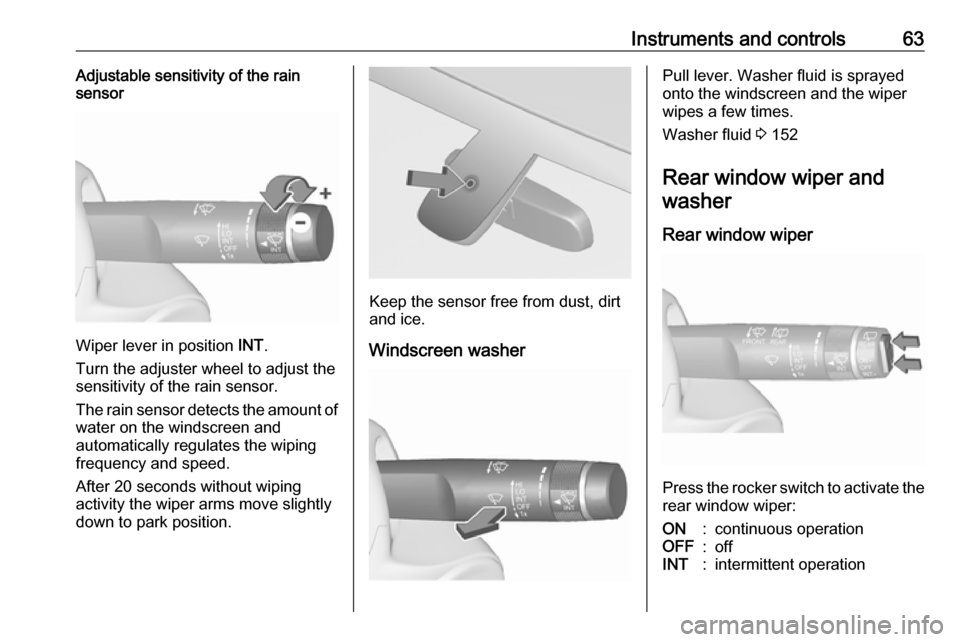
Instruments and controls63Adjustable sensitivity of the rain
sensor
Wiper lever in position INT.
Turn the adjuster wheel to adjust the
sensitivity of the rain sensor.
The rain sensor detects the amount of water on the windscreen and
automatically regulates the wiping
frequency and speed.
After 20 seconds without wiping
activity the wiper arms move slightly
down to park position.
Keep the sensor free from dust, dirt
and ice.
Windscreen washer
Pull lever. Washer fluid is sprayed
onto the windscreen and the wiper
wipes a few times.
Washer fluid 3 152
Rear window wiper and washer
Rear window wiper
Press the rocker switch to activate the
rear window wiper:
ON:continuous operationOFF:offINT:intermittent operation
Page 69 of 223
Instruments and controls67With ignition off, the power outlet is
deactivated. Additionally, the power outlet is deactivated in the event of
low vehicle battery voltage.
Electrical accessories that are
connected must comply with the
electromagnetic compatibility
requirements laid down in
DIN VDE 40 839.
Do not connect any current-delivering
accessories, e.g. electrical charging
devices or batteries.
Do not damage the outlet by using
unsuitable plugs.
Stop-start system 3 118.Cigarette lighter
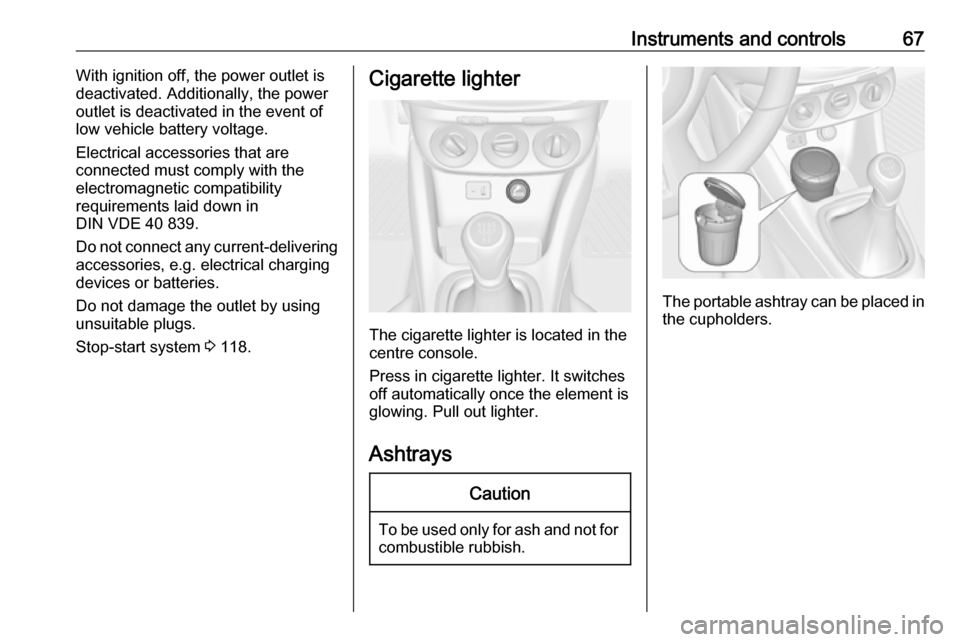
The cigarette lighter is located in the
centre console.
Press in cigarette lighter. It switches off automatically once the element is
glowing. Pull out lighter.
Ashtrays
Caution
To be used only for ash and not for combustible rubbish.
The portable ashtray can be placed inthe cupholders.
Page 70 of 223
68Instruments and controlsWarning lights, gauges
and indicators
Instrument cluster
The needles of the instruments briefly
rotate to the end position when the
ignition is switched on.
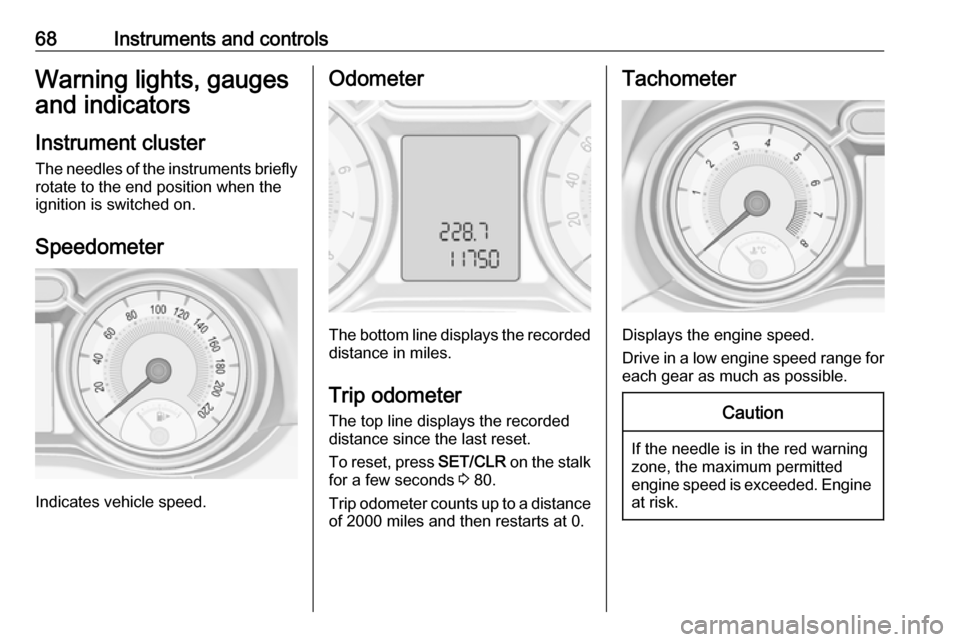
Speedometer
Indicates vehicle speed.
Odometer
The bottom line displays the recorded distance in miles.
Trip odometer The top line displays the recordeddistance since the last reset.
To reset, press SET/CLR on the stalk
for a few seconds 3 80.
Trip odometer counts up to a distance
of 2000 miles and then restarts at 0.
Tachometer
Displays the engine speed.
Drive in a low engine speed range for each gear as much as possible.
Caution
If the needle is in the red warning
zone, the maximum permitted
engine speed is exceeded. Engine at risk.
Page 72 of 223
70Instruments and controlsWhen petrol fuel tank is empty, the
engine will not start.
Every six months, run the petrol tank
down until control indicator Y
illuminates, then refuel. This helps
maintain fuel quality and system
function for petrol operation.
Fill the tank completely at regular
intervals to prevent corrosion in the
tank.
Faults and remedies
If gas mode is not possible, check
whether there is enough liquid gas or petrol present for starting.
Due to extreme temperatures in
combination with the gas
composition, it may take slightly
longer before the system switches
from petrol to gas mode.
In extreme situations, the system may
also switch back to petrol mode if the
minimum requirements are not
fulfilled. If conditions allow, it might be
possible to manually switch back to
liquid gas operation.
Seek the assistance of a workshop in the event of all other faults.Caution
Repairs and adjustments may onlybe made by trained specialists in
order to maintain the safety and
warranty on the LPG system.
Liquid gas is given a particular odour
(odorised) so that any leaks can be
detected easily.
9 Warning
If you smell gas in the vehicle or in
the immediate vicinity, switch to petrol mode immediately. No
smoking. No naked flames or
ignition sources.
If the gas odour persists, do not start
the engine. Have the cause of the
fault remedied by a workshop.
When using underground car parks,
follow the instructions of the operator
and local laws.
Notice
In the event of an accident, switch off
the ignition.
Fuel for liquid gas operation 3 144.
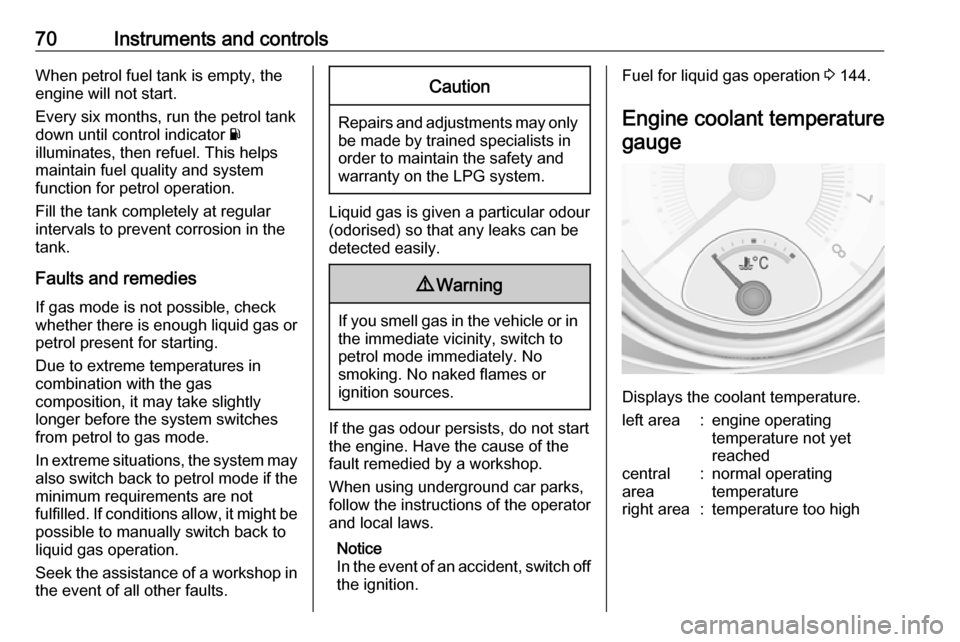
Engine coolant temperature gauge
Displays the coolant temperature.
left area:engine operating
temperature not yet
reachedcentral
area:normal operating
temperatureright area:temperature too high