light VAUXHALL ADAM 2019 Owner's Manual
[x] Cancel search | Manufacturer: VAUXHALL, Model Year: 2019, Model line: ADAM, Model: VAUXHALL ADAM 2019Pages: 223, PDF Size: 6.54 MB
Page 3 of 223

Introduction.................................... 2
In brief ............................................ 6
Keys, doors and windows ............19
Seats, restraints ........................... 31
Storage ........................................ 51
Instruments and controls .............60
Lighting ........................................ 98
Climate control ........................... 106
Driving and operating .................115
Vehicle care ............................... 148
Service and maintenance ..........195
Technical data ........................... 198
Customer information ................207
Index .......................................... 216Contents
Page 13 of 223

In brief111Power windows .....................27
2 Exterior mirrors .....................26
3 Cruise control .....................129
Speed limiter ....................... 130
4 Side air vents ...................... 113
5 Turn lights, headlight
flash, low beam and high
beam ................................... 101
Exit lighting ......................... 104
Parking lights ...................... 101
Buttons for Driver
Information Centre ................80
6 Instruments .......................... 68
7 Steering wheel controls .......61
8 Driver Information Centre ...... 80
9 Windscreen wiper,
windscreen washer
system, headlight washer
system, rear wiper, rear
washer system ......................62
10 Central locking system ..........21
City mode ............................ 128
Fuel selector ......................... 69Eco button for stop-start
system ................................. 118
Traction Control system .....125
Electronic Stability Control . 126
Parking assist ..................... 132
Seat heating .......................... 35
Heated steering wheel ..........61
11 Info Display .......................... 85
12 Hazard warning flashers ....100
Control indicator for airbag
deactivation .......................... 75
Control indicator for front
passenger seat belt .............74
13 Sensor electronic climate
control system ....................109
14 Centre air vents .................. 113
15 Side air vents passenger
side ..................................... 113
16 Glovebox .............................. 51
Fuse box ............................ 167
17 Climate control system ........ 106
18 Power outlet .......................... 66
19 AUX input, USB input ...........1020Selector lever,
transmission ....................... 123
21 Parking brake ......................124
22 Ignition switch with
steering wheel lock ............116
23 Horn ..................................... 62
Driver airbag ........................ 42
24 Bonnet release lever ..........150
25 Steering wheel adjustment ..61
26 Light switch .......................... 98
Headlight range
adjustment ......................... 100
Rear fog light ...................... 101 Brightness of instrument
panel illumination ................102
Brightness of ambient light 102
Page 14 of 223
12In briefExterior lighting
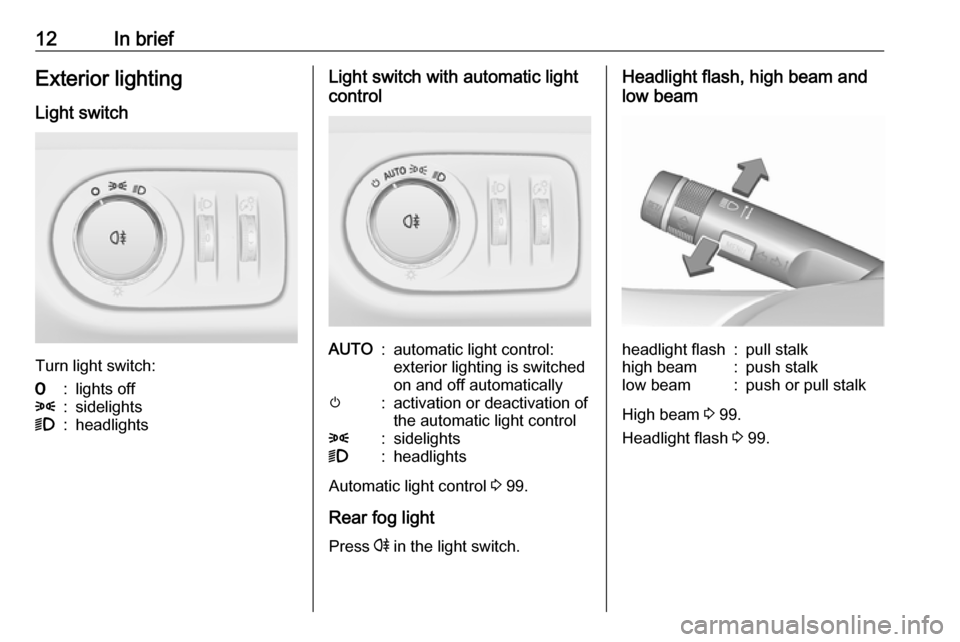
Light switch
Turn light switch:
7:lights off8:sidelights9:headlightsLight switch with automatic light
controlAUTO:automatic light control:
exterior lighting is switched
on and off automaticallym:activation or deactivation of
the automatic light control8:sidelights9:headlights
Automatic light control 3 99.
Rear fog light Press r in the light switch.
Headlight flash, high beam and
low beamheadlight flash:pull stalkhigh beam:push stalklow beam:push or pull stalk
High beam 3 99.
Headlight flash 3 99.
Page 15 of 223
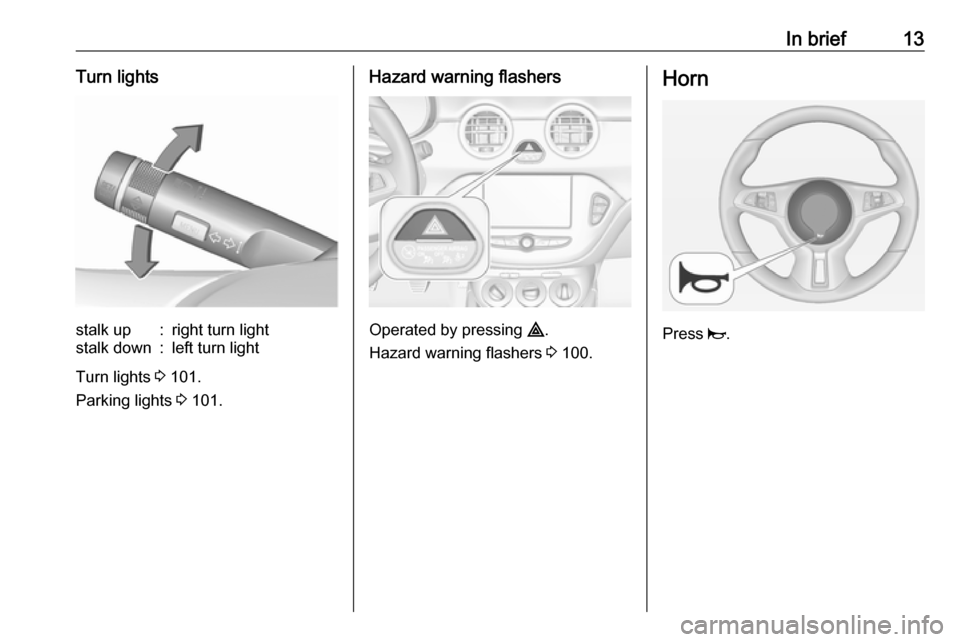
In brief13Turn lightsstalk up:right turn lightstalk down:left turn light
Turn lights 3 101.
Parking lights 3 101.
Hazard warning flashers
Operated by pressing ¨.
Hazard warning flashers 3 100.
Horn
Press j.
Page 18 of 223
16In briefTransmission
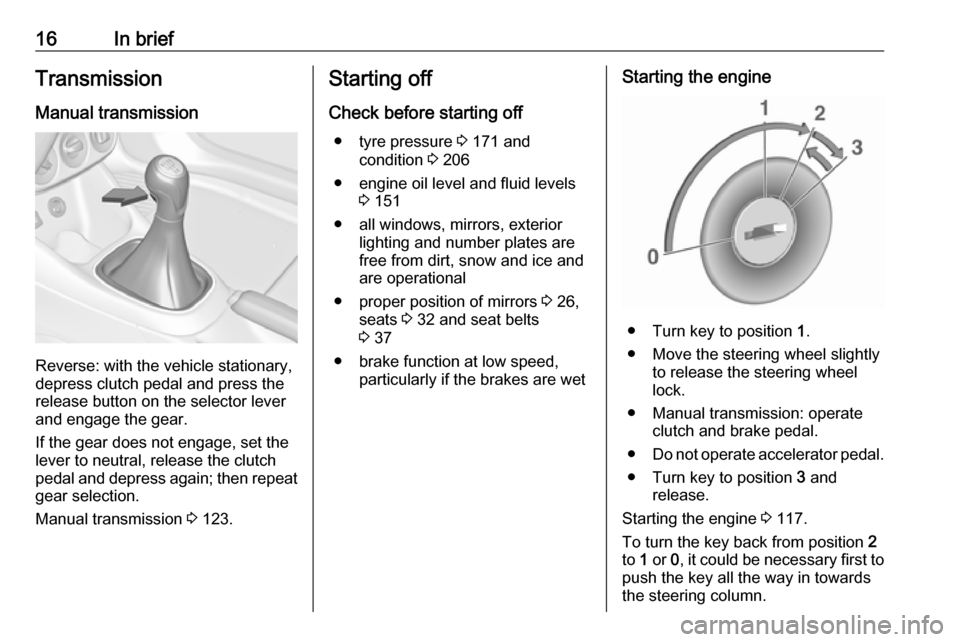
Manual transmission
Reverse: with the vehicle stationary,
depress clutch pedal and press the release button on the selector lever
and engage the gear.
If the gear does not engage, set the
lever to neutral, release the clutch
pedal and depress again; then repeat
gear selection.
Manual transmission 3 123.
Starting off
Check before starting off ● tyre pressure 3 171 and
condition 3 206
● engine oil level and fluid levels 3 151
● all windows, mirrors, exterior lighting and number plates are
free from dirt, snow and ice and
are operational
● proper position of mirrors 3 26,
seats 3 32 and seat belts
3 37
● brake function at low speed, particularly if the brakes are wetStarting the engine
● Turn key to position 1.
● Move the steering wheel slightly to release the steering wheel
lock.
● Manual transmission: operate clutch and brake pedal.
● Do not operate accelerator pedal.
● Turn key to position 3 and
release.
Starting the engine 3 117.
To turn the key back from position 2
to 1 or 0, it could be necessary first to
push the key all the way in towards the steering column.
Page 23 of 223
Keys, doors and windows21Radio remote control battery
replacement
Replace the battery as soon as the
range reduces.
Batteries do not belong in household
waste. They must be disposed of at
an appropriate recycling collection
point.
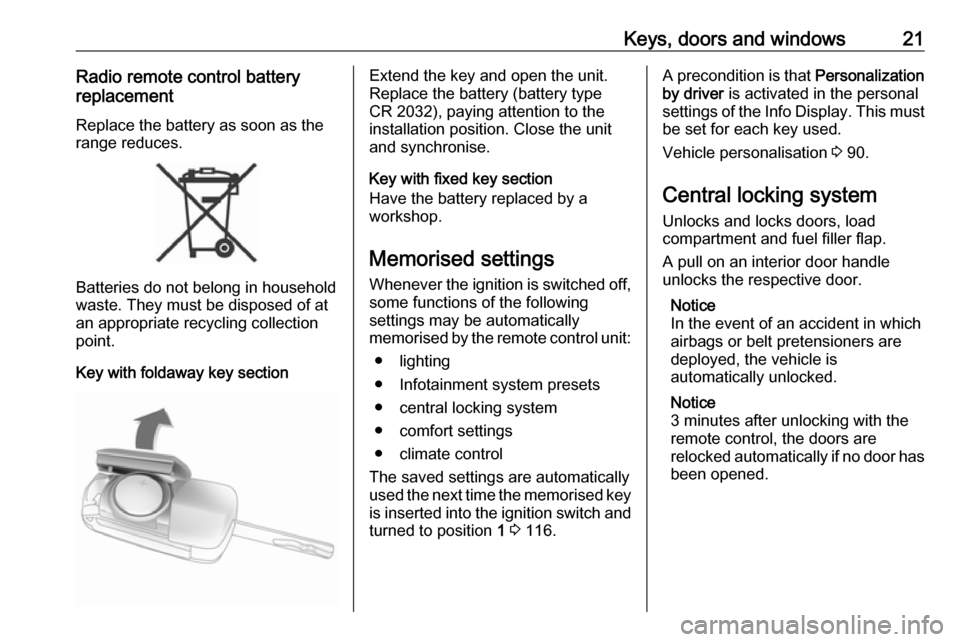
Key with foldaway key section
Extend the key and open the unit.
Replace the battery (battery type CR 2032), paying attention to the
installation position. Close the unit
and synchronise.
Key with fixed key section
Have the battery replaced by a
workshop.
Memorised settings Whenever the ignition is switched off,
some functions of the following
settings may be automatically
memorised by the remote control unit:
● lighting
● Infotainment system presets
● central locking system
● comfort settings
● climate control
The saved settings are automatically
used the next time the memorised key
is inserted into the ignition switch and
turned to position 1 3 116.A precondition is that Personalization
by driver is activated in the personal
settings of the Info Display. This must
be set for each key used.
Vehicle personalisation 3 90.
Central locking system
Unlocks and locks doors, load
compartment and fuel filler flap.
A pull on an interior door handle
unlocks the respective door.
Notice
In the event of an accident in which
airbags or belt pretensioners are
deployed, the vehicle is
automatically unlocked.
Notice
3 minutes after unlocking with the
remote control, the doors are
relocked automatically if no door has
been opened.
Page 28 of 223
26Keys, doors and windowsExterior mirrors
Convex shape
The shape of the mirror makes
objects appear smaller, which will
affect the ability to estimate
distances.
Side blind spot alert 3 141.
Electric adjustment
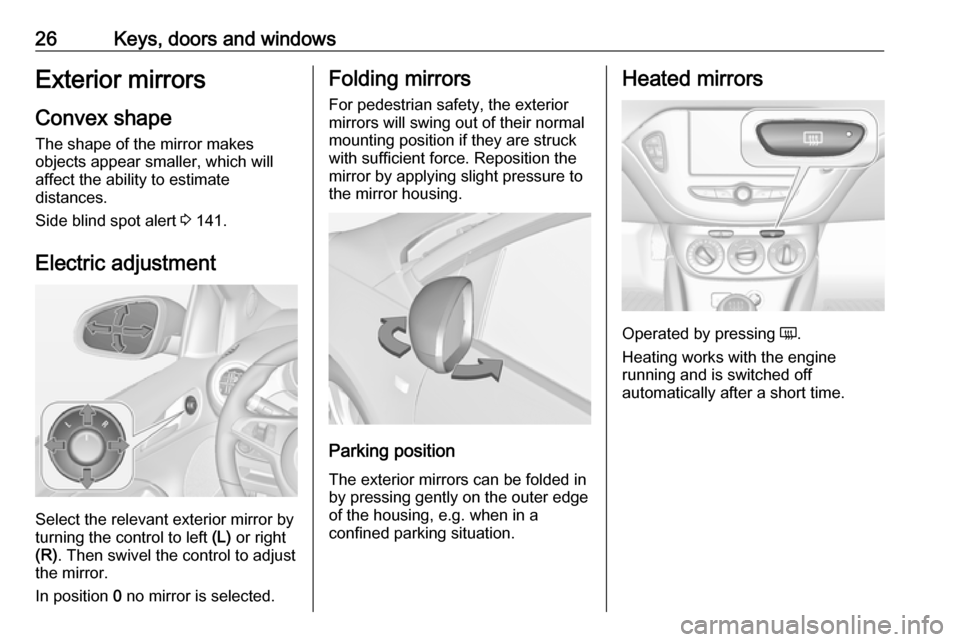
Select the relevant exterior mirror by
turning the control to left (L) or right
(R) . Then swivel the control to adjust
the mirror.
In position 0 no mirror is selected.
Folding mirrors
For pedestrian safety, the exterior mirrors will swing out of their normal
mounting position if they are struck
with sufficient force. Reposition the
mirror by applying slight pressure to
the mirror housing.
Parking position
The exterior mirrors can be folded in
by pressing gently on the outer edge
of the housing, e.g. when in a
confined parking situation.
Heated mirrors
Operated by pressing Ü.
Heating works with the engine
running and is switched off
automatically after a short time.
Page 29 of 223
Keys, doors and windows27Interior mirrors
Manual anti-dazzle
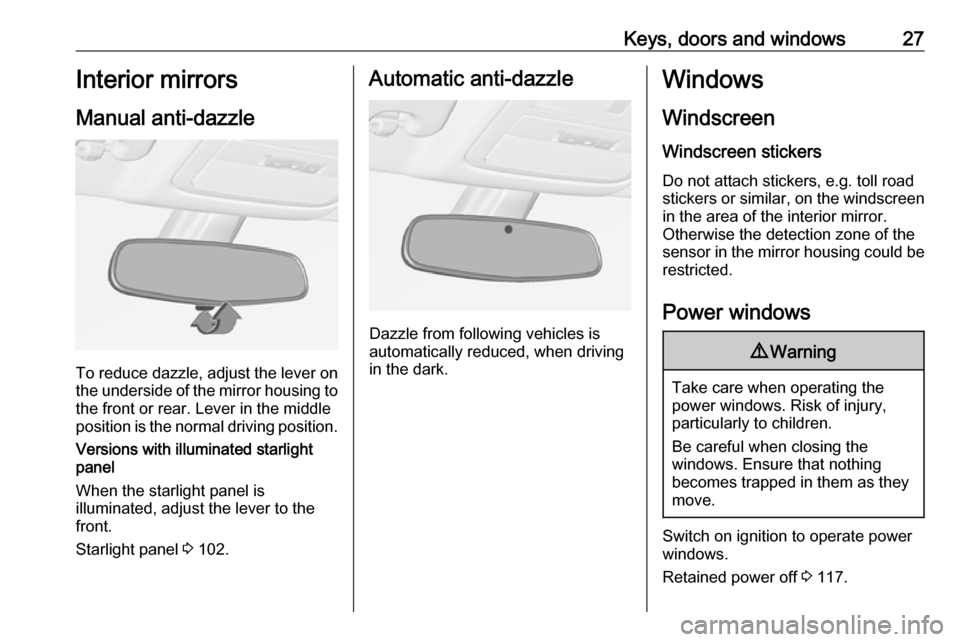
To reduce dazzle, adjust the lever on the underside of the mirror housing to
the front or rear. Lever in the middle
position is the normal driving position.
Versions with illuminated starlight
panel
When the starlight panel is
illuminated, adjust the lever to the
front.
Starlight panel 3 102.
Automatic anti-dazzle
Dazzle from following vehicles is
automatically reduced, when driving
in the dark.
Windows
Windscreen
Windscreen stickers
Do not attach stickers, e.g. toll road
stickers or similar, on the windscreen
in the area of the interior mirror.
Otherwise the detection zone of the
sensor in the mirror housing could be restricted.
Power windows9 Warning
Take care when operating the
power windows. Risk of injury,
particularly to children.
Be careful when closing the
windows. Ensure that nothing
becomes trapped in them as they
move.
Switch on ignition to operate power
windows.
Retained power off 3 117.
Page 30 of 223
28Keys, doors and windows
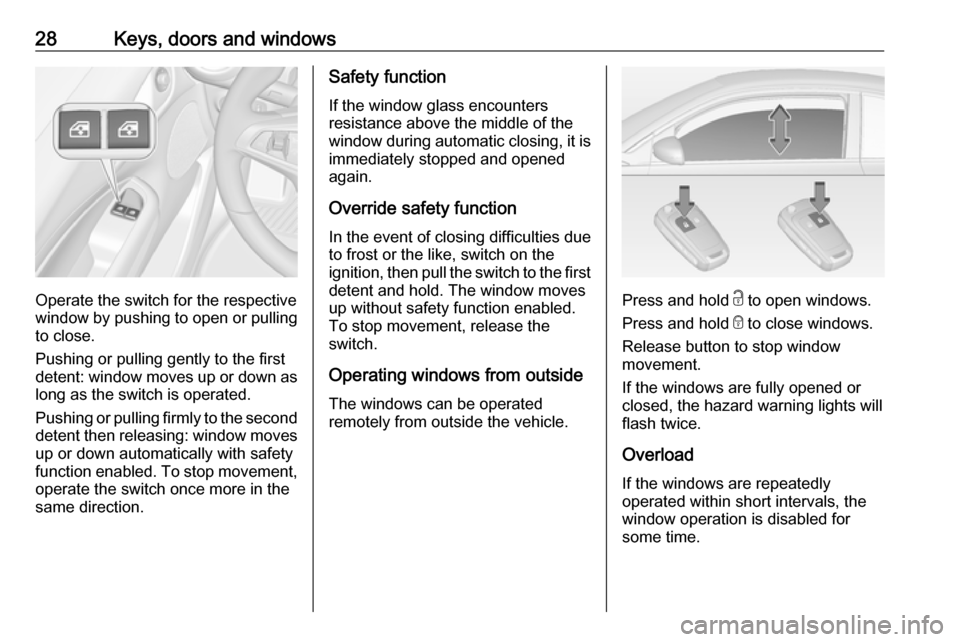
Operate the switch for the respective
window by pushing to open or pulling to close.
Pushing or pulling gently to the first
detent: window moves up or down as long as the switch is operated.
Pushing or pulling firmly to the second
detent then releasing: window moves
up or down automatically with safety
function enabled. To stop movement,
operate the switch once more in the
same direction.
Safety function
If the window glass encounters
resistance above the middle of the
window during automatic closing, it is
immediately stopped and opened
again.
Override safety function
In the event of closing difficulties due
to frost or the like, switch on the
ignition, then pull the switch to the first
detent and hold. The window moves
up without safety function enabled.
To stop movement, release the
switch.
Operating windows from outside
The windows can be operated
remotely from outside the vehicle.
Press and hold c to open windows.
Press and hold e to close windows.
Release button to stop window
movement.
If the windows are fully opened or
closed, the hazard warning lights will
flash twice.
Overload If the windows are repeatedly
operated within short intervals, the
window operation is disabled for
some time.
Page 35 of 223
Seats, restraints33
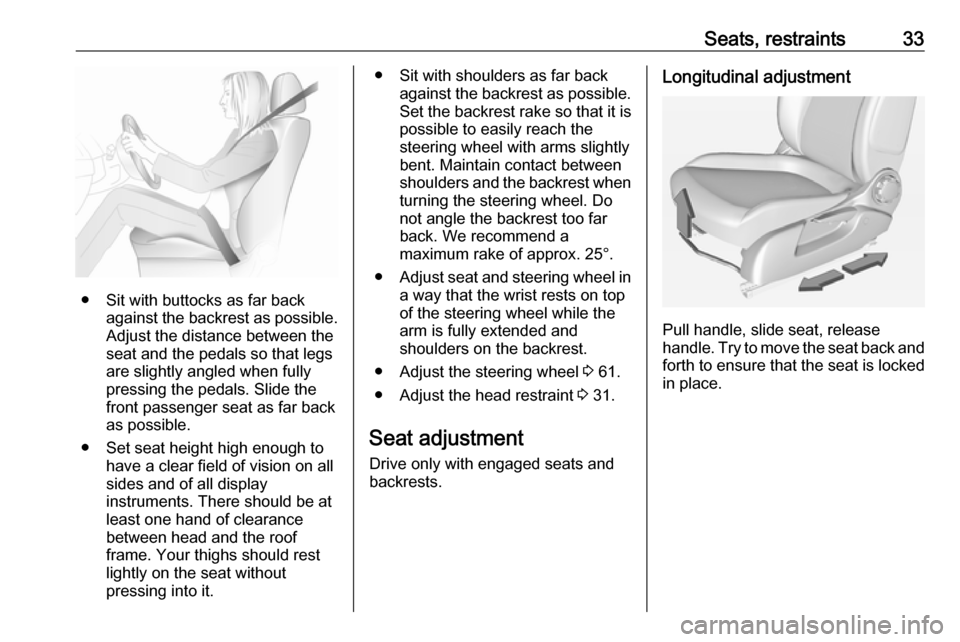
● Sit with buttocks as far backagainst the backrest as possible.
Adjust the distance between the
seat and the pedals so that legs
are slightly angled when fully
pressing the pedals. Slide the
front passenger seat as far back
as possible.
● Set seat height high enough to have a clear field of vision on all
sides and of all display
instruments. There should be at
least one hand of clearance
between head and the roof
frame. Your thighs should rest
lightly on the seat without
pressing into it.
● Sit with shoulders as far back against the backrest as possible.
Set the backrest rake so that it is possible to easily reach the
steering wheel with arms slightly
bent. Maintain contact between
shoulders and the backrest when
turning the steering wheel. Do
not angle the backrest too far
back. We recommend a
maximum rake of approx. 25°.
● Adjust seat and steering wheel in
a way that the wrist rests on top
of the steering wheel while the
arm is fully extended and
shoulders on the backrest.
● Adjust the steering wheel 3 61.
● Adjust the head restraint 3 31.
Seat adjustment Drive only with engaged seats andbackrests.Longitudinal adjustment
Pull handle, slide seat, release
handle. Try to move the seat back and forth to ensure that the seat is locked
in place.