seat adjustment VAUXHALL ANTARA 2014 Owner's Manual
[x] Cancel search | Manufacturer: VAUXHALL, Model Year: 2014, Model line: ANTARA, Model: VAUXHALL ANTARA 2014Pages: 217, PDF Size: 5.94 MB
Page 8 of 217

6In briefIn briefInitial drive informationVehicle unlocking
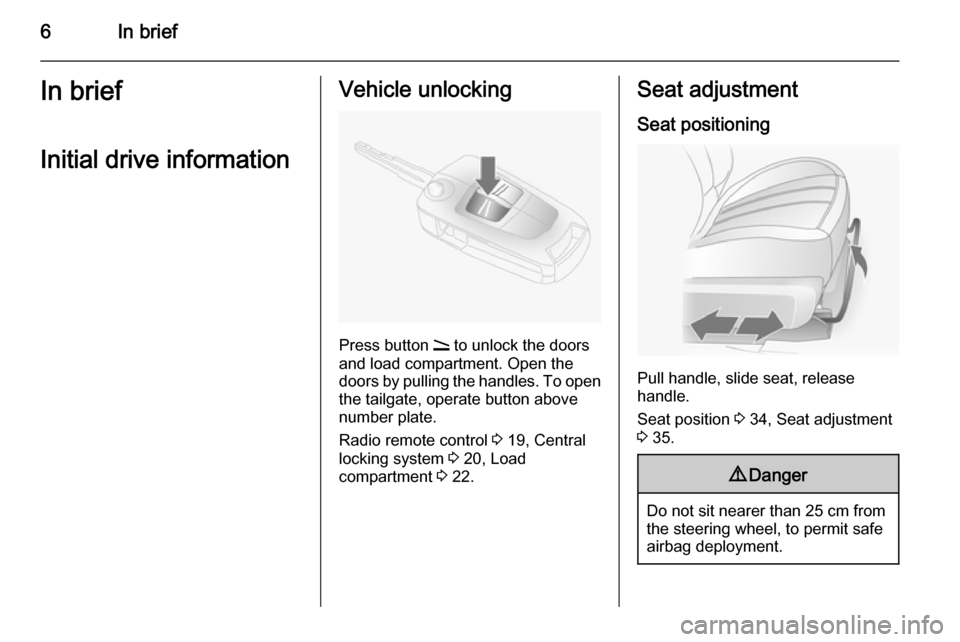
Press button q to unlock the doors
and load compartment. Open the
doors by pulling the handles. To open
the tailgate, operate button above
number plate.
Radio remote control 3 19, Central
locking system 3 20, Load
compartment 3 22.
Seat adjustment
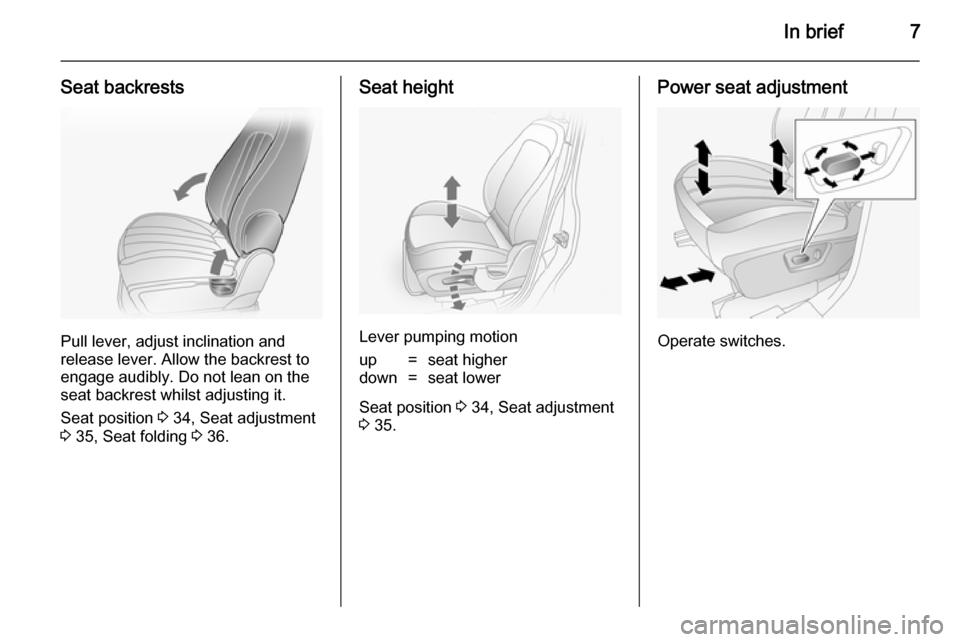
Seat positioning
Pull handle, slide seat, release
handle.
Seat position 3 34, Seat adjustment
3 35.
9 Danger
Do not sit nearer than 25 cm from
the steering wheel, to permit safe
airbag deployment.
Page 9 of 217

In brief7
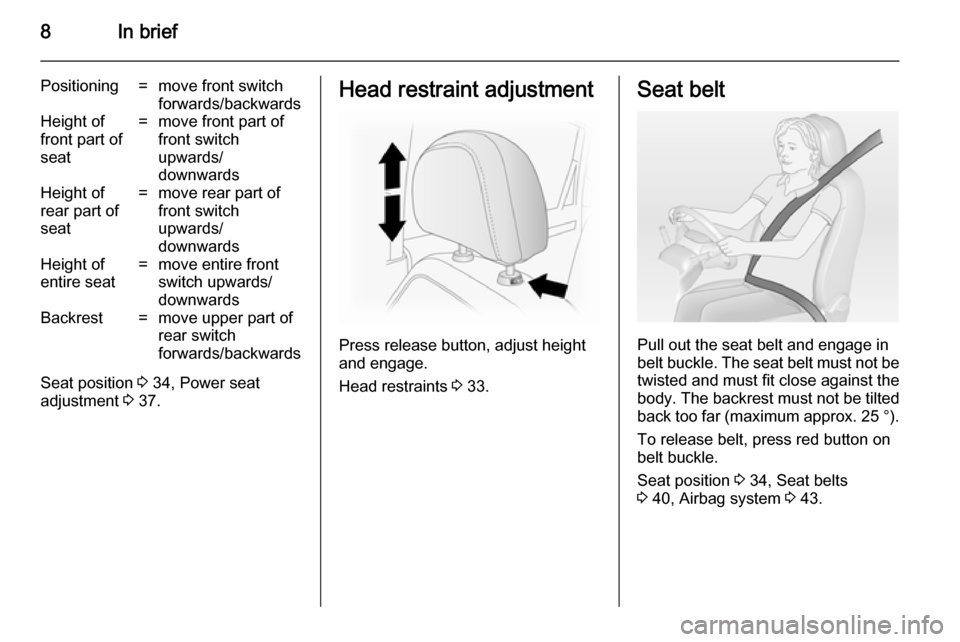
Seat backrests
Pull lever, adjust inclination and
release lever. Allow the backrest to
engage audibly. Do not lean on the
seat backrest whilst adjusting it.
Seat position 3 34, Seat adjustment
3 35, Seat folding 3 36.
Seat height
Lever pumping motion
up=seat higherdown=seat lower
Seat position 3 34, Seat adjustment
3 35.
Power seat adjustment
Operate switches.
Page 10 of 217

8In brief
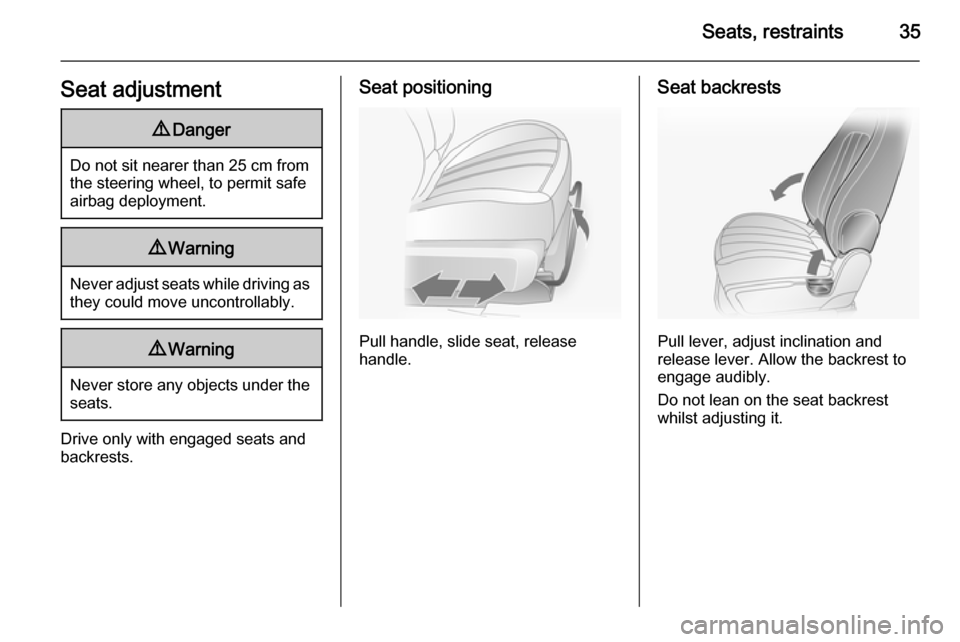
Positioning=move front switch
forwards/backwardsHeight of
front part of
seat=move front part of
front switch
upwards/
downwardsHeight of
rear part of
seat=move rear part of
front switch
upwards/
downwardsHeight of
entire seat=move entire front
switch upwards/
downwardsBackrest=move upper part of
rear switch
forwards/backwards
Seat position 3 34, Power seat
adjustment 3 37.
Head restraint adjustment
Press release button, adjust height
and engage.
Head restraints 3 33.
Seat belt
Pull out the seat belt and engage in
belt buckle. The seat belt must not be twisted and must fit close against the
body. The backrest must not be tilted
back too far (maximum approx. 25 ° ).
To release belt, press red button on belt buckle.
Seat position 3 34, Seat belts
3 40, Airbag system 3 43.
Page 13 of 217

In brief11
1Side air vents .....................119
2 Fixed air vents .................... 120
3 High beam .......................... 106
Headlight flash ...................106
Turn and lane-change
signals ................................ 108
Exit lighting ......................... 112
Parking lights .....................109
Cruise control ....................... 90
4 Remote control on
steering wheel ......................72
Trip computer .....................100
5 Horn ..................................... 73
6 Instruments .......................... 79
7 Windscreen wiper and
washer system, headlight
washer system .....................73
Rear window wiper and
washer system .....................758Info-Display .......................... 93
Check control, tyre
pressure monitoring
system ................................ 176
Trip computer .....................100
9 Centre air vents .................. 119
10 Hazard warning flashers ....107
Parking assist ..................... 141
Electronic Stability Control . 137
Descent control system ...... 138
Status LED for anti-theft
alarm system ........................ 24
Folding exterior mirrors ........27
Eco button for stop/start
system ................................. 124
11 Infotainment system .............10
12 Front passenger airbag ........46
13 Status LEDs for front
passenger airbag .................48
Control indicator for front
passenger seat belt .............41
14 Glovebox .............................. 5515Fuse box ............................ 170
16 Climate control system ....... 114
17 Ignition switch with
steering wheel lock ............123
18 Accelerator pedal ...............122
19 Driver airbag ........................ 46
20 Brake pedal ........................ 135
21 Clutch pedal ....................... 122
22 Steering wheel adjustment ..72
23 Bonnet release ...................152
24 Coin storage ......................... 56
25 Card holder .......................... 56
26 Light switch ........................ 105
Automatic light control .......105
Instrument illumination .......110
Rear fog light ...................... 109
Front fog lights ...................108
Headlight range
adjustment ......................... 106
Page 35 of 217

Seats, restraints33Seats, restraintsHead restraints............................ 33
Front seats ................................... 34
Rear seats ................................... 38
Seat belts ..................................... 40
Airbag system .............................. 43
Child restraints ............................. 50Head restraints
Position9 Warning
Only drive with the head restraint
set to the proper position.
The upper edge of the head restraint
should be at upper head level. If this
is not possible for extremely tall
people, set to highest position, and
set to lowest position for small people.
Height adjustment
Press release button, adjust height
and engage.
Pull head restraint up to raise. Push
head restraint down while pressing
the release button to lower the head
restraint.
Removal
Insert a suitable tool into the small
hole in the side of the guide sleeve
without the release button and
depress the lock. Press the release
button on the other guide sleeve and
pull up the head restraint.
Page 37 of 217

Seats, restraints35Seat adjustment9Danger
Do not sit nearer than 25 cm from
the steering wheel, to permit safe
airbag deployment.
9 Warning
Never adjust seats while driving as
they could move uncontrollably.
9 Warning
Never store any objects under the
seats.
Drive only with engaged seats andbackrests.
Seat positioning
Pull handle, slide seat, release
handle.
Seat backrests
Pull lever, adjust inclination and
release lever. Allow the backrest to
engage audibly.
Do not lean on the seat backrest
whilst adjusting it.
Page 39 of 217

Seats, restraints37
Slide seat forwards.
To return the backrest to its original position, slide seat as far back as it
will go, lift release lever, move the
backrest to upright position, lower
lever and the backrest engages.
Folding the backrest forwards is
possible only when the backrest is in
an upright position.
Do not operate lever to adjust lumbar support with backrest tilted forward.
Power seat adjustment9 Warning
Care must be taken when
operating the power seats. There
is a risk of injury, particularly for
children. Articles could become
trapped.
Keep a close watch on the seats
when adjusting them. Vehicle
passengers should be informed
accordingly.
Seat lengthwise position
Move front switch forwards/
backwards.
Seat height
Move front of switch upwards/
downwards to adjust height of front
part of seat cushion.
Move rear of switch upwards/
downwards to adjust height of rear
part of seat cushion.
Move front and rear of switch
upwards/downwards to adjust height
of entire seat cushion.
Seat backrests
Move upper part of rear switch
forwards/backwards.
The seat backrest must not be tilted
back too far (recommended
maximum tilting angle approx. 25°).
Page 43 of 217

Seats, restraints41
pretensioners. Do not make any
modifications to belt pretensioner components as this will invalidate
the vehicle type approval.
Three-point seat belt
Fastening
Withdraw the belt from the retractor,
guide it untwisted across the body
and insert the latch plate into the
buckle. Tighten the lap belt regularly
whilst driving by pulling the shoulder
belt.
Seat belt reminder X 3 83.
Loose or bulky clothing prevents the
belt from fitting snugly. Do not place
objects such as handbags or mobile
phones between the belt and your body.
9 Warning
The belt must not rest against hard
or fragile objects in the pockets of
your clothing.
Height adjustment
1. Squeeze release buttons together.
2. Slide adjuster up or down.
3. Ensure adjuster latches into position.
Page 53 of 217

Seats, restraints51Child restraint installation locationsPermissible options for fitting a child restraint system
Weight and age class
On front passenger seat
On rear outboard seatsOn rear centre seat
activated airbagdeactivated airbagGroup 0: up to 10 kg
or approx. 10 monthsXU 1U,
or approx. 6 to 12 yearsXXUX1=Child restraint system must be secured using a three-point seat belt. Move seat height adjustment to uppermost
position and ensure that vehicle seat belt runs forwards from the upper anchorage point. Adjust seat backrest
inclination as far as necessary to a vertical position to ensure that the belt is tight on the buckle side.<=Vehicle seat with ISOFIX mounting available. When mounting with ISOFIX, only ISOFIX child restraint systems that
have been approved for the vehicle may be used.U=Universal suitability in conjunction with three-point seat belt.X=No child restraint system permitted in this weight and age class.
Page 109 of 217

Lighting107
Vehicles without automatic level
control system
Turn thumb wheel ? to required
position:0=front seats occupied1=all seats occupied2=all seats occupied and load
compartment laden3=driver's seat occupied and load
compartment laden
Vehicles with automatic level control
system
Turn thumb wheel to required
position:
0=front seats occupied1=all seats occupied1=all seats occupied and load
compartment laden2=driver's seat occupied and load
compartment laden
Automatic level control 3 139.
Automatic headlight range
adjustment On vehicles with Xenon headlights,
the headlight range is adjusted
automatically based on vehicle load.
If control indicator q illuminates in the
instrument cluster while driving, a
fault has occurred. Have the cause of
the fault remedied immediately by a
workshop.
Control indicator q 3 89.
Headlights when driving
abroad
The asymmetrical headlight beam
extends visibility at the edge of the
road on the passenger side.
However, when driving in countries
where traffic drives on the opposite
side of the road, have the headlights adjusted to prevent dazzling of
oncoming traffic. Seek the assistance
of a workshop.
Daytime running lights
Daytime running lights increase
visibility of the vehicle during daylight.
They are switched on automatically
when ignition is on.
Automatic light control 3 105.Hazard warning flashers
Operated with the ¨ button.
In the event of an accident with airbag
deployment the hazard warning
flashers are activated automatically.