E brake VAUXHALL ANTARA 2014 Owner's Manual
[x] Cancel search | Manufacturer: VAUXHALL, Model Year: 2014, Model line: ANTARA, Model: VAUXHALL ANTARA 2014Pages: 217, PDF Size: 5.94 MB
Page 13 of 217

In brief11
1Side air vents .....................119
2 Fixed air vents .................... 120
3 High beam .......................... 106
Headlight flash ...................106
Turn and lane-change
signals ................................ 108
Exit lighting ......................... 112
Parking lights .....................109
Cruise control ....................... 90
4 Remote control on
steering wheel ......................72
Trip computer .....................100
5 Horn ..................................... 73
6 Instruments .......................... 79
7 Windscreen wiper and
washer system, headlight
washer system .....................73
Rear window wiper and
washer system .....................758Info-Display .......................... 93
Check control, tyre
pressure monitoring
system ................................ 176
Trip computer .....................100
9 Centre air vents .................. 119
10 Hazard warning flashers ....107
Parking assist ..................... 141
Electronic Stability Control . 137
Descent control system ...... 138
Status LED for anti-theft
alarm system ........................ 24
Folding exterior mirrors ........27
Eco button for stop/start
system ................................. 124
11 Infotainment system .............10
12 Front passenger airbag ........46
13 Status LEDs for front
passenger airbag .................48
Control indicator for front
passenger seat belt .............41
14 Glovebox .............................. 5515Fuse box ............................ 170
16 Climate control system ....... 114
17 Ignition switch with
steering wheel lock ............123
18 Accelerator pedal ...............122
19 Driver airbag ........................ 46
20 Brake pedal ........................ 135
21 Clutch pedal ....................... 122
22 Steering wheel adjustment ..72
23 Bonnet release ...................152
24 Coin storage ......................... 56
25 Card holder .......................... 56
26 Light switch ........................ 105
Automatic light control .......105
Instrument illumination .......110
Rear fog light ...................... 109
Front fog lights ...................108
Headlight range
adjustment ......................... 106
Page 18 of 217
![VAUXHALL ANTARA 2014 Owners Manual 16In brief
Automatic transmissionP=parkR=reverseN=neutralD=drive
Manual mode: move selector lever
from D to the left.
<=higher gear]=lower gear
The selector lever can only be moved
out of P when the VAUXHALL ANTARA 2014 Owners Manual 16In brief
Automatic transmissionP=parkR=reverseN=neutralD=drive
Manual mode: move selector lever
from D to the left.
<=higher gear]=lower gear
The selector lever can only be moved
out of P when the](/img/38/19316/w960_19316-17.png)
16In brief
Automatic transmissionP=parkR=reverseN=neutralD=drive
Manual mode: move selector lever
from D to the left.
<=higher gear]=lower gear
The selector lever can only be moved
out of P when the ignition is on and
the foot brake is applied. To engage
P or R, push the release button.
Automatic transmission 3 128.
Starting off
Check before starting off ■ Tyre pressure and condition 3 176,
3 207.
■ Engine oil level and fluid levels 3 152.
■ All windows, mirrors, exterior lighting and number plates are free
from dirt, snow and ice and are
operational.
■ Proper position of mirrors, seats, and seat belts 3 27, 3 34,
3 41.
■ Brake function at low speed, particularly if the brakes are wet.Starting the engine
■ Turn key to position ACC
■ move the steering wheel slightly to release the steering wheel lock
■ manual transmission in neutral
■ operate clutch and brake pedals ■ automatic transmission in P or N
■ do not accelerate
■ diesel engines: turn key to ON for
preheating and wait until control
indicator ! extinguishes
■ turn key to START and release
Starting the engine 3 123.
Page 19 of 217
In brief17
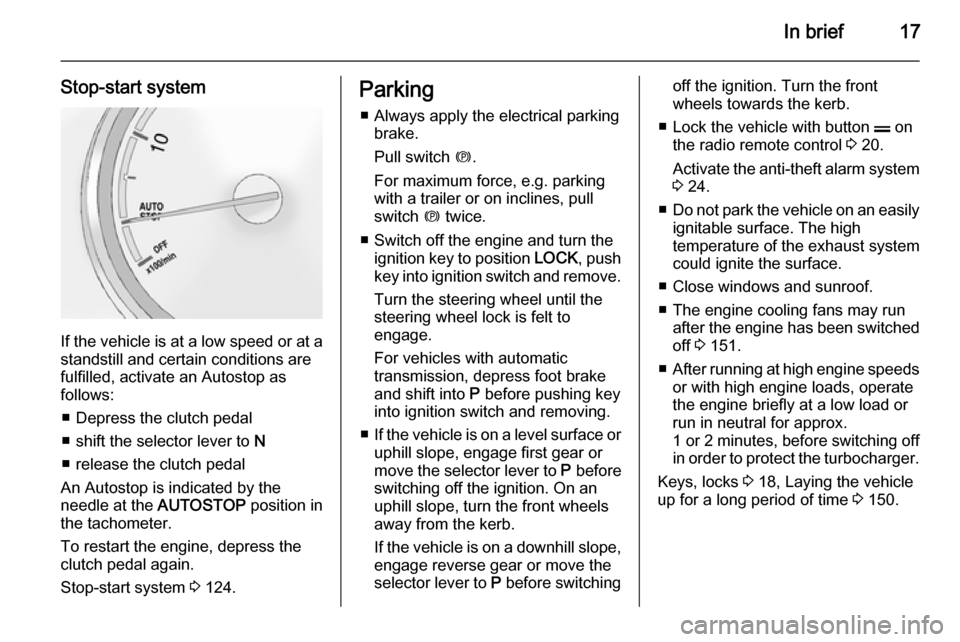
Stop-start system
If the vehicle is at a low speed or at astandstill and certain conditions are
fulfilled, activate an Autostop as
follows:
■ Depress the clutch pedal
■ shift the selector lever to N
■ release the clutch pedal
An Autostop is indicated by the
needle at the AUTOSTOP position in
the tachometer.
To restart the engine, depress the
clutch pedal again.
Stop-start system 3 124.
Parking
■ Always apply the electrical parking brake.
Pull switch m.
For maximum force, e.g. parking with a trailer or on inclines, pull
switch m twice.
■ Switch off the engine and turn the ignition key to position LOCK, push
key into ignition switch and remove.
Turn the steering wheel until the
steering wheel lock is felt to
engage.
For vehicles with automatic
transmission, depress foot brake
and shift into P before pushing key
into ignition switch and removing.
■ If the vehicle is on a level surface or
uphill slope, engage first gear or
move the selector lever to P before
switching off the ignition. On an
uphill slope, turn the front wheels
away from the kerb.
If the vehicle is on a downhill slope,
engage reverse gear or move the
selector lever to P before switchingoff the ignition. Turn the front
wheels towards the kerb.
■ Lock the vehicle with button p on
the radio remote control 3 20.
Activate the anti-theft alarm system
3 24.
■ Do not park the vehicle on an easily
ignitable surface. The high
temperature of the exhaust system
could ignite the surface.
■ Close windows and sunroof.
■ The engine cooling fans may run after the engine has been switched
off 3 151.
■ After running at high engine speeds
or with high engine loads, operate the engine briefly at a low load or
run in neutral for approx.
1 or 2 minutes, before switching off in order to protect the turbocharger.
Keys, locks 3 18, Laying the vehicle
up for a long period of time 3 150.
Page 23 of 217
Keys, doors and windows21
Notice
For safety reasons, the vehicle
cannot be locked or unlocked via the remote control (and the anti-theft
systems will not be activated) if the
key is in the ignition switch.
If the driver's door is not closed
properly, the central locking system
will not work.
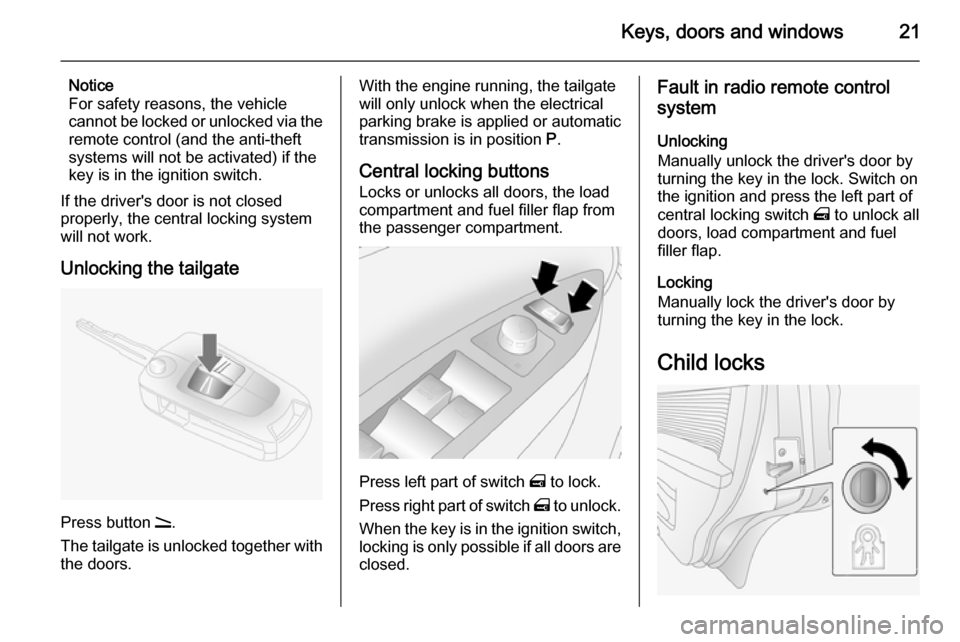
Unlocking the tailgate
Press button q.
The tailgate is unlocked together with the doors.
With the engine running, the tailgate
will only unlock when the electrical
parking brake is applied or automatic
transmission is in position P.
Central locking buttons Locks or unlocks all doors, the load
compartment and fuel filler flap from
the passenger compartment.
Press left part of switch m to lock.
Press right part of switch m to unlock.
When the key is in the ignition switch,
locking is only possible if all doors are closed.
Fault in radio remote control
system
Unlocking
Manually unlock the driver's door by
turning the key in the lock. Switch on
the ignition and press the left part of
central locking switch m to unlock all
doors, load compartment and fuel
filler flap.
Locking
Manually lock the driver's door by
turning the key in the lock.
Child locks
Page 36 of 217

34Seats, restraints
Stow head restraints securely in load
compartment.
Active head restraintsIn the event of a rear-end impact, the
active head restraints automatically
tilt forwards. Thus the head is
supported so that the risk of whiplash injury is reduced.
Notice
Do not attach objects or components
that are not approved for your
vehicle to the head restraints. These
affect the protective effect of the
head restraints and can be propelled through the vehicle in an
uncontrolled manner if the driver
brakes hard or an accident occurs.
Notice
Approved accessories may only be
attached if the seat is not in use.Front seats
Seat position9 Warning
Only drive with the seat correctly
adjusted.
■ Sit with buttocks as far back against
the backrest as possible. Adjust the distance between the seat and the
pedals so that legs are slightly
angled when pressing the pedals.
Slide the front passenger seat as
far back as possible.
■ Sit with shoulders as far back against the backrest as possible.
Set the backrest rake so that it is possible to easily reach the
steering wheel with arms slightly bent. Maintain contact between
shoulders and the backrest when
turning the steering wheel. Do not
angle the backrest too far back. We recommend a maximum rake of
approximately 25°.
■ Adjust the steering wheel 3 72.
■ Set seat height high enough to have a clear field of vision on allsides and of all display instruments.
There should be at least one hand
of clearance between head and the
roof frame. Your thighs should rest
lightly on the seat without pressing
into it.
■ Adjust the head restraint 3 33.
■ Adjust the height of the seat belt 3 41.
■ Adjust the lumbar support so that it
supports the natural shape of the
spine.
Page 72 of 217
70StorageRoof rack systemRoof rack
For safety reasons and to avoid
damage to the roof, the vehicle
approved roof rack system is
recommended. For further
information contact a workshop.
Fasten the roof rack to the roof rails
following the instructions that
accompany the system, ensuring that
the roof load is evenly distributed over the side or cross rails.
Loads must not be placed on the roof surface. To prevent damage or loss,
check frequently that roof loads are
securely fastened.
Driving with a roof load affects the
vehicle centre of gravity; drive
carefully in crosswinds and do not
drive at high speeds.
Remove the roof rack when not in
use.Loading information
■ Heavy objects in the load compartment should be evenly
distributed and placed as far
forward as possible. Ensure the
backrests are securely engaged. If
objects can be stacked, the heavier
objects should be placed at the
bottom.
With rear seats in the folded
position, objects must not be
stacked higher than the seat
backrests.
■ Secure objects with lashing straps attached to lashing eyes 3 69.
■ Secure loose objects in the load compartment, e.g. with a luggage
floor net, to prevent sliding.
■ When transporting objects in the load compartment, the backrests of
the rear seats must not be angled
forward.
■ Do not allow the load to protrude above the upper edge of the
backrests.■ Do not place any objects on the load compartment cover or the
instrument panel, and do not cover
the sensor on top of the instrument panel.
■ The load must not obstruct the operation of the pedals, electrical
parking brake and gear selector, or hinder the freedom of movement ofthe driver. Do not place any
unsecured objects in the interior.
■ Do not drive with an open load compartment.9 Warning
Always make sure that the load in
the vehicle is securely stowed.
Otherwise objects can be thrown
around inside the vehicle and
cause personal injury or damage
to the load or car.
■ The payload is the difference between the permitted gross
vehicle weight (see identification
plate 3 198) and the EC kerb
weight.
Page 85 of 217

Instruments and controls83Turn signalO illuminates or flashes green.
The relevant control indicator flashes
when the turn signal is switched on
3 108.
Rapid flashing: failure of a turn signal
bulb or the associated fuse or failure
of a turn signal light on trailer.
Both control indicators flash when the
hazard warning flashers are active
3 107.
Bulb replacement 3 159, Fuses
3 165.
Turn signals 3 108.
Seat belt reminder Seat belt reminder for frontseats X for driver's seat illuminates or
flashes red.
k for front passenger's seat
illuminates or flashes red, when the
seat is occupied.When the engine is running, if seat
belt is not engaged, the control
indicator will flash for 100 seconds
then illuminate until seat belt is
fastened.
If vehicle speed exceeds 14 mph, the
control indicator will flash for
100 seconds along with a warning
chime and remains illuminated until seat belt is fastened.
Fastening the seat belt 3 40.
Front passenger seat belt reminder k
3 41.
Airbag and belt tensioners
v illuminates red.
When the ignition is switched on, v
flashes briefly. If it does not flash, stays lit or flashes during driving,
there is a fault in the airbag system.
Seek the assistance of a workshop.
The airbags and belt pretensioners
may fail to trigger in the event of an
accident.
Deployment of the belt pretensioners or airbags is indicated by continuous
illumination of v.9
Warning
Have the cause of the fault
remedied immediately by a
workshop.
Belt pretensioners, airbag system
3 40, 3 43.
Charging system
p illuminates red.
Illuminates when the ignition is
switched on and extinguishes shortly
after the engine starts. If it does not
illuminate, seek the assistance of a
workshop.
Illuminates when the engine is running
Stop vehicle and switch off engine.
Battery is not charging. Engine
cooling may be interrupted. The
brake servo unit may cease to be
effective.
Page 86 of 217

84Instruments and controls
Interrupt your journey immediately.
Remove key and check drive belt
condition and tensioning before
seeking the assistance of a
workshop.
Malfunction indicator light
Z illuminates or flashes yellow.
Illuminates when the ignition is
switched on and extinguishes shortly
after the engine starts. If it does not
illuminate, seek the assistance of a
workshop.
Can illuminate briefly when driving;
this is normal and does not indicate a system fault.
Illuminates when the engine is
running
Fault in the emission control system. The permitted emission limits may be exceeded. Fuel economy and vehicle
driveability may be impaired. Seek
the assistance of a workshop
immediately.Control indicator Z also illuminates if
there is a fault in the diesel particle
filter 3 127 or with the automatic
transmission 3 131. Seek the
assistance of a workshop as soon as
possible.
Ensure the fuel filler cap is screwed in completely 3 144.
Flashes when the engine is
running
Fault that could lead to catalytic
converter damage 3 128 . Ease up on
the accelerator until the flashing
stops. Seek the assistance of a
workshop immediately.
Service vehicle soon
g illuminates yellow.
Illuminates when the engine is
running to indicate a fault in the
engine or transmission electronics. The electronics switch to an
emergency running programme, fuel
consumption may be increased and
vehicle handling may be impaired.In some cases, the fault can be
eliminated by switching the engine off and back on again. If g illuminates
again after restarting the engine, the
vehicle may need a service.
Have the cause of the fault eliminated
by a workshop.
Brake system R illuminates red.
Illuminates when the ignition is switched on and extinguishes shortly
after the engine starts. If it does not
illuminate, stop and seek the
assistance of a workshop.
If it stays lit while the engine is
running, the brakes do not operate as
normal, or leaks are found in the
brake system, do not attempt to drive
the vehicle. Have the vehicle towed to a workshop for inspection and repair.9 Warning
Stop. Do not continue your
journey. Consult a workshop.
Page 87 of 217
Instruments and controls85
Illuminates when engine is running if
fluid level for brake hydraulics is too
low 3 155.
Brake system 3 135.
Electrical parking brake
m illuminates or flashes red.
When the engine is started, m
illuminates briefly. If it does not
illuminate, seek the assistance of a
workshop.
Illuminates Electrical parking brake is applied3 136.
Flashes Electrical parking brake is not fully
applied or released.
Switch on ignition, depress brake
pedal and attempt to reset the system
by first releasing and then re-applying the electrical parking brake.
If m remains flashing, do not drive
and seek the assistance of a
workshop.Electrical parking brake
fault
j illuminates yellow.
When the ignition is switched on, j
illuminates briefly. If it does not
illuminate, seek the assistance of a
workshop.
Illuminates
Electrical parking brake is operating
with degraded performance 3 136.9 Warning
Have the cause of the fault
remedied immediately by a
workshop.
Antilock brake system
(ABS) u illuminates yellow.
The system is ready for operation
when the control indicator
extinguishes.
If the control indicator does not
illuminate when the ignition is
switched on, stays lit or illuminates
during driving, there is a fault in the
ABS. The brake system remains
operational but without ABS
regulation.
If control indicator u illuminates
during driving along with brake
system control indicator R, there is a
serious fault in the brake system.
Have the system checked
immediately by a workshop.
Antilock brake system 3 135.
Upshift [ illuminates green.
Upshifting is recommended for fuel
saving purposes.
All wheel drive B illuminates or flashes yellow.
Illuminates briefly when the ignition is
switched on. If it does not illuminate,
seek the assistance of a workshop.
Page 89 of 217
Instruments and controls87
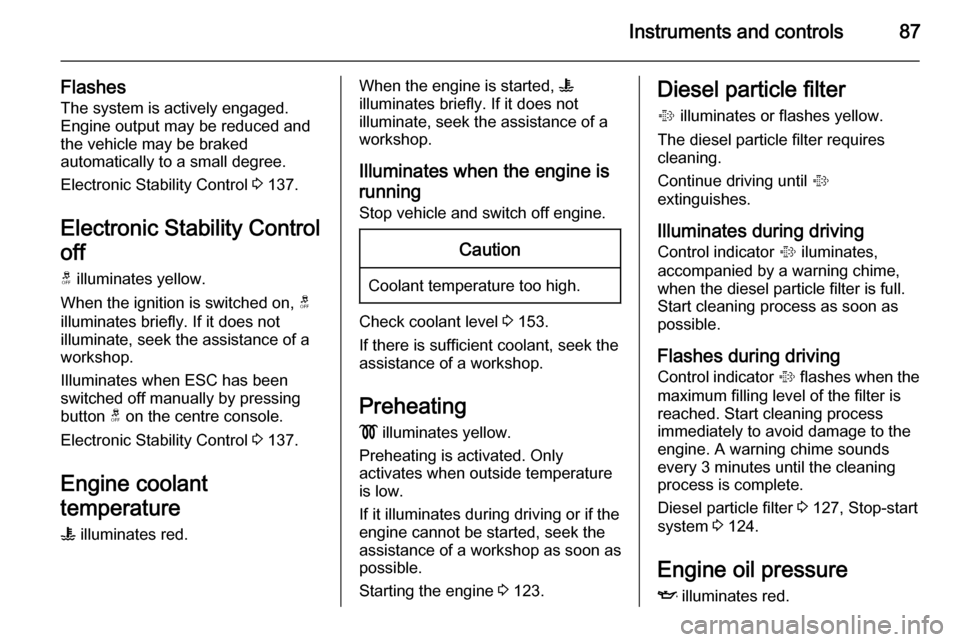
FlashesThe system is actively engaged.
Engine output may be reduced and
the vehicle may be braked
automatically to a small degree.
Electronic Stability Control 3 137.
Electronic Stability Control off
t illuminates yellow.
When the ignition is switched on, t
illuminates briefly. If it does not
illuminate, seek the assistance of a
workshop.
Illuminates when ESC has been
switched off manually by pressing
button t on the centre console.
Electronic Stability Control 3 137.
Engine coolant
temperature W illuminates red.When the engine is started, W
illuminates briefly. If it does not
illuminate, seek the assistance of a
workshop.
Illuminates when the engine is running
Stop vehicle and switch off engine.Caution
Coolant temperature too high.
Check coolant level 3 153.
If there is sufficient coolant, seek the
assistance of a workshop.
Preheating ! illuminates yellow.
Preheating is activated. Only
activates when outside temperature
is low.
If it illuminates during driving or if the
engine cannot be started, seek the
assistance of a workshop as soon as
possible.
Starting the engine 3 123.
Diesel particle filter
% illuminates or flashes yellow.
The diesel particle filter requires
cleaning.
Continue driving until %
extinguishes.
Illuminates during driving
Control indicator % iluminates,
accompanied by a warning chime,
when the diesel particle filter is full.
Start cleaning process as soon as
possible.
Flashes during drivingControl indicator % flashes when the
maximum filling level of the filter is
reached. Start cleaning process
immediately to avoid damage to the
engine. A warning chime sounds
every 3 minutes until the cleaning
process is complete.
Diesel particle filter 3 127, Stop-start
system 3 124.
Engine oil pressure I illuminates red.