ESP VAUXHALL ANTARA 2015 Infotainment system
[x] Cancel search | Manufacturer: VAUXHALL, Model Year: 2015, Model line: ANTARA, Model: VAUXHALL ANTARA 2015Pages: 151, PDF Size: 2.82 MB
Page 107 of 151
Radio107
The frequency last tuned into is
displayed.
Turn the multifunction knob until the
exact frequency is reached.
You will hear the newly tuned-in
station.
Press the multifunction knob.
The radio menu is displayed.
The newly tuned-in station is
displayed.
Station memory
Separate memory slots are available
for each wavelength (FM, AM, DAB):
9 memory slots are available for each of the following wavelength:
FM, FM-AS (automatically stored FM
stations), AM, AM-AS (automatically
stored AM stations), DAB and DAB-
AS (automatically stored digital
stations).
The memory slots can be selected
directly in the respective wavelength
via the station buttons or via the list of
stations.Manual Storing
To store stations manually, the radio
needs to be in normal mode (not AS
mode).
RDS on or RDS off are stored
together with the station.
Two options are available for manual
station storing:
Tune in to the desired station.
Keep the station button pressed on
which the tuned-in station is to be
stored.
The radio is muted for a short while
and displays the station previously
stored in the memory slot.
The station tuned-in is audible again
and is displayed.
The station is stored in the desired
memory slot.
Or:
In the radio menu set the station
required.
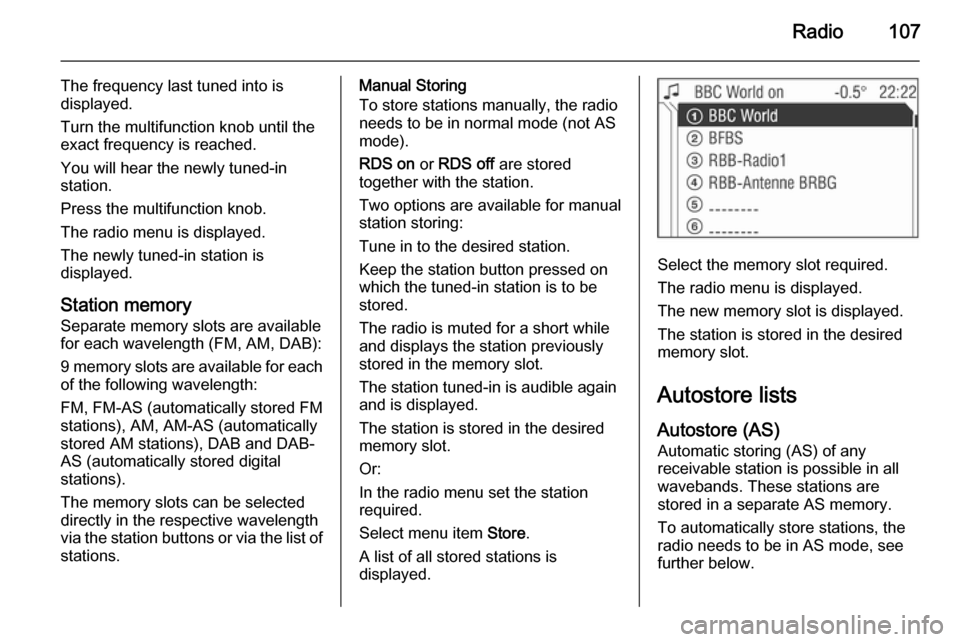
Select menu item Store.
A list of all stored stations is
displayed.
Select the memory slot required.
The radio menu is displayed.
The new memory slot is displayed.
The station is stored in the desired
memory slot.
Autostore lists
Autostore (AS) Automatic storing (AS) of any
receivable station is possible in all
wavebands. These stations are
stored in a separate AS memory.
To automatically store stations, the
radio needs to be in AS mode, see further below.
Page 108 of 151
108Radio
In the radio menu enable/disable on
standby for traffic announcements if
desired 3 109.
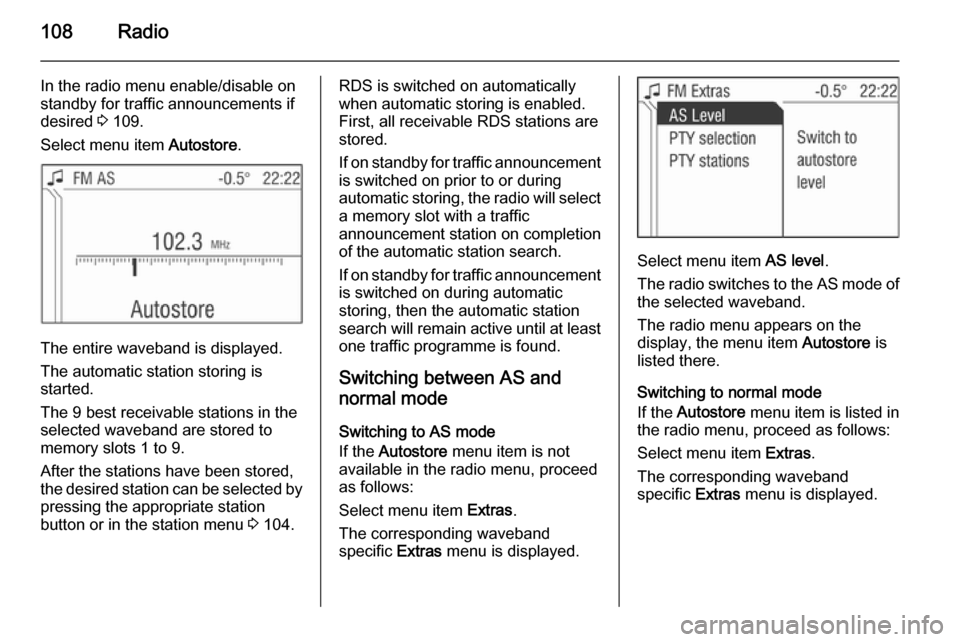
Select menu item Autostore.
The entire waveband is displayed.
The automatic station storing is
started.
The 9 best receivable stations in the selected waveband are stored to
memory slots 1 to 9.
After the stations have been stored,
the desired station can be selected by pressing the appropriate station
button or in the station menu 3 104.
RDS is switched on automatically
when automatic storing is enabled.
First, all receivable RDS stations are
stored.
If on standby for traffic announcement
is switched on prior to or during
automatic storing, the radio will select a memory slot with a traffic
announcement station on completion
of the automatic station search.
If on standby for traffic announcement is switched on during automatic
storing, then the automatic station
search will remain active until at least one traffic programme is found.
Switching between AS and
normal mode
Switching to AS mode
If the Autostore menu item is not
available in the radio menu, proceed
as follows:
Select menu item Extras.
The corresponding waveband
specific Extras menu is displayed.
Select menu item AS level.
The radio switches to the AS mode of the selected waveband.
The radio menu appears on the
display, the menu item Autostore is
listed there.
Switching to normal mode
If the Autostore menu item is listed in
the radio menu, proceed as follows:
Select menu item Extras.
The corresponding waveband
specific Extras menu is displayed.
Page 110 of 151
110Radio
Switching RDS on/off
If you switch RDS on, the RDS
functions are enabled and only RDS stations are sought during the
automatic station search.
If you switch RDS off, the RDS
functions will be disabled and the
automatic station search will not only
look for RDS stations.
Select menu item RDS.
Select the option field On or Off.
If the RDS function is switched on, the
programme name of an RDS station
is displayed.
If the RDS function is not switched on, the frequency of an RDS station is
displayed.
Automatic RDS
Use this function to ensure that the
RDS function is enabled even when
RDS is disabled. However, the
automatic station search will also
respond to non-RDS stations.
This function is only applied if RDS is switched off.
Select menu item RDS.Enable/disable the Automatic tick
box.
Programme type (PTY)
Many RDS stations transmit a PTY
code describing the type of
programme broadcast (e. g. news).
The PTY code allows selection of
stations by programme type.
■ Programme type and station selection is only possible in the FMwaveband.
■ This function is set in the radio menu.
Programme type selection
You are listening to the station last
tuned in.
Select menu item Extras.
Select menu item PTY selection.
Several programme types such as
e. g. News or Sport are available.
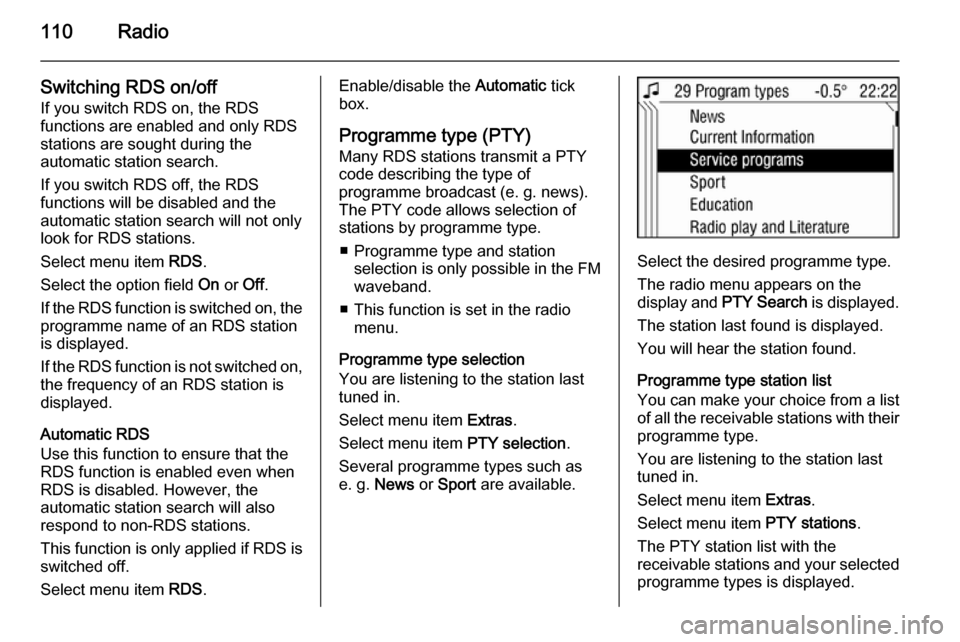
Select the desired programme type.
The radio menu appears on the
display and PTY Search is displayed.
The station last found is displayed.
You will hear the station found.
Programme type station list
You can make your choice from a list
of all the receivable stations with their programme type.
You are listening to the station last
tuned in.
Select menu item Extras.
Select menu item PTY stations.
The PTY station list with the
receivable stations and your selected
programme types is displayed.
Page 114 of 151
114Radio
Press the rocker switch c or d.
The previous or next occupied
memory level appears briefly on the
display.
After that the ensemble stored on the
memory level and its first available
programme are displayed.
The first available programme of the
ensemble is played.
Selecting an ensemble
You can select ensembles directly
which you have already received
once (the ensemble must be
receivable).
This function is set in the radio menu.
Select the arrow next to the ensemble
name.
Select the desired ensemble.
The radio menu is displayed.
The desired ensemble and its first
available programme are displayed.
The first available programme of the
ensemble is played.Automatic ensemble search
Keep rocker switch c or d pressed
until the ensemble search starts.
The radio is muted until an ensemble
is found.
The first available programme of the
ensemble is played.
Or:
This function is set in the radio menu. Select the arrow next to the ensemble
name.
Select menu item Search available
ensembles .
The DAB Ensemble menu is
displayed.
The entire waveband is displayed.
The automatic ensemble search
starts.
After going through the wavelength,
the system changes back to the
ensemble list.
You will hear the program available
from the first ensemble. This is
marked with an arrow.DAB menu
DAB menu functions are set in the
radio menu.
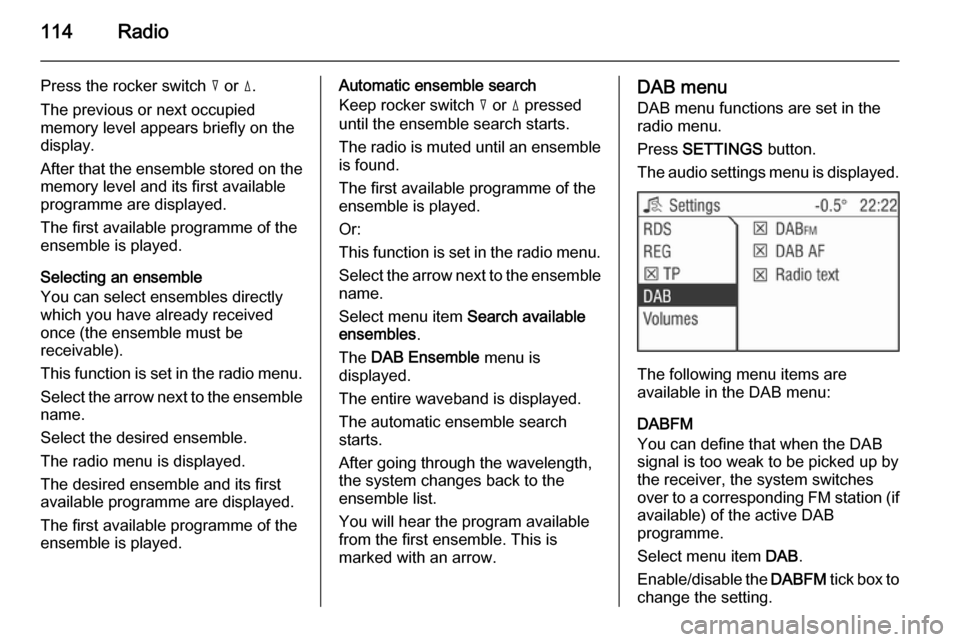
Press SETTINGS button.
The audio settings menu is displayed.
The following menu items are
available in the DAB menu:
DABFM
You can define that when the DAB
signal is too weak to be picked up by the receiver, the system switches
over to a corresponding FM station (if
available) of the active DAB
programme.
Select menu item DAB.
Enable/disable the DABFM tick box to
change the setting.
Page 116 of 151
116CD PlayerCD PlayerGeneral information...................116
Usage ........................................ 117General information
You can play standard commercial
CDs with a diameter of 12 cm with this unit. CDs with a diameter of 8 cm can only be played with an adapter.Caution
Under no circumstances place
DVDs, single-CDs with a diameter
of 8 cm or shaped CDs in the audio
player.
You must not put any stickers on
CDs. These discs can get jammed
in the CD drive and ruin the drive.
An expensive replacement of the
device will then be necessary.
■ The format of the CD must be ISO 9660 Level 1, Level 2 or
JOLIET. All other formats cannot be played back reliably.
■ Audio CDs with copy protection, which are not in compliance with
the audio CD standard, may not
play correctly or not at all.
■ You can also use the Infotainment system to play CDs containing MP3
music data and Mixed Mode CDs.
■ Self-recorded CD-Rs and CD-RWs
are more vulnerable to mishandling
than prerecorded CDs. Correct
handling, especially in the case of
self-recorded CD-Rs and CD-RWs, must be ensured. See below.
■ Self-recorded CD-Rs and CD-RWs
may not play correctly or not at all.
In such cases it is not the
equipment that is at fault.
■ Avoid leaving fingerprints when you
change CDs.
■ Put CDs back in their sleeves immediately after removing them
from the CD player in order to
protect them from damage and dirt.
■ Dirt and liquids on CDs can smear the lens of the CD player inside the
device and cause faults.
■ Protect CDs from heat and direct sunlight.
■ The following restrictions apply for data stored on an MP3 CD:
Page 119 of 151

CD Player119
MP3 CD:
If there are 5 or fewer albums on an
MP3 CD, 4 tracks per album are
played in random order. If there are
more than 5 albums on the MP3 CD, 1 track respectively is played per
album.
Mixed Mode CD:
On a Mixed Mode CD, the tracks from
the audio part are played first in
random order. Then the tracks from
the MP3 part are played as described above.Switching on Random CD
Select the Random CD option field.
The g symbol appears in the
display.
Repeat Track
The CD player repeats the current
track using the Repeat function.
Switching on Repeat Track
A track will be played.
Hold down the rocker switch c until
the i symbol appears in the display.
Repeat On appears in the display for
a few seconds.This track will be repeated constantly.
Or:
Select the Repeat Track option field.
The i symbol appears in the
display.
This track will be repeated constantly.Switching off Repeat Track
Hold down the rocker switch c until
the i symbol is no longer displayed.
Repeat Off appears in the display for
a few seconds.
Or:
Select a new track.
Or:
Select the Normal option field.
The i symbol is no longer displayed.
Scan CD
With the Scan CD function, the CD
changer plays each track for 10
seconds.
Switching on Scan CD
A track will be played.
Hold down the rocker switch d until
the k symbol appears in the display.Or:
Select the Scan CD option field.
The k symbol appears in the display.Switching off Scan CD
Hold down the rocker switch d until
the 6⃒ symbol is no longer displayed.
Or:
Select a new track.
Or:
Select the Normal option field.
The CD menu appears in the display.
The k symbol is no longer displayed.
Activating/deactivating CD text
Different information can be
displayed depending on whether CD
text is activated or deactivated.
Activated=CD name
Track name
Artist name
Album nameDeactivated=Track number
Album name
Playing time
Page 136 of 151

136Introduction
3. Deactivate Connect.
The message Disconnected!
appears followed once again by
the Bluetooth ™ menu.
4. Select Remove.
The message Removed! appears
followed once again by the
Bluetooth ™ menu.
UHP visible Activating this function enables the
mobile telephone portal to be
detected by other Bluetooth™
devices. In this way e.g. a
Bluetooth™ connection can be
established from the mobile
telephone to the Mobile telephone portal.
1. In the Bluetooth ™ menu select
UHP visible .
The Mobile phone portal can be
seen by the other devices for the next 3 minutes.
2. Start the mobile telephone's search function for Bluetooth™
devices (see the operating
instructions for the mobile telephone).The message "Device found:
UHP" appears on the display of
the mobile telephone.
3. Start the mobile telephone's connection function (see the
operating instructions for the
mobile telephone).
4. Enter the Bluetooth PIN in the
Infotainment system).
5. Enter the "Bluetooth PIN" on the mobile telephone.
The Bluetooth™ connection has been created between the mobile
telephone and the Infotainment
system.
Freespeech
A telephone connection is active.
Move the thumbwheel.
A context menu is opened. Activate
Freespeech . The sound is sent to the
car's loudspeakers.Emergency call9 Warning
Connection setup cannot be
guaranteed in all situations. For
this reason you should not rely
exclusively on a mobile phone
when a vitally important
communication (e. g. a medical
emergency) is concerned.
In some networks it may be
necessary for a valid SIM card to
be properly inserted in the mobile
phone.
9 Warning
Bear in mind that you can make
and receive calls with the mobile
phone, if it is in a service area with
a sufficiently strong signal. Under
certain circumstances emergency
calls cannot be made on all mobile
phone networks; it is possible that
they cannot be made when certain network services and/or telephone
Page 138 of 151
138Introduction
In addition to operating using the
steering wheel remote control
system, some functions can also be
operated using a speech recognition
system 3 143.
If a connection has been created via
the telephone-specific adapter, the
functionality of the mobile telephone
can be limited (in this respect, see
instructions enclosed with the
adapter).
When a Bluetooth™ connection
exists, the functional scope of the
mobile telephone can also be limited.
Entering PIN codes
When the mobile telephone is
switched on after being slotted into
the telephone-specific adapter, the
PIN code must still be entered.
The Infotainment system is switched
on.
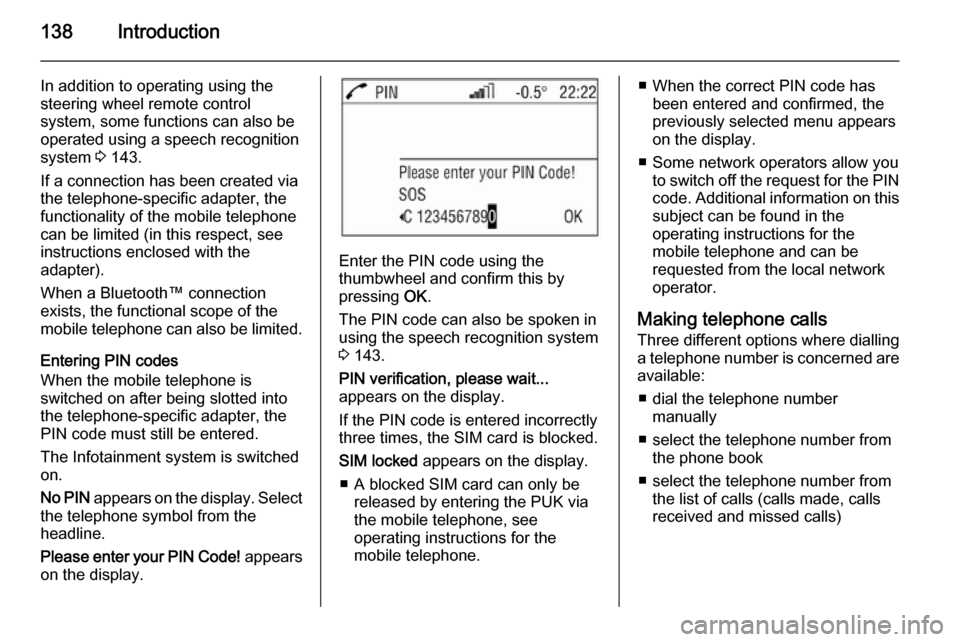
No PIN appears on the display. Select
the telephone symbol from the
headline.
Please enter your PIN Code! appears
on the display.
Enter the PIN code using the
thumbwheel and confirm this by
pressing OK.
The PIN code can also be spoken in using the speech recognition system
3 143.
PIN verification, please wait...
appears on the display.
If the PIN code is entered incorrectly
three times, the SIM card is blocked.
SIM locked appears on the display.
■ A blocked SIM card can only be released by entering the PUK via
the mobile telephone, see
operating instructions for the
mobile telephone.
■ When the correct PIN code has been entered and confirmed, the
previously selected menu appears
on the display.
■ Some network operators allow you to switch off the request for the PIN
code. Additional information on this subject can be found in the
operating instructions for the
mobile telephone and can be
requested from the local network
operator.
Making telephone calls Three different options where dialling
a telephone number is concerned are available:
■ dial the telephone number manually
■ select the telephone number from the phone book
■ select the telephone number from the list of calls (calls made, calls
received and missed calls)
Page 141 of 151
Introduction141
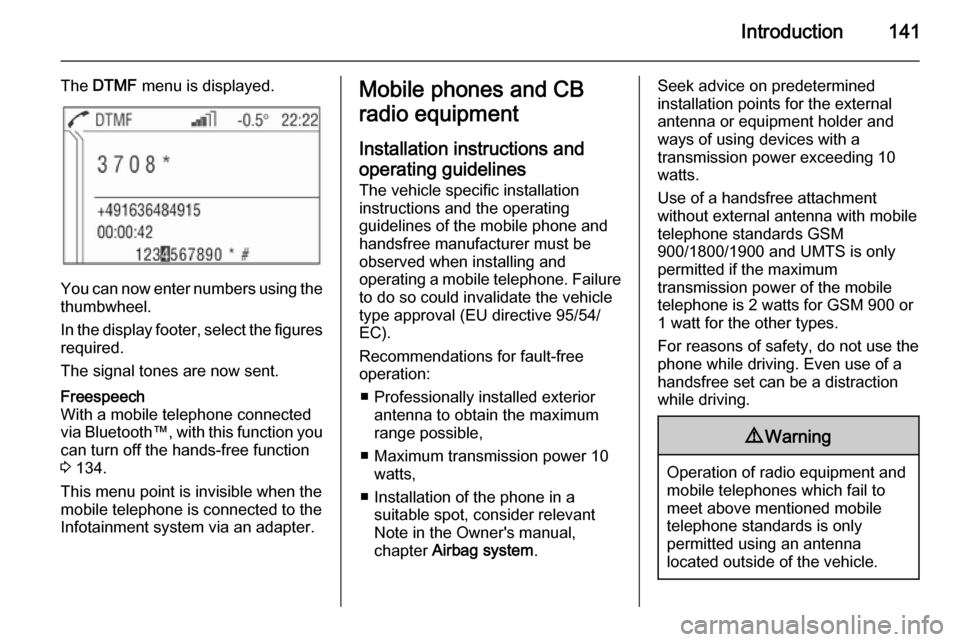
The DTMF menu is displayed.
You can now enter numbers using the
thumbwheel.
In the display footer, select the figures required.
The signal tones are now sent.
Freespeech
With a mobile telephone connected
via Bluetooth™, with this function you
can turn off the hands-free function
3 134.
This menu point is invisible when the
mobile telephone is connected to the
Infotainment system via an adapter.Mobile phones and CB
radio equipment
Installation instructions and operating guidelines The vehicle specific installation
instructions and the operating
guidelines of the mobile phone and
handsfree manufacturer must be observed when installing and
operating a mobile telephone. Failure to do so could invalidate the vehicle
type approval (EU directive 95/54/
EC).
Recommendations for fault-free
operation:
■ Professionally installed exterior antenna to obtain the maximum
range possible,
■ Maximum transmission power 10 watts,
■ Installation of the phone in a suitable spot, consider relevant
Note in the Owner's manual,
chapter Airbag system .Seek advice on predetermined
installation points for the external
antenna or equipment holder and
ways of using devices with a
transmission power exceeding 10
watts.
Use of a handsfree attachment
without external antenna with mobile
telephone standards GSM
900/1800/1900 and UMTS is only
permitted if the maximum
transmission power of the mobile
telephone is 2 watts for GSM 900 or
1 watt for the other types.
For reasons of safety, do not use the
phone while driving. Even use of a handsfree set can be a distraction
while driving.9 Warning
Operation of radio equipment and
mobile telephones which fail to
meet above mentioned mobile
telephone standards is only
permitted using an antenna
located outside of the vehicle.
Page 144 of 151

144Voice recognition
Ending the dialogue
There are various ways to deactivate
the speech recognition system and
end the dialogue:
■ By pressing q
■ Time-outs: if nothing has been input for a certain period of time
The speech recognition system is
also interrupted by an incoming call.
Operation With the aid of the speech recognition
system, the mobile telephone can be
operated very comfortably using the
voice input function. Simply activate
the speech recognition system and
say the desired command. Once the
command has been input, you will be
led through the dialogue with the
corresponding questions and
messages in order to reach the
required action.
Say the commands and digits in a
normal voice, without any artificial
pauses between the numbers.
Recognition is most successful when
you pause for at least half a second
after every three to five numbers.The Infotainment system
simultaneously reacts to commands with voice messages and displays.
SIM card If no SIM card has been inserted, the
following message appears: Please
insert a SIM card!
Once you have inserted a SIM card,
you will be asked to enter the PIN
code. For more on this, see the next
section.
PIN code
If the PIN code has not been entered, the following message appears:
Please enter the PIN code! .
Now say the PIN code in a normal
voice, without any artificial pauses
between the numbers.
The following commands are
available:
■ " Accept ": The PIN code is
confirmed.
■ " Change ": The number last entered
is deleted.■ " Delete ": The PIN code is deleted.
■ " Additional digits ": Additional
numbers can be entered.
Example of a dialogue whereby a PIN
code is entered:
Voice output: " Please enter the PIN
code! "
User: " One Two Three Four – Accept "
Voice output: " The PIN code is
incorrect! "
User: " Four Three Two One – Accept "
Voice output: " The PIN code has
been accepted "
Main commands After the speech recognition system
has been activated, you will hear a
short sound, which is a signal to
inform you that the speech
recognition system is waiting for an
input.
The following commands are
available:
■ " Call "
■ " Redial "
■ " Save "