ECU VAUXHALL ASTRA J 2015.75 User Guide
[x] Cancel search | Manufacturer: VAUXHALL, Model Year: 2015.75, Model line: ASTRA J, Model: VAUXHALL ASTRA J 2015.75Pages: 337, PDF Size: 10.17 MB
Page 75 of 337
Storage73
the attachment of electrically-
powered bicycles to the pull-out
carrier. The maximum load per
bicycle on the adapter is 20 kg.
The wheelbase of a bicycle must not
exceed 1.15 metres. Otherwise the
secure fastening of a bicycle is not
possible.
If not in use, the carrier system must
be slid back into the vehicle floor.
There must not be any objects on the bicycles that could become loose
during transportation.Caution
If the rear carrier system is
extended and the vehicle is fully
loaded, the chassis clearance will
be reduced.
Drive carefully whenever the road has a strong inclination or when
driving over a ramp, bump, etc.
Caution
Consult your bicycle dealer before
attaching bicycles with carbon
frames. The bicycles might get
damaged.
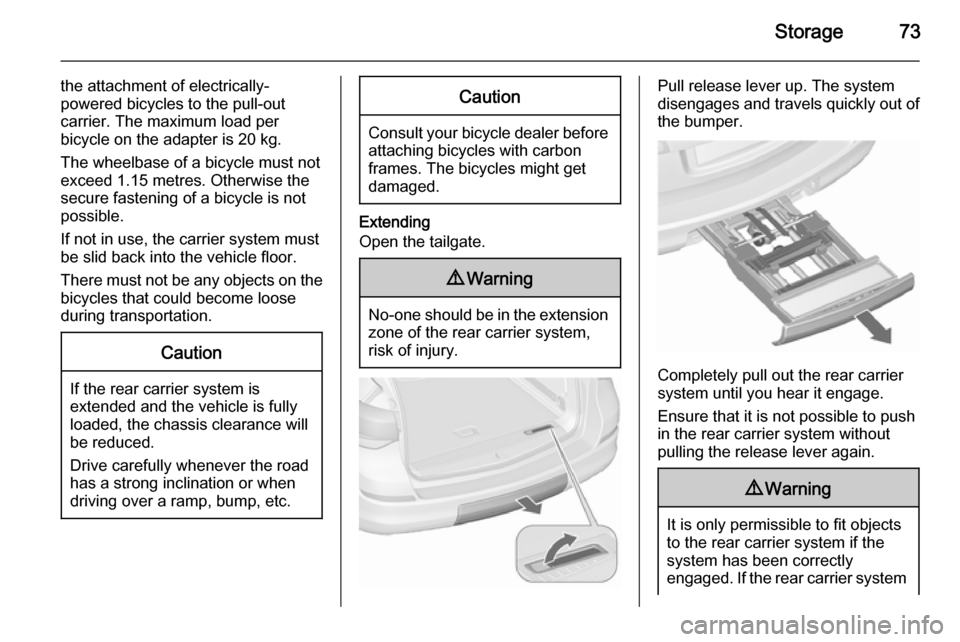
Extending
Open the tailgate.
9 Warning
No-one should be in the extension
zone of the rear carrier system,
risk of injury.
Pull release lever up. The system
disengages and travels quickly out of
the bumper.
Completely pull out the rear carrier
system until you hear it engage.
Ensure that it is not possible to push in the rear carrier system without
pulling the release lever again.
9 Warning
It is only permissible to fit objects
to the rear carrier system if the
system has been correctly
engaged. If the rear carrier system
Page 78 of 337
76Storage
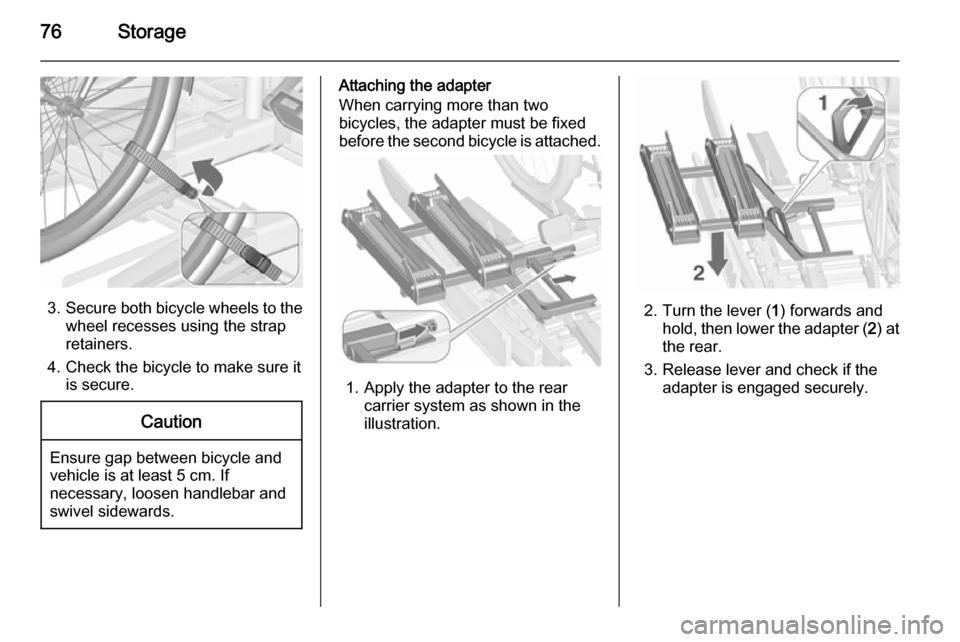
3.Secure both bicycle wheels to the
wheel recesses using the strap
retainers.
4. Check the bicycle to make sure it is secure.
Caution
Ensure gap between bicycle and
vehicle is at least 5 cm. If
necessary, loosen handlebar and swivel sidewards.
Attaching the adapter
When carrying more than two
bicycles, the adapter must be fixed
before the second bicycle is attached.
1. Apply the adapter to the rear
carrier system as shown in the
illustration.
2. Turn the lever ( 1) forwards and
hold, then lower the adapter ( 2) at
the rear.
3. Release lever and check if the adapter is engaged securely.
Page 80 of 337
78Storage
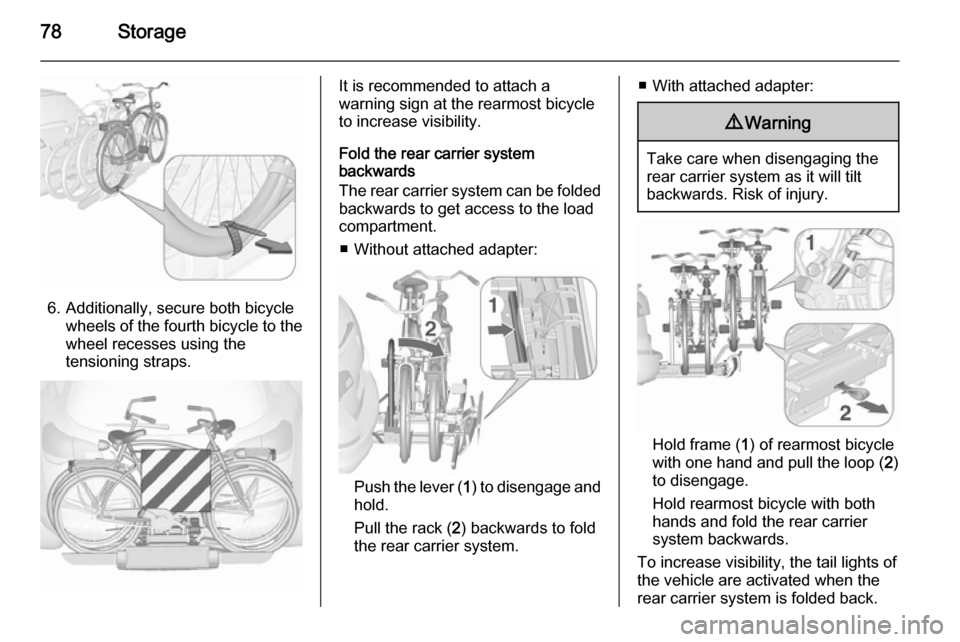
6. Additionally, secure both bicyclewheels of the fourth bicycle to the
wheel recesses using the
tensioning straps.
It is recommended to attach a
warning sign at the rearmost bicycle
to increase visibility.
Fold the rear carrier system
backwards
The rear carrier system can be folded
backwards to get access to the load
compartment.
■ Without attached adapter:
Push the lever ( 1) to disengage and
hold.
Pull the rack ( 2) backwards to fold
the rear carrier system.
■ With attached adapter:9 Warning
Take care when disengaging the
rear carrier system as it will tilt
backwards. Risk of injury.
Hold frame ( 1) of rearmost bicycle
with one hand and pull the loop ( 2)
to disengage.
Hold rearmost bicycle with both
hands and fold the rear carrier
system backwards.
To increase visibility, the tail lights of
the vehicle are activated when the
rear carrier system is folded back.
Page 81 of 337
Storage799Warning
When folding the rear carrier
system forwards again, take care that the system is engaged
securely.
Removing bicycles
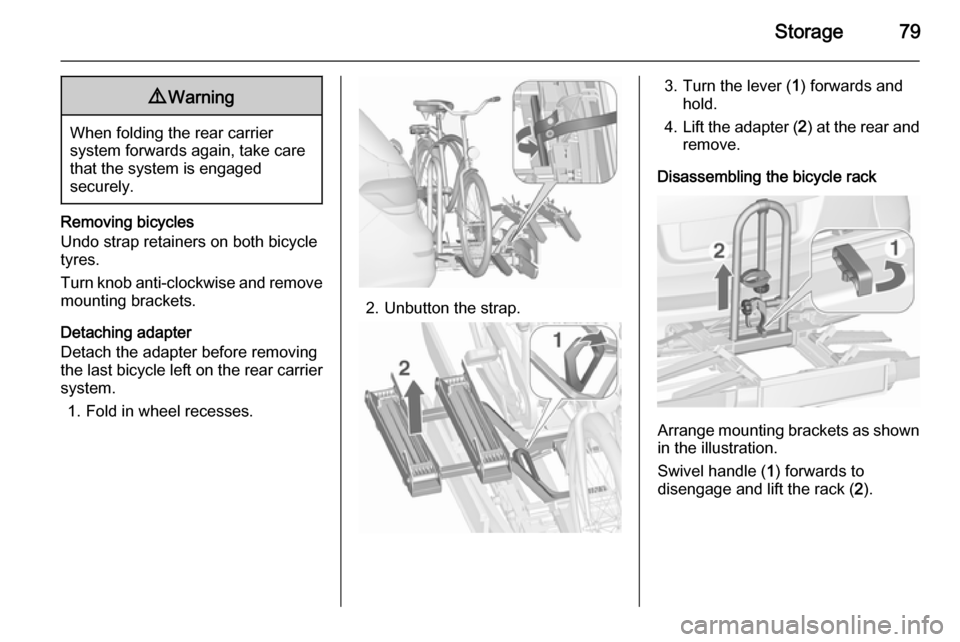
Undo strap retainers on both bicycle
tyres.
Turn knob anti-clockwise and remove
mounting brackets.
Detaching adapter
Detach the adapter before removing the last bicycle left on the rear carrier
system.
1. Fold in wheel recesses.
2. Unbutton the strap.
3. Turn the lever ( 1) forwards and
hold.
4. Lift the adapter ( 2) at the rear and
remove.
Disassembling the bicycle rack
Arrange mounting brackets as shown in the illustration.
Swivel handle ( 1) forwards to
disengage and lift the rack ( 2).
Page 84 of 337
82Storage
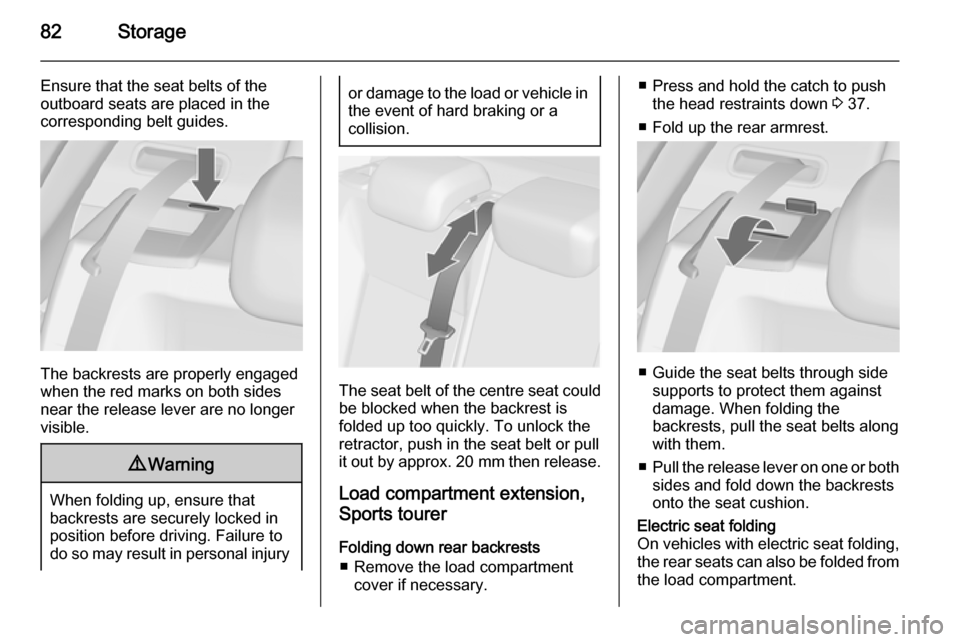
Ensure that the seat belts of the
outboard seats are placed in the
corresponding belt guides.
The backrests are properly engaged
when the red marks on both sides near the release lever are no longer
visible.
9 Warning
When folding up, ensure that
backrests are securely locked in
position before driving. Failure to
do so may result in personal injury
or damage to the load or vehicle in the event of hard braking or a
collision.
The seat belt of the centre seat could
be blocked when the backrest is
folded up too quickly. To unlock the
retractor, push in the seat belt or pull
it out by approx. 20 mm then release.
Load compartment extension,
Sports tourer
Folding down rear backrests ■ Remove the load compartment cover if necessary.
■ Press and hold the catch to push the head restraints down 3 37.
■ Fold up the rear armrest.
■ Guide the seat belts through side supports to protect them against
damage. When folding the
backrests, pull the seat belts along
with them.
■ Pull the release lever on one or both
sides and fold down the backrests
onto the seat cushion.
Electric seat folding
On vehicles with electric seat folding,
the rear seats can also be folded from the load compartment.
Page 85 of 337
Storage83
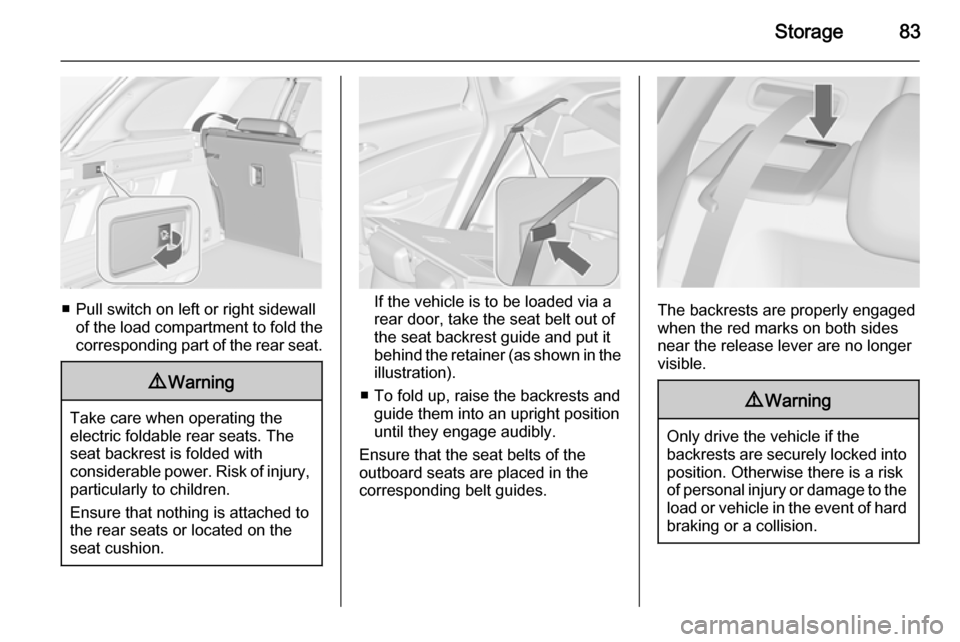
■ Pull switch on left or right sidewallof the load compartment to fold the
corresponding part of the rear seat.
9 Warning
Take care when operating the
electric foldable rear seats. The seat backrest is folded with
considerable power. Risk of injury, particularly to children.
Ensure that nothing is attached to
the rear seats or located on the
seat cushion.
If the vehicle is to be loaded via a rear door, take the seat belt out of
the seat backrest guide and put it
behind the retainer (as shown in the illustration).
■ To fold up, raise the backrests and guide them into an upright position
until they engage audibly.
Ensure that the seat belts of the
outboard seats are placed in the
corresponding belt guides.The backrests are properly engaged
when the red marks on both sides
near the release lever are no longer
visible.
9 Warning
Only drive the vehicle if the
backrests are securely locked into position. Otherwise there is a risk
of personal injury or damage to the
load or vehicle in the event of hard braking or a collision.
Page 86 of 337
84Storage
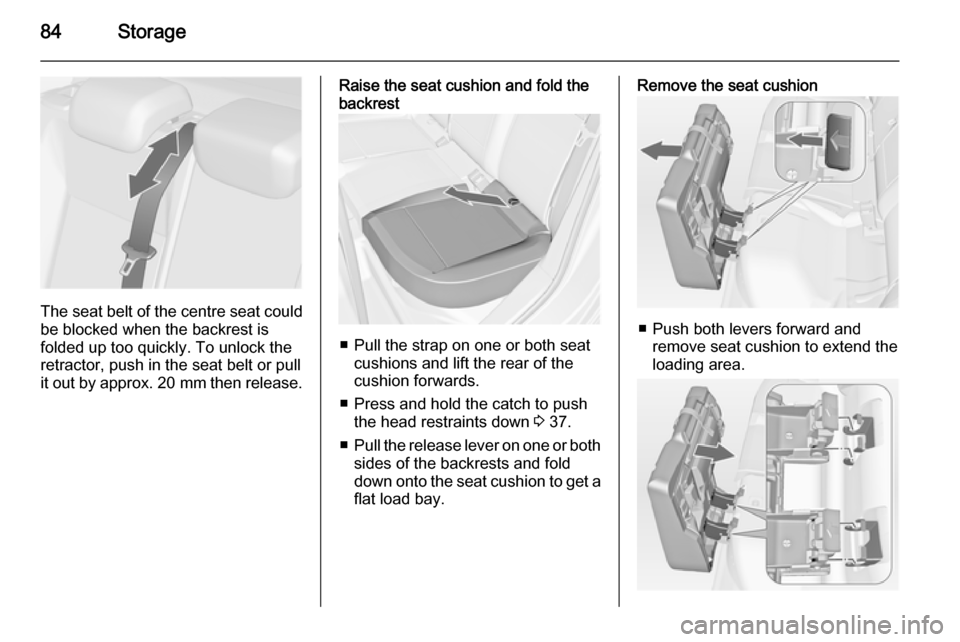
The seat belt of the centre seat couldbe blocked when the backrest is
folded up too quickly. To unlock the
retractor, push in the seat belt or pull
it out by approx. 20 mm then release.
Raise the seat cushion and fold the
backrest
■ Pull the strap on one or both seat
cushions and lift the rear of thecushion forwards.
■ Press and hold the catch to push the head restraints down 3 37.
■ Pull the release lever on one or both
sides of the backrests and fold
down onto the seat cushion to get a
flat load bay.
Remove the seat cushion
■ Push both levers forward and remove seat cushion to extend theloading area.
Page 87 of 337

Storage85
■ To attach, apply seat cushion asshown in the illustration and
engage both levers.
Open the pass-through in the rear centre backrest ■ Fold down the rear armrest.
■ Pull the grip and open the cover.
Suitable for loading long, narrow
objects.
Ensure that the cover engages after
folding up.
The closed cover can be secured
from the side of the load
compartment. Turn the knob 90°:
knob horizontal=cover secured
from the side of
the passenger
compartmentknob vertical=cover not securedRear storage
3-door hatchback
Press both buttons and fold down
cover.
Maximum load: 0.5 kg.
Load compartment coverDo not place any objects on the cover.
Page 92 of 337
90Storage
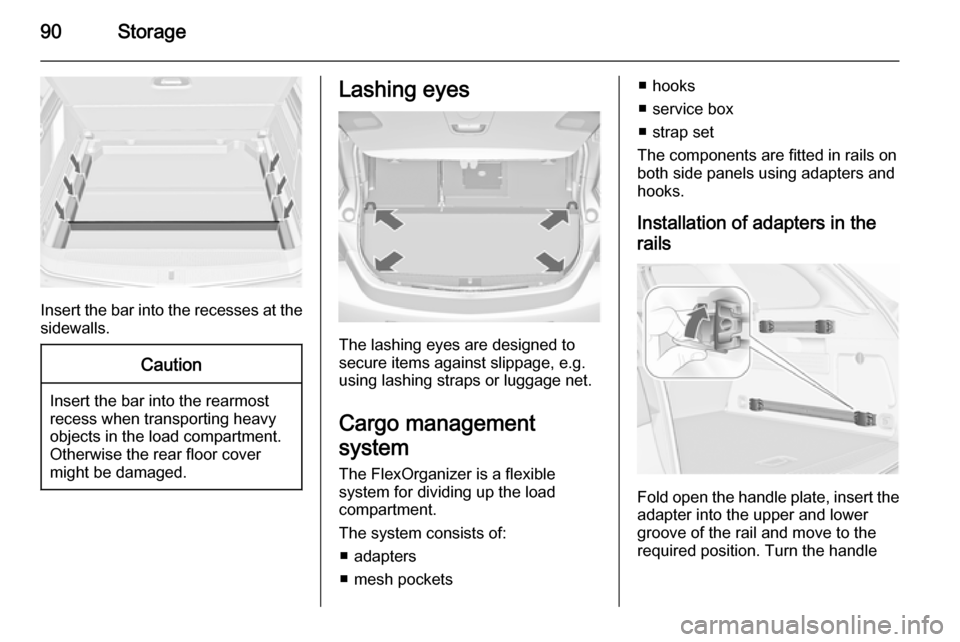
Insert the bar into the recesses at the
sidewalls.
Caution
Insert the bar into the rearmost
recess when transporting heavy objects in the load compartment.Otherwise the rear floor cover
might be damaged.
Lashing eyes
The lashing eyes are designed to
secure items against slippage, e.g.
using lashing straps or luggage net.
Cargo management
system
The FlexOrganizer is a flexible
system for dividing up the load
compartment.
The system consists of: ■ adapters
■ mesh pockets
■ hooks
■ service box
■ strap set
The components are fitted in rails on
both side panels using adapters and hooks.
Installation of adapters in the
rails
Fold open the handle plate, insert the adapter into the upper and lower
groove of the rail and move to the
required position. Turn the handle
Page 95 of 337
Storage93
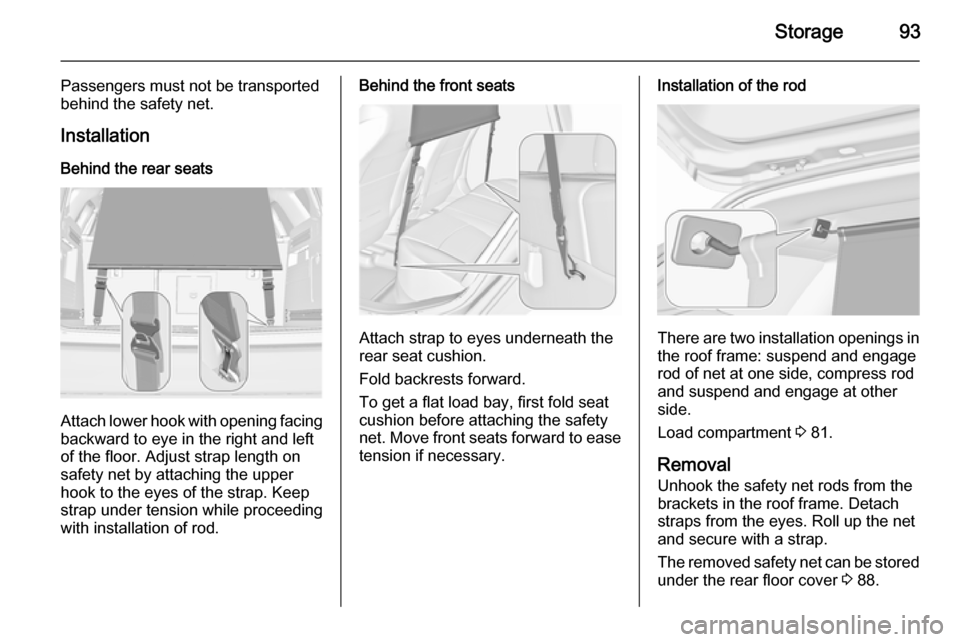
Passengers must not be transported
behind the safety net.
Installation
Behind the rear seats
Attach lower hook with opening facing
backward to eye in the right and left
of the floor. Adjust strap length on
safety net by attaching the upper
hook to the eyes of the strap. Keep
strap under tension while proceeding
with installation of rod.
Behind the front seats
Attach strap to eyes underneath the
rear seat cushion.
Fold backrests forward.
To get a flat load bay, first fold seat cushion before attaching the safety
net. Move front seats forward to ease
tension if necessary.
Installation of the rod
There are two installation openings in the roof frame: suspend and engage
rod of net at one side, compress rod and suspend and engage at other
side.
Load compartment 3 81.
Removal Unhook the safety net rods from the
brackets in the roof frame. Detach
straps from the eyes. Roll up the net
and secure with a strap.
The removed safety net can be stored under the rear floor cover 3 88.