tailgate VAUXHALL ASTRA J 2016.5 User Guide
[x] Cancel search | Manufacturer: VAUXHALL, Model Year: 2016.5, Model line: ASTRA J, Model: VAUXHALL ASTRA J 2016.5Pages: 343, PDF Size: 10.44 MB
Page 69 of 343

Storage67
Check the cable and lamp position to
ensure these are correctly installed
and are securely located.
Lock the rear carrier system
Swivel the right clamping lever ( 1)
first, followed by the left clamping
lever ( 2), until a resistance is
noticeable.
The rear carrier system is locked
when the clamping levers are
swivelled by approx. 50°. Otherwise
safe functionality is not guaranteed.
Notice
Close the tailgate.
Unfold pedal crank recesses
Fold one or both pedal crank
recesses upwards until the diagonal
support engages.
Page 72 of 343
70StorageAttach the pedal crank by rotating the
attachment screw on the pedal crank
mount.
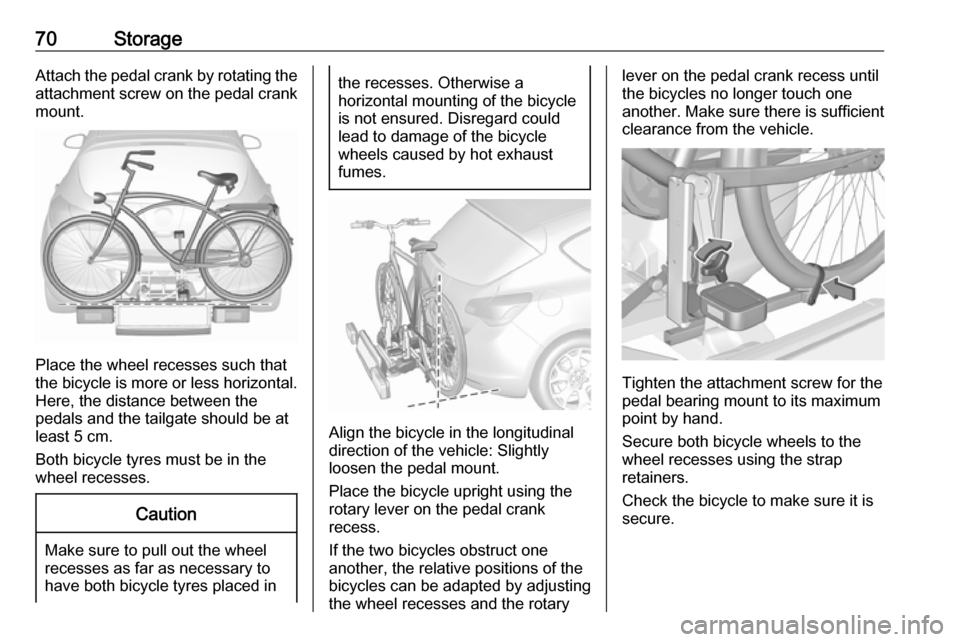
Place the wheel recesses such that
the bicycle is more or less horizontal. Here, the distance between the
pedals and the tailgate should be at
least 5 cm.
Both bicycle tyres must be in the
wheel recesses.
Caution
Make sure to pull out the wheel
recesses as far as necessary to have both bicycle tyres placed in
the recesses. Otherwise a
horizontal mounting of the bicycle
is not ensured. Disregard could
lead to damage of the bicycle
wheels caused by hot exhaust
fumes.
Align the bicycle in the longitudinal direction of the vehicle: Slightly
loosen the pedal mount.
Place the bicycle upright using the
rotary lever on the pedal crank
recess.
If the two bicycles obstruct one
another, the relative positions of the
bicycles can be adapted by adjusting
the wheel recesses and the rotary
lever on the pedal crank recess until
the bicycles no longer touch one
another. Make sure there is sufficient
clearance from the vehicle.
Tighten the attachment screw for the
pedal bearing mount to its maximum
point by hand.
Secure both bicycle wheels to the
wheel recesses using the strap
retainers.
Check the bicycle to make sure it is
secure.
Page 75 of 343
Storage73Push the clamping lever down and
pull both lamp supports out of the recesses.
Fold in the lamp supports on the
backs of the tail lamps.
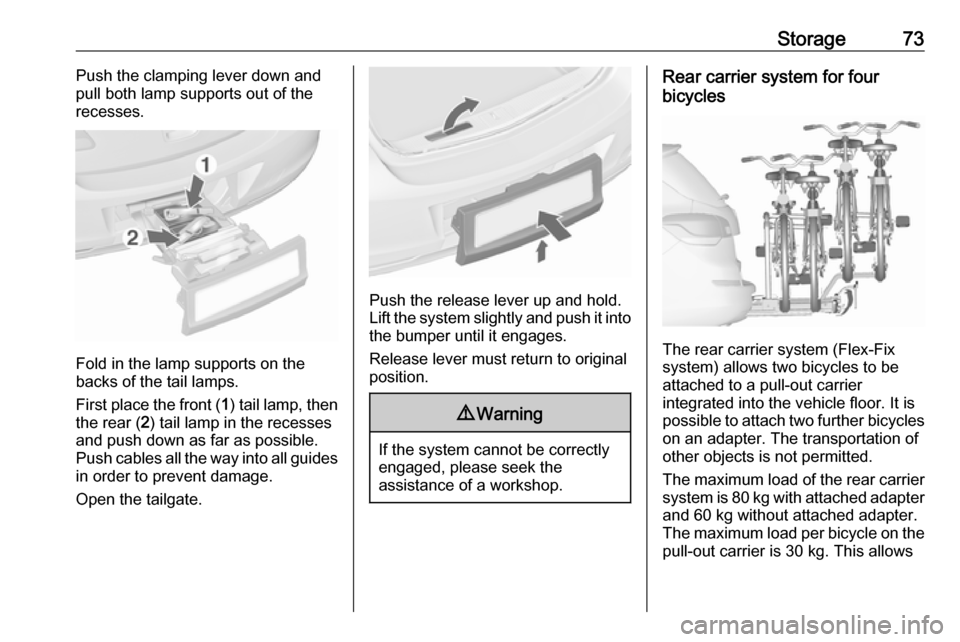
First place the front ( 1) tail lamp, then
the rear ( 2) tail lamp in the recesses
and push down as far as possible.
Push cables all the way into all guides
in order to prevent damage.
Open the tailgate.
Push the release lever up and hold.
Lift the system slightly and push it into the bumper until it engages.
Release lever must return to original
position.
9 Warning
If the system cannot be correctly
engaged, please seek the
assistance of a workshop.
Rear carrier system for four
bicycles
The rear carrier system (Flex-Fix
system) allows two bicycles to be
attached to a pull-out carrier
integrated into the vehicle floor. It is
possible to attach two further bicycles
on an adapter. The transportation of
other objects is not permitted.
The maximum load of the rear carrier
system is 80 kg with attached adapter and 60 kg without attached adapter.The maximum load per bicycle on the
pull-out carrier is 30 kg. This allows
Page 76 of 343
74Storagethe attachment of electrically-
powered bicycles to the pull-out
carrier. The maximum load per
bicycle on the adapter is 20 kg.
The wheelbase of a bicycle must not
exceed 1.15 metres. Otherwise the
secure fastening of a bicycle is not
possible.
If not in use, the carrier system must
be slid back into the vehicle floor.
There must not be any objects on the bicycles that could become loose
during transportation.Caution
If the rear carrier system is
extended and the vehicle is fully
loaded, the chassis clearance will
be reduced.
Drive carefully whenever the road has a strong inclination or when
driving over a ramp, bump, etc.
Caution
Consult your bicycle dealer before
attaching bicycles with carbon
frames. The bicycles may get
damaged.
Extending
Open the tailgate.
9 Warning
No-one should be in the extension
zone of the rear carrier system,
risk of injury.
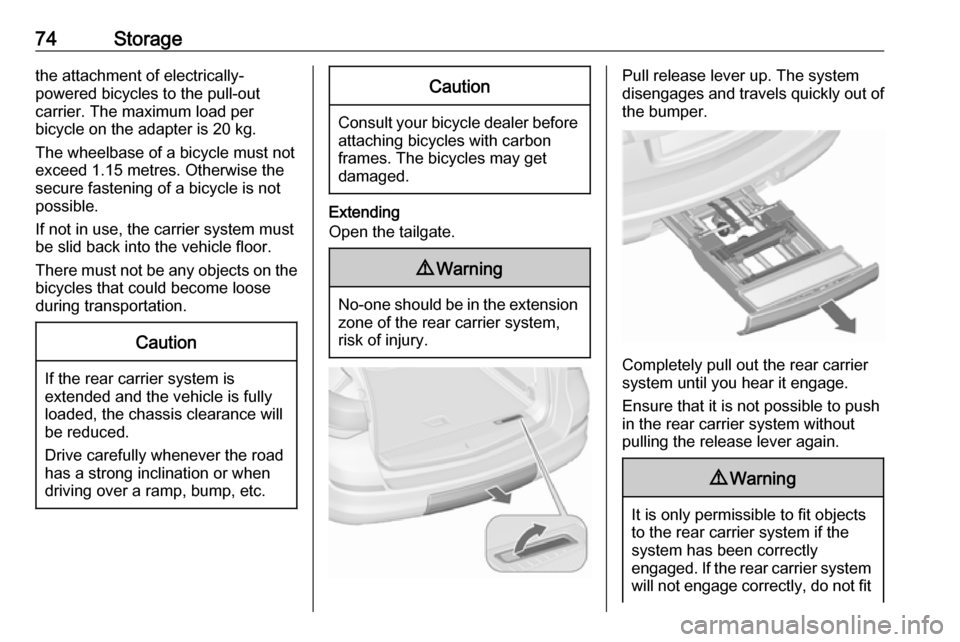
Pull release lever up. The system
disengages and travels quickly out of
the bumper.
Completely pull out the rear carrier
system until you hear it engage.
Ensure that it is not possible to push in the rear carrier system without
pulling the release lever again.
9 Warning
It is only permissible to fit objects
to the rear carrier system if the
system has been correctly
engaged. If the rear carrier system will not engage correctly, do not fit
Page 88 of 343

86Storage
The closed cover can be secured
from the side of the load
compartment. Turn the knob 90°:
knob horizontal:cover secured
from the side of
the passenger
compartmentknob vertical:cover not securedRear storage
3-door hatchback
Press both buttons and fold down
cover.
Maximum load: 0.5 kg.
Load compartment cover
Do not place any objects on the cover.
3-door and 5-door hatchback
Removing
Unhook retaining straps from tailgate.
Page 89 of 343
Storage87Lift cover at the rear and push it
upwards at the front.
Remove the cover.
If the height adjustable cover is
mounted in the middle or upper
position, the load compartment cover
can be stowed below it.
Height adjustable cover 3 88.
Fitting
Engage cover in side guides and fold downwards. Attach retaining straps to
tailgate.
Sports tourer
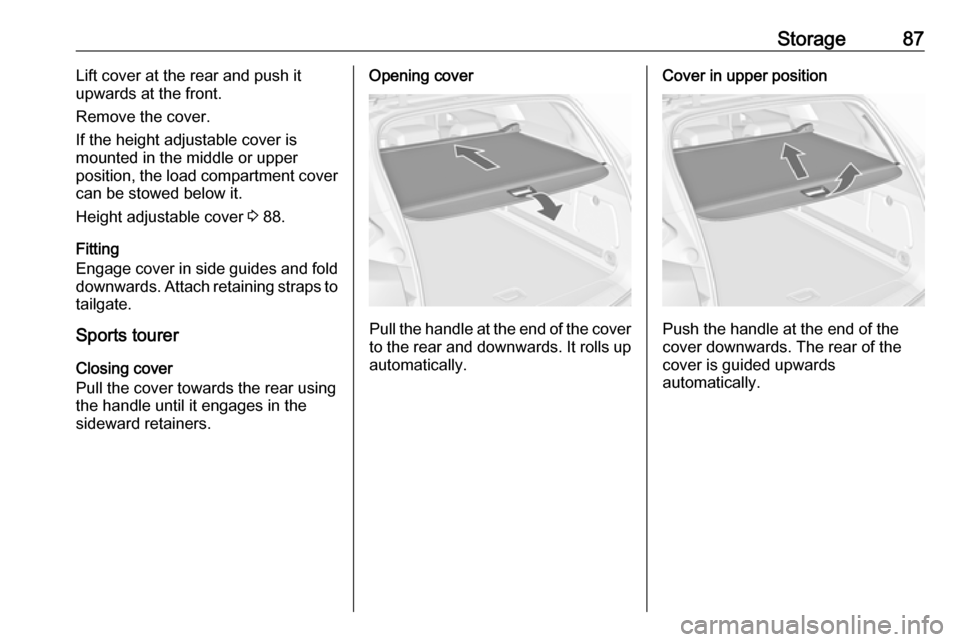
Closing cover
Pull the cover towards the rear using the handle until it engages in the
sideward retainers.Opening cover
Pull the handle at the end of the cover
to the rear and downwards. It rolls up automatically.
Cover in upper position
Push the handle at the end of the
cover downwards. The rear of the
cover is guided upwards
automatically.
Page 96 of 343
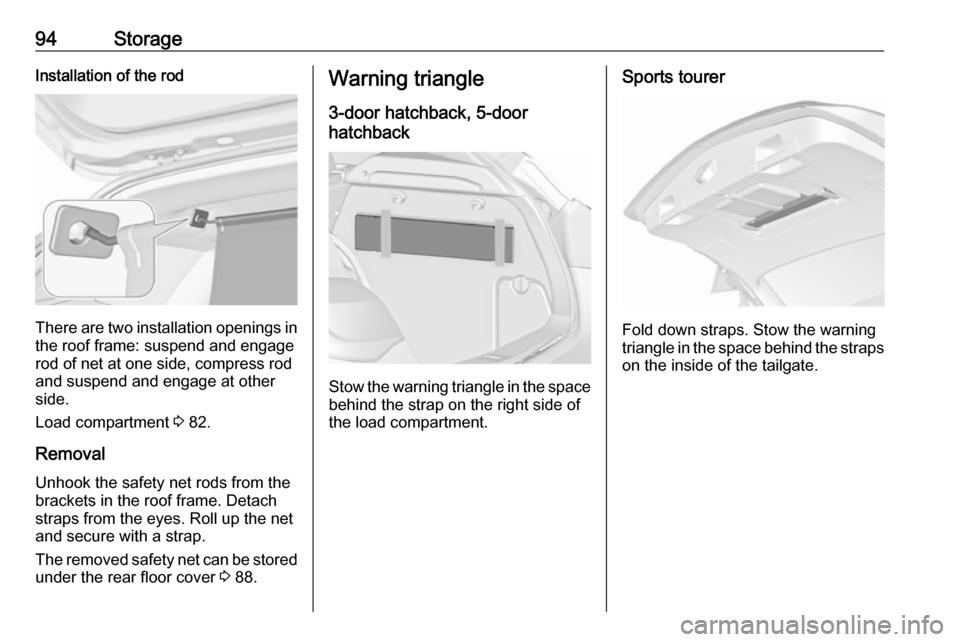
94StorageInstallation of the rod
There are two installation openings inthe roof frame: suspend and engage
rod of net at one side, compress rod and suspend and engage at other
side.
Load compartment 3 82.
Removal
Unhook the safety net rods from the
brackets in the roof frame. Detach
straps from the eyes. Roll up the net
and secure with a strap.
The removed safety net can be stored under the rear floor cover 3 88.
Warning triangle
3-door hatchback, 5-door
hatchback
Stow the warning triangle in the space
behind the strap on the right side of
the load compartment.
Sports tourer
Fold down straps. Stow the warning
triangle in the space behind the straps on the inside of the tailgate.
Page 98 of 343

96StorageSports tourer
Fold down strap. Stow the first aid kit
in the space behind a strap on the
inside of the tailgate.
4-door saloon
Stow the first aid kit in the space
behind the mesh net on the right side of the load compartment.
Roof rack system
Roof rack
For safety reasons and to avoid
damage to the roof, the vehicle
approved roof rack system is
recommended. For further
information contact your workshop.
Follow the installation instructions
and remove the roof rack when not in use.
Mounting roof rack Detach the cover from each mounting
point by using a coin.
Page 122 of 343

120Instruments and controlsIlluminates green
Adaptive cruise control is active.
Adaptive cruise control 3 188.
Vehicle detected ahead
A illuminates green.
A vehicle ahead is detected in the
same lane.
Adaptive cruise control 3 188,
Forward collision alert 3 195.
Door open h illuminates red.
A door or the tailgate is open.Information displays
Driver Information Centre The Driver Information Centre is
located in the instrument cluster
between speedometer and
tachometer. It is available as
Midlevel-Display or Uplevel-Combi-
Display.
Midlevel-Display indicates:
● overall odometer
● trip odometer
● some control indicators
● vehicle information
● trip/fuel information
● vehicle messages, displayed as code numbers 3 126.
In the Uplevel-Combi-Display, menu
pages can be selected by pressing
MENU . Menu symbols are indicated
in the top line of the display:
● X Vehicle Information Menu
● W Trip/Fuel Information Menu
● s ECO Information Menu
● C Performance Menu
Page 131 of 343

Instruments and controls129The system displays messages
regarding the following topics:
● fluid levels
● anti-theft alarm system
● brakes
● drive systems
● ride control systems
● cruise control
● object detection systems
● lighting, bulb replacement
● wiper/washer system
● doors, windows
● radio remote control
● seat belts
● airbag systems
● engine and transmission
● tyre pressure
● diesel particle filter
● vehicle battery statusVehicle messages on the Colour-
Info-Display
Some important messages appear
additionally in the Colour-Info-
Display. Press the multifunction knob to confirm a message. Some
messages only pop-up for a few
seconds.
Warning chimes When starting the engine or whilst
driving
Only one warning chime will sound at a time.
The warning chime regarding
unfastened seat belts has priority
over any other warning chime.
● If seat belt is not fastened.
● If a door or the tailgate is not fully
closed when starting off.
● If a certain speed is exceeded with parking brake applied.
● If a programmed speed is exceeded.● If a warning message or awarning code appears in the
Driver Information Centre.
● If the parking assist detects an object.
● If an unintended lane change occurs.
● If the reverse gear is engaged and the rear carrier sytem
extended.
● If the diesel particle filter has reached the maximum filling
level.
When the vehicle is parked and/or the driver's door is opened
● With exterior lights on.
During an Autostop ● If the driver's door is opened.
Battery voltage
When the vehicle battery voltage is
running low, a warning message or
warning code 174 will appear in the
Driver Information Centre.