ECU VAUXHALL ASTRA J 2016.5 Owner's Manual
[x] Cancel search | Manufacturer: VAUXHALL, Model Year: 2016.5, Model line: ASTRA J, Model: VAUXHALL ASTRA J 2016.5Pages: 343, PDF Size: 10.44 MB
Page 22 of 343

20Keys, doors and windowsKeys, doors and
windowsKeys, locks ................................... 20
Keys .......................................... 20
Car Pass .................................... 21
Radio remote control .................21
Memorised settings ...................22
Central locking system ..............23
Automatic locking ......................24
Child locks ................................. 25
Doors ........................................... 25
Load compartment ....................25
Vehicle security ............................ 27
Anti-theft locking system ...........27
Anti-theft alarm system ..............28
Immobiliser ................................ 29
Exterior mirrors ............................ 30
Convex shape ........................... 30
Electric adjustment ....................30
Folding mirrors .......................... 30
Heated mirrors ........................... 31
Interior mirrors ............................. 31
Manual anti-dazzle ....................31
Automatic anti-dazzle ................32Windows...................................... 32
Windscreen ............................... 32
Manual windows ........................32
Power windows ......................... 33
Heated rear window ..................35
Sun visors .................................. 35
Roof ............................................. 35
Sunroof ...................................... 35
Glass panel ............................... 36Keys, locks
KeysCaution
Do not attach heavy or bulky items to the ignition key.
Replacement keys
The key number is specified in the
Car Pass or on a detachable tag.
The key number must be quoted
when ordering replacement keys as it
is a component of the immobiliser
system.
Locks 3 285.
The code number of the adapter for
the locking wheel nuts is specified on
a card. It must be quoted when
ordering a replacement adapter.
Wheel changing 3 273.
Page 23 of 343
Keys, doors and windows21Lock cylinders
Designed to free-wheel if they are forcefully rotated without the correct
key or if the correct key is not fully
inserted. To reset, turn cylinder with
the correct key until its slot is vertical, remove key and then re-insert it. If the
cylinder still free-wheels, turn the key through 180° and repeat operation.
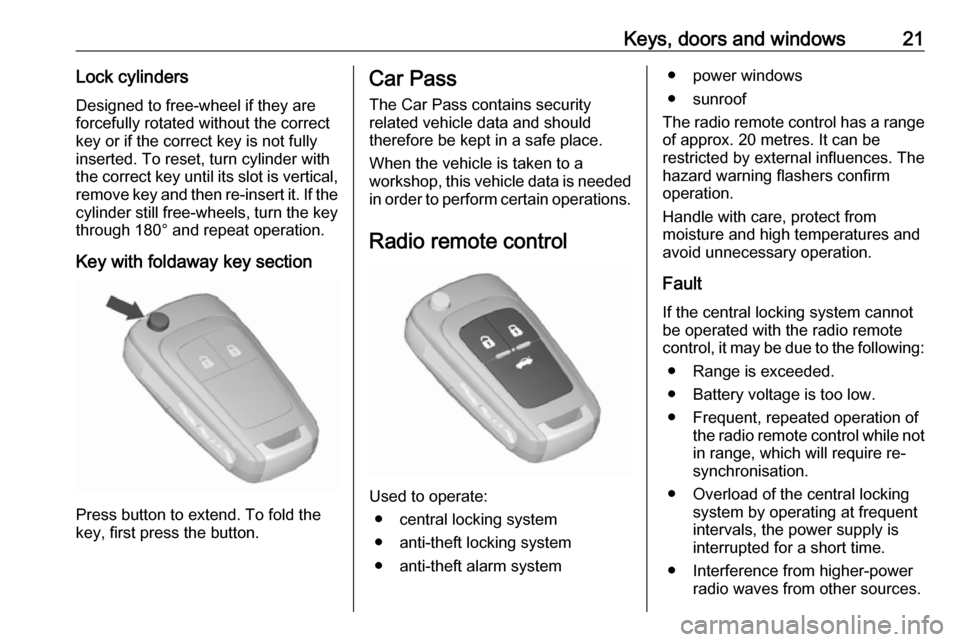
Key with foldaway key section
Press button to extend. To fold the
key, first press the button.
Car Pass
The Car Pass contains security
related vehicle data and should
therefore be kept in a safe place.
When the vehicle is taken to a
workshop, this vehicle data is needed
in order to perform certain operations.
Radio remote control
Used to operate: ● central locking system
● anti-theft locking system
● anti-theft alarm system
● power windows
● sunroof
The radio remote control has a range of approx. 20 metres. It can be
restricted by external influences. The
hazard warning flashers confirm
operation.
Handle with care, protect from
moisture and high temperatures and
avoid unnecessary operation.
Fault
If the central locking system cannot
be operated with the radio remote
control, it may be due to the following:
● Range is exceeded.
● Battery voltage is too low.
● Frequent, repeated operation of the radio remote control while not
in range, which will require re-
synchronisation.
● Overload of the central locking system by operating at frequent
intervals, the power supply is
interrupted for a short time.
● Interference from higher-power radio waves from other sources.
Page 26 of 343
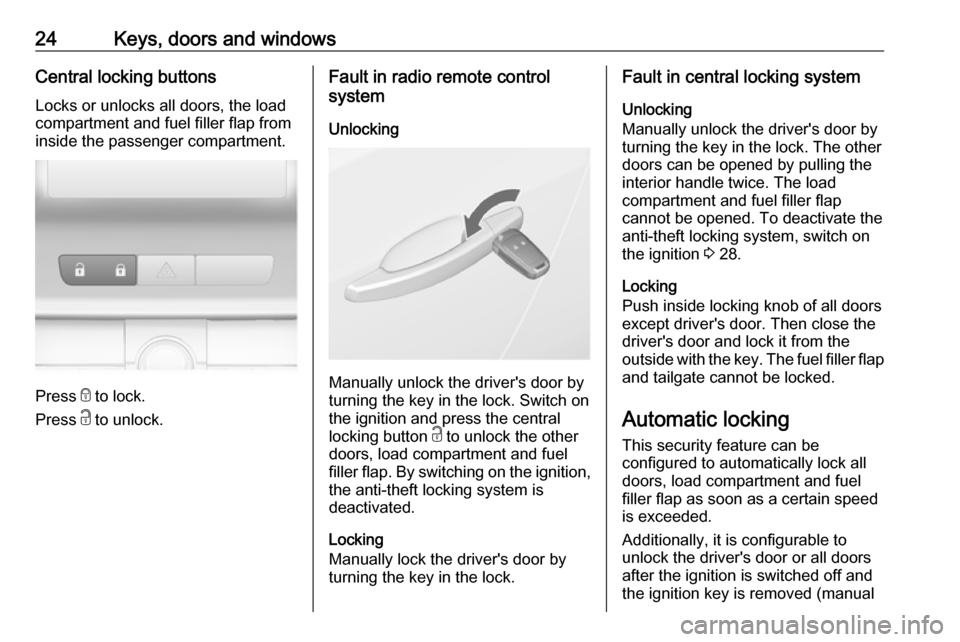
24Keys, doors and windowsCentral locking buttonsLocks or unlocks all doors, the load
compartment and fuel filler flap from
inside the passenger compartment.
Press e to lock.
Press c to unlock.
Fault in radio remote control
system
Unlocking
Manually unlock the driver's door by
turning the key in the lock. Switch on
the ignition and press the central
locking button c to unlock the other
doors, load compartment and fuel
filler flap. By switching on the ignition, the anti-theft locking system is
deactivated.
Locking
Manually lock the driver's door by
turning the key in the lock.
Fault in central locking system
Unlocking
Manually unlock the driver's door by
turning the key in the lock. The other
doors can be opened by pulling the
interior handle twice. The load
compartment and fuel filler flap
cannot be opened. To deactivate the
anti-theft locking system, switch on
the ignition 3 28.
Locking
Push inside locking knob of all doors
except driver's door. Then close the
driver's door and lock it from the
outside with the key. The fuel filler flap and tailgate cannot be locked.
Automatic locking
This security feature can be
configured to automatically lock all
doors, load compartment and fuel
filler flap as soon as a certain speed
is exceeded.
Additionally, it is configurable to
unlock the driver's door or all doors
after the ignition is switched off and
the ignition key is removed (manual
Page 29 of 343
Keys, doors and windows27Use one of the interior handles.
Do not push the touchpad switch or
the emblem whilst closing as this will
unlock the tailgate again.
Central locking system 3 23.
General hints for operating
tailgate9 Danger
Do not drive with the tailgate open
or ajar, e.g. when transporting
bulky objects, since toxic exhaust
gases, which cannot be seen or
smelled, could enter the vehicle.
This can cause unconsciousness
and even death.
Caution
Before opening the tailgate check
overhead obstructions, such as a
garage door, to avoid damage to
the tailgate. Always check the
moving area above and behind the tailgate.
Notice
The installation of certain heavy
accessories onto the tailgate may
affect its ability to remain open.Vehicle security
Anti-theft locking system9 Warning
Do not use the system if there are
people in the vehicle! The doorscannot be unlocked from the
inside.
The system deadlocks all the doors. All doors must be closed otherwise
the system cannot be activated.
If the ignition was on, the driver's door
must be opened and closed once so
that the vehicle can be secured.
Unlocking the vehicle disables the
mechanical anti-theft locking system.
This is not possible with the central
locking button.
Page 47 of 343
Seats, restraints45Seat foldingCaution
When seat height is in highest
position, push head restraints
down and lift up sun visors before
folding backrest forwards.
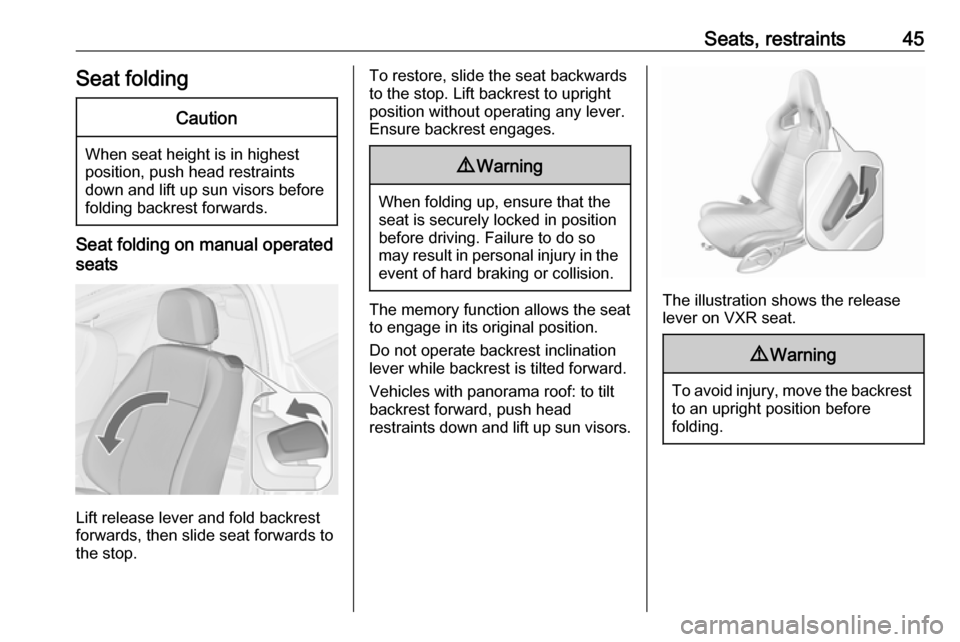
Seat folding on manual operated
seats
Lift release lever and fold backrest
forwards, then slide seat forwards to
the stop.
To restore, slide the seat backwards
to the stop. Lift backrest to upright
position without operating any lever.
Ensure backrest engages.9 Warning
When folding up, ensure that the
seat is securely locked in position
before driving. Failure to do so
may result in personal injury in the event of hard braking or collision.
The memory function allows the seat
to engage in its original position.
Do not operate backrest inclination
lever while backrest is tilted forward.
Vehicles with panorama roof: to tilt
backrest forward, push head
restraints down and lift up sun visors.The illustration shows the release
lever on VXR seat.
9 Warning
To avoid injury, move the backrest
to an upright position before
folding.
Page 55 of 343

Seats, restraints53
The inflated airbags cushion the
impact, thereby reducing the risk of
injury to the upper body and head of
the front seat occupants
considerably.
9 Warning
Optimum protection is only
provided when the seat is in the
proper position.
Seat position 3 39.
Keep the area in which the airbag
inflates clear of obstructions.
Fit the seat belt correctly and
engage securely. Only then is the
airbag able to protect.
Side airbag system
The side airbag system consists of an
airbag in each front seat backrest.
This can be identified by the word
AIRBAG .
The side airbag system is triggered in the event of a side impact of a certain
severity. The ignition must be
switched on.
The inflated airbags cushion the
impact, thereby reducing the risk of
injury to the upper body and pelvis in
the event of a side-on collision
considerably.
9 Warning
Keep the area in which the airbag
inflates clear of obstructions.
Notice
Only use protective seat covers that
have been approved for the vehicle.Be careful not to cover the airbags.
Page 58 of 343

56Seats, restraintsChild restraintsChild restraint systems
We recommend the Vauxhall child
restraint system which is tailored
specifically to the vehicle.
When a child restraint system is being
used, pay attention to the following
usage and installation instructions
and also those supplied with the child restraint system.
Always comply with local or national
regulations. In some countries, the
use of child restraint systems is
forbidden on certain seats.9 Warning
When using a child restraint
system on the front passenger
seat, the airbag systems for the
front passenger seat must be
deactivated; if not, the triggering of the airbags poses a risk of fatal
injury to the child.
This is especially the case if rear-
facing child restraint systems are
used on the front passenger seat.
Airbag deactivation 3 54.
Airbag label 3 52.
Selecting the right system The rear seats are the most
convenient location to fasten a child
restraint system.
Children should travel facing
rearwards in the vehicle as long as
possible. This makes sure that the
child's backbone, which is still very
weak, is under less strain in the event of an accident.
Suitable are restraint systems that
comply with valid UN ECE
regulations. Check local laws and
regulations for mandatory use of child restraint systems.
Ensure that the child restraint system
to be installed is compatible with the
vehicle type.
Ensure that the mounting location of
the child restraint system within the
vehicle is correct, see following
tables.
Allow children to enter and exit the
vehicle only on the side facing away
from the traffic.When the child restraint system is not in use, secure the seat with a seat beltor remove it from the vehicle.
Notice
Do not affix anything on the child
restraint systems and do not cover
them with any other materials.
A child restraint system which has
been subjected to stress in an
accident must be replaced.
Page 59 of 343

Seats, restraints57Child restraint installation locations
Permissible options for fitting a child restraint system
Weight and age class
On front passenger seat
On rear outboard seatsOn rear centre seat
activated airbagdeactivated airbagGroup 0: up to 10 kg
or approx. 10 monthsXU 1UUGroup 0+: up to 13 kg
or approx. 2 yearsXU 1UUGroup I: 9 to 18 kg
or approx. 8 months to 4 yearsXU 1UUGroup II: 15 to 25 kg
or approx. 3 to 7 yearsXXUUGroup III: 22 to 36 kg
or approx. 6 to 12 yearsXXUU1:if the child restraint system is being secured using a three-point seat belt, move seat height adjustment to uppermost position and ensure that vehicle seat belt runs forwards from the upper anchorage point. Adjust seat backrest
inclination as far as necessary to a vertical position to ensure that the belt is tight on the buckle side.U:universal suitability in conjunction with three-point seat belt.X:no child restraint system permitted in this weight class.
Page 67 of 343
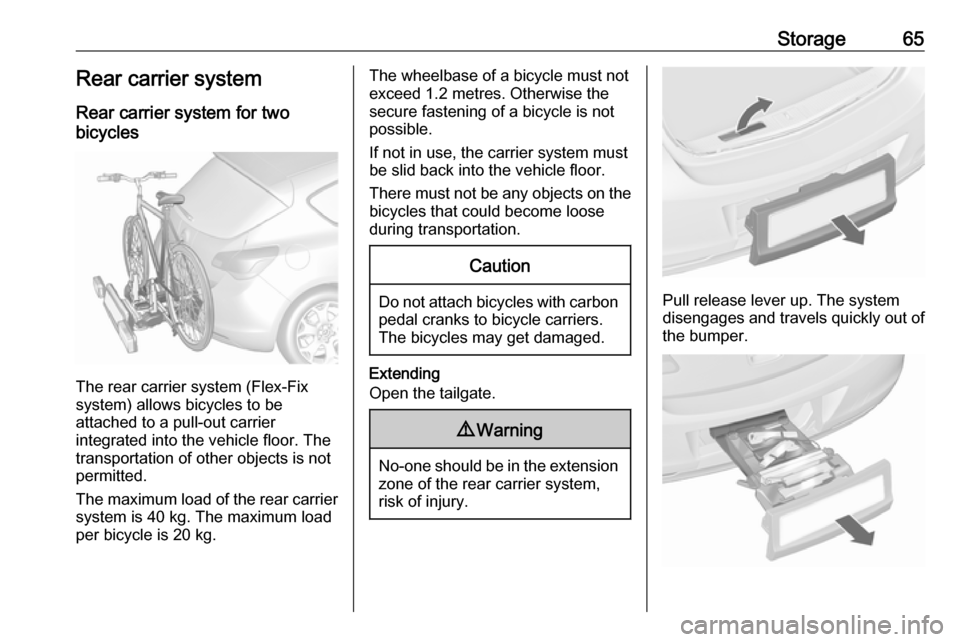
Storage65Rear carrier system
Rear carrier system for two
bicycles
The rear carrier system (Flex-Fix
system) allows bicycles to be
attached to a pull-out carrier
integrated into the vehicle floor. The
transportation of other objects is not
permitted.
The maximum load of the rear carrier
system is 40 kg. The maximum load
per bicycle is 20 kg.
The wheelbase of a bicycle must not
exceed 1.2 metres. Otherwise the
secure fastening of a bicycle is not possible.
If not in use, the carrier system must
be slid back into the vehicle floor.
There must not be any objects on the bicycles that could become loose
during transportation.Caution
Do not attach bicycles with carbon pedal cranks to bicycle carriers.
The bicycles may get damaged.
Extending
Open the tailgate.
9 Warning
No-one should be in the extension
zone of the rear carrier system,
risk of injury.
Pull release lever up. The system
disengages and travels quickly out of
the bumper.
Page 69 of 343

Storage67
Check the cable and lamp position to
ensure these are correctly installed
and are securely located.
Lock the rear carrier system
Swivel the right clamping lever ( 1)
first, followed by the left clamping
lever ( 2), until a resistance is
noticeable.
The rear carrier system is locked
when the clamping levers are
swivelled by approx. 50°. Otherwise
safe functionality is not guaranteed.
Notice
Close the tailgate.
Unfold pedal crank recesses
Fold one or both pedal crank
recesses upwards until the diagonal
support engages.