change wheel VAUXHALL ASTRA J GTC 2018.5 Owner's Manual
[x] Cancel search | Manufacturer: VAUXHALL, Model Year: 2018.5, Model line: ASTRA J GTC, Model: VAUXHALL ASTRA J GTC 2018.5Pages: 293, PDF Size: 8.28 MB
Page 14 of 293

12In brief1Power windows .....................32
2 Exterior mirrors .....................29
3 Cruise control .....................158
Speed limiter ....................... 160
Adaptive cruise control .......161
Forward collision alert .........168
4 Side air vents ...................... 136
5 Windscreen wiper,
windscreen washer
system, headlight washer
system, rear window
wiper, rear window washer system ................................... 73
6 Instruments .......................... 79
7 Steering wheel controls .......72
8 Driver Information Centre ...... 92
9 Turn and lane-change
signals, headlight flash,
low beam and high beam,
high beam assist .................122
Exit lighting ......................... 126
Parking lights ...................... 123
Buttons for Driver
Information Centre ................9210Sport mode ........................ 156
Central locking system ..........22
Hazard warning flashers ....122
Fuel selector ......................... 80
Control indicator for airbag
deactivation .......................... 86
Control indicator for front
passenger seat belt .............86
Tour mode .......................... 156
11 Info Display ........................... 96
12 Anti-theft alarm system
status LED ........................... 27
13 Centre air vents .................. 136
14 Glovebox .............................. 59
15 Sport mode ........................ 156
Tour mode .......................... 156
Traction Control system
(TC) ..................................... 154
Electronic Stability Control (ESC) .................................. 154
Parking assist systems .......174Lane departure warning .....186
Eco button for stop-start
system ................................. 141
16 Climate control system ........ 128
17 AUX input, USB input ..........11
18 Power outlet .......................... 77
19 Selector lever, manual
transmission ....................... 150
Automatic transmission ......146
20 Electric parking brake .........152
21 Ignition switch with
steering wheel lock ............140
22 Horn ..................................... 73
Driver airbag ........................ 50
23 Bonnet release lever ..........200
24 Storage compartment,
fuse box ............................. 224
25 Steering wheel adjustment ..72
26 Light switch ........................ 115
Headlight range
adjustment ......................... 118
Front fog lights ...................123
Page 51 of 293
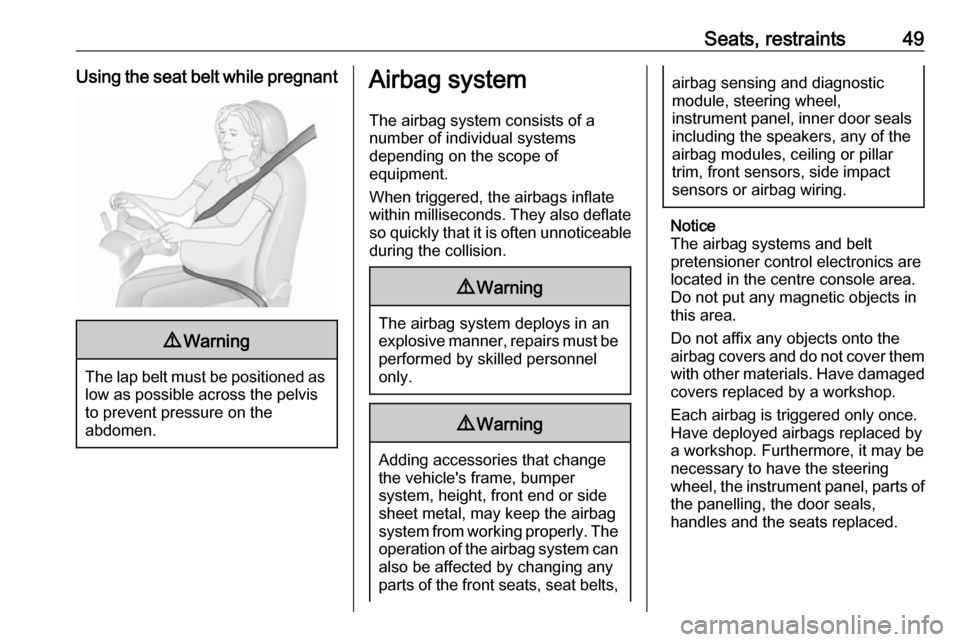
Seats, restraints49Using the seat belt while pregnant9Warning
The lap belt must be positioned as
low as possible across the pelvis
to prevent pressure on the
abdomen.
Airbag system
The airbag system consists of a
number of individual systems
depending on the scope of
equipment.
When triggered, the airbags inflate
within milliseconds. They also deflate
so quickly that it is often unnoticeable
during the collision.9 Warning
The airbag system deploys in an
explosive manner, repairs must be performed by skilled personnel
only.
9 Warning
Adding accessories that change
the vehicle's frame, bumper
system, height, front end or side
sheet metal, may keep the airbag
system from working properly. The operation of the airbag system can
also be affected by changing any
parts of the front seats, seat belts,
airbag sensing and diagnostic
module, steering wheel,
instrument panel, inner door seals including the speakers, any of the
airbag modules, ceiling or pillar
trim, front sensors, side impact
sensors or airbag wiring.
Notice
The airbag systems and belt
pretensioner control electronics are
located in the centre console area.
Do not put any magnetic objects in
this area.
Do not affix any objects onto the
airbag covers and do not cover them with other materials. Have damagedcovers replaced by a workshop.
Each airbag is triggered only once.
Have deployed airbags replaced by
a workshop. Furthermore, it may be
necessary to have the steering
wheel, the instrument panel, parts of
the panelling, the door seals,
handles and the seats replaced.
Page 61 of 293

Storage59StorageStorage compartments................59
Glovebox ................................... 59
Cupholders ................................ 59
Front storage ............................. 60
Underseat storage .....................61
Armrest storage .........................61
Centre console storage .............62
Load compartment .......................63
Rear storage .............................. 65
Load compartment cover ...........65
Rear floor storage cover ............66
Lashing eyes ............................. 67
Warning triangle ........................68
First aid kit ................................. 68
Roof rack system .........................69
Roof rack ................................... 69
Loading information .....................69Storage compartments9Warning
Do not store heavy or sharp
objects in the storage
compartments. Otherwise, the
storage compartment lid could
open and vehicle occupants could be injured by objects being thrown
around in the event of hard
braking, a sudden change in
direction or an accident.
Glovebox
The glovebox features a pen holder,
a credit card holder, a coin holder and
an adapter for the locking wheel nuts.
The glovebox should be closed whilst
driving.
Cupholders
Cupholders are located in the centre
console.
Page 84 of 293
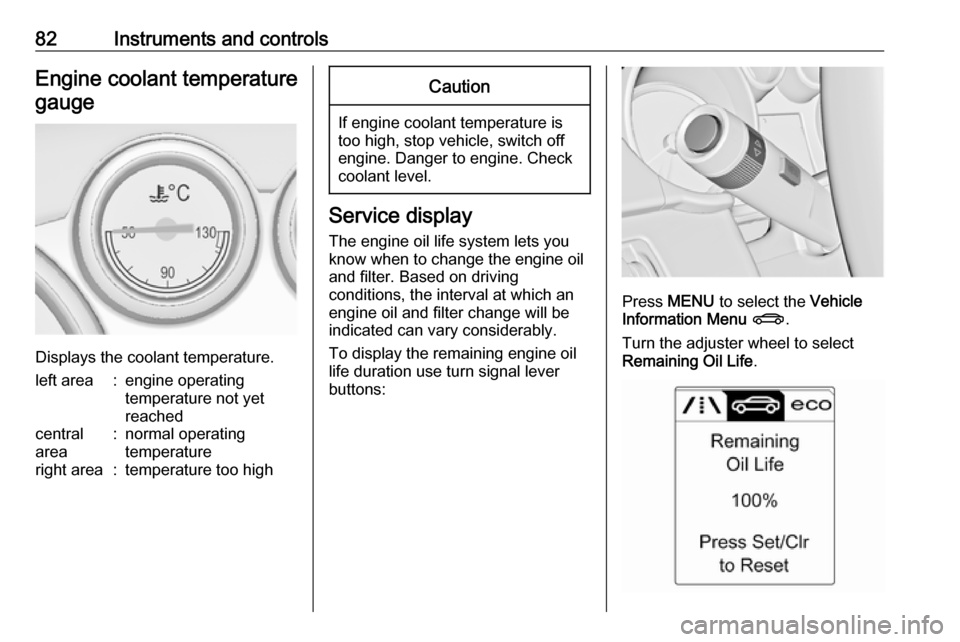
82Instruments and controlsEngine coolant temperaturegauge
Displays the coolant temperature.
left area:engine operating
temperature not yet
reachedcentral
area:normal operating
temperatureright area:temperature too highCaution
If engine coolant temperature is
too high, stop vehicle, switch off
engine. Danger to engine. Check
coolant level.
Service display
The engine oil life system lets you
know when to change the engine oil
and filter. Based on driving
conditions, the interval at which an
engine oil and filter change will be
indicated can vary considerably.
To display the remaining engine oil
life duration use turn signal lever
buttons:
Press MENU to select the Vehicle
Information Menu X .
Turn the adjuster wheel to select
Remaining Oil Life .
Page 95 of 293
Instruments and controls93Some of the displayed functions differ
when the vehicle is being driven or at
a standstill. Some functions are only
available when the vehicle is being
driven.
Vehicle personalisation 3 104.
Memorised settings 3 22.
Selecting menus and functions
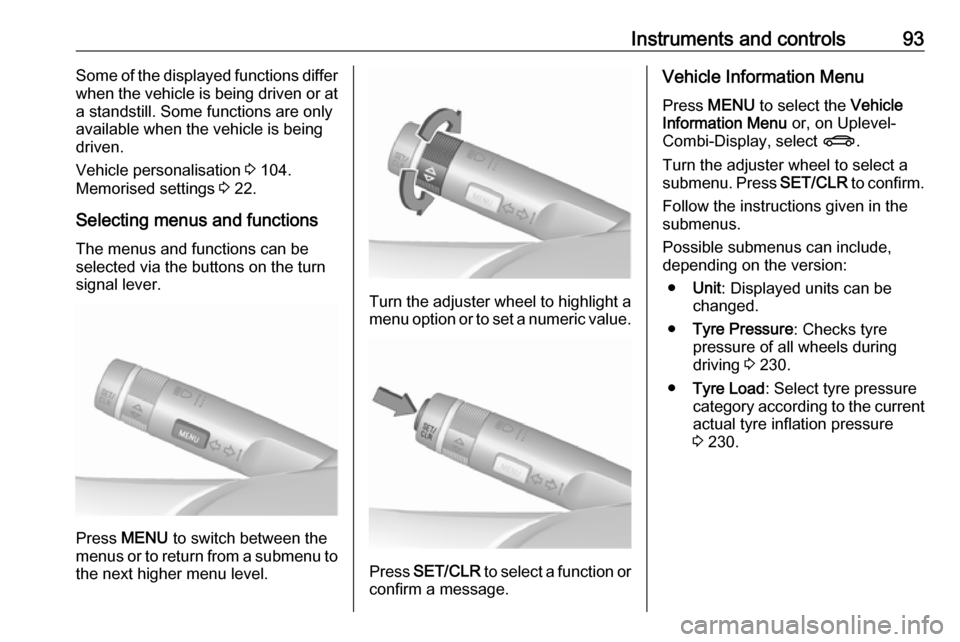
The menus and functions can be
selected via the buttons on the turn
signal lever.
Press MENU to switch between the
menus or to return from a submenu to the next higher menu level.
Turn the adjuster wheel to highlight a
menu option or to set a numeric value.
Press SET/CLR to select a function or
confirm a message.
Vehicle Information Menu
Press MENU to select the Vehicle
Information Menu or, on Uplevel-
Combi-Display, select X.
Turn the adjuster wheel to select a submenu. Press SET/CLR to confirm.
Follow the instructions given in the
submenus.
Possible submenus can include,
depending on the version:
● Unit : Displayed units can be
changed.
● Tyre Pressure : Checks tyre
pressure of all wheels during
driving 3 230.
● Tyre Load : Select tyre pressure
category according to the current actual tyre inflation pressure
3 230.
Page 96 of 293

94Instruments and controls
●Remaining Oil Life : Indicates
when to change the engine oil and filter 3 82.
● Speed Warning : If exceeding the
preset speed, a warning chime will be activated.
● Traffic Sign Assistant : Displays
detected traffic signs for the
current route section. 3 182
● Following Dist. : Displays the
distance to a moving vehicle ahead 3 171.
Selection and indication can be
different between Midlevel-Display
and Uplevel-Combi-Display.
Trip/Fuel Information Menu
Press MENU to select the Trip/Fuel
Information Menu , or select W on
Uplevel-Combi-Display.
Turn the adjuster wheel to select a
submenu. Press SET/CLR to confirm.
● trip odometer 1
● trip odometer 2
● digital speed
Trip odometer 2 and digital speed are
only available on vehicles with
Uplevel-Combi-Display.
Reset trip odometer by pressing
SET/CLR on the turn signal lever for
a few seconds or by pressing the
Page 102 of 293

100Instruments and controlsNo.Vehicle message56Tyre pressure imbalance on
front axle57Tyre pressure imbalance on
rear axle58Tyres without TPMS sensors
detected59Open then close driver window60Open then close front
passenger window61Open then close rear left
window62Open then close rear right
window65Theft attempted66Service anti-theft alarm system67Service steering wheel lock68Service power steering69Service suspension system70Service level control systemNo.Vehicle message71Service rear axle74Service AFL75Service air conditioning76Service side blind spot alert
system77Service lane departure warning79Top up engine oil81Service transmission82Change engine oil soon83Service adaptive cruise control84Engine power is reduced89Service vehicle soon94Shift to park position before
exiting95Service airbag128Bonnet open134Park assist fault, clean bumper136Service parking assistNo.Vehicle message145Check washer fluid level174Low vehicle battery258Parking assist off
Vehicle messages on the
Uplevel-Combi-Display
The vehicle messages are displayed
as text. Follow the instructions given
in the messages.
Page 160 of 293
158Driving and operatingNORMAL mode
In NORMAL mode, when neither
SPORT nor VXR is pressed, all
settings of the systems are adapted to standard values.
SPORT mode
The settings of the systems are
adapted to a sportier driving style.
VXR mode
The drive dynamic characteristics are adapted to high performance
settings.
In this mode, the illumination of main
instruments is switched to red.
Personalised settings in the VXR
mode
The driver can select the functions of
the VXR mode when VXR is pressed.
These settings can be changed in the
Settings menu in the Info-Display.
Vehicle personalisation 3 104.Driver assistance
systems9 Warning
Driver assistance systems are
developed to support the driver
and not to replace the driver's
attention.
The driver accepts full
responsibility when driving the
vehicle.
When using driver assistance
systems, always take care
regarding the current traffic
situation.
Cruise control
The Cruise control can store and
maintain speeds of approx. 20 to
120 mph. Deviations from the stored
speeds may occur when driving uphill or downhill.
For safety reasons, the cruise control cannot be activated until the brake
pedal has been operated once.
Activating in first gear is not possible.
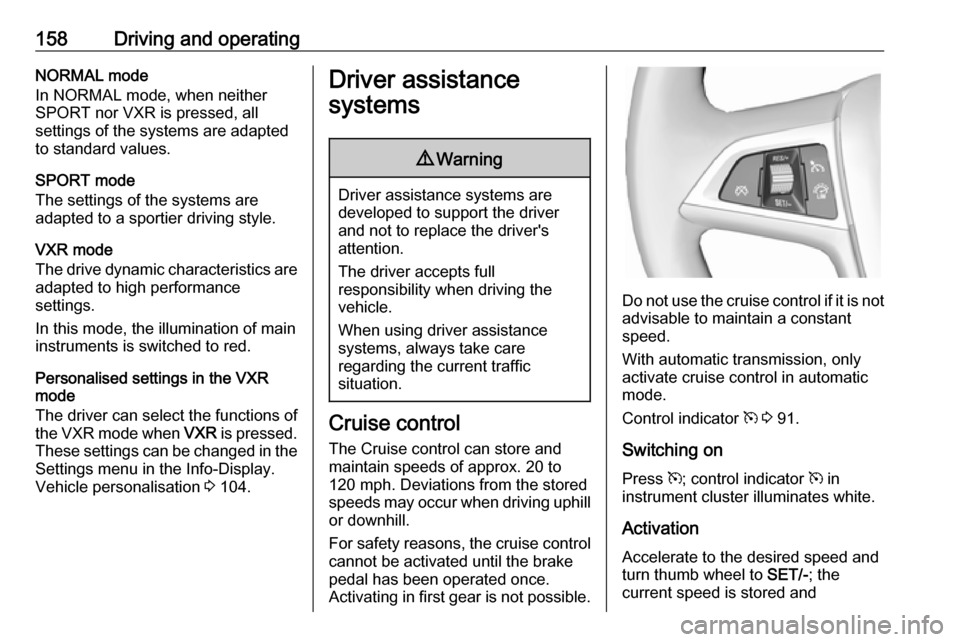
Do not use the cruise control if it is not advisable to maintain a constant
speed.
With automatic transmission, only
activate cruise control in automatic
mode.
Control indicator m 3 91.
Switching on
Press m; control indicator m in
instrument cluster illuminates white.
Activation
Accelerate to the desired speed and
turn thumb wheel to SET/-; the
current speed is stored and
Page 163 of 293
Driving and operating161
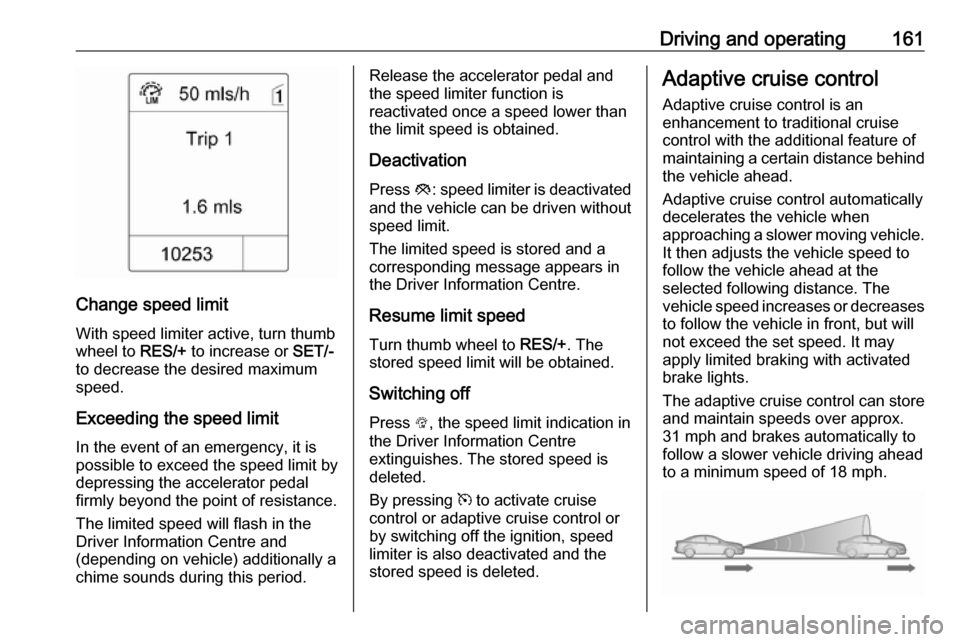
Change speed limit
With speed limiter active, turn thumb
wheel to RES/+ to increase or SET/-
to decrease the desired maximum
speed.
Exceeding the speed limit
In the event of an emergency, it is
possible to exceed the speed limit by
depressing the accelerator pedal
firmly beyond the point of resistance.
The limited speed will flash in the
Driver Information Centre and
(depending on vehicle) additionally a
chime sounds during this period.
Release the accelerator pedal and the speed limiter function is
reactivated once a speed lower than
the limit speed is obtained.
Deactivation Press y: speed limiter is deactivated
and the vehicle can be driven without speed limit.
The limited speed is stored and a corresponding message appears in
the Driver Information Centre.
Resume limit speed
Turn thumb wheel to RES/+. The
stored speed limit will be obtained.
Switching off
Press L, the speed limit indication in
the Driver Information Centre
extinguishes. The stored speed is
deleted.
By pressing m to activate cruise
control or adaptive cruise control or
by switching off the ignition, speed
limiter is also deactivated and the
stored speed is deleted.Adaptive cruise control
Adaptive cruise control is an
enhancement to traditional cruise control with the additional feature of
maintaining a certain distance behind the vehicle ahead.
Adaptive cruise control automatically
decelerates the vehicle when
approaching a slower moving vehicle. It then adjusts the vehicle speed to
follow the vehicle ahead at the
selected following distance. The
vehicle speed increases or decreases
to follow the vehicle in front, but will
not exceed the set speed. It may
apply limited braking with activated
brake lights.
The adaptive cruise control can store and maintain speeds over approx.
31 mph and brakes automatically to
follow a slower vehicle driving ahead
to a minimum speed of 18 mph.
Page 165 of 293

Driving and operating163Once the system is activated,
adaptive cruise control decelerates or
brakes if it detects a vehicle ahead,
which is slower or closer than the
desired following distance.9 Warning
Accelerating by the driver
deactivates automatic braking by
the system. This is indicated as a
pop-up warning in the Driver
Information Centre.
Increase speed
With adaptive cruise control active,
hold thumb wheel turned to RES/+:
speed increases continuously in large
increments, or activate repeatedly
RES/+ : speed increases in small
increments.
If the vehicle is driven with adaptive cruise control active much faster than
the desired speed, e.g. after
depressing the accelerator pedal,
then the current speed can be stored
and maintained by turning the thumb
wheel to SET/-.
Reduce speed
With adaptive cruise control active,
hold thumb wheel turned to SET/-:
speed decreases continuously in
large increments, or activate
repeatedly SET/-: speed decreases in
small increments.
If the vehicle is driven with adaptive
cruise control active much slower
than the desired speed, e.g. because of a slower vehicle ahead, then the
current speed can be stored and
maintained by turning the thumb
wheel to SET/-.
Resume stored speed If the system is switched on but
inactive, then turn thumb wheel to
RES/+ at a speed above 31 mph to
resume the stored speed.
Setting the following distance
When adaptive cruise control detects a slower moving vehicle in the drivingpath, it will adjust the vehicle speed to
maintain the following distance
selected by the driver.The following distance can be set to
near, medium or far.
Press E; the current setting is shown
in the Driver Information Centre.
Press E again to change the
following distance. The setting is also displayed in the top line of the Driver
Information Centre.