change wheel VAUXHALL ASTRA J GTC 2018.5 User Guide
[x] Cancel search | Manufacturer: VAUXHALL, Model Year: 2018.5, Model line: ASTRA J GTC, Model: VAUXHALL ASTRA J GTC 2018.5Pages: 293, PDF Size: 8.28 MB
Page 167 of 293

Driving and operating165● There is no traffic and nothingdetected on the road sides for
several minutes. In this case,
there are no radar echoes and
the sensor may report that it is
blocked.
● The collision imminent braking system is applying the brakes.
● The radar sensor is blocked by an ice or water film.
● A fault is detected in the radar, engine or brake system.
When adaptive cruise control is
deactivated automatically, the control
indicator m illuminates white and a
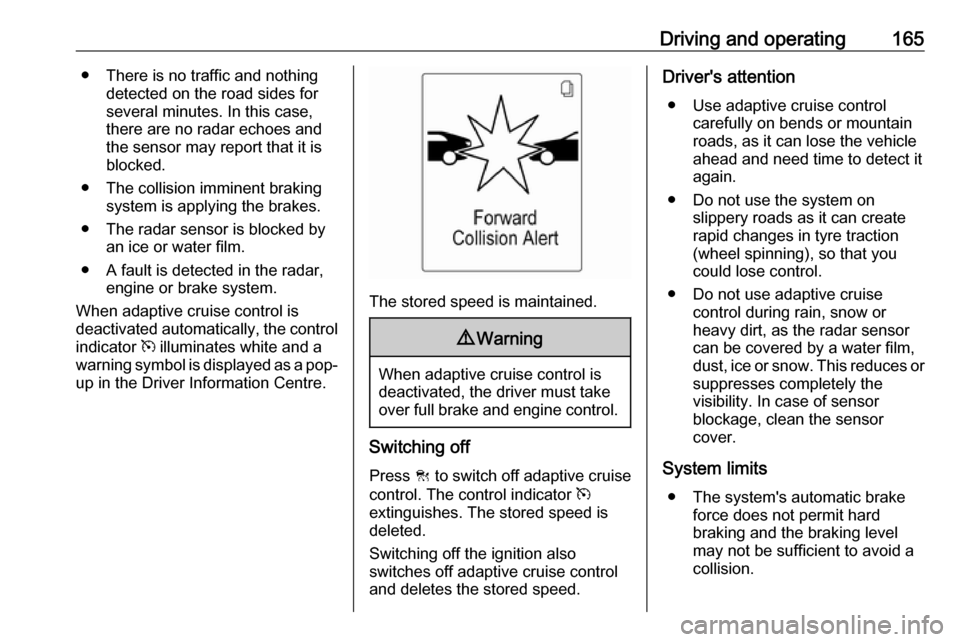
warning symbol is displayed as a pop- up in the Driver Information Centre.
The stored speed is maintained.
9 Warning
When adaptive cruise control is
deactivated, the driver must take
over full brake and engine control.
Switching off
Press C to switch off adaptive cruise
control. The control indicator m
extinguishes. The stored speed is
deleted.
Switching off the ignition also
switches off adaptive cruise control
and deletes the stored speed.
Driver's attention
● Use adaptive cruise control carefully on bends or mountain
roads, as it can lose the vehicle
ahead and need time to detect it
again.
● Do not use the system on slippery roads as it can create
rapid changes in tyre traction
(wheel spinning), so that you
could lose control.
● Do not use adaptive cruise control during rain, snow or
heavy dirt, as the radar sensor
can be covered by a water film,
dust, ice or snow. This reduces or suppresses completely the
visibility. In case of sensor
blockage, clean the sensor
cover.
System limits ● The system's automatic brake force does not permit hard
braking and the braking level
may not be sufficient to avoid a
collision.
Page 240 of 293

238Vehicle careMake the following preparations and
observe the following information:
● Park the vehicle on a level, firm and non-skid surface. The front
wheels must be in the straight- ahead position.
● Apply the parking brake and engage first gear, reverse gear or
P .
● Remove the spare wheel 3 241.
● Never change more than one wheel at once.
● Use the jack only to change wheels in case of puncture, not
for seasonal winter or summer
tyre change.
● The jack is maintenance-free.
● If the ground on which the vehicle
is standing is soft, a solid board
(max. 1 cm thick) should be
placed under the jack.
● Take heavy objects out of the vehicle before jacking up.
● No people or animals may be in the vehicle when it is jacked-up.
● Never crawl under a jacked-up vehicle.●Do not start the vehicle when it is
raised on the jack.
● Clean wheel nuts and thread with
a clean cloth before mounting the wheel.9 Warning
Do not grease wheel bolt, wheel
nut and wheel nut cone.
1. Disengage wheel nut caps with a
screwdriver and remove. Pull off
the wheel cover. Vehicle tools
3 226.
Alloy wheels: Disengage wheel
nut caps with a screwdriver and
remove. To protect the wheel,
place a soft cloth between the
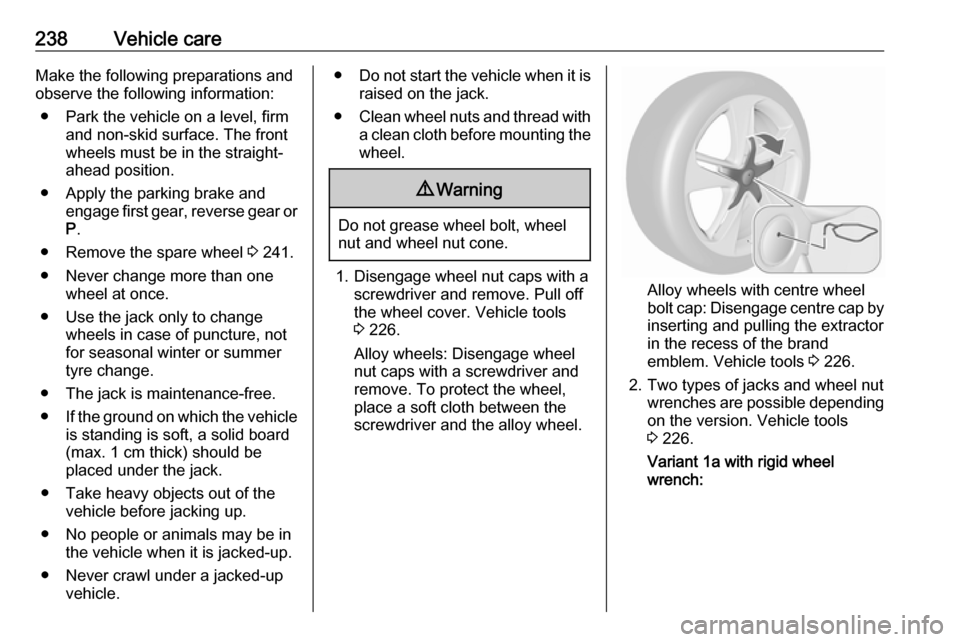
screwdriver and the alloy wheel.Alloy wheels with centre wheel
bolt cap: Disengage centre cap by
inserting and pulling the extractor
in the recess of the brand
emblem. Vehicle tools 3 226.
2. Two types of jacks and wheel nut wrenches are possible dependingon the version. Vehicle tools
3 226.
Variant 1a with rigid wheel
wrench:
Page 242 of 293

240Vehicle care
Set the jack to the necessary
height. Position it directly below
the jacking point in a manner that
prevents it from slipping.
Attach jack handle and with the
jack correctly aligned rotate
handle until wheel is clear of the ground.
5. Unscrew the wheel nuts.
6. Change the wheel. Spare wheel 3 241.
7. Screw on the wheel nuts.
8. Lower the vehicle and remove jack.
9. Install the wheel wrench ensuring that it is located securely and
tighten each nut in a crosswise
sequence. Tightening torque is
140 Nm.
10. Align the valve hole in the wheel cover with the tyre valve before
installing.
Install wheel nut caps.
Install centre cap on alloy wheels.
11. Install vehicle jacking point cover on versions with sill panelling.
12. Stow the replaced wheel 3 241,
the vehicle tools 3 226 and the
adapter for the locking wheel nuts 3 59.
13. Check the tyre pressure of the installed tyre and the wheel nut
torque as soon as possible.Have the defective tyre renewed or repaired as soon as possible.
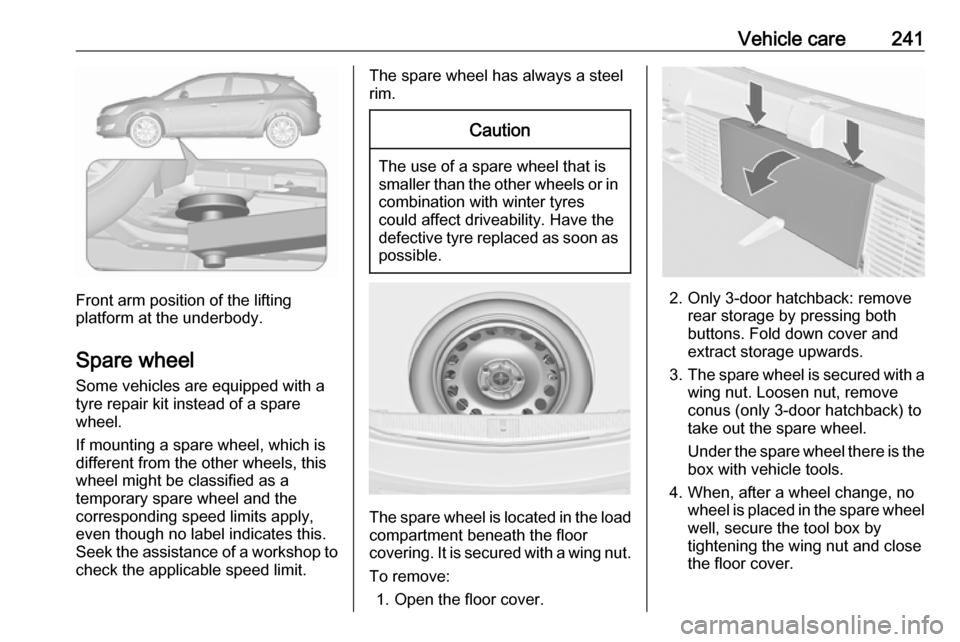
Jacking position for lifting platform
Rear arm position of the lifting
platform centrically under the recess
of the sill.
Page 243 of 293

Vehicle care241
Front arm position of the lifting
platform at the underbody.
Spare wheel Some vehicles are equipped with a
tyre repair kit instead of a spare
wheel.
If mounting a spare wheel, which is
different from the other wheels, this
wheel might be classified as a
temporary spare wheel and the
corresponding speed limits apply,
even though no label indicates this.
Seek the assistance of a workshop to
check the applicable speed limit.
The spare wheel has always a steel
rim.Caution
The use of a spare wheel that is smaller than the other wheels or in combination with winter tyres
could affect driveability. Have the defective tyre replaced as soon as
possible.
The spare wheel is located in the load
compartment beneath the floor
covering. It is secured with a wing nut.
To remove: 1. Open the floor cover.
2. Only 3-door hatchback: remove rear storage by pressing both
buttons. Fold down cover and
extract storage upwards.
3. The spare wheel is secured with a
wing nut. Loosen nut, remove
conus (only 3-door hatchback) to
take out the spare wheel.
Under the spare wheel there is the box with vehicle tools.
4. When, after a wheel change, no wheel is placed in the spare wheel
well, secure the tool box by
tightening the wing nut and close
the floor cover.
Page 284 of 293

282Customer informationThis data includes, for example:● Vehicle status information (e.g. wheel rotation rate, speed,
movement delay, lateral
acceleration, "seatbelts
fastened" display),
● Ambient conditions (e.g. temperature, rain sensor,
distance sensor).
Most of this data is volatile and is
processed only in the vehicle itself, and not beyond the operating time.
Moreover, many control units include
data storage device (amongst others the vehicle key). This is used to allow
information to be documented
temporarily or permanently on vehicle condition, component stress,
maintenance requirements and
technical events and errors.
The following information, for
example, is stored:
● System component operating states (e.g. fill level, tyre
pressure, battery status),
● State of charge of the high voltage battery, estimated range
(in the case of electric vehicles),● Faults and defects in important system components (e.g. lights,
brakes),
● System reactions in special driving situations (e.g. triggeringof an airbag, actuation of the
stability control systems),
● Information on events damaging the vehicle.
In special cases (e.g. if the vehicle
has detected a malfunction), it may be
necessary to save data that would
otherwise just be volatile.
When you use services, the operating
data saved can be read together with the vehicle identification number andused if necessary. Staff working for
the service net-work (e.g. garages, manufacturers) or third parties (e.g.
breakdown services) can read the
data from the vehicle. Services
include repair services, maintenance
processes, warranty cases and
quality assurance measures.
Data is generally read via the OBD
(On-Board Diagnostics) port
prescribed by law in the vehicle. The operating data which has been read
out documents the technical conditionof the vehicle or individual
components and assists with fault
diagnosis, compliance with warranty
obligations and quality improvement.
This data, in particular information on component stress, technical events,
operator errors and other faults, is
transmitted to the manufacturer
where appropriate, together with the vehicle identification number. The
manufacturer is also subject to
product liability. The manufacturer
potentially also needs operating data
from vehicles for product recalls.
Fault memories in the vehicle can be
reset by a service company when
carrying out servicing or repairs.
Comfort and infotainment
functions
Comfort settings and custom settings
can be stored in the vehicle and
changed at any time.