vents VAUXHALL ASTRA K 2017 Owner's Manual
[x] Cancel search | Manufacturer: VAUXHALL, Model Year: 2017, Model line: ASTRA K, Model: VAUXHALL ASTRA K 2017Pages: 293, PDF Size: 8.27 MB
Page 14 of 293

12In brief1Power windows .....................32
2 Exterior mirrors .....................30
3 Cruise control .....................157
Speed limiter ....................... 159
Adaptive cruise control .......160
Forward collision alert .........167
4 Side air vents ...................... 135
5 Windscreen wiper,
windscreen washer
system, headlight washer
system, rear window
wiper, rear window washer system ................................... 73
6 Instruments .......................... 79
7 Steering wheel controls .......72
8 Driver Information Centre ...... 91
9 Turn and lane-change
signals, headlight flash,
low beam and high beam,
high beam assist .................121
Exit lighting ......................... 125
Parking lights ...................... 122
Buttons for Driver
Information Centre ................9110Sport mode ........................ 154
Central locking system ..........23
Hazard warning flashers ....121
Fuel selector ......................... 80
Control indicator for airbag
deactivation .......................... 85
Control indicator for front
passenger seat belt .............85
Tour mode .......................... 154
11 Info-Display .......................... 95
12 Anti-theft alarm system
status LED ........................... 27
13 Centre air vents .................. 135
14 Glovebox .............................. 59
15 Sport mode ........................ 154
Tour mode .......................... 154
Traction Control system
(TC) ..................................... 152
Electronic Stability Control (ESC) .................................. 153
Parking assist systems .......173Lane departure warning .....185
Eco button for stop-start
system ................................. 140
16 Climate control system ........ 127
17 AUX input, USB input ..........11
18 Power outlet .......................... 77
19 Selector lever, manual
transmission ....................... 149
Automatic transmission ......145
20 Electric parking brake .........150
21 Ignition switch with
steering wheel lock ............139
22 Horn ..................................... 73
Driver airbag ........................ 49
23 Bonnet release lever ..........200
24 Storage compartment,
fuse box ............................. 224
25 Steering wheel adjustment ..72
26 Light switch ........................ 114
Headlight range
adjustment ......................... 117
Front fog lights ...................122
Page 49 of 293

Seats, restraints47Seat belt reminderFront seats are equipped with a seat
belt reminder, indicated for driver seat
by control indicator X in the
tachometer 3 85 and for passenger
seat by the control indicators in the
centre console 3 82.
Belt force limiters
On the front seats, stress on the body is reduced by the gradual release of
the belt during a collision.
Belt pretensioners In the event of a head-on or rear-end
collision of a certain severity, the front
seat belts are tightened.9 Warning
Incorrect handling ( e.g. removal or
fitting of belts) can trigger the belt
pretensioners.
Deployment of the belt pretensioners
is indicated by continuous illumination
of control indicator v 3 85.
Triggered belt pretensioners must be
replaced by a workshop. Belt
pretensioners can only be triggered
once.
Notice
Do not affix or install accessories or
other objects that may interfere with
the operation of the belt
pretensioners. Do not make any
modifications to belt pretensioner
components as this will invalidate
the vehicle type approval.
Three-point seat belt
FastenWithdraw the belt from the retractor,
guide it untwisted across the body
and insert the latch plate into the
buckle. Tighten the lap belt regularly
whilst driving by pulling the shoulder
belt.
Loose or bulky clothing prevents the
belt from fitting snugly. Do not place
objects such as handbags or mobile
phones between the belt and your body.
Page 129 of 293

Climate control127Climate controlClimate control systems.............127
Heating and ventilation system 127
Air conditioning system ...........128
Electronic climate control system .................................... 130
Auxiliary heater ........................134
Air vents ..................................... 135
Adjustable air vents .................135
Fixed air vents ......................... 135
Maintenance .............................. 135
Air intake ................................. 135
Pollen filter ............................... 135
Air conditioning regular
operation ................................ 136
Service .................................... 136Climate control systems
Heating and ventilation system
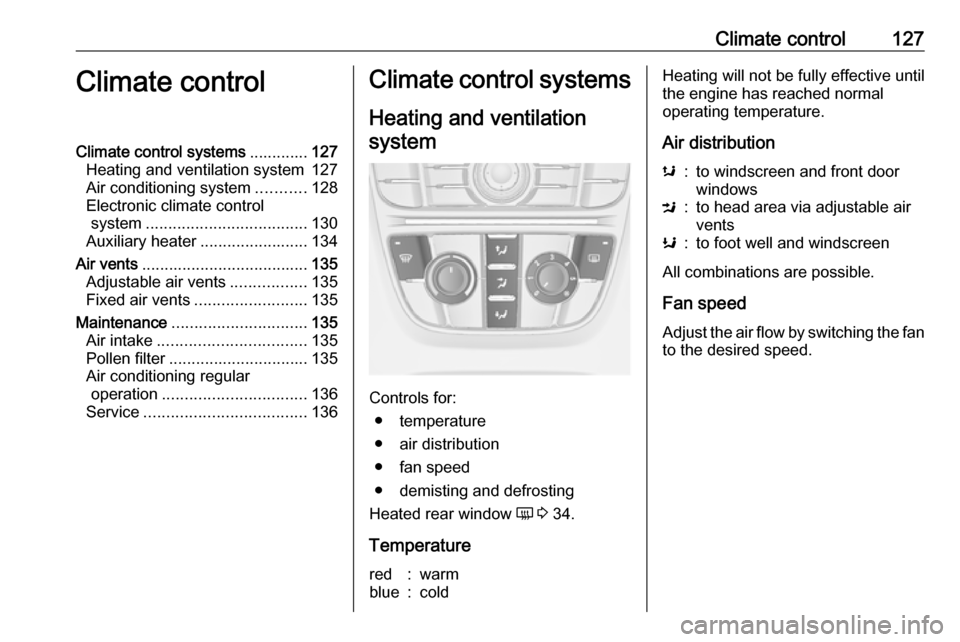
Controls for: ● temperature
● air distribution
● fan speed
● demisting and defrosting
Heated rear window Ü 3 34.
Temperature
red:warmblue:coldHeating will not be fully effective until
the engine has reached normal
operating temperature.
Air distributions:to windscreen and front door
windowsM:to head area via adjustable air
ventsK:to foot well and windscreen
All combinations are possible.
Fan speed
Adjust the air flow by switching the fan to the desired speed.
Page 130 of 293

128Climate controlDemisting and defrosting
●Press V: fan automatically
switches to higher speed, the air
distribution is directed towards
the windscreen.
● Set temperature control to warmest level.
● Switch on heated rear window Ü.
● Open side air vents as required and direct them towards the doorwindows.
Air conditioning system
In addition to the heating and
ventilation system, the air
conditioning system has controls for:
n:cooling4:air recirculation
Heated seats ß 3 45, Heated
steering wheel * 3 72.
Cooling n
Press n to switch on cooling. The
LED in the button illuminates to
indicate activation. Cooling is only
functional when the engine is running and climate control fan is switched on.
Press n again to switch off cooling.
The air conditioning system cools and
dehumidifies (dries) as soon as the
outside temperature is slightly above
the freezing point. Therefore
condensation may form and drip from under the vehicle.
Page 131 of 293

Climate control129If no cooling or drying is required,
switch off the cooling system for fuel
saving reasons. Activated cooling
may inhibit Autostops.
Stop-start system 3 140.
Air recirculation system 4
Press 4 to activate air recirculation
mode. The LED in the button
illuminates to indicate activation.
Press 4 again to deactivate air
recirculation mode.
9 Warning
The exchange of fresh air is
reduced in air recirculation mode.
In operation without cooling the air humidity increases, so the
windows may mist up from inside.
The quality of the passenger
compartment air deteriorates,
which may cause the vehicle
occupants to feel drowsy.
In warm and very humid ambient air conditions, the windscreen may mist
up from outside when cold air is
directed towards it. If windscreen
mists up from outside, activate
windscreen wiper and deactivate s.
Maximum cooling
Briefly open the windows so that hot
air can disperse quickly.
● Switch on cooling n.
● Air circulation system 4 on.
● Press air distribution switch M.
● Set temperature control to coldest level.
● Set fan speed to highest level.
● Open all vents.
Page 132 of 293

130Climate controlDemisting and defrosting the
windows V
●
Press V: fan automatically
switches to higher speed, the air
distribution is directed towards
the windscreen.
● Set temperature control to warmest level.
● Switch on heated rear window Ü.
● Open side air vents as required and direct them towards the doorwindows.
Notice
If V is pressed while the engine is
running, an Autostop will be inhibited
until V is pressed again.
If s is pressed with the fan switched
on and the engine running, an
Autostop will be inhibited until s is
pressed again or until the fan is
switched off.
If V is pressed while the engine is
in an Autostop, the engine will restart automatically.
If s is pressed with the fan switched
on while the engine is in an
Autostop, the engine will restart
automatically.
Stop-start system 3 140.
Electronic climate control system
The dual zone climate control allows
different climatisation temperatures
for driver side and front passenger
side.
In automatic mode, temperature, fan
speed and air distribution are
regulated automatically.
Controls for:
● temperature on driver side
● air distribution
● fan speed
● temperature on front passenger side
n:coolingAUTO:automatic mode4:manual air recirculationV:demisting and defrosting
Heated rear window Ü 3 34, Heated
seats ß 3 45, Heated steering wheel
* 3 72.
Page 133 of 293

Climate control131
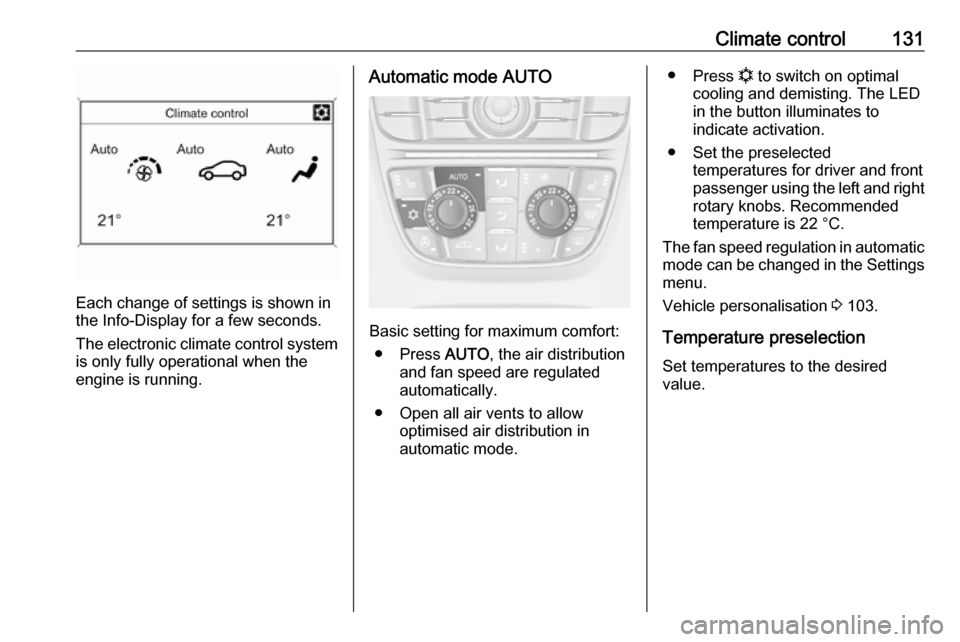
Each change of settings is shown in
the Info-Display for a few seconds.
The electronic climate control system
is only fully operational when the
engine is running.
Automatic mode AUTO
Basic setting for maximum comfort:
● Press AUTO, the air distribution
and fan speed are regulated
automatically.
● Open all air vents to allow optimised air distribution in
automatic mode.
● Press n to switch on optimal
cooling and demisting. The LED in the button illuminates to
indicate activation.
● Set the preselected temperatures for driver and front
passenger using the left and right
rotary knobs. Recommended
temperature is 22 °C.
The fan speed regulation in automatic mode can be changed in the Settings menu.
Vehicle personalisation 3 103.
Temperature preselection
Set temperatures to the desired
value.
Page 135 of 293

Climate control133Fan speed Z
Press lower button to decrease or
upper button to increase fan speed.
The fan speed is indicated by the
number of segments in the display.
Pressing the lower button for longer:
fan and cooling are switched off.
Pressing the upper button for longer:
the fan runs at maximum speed.
To return to automatic mode: Press
AUTO .
Air distribution s, M , K
Press appropriate button for desired
adjustment. The LED in the button
illuminates to indicate activation.
s:to windscreen and front door
windows (air conditioning is
activated in the background to
help preventing windows from
fogging)M:to head area via adjustable air
ventsK:to foot well and windscreen
All combinations are possible.
Return to automatic air distribution:
press AUTO .
Cooling n
Press n to switch on cooling. The
LED in the button illuminates to
indicate activation. Cooling is only
functional when the engine is running and climate control fan is switched on.
Press n again to switch off cooling.
The air conditioning system cools and
dehumidifies (dries) when outside
temperature is above a specific level. Therefore condensation may form
and drip from under the vehicle.
If no cooling or drying is required,
switch off the cooling system for fuel
saving reasons. When the cooling
system is switched off, no engine
Page 137 of 293

Climate control135Air vents
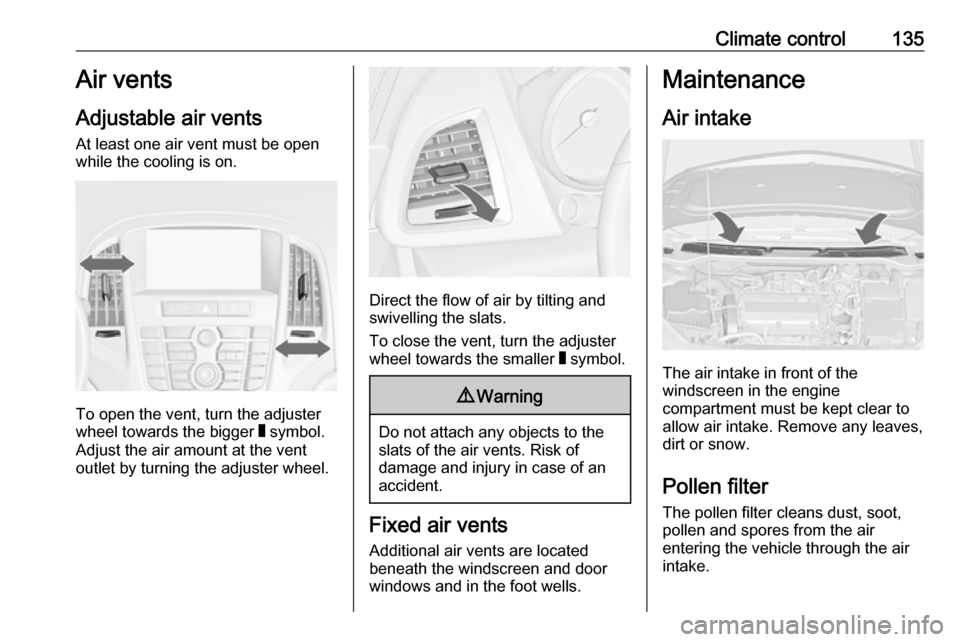
Adjustable air vents At least one air vent must be open
while the cooling is on.
To open the vent, turn the adjuster
wheel towards the bigger W symbol.
Adjust the air amount at the vent
outlet by turning the adjuster wheel.
Direct the flow of air by tilting and
swivelling the slats.
To close the vent, turn the adjuster
wheel towards the smaller W symbol.
9 Warning
Do not attach any objects to the
slats of the air vents. Risk of
damage and injury in case of an
accident.
Fixed air vents
Additional air vents are located
beneath the windscreen and door windows and in the foot wells.
Maintenance
Air intake
The air intake in front of the
windscreen in the engine
compartment must be kept clear to
allow air intake. Remove any leaves,
dirt or snow.
Pollen filter The pollen filter cleans dust, soot,
pollen and spores from the air
entering the vehicle through the air
intake.
Page 151 of 293

Driving and operating149Manual transmission
To engage reverse, with the vehicle
stationary, depress clutch pedal,
press the release button on the
selector lever and engage the gear.
If the gear does not engage, set the
lever to neutral, release the clutch
pedal and depress again; then repeat
gear selection.
Do not slip the clutch unnecessarily.
When operating, depress the clutch
pedal completely. Do not use the
pedal as a foot rest.
Caution
It is not advisable to drive with the hand resting on the selector lever.
Upshift indication 3 87.
Brakes
The brake system comprises two independent brake circuits.
If a brake circuit fails, the vehicle can
still be braked using the other brake
circuit. However, braking effect is
achieved only when the brake pedal
is depressed firmly. Considerably
more force is needed for this. The
braking distance is extended. Seek
the assistance of a workshop before
continuing your journey.
When the engine is not running, the
support of the brake servo unit
disappears once the brake pedal has
been depressed once or twice.
Braking effect is not reduced, but
braking requires significantly greater
force. It is especially important to bear this in mind when being towed.
Control indicator R 3 86.
Antilock brake system
Antilock brake system (ABS)
prevents the wheels from locking.