warning VAUXHALL COMBO 2014 Owner's Guide
[x] Cancel search | Manufacturer: VAUXHALL, Model Year: 2014, Model line: COMBO, Model: VAUXHALL COMBO 2014Pages: 187, PDF Size: 4.15 MB
Page 49 of 187

Seats, restraints47
Reactivating front passenger airbag
system - see Driver Information
Centre 3 79.Child restraints
Child restraint systems
We recommend the Vauxhall child
restraint system which is tailored
specifically to the vehicle.
When a child restraint system is being used, pay attention to the following
usage and installation instructions and also those supplied with the child
restraint system.
Always comply with local or national
regulations. In some countries, the
use of child restraint systems is
forbidden on certain seats.9 Warning
When using a child restraint
system on the front passenger
seat, the airbag systems for the
front passenger seat must be
deactivated; if not, the triggering of the airbags poses a risk of fatal
injury to the child.
This is especially the case if rear-
facing child restraint systems are
used on the front passenger seat.
Selecting the right system
The rear seats are the most
convenient location to fasten a child
restraint system.
Children should travel facing
rearwards in the vehicle as long as
possible. This makes sure that the child's backbone, which is still very
weak, is under less strain in the event of an accident.
Suitable restraint systems comply
with ECE 44-03 or ECE 44-04. Check
local laws and regulations for
mandatory use of child restraint
systems.
Ensure that the child restraint system to be installed is compatible with the
vehicle type.
Ensure that the mounting location of
the child restraint system within the
vehicle is correct.
Page 55 of 187
Storage53StorageStorage compartments................53
Load compartment .......................55
Roof rack system .........................58
Loading information .....................59Storage compartments9Warning
Do not store heavy or sharp
objects in the storage
compartments. Otherwise vehicle
occupants could be injured by
objects being thrown around in the
event of hard braking, a sudden
change in direction or an accident.
Instrument panel storage
Storage compartments are located in the instrument panel.
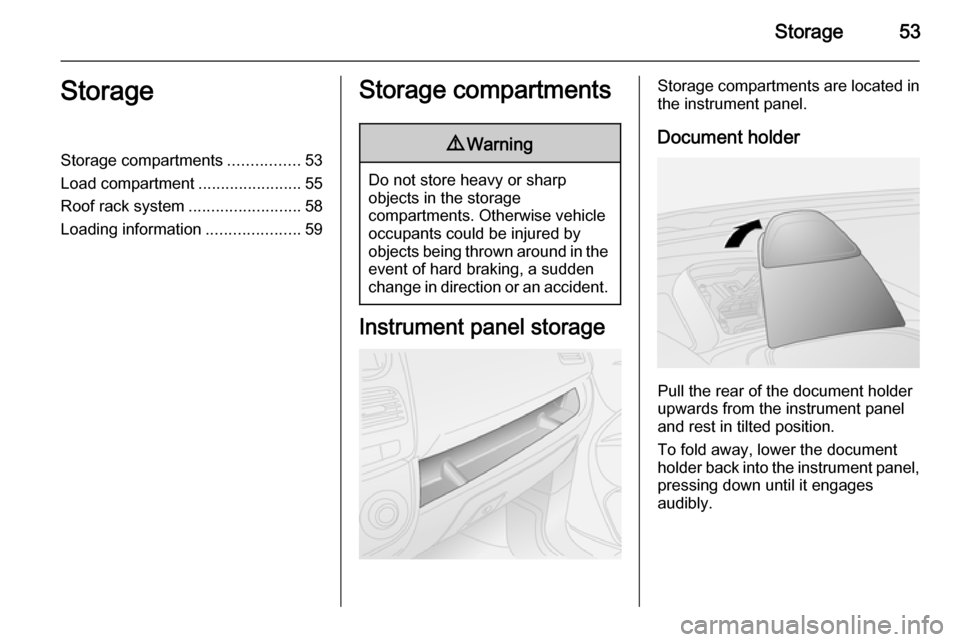
Document holder
Pull the rear of the document holder
upwards from the instrument panel
and rest in tilted position.
To fold away, lower the document holder back into the instrument panel, pressing down until it engages
audibly.
Page 57 of 187

Storage55Load compartment
Folding down rear seat
backrests
The rear seat backrest is divided into
two parts. Both parts can be folded
down.
Remove the load compartment cover if necessary.
Press and hold the catch, then push
the head restraints down.
Pull the release lever on one or both
sides and fold down the backrests
onto the seat cushion.
Pull lever to release, the seat base is
tensioned and will start to rise
automatically.
Fold the seat forward completely.
To fold up, lower seats to the floor
until they engage audibly. Raise
backrests and guide them into an
upright position until they engage
audibly.
The backrests are properly engaged
when both red marks on the release
levers are no longer visible.
Ensure that the seat belts are
positioned correctly before returning the seats to the upright position.9 Warning
Only drive the vehicle if the
backrests are securely locked into position. Otherwise there is a risk
of personal injury or damage to the
load or vehicle in the event of
heavy braking or a collision.
Load compartment cover
Extendable load compartment
cover Do not place any heavy or sharp-
edged objects on the extendable load
compartment cover.
Page 59 of 187

Storage57
Rear parcel shelfThe rear parcel shelf consists of two
parts - a front part and rear part. The
front part can be opened or closed,
allowing for greater flexibility in the
load compartment.
Do not place any excessively heavy
or sharp-edged objects on the rear
parcel shelf.9 Warning
Always make sure that the load in
the vehicle is securely stowed.
Otherwise objects can be thrown
around inside the vehicle and
cause personal injury or damage
to the load or car.The rear parcel shelf can be installed
in 2 positions, i.e. the upper position
or the lower position. In the lower
position, the maximum load
permissible is 70 kg.
Removing
If the rear seats are in the folded
position, remove the parcel shelf and
store it horizontally between the back of the front seats and the folded rearseats.Caution
For safety reasons, do not place
loads on the folded rear seats.
Page 61 of 187

Storage59
To fasten a roof rack, insert the
mounting bolts in the holes indicated
in the illustration.Loading information
■ Heavy objects in the load compartment should be evenly
distributed and placed as far
forward as possible. If objects can
be stacked, the heavier objects
should be placed at the bottom.
■ Secure objects with lashing straps attached to lashing eyes 3 58.
■ Secure loose objects in load compartment to prevent them from
sliding.
■ When transporting objects in the load compartment, the backrests ofthe rear seats must not be tilted
forwards or folded down.
■ Do not allow the load to protrude above the upper edge of the
backrests.
■ Do not place any objects on the extendable load compartment
cover 3 55 or the instrument panel,
and do not cover the sensor on top
of the instrument panel 3 97.■ The load must not obstruct the
operation of the pedals, parking
brake and gear selector, or hinder
the freedom of movement of the
driver. Do not place any unsecured objects in the interior.
■ Do not drive with an open load compartment.9 Warning
Always make sure that the load in
the vehicle is securely stowed.
Otherwise objects can be thrown
around inside the vehicle and
cause personal injury or damage
to the load or car.
■ The payload is the difference between the permitted gross
vehicle weight (see identification
plate 3 161) and the EC kerb
weight.
To calculate the payload, enter the
data for your vehicle in the Weights
table at the front of this manual.
The EC kerb weight includes
weights for the driver (68 kg),
Page 63 of 187
Instruments and controls61Instruments and
controlsControls ....................................... 61
Warning lights, gauges and indi‐ cators ........................................... 67
Information displays .....................79
Vehicle messages ........................ 85
Trip computer ............................... 86Controls
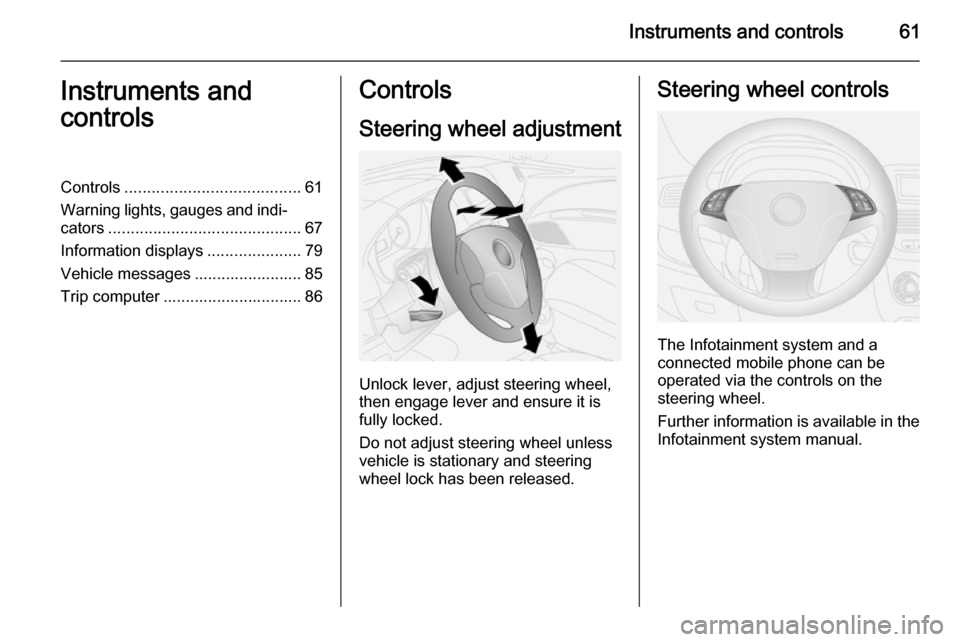
Steering wheel adjustment
Unlock lever, adjust steering wheel,
then engage lever and ensure it is fully locked.
Do not adjust steering wheel unless
vehicle is stationary and steering
wheel lock has been released.
Steering wheel controls
The Infotainment system and a
connected mobile phone can be
operated via the controls on the
steering wheel.
Further information is available in the
Infotainment system manual.
Page 65 of 187
Instruments and controls63Rear window wiper/washer
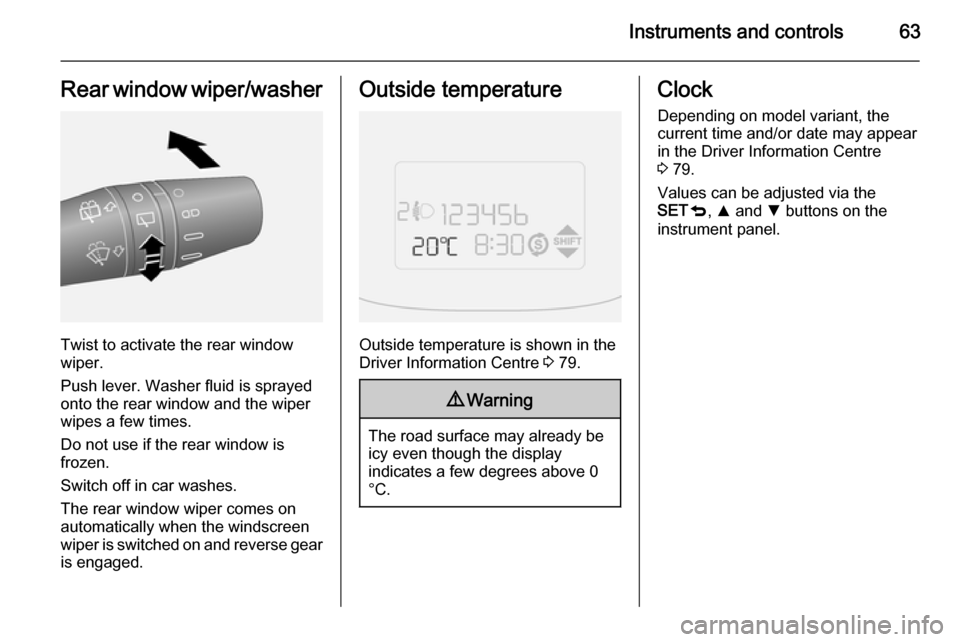
Twist to activate the rear window
wiper.
Push lever. Washer fluid is sprayed
onto the rear window and the wiper
wipes a few times.
Do not use if the rear window is
frozen.
Switch off in car washes.
The rear window wiper comes on
automatically when the windscreen
wiper is switched on and reverse gear
is engaged.
Outside temperature
Outside temperature is shown in the
Driver Information Centre 3 79.
9 Warning
The road surface may already be
icy even though the display
indicates a few degrees above 0
°C.
Clock
Depending on model variant, the
current time and/or date may appear
in the Driver Information Centre
3 79.
Values can be adjusted via the
SET q, R and S buttons on the
instrument panel.
Page 69 of 187
Instruments and controls67AshtraysCaution
To be used only for ash and not forcombustible rubbish.
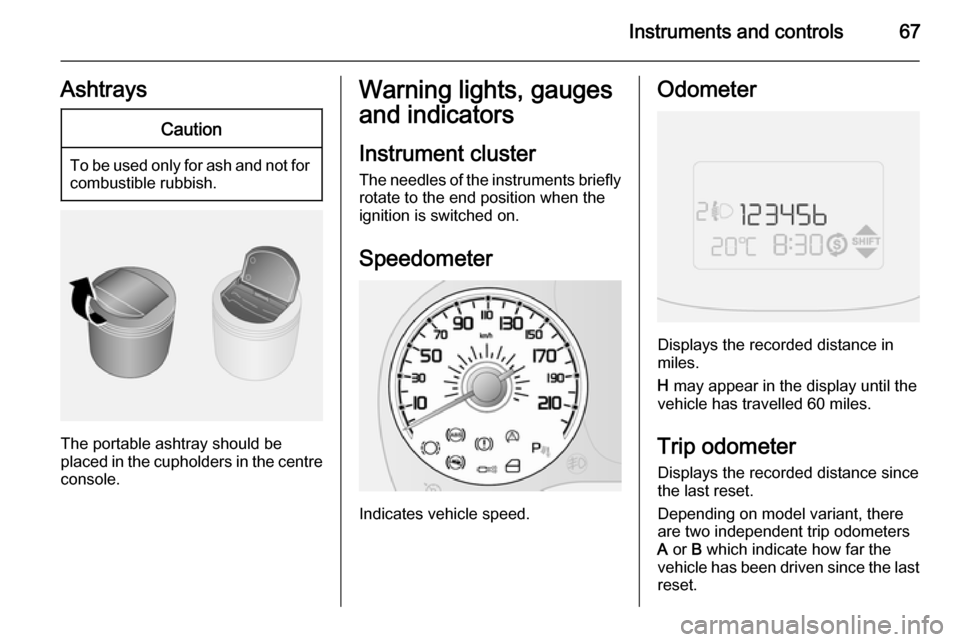
The portable ashtray should be
placed in the cupholders in the centre
console.
Warning lights, gauges
and indicators
Instrument cluster
The needles of the instruments briefly rotate to the end position when the
ignition is switched on.
Speedometer
Indicates vehicle speed.
Odometer
Displays the recorded distance in
miles.
H may appear in the display until the
vehicle has travelled 60 miles.
Trip odometer Displays the recorded distance since
the last reset.
Depending on model variant, there are two independent trip odometers
A or B which indicate how far the
vehicle has been driven since the last
reset.
Page 70 of 187
68Instruments and controls
To reset the trip odometer, press andhold the TRIP button for a few
seconds while the relevant trip
odometer is displayed.
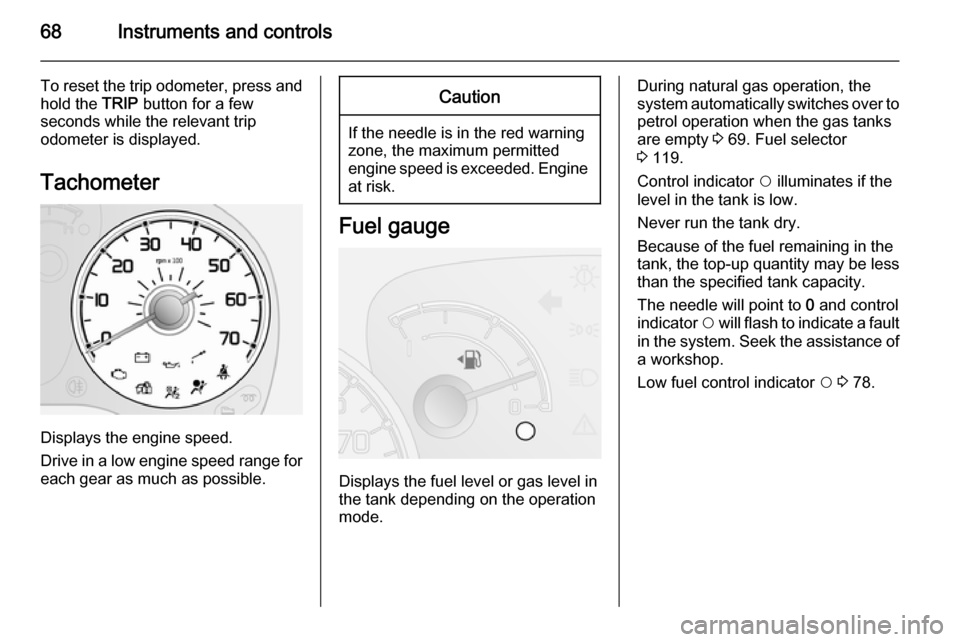
Tachometer
Displays the engine speed.
Drive in a low engine speed range for each gear as much as possible.
Caution
If the needle is in the red warning
zone, the maximum permitted
engine speed is exceeded. Engine at risk.
Fuel gauge
Displays the fuel level or gas level in
the tank depending on the operation
mode.
During natural gas operation, the
system automatically switches over to
petrol operation when the gas tanks
are empty 3 69. Fuel selector
3 119.
Control indicator $ illuminates if the
level in the tank is low.
Never run the tank dry.
Because of the fuel remaining in the
tank, the top-up quantity may be less
than the specified tank capacity.
The needle will point to 0 and control
indicator $ will flash to indicate a fault
in the system. Seek the assistance of a workshop.
Low fuel control indicator $ 3 78.
Page 73 of 187

Instruments and controls71
The control indicator colours mean:red=danger, important
reminderyellow=warning, information, faultgreen=confirmation of activationblue=confirmation of activation