warning VAUXHALL COMBO 2014 Workshop Manual
[x] Cancel search | Manufacturer: VAUXHALL, Model Year: 2014, Model line: COMBO, Model: VAUXHALL COMBO 2014Pages: 187, PDF Size: 4.15 MB
Page 113 of 187

Driving and operating111Electronic driving
programmes
Eco mode E
When automatic mode is engaged,
the Eco mode can be selected to
reduce fuel consumption.
Eco mode selects the most suitable gear depending on the speed of the
vehicle, the engine speed and the
intensity with which the accelerator is pressed.
Activation
Press the E button on the selector
lever housing. Control indicator E is
shown in the transmission display to
indicate activation.
Deactivation
Eco mode is switched off by:
■ pressing the E button again,
■ switching to manual mode.
In order to protect the transmission at
extremely high clutch temperatures,
an intermittent audible warning chime may sound. In such cases, depress
the foot brake, select N and apply the
parking brake to allow the clutch to
cool down.
Kickdown
If the accelerator pedal is pressed
past the pressure point, the
transmission shifts to a lower gear
depending on engine speed. Full
engine power is available for
acceleration.If engine speed is too high the
transmission switches to a higher
gear, even in manual mode. Without
kickdown this automatic shift is not
effected in manual mode.
Fault In the event of a fault, control indicator
Ñ is shown in the transmission
display.
Continued driving is possible,
provided the vehicle is driven with
care and anticipation. A warning
message may appear in the Driver
Information Centre in conjunction with
a warning chime 3 85.
Notice
The volume of the warning chime
can also be adjusted via the Driver
Information Centre 3 79.
Have the cause of the fault remedied
by a workshop.
Page 114 of 187

112Driving and operatingBrakes
The brake system comprises two
independent brake circuits.
If a brake circuit fails, the vehicle can
still be braked using the other brake
circuit. However, braking effect is
achieved only when the brake pedal
is depressed firmly. Considerably
more force is needed for this. The
braking distance is extended. Seek the assistance of a workshop before
continuing your journey.
When the engine is not running, the
support of the brake servo unit
disappears once the brake pedal has been depressed once or twice.
Braking effect is not reduced, but
braking requires significantly greater
force. It is especially important to bear this in mind when being towed.
Control indicator R 3 74.
Antilock brake system Antilock brake system (ABS)
prevents the wheels from locking.ABS starts to regulate brake pressure as soon as a wheel shows a tendency
to lock. The vehicle remains
steerable, even during hard braking.
ABS control is made apparent
through a pulse in the brake pedal
and the noise of the regulation
process.
For optimum braking, keep the brake
pedal fully depressed throughout the
braking process, despite the fact that
the pedal is pulsating. Do not reduce
the pressure on the pedal.
After starting off the system performs a self-test which may be audible.
Control indicator u 3 75.
Fault9 Warning
If there is a fault in the ABS, the
wheels may be liable to lock due
to braking that is heavier than
normal. The advantages of ABS are no longer available. During
hard braking, the vehicle can nolonger be steered and may
swerve.
Have the cause of the fault remedied
by a workshop.
Parking brake Manual parking brake
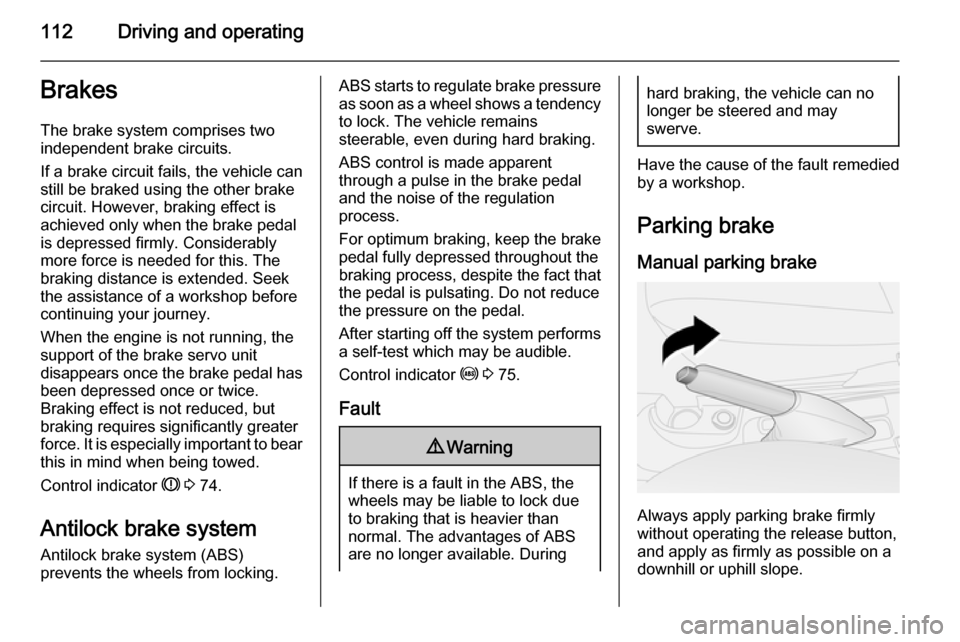
Always apply parking brake firmly
without operating the release button,
and apply as firmly as possible on a
downhill or uphill slope.
Page 115 of 187

Driving and operating113
To release the parking brake, pull thelever up slightly, press the release
button and fully lower the lever.
To reduce the operating forces of the
parking brake, depress the foot brake
at the same time.
A warning chime will sound if a certain speed is exceeded with the parking
brake applied.
Notice
The volume of the warning chime
can also be adjusted via the Driver
Information Centre 3 79.
Control indicator R 3 74.
Brake assist
If the brake pedal is depressed
quickly and forcefully, maximum
brake force is automatically applied
(full braking).
Maintain steady pressure on the
brake pedal for as long as full braking is required. Maximum brake force is
automatically reduced when the
brake pedal is released.Hill start assist
The system helps prevent unintendedmovement when driving away on
inclines.
When releasing the foot brake after
stopping on an incline, the brakes
remain on for a further two seconds.
The brakes release automatically as
soon as the vehicle begins to
accelerate.
If control indicator Z illuminates
while driving, there is a fault in the Hill
start assist 3 75 . Seek the assistance
of a workshop to have the fault
remedied.
The Hill start assist is not active
during an Autostop.
Stop-start system 3 103.Ride control systems
Traction Control system
The Anti-Slip Regulator (ASR) is a
component of the Electronic Stability
Program (ESP).
ASR improves driving stability when
necessary, regardless of the type of
road surface or tyre grip, by
preventing the drive wheels from
spinning.
As soon as the drive wheels starts to spin, engine output is reduced and
the wheel spinning the most is braked
individually. This considerably
improves the driving stability of the
vehicle on slippery road surfaces.
ASR is operational as soon as the
control indicator x extinguishes.
When ASR is active, control indicator x flashes.
Page 116 of 187

114Driving and operating9Warning
Do not let this special safety
feature tempt you into taking risks
when driving.
Adapt speed to the road
conditions.
Deactivation
ASR can be switched off when
spinning of drive wheels is required:
press button ASR OFF briefly.
LED in button illuminates and a
message appears in the Driver
Information Centre.
ASR is reactivated by pressing the
ASR OFF button again.
ASR is also reactivated the next time
the ignition is switched on.
Fault ASR will switch off automatically in
the event of a fault. Control indicator
x will illuminate in the instrument
cluster in conjunction with a message
in the Driver Information Centre 3 79.
Have the cause of the fault remedied
by a workshop.
Control indicator x 3 76.
Electronic stability
program
Electronic Stability Program (ESP)
improves driving stability when
necessary, regardless of the type of
road surface or tyre grip. It also
prevents the drive wheels from
spinning.
As soon as the vehicle starts to
swerve (understeer/oversteer),
engine output is reduced and the wheels are braked individually. Thisconsiderably improves the driving
stability of the vehicle on slippery road
surfaces.
ESP is operational as soon as control
indicator x extinguishes.
When ESP comes into action, control indicator x flashes.
The ESP system is automatically
activated when the vehicle is started
and cannot be deactivated9 Warning
Do not let this special safety
feature tempt you into taking risks
when driving.
Adapt speed to the road
conditions.
Fault
In the event of a fault, ESP will be
automatically switched off and control
indicator x will illuminate in the
instrument cluster in conjunction with
a message in the Driver Information
Centre 3 79. The LED in the ASR
OFF button will also illuminate.
Page 119 of 187

Driving and operating117
System operation
The parking assist is turned on
automatically when reverse gear is engaged.
The intervals between the beeps
become shorter as the vehicle gets
closer to the obstacle. When the
distance is less than 30 cm, the beeping is a continuous tone whichstops immediately when the distance
is increased.
Fault In the event of a fault in the system,
r illuminates and a message is
displayed in the Driver Information Centre 3 79.
The following conditions could affect
the system's performance:
■ The ultrasonic sensors are not clean. Keep the bumper free of
mud, dirt, snow, ice and slush.
■ The sensors are covered by frost or
ice.
■ The rear doors / tailgate are open.■ An object was hanging out of the rear doors / tailgate during the last
drive cycle. Once the object has been removed, the parking assist
will return to normal operation.
■ An object or cover is attached to the
rear of the vehicle.
■ The bumper is damaged. Take the vehicle to a workshop to repair the
system.
■ Other conditions, such as vibrations from a jackhammer, are
affecting system performance.
In the event the system still does not
work properly, seek the assistance of
a workshop.
A warning chime is also sounded
briefly if a fault is present when
reverse gear is engaged 3 85.
Notice
The volume of the warning chime
can also be adjusted via the Driver
Information Centre 3 79.Important hints for using the
parking assist systems9 Warning
Under certain circumstances,
various reflective surfaces on
objects or clothing as well as
external noise sources may cause the system to fail to detect
obstacles.
Special attention has to be paid to
low obstacles which can damage
the lower part of the bumper. If
such obstacles leave the detection area of the sensors during
approach of the vehicle, a
continuous warning tone will
sound.
Page 123 of 187

Driving and operating121
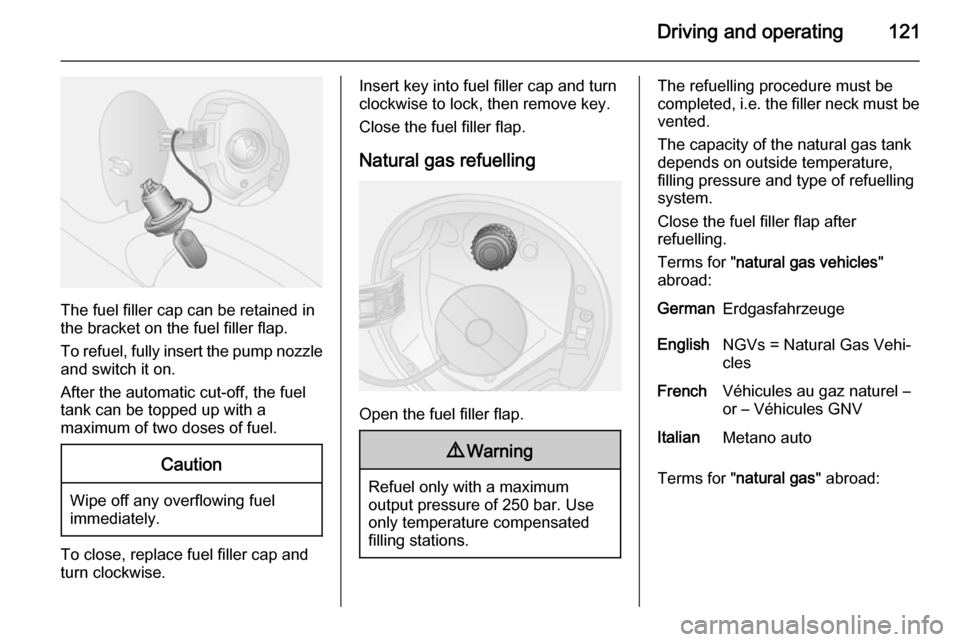
The fuel filler cap can be retained in
the bracket on the fuel filler flap.
To refuel, fully insert the pump nozzle
and switch it on.
After the automatic cut-off, the fuel tank can be topped up with a
maximum of two doses of fuel.
Caution
Wipe off any overflowing fuel
immediately.
To close, replace fuel filler cap and
turn clockwise.
Insert key into fuel filler cap and turn
clockwise to lock, then remove key.
Close the fuel filler flap.
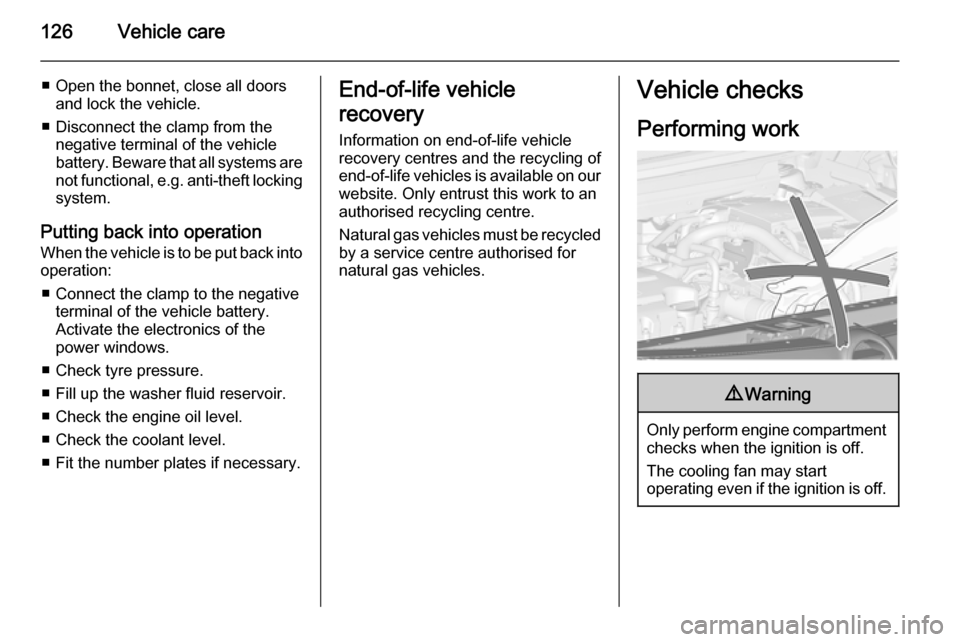
Natural gas refuelling
Open the fuel filler flap.
9 Warning
Refuel only with a maximum
output pressure of 250 bar. Use
only temperature compensated
filling stations.
The refuelling procedure must be
completed, i.e. the filler neck must be
vented.
The capacity of the natural gas tank depends on outside temperature,
filling pressure and type of refuelling
system.
Close the fuel filler flap after
refuelling.
Terms for " natural gas vehicles "
abroad:GermanErdgasfahrzeugeEnglishNGVs = Natural Gas Vehi‐
clesFrenchVéhicules au gaz naturel –
or – Véhicules GNVItalianMetano auto
Terms for " natural gas " abroad:
Page 128 of 187

126Vehicle care
■ Open the bonnet, close all doorsand lock the vehicle.
■ Disconnect the clamp from the negative terminal of the vehicle
battery. Beware that all systems are not functional, e.g. anti-theft lockingsystem.
Putting back into operation When the vehicle is to be put back into
operation:
■ Connect the clamp to the negative terminal of the vehicle battery.
Activate the electronics of the
power windows.
■ Check tyre pressure.
■ Fill up the washer fluid reservoir.
■ Check the engine oil level.
■ Check the coolant level.
■ Fit the number plates if necessary.End-of-life vehicle
recovery
Information on end-of-life vehicle
recovery centres and the recycling of
end-of-life vehicles is available on our website. Only entrust this work to an
authorised recycling centre.
Natural gas vehicles must be recycled by a service centre authorised for
natural gas vehicles.Vehicle checks
Performing work9 Warning
Only perform engine compartment
checks when the ignition is off.
The cooling fan may start
operating even if the ignition is off.
Page 131 of 187

Vehicle care129
If the cooling system is cold, the
coolant level should be between the
MIN and MAX mark. Top up if the
level is low.
9 Warning
Allow the engine to cool before
opening the cap. Carefully open
the cap, relieving the pressure
slowly.
To top up use a 1:1 mixture of
released coolant concentrate mixed
with clean tap water. If no coolant
concentrate is available, use clean
tap water. Install the cap tightly. Have
the coolant concentration checked
and have the cause of the coolant
loss remedied by a workshop.
Power steering fluid
If the fluid level in the reservoir falls
below the MIN mark consult a
workshop.
Washer fluid
Fill with clean water mixed with a
suitable quantity of windscreen
washer fluid which contains
antifreeze.
Caution
Only washer fluid with a sufficient
antifreeze concentration provides
protection at low temperatures or
a sudden drop in temperature.
Page 132 of 187

130Vehicle careBrakesA squealing noise, or illumination ofbrake pad wear control indicator F
indicates that the brake lining is at its
minimum thickness.
Continued driving is possible but
have the brake linings replaced as
soon as possible.
Once new brake linings are installed,
do not brake unnecessarily hard for
the first few journeys.
Brake pad wear indicator F 3 75.
Brake fluid9 Warning
Brake fluid is poisonous and
corrosive. Avoid contact with eyes, skin, fabrics and painted surfaces.
The brake fluid level must be betweenthe MIN and MAX marks.
When topping up, ensure maximum cleanliness as contamination of the
brake fluid can lead to brake system
malfunctions. Have the cause of the
loss of brake fluid remedied by a
workshop.
Only use high-performance brake
fluid approved for the vehicle.
Brake and clutch fluid 3 159.
Battery
The vehicle battery is maintenance-
free provided that the driving profile
allows sufficient charging of the
battery. Short-distance-driving and
frequent engine starts can discharge
the battery. Avoid the use of
unnecessary electrical consumers.
Batteries do not belong in household
waste. They must be disposed of at
an appropriate recycling collection
point.
Laying up the vehicle for more than
4 weeks can lead to battery
discharge. Disconnect the clamp from the negative terminal of the vehicle
battery.
Ensure the ignition is switched off
before connecting or disconnecting
the vehicle battery.
Page 133 of 187

Vehicle care131
The anti-theft alarm siren must be
deactivated as follows: Switch the ignition on then off, disconnect the
vehicle's battery within 15 seconds.
Replacing the battery Notice
Any deviation from the instructions
given in this paragraph may lead to
a temporary deactivation of the stop-
start system.
In vehicles with stop-start system,
ensure the correct battery is used
when replacing the battery. We
recommend that you have the battery
replaced by a workshop.
Stop-start system 3 103.
Charging the battery9 Warning
On vehicles with stop-start
system, ensure that the charging potential does not exceed 14.6
volts when using a battery
charger. Otherwise the battery
might be damaged.
Jump starting 3 152.
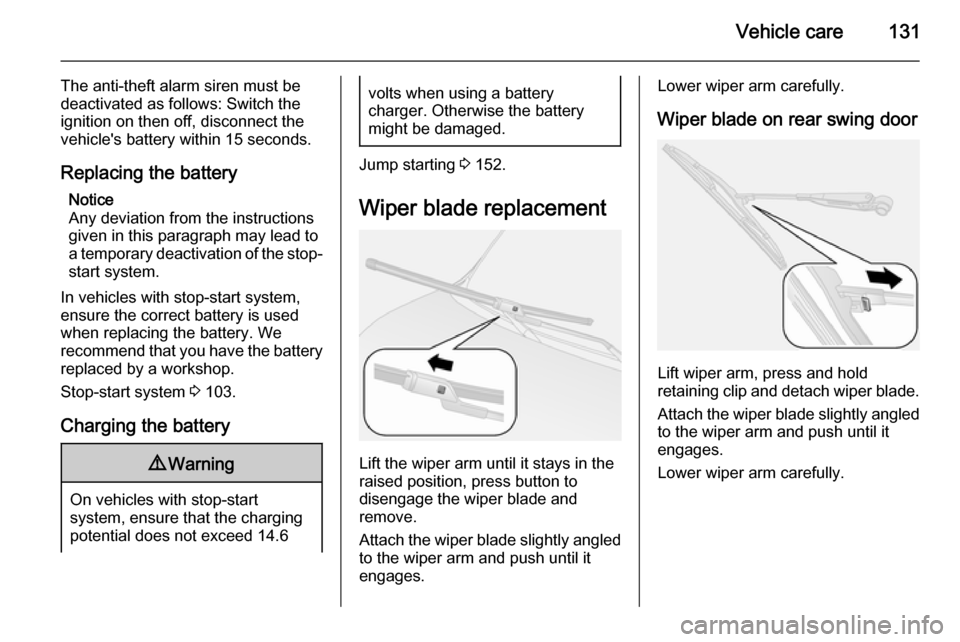
Wiper blade replacement
Lift the wiper arm until it stays in the
raised position, press button to
disengage the wiper blade and
remove.
Attach the wiper blade slightly angled
to the wiper arm and push until it
engages.
Lower wiper arm carefully.
Wiper blade on rear swing door
Lift wiper arm, press and hold
retaining clip and detach wiper blade.
Attach the wiper blade slightly angled
to the wiper arm and push until it
engages.
Lower wiper arm carefully.